
If you’re a fan of cozy and handmade items, then the knitted granny square blanket pattern is perfect for you. This classic pattern is not only timeless, but it also allows you to create a beautiful and customizable blanket that can be passed down for generations.
The granny square pattern is characterized by its small, square motifs that are joined together to create a larger piece. It is a popular technique in crochet, but can also be adapted for knitting. With its simple yet intricate design, the granny square blanket is a favorite among knitters of all skill levels.
One of the great things about the knitted granny square blanket pattern is that it can be easily modified to suit your preferences. You can choose the size of your squares, the number of colors you want to use, and even experiment with different stitches and patterns. This allows you to put your own creative spin on the traditional pattern and make it truly unique.
Knitted Granny Square Blanket Pattern: How to Create a Cozy and Elegant Blanket
Granny square blankets are a classic and timeless addition to any home decor. With their intricate patterns and cozy texture, they provide warmth and style to any space. Creating your own knitted granny square blanket is a rewarding project that allows you to customize the design to suit your personal taste and style.
To start your knitted granny square blanket, you will need a selection of yarn in your desired colors, as well as knitting needles of appropriate size. Begin by knitting several individual granny squares using the basic granny square pattern: a center square with multiple rounds of alternating stitches and chain spaces. Each round will increase the size of the square until you have reached the desired dimensions.
Step 1: Knitting the Center Square
Start by casting on a multiple of four stitches, then work in the round to create a square shape. Use the basic combination of knit and purl stitches to create texture and visual interest. Once you have completed the center square, you can begin adding rounds of chain spaces and stitches to create the classic granny square pattern.
Step 2: Adding the Granny Square Pattern
After completing the center square, it’s time to add the granny square pattern. This involves working rounds of double crochet stitches, chain spaces, and clusters to create the unique and beautiful design. You can use different colors or yarn weights for each round to create a vibrant and dynamic look.
Continue adding rounds to each granny square until they reach the desired size. Once you have completed all of the granny squares, it’s time to join them together to form the blanket. This can be done using a whipstitch or slip stitch method, depending on your preference.
Finally, add a border to your knitted granny square blanket for a finished look. You can choose a simple garter stitch border or experiment with different stitch patterns to add interest and texture. The border will also help to give the blanket stability and prevent it from stretching or warping over time.
Creating a knitted granny square blanket is a labor of love that allows you to showcase your knitting skills and create a beautiful and cozy heirloom piece. Whether you choose to create a traditional color scheme or experiment with bold and modern colors, the end result will be a stunning addition to your home decor.
Choosing the Right Yarn and Needles for Your Blanket
When it comes to knitting a granny square blanket, choosing the right yarn and needles is crucial for the success of your project. The yarn you select will determine the overall look and feel of the blanket, while the right needles will ensure that your stitches are even and consistent.
Selecting the Yarn:
When choosing the yarn for your blanket, it is important to consider the weight, fiber content, and color. The weight of the yarn will determine the thickness and warmth of your blanket. If you want a cozy and chunky blanket, opt for a bulky or super bulky yarn. For a lighter and more delicate blanket, choose a fingering or sport weight yarn.
The fiber content of the yarn will affect the drape, softness, and durability of your blanket. Natural fibers like wool or cotton are great options as they provide warmth and breathability. However, if you prefer a more affordable and low-maintenance option, acrylic yarn is a popular choice.
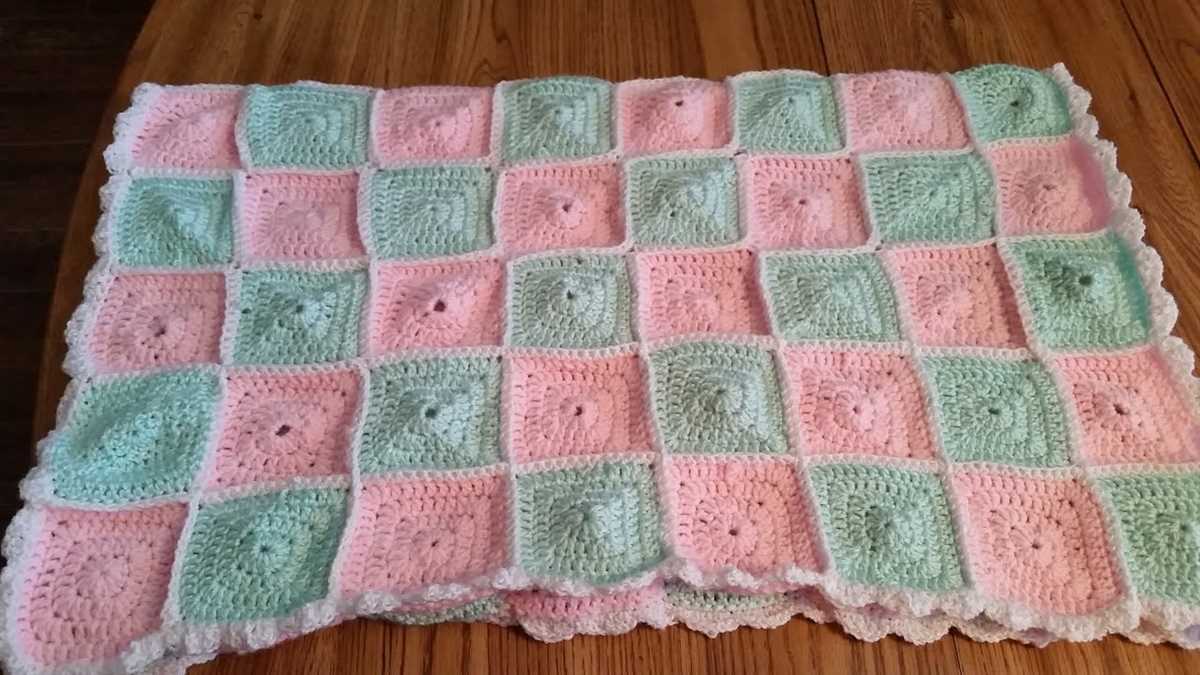
When it comes to color, think about the overall look and feel you want to achieve. If you want a classic and traditional blanket, neutral or pastel shades would work well. For a more vibrant and modern look, consider using bold and bright colors. You can also experiment with different color combinations for each granny square to create a unique and eye-catching design.
Choosing the Needles:
The size of the needles you choose will depend on the thickness of the yarn and the desired tension of your stitches. If you are using a bulky or super bulky yarn, you will need larger needles, such as size 10 or above, to create larger stitches. For finer yarns, like fingering or sport weight, smaller needles, such as size 2-4, will be suitable for creating smaller and more intricate stitches.
In addition to needle size, consider the type of needles you prefer to work with. Straight needles are commonly used for knitting blankets, as they provide stability and control. However, if you find them uncomfortable or if you prefer to knit in the round, circular needles may be a better choice. They allow you to accommodate a larger number of stitches and distribute the weight of your blanket more evenly.
Ultimately, the choice of yarn and needles is a personal preference and will depend on the look and feel you want to achieve for your granny square blanket. Experiment with different options and find the combination that works best for you. Happy knitting!
Getting Started: Basic Stitches and Techniques
If you’re new to knitting and want to make a beautiful granny square blanket, it’s important to start with the basic stitches and techniques. These foundational skills will serve as building blocks for the rest of your blanket and allow you to create intricate patterns and designs.
One of the most essential stitches in knitting is the knit stitch. This stitch forms the basis of many other stitches and is quite simple to learn. To make a knit stitch, insert the right-hand needle into the front of the stitch on the left-hand needle, bring the yarn over the right-hand needle, and pull it through the stitch. This creates a new stitch on the right-hand needle and transfers the original stitch from the left-hand needle. Repeat this process for each stitch until you’ve completed the row.
Next, let’s talk about the purl stitch. This stitch is the opposite of the knit stitch and creates a different texture on your blanket. To make a purl stitch, insert the right-hand needle into the back of the stitch on the left-hand needle, bring the yarn in front of the right-hand needle, and pull it through the stitch. This transfers the original stitch from the left-hand needle to the right-hand needle, creating a new stitch. Repeat this process for each stitch in the row.
Once you’ve mastered the knit and purl stitches, you can start experimenting with different patterns and techniques. One popular technique for creating a granny square blanket is the “double crochet” stitch. This stitch is created by wrapping the yarn around the hook, inserting the hook into the stitch, yarning over, and pulling the yarn through the stitch. Then, yarn over again and pull through two loops, yarn over once more, and pull through the remaining two loops on the hook. This creates a taller stitch and allows you to work more quickly on your blanket.
As you gain more experience with knitting, you can also try out other techniques like the “slip stitch,” “half-double crochet,” “treble crochet,” and “crochet in the round.” These stitches and techniques will add variety and complexity to your granny square blanket, making it even more unique and eye-catching.
- Some additional stitches and techniques you may come across in your knitting journey include:
- The “yarn over” stitch, which creates an eyelet hole in your work.
- The “knit two together” stitch, which decreases the number of stitches in a row.
- The “knit through the back loop” stitch, which twists the stitch and creates a different look.
- The “cable stitch,” which involves crossing stitches over each other to create a cable-like pattern.
Remember, practice makes perfect! Don’t be discouraged if your first attempts don’t turn out perfectly. With time and practice, you’ll develop your skills and be able to create beautiful knitted granny square blankets.
Step-by-Step Guide to Making a Granny Square
Granny squares are a popular and classic design in knitting. They are versatile, fun to make, and can be combined to create beautiful blankets, scarves, and more. Here is a step-by-step guide to making your own granny square.
Gather Your Materials
Before you start, gather all the materials you will need for this project. You will need knitting needles, yarn in the colors of your choice, a yarn needle, and scissors. Choose colors that complement each other and create the look you desire for your blanket.
Start with the Center
To begin your granny square, make a slip knot and start with a small loop of yarn on your needle. This will be the center of your square. You can use a different color for the center, or the same color as the rest of your square.
Create the First Round
Next, you will start building the first round of your granny square. Insert your needle into the center loop and knit two stitches. Then, yarn over and knit two more stitches. Repeat this pattern until you have completed one round, making sure to maintain an even tension.
Build the Next Rounds
Once you have completed the first round, it’s time to build the next rounds of your granny square. Each round will increase the size of your square. To do this, you will need to increase the number of stitches in each section. Typically, each section of the round will consist of two stitches, followed by a yarn over and two more stitches. Repeat this pattern until you have reached the desired size for your square.
Finish Off and Weave in Ends
Once your square has reached the desired size, it’s time to finish off your work. Cut the yarn, leaving a long tail. Thread the tail onto a yarn needle and weave it through the stitches to secure them. Trim any excess yarn. Repeat this process for any other squares you wish to make for your blanket.
Once all your squares are finished, you can arrange them in a pattern and sew them together to create your granny square blanket. Enjoy the process of making each square and the satisfaction of completing a beautiful and cozy handmade blanket.
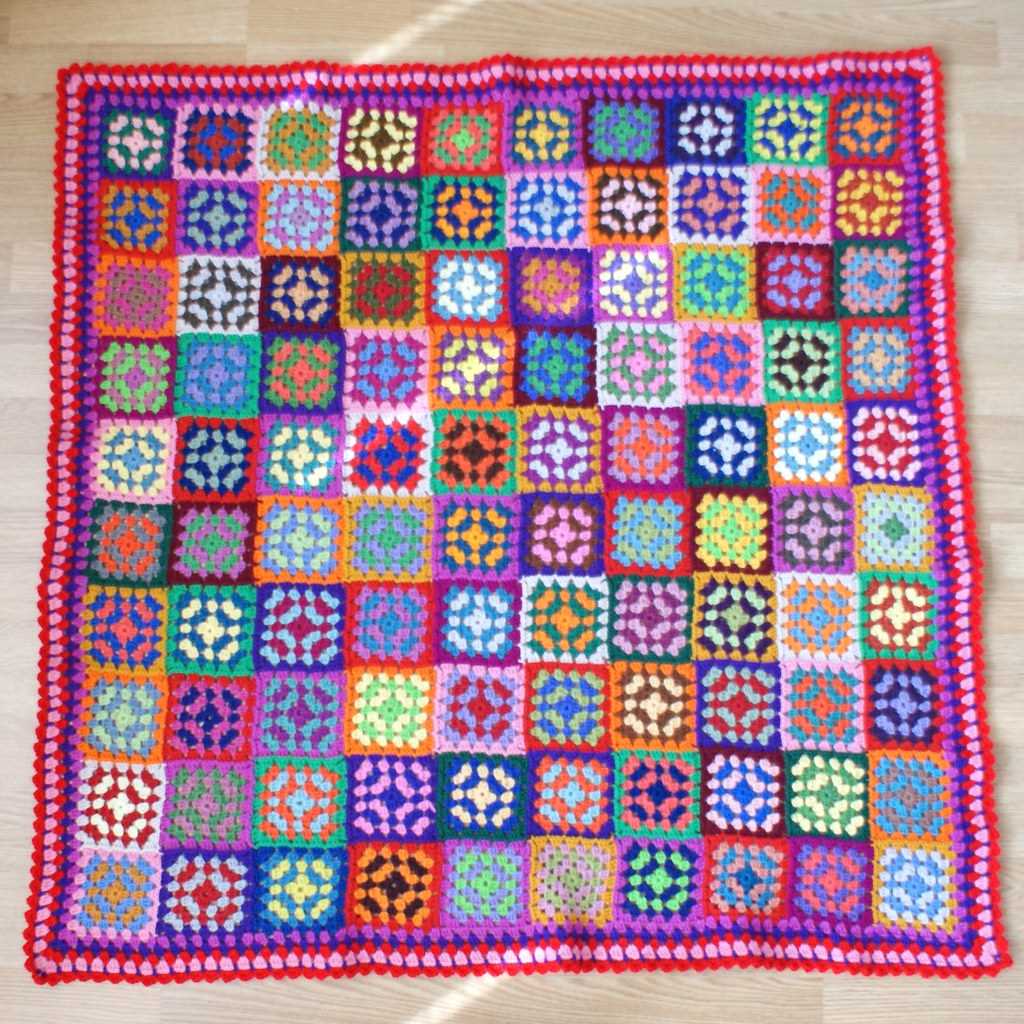
Creating Colorful Patterns with Different Granny Square Variations
Granny squares are a versatile and popular knitting pattern that can be used to create beautiful and colorful blankets. By varying the colors and stitch patterns used in each square, you can create unique patterns and designs. Here are a few different granny square variations that you can use to create your own customized blanket.
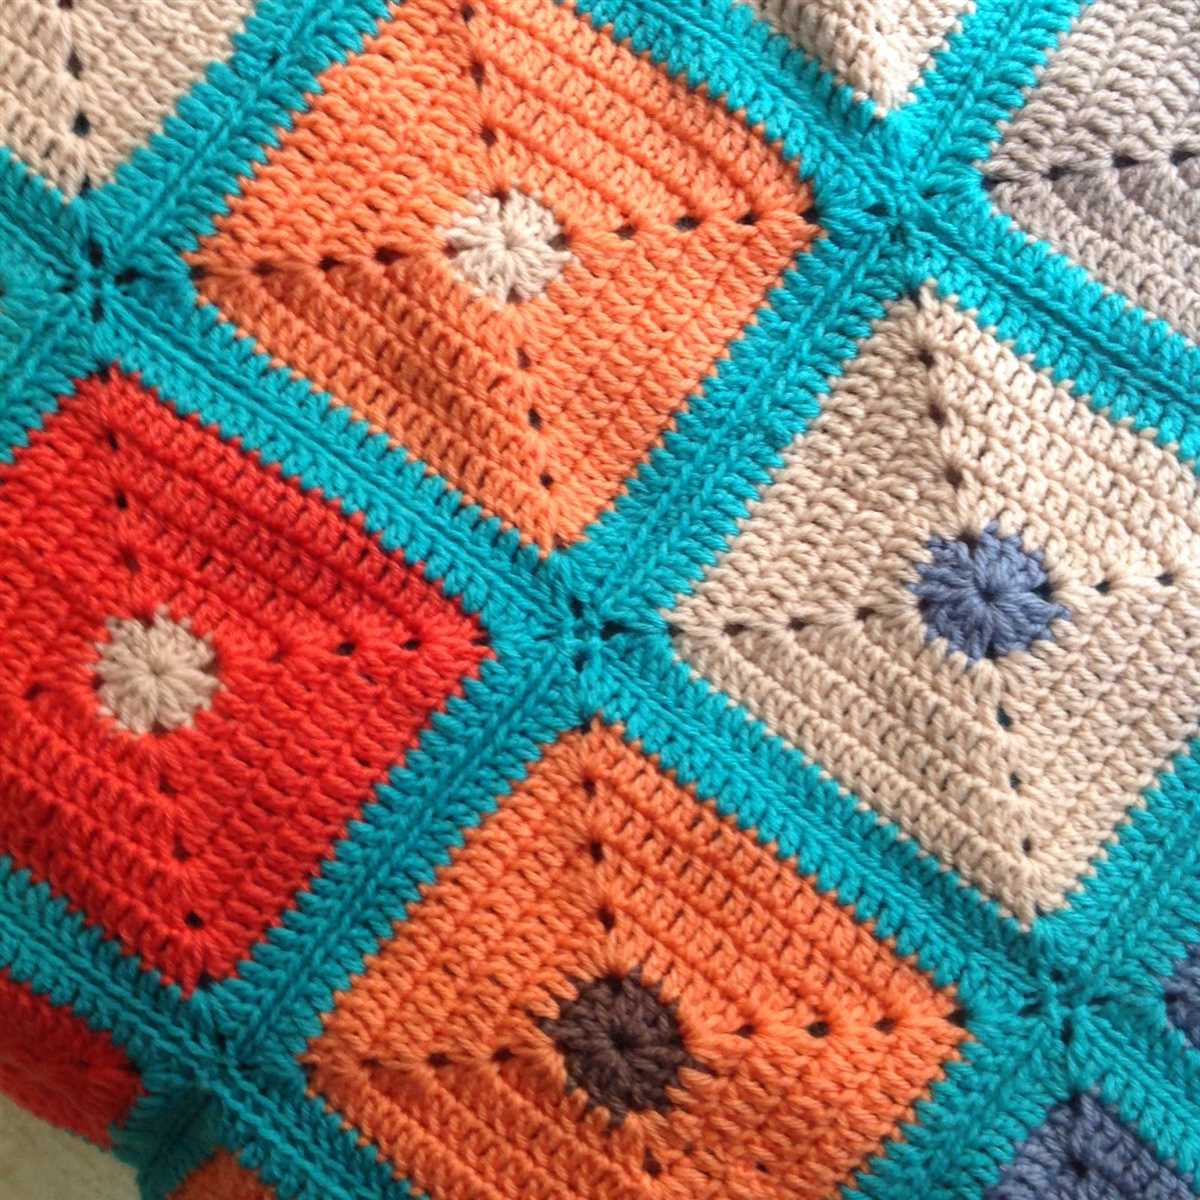
Traditional Granny Square
The traditional granny square is a classic design that consists of clusters of double crochet stitches separated by chain stitches. By changing colors after a certain number of rounds, you can create a striped or checkerboard effect. This pattern is great for beginners and can be easily customized by using different color combinations.
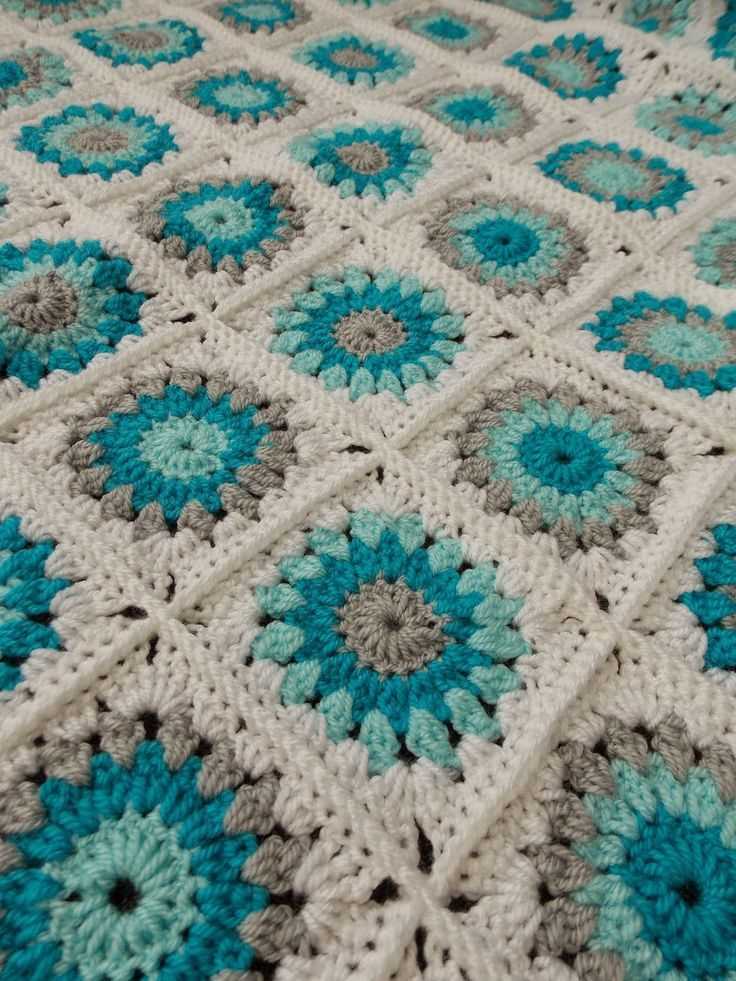
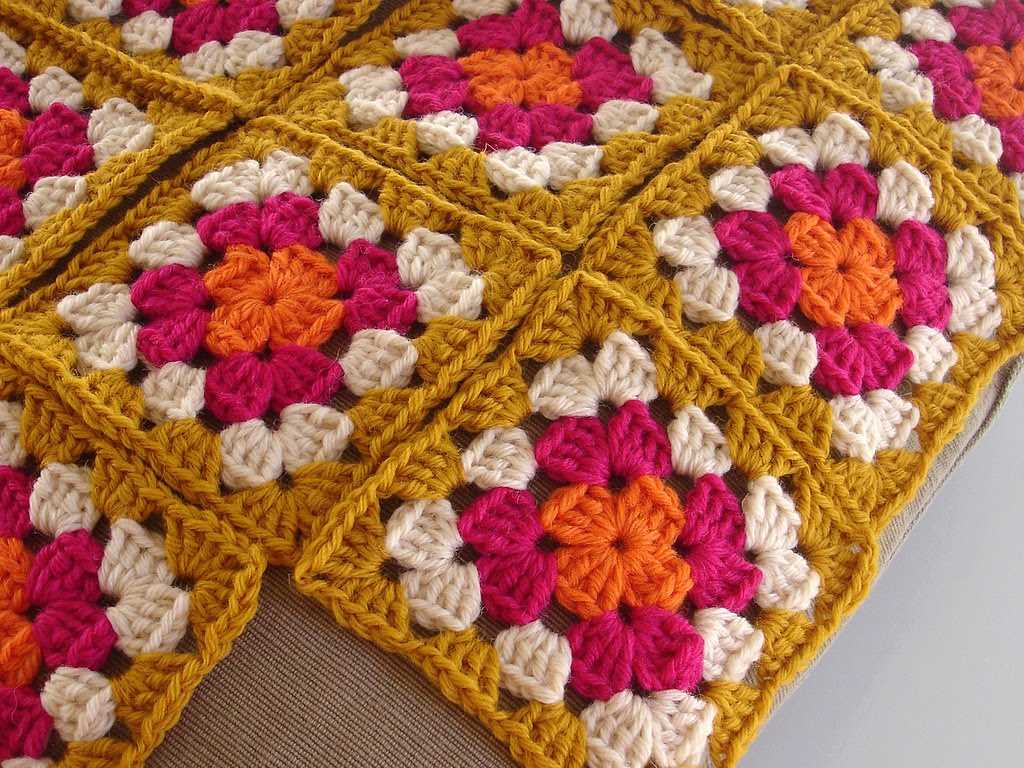
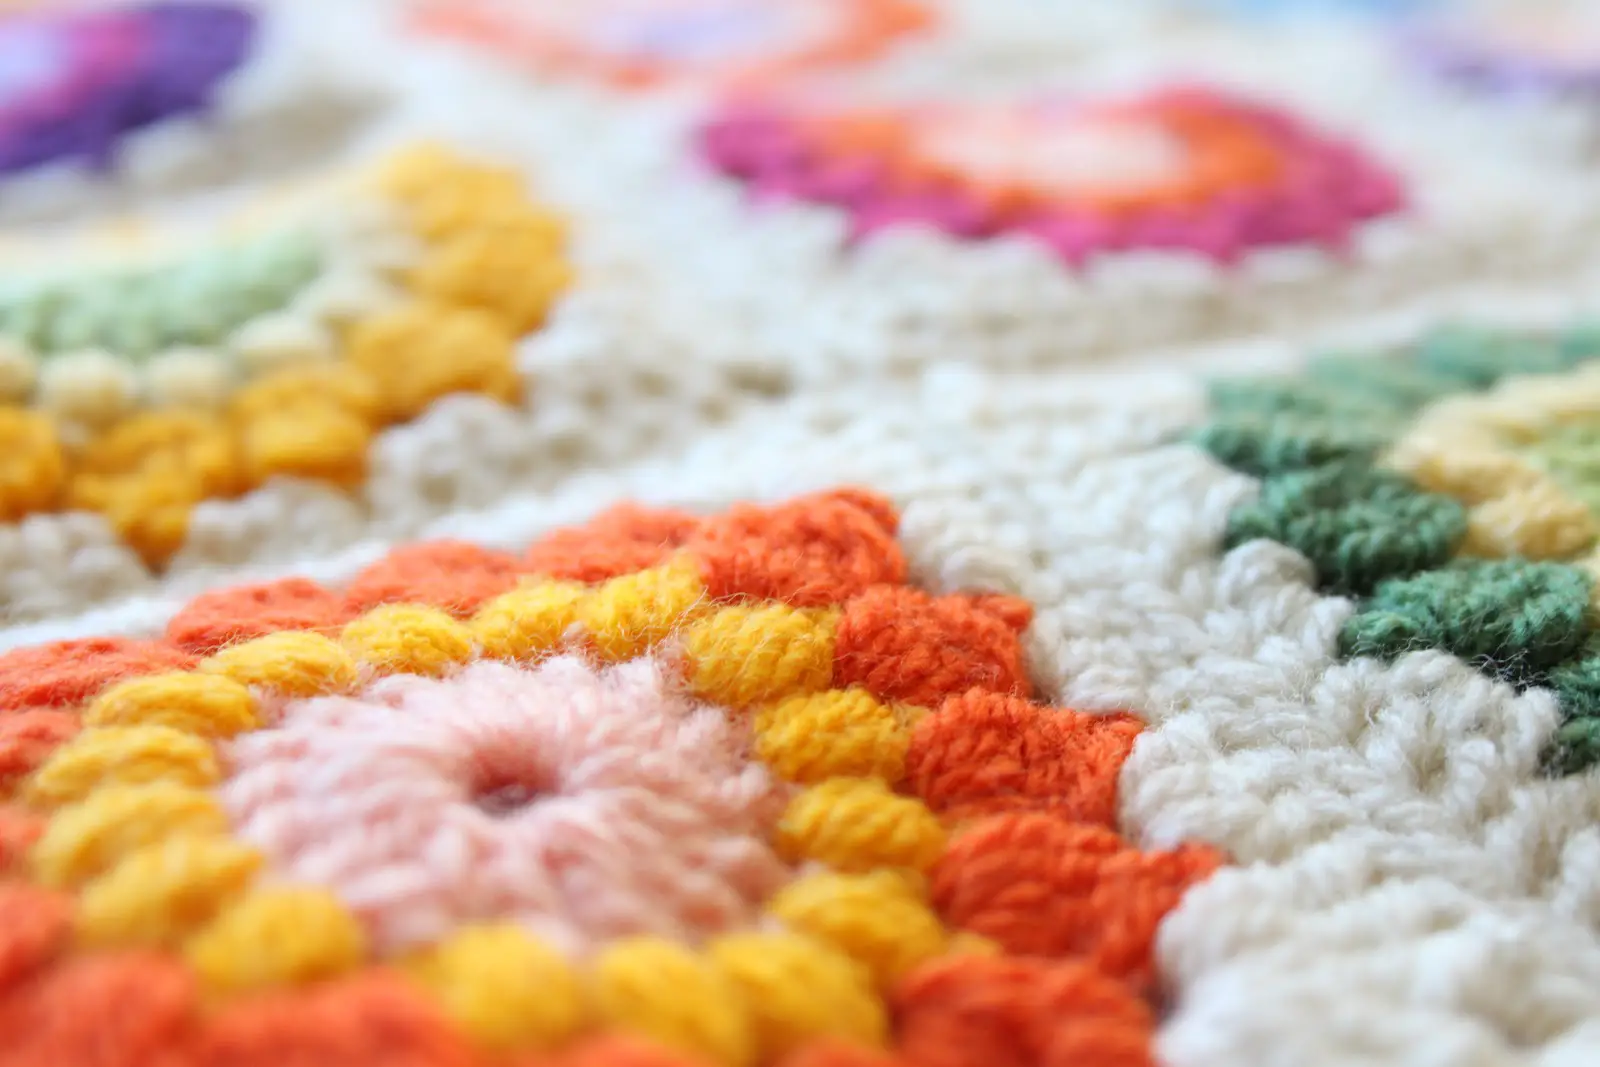
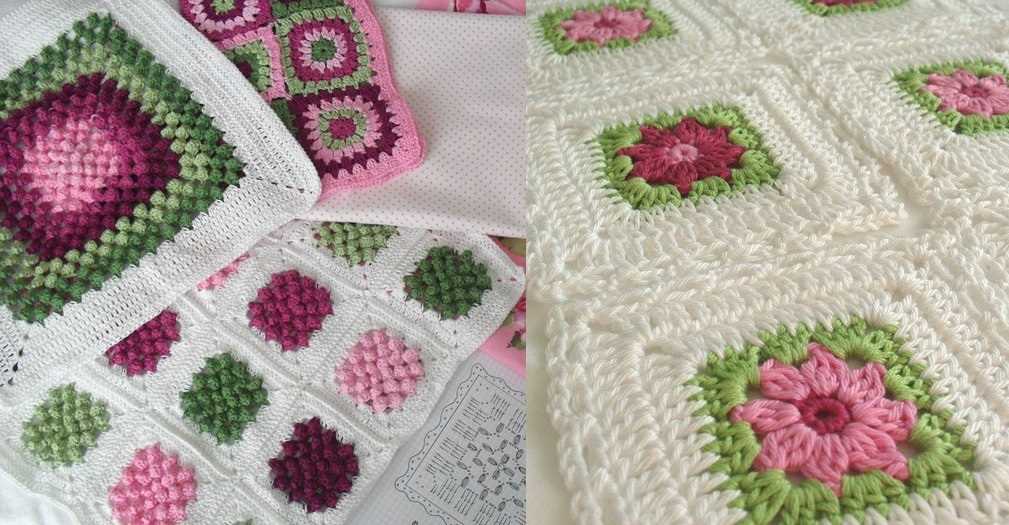
Flower Granny Square
The flower granny square adds a whimsical touch to your blanket. To create this variation, simply replace some of the clusters of double crochet stitches with a flower motif. You can choose to make the flowers all the same color or vary the colors for a more vibrant look. This pattern is a bit more intricate but can create a stunning and eye-catching result.
Granny Square with Bobble Stitches
For an added texture and dimension, try incorporating bobble stitches into your granny square pattern. Instead of the traditional clusters of double crochet stitches, replace them with clusters of bobble stitches. This will create a raised and bumpy effect that adds visual interest to your blanket. Mix and match different colors to create a unique and playful design.
Granny Square with Popcorn Stitches
If you prefer a more subtle texture, consider using popcorn stitches in your granny square pattern. Popcorn stitches are similar to bobble stitches but are worked in a slightly different way. By alternating between clusters of double crochet stitches and popcorn stitches, you can create a pattern that has small pops of texture throughout. This variation works well with solid color yarns or can be combined with other stitch patterns for added complexity.
Experimenting with different granny square variations is a fun way to unleash your creativity and create a truly one-of-a-kind blanket. Whether you prefer a traditional design or want to incorporate more intricate stitch patterns, there are endless possibilities for creating colorful patterns with different granny square variations.
Joining Granny Squares: Seamless Techniques for a Professional Finish
When it comes to creating a beautiful and professional-looking crochet blanket, joining granny squares is an essential step. The way in which you join your squares can make a significant difference in the overall appearance of your finished piece. Fortunately, there are several seamless techniques you can use to achieve a polished and seamless finish.
Whipstitch Method: One popular technique for joining granny squares is the whipstitch method. This involves sewing the squares together using a simple whipstitch, which creates a sturdy seam while still allowing for flexibility. To do this, align two squares with the right sides facing, and use a needle and yarn to sew through the back loops of each stitch along the edge. Repeat this process for each side, and you’ll have a seamless join.
Invisible Seam Method: Another technique that can give your granny square blanket a seamless finish is the invisible seam method. This method involves overlapping the edges of the squares and using slip stitches to join them together from behind. This creates an almost invisible seam that blends seamlessly into the design. To achieve this, line up the squares with the wrong sides facing, insert your hook into the back loops of both squares, yarn over, and pull through both loops. Continue this slip stitch method for each stitch along the edge, and you’ll have a beautifully joined granny square blanket.
Surface Crochet Method: For an even more decorative and unique joining technique, you can try the surface crochet method. This involves adding a decorative border or stitch along the edges of the squares to connect them. You can use a contrasting color of yarn to create an eye-catching design or use the same color for a more subtle effect. By surface crocheting the edges of your squares together, you’ll create a seamless join that adds an extra touch of style to your blanket.
These are just a few of the seamless techniques you can use to join granny squares and give your blanket a professional finish. Whether you prefer the traditional whipstitch method, the invisible seam method, or the more decorative surface crochet method, you’ll be able to create a beautiful and seamless blanket that will be admired for years to come.
Adding Borders and Edges: Enhancing the Beauty of Your Blanket
When it comes to knitting a granny square blanket, adding borders and edges can truly enhance the beauty of your finished piece. Not only do borders provide a clean and finished look, but they also add an extra element of design and personalization to your blanket.
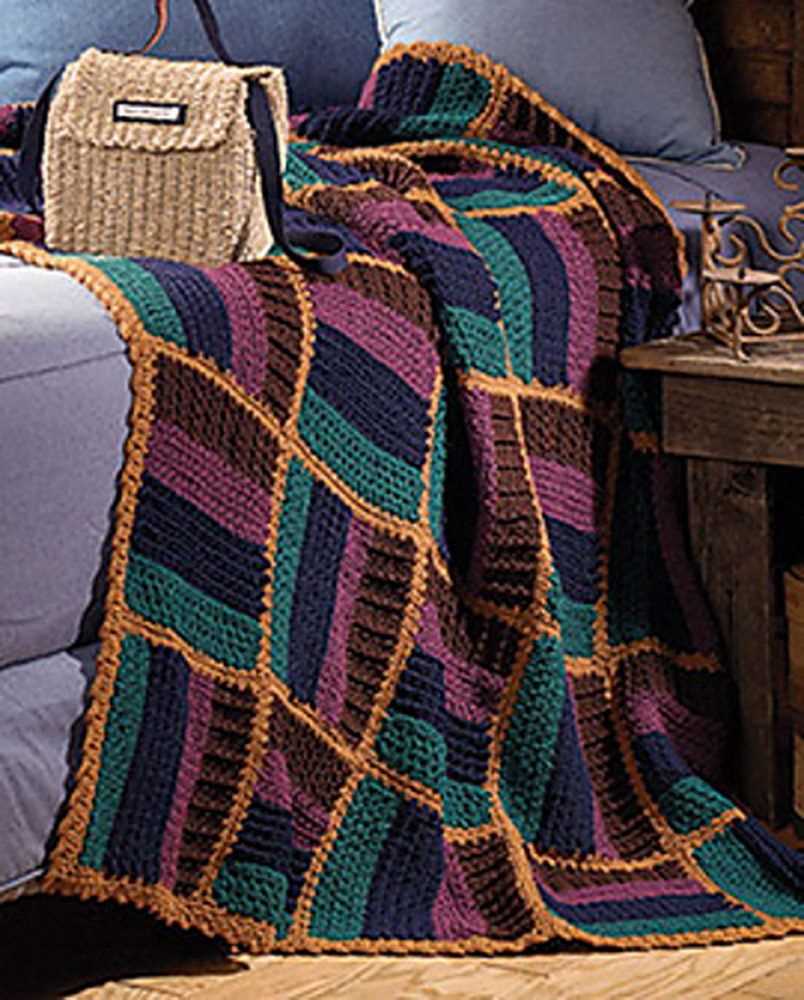
One popular option for adding borders is to use a contrasting or coordinating color. This can help to define the edges of each square and create a more cohesive overall appearance. You could choose a color that complements the colors in your squares, or opt for a bold contrasting color to make a statement.
Another option for borders is to incorporate different stitch patterns or textures. For example, you could use a simple garter stitch to create a clean and classic border, or experiment with more intricate lace or cable patterns for a more intricate and detailed look.
To make your border stand out even more, consider adding some decorative elements such as tassels, pompoms, or fringe. These can add a fun and playful touch to your blanket, and can also help to tie in different colors or textures that you may have used throughout your squares.
Finally, don’t forget about the importance of blocking your blanket once you’ve finished adding borders and edges. This step can help to even out any tension discrepancies and give your blanket a polished and professional look. Blocking involves gently shaping the blanket and allowing it to dry flat, which can help to smooth out any bumps or unevenness in the fabric.
Tips and Tricks for Tackling Common Challenges in Granny Square Blanket Knitting

Knitting a granny square blanket can be a fun and rewarding project, but it can also come with its fair share of challenges. Here are some tips and tricks to help you overcome common hurdles and create a beautiful blanket.
1. Joining the squares
One of the challenges when knitting a granny square blanket is joining the individual squares together. To ensure a neat and seamless finish, try using the mattress stitch or slip stitch method for joining. These techniques allow you to invisibly connect the squares, creating a smooth and professional-looking result.
2. Consistent tension
Maintaining consistent tension throughout your granny square blanket is essential to achieve an even and professional appearance. To avoid inconsistencies in your tension, make sure to use the same size needles and yarn for each square. Additionally, take breaks and relax your hands and wrists to prevent excessive tightness in your knitting.
3. Avoiding gaps and holes
Gaps and holes can detract from the overall look of your granny square blanket. To prevent this, pay attention to your tension when knitting the corners of each square. You may need to adjust your needle size or tension to ensure a tight and uniform stitch. Additionally, blocking your squares before joining can help even out any uneven stitches and minimize gaps.
4. Color management
If you’re using multiple colors in your granny square blanket, it’s essential to manage your color changes effectively. To keep your yarn tails neat and secure, consider weaving them in as you go or using the Russian join technique. This will minimize the amount of finishing work required later on. Additionally, planning your color sequences in advance can help create a harmonious and balanced design.
5. Adding an edging
Adding an edging to your granny square blanket can give it a polished and finished look. There are many options for edgings, such as a simple single crochet border or a more intricate lace pattern. When choosing an edging, consider the overall style and size of your blanket. Ensure that the edging complements the squares and enhances the overall design.
With these tips and tricks in mind, you’ll be well-equipped to tackle common challenges that may arise when knitting a granny square blanket. Remember to take your time, enjoy the process, and embrace the creativity that comes with this versatile knitting project.
Exploring Creative Ideas for Customizing Your Blanket
When it comes to knitting a granny square blanket, the possibilities for customization are endless. With each square representing a small canvas, you can experiment with different colors, textures, and patterns to create a truly unique and personalized piece. Here are some creative ideas to inspire you:
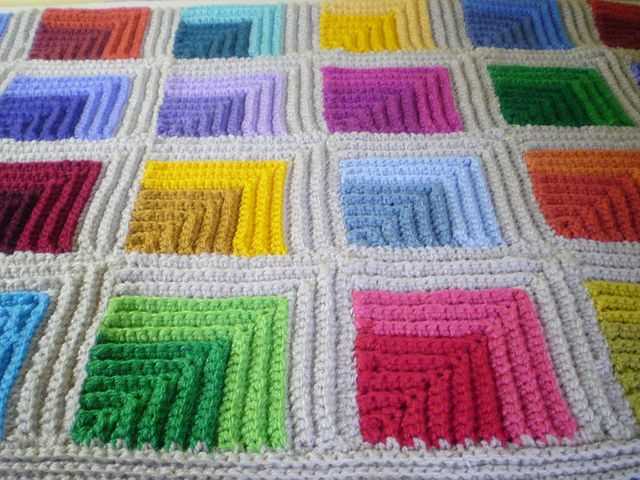
1. Colorful Variations
One way to add a personal touch to your blanket is by playing with color variations. You can choose a color scheme that reflects your personality or matches your home decor. Try combining vibrant hues to create a bold and eye-catching design. Alternatively, opt for a more subtle approach by using varying shades of a single color, creating a gradient effect.
2. Embellishments and Appliques
In addition to experimenting with colors, consider adding embellishments or appliques to your granny squares. You can sew on buttons, beads, or sequins for a touch of sparkle. Alternatively, you can create small crochet flowers or other motifs and attach them to the squares for an added dimension.
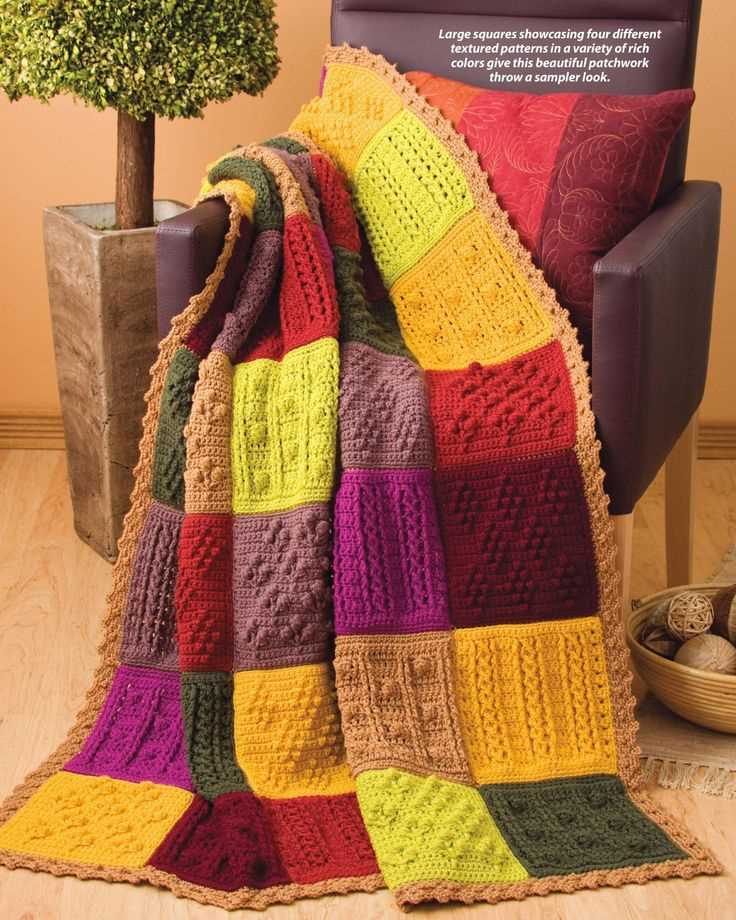
3. Mixing Textures
Another way to make your blanket truly unique is by incorporating different textures into each square. You can experiment with using different types of yarn, such as mohair, wool, or silk, to create squares with varying textures. This will not only add visual interest to your blanket but also create a tactile experience.
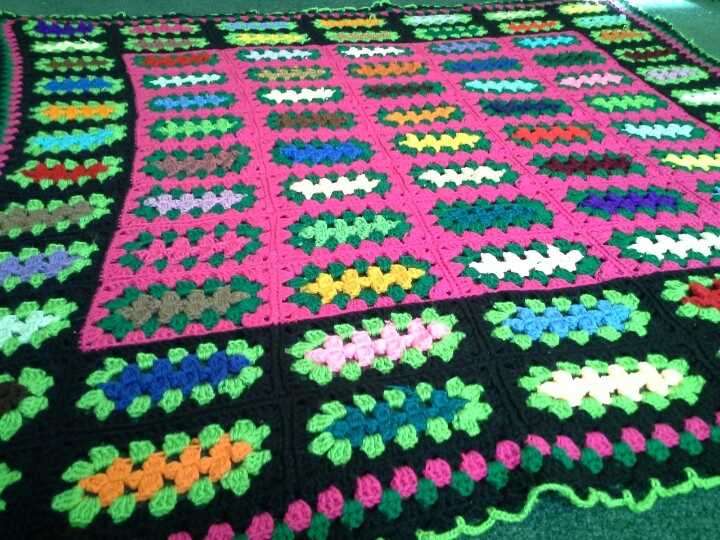
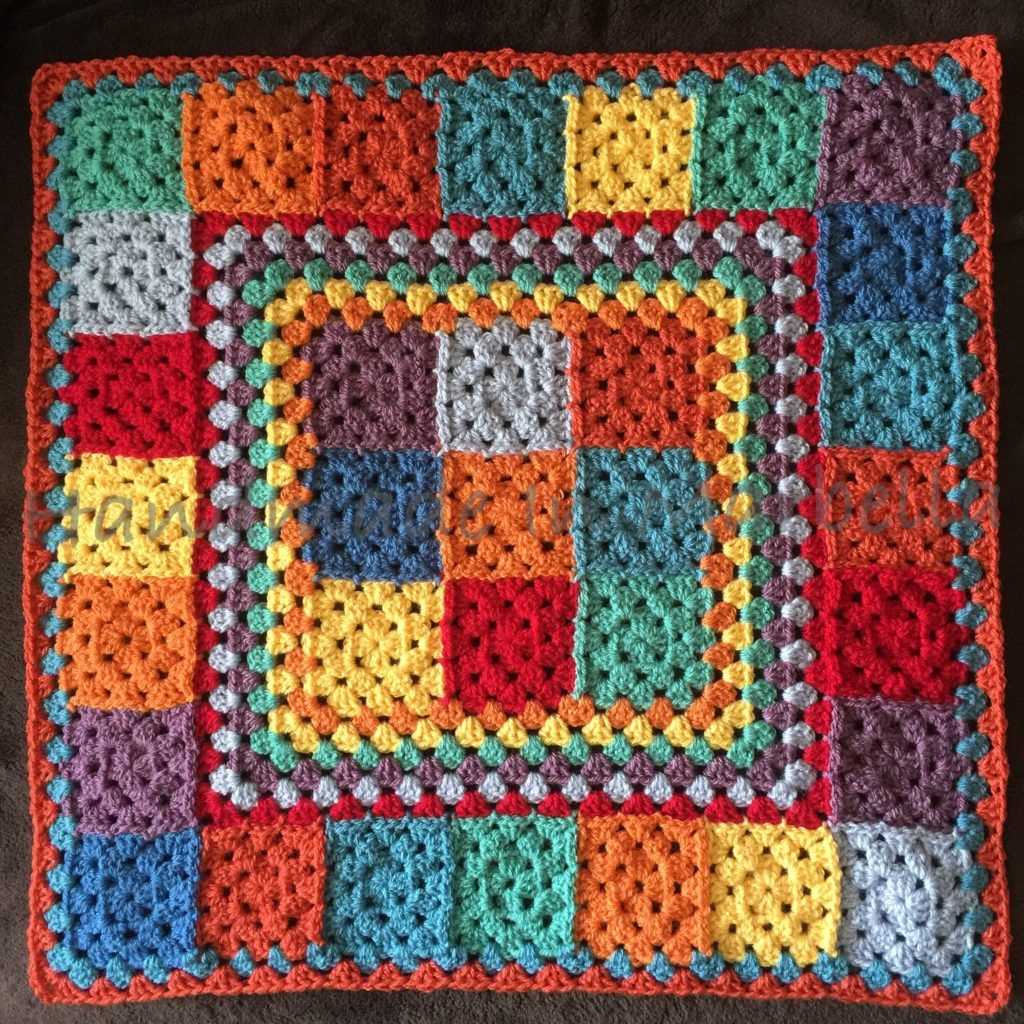
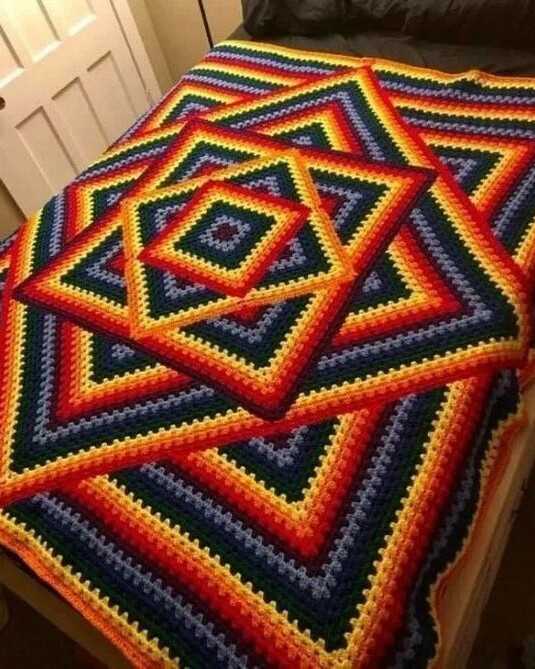
4. Creative Layouts
Think beyond the traditional grid layout when arranging your granny squares. Instead, consider creating geometric patterns or arranging them in a diagonal or spiral formation. You can also experiment with different sizes of squares or mix in other shapes, such as triangles or hexagons, to create a dynamic and visually appealing design.
5. Personalized Messages
If you’re creating a blanket as a gift or for a special occasion, consider adding personalized messages or names to some of the squares. You can use duplicate stitch or embroidery techniques to weave letters or words into the fabric. This will add a heartfelt touch and make the blanket even more special.
Remember, the beauty of a granny square blanket is that it’s both a functional and artistic piece. Don’t be afraid to let your creativity shine and experiment with different ideas to create a one-of-a-kind masterpiece.
Inspiration from Beautiful Knitted Granny Square Blankets
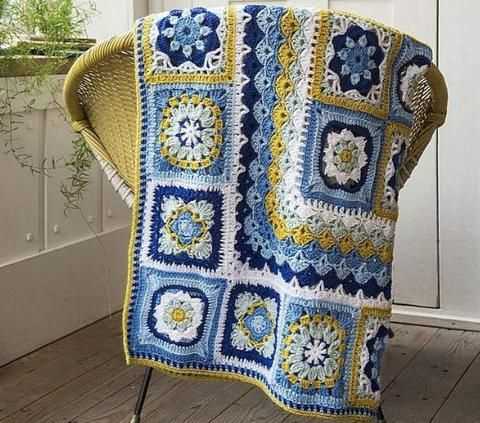
Knitted granny square blankets are a timeless and classic choice for adding warmth and style to any home. They are made up of individual granny squares, which are small, square-shaped pieces of fabric that are knitted or crocheted and then joined together to create a larger blanket. These blankets are not only cozy and functional but also serve as a decorative element, adding a touch of vintage charm to any space.
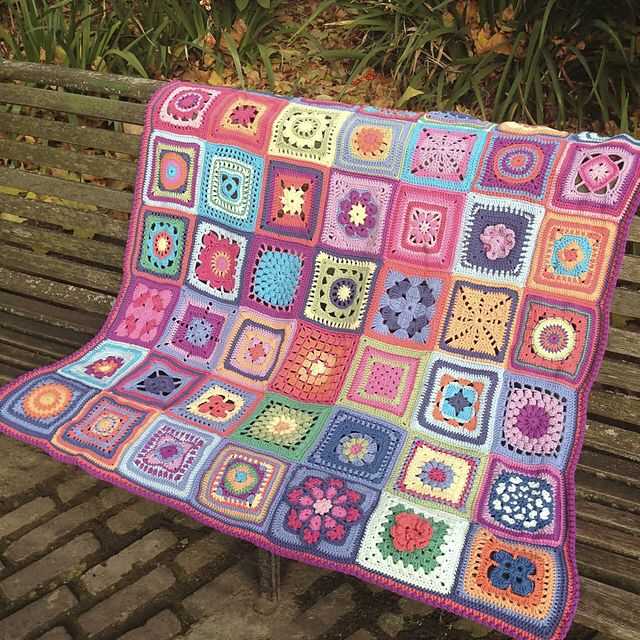
One of the reasons why knitted granny square blankets are so popular is their versatility. They can be made using any color combination, allowing you to create a design that perfectly matches your personal style and home decor. Whether you prefer muted pastel shades or bold, vibrant hues, there is a granny square blanket pattern out there that will suit your taste.
The beauty of knitted granny square blankets lies in their intricate patterns and textures. Each square can be knitted or crocheted using different stitches, creating a stunning visual effect when they are all joined together. From simple stripes and chevron patterns to more complex floral or geometric motifs, the possibilities are endless.
Another aspect that makes knitted granny square blankets so appealing is the fact that they can be made using various types of yarn. Whether you prefer the softness of merino wool, the durability of acrylic yarn, or the luxury of cashmere, there is a yarn option available for every preference and budget.
Whether you are a beginner or an experienced knitter, knitting a granny square blanket can be a rewarding and enjoyable project. There are many patterns and tutorials available online that provide step-by-step instructions and helpful tips to guide you through the process. So, gather your knitting needles, choose your favorite yarn, and get ready to create a beautiful knitted granny square blanket that will become a cherished heirloom for years to come.
Caring for Your Knitted Blanket: Washing and Storage Tips
Keeping your knitted granny square blanket clean and well-maintained is important to ensure its longevity and continued comfort. Follow these washing and storage tips to keep your knitted blanket in excellent condition for years to come.
Washing:
It is best to wash your knitted blanket by hand to avoid any damage or stretching. Fill a basin or sink with lukewarm water and add a mild detergent specifically designed for delicate fabrics. Gently swish the blanket in the soapy water, ensuring all areas are submerged.
- Spot Cleaning: If only a small portion of the blanket is soiled, spot clean the area using a gentle stain remover or hand wash the affected area separately.
- Rinsing: Drain the soapy water from the basin and refill it with clean water. Rinse the blanket by gently agitating it in the water, repeating this process until the water runs clear.
- Drying: After rinsing, gently squeeze out excess water from the blanket, taking care not to wring or twist it. Lay the blanket flat on a clean, dry towel and roll it up to remove additional moisture. Unroll the towel and reshape the blanket as needed before laying it flat to air dry.
Storage:
To properly store your knitted blanket, it is important to keep it clean and protect it from dust and pests.
- Clean and Dry: Make sure your blanket is completely dry before storing it. Any moisture can lead to mold or mildew growth. If necessary, allow the blanket to air out and fully dry before folding and storing it.
- Fold Neatly: Fold the blanket neatly to avoid unnecessary creasing or stretching. If your blanket is large, consider folding it in thirds or quarters to fit in your chosen storage container.
- Storage Container: Choose a storage container that is clean, dry, and preferably airtight to prevent dust or insects from getting inside. If using a cardboard box, line it with acid-free tissue paper to provide an additional barrier against moisture and pests.
- Protect from Moths: If you are concerned about moths, you can add cedar balls or sachets to the storage container. Cedar is a natural moth repellent that can help protect your knitted blanket.
By following these washing and storage tips, you can ensure that your knitted granny square blanket stays clean, cozy, and in great condition for many years to come.
Sharing Your Creations: Joining Granny Square Knitting Communities and Showcasing Your Work

After putting in all the hard work and time to create your beautiful granny square blanket, it’s time to share your creations with the world! Joining knitting communities and showcasing your work can be a fun and fulfilling way to connect with other knitters, learn new techniques, and gain inspiration for future projects. Here are some tips for sharing your creations:
1. Join Online Knitting Communities: There are numerous online knitting communities where you can connect with fellow knitters, share your creations, and learn from others. Websites like Ravelry, Knitting Paradise, and LoveKnitting have active forums and groups dedicated to granny square knitting and blankets. Joining these communities allows you to become part of a supportive network of knitters who will appreciate and provide feedback on your work.
2. Share on Social Media: Social media platforms like Instagram, Facebook, and Pinterest are ideal for showcasing your knitted creations. Create a dedicated account or use relevant hashtags to reach a wider audience and attract fellow knitters who share your passion for granny square knitting. Sharing your work on social media not only allows you to connect with other knitters but also serves as a personal portfolio for your knitting journey.
3. Participate in Knitting Challenges: Many knitting communities and websites host knitting challenges or contests where you can submit your work for a chance to win prizes or gain recognition. These challenges often come with specific themes or requirements, so be sure to read the guidelines before submitting your granny square blanket. Participating in these challenges is not only a great way to showcase your work but also an opportunity to push your knitting skills and creativity.
4. Display Your Work at Local Yarn Shops or Exhibitions: If you prefer offline interactions, consider displaying your granny square blanket at local yarn shops or knitting exhibitions. Many shops have dedicated areas where knitters can showcase their work, and these displays often attract fellow knitters and inspire them to start their own projects. Additionally, knitting exhibitions or fiber festivals provide a platform to showcase your work to a wider audience and connect with like-minded individuals.
5. Gift or Donate Your Creations: Share the warmth and love of your knitted granny square blankets by gifting or donating them to family, friends, or charitable organizations. Seeing your creations being cherished and providing comfort to others can be a rewarding experience, and it also spreads the joy of knitting.
Remember, sharing your creations is a personal choice, and there’s no pressure to do so if you prefer to keep your work private. However, joining knitting communities and showcasing your work can provide a sense of community, motivation, and pride in your knitting achievements. Whether online or offline, the knitting world is waiting to admire and appreciate your granny square blanket!