
A knit pattern cardigan is a cozy and stylish addition to any wardrobe. With its intricate stitching and warm fabric, it’s perfect for chilly days and evenings. Whether you’re curling up with a book by the fireplace or heading out for a walk in the park, a knit pattern cardigan will keep you comfortable and fashionable.
One of the great things about a knit pattern cardigan is its versatility. It can be dressed up or down, depending on the occasion. Pair it with jeans and a t-shirt for a casual, everyday look, or wear it over a dress for a more polished and put-together ensemble. You can even experiment with different colors and designs to match your personal style.
Not only is a knit pattern cardigan stylish, but it’s also practical. The knit fabric provides insulation, keeping you warm without the need for multiple layers. This makes it a great option for travel, as it can easily be packed in a suitcase and worn in a variety of climates. Plus, the cardigan style allows for easy on and off, making it a convenient choice for those on the go.
Benefits of knitting your own cardigan

Knitting your own cardigan offers a multitude of benefits, making it a popular choice for those who enjoy crafting and fashion. Whether you are a seasoned knitter or a beginner, the process of creating your own cardigan can be rewarding and fulfilling.
1. Customization: One of the greatest advantages of knitting your own cardigan is the ability to customize it to your exact preferences. You can choose the color, pattern, and style of yarn that best suits your personality and wardrobe. This allows you to create a unique and personalized piece that perfectly matches your individual style.
2. Quality: When you knit your own cardigan, you have full control over the quality of the materials and the construction. You can select high-quality yarn that is soft, durable, and comfortable to wear. Additionally, you can ensure that your cardigan is made with attention to detail, resulting in a well-crafted garment that will last for years to come.
3. Cost savings: While knitting your own cardigan may require an initial investment in knitting needles and supplies, it can be a cost-effective option in the long run. By purchasing yarn in bulk or taking advantage of sales, you can save money compared to buying a similar cardigan from a store. Moreover, you can use leftover yarn from other projects, reducing waste and maximizing your resources.
4. Therapeutic benefits: Knitting has been shown to have therapeutic benefits, such as reducing stress and promoting relaxation. The repetitive nature of knitting can help calm the mind and provide a sense of accomplishment as your cardigan takes shape. It can also serve as a creative outlet and a form of meditation, allowing you to focus on the present moment and let go of worries.
5. Knowledge and skills: Knitting your own cardigan allows you to develop and expand your knitting skills. You can learn new techniques, stitches, and patterns, honing your craft and gaining valuable knowledge. This can not only enhance your knitting abilities but also open up new possibilities for future projects.
In conclusion, knitting your own cardigan offers a range of benefits including customization, quality, cost savings, therapeutic benefits, and the opportunity to acquire new knowledge and skills. So why not pick up your knitting needles and embark on a creative journey to craft a cardigan that is uniquely yours?
Tips for choosing the right knit pattern
When it comes to choosing a knit pattern for a cardigan, there are several factors to consider. From the design and style to the difficulty level, finding the right pattern can make all the difference in creating a cardigan that you will love to wear. Here are some tips to help you choose the perfect knit pattern for your cardigan:
1. Consider your skill level

Before selecting a knit pattern, it’s important to assess your skill level. If you are a beginner, opt for a pattern that is labeled as “easy” or “beginner-friendly.” These patterns usually involve basic stitches and simple construction methods. On the other hand, if you have more experience and are looking for a challenge, you can choose a pattern that includes intricate stitch patterns or advanced techniques.
2. Determine the style and design
Think about the style and design that you want for your cardigan. Do you prefer a classic, timeless look or something more trendy and modern? Consider the length, collar style, and sleeve length of the cardigan as well. Look for patterns that match your desired style and have the design elements you’re looking for.
3. Take into account your body type
When choosing a knit pattern, it’s essential to consider your body type. Certain patterns and designs may flatter different body shapes better than others. For example, if you have a pear-shaped body, a pattern with a shorter length and a fitted waist may be more flattering. On the other hand, if you have an hourglass figure, a pattern with a defined waist and flared bottom may complement your shape. Take your body type into account when selecting a knit pattern to ensure a flattering fit.
4. Check the gauge and recommended yarn
Before starting any knit project, it’s crucial to check the gauge and recommended yarn for the pattern. The gauge will determine how many stitches and rows per inch you need to achieve the correct size. Make sure to use the recommended yarn weight and needle size to achieve the desired results. Swatch and measure your gauge accurately before starting the project to avoid any sizing issues.
5. Read reviews and look at finished projects
Before committing to a knit pattern, it’s helpful to read reviews and look at finished projects from other knitters. This can give you an idea of how the pattern works up, any modifications that may be necessary, and the overall fit and look of the finished cardigan. Online knitting communities and forums are great places to find reviews and see pictures of completed projects.
By considering these tips, you can choose the right knit pattern for your cardigan project and create a garment that you will enjoy wearing and be proud to show off.
Consider the skill level
When choosing a knit pattern for a cardigan, it is important to consider the skill level required to complete the project. Some patterns may be more suitable for beginners, while others may require more advanced knitting techniques.
Beginner-friendly patterns: If you are new to knitting or still developing your skills, it is recommended to choose a pattern that is labeled as “beginner-friendly” or “easy”. These patterns typically use basic stitches and techniques, making them more accessible for beginners. They usually have clear instructions and minimal shaping, allowing you to build your confidence and knitting skills.
Intermediate to advanced patterns: If you are an experienced knitter or looking for a more challenging project, you can opt for intermediate to advanced patterns. These patterns often involve more complex stitches, techniques, and shaping. They may require knowledge of lace knitting, cables, colorwork, or other advanced techniques. It is important to carefully read through the pattern and assess your skills before committing to a more advanced project.
When choosing a knit pattern cardigan, it is also helpful to consider the construction of the cardigan. Some patterns may require seaming or picking up stitches, which can add additional difficulty. Others may be knit seamlessly in one piece, making them more beginner-friendly.
Factors to consider when determining skill level:
- Complexity of stitches and techniques
- Level of shaping
- Pattern instructions and clarity
- Construction of the cardigan (seamed vs. seamless)
- Your own knitting skills and experience
By carefully considering the skill level required for a knit pattern cardigan, you can choose a project that aligns with your abilities and goals. Whether you are a beginner looking for a simple and satisfying project or an experienced knitter seeking a challenge, there is a wide range of patterns available to suit every skill level.
Think about the style you want
When it comes to knit pattern cardigans, there are a multitude of styles to choose from. Whether you’re looking for something classic and timeless or a more contemporary and trendy design, there’s definitely a style out there to suit your preferences. Consider your personal style and the overall aesthetic you want to achieve with your cardigan.
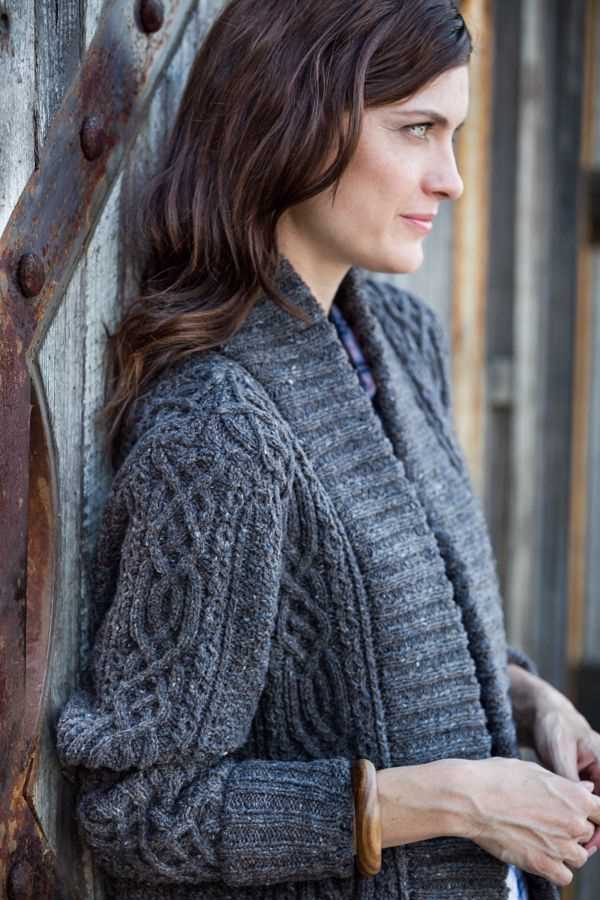
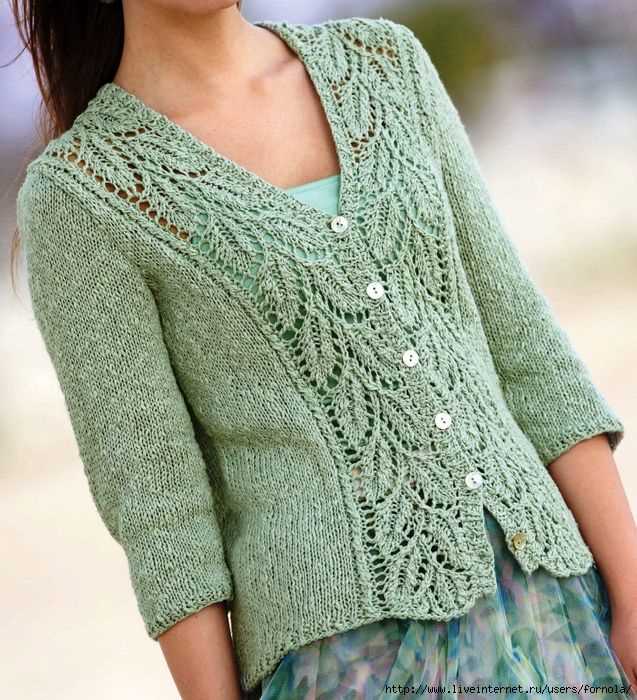
Classic: If you prefer a more traditional look, opt for a knit pattern cardigan with a simple and elegant design. Look for classic stitches like ribbing, cables, or seed stitch, and choose a neutral color like black, gray, or navy for a versatile and timeless piece.
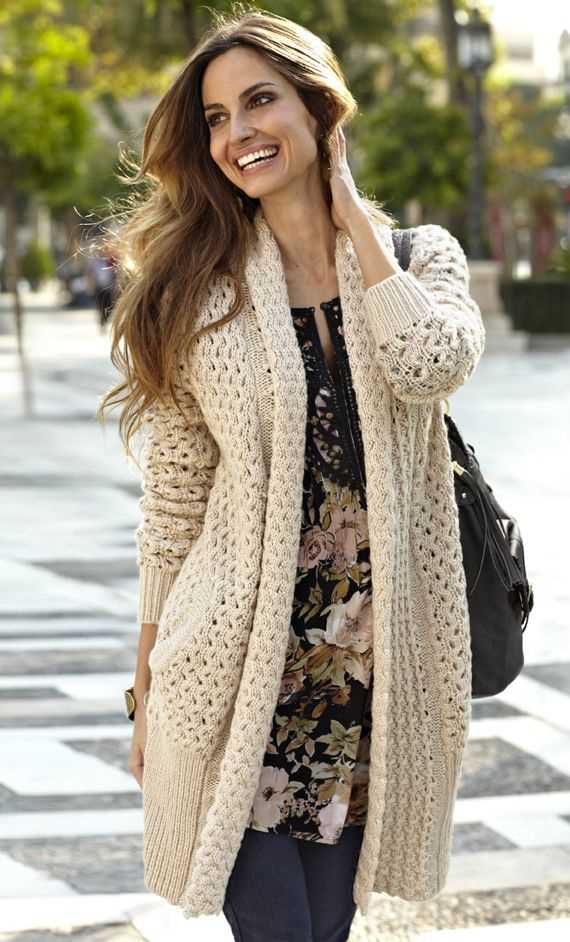
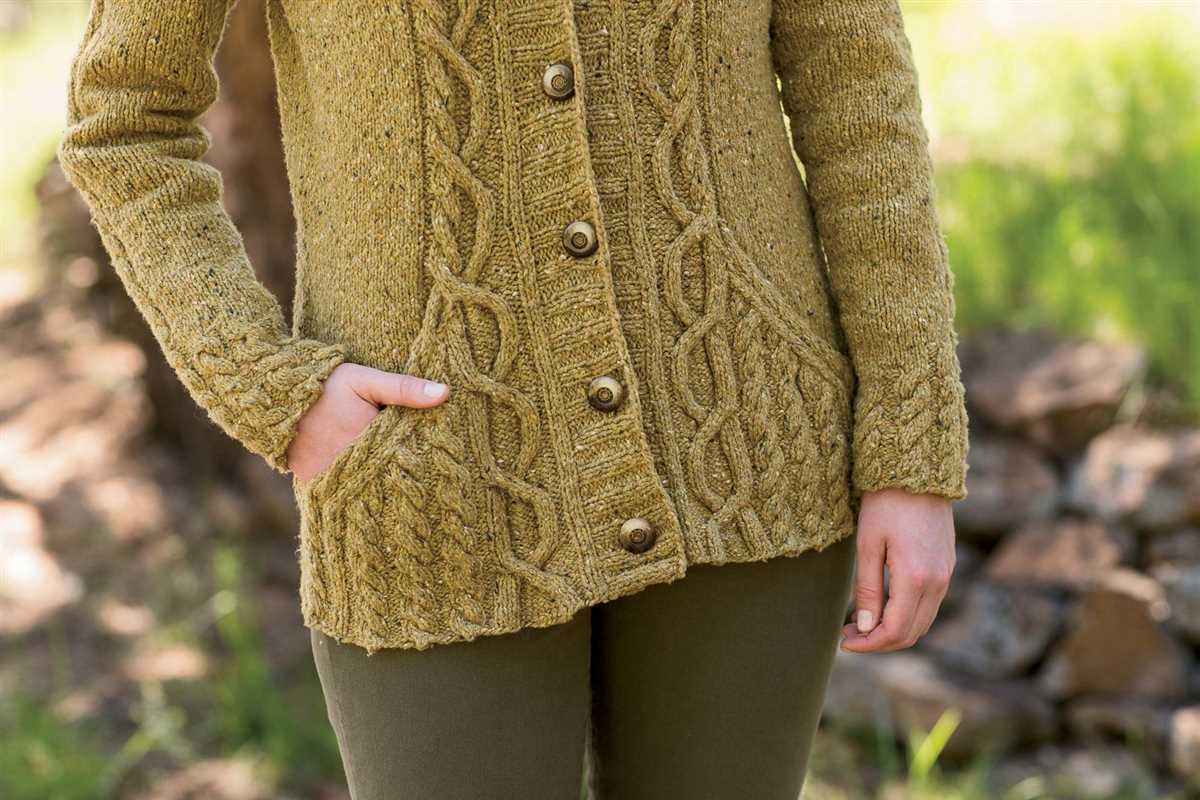
Boho-chic: If you’re into a more bohemian and free-spirited style, go for a knit pattern cardigan with a relaxed and oversized fit. Look for chunky knit patterns with fringe details or tassels for a touch of boho flair. Earthy tones like brown, rust, and olive green would complement this style beautifully.
Modern and trendy: For those who like to stay on top of the latest fashion trends, consider a knit pattern cardigan in a bold color or with a unique pattern. Look for cardigans with geometric designs, color blocking, or even animal prints for a fashion-forward look. Pair it with other trendy pieces like mom jeans and chunky boots for a modern and stylish ensemble.
Retro-inspired: If you love the vintage look, opt for a knit pattern cardigan with a retro-inspired design. Look for cardigans with bold and vibrant colors, like mustard yellow or burnt orange, and consider patterns like stripes or chevron. Pair it with high-waisted jeans or a vintage-inspired skirt for a perfect retro ensemble.
Remember, the style you choose should reflect your personal taste and make you feel confident and comfortable. Take some time to explore different styles and patterns to find the perfect knit pattern cardigan that suits you.
Take into account the yarn type
When choosing a knit pattern for a cardigan, it is important to take into consideration the type of yarn you will be using. The yarn type can greatly impact the final look and feel of the garment, as well as its durability and care requirements.
One of the first things to consider is the weight of the yarn. This refers to the thickness or thinness of the individual strands. Different yarn weights are suitable for different types of projects, so it’s essential to choose one that will work well for a cardigan. For example, a bulky or chunky weight yarn will create a cozy and warm cardigan, while a fingering weight yarn will result in a lightweight and airy garment.
When it comes to fiber content, there are numerous options available, including wool, cotton, acrylic, and blends of these and other fibers. Each fiber has its own unique qualities and characteristics. For instance, wool is known for its warmth and elasticity, while cotton is known for its breathability and softness.
It’s also important to consider the care requirements of the yarn. Some yarns require hand washing or dry cleaning, while others can be machine washed and dried. Choosing a yarn that aligns with your preferred care routine can make a big difference in the long run.
To summarize, when selecting a knit pattern for a cardigan, take the time to consider the yarn type. Consider the weight, fiber content, and care requirements of the yarn to ensure you choose the right one for your project. This will help you create a cardigan that not only looks beautiful but also suits your needs and preferences.
Step-by-step knitting instructions
Knitting a cardigan can be a fun and rewarding project for those who enjoy working with yarn and creating their own garments. To start, gather your materials, including the appropriate yarn, knitting needles, and a pattern for the cardigan. Make sure to choose a pattern that matches your skill level and desired style.
1. Gauge swatch: Before beginning your cardigan, it’s important to knit a gauge swatch to ensure that your finished project will fit correctly. Follow the pattern instructions to determine how many stitches and rows should be in a 4×4 inch square. Knit the swatch using the recommended needle size, and measure it to see if it matches the required gauge. Adjust your needle size if necessary.
2. Cast on: Once you have determined the correct gauge, it’s time to cast on the required number of stitches for your size. Follow the pattern instructions for the cast-on method and stitch count. Be sure to keep track of any increases or decreases that may be required as you work.
3. Ribbing: Most cardigan patterns start with a ribbed section at the bottom. This can be a simple knit 1, purl 1 rib or a more intricate pattern. Follow the pattern instructions to knit the required number of rows or inches for the ribbing section.
4. Body and sleeves: After completing the ribbing, you will begin working on the body of the cardigan and the sleeves. This is where the main pattern stitch will be used. Follow the instructions for the stitch pattern, working the required number of rows or inches for each section. Pay attention to any shaping instructions for the sleeves and armholes.
5. Finishing: Once you have finished knitting the body and sleeves, it’s time to sew the pieces together and add any necessary finishing touches. Follow the pattern instructions for seaming the sides, setting in the sleeves, and creating any button bands or borders. Remember to weave in any loose ends and block or steam your cardigan to give it a polished look.
These step-by-step instructions should help guide you through the process of knitting a cardigan. Remember to take your time, read the pattern carefully, and don’t be afraid to ask for help if needed. With practice and patience, you’ll soon have a beautiful hand-knit cardigan to wear and enjoy.
Start with a gauge swatch

Before you begin knitting your cardigan, it’s important to start with a gauge swatch. A gauge swatch is a small sample of knitting that helps you determine the correct number of stitches and rows per inch that you need to achieve in the pattern.
To make a gauge swatch, choose the yarn and needles you’ll be using for your cardigan. Follow the instructions in the pattern for the recommended needle size and yarn weight. Cast on a few more stitches than the recommended gauge, and knit a few inches in the stitch pattern specified in the pattern.
Measuring the gauge swatch
Once you have completed your gauge swatch, it’s time to measure it. Lay your swatch on a flat surface and use a ruler or tape measure to measure the number of stitches and rows per inch. Make sure to measure in the same stitch pattern specified in the pattern.
If your swatch doesn’t match the recommended gauge, you may need to change your needle size. If your swatch has too many stitches per inch, try using a larger needle size. If your swatch has too few stitches per inch, try using a smaller needle size. Keep making swatches and adjusting your needle size until you achieve the correct gauge.
Remember, taking the time to make a gauge swatch is essential for ensuring that your finished cardigan fits correctly. Knitting tightly or loosely can greatly affect the size of your garment, so don’t skip this important step!
Cast on and knit the body
In order to start knitting the body of the cardigan, you will need to cast on the required number of stitches. The exact number of stitches will depend on the size of the cardigan you are making, as specified in the pattern. Make sure to use the recommended knitting needles for the project.
Once you have cast on the stitches, you can begin knitting the body of the cardigan. The pattern will specify the stitch or stitch pattern to use. You may need to repeat a certain number of rows or work a specific pattern for the body. Pay attention to the pattern instructions and follow them carefully to achieve the desired result.
If the pattern calls for shaping the body, such as decreasing or increasing stitches, make sure to follow the instructions provided. This will help create the intended fit and shape of the cardigan. It is important to count your stitches regularly to ensure that you are on track and have the correct number of stitches for each row.
As you knit the body of the cardigan, it is helpful to use stitch markers to indicate specific points in the pattern, such as the beginning and end of a repeat or the location of shaping. This can make it easier to keep track of your progress and identify any mistakes along the way.
Continue knitting the body of the cardigan according to the pattern instructions until you have reached the desired length or completed the specified number of rows. Remember to always check your work for any errors or inconsistencies before proceeding to the next step in the pattern.
Create the sleeves

Now it’s time to create the sleeves for your knit pattern cardigan. Follow these steps to complete this part of the project:
1. Measure and cast on the required number of stitches
Start by measuring your arm circumference at the widest point, as well as the length from your shoulder to your wrist. Use these measurements to determine the number of stitches you need to cast on for each sleeve. Make sure to account for any increases or decreases in the pattern.
2. Work the ribbing
Once you have cast on the required number of stitches, work a few rows in ribbing pattern (such as k1, p1) to create a stretchy cuff for the sleeves. Continue this ribbing pattern for the desired length, keeping in mind the overall length of the sleeves.
3. Start the main pattern
After completing the ribbing, switch to the main pattern stitch for the sleeves. This could be a simple stockinette stitch, a cable pattern, or any other stitch pattern of your choice. Follow the instructions in the knit pattern to work the main pattern for the required length, ensuring that both sleeves are worked consistently.
4. Shape the sleeves
As you work the main pattern, you may need to shape the sleeves by increasing or decreasing stitches. Follow the instructions in the knit pattern to shape the sleeves correctly, ensuring they fit your arm comfortably. This may involve working increases or decreases at specific intervals or on specific rows.
5. Complete the sleeves
Continue working the main pattern and shaping as necessary until you reach the desired length for the sleeves. Once you reach the desired length, finish off the sleeves according to the knit pattern instructions. This may involve binding off stitches or working some finishing rows.
Repeat these steps for the second sleeve to complete the knit pattern cardigan. Make sure to double-check your work against the pattern instructions and adjust as necessary to ensure a proper fit.
Knit the collar and button band
The next step in knitting your cardigan is to knit the collar and button band. This is an important part of the pattern as it provides structure and stability to the neckline and front opening of the cardigan. It also adds a nice finishing touch to the overall look of the garment.
To knit the collar and button band, you will need to follow the instructions provided in the pattern. Start by picking up stitches along the front opening of the cardigan using your preferred method. This can be done by inserting the needle into the edge of the fabric and pulling the yarn through. Make sure to evenly space out the stitches to achieve a neat and uniform look.
Once you have picked up the stitches, you can begin knitting the collar and button band. This is usually done using a rib stitch pattern, such as a 1×1 rib or a 2×2 rib. Rib stitch patterns create a stretchy and flexible fabric that is perfect for collars and button bands, as it allows them to lie flat and conform to the shape of the neckline.
To knit the collar and button band, continue working in the rib stitch pattern for the specified number of rows or until the desired length is reached. Remember to maintain an even tension and to keep track of your stitch count to ensure a consistent and professional-looking finish.
Once you have finished knitting the collar and button band, you can proceed to the next step in the pattern, which is usually sewing on the buttons and adding any additional finishing touches. With the collar and button band complete, your cardigan is one step closer to being finished and ready to wear!
Finish with blocking and seaming
Once you have completed knitting your cardigan, it is important to finish it properly with blocking and seaming. Blocking helps to shape the garment and even out any irregularities in the stitches, while seaming ensures that all the pieces are securely joined together.
To begin, fill a basin with lukewarm water and add a small amount of wool wash or mild detergent. Gently place your knitted cardigan into the water, making sure it is fully submerged. Allow it to soak for about 15 to 20 minutes, then carefully remove it and gently squeeze out any excess water. Avoid wringing or twisting the fabric, as this can damage the fibers.
Next, it’s time to block the cardigan. Lay a clean, flat towel on a table or flat surface. Carefully lay the damp cardigan onto the towel, shaping it to the desired dimensions. Use rust-proof pins to secure the edges and smooth out any wrinkles or puckering. Allow the cardigan to dry completely, usually overnight or up to 24 hours.
Once the cardigan is dry, it’s time to seam the pieces together. Lay the main body sections flat, aligning the edges to be joined. Use a yarn needle and matching yarn to stitch the pieces together, working from the bottom up. Use a whipstitch or mattress stitch for a neat and durable seam. Repeat the process for the sleeves, collar, and any other pieces that need to be attached.
After seaming, give your cardigan one final blocking to help the seams lay flat and blend in with the rest of the garment. Place a damp cloth over the seams and apply gentle pressure with a warm iron. Be careful not to press too hard or directly onto the fabric to avoid damaging it.
With the blocking and seaming complete, your knit pattern cardigan is now ready to be worn and enjoyed. The finishing touches of these steps will ensure a polished and professional-looking garment that you can be proud of.
Styling and caring for your knit cardigan
Once you have completed your knit cardigan, you’ll want to style it in a way that complements your personal style and keeps you warm and cozy. Here are some tips for styling and caring for your knit cardigan:
Styling:
- Pair your knit cardigan with a simple white t-shirt and jeans for a casual, everyday look.
- Dress it up by layering your cardigan over a blouse and adding tailored pants or a skirt.
- For a boho-inspired outfit, wear your cardigan with a flowy maxi dress and some ankle boots.
- Experiment with different accessories, such as scarves, hats, and statement jewelry, to add personality to your cardigan.
Caring:
Proper care is essential to keep your knit cardigan looking its best and extend its lifespan:
- Always follow the care instructions provided by the yarn manufacturer.
- Hand wash your cardigan using a gentle detergent and lukewarm water. Avoid using hot water, as it can cause shrinking and felting.
- Gently squeeze out excess water and reshape your cardigan while it’s still damp.
- Lay it flat to dry on a clean towel or a drying rack. Avoid hanging it, as this can cause stretching and distortion.
- If necessary, iron your cardigan on a low heat setting, using a press cloth to protect the fibers.
- Store your cardigan folded in a drawer or on a shelf, away from direct sunlight and moisture.
By following these styling tips and caring for your knit cardigan properly, you’ll ensure that it remains a beloved staple in your wardrobe for years to come.