
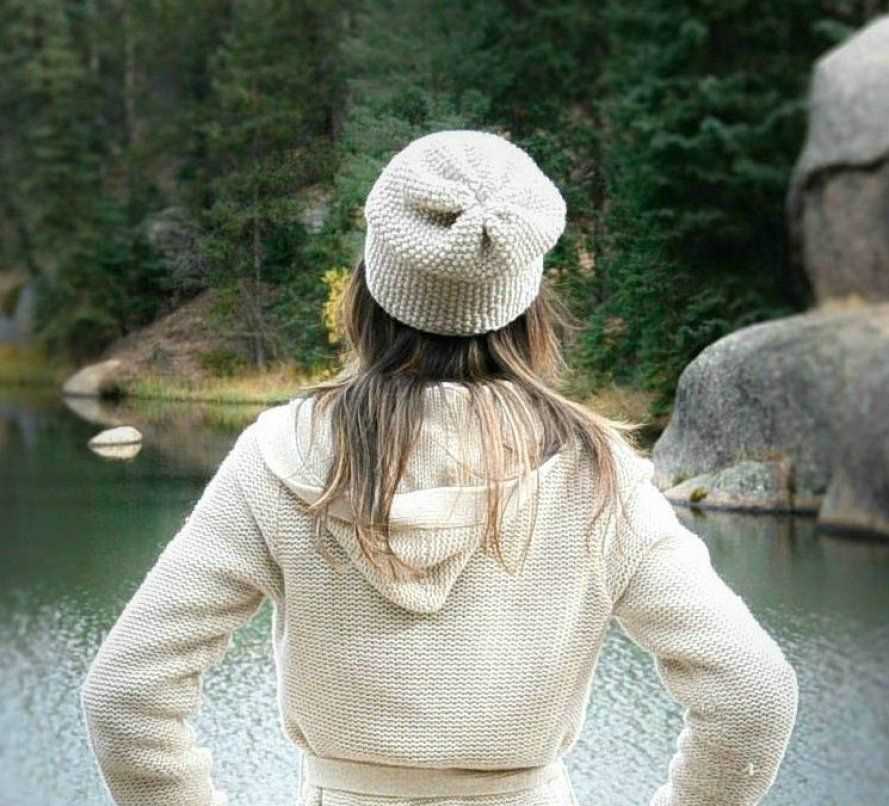
If you’re a knitting enthusiast looking for a new project, why not try your hand at knitting a beret? This stylish and versatile accessory is perfect for adding a touch of elegance to any outfit. And the best part is, you don’t have to be an experienced knitter to create your own beret. In this article, we’ll share an easy and free knitting pattern for a beret that you can knit at your own pace.
Before we get started with the pattern, let’s talk about the materials you’ll need. You’ll need a set of double-pointed knitting needles, a circular knitting needle, and a ball of yarn in the color of your choice. The beret pattern we’ll be using is designed for an adult size, but you can easily adjust it to fit a smaller head by using a lighter weight yarn and smaller needles.
Now that you have your materials ready, let’s dive into the pattern. The first step is to cast on the required number of stitches using the circular knitting needle. Once you have the initial stitches in place, you’ll continue knitting in the round, following the pattern instructions for the desired length and shaping. The pattern includes simple stitches like knit and purl, so even if you’re a beginner, you’ll be able to complete this project with ease.
Once you’ve finished knitting the beret, you’ll need to sew up the bottom seam and attach any additional embellishments, such as a pom-pom or a decorative button. And voila! You now have a beautiful hand-knit beret to wear and show off to your friends and family. So grab your knitting needles and get started on this easy and free beret knitting pattern today!
Beret Knitting Pattern Easy Free
Are you looking for an easy and free knitting pattern to make your own beret? Look no further! We have the perfect pattern for you. Whether you are a beginner knitter or an experienced one, this pattern will guide you through the process and help you create a beautiful beret that you can wear with pride.
Materials:
- Yarn – Choose a soft and warm yarn in your favorite color. Worsted weight yarn works well for this project.
- Knitting needles – Size US 8 (5mm) circular needles and double-pointed needles.
- Stitch marker
- Tapestry needle
Instructions:
- Cast on 88 stitches using the circular needles.
- Join in the round, being careful not to twist the stitches. Place a stitch marker to mark the beginning of the round.
- Knit in a rib stitch pattern for 2 inches (5cm). This will create a stretchy band for the beret.
- Switch to stockinette stitch and knit until the beret measures 5 inches (12.5cm) from the cast-on edge.
- Begin decreasing stitches to shape the beret. Switch to the double-pointed needles when necessary.
- Decrease round 1: *Knit 4, knit 2 together. Repeat from * to end of round.
- Decrease round 2: Knit.
- Repeat decrease rounds 1 and 2 until you have 11 stitches remaining.
- Cut the yarn, leaving a long tail. Thread the tail through a tapestry needle and slide the needle through the remaining stitches. Pull tight to close the top of the beret.
- Weave in any loose ends and block the beret to shape, if desired.
Congratulations! You have completed your very own beret using this easy and free knitting pattern. Now you can enjoy wearing your stylish and cozy accessory all winter long.
Choosing the Right Yarn for Your Beret
Making your own beret can be a fun and rewarding knitting project. One of the key decisions you’ll have to make when starting your beret knitting pattern is choosing the right yarn. The yarn you choose will have a big impact on the final look and feel of your beret.
1. Consider the fiber: There are different types of yarn fibers available, such as wool, acrylic, alpaca, and cotton. Each fiber has its own characteristics, so think about the qualities you want your beret to have. For a warm and cozy beret, wool is a great choice. If you prefer a lightweight and breathable beret, cotton or acrylic may be more suitable. Alpaca yarn adds a soft and luxurious touch to your beret.
2. Gauge and weight:
Gauge: Check your beret knitting pattern for the recommended gauge. This will help you determine the thickness of the yarn you need. If your gauge is too tight, you may need to switch to a thinner yarn. If it’s too loose, a thicker yarn may be required.
Weight: Yarns are typically classified into different weights, such as lace, fingering, sport, worsted, and bulky. The weight of the yarn will affect the drape and structure of your beret. Lace and fingering weight yarns create a delicate and lightweight beret, while worsted and bulky weight yarns result in a more substantial and cozy beret.
3. Texture and color:
Texture: Consider the texture you want for your beret. Smooth and plied yarns create a clean and even look, while boucle or novelty yarns add texture and interest.
Color: The color you choose for your beret can have a big impact on its overall style. Think about whether you want a neutral and versatile beret or a bold and vibrant statement piece. Consider your personal style and the outfits you plan to wear with the beret.
By considering the fiber, gauge and weight, as well as texture and color, you can choose the perfect yarn for your beret knitting project. Experiment with different options to find the yarn that best suits your preferences and the desired look of your beret.
Essential Knitting Tools and Supplies
When it comes to knitting, having the right tools and supplies is essential to create beautiful and well-crafted projects. Whether you are a beginner or an experienced knitter, there are a few key items that you should always have on hand.
Knitting Needles
The most basic and important tool for knitting is a pair of knitting needles. These come in many different sizes and materials, but the most commonly used are metal, wood, and plastic. The size of your needles will depend on the project you are working on and the type of yarn you are using. It is always a good idea to have a variety of needle sizes in your collection.
Yarn
Of course, you can’t knit without yarn! Yarn comes in various weights and fibers, each with its own unique qualities. When choosing yarn for a project, consider factors such as the desired drape, warmth, and stitch definition. It’s also important to know how much yarn you will need for your project, so make sure to check the pattern or calculate it yourself.
Tape Measure and Gauge Ruler
Accurate measurements are crucial in knitting, especially if you want your finished piece to fit properly. A tape measure is handy for measuring body parts, while a gauge ruler helps you determine your knitting tension and match it to the recommended gauge in the pattern. Both of these tools are essential for achieving the correct size and fit in your projects.
Scissors and Yarn Needles
Having a sharp pair of scissors is essential for cutting yarn and trimming loose ends. Yarn needles, also known as tapestry needles, are used for weaving in tails and sewing seams. These tools come in different sizes and shapes, so it’s a good idea to have a variety in your knitting kit.
Stitch Markers and Row Counters
Stitch markers are small rings or clips that can be placed on a knitting needle to mark specific stitches or sections in your project. They are useful for keeping track of increases, decreases, or pattern repeats. Row counters, on the other hand, help you keep count of rows or pattern repeats. Both of these tools can save you from counting mistakes and make your knitting experience more enjoyable.
Knitting Bag or Organizer
To keep all your knitting tools and supplies in one place, it’s helpful to have a knitting bag or organizer. This will keep your needles, yarn, and other accessories organized and easily accessible. It can also be a great way to transport your projects when you are on the go.
With these essential tools and supplies, you’ll be well-equipped to take on any knitting project. Whether you are knitting a beret or any other pattern, having the right tools will ensure that your knitting experience is enjoyable and successful.
Casting On and Creating the Ribbing
Casting on is the first step in knitting any project, and this beret pattern is no exception. To get started, you will need to cast on the required number of stitches using the long tail cast on method. This method creates a sturdy, yet flexible edge for your ribbing.
Once you have cast on your stitches, it’s time to create the ribbing. The ribbing is what gives the beret its stretch and structure. In this pattern, the ribbing is created using a combination of knit and purl stitches in a 2×2 ribbing pattern. This means that you will alternate knitting two stitches and purling two stitches across each row.
To create the ribbing, begin by knitting the first two stitches. To do this, insert the right needle into the first stitch on the left needle and wrap the yarn around the right needle in a counterclockwise direction. Then, use the right needle to pull the yarn through the stitch, sliding it off the left needle. Repeat this process for the second stitch.
Next, it’s time to purl the next two stitches. To do this, insert the right needle into the second stitch on the left needle from back to front. Wrap the yarn around the right needle in a clockwise direction, and then use the right needle to pull the yarn through the stitch, sliding it off the left needle. Repeat this process for the third and fourth stitches.
Continue knitting two stitches and purling two stitches across the row until you reach the end. The ribbing should begin to take shape, with the knitted stitches forming a raised ridge and the purled stitches creating a recessed valley. This ribbing pattern not only adds visual interest to the beret, but also helps it to fit snugly on the head.
Knitting the Body of the Beret
Once you have finished knitting the brim of the beret, it’s time to move on to the body of the beret. This is where the beret starts to take shape and become the stylish accessory it’s meant to be.
Start by joining a new color of yarn, if desired, to add some visual interest to your beret. You can do this by simply tying the new yarn to the end of the old yarn and continuing with the new color. Alternatively, you can switch colors at any point during the body of the beret if you prefer a different look.
Continue knitting in the round, using the desired stitch pattern for your beret. You can choose to knit all stitches for a smooth and classic look, or experiment with different stitch patterns such as ribbing or cables for added texture. Keep in mind that the number of stitches you cast on for the brim should be divisible by the stitch pattern you choose to maintain the correct shape of the beret.
As you knit, continue to check your gauge to ensure that your beret is coming out the correct size. You can also try the beret on from time to time to see how it’s fitting and make any necessary adjustments. Keep in mind that the body of the beret should be slightly larger than the brim to create the slouchy effect.
Continue knitting until the body of the beret reaches your desired length. This can vary depending on your personal preference and the style of beret you are going for. Some berets are shorter and sit higher on the head, while others are longer and provide more slouch. Keep in mind that the brim of the beret should also be taken into account when determining the final length.
Shaping the Crown of the Beret
Shaping the crown of the beret is an important step in the knitting process, as it gives the beret its iconic shape and fit. There are several methods you can use to shape the crown of your beret, depending on the style and design you prefer.
Decreasing Stitches
One common method is to decrease stitches gradually as you knit towards the center of the crown. To do this, you can use techniques such as knit 2 together (k2tog) or slip, slip, knit (ssk) to reduce the number of stitches on your needles. By decreasing stitches in a controlled manner, you can create a smooth and symmetrical shape for the crown of your beret.
Short Rows
Another technique for shaping the crown is using short rows. With short rows, you knit or purl across only a portion of the stitches in a row and then turn your work without completing the entire row. This creates extra fabric in certain areas, allowing you to shape the beret with added volume or height. Short rows can be especially useful for creating a slouchy or asymmetrical beret design.
Final Touches
Once you have shaped the crown of your beret, it’s important to finish it off neatly. You can cut the yarn, leaving a long tail, and use a tapestry needle to thread the tail through the remaining stitches and cinch them together tightly. This will secure the crown of the beret and give it a clean, polished look.
Remember, the process of shaping the crown may vary slightly depending on the specific knitting pattern you are following. Be sure to read through the instructions carefully and make any necessary adjustments to achieve the desired shape and fit for your beret.
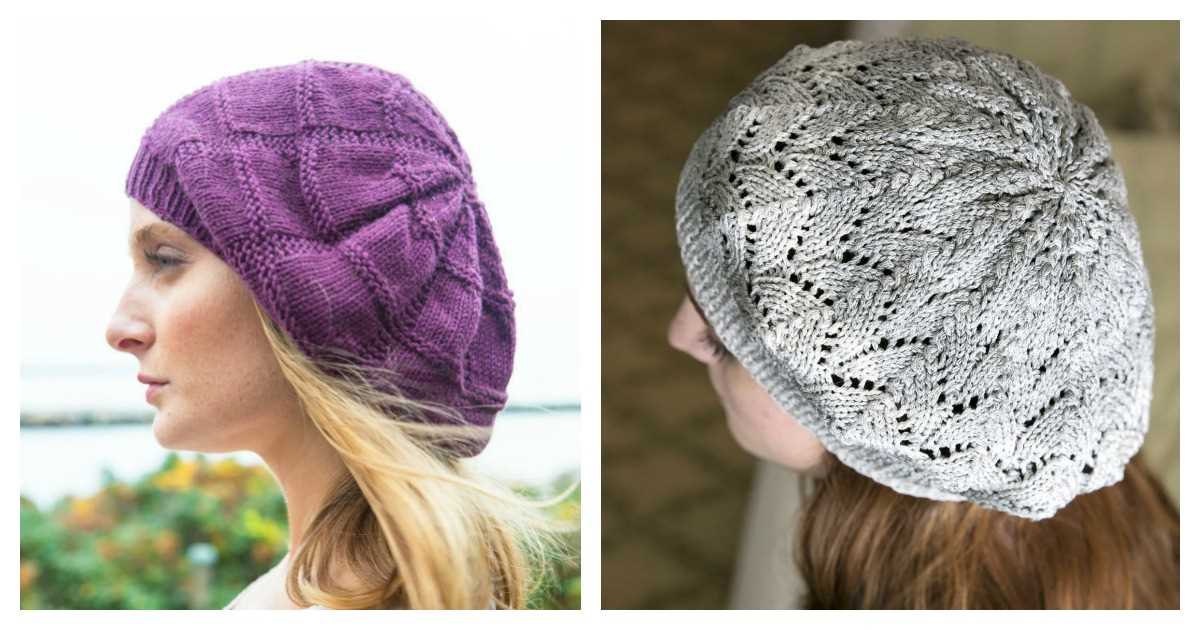
Adding Decorative Stitches or Patterns
When knitting a beret, you can add decorative stitches or patterns to make it more unique and visually appealing. There are several different techniques you can use to achieve this.
Cable Knitting: One of the most popular ways to add a decorative element to a beret is by incorporating cable knitting. This technique involves crossing stitches over each other to create intricate patterns. You can use simple cable patterns, such as a basic twist or braid, or more complex ones like a horseshoe or honeycomb. Cable knitting adds texture and depth to the beret, making it stand out.
Fair Isle Knitting: Another way to add decorative patterns to a beret is by using the Fair Isle knitting technique. This technique is characterized by knitting with two or more colors in a row, creating colorful and intricate designs. You can choose to knit a traditional Fair Isle pattern, like a geometric motif or a floral design, or create your own unique pattern. Fair Isle knitting is a great way to add pops of color and create interesting visual effects in your beret.
Lace Knitting: If you prefer a more delicate and feminine look, you can incorporate lace knitting into your beret. Lace knitting involves creating patterns with holes and eyelets, giving the fabric an airy and intricate look. You can choose from a wide range of lace patterns, such as leaf motifs, floral designs, or geometric shapes. Lace knitting adds elegance and a touch of sophistication to your beret.
Colorwork: Adding colorwork to your beret is another way to make it more visually appealing. Colorwork involves knitting with multiple colors in a row or creating patterns with different colored yarns. You can choose to knit stripes, chevron patterns, or even create your own unique design. Colorwork allows you to experiment with different color combinations and create a beret that reflects your personal style.
Sequins, Beads, or Embroidery: For those who want to take their decorative stitches to the next level, you can add sequins, beads, or embroidery to your beret. These embellishments can be sewn onto the fabric after knitting, adding a touch of sparkle and texture. You can create intricate patterns or designs using sequins or beads, or add embroidered flowers, initials, or other motifs. Using sequins, beads, or embroidery can transform a simple beret into a statement piece.
Incorporating decorative stitches or patterns into your beret allows you to personalize it and create a unique accessory. Whether you choose to add cable knitting, Fair Isle knitting, lace knitting, colorwork, or embellishments like sequins or beads, your beret will become a stylish and eye-catching piece. So let your creativity run wild and have fun exploring different techniques to add that extra touch of flair to your beret.
Finishing the Edges of Your Beret
When knitting a beret, one of the key steps in achieving a polished and professional finish is to properly finish the edges. This not only adds a decorative touch but also helps to prevent the edges from curling or unraveling over time. There are several techniques you can use to finish the edges of your beret, depending on the look you want to achieve and your skill level.
Crochet Border: One popular method for finishing the edges of a beret is to crochet a border. This adds a decorative edge and helps to stabilize the edges of the beret. To crochet a border, you can use a crochet hook and your choice of yarn. Start by inserting the crochet hook into the fabric along the edge and pulling a loop of yarn through. Then, continue to work single crochet stitches along the edge, spacing them evenly. You can experiment with different crochet stitches and yarn colors to create a unique and personalized border for your beret.
Double-Knit Edge: Another technique for finishing the edges of a beret is the double-knit edge. This method involves knitting an extra row of stitches along the edge of the beret using a contrasting color yarn. To create a double-knit edge, start by picking up stitches along the edge of the beret with the contrasting yarn. Then, work one row of knit stitches with the contrasting yarn. This creates a clean and finished look, as well as adds stability to the edges of the beret.
I-Cord Edge: The I-cord edge is a popular technique for finishing the edges of various knitting projects, including berets. This method involves creating a narrow tube of stitches that can be sewn or attached to the edge of the beret. To create an I-cord edge, you can use double-pointed needles and your choice of yarn. Start by casting on a small number of stitches onto the double-pointed needles. Then, knit these stitches in a round, pulling the yarn tightly to create a cord-like tube. Finally, sew or attach the I-cord to the edge of the beret to create a clean and finished edge.
By choosing the appropriate finishing technique for your beret and taking the time to properly finish the edges, you can elevate your knitting project to the next level. Whether you opt for a crochet border, double-knit edge, or I-cord edge, these methods will not only enhance the appearance of your beret but also ensure its longevity and durability.
Blocking and Shaping Your Beret
A properly blocked and shaped beret can make a huge difference in the final look of your knitted project. Blocking helps to even out the stitches, open up the lace pattern, and give your beret a smooth and professional finish. Here are some key steps to follow when blocking and shaping your beret:
1. Soak your beret
Start by filling a basin or sink with lukewarm water and a mild detergent. Gently submerge your beret in the water, making sure it is fully saturated. Allow it to soak for about 15 minutes to ensure that the fibers are thoroughly hydrated.
2. Gently squeeze out excess water
After soaking, carefully lift the beret out of the water and gently squeeze out the excess water. Avoid twisting or wringing the fabric, as this can cause the fibers to stretch or warp. Instead, gently press the beret between your hands to remove as much water as possible.
3. Shape your beret
To achieve the desired shape, you will need a blocking form or something similar, such as a dinner plate or a balloon. Place the wet beret on the blocking form, ensuring that the center of the crown is aligned with the center of the form. Gently stretch the beret to shape it, ensuring that the ribbing and lace patterns are evenly spread out.
4. Allow your beret to dry
Leave your beret on the blocking form to air dry. Avoid placing it in direct sunlight or near a source of heat, as this can cause the fibers to shrink or become damaged. Allow the beret to dry completely before removing it from the form.
Following these steps will help you achieve a beautifully shaped and professional-looking beret. Taking the time to block your beret will bring out the beauty of the stitches and ensure that your finished project looks its best.
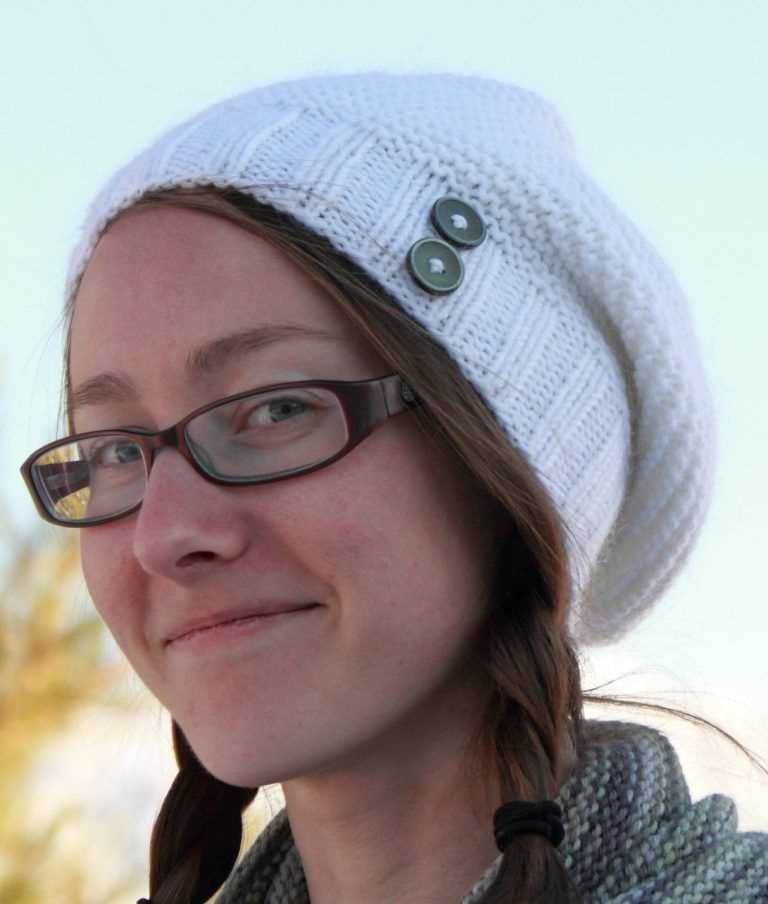
Attaching Embellishments or Accessories
In the world of knitting, adding embellishments or accessories to your finished project can be a fun and creative way to make it truly unique. Whether you’re knitting a beret or any other type of garment, there are a variety of ways to attach embellishments to enhance the overall look of your creation.
One popular method for attaching embellishments is sewing. This can be done by hand using a needle and thread, or with a sewing machine for added convenience. Sewing allows you to securely attach items such as buttons, beads, or patches to your knitted piece. To ensure durability, consider reinforcing the attachment points by sewing through multiple layers of fabric.
If sewing isn’t your preferred method, you can also use knitting techniques to attach embellishments. For example, you can incorporate bobbles, tassels, or pom poms directly into your knitting by following a specific pattern. This allows you to seamlessly integrate these decorative elements into your project without the need for additional sewing.
Another option is to use adhesive materials such as fabric glue or iron-on patches. These can be great for attaching lightweight embellishments that don’t require heavy-duty sewing. Simply apply the adhesive to the back of your embellishment and press it onto your knitted piece. Be sure to follow the manufacturer’s instructions for proper application and care.
Lastly, consider using accessories such as brooches or pins to add a touch of elegance to your knitted beret. These can easily be attached with a simple stitch or by using the fastening provided by the accessory itself. Play around with different placements and arrangements to find the perfect look for your project.
Care and Washing Instructions for Your Beret
If you’ve recently knitted or purchased a beret, it’s important to take proper care of it to ensure it stays in good condition for a long time. Here are some care and washing instructions to help you maintain the quality of your beret.
Hand washing: The best way to clean your beret is by hand washing. Fill a basin or sink with lukewarm water and add a small amount of mild detergent. Gently agitate the beret in the water, ensuring all areas are submerged. Avoid rubbing or wringing the beret as it may cause damage. Rinse the beret thoroughly with clean water until all soap residue is gone.
Drying: After washing, gently squeeze out excess water from the beret. Avoid twisting or wringing the fabric. Lay a clean towel flat on a table or countertop and place the beret on top. Reshape the beret to its original shape by gently stretching and patting it. Allow it to air dry on the towel, away from direct heat or sunlight.
- Do not machine wash: Machine washing can lead to shrinking, stretching, or damaging the fabric of your beret.
- Avoid harsh chemicals: Do not use bleach or any harsh chemicals on your beret as it can cause discoloration or damage to the fabric.
- Store it properly: When not in use, store your beret in a clean, dry place away from any sharp objects or rough surfaces that can snag the fabric. You can also gently stuff the beret with tissue paper to help maintain its shape.
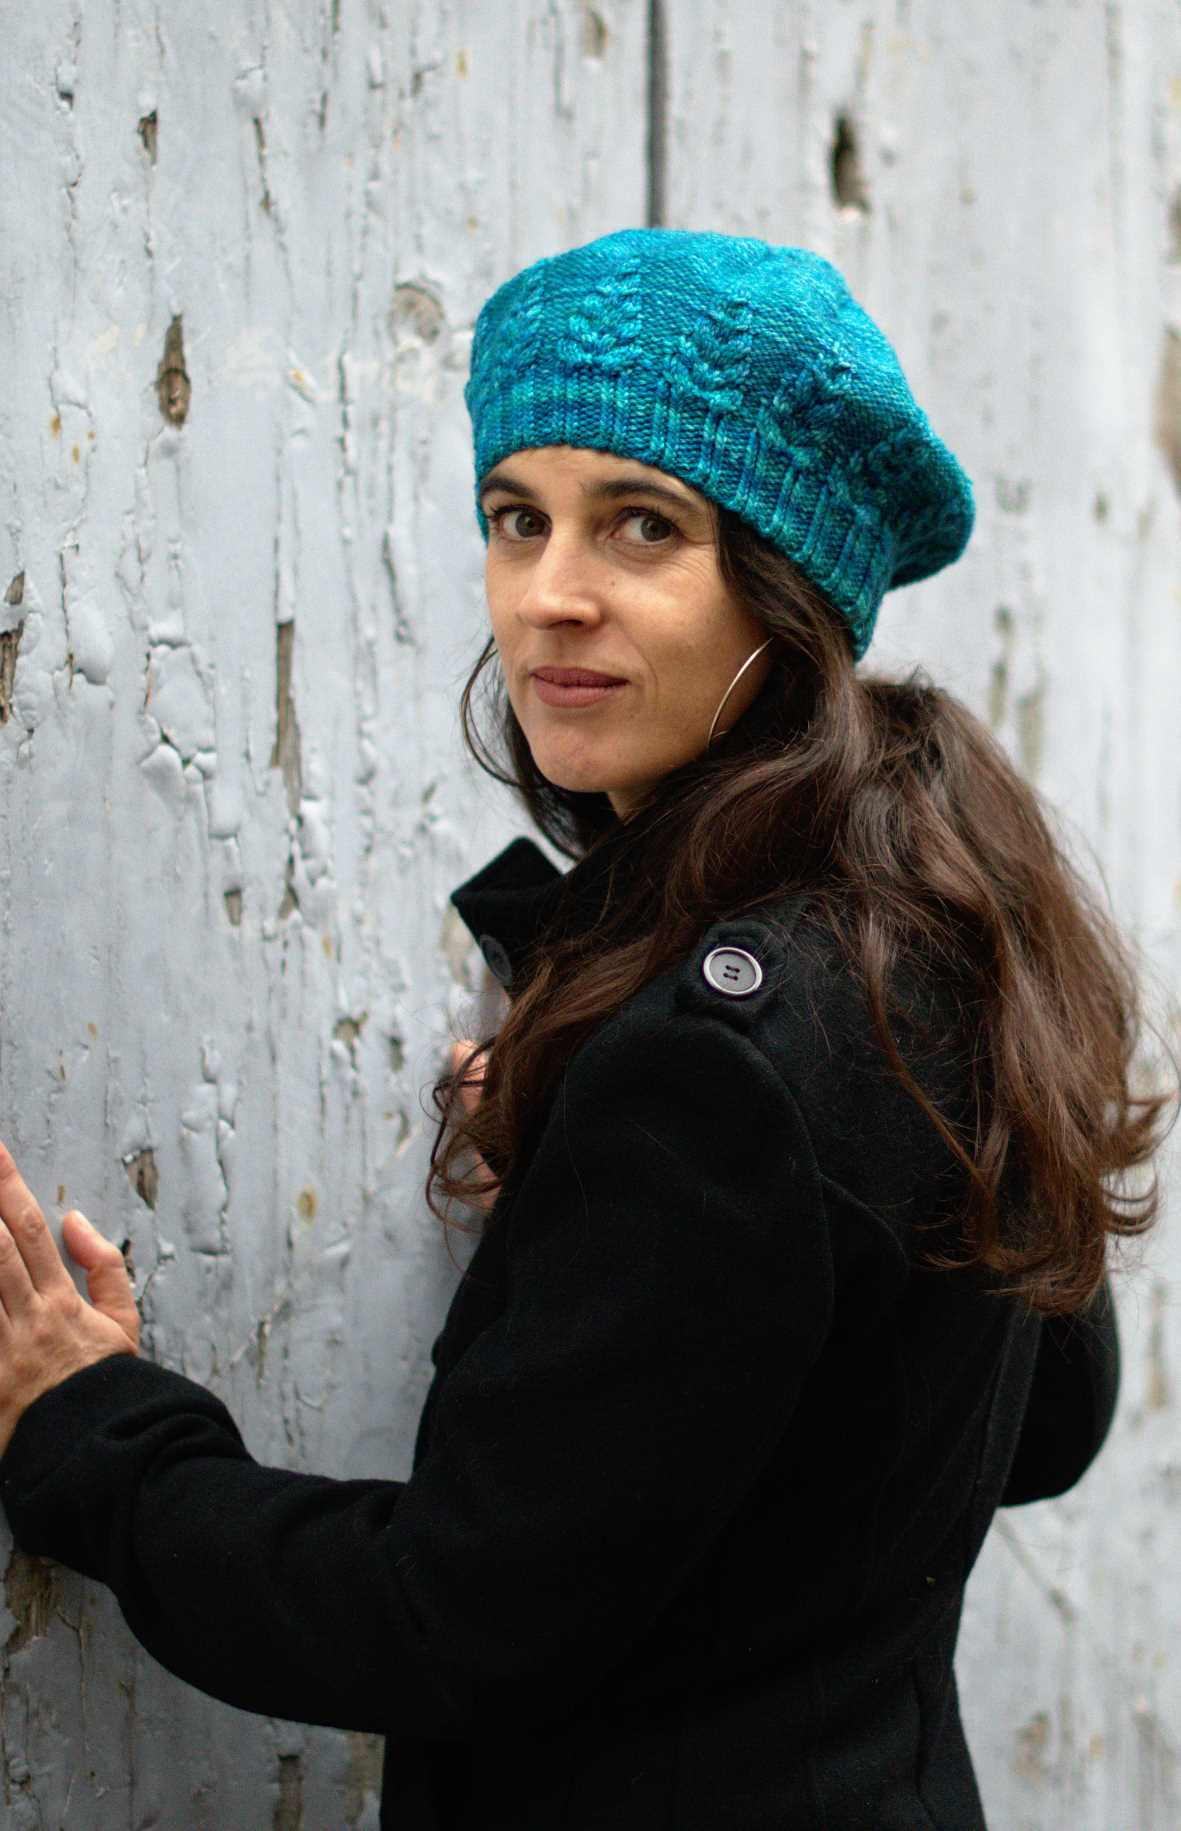
Styling Tips and Outfit Ideas with Your Beret
Now that you have your beautiful beret knitted, it’s time to style it and create some chic outfits! Berets are versatile accessories that can be paired with various clothing items to achieve different looks. Here are some styling tips and outfit ideas to inspire you:
Casual and Effortless
For a laid-back and effortless look, pair your beret with a cozy oversized sweater, skinny jeans, and ankle boots. This combination is perfect for a casual day out or a coffee date with friends. Add a statement necklace or a chunky scarf to elevate your outfit.
French Chic
If you want to channel your inner Parisian, opt for a striped breton top, high-waisted jeans, and a beret in a classic color like black or navy. Complete the look with ballet flats or loafers and a red lip for that timeless French chic style.
Winter Wonderland
During the colder months, pair your beret with a cozy coat, a warm sweater dress, and knee-high boots. This combination will keep you stylish and warm while adding a touch of elegance to your winter wardrobe.
Vintage Vibes
To achieve a vintage-inspired look, pair your beret with a retro-inspired dress, stockings, and Mary Jane shoes. Accessorize with a pearl necklace or a vintage brooch to complete the vintage vibes.
Remember, the key to styling your beret is to have fun and experiment with different outfits. Don’t be afraid to mix and match, and let your creativity shine through. Whether you’re going for a casual or a more dressed-up look, the beret is a versatile accessory that can add a touch of elegance and sophistication to any outfit.
So go ahead, grab your knitted beret, and start styling your way to a fashionable and confident look!