
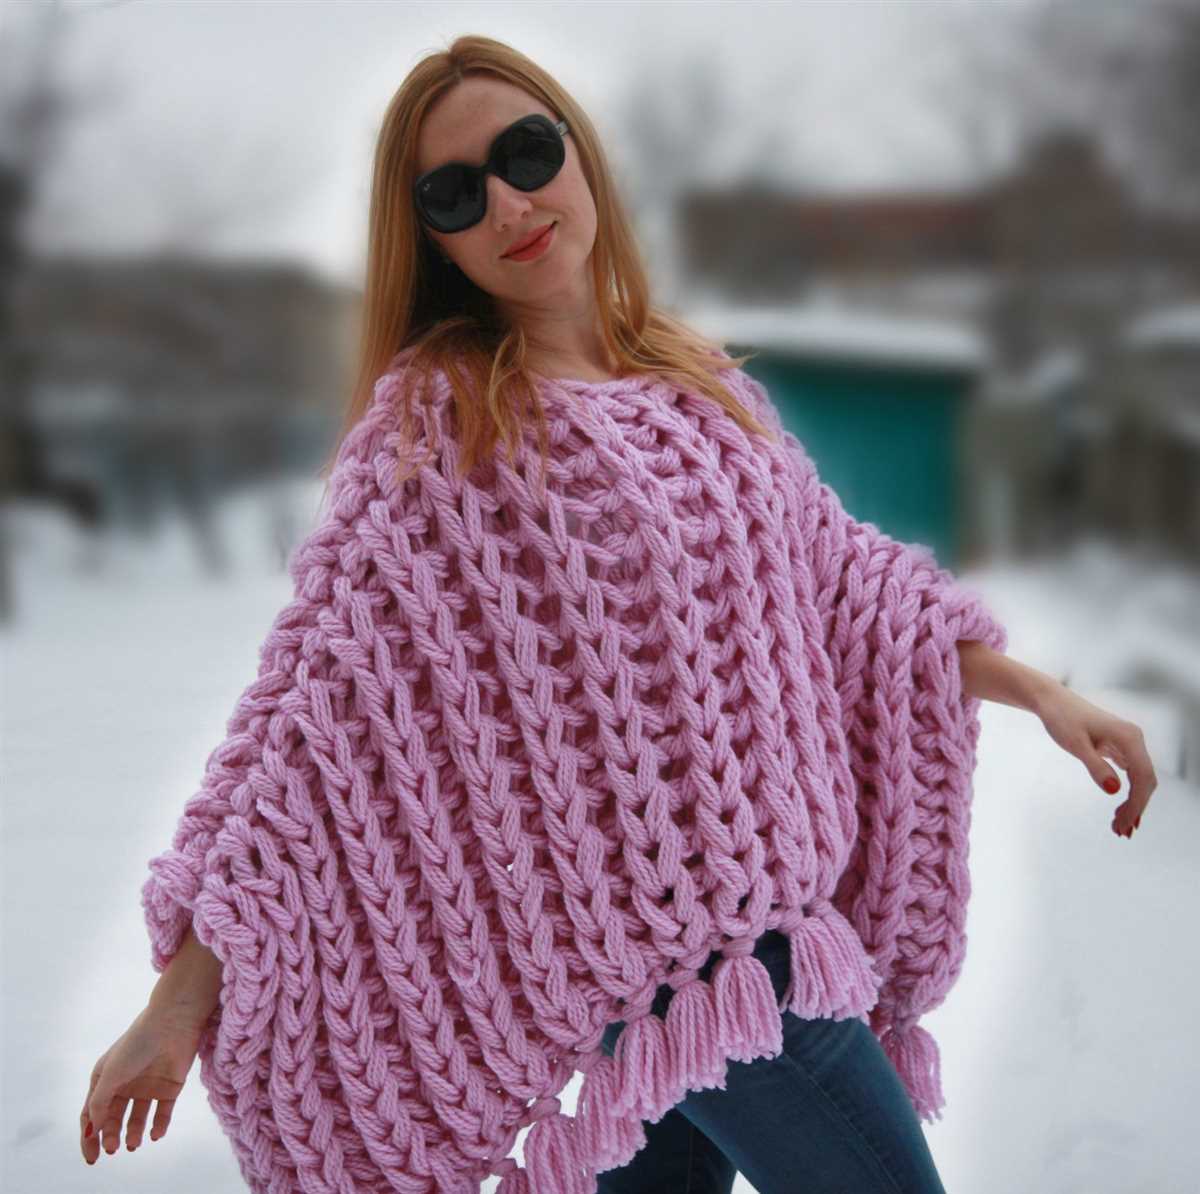
A poncho is a versatile and stylish addition to any autumn or winter wardrobe. It can be worn as a cozy layering piece or as a statement accessory. Hand knitting your own poncho allows you to customize the design, color, and yarn to create a one-of-a-kind garment that reflects your personal style.
Knitting a poncho may seem intimidating, but with the right pattern and some basic knitting skills, it can be a rewarding and enjoyable project. In this article, we will provide a step-by-step hand knitted poncho pattern that is suitable for knitters of all levels.
Whether you are a beginner looking to expand your knitting skills or an experienced knitter looking for a new project, this pattern will guide you through the process of creating a beautiful and functional poncho. So grab your knitting needles and let’s get started!
Hand Knitted Poncho Pattern: A Complete Guide
Are you looking to add some stylish and cozy clothing to your wardrobe? Look no further than a hand knitted poncho! With its versatile design and endless pattern possibilities, a hand knitted poncho is a must-have accessory for any fashion-forward individual. Whether you are a beginner knitter or an experienced pro, this complete guide will provide you with all the information you need to create your own beautiful poncho.
Choosing the Right Yarn
Before you start knitting your poncho, it’s important to choose the right yarn. Consider the weight and fiber content of the yarn, as it will directly impact the drape and warmth of the finished garment. For a lightweight and airy poncho, opt for a fingering or sport weight yarn. If you prefer a more substantial and warm poncho, choose a worsted or bulky weight yarn. Additionally, consider the fiber content of the yarn, such as wool for warmth, cotton for breathability, or acrylic for easy care.
Selecting the Perfect Pattern
Once you have chosen your yarn, it’s time to select a pattern for your poncho. There are countless pattern options available, ranging from simple garter stitch designs to intricate lace patterns. Consider your knitting skill level and the desired style of your poncho when choosing a pattern. For beginners, a basic stockinette stitch pattern or a simple ribbing pattern may be a great starting point. If you are more experienced, you can challenge yourself with a pattern that incorporates cables or colorwork.
Knitting and Finishing Steps
Once you have your yarn and pattern, it’s time to start knitting your poncho! Follow the pattern instructions carefully, ensuring you are using the correct needle size and achieving the desired gauge. Knit each section of the poncho according to the pattern, whether it’s a rectangular shape that will be seamed together or a circular design that is knit in the round. Once all the sections are complete, use a tapestry needle to sew them together, following the pattern’s finishing instructions.
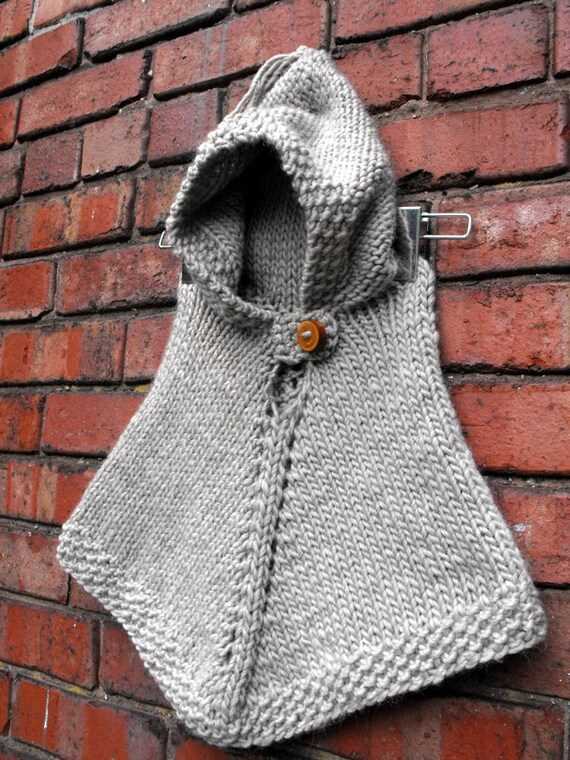
After sewing the pieces together, it’s time to add any desired finishing touches, such as ribbed borders, fringe, or buttons. These small details can take your hand knitted poncho to the next level and add a personal touch to your finished garment. Finally, block your poncho to ensure it takes its final shape and to enhance its drape and overall appearance. With the right yarn, pattern, and attention to detail, you will have a beautiful hand knitted poncho that is both stylish and cozy.
Choosing the Right Yarn for Your Hand Knitted Poncho
Making a hand knitted poncho is a great way to showcase your knitting skills and create a stylish and cozy accessory. One of the most important factors to consider when knitting a poncho is choosing the right yarn. The type and weight of yarn you choose will greatly impact the final look and feel of your poncho.
Weight: Ponchos can be made in various weights of yarn, from lightweight and airy to chunky and warm. The weight of the yarn will determine the thickness and drape of your poncho. If you want a light and flowy poncho, choose a fingering or sport weight yarn. For a more substantial and cozy poncho, opt for a worsted or bulky weight yarn.
Fiber: The fiber content of the yarn will also affect the look and feel of your poncho. Wool is a popular choice for its warmth and durability, but there are also many other options to consider. Acrylic yarns are affordable and easy to care for, while alpaca yarns offer a soft and luxurious feel. Cotton yarns are great for warmer weather, as they are breathable and lightweight.
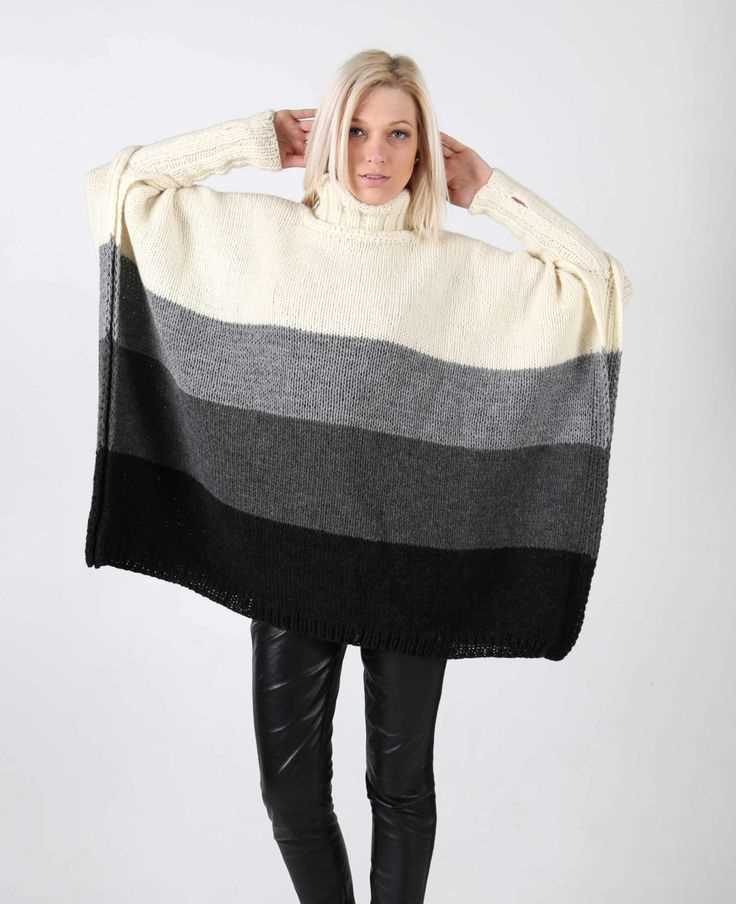
Color: The color of your yarn can greatly impact the overall appearance of your poncho. Darker, neutral colors like black, brown, or gray can create a sophisticated and versatile poncho. Bright and vibrant colors can add a pop of personality and make a statement. Consider the purpose of your poncho and the colors that will complement your wardrobe when choosing a yarn color.
Texture: Some yarns come with textured elements like boucle or tweed, which can add visual interest and depth to your poncho. Consider the desired texture and look you want to achieve when choosing a yarn. Smooth and even yarns are great for showcasing intricate stitch patterns, while textured yarns can create a more rustic and cozy feel.
Conclusion: When choosing a yarn for your hand knitted poncho, take into account the weight, fiber, color, and texture. Consider the desired look, feel, and purpose of your poncho to ensure you select the perfect yarn for your project. With the right yarn, your hand knitted poncho will not only be stylish but also a cozy and comfortable accessory for any occasion.
Essential Tools and Materials for Knitting a Poncho
When it comes to knitting a poncho, having the right tools and materials is essential for a successful and enjoyable project. Whether you are a beginner or an experienced knitter, there are a few key items that you will need to get started.
Knitting Needles:
One of the most important tools you will need is a pair of knitting needles. The size of the needles will depend on the pattern you are using and the desired gauge. It is recommended to use circular needles for knitting a poncho, as they allow for easier knitting of large projects and can hold a larger number of stitches.
Yarn:
Choosing the right yarn is crucial for the overall look and feel of your poncho. When selecting yarn for a poncho, consider the season and climate for which it will be worn. For colder weather, a chunky or bulky weight yarn will provide warmth and coziness, while a lighter weight yarn such as fingering or sport weight can be used for a spring or summer poncho. Additionally, consider the fiber content of the yarn, as certain fibers may be more suitable for specific designs and styles.
Pattern:
A well-written and clear knitting pattern is essential for successfully knitting a poncho. Look for a pattern that matches your skill level and provides detailed instructions for each step of the knitting process. Pay attention to the recommended gauge and measurements to ensure that your finished poncho will fit properly.
Stitch Markers and Row Counters:
Stitch markers are useful tools for marking specific points in your knitting, such as the beginning of a round or a pattern repeat. Row counters can be used to keep track of the number of rows or pattern repeats you have completed. These tools can help you stay organized and ensure that your poncho is knitted correctly.
Tapestry Needle:
A tapestry needle is needed for weaving in loose ends and sewing up any seams in your poncho. Choose a needle with a large eye that is suitable for the weight of your yarn. This tool is essential for finishing touches and giving your poncho a polished look.
By having these essential tools and materials on hand, you will be well-prepared to start knitting your own beautiful poncho. Enjoy the process and create a cozy and stylish garment that you can proudly wear or gift to a loved one.
Understanding Different Stitch Patterns for Your Hand Knitted Poncho
When knitting a hand-knitted poncho, understanding different stitch patterns can help you create a unique and beautiful design. Whether you are a beginner or an experienced knitter, experimenting with different stitch patterns can add texture and interest to your poncho.
One popular stitch pattern for ponchos is the garter stitch. This stitch pattern is created by knitting every row, resulting in a ridged texture. The garter stitch is a great choice for beginners as it is easy to knit and creates a soft and cozy fabric. It is also versatile and can be used for both lightweight and chunky ponchos.
Another stitch pattern to consider is the seed stitch. This pattern is created by alternating knit and purl stitches within a row, and then switching the pattern for the next row. The seed stitch creates a textured fabric with a bumpy appearance. With its small, raised bumps, the seed stitch is perfect for adding visual interest to your poncho.
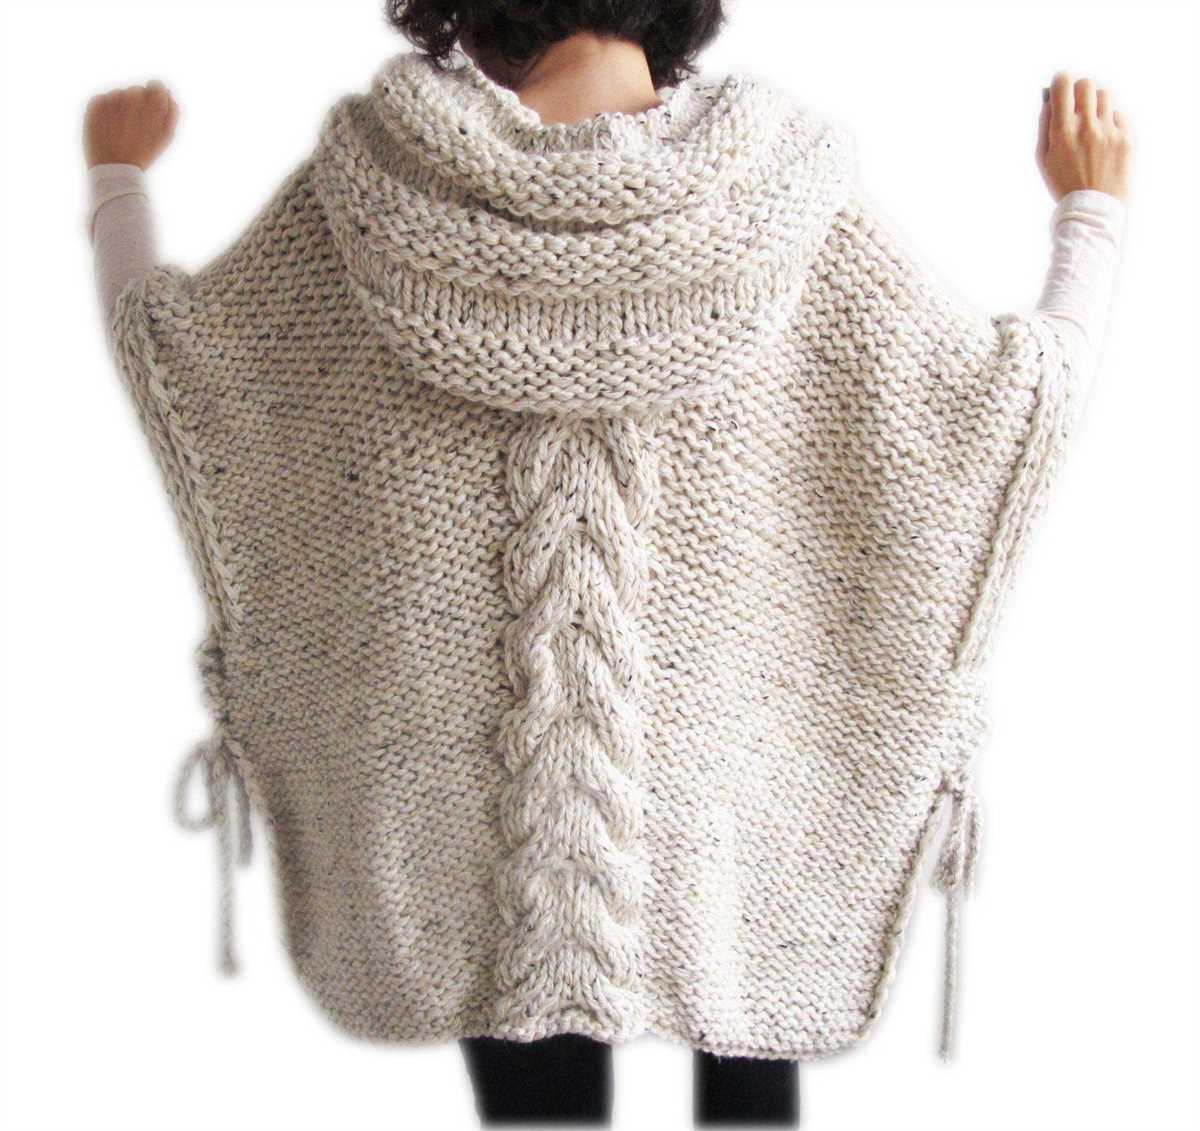
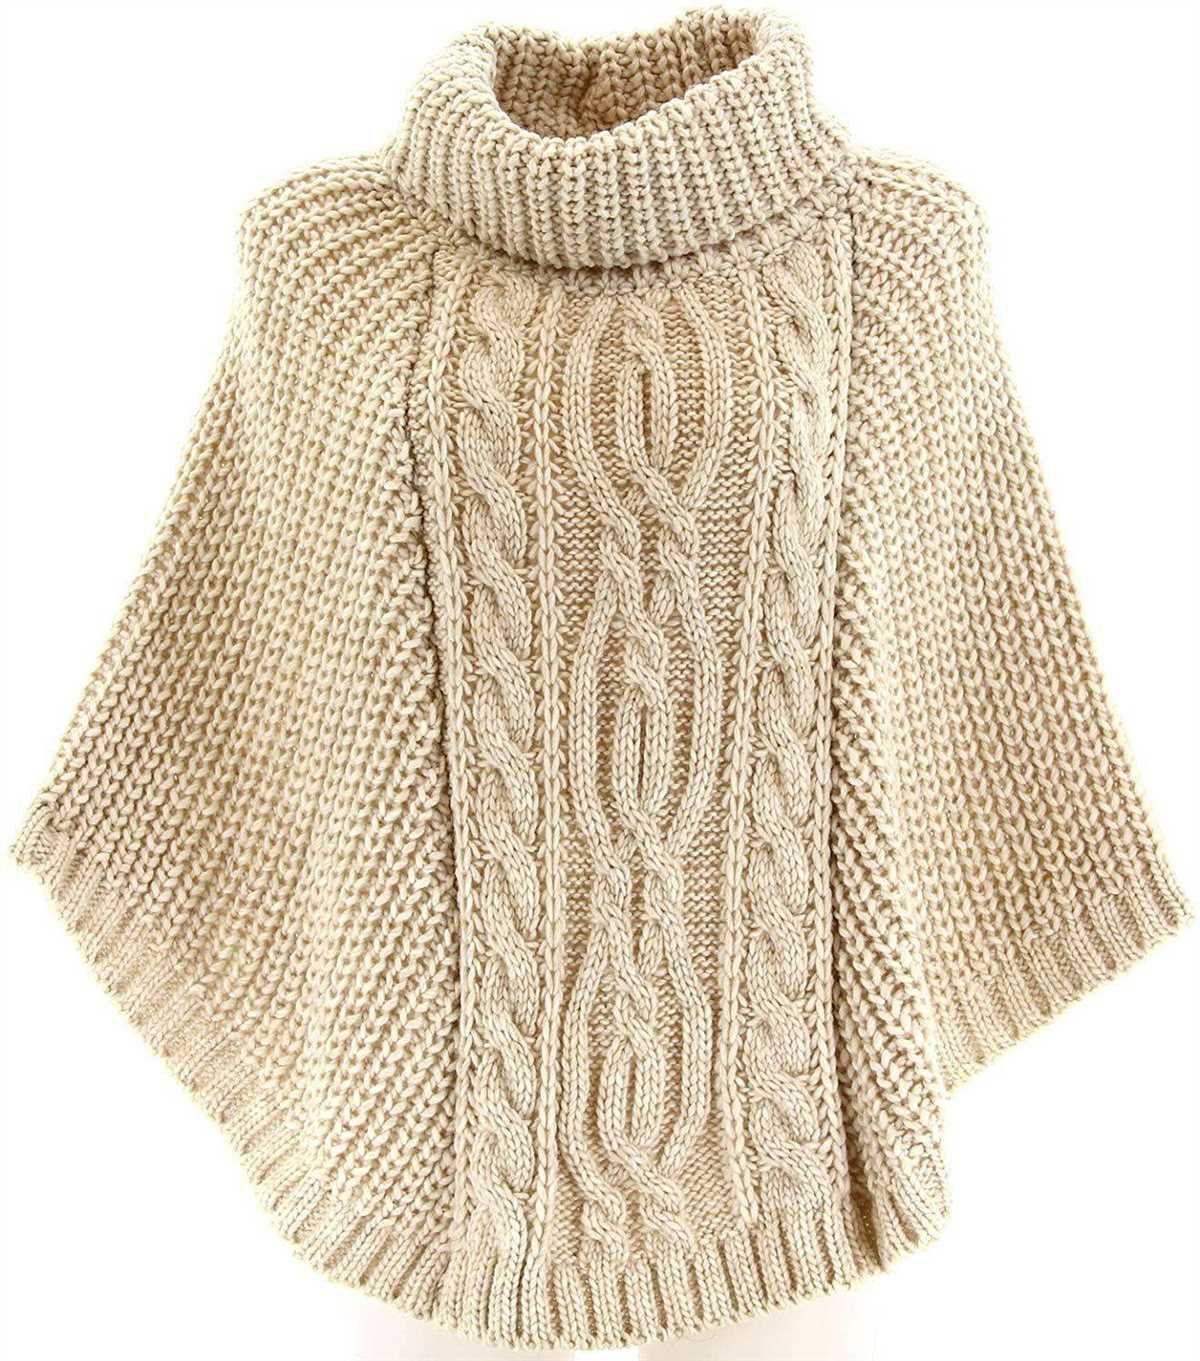
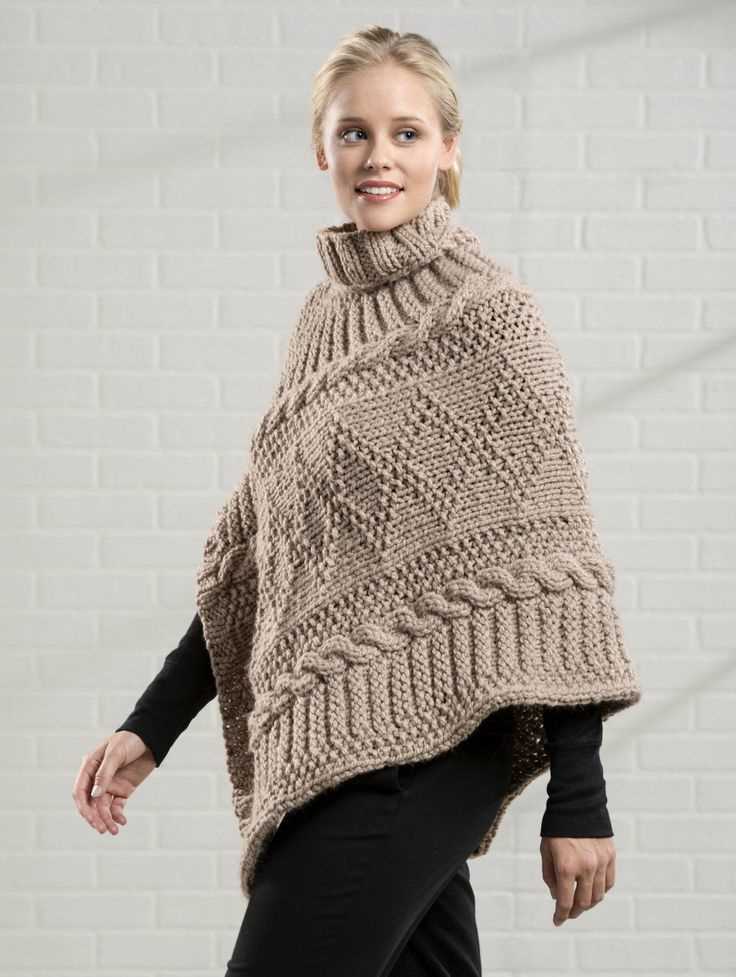
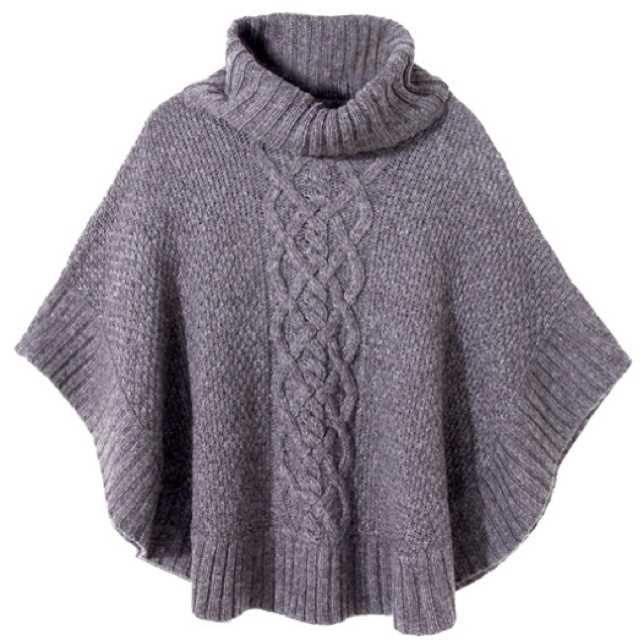
If you prefer a more intricate stitch pattern, you might want to try the cable stitch. This pattern involves crossing stitches over each other to create a cable-like effect. Cable stitches can range from simple twists to more complex designs, allowing you to create unique and eye-catching details on your poncho.
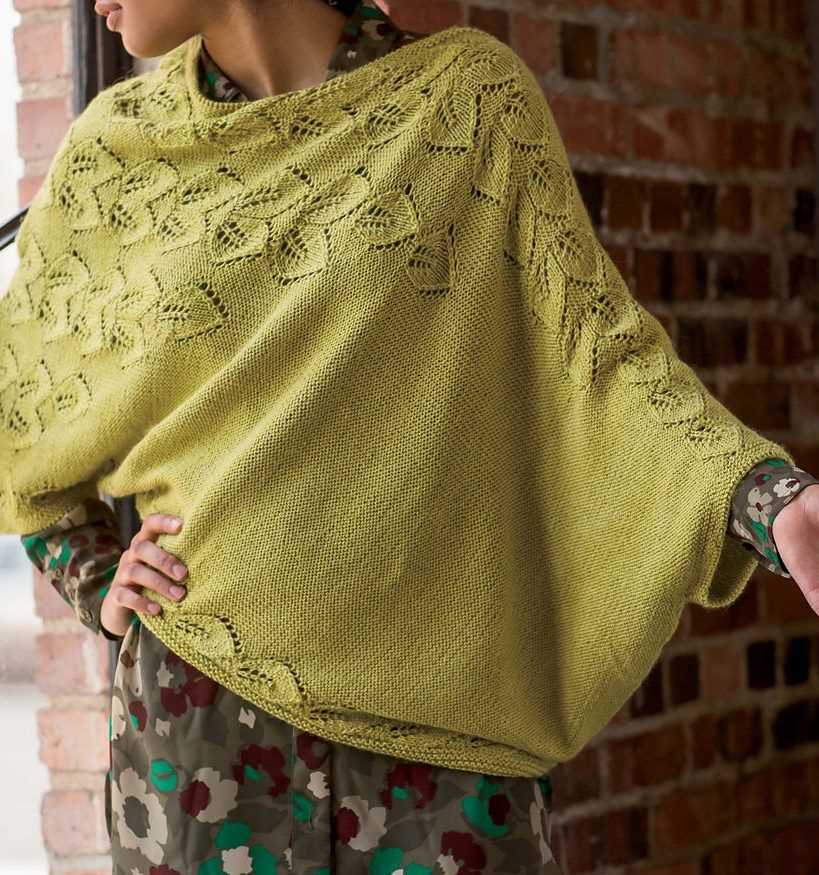
For a lacy and delicate look, consider using a lace stitch pattern for your poncho. Lace stitches often feature yarn overs and decreases, creating an open and airy fabric. Lace patterns can be intricate and require more advanced knitting skills, but the result is a beautiful and elegant poncho that is perfect for special occasions or warmer weather.
Once you understand different stitch patterns, you can begin to experiment with combining them to create your own unique designs. Whether you prefer a simple garter stitch poncho or a more complex cable and lace pattern, exploring different stitch patterns allows you to add a personal touch to your hand-knitted poncho.
How to Read and Follow a Poncho Knitting Pattern
Knitting a poncho can be a fun and rewarding project, but it’s important to be able to read and follow a knitting pattern to ensure that the final product turns out as desired. Here are some steps to help you read and understand a poncho knitting pattern.
1. Familiarize Yourself with the Abbreviations Used
Most knitting patterns use standard abbreviations to represent different knitting stitches and techniques. Take the time to familiarize yourself with these abbreviations before you start the pattern. The pattern should include a key or glossary that explains what each abbreviation stands for, such as “k” for knit, “p” for purl, and “yo” for yarn over.
2. Read and Understand the Pattern Instructions
Begin by carefully reading through the entire pattern instructions from start to finish. Pay attention to any special instructions, such as stitch counts or specific stitch patterns. It’s important to understand the overall structure of the poncho, including the number of stitches and rows required for each section.
3. Take Note of the Gauge
Before you start knitting, check the gauge stated in the pattern. The gauge is usually given as a certain number of stitches and rows per inch. Use the recommended yarn and needle size to create a gauge swatch and make sure that your knitting matches the gauge specified in the pattern. This will help ensure that the poncho will have the right fit and size.
4. Follow the Row-by-Row Instructions
Once you’ve familiarized yourself with the pattern and have checked your gauge, begin knitting the poncho by following the row-by-row instructions. Each row in the pattern should be clearly laid out and include the stitches and techniques to be used. As you work through each row, cross off or mark the rows that you have completed to keep track of your progress.
5. Make Adjustments, if Necessary
As you knit the poncho, it’s possible that you might need to make adjustments to the pattern. For example, if the poncho is turning out too long or too short, you can adjust the number of rows in each section. Take the time to try on the poncho as you go and make any necessary adjustments to ensure the best fit.
By following these steps and carefully reading and understanding the poncho knitting pattern, you’ll be able to create a beautiful hand-knitted poncho that you can be proud of.
Casting On: Getting Started with Your Hand Knitted Poncho
When it comes to hand knitting a poncho, one of the first steps you need to take is casting on. This is the foundation of your project, where you create the stitches that will eventually form the body of your poncho. Casting on can be done in different ways, but the most common method used for ponchos is the long-tail cast on.
The long-tail cast on is a versatile technique that provides a neat and firm edge. To begin, you’ll need to estimate the length of yarn needed for your cast on. Keep in mind that the width of your poncho will determine the number of stitches you need to cast on. It’s always a good idea to make a swatch to ensure you have the correct gauge before starting your project.
To perform a long-tail cast on:
- Make a slipknot at the end of your yarn, leaving a long tail.
- Hold the slipknot in your left hand, with the tail hanging down and the working yarn (the ball end) over your index finger.
- Insert the right needle through the slipknot from front to back, under the working yarn.
- Wrap the working yarn around the right needle counterclockwise, going over the left thumb and then under the right needle.
- With your right hand, pull the right needle through the slipknot, bringing the new loop through.
- Drop the slipknot off your left hand.
- You have now cast on one stitch.
- Repeat steps 3-7 for the desired number of stitches.
Remember to keep your tension consistent throughout the cast on process to ensure an even edge. Once you have cast on all the stitches required for your poncho, you can proceed to the next step – knitting the first row. Stay tuned for more instructions on how to create your perfect hand knitted poncho!
Knitting the Body of Your Poncho
When knitting a hand-knitted poncho, one of the most important steps is knitting the body. This is the main part of the poncho that will drape over your shoulders and provide warmth and style. Here are some steps to follow when knitting the body of your poncho:
1. Choose Your Pattern
Before you start knitting, it’s important to choose a pattern that you love and that suits your skill level. There are many different patterns available, ranging from simple garter stitch designs to more intricate lace or cable patterns. Take your time to browse through pattern books or online resources to find the perfect pattern for your hand-knitted poncho.
2. Cast On
Once you have chosen your pattern, it’s time to cast on the stitches for the body of your poncho. The number of stitches you will need to cast on will depend on the size of the poncho and the gauge specified in the pattern. Make sure to follow the pattern instructions carefully to ensure that you cast on the correct number of stitches.
3. Knit in Pattern
Now that you have cast on, it’s time to start knitting in the pattern specified in your chosen design. This may involve knitting in stockinette stitch, garter stitch, or a more complicated stitch pattern. Follow the instructions in the pattern closely, making sure to keep track of any stitch or row counts that are specified.
4. Increase or Decrease
As you knit the body of your poncho, you may need to increase or decrease stitches to shape the garment. This will depend on the design of your poncho and the measurements provided in the pattern. Make sure to pay attention to any instructions for shaping and make adjustments as necessary to achieve the desired fit.
5. Finishing Touches
Once you have completed knitting the body of your poncho, it’s time to finish it off. This may involve binding off the stitches, adding any desired edgings or borders, or blocking the poncho to give it a finished look. Follow the instructions in your pattern for any finishing touches and enjoy the satisfaction of completing your hand-knitted poncho.
Creating the Neckline and Armholes
When knitting a poncho, one of the key components is creating the neckline and armholes. These openings will determine the overall fit and style of the garment, so it’s important to pay attention to the details and follow the pattern carefully.
To create the neckline, you will need to divide your stitches, either by binding off a specific number of stitches in the center of the row or by using stitch markers to mark the center stitches. This will create a gap in the middle of your knitting which will later be used to form the neck opening.
For example:
- Knit the first X number of stitches in the row as specified in the pattern.
- Place a stitch marker to mark the center of your work.
- Continue knitting until you reach the desired number of stitches in the row.
- Bind off the specified number of stitches in the center, usually in a v-shape or rounded neckline design.
- Continue knitting the remaining stitches in the row, following the pattern instructions.
Creating the armholes is a similar process, where you will need to divide your stitches to create gaps for the arm openings. This is usually done on both sides of the knitting, at the point where the armholes should be located.
For example:
- Knit the first X number of stitches in the row as specified in the pattern.
- Place a stitch marker to mark the side of your work.
- Continue knitting until you reach the desired number of stitches for the armhole.
- Bind off the specified number of stitches to create the armhole.
- Continue knitting the remaining stitches in the row, following the pattern instructions.
Be sure to read the pattern carefully and follow any additional instructions or shaping details provided. Creating the neckline and armholes correctly will ensure a well-fitting and comfortable poncho.
Shaping the Poncho: Increasing and Decreasing Stitches
When knitting a hand-knitted poncho, shaping the garment becomes crucial to achieve the desired fit. Increasing and decreasing stitches are the primary techniques employed to shape the poncho. These techniques allow you to add or remove stitches at specific points to create the desired contours.
Increasing stitches: To add stitches, you can use various methods. One common method is the knit front and back (kfb) technique. Here, you knit into the front of a stitch, then without removing it from the left needle, knit into the back of the same stitch. This creates an additional stitch. Another method is the yarn-over (YO) method, where you wrap the yarn around the needle before or after a stitch, creating a new stitch.
Decreasing stitches: To remove stitches, you can use techniques like knit two together (k2tog), where you knit two stitches together as one, or slip-slip-knit (ssk), where you slip two stitches, one by one, knitwise onto the right needle, then slip them back to the left needle, and knit them together through the back loops. Another common method is the double decrease (dd), where you slip two stitches knitwise, knit the next stitch, then pass the slipped stitches over the knitted stitch.
It is important to carefully plan and execute the increases and decreases to maintain the overall pattern of the poncho. Generally, increases are placed towards the outer edges or specific panels of the poncho, while decreases are placed towards the neck or edges of the poncho to achieve the desired shape. Following the instructions and charts provided in the hand-knitted poncho pattern will guide you in shaping the garment effectively.
Adding Design Elements: Cables, Lace, and Colorwork
When it comes to creating a unique and eye-catching knitted poncho, adding design elements is essential. Cables, lace, and colorwork are popular techniques that can elevate the overall look and feel of a hand-knitted poncho.
Cables: Cables are created by crossing stitches over each other to create a twisted and textured appearance. They can add depth and dimension to the poncho, making it visually interesting. Whether you choose a simple cable pattern or a more intricate design, cables are a great way to enhance the overall look of the poncho.
Lace: Lace patterns are delicate and intricate, adding a touch of elegance to the poncho. They create an open and airy texture, making the poncho perfect for warmer weather or layering. Lace patterns can range from simple and repetitive to complex and detailed, giving you endless options for adding a feminine and romantic touch to your hand-knitted poncho.
Colorwork: Colorwork involves using multiple colors of yarn to create patterns and designs. It can be as simple as stripes or as complex as Fair Isle or intarsia. Colorwork adds visual interest and allows you to showcase your creativity by choosing colors that complement each other and create a harmonious design. Whether you prefer bold and vibrant colors or soft and subtle hues, colorwork can transform a plain poncho into a statement piece.
Adding cables, lace, or colorwork to your hand-knitted poncho pattern can take it from ordinary to extraordinary. These design elements allow you to showcase your knitting skills and create a poncho that is truly unique and personalized. So, don’t be afraid to experiment and add your own artistic touch to your next knitted poncho project.
Finishing Touches: Binding Off and Weaving in Ends
When you have finished knitting your poncho, it’s time to give it those final touches that will make it a polished and professional-looking garment. One of the first steps in finishing your knitting project is binding off. This is the process of casting off your stitches to create a secure edge that won’t unravel. To bind off, simply knit the first two stitches of your row, then use the left needle to lift the first stitch up and over the second stitch and off the needle. Continue this process until you have bound off all your stitches.
After binding off, you will have several loose ends of yarn hanging from your poncho. These ends need to be woven in to ensure that they don’t come undone and create an unsightly mess. To weave in ends, thread a tapestry needle with one of the loose ends and insert it into the back of your work. Follow the natural path of the yarn, weaving it in and out of the stitches for about an inch or two. Then trim the excess yarn close to the fabric, being careful not to cut any of your stitches.
Additional Tips for Binding Off and Weaving in Ends
- When binding off, make sure to keep your tension even so that the edge of your poncho remains neat and straight.
- If you’re changing yarn colors or adding new yarn, make sure to weave in the ends as you go to minimize the amount of finishing work at the end.
- If you have a lot of loose ends to weave in, it can be helpful to do this step before blocking your poncho. That way, you can use the water and the weight of the fabric during blocking to help secure the ends.
- Always weave in your ends on the wrong side of your fabric to keep the right side looking clean and seamless.
- After weaving in and trimming your ends, give your poncho a final gentle block to even out any tension and shape the fabric.
By taking the time to properly bind off your stitches and weave in your ends, you can ensure that your hand-knitted poncho is not only beautiful but also durable and long-lasting. These finishing touches may seem small, but they make a big difference in the overall quality and appearance of your finished project.
Blocking and Care Instructions for Your Hand Knitted Poncho
Blocking your hand knitted poncho is an important step to ensure that it has a polished and professional appearance. To block your poncho, start by laying it out flat on a clean and dry surface. Gently shape the poncho to the desired dimensions by pulling and pinning the edges. Use rust-proof pins to securely hold the shape in place. Next, lightly mist the poncho with water or a blocking spray to dampen the fibers. Allow the poncho to dry completely before unpinning.
When it comes to caring for your hand knitted poncho, it’s important to follow a few simple guidelines to ensure its longevity. Firstly, always wash your poncho by hand using a mild detergent and lukewarm water. Avoid using harsh chemicals or bleach as they can damage the fibers. Gently squeeze the excess water from the fabric and lay it flat to dry on a clean towel. Avoid wringing or twisting the poncho as this can cause it to lose its shape.
Additionally, it’s a good idea to store your poncho folded rather than hanging it, as this can prevent stretching and distortion. Keep it in a cool and dry place, away from direct sunlight to avoid fading. If your poncho gets wrinkled, you can lightly steam it or use a fabric steamer to remove any creases. Remember to always test the steamer or iron on a small, inconspicuous area before applying it to the entire poncho.
By following these blocking and care instructions, you can ensure that your hand knitted poncho remains in excellent condition for years to come. Enjoy wearing your cozy and fashionable creation!
Styling Tips: Ways to Wear and Pair Your Hand Knitted Poncho
Now that you have mastered the art of hand knitting and have your gorgeous poncho ready, it’s time to explore different styling options to enhance your outfit. Whether you want to dress up for a special occasion or create a casual yet chic look, your poncho can be a versatile piece in your wardrobe.
Here are some styling tips to help you make the most out of your hand knitted poncho:
1. Layer it over a fitted top
One of the easiest ways to wear your poncho is to layer it over a fitted top. Pair it with a long-sleeved shirt or a turtleneck for a cozy and stylish look. This combination works well for both casual and dressy occasions. You can also play with colors and patterns to add more depth to your outfit.
2. Belt it for a defined silhouette
If you want to show off your waist and create a more defined silhouette, try belting your poncho. Choose a belt that complements your poncho and cinch it at your natural waist or a little below. This styling trick not only accentuates your curves but also adds a touch of sophistication to your ensemble.
3. Pair it with jeans or leggings
For a relaxed and chic look, wear your poncho with jeans or leggings. This combination is perfect for everyday wear and can be easily dressed up or down depending on your accessories. Opt for slim-fitting bottoms to balance the volume of the poncho and create a streamlined look.
4. Style it with a skirt or dress
Elevate your outfit by pairing your poncho with a skirt or dress. This combination adds a feminine touch and can be worn for special occasions or a night out. Opt for a fitted skirt or a flowy dress to create a contrast with the loose and cozy poncho. Finish off the look with heels or ankle boots.
5. Experiment with different textures
Don’t be afraid to experiment with different textures when styling your poncho. Mix and match different fabrics, such as leather, denim, or velvet, to create interesting and unique looks. You can also accessorize with statement jewelry or scarves to add more visual interest to your outfit.
Remember, the key to styling your hand-knitted poncho is to have fun and express your personal style. Don’t be afraid to try new combinations and get creative with your accessories. With these tips, you’ll be able to create endless stylish outfits with your beautiful poncho.
So go ahead, showcase your knitting skills and rock your hand-knitted poncho with confidence!