
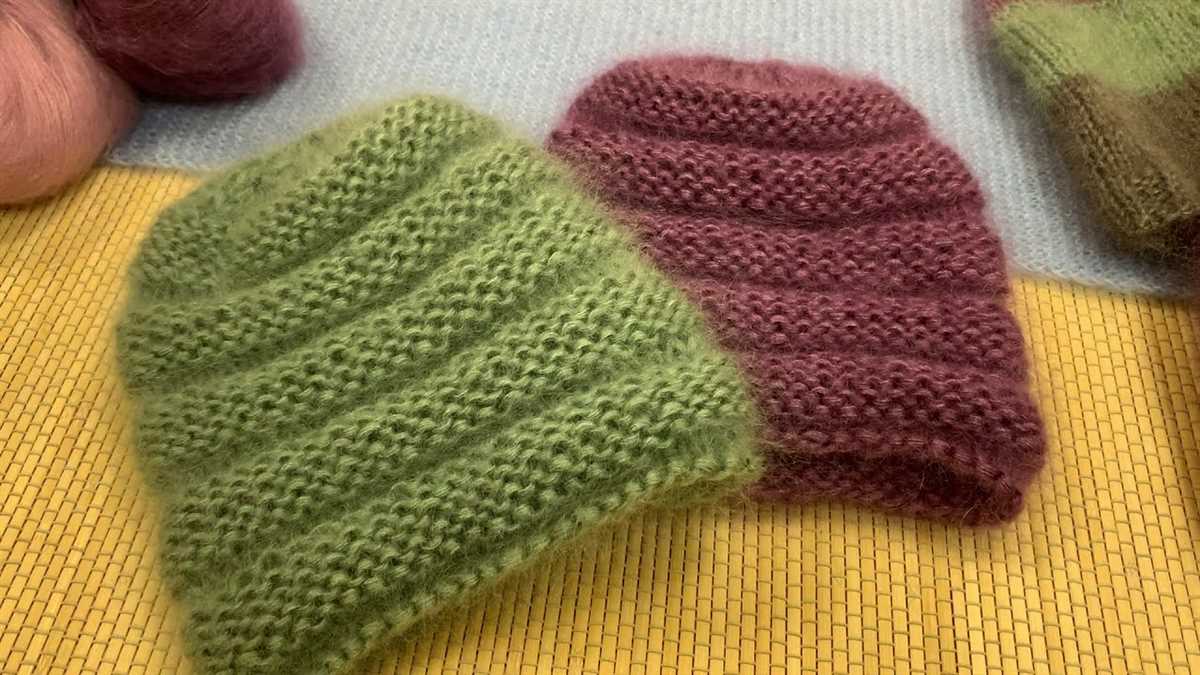
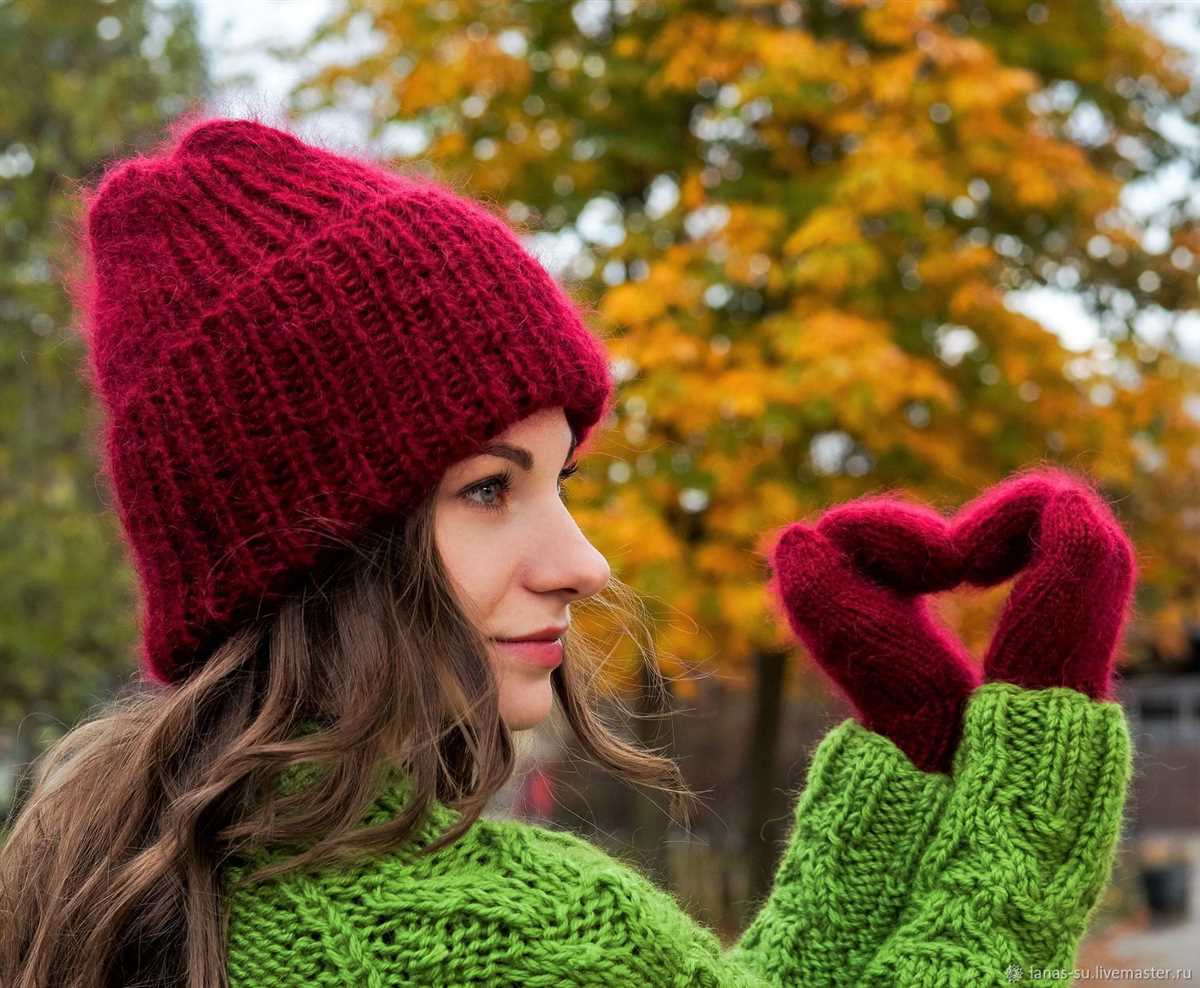
If you love knitting and want to try something new, this mohair hat pattern is perfect for you. Mohair yarn is known for its softness and warmth, making it an ideal choice for winter accessories. With this free knitting pattern, you can create a beautiful hat that will keep you cozy and stylish all season long.
Knitting your own hat is not only a fun and creative project, but it also allows you to personalize your accessories to match your style. This mohair hat pattern is beginner-friendly, so even if you are new to knitting, you can easily complete this project. The pattern includes detailed instructions and helpful tips to guide you through each step.
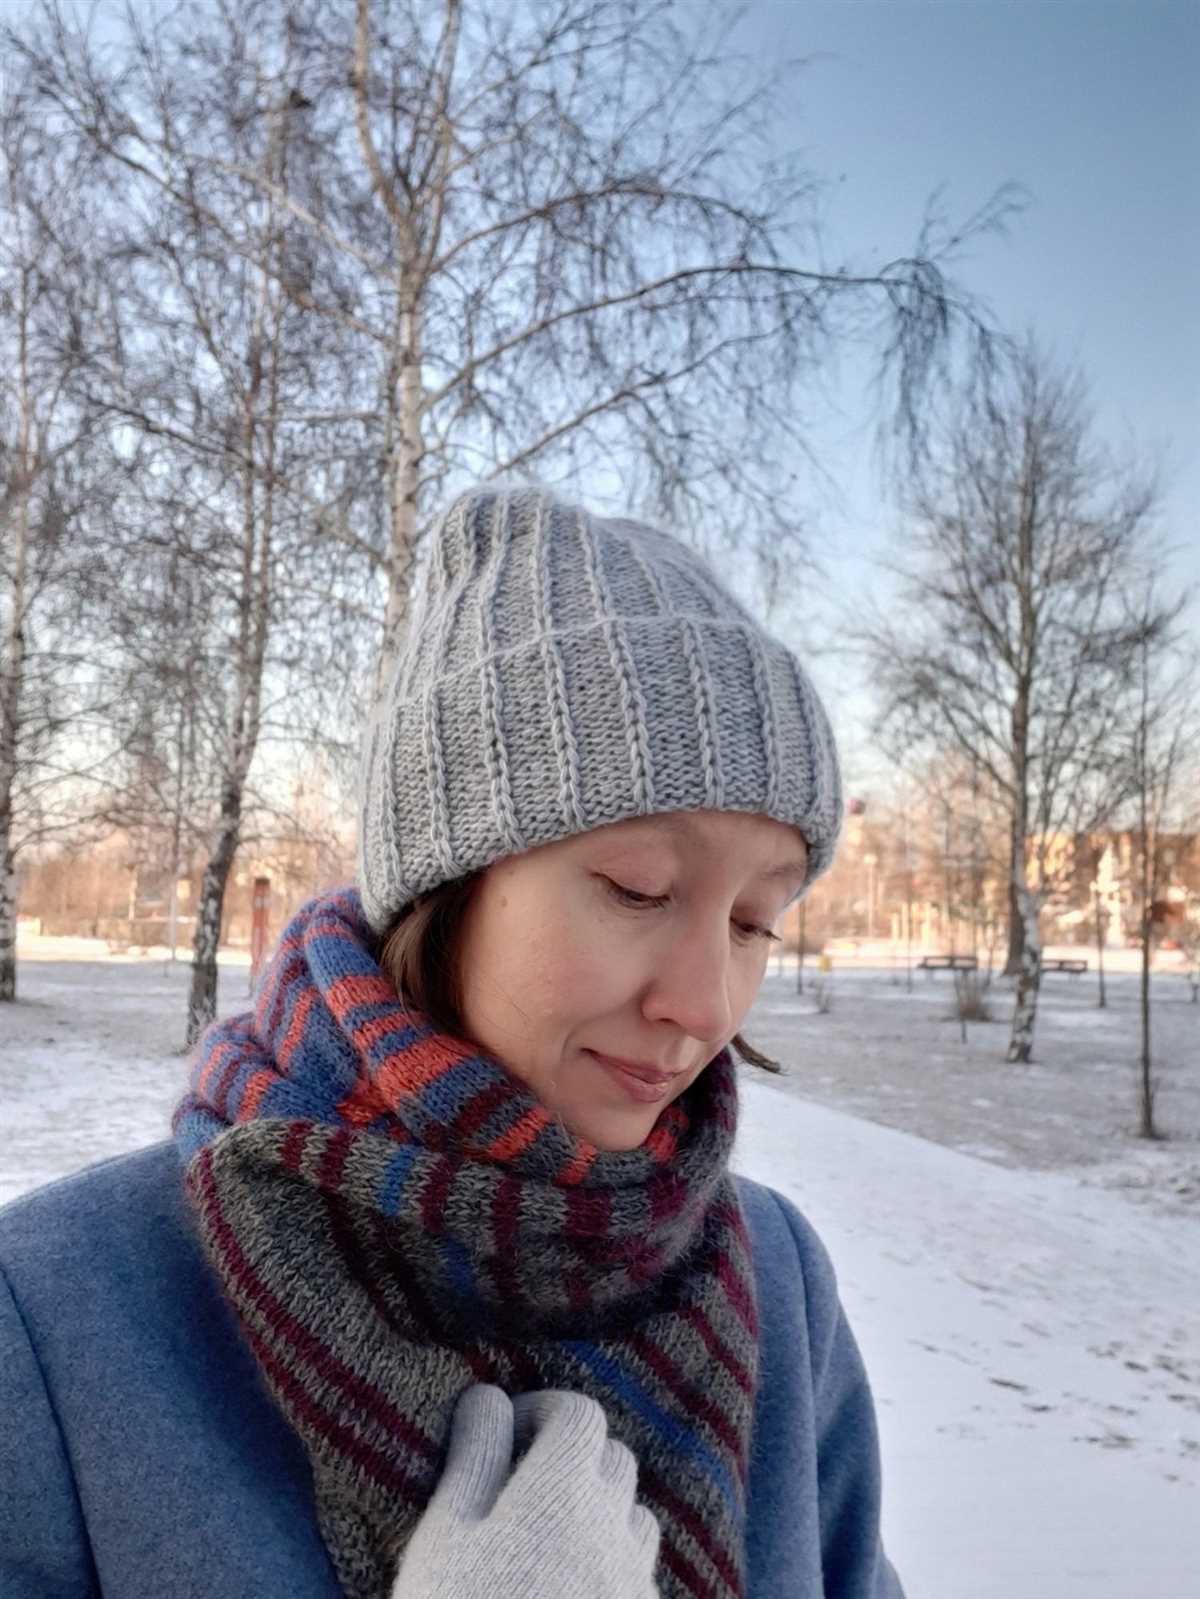
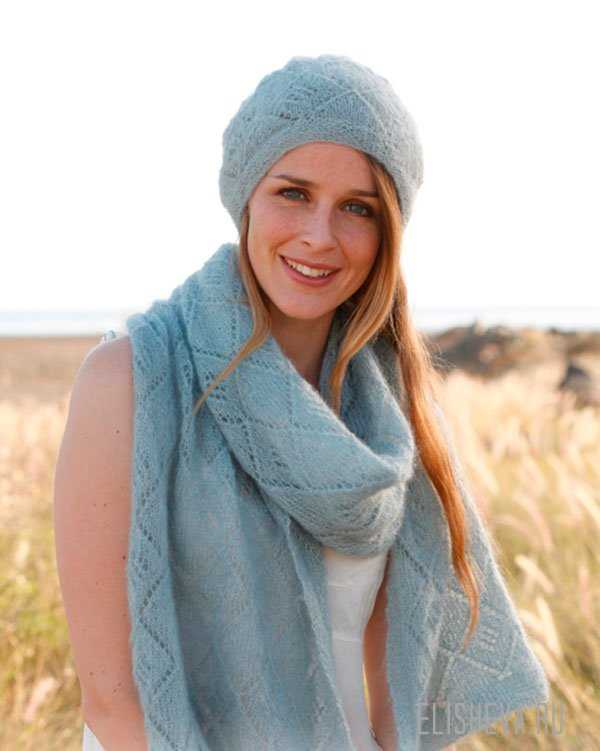
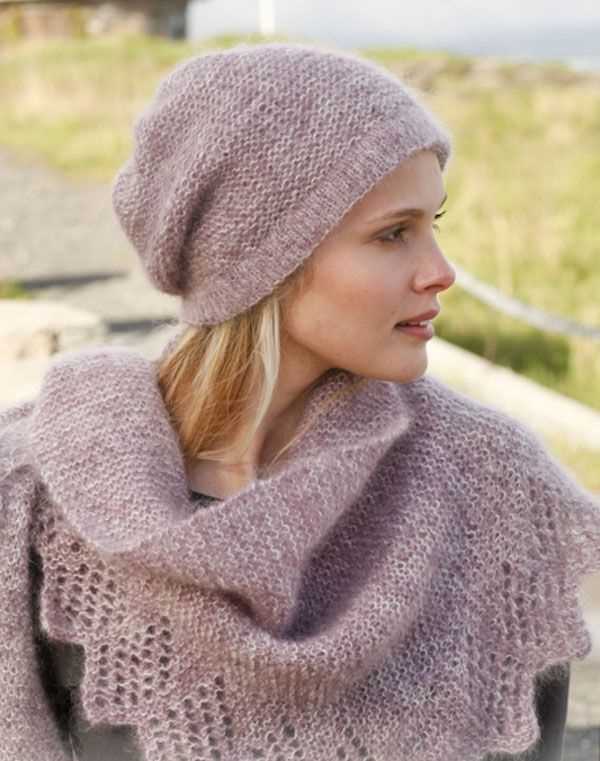
With this mohair hat knitting pattern, you can experiment with different stitch patterns and colors to create a unique look. You can choose a classic solid color for a timeless style or opt for a variegated yarn for a more vibrant and playful hat. Whether you prefer a slouchy beanie or a snug fitting hat, you can easily customize the pattern to fit your desired style.
How to knit a mohair hat: free pattern and tips
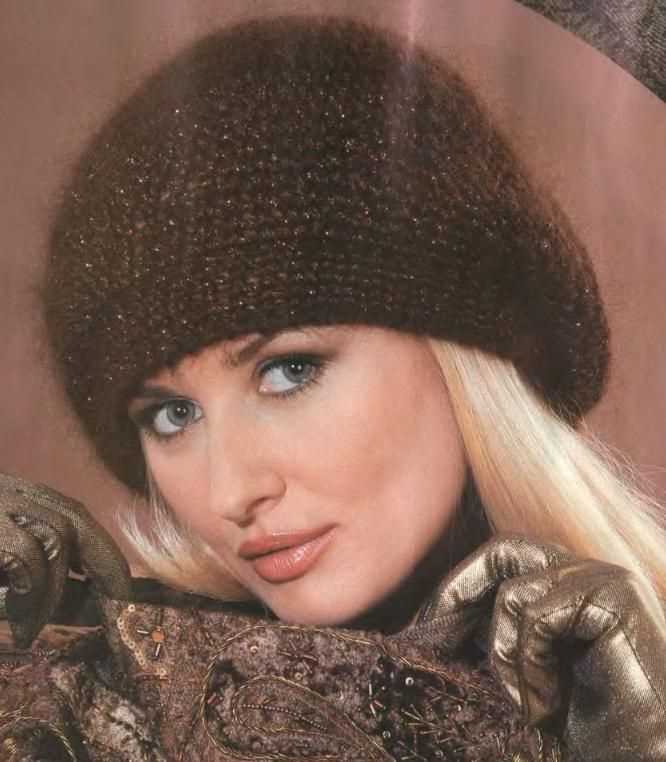
Knitting a mohair hat is a great way to create a cozy and stylish accessory for the colder months. Mohair yarn is known for its softness and warmth, making it perfect for hats. In this article, you will find a free knitting pattern for a mohair hat, as well as some useful tips to help you along the way.
Materials needed:
- Mohair yarn: Select a soft and fluffy mohair yarn in the color of your choice. Approximately 100 grams should be enough for a hat.
- Knitting needles: Use a pair of size 9 (5.5 mm) knitting needles or the size needed to achieve the gauge.
- Tapestry needle: This will be used for weaving in loose ends.
- Stitch markers: These will help you keep track of your stitches.
Pattern:
Cast on 72 stitches.
Row 1: *K2, P2* Repeat from * to * across the row.
Row 2: *P2, K2* Repeat from * to * across the row.
Continue knitting in a rib stitch pattern (alternating knit and purl stitches) for the desired length. For a slouchy hat, knit for approximately 8 inches. For a beanie style, knit for approximately 6 inches.
Next, decrease the stitches to shape the crown of the hat:
- Row 1: *K2, P2, K2, P2tog* Repeat from * to * across the row.
- Row 2: *P2, K2, P2* Repeat from * to * across the row.
- Row 3: *K2, P2, K2tog, P1* Repeat from * to * across the row.
- Row 4: *P2, K2, P1* Repeat from * to * across the row.
Repeat rows 3 and 4 until you have a small number of stitches remaining on your needles.
Cut the yarn, leaving a long tail. Thread the tail through a tapestry needle and slip the remaining stitches onto the needle. Gather the stitches tightly and secure the yarn.
Tips:
- Gauge: Make sure to check your gauge before starting the project. This will ensure that your hat will have the correct size and fit.
- Blocking: Blocking your finished hat can help to even out the stitches and give it a polished look. Follow the instructions on your yarn label for blocking mohair.
- Customization: Feel free to customize the pattern by adding stripes, cables, or other stitch patterns to make the hat uniquely yours.
- Gift idea: A mohair hat makes a great handmade gift for friends and family. Consider making a matching set of hats for your loved ones.
Now that you have the pattern and some helpful tips, you are ready to start knitting your mohair hat. Enjoy the process and stay warm and stylish this winter!
Materials and tools needed for knitting
Knitting is a popular craft that requires a few essential materials and tools to get started. Whether you’re a beginner or an experienced knitter, having the right supplies is important to ensure a successful and enjoyable knitting experience.
Yarn:
The primary material needed for knitting is yarn. Yarn comes in a variety of fibers, weights, colors, and textures, allowing you to choose the perfect yarn for your project. For a mohair hat, you would typically use mohair yarn, known for its softness and warmth.
Knitting Needles:
Knitting needles are used to stitch the yarn and create the fabric. They come in various sizes and materials, such as metal, wood, and plastic. The size of the needles depends on the yarn weight and the desired outcome. For the mohair hat knitting pattern, you would need appropriate-sized knitting needles recommended by the pattern.
Tape Measure:
A tape measure is an essential tool for knitters to ensure accurate measurements. It helps you determine the size and length of your project, allowing you to follow the pattern correctly. You can also use a ruler or a knitting gauge to measure your knitting tension.
Stitch Markers:
Stitch markers are small rings or clips that help you mark specific stitches in your knitting. They are especially helpful when following a complex pattern or when shaping the garment. Stitch markers can be placed on the needle or directly onto the fabric to keep track of your progress.
Darning Needle:
A darning needle, also known as a yarn needle or a tapestry needle, is a large needle with a blunt tip. It is used to weave in loose yarn ends and sew pieces of the project together. A darning needle is an essential tool for finishing touches and giving your knitted item a polished look.
Scissors:
A pair of sharp scissors is necessary for cutting the yarn and trimming any excess threads. They should be easily accessible while knitting to ensure smooth and precise cutting. It’s important to have scissors specifically dedicated to your knitting projects to avoid damaging them.
By having these essential materials and tools on hand, you’ll be well-prepared to tackle any knitting project, including a mohair hat. Investing in quality supplies will not only enhance your knitting experience but also improve the quality and durability of your finished knitted items.
Choosing the right mohair yarn
Mohair yarn is a popular choice for knitting due to its luxurious feel and beautiful texture. When selecting the right mohair yarn for your project, there are several factors to consider.
Fiber content: Mohair yarn is made from the fleece of Angora goats. It is known for its softness, warmth, and durability. However, not all mohair yarns are created equal. Some yarns may contain a blend of mohair and other fibers, such as silk or merino wool. When choosing a mohair yarn, consider the fiber content and how it will affect the final result of your project.
Gauge: Mohair yarn tends to knit up at a looser gauge than other yarns. This means that you may need to adjust your knitting needles to achieve the desired tension. It is important to swatch and check your gauge before starting your project to ensure that your finished piece will fit properly.
Texture: Mohair yarn has a unique texture that adds depth and dimension to your knitted fabric. It can create a fuzzy halo effect that is both soft and visually appealing. Consider the texture of the mohair yarn and how it will enhance the overall look of your project.
Color: Mohair yarn is available in a wide range of beautiful colors, from subtle neutrals to vibrant shades. Consider the color of the mohair yarn and how it will complement your skin tone, wardrobe, and the overall style of your project. Remember that mohair has a lustrous sheen that can enhance the color and give your project a luxurious appearance.
Care instructions: Finally, consider the care instructions for the mohair yarn. Some mohair yarns may require special care, such as hand washing or laying flat to dry. Others may be machine washable. Consider your lifestyle and how much time and effort you are willing to put into caring for your finished project.
Conclusion
Choosing the right mohair yarn for your knitting project is an important decision. Consider the fiber content, gauge, texture, color, and care instructions to ensure that your finished piece is everything you envisioned. With the right mohair yarn, you can create a luxurious and beautiful knitted item that will be cherished for years to come.
Selecting the appropriate knitting needles
When it comes to knitting, selecting the right needles can make a big difference in both the ease of your knitting experience and the final result of your project. The type and size of needles you choose depend on several factors, including the type of yarn you’re using and the pattern you’re following.
Material: Knitting needles are made from various materials, each with its own unique characteristics. Common materials include metal, wood, and plastic. Metal needles, such as those made from aluminum or stainless steel, are durable and provide smooth knitting. Wood needles, like bamboo or birch, have a warm and natural feel, and they are great for slippery yarns. Plastic needles are lightweight and budget-friendly, but they may not be as smooth as metal or wood.
Size:
Needle size is an important consideration when selecting knitting needles. The correct needle size will help you achieve the desired gauge or tension specified in your pattern. Most knitting needles are labeled with both the US size and the millimeter size. You can find charts that show the equivalent sizes for different knitting needle systems. The pattern you’re using will specify the recommended needle size, typically indicated by a “gauge swatch” that you knit to measure your tension.
Note: Remember that your knitting tension can vary from the suggested gauge, so it’s always a good idea to make a gauge swatch before starting your project. This will help you determine if you need to adjust your needle size to achieve the correct gauge.
Type of Needle:
There are different types of knitting needles to choose from, including straight, circular, and double-pointed needles. Straight needles are the most common and are used for knitting flat pieces, such as scarves or blankets. Circular needles are made up of two needle tips connected by a flexible cable, and they can be used for both flat and circular knitting. Double-pointed needles, also known as DPNs, are used for knitting small circumferences, like hats or socks.
Specialty Needles:
In addition to the standard knitting needles, there are also specialty needles available for specific techniques. For example, cable needles have a hook or bend in the middle to help hold stitches when creating cables. Lace needles have a sharper point and a longer length, making it easier to work intricate lace patterns. If you plan to knit with more advanced techniques, such as entrelac or brioche, you may want to consider investing in specialty needles designed for those specific techniques.
In conclusion, selecting the appropriate knitting needles involves considering the material, size, type, and any specialty features you may need. By choosing the right needles for your project, you can ensure a more enjoyable knitting experience and achieve the best results in your finished piece.
Step-by-step instructions for knitting a mohair hat
Knitting a mohair hat can be a fun and rewarding project. Mohair is a luxurious and warm fiber, making it perfect for cold weather accessories like hats. With the right pattern and a bit of practice, you can create a beautiful mohair hat to keep you cozy all winter long. Here are step-by-step instructions to help you get started.
Materials you will need:
- Mohair yarn, in the color and weight of your choice
- Knitting needles, appropriate for your yarn weight
- Tapestry needle
- Stitch markers
- Scissors
Step 1: Cast on
Start by casting on the desired number of stitches, depending on the size of the hat you want to make. The pattern you are using should indicate the appropriate number of stitches to cast on. Make sure to leave a long tail of yarn, as you will need it later for seaming the hat.
Step 2: Knit in the round
Once you have cast on, join your knitting in the round. Place a stitch marker to mark the beginning of the round. Knit every stitch in the round until you reach your desired length for the hat.
Step 3: Decrease for the crown
When you have reached the desired length, it’s time to start decreasing for the crown of the hat. Follow the pattern instructions for the specific decreases to make. This is usually done by knitting two stitches together, or using other decrease techniques such as “ssk” and “k2tog”. Continue decreasing in the specified pattern until you are left with a small number of stitches.
Step 4: Finishing touches
Once you have completed the decreases, cut the yarn, leaving a long tail. Thread the tail through a tapestry needle and slide it through the remaining stitches, pulling tight to close the top of the hat. Secure the yarn and weave in any loose ends using the tapestry needle.
Step 5: Blocking
To give your mohair hat a polished look, consider blocking it. Wet blocking is often recommended for mohair to help the fibers relax and shape the hat. Fill a sink or basin with lukewarm water and a small amount of mild soap. Submerge the hat in the water, gently squeezing to distribute the soap. Rinse the hat well and squeeze out excess water. Lay the hat flat on a clean towel and shape it to the desired size. Let it dry completely before wearing.
With these step-by-step instructions, you are ready to start knitting your own mohair hat. Choose a pattern that catches your eye, gather your materials, and enjoy the process of creating a cozy and stylish accessory.
Casting on stitches
When knitting a mohair hat, one of the first steps is to cast on stitches. This is the process of creating a foundation row of stitches on the knitting needle before beginning the actual pattern. There are several methods of casting on stitches, each with its own advantages and uses.
One common method is the long tail cast on. To start, measure a length of yarn that is about three to four times the width of the finished hat. Make a slip knot at the end of the yarn and place it on the needle. Hold the needle in your right hand and the end of the yarn in your left hand. Using your thumb and index finger, make a loop with the working yarn, bringing it in front of the needle. With your right hand, insert the needle through the loop from left to right, catching the working yarn. Pull the loop snugly onto the needle, and repeat this process for the desired number of stitches.
Another method is the knitted cast on, which creates a stretchy and decorative edge. Start with a slip knot, as with the long tail cast on. Hold the needle in your right hand and the end of the working yarn in your left hand. Insert the right needle into the slip knot as if to knit, and wrap the yarn around the needle counterclockwise. Pull the yarn through the slip knot, creating a new stitch on the right needle. Now, insert the right needle between the two stitches on the left needle, bringing it from front to back. Wrap the yarn counterclockwise around the right needle and pull it through the space between the stitches. Repeat this process until the desired number of stitches is cast on.
Once the stitches are cast on, you are ready to begin knitting the mohair hat according to the pattern. Casting on correctly is crucial for the success of your project, so take your time and practice if necessary. With a bit of patience and skill, you’ll be on your way to creating a beautiful mohair hat.
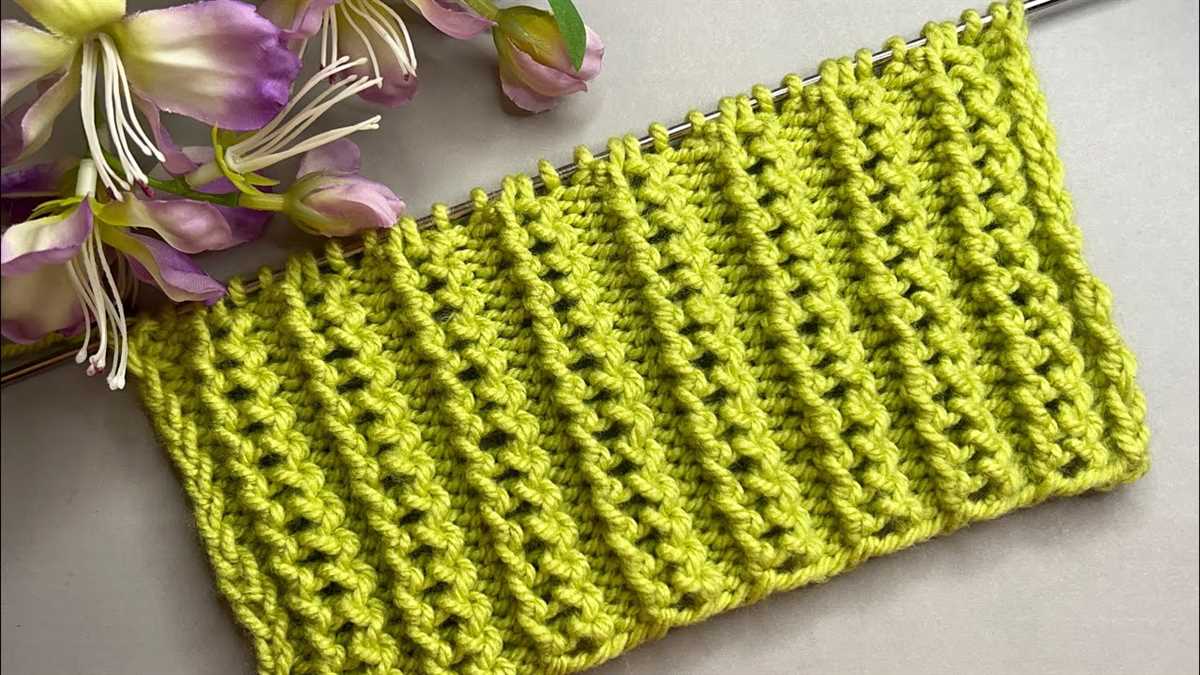
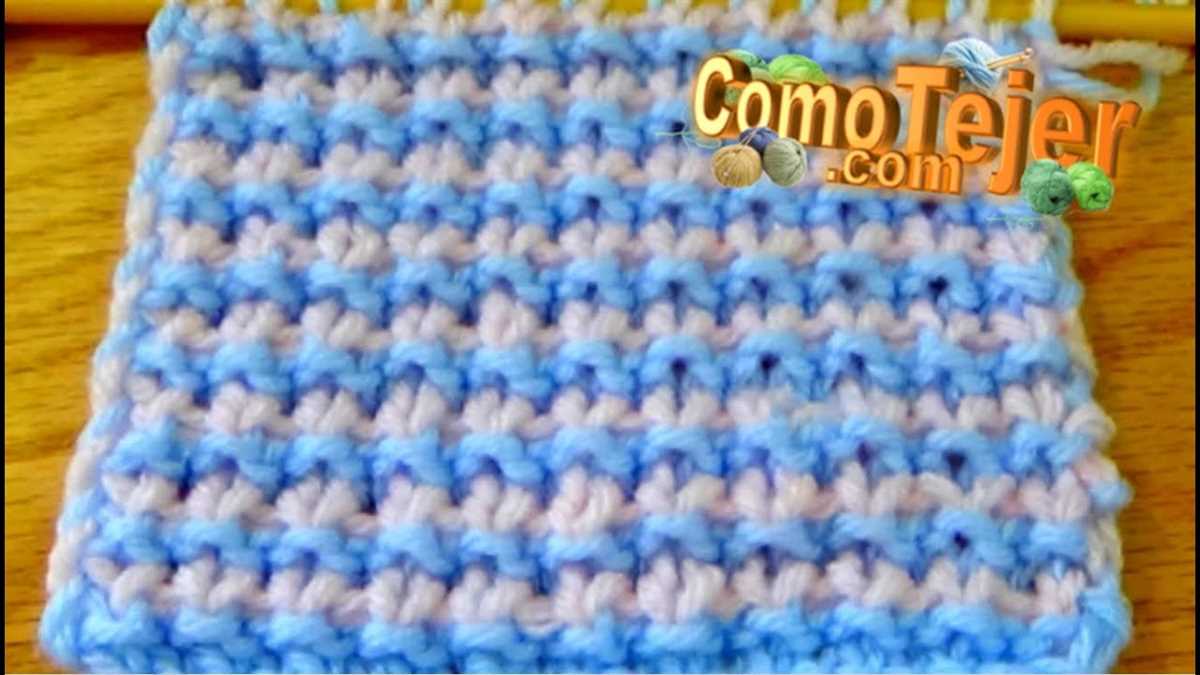
Creating the ribbed brim
Before you start knitting the ribbed brim of your mohair hat, make sure you have the necessary supplies, including a set of double-pointed knitting needles in the appropriate size for your yarn, a stitch marker, and a tapestry needle for weaving in ends.
To begin, cast on the desired number of stitches for your hat’s brim. This pattern typically recommends using a multiple of 4 stitches, as this will create a nice ribbed effect. You can use the long-tail cast-on method or any other preferred method.
Row 1: Ribbing stitch
- Start by knitting the first stitch of the row.
- Next, purl the following stitch, making sure to keep the yarn in front of the work.
- Repeat the knit-purl pattern until the end of the row.
Row 2: Switching to ribbing pattern
- Start by purling the first stitch of the row.
- Next, knit the following stitch, bringing the yarn to the back of the work.
- Repeat the purl-knit pattern until the end of the row.
Continue alternating between Row 1 and Row 2 until the ribbed brim reaches your desired length. Remember to place a stitch marker after the first stitch of each row to keep track of your progress.
Once you’re happy with the length of the ribbed brim, you can proceed to the next section of the mohair hat knitting pattern. In the following sections, you will learn how to shape the crown and finish off your cozy hat.
Knitting the body of the hat
After completing the ribbing, it’s time to start knitting the body of the hat. Using your preferred circular knitting method, begin knitting in the round with the main color yarn. Make sure to place a stitch marker to indicate the beginning of the round.
Continue knitting in the round until you reach the desired length for the body of the hat, keeping in mind that the hat will stretch slightly when worn. If you are following a specific pattern, make sure to follow the instructions for the stitch pattern and any shaping that may be required.
As you knit, it is important to keep an eye on your tension to ensure an even and consistent fabric. Check the gauge periodically, especially if you are using a different yarn weight or needle size than the pattern suggests.
When you are satisfied with the length of the body, it’s time to start shaping the crown of the hat. This may involve decreasing stitches gradually to create a smoother, fitted top. Follow the pattern instructions for crown shaping, or if you are improvising, consider using techniques such as k2tog (knit two stitches together) or ssk (slip, slip, knit) to decrease stitches.
Once you have completed the crown shaping, it’s time to finish off the hat. Cut the yarn, leaving a long tail for sewing. Thread the tail onto a tapestry needle and carefully remove the stitches from the knitting needle, threading the needle through the live stitches.
Secure the stitches by pulling the tail tightly and weaving it in and out of the live stitches. Tie a knot to secure the end and weave in any remaining loose ends. Finally, give the hat a gentle block if necessary, shaping it into its final form.
Congratulations, you have successfully knitted the body of the hat! The next step is adding any additional embellishments, such as a pompom or ribbons, to personalize your hat.
Shaping the crown
Shaping the crown is an important step in knitting a mohair hat. It gives the hat its characteristic rounded shape and ensures a snug fit. To shape the crown, you will need to decrease stitches evenly across each round. This will gradually decrease the circumference of the hat until you reach the desired size.
To begin shaping the crown, you can start with a decrease round. This can be done by knitting two stitches together throughout the round. This will reduce the total number of stitches by half. Repeat this decrease round every few rounds, gradually reducing the number of stitches as you go.
Another way to shape the crown is by using a decrease pattern. There are various decrease patterns you can use, such as k2tog (knit two stitches together), ssk (slip, slip, knit), or p2tog (purl two stitches together). These decrease patterns create a more decorative effect and can be used to create different crown shapes, such as a pointed or slouchy crown.
It’s important to note that the number of decrease rounds or the type of decrease pattern used can vary depending on the specific hat pattern you are following. Always refer to the pattern instructions for guidance on how to shape the crown. By following the pattern and carefully shaping the crown, you will be able to create a beautifully designed mohair hat that fits comfortably and looks stylish.
Adding decorative elements to the mohair hat
When it comes to knitting a mohair hat, there are several ways to add decorative elements to make it unique and stylish. These elements can enhance the overall look of the hat and showcase the knitter’s creativity. Whether you want to add a touch of color, texture, or pattern, there are various techniques and options to explore.
1. Colorwork: One way to add visual interest to a mohair hat is through colorwork. This can be achieved by incorporating multiple colors in the pattern using techniques such as stranded colorwork or fair isle knitting. By carefully selecting different shades of mohair yarn, you can create intricate color patterns and motifs that make the hat stand out.
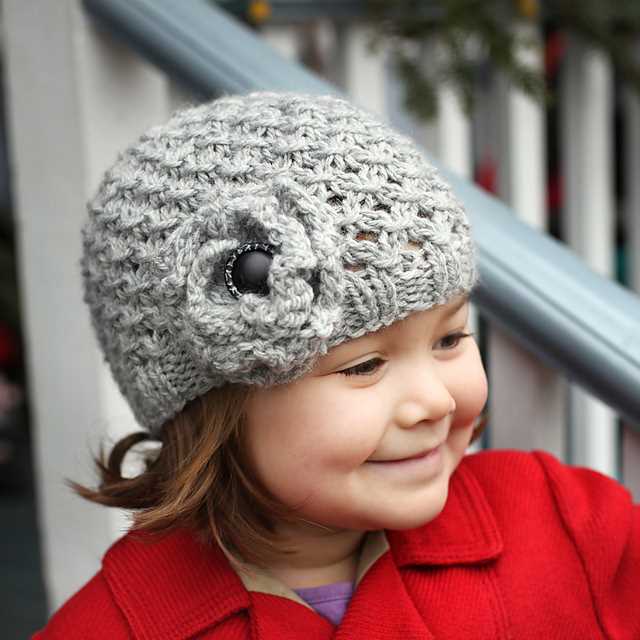
2. Embellishments: Another way to enhance a mohair hat is by adding embellishments. This can include attaching buttons, beads, or decorative patches to the hat. These small details can add a touch of glamour or whimsy, depending on the chosen embellishments. Be sure to securely attach the embellishments so they withstand wear and tear.
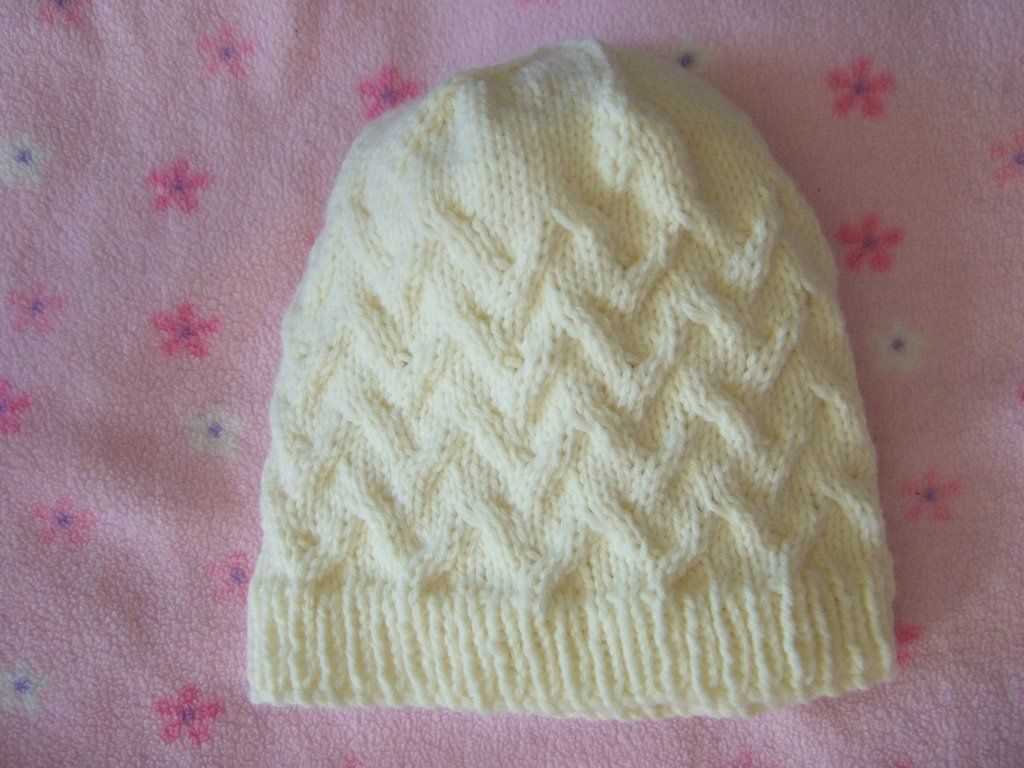
3. Textured stitches: Using textured stitches can also elevate the look of a mohair hat. Incorporating cable patterns, bobbles, or lace motifs can create a visual and tactile interest. Mohair yarn’s fuzzy texture can further enhance the effect of these stitches, adding depth and dimension to the hat.
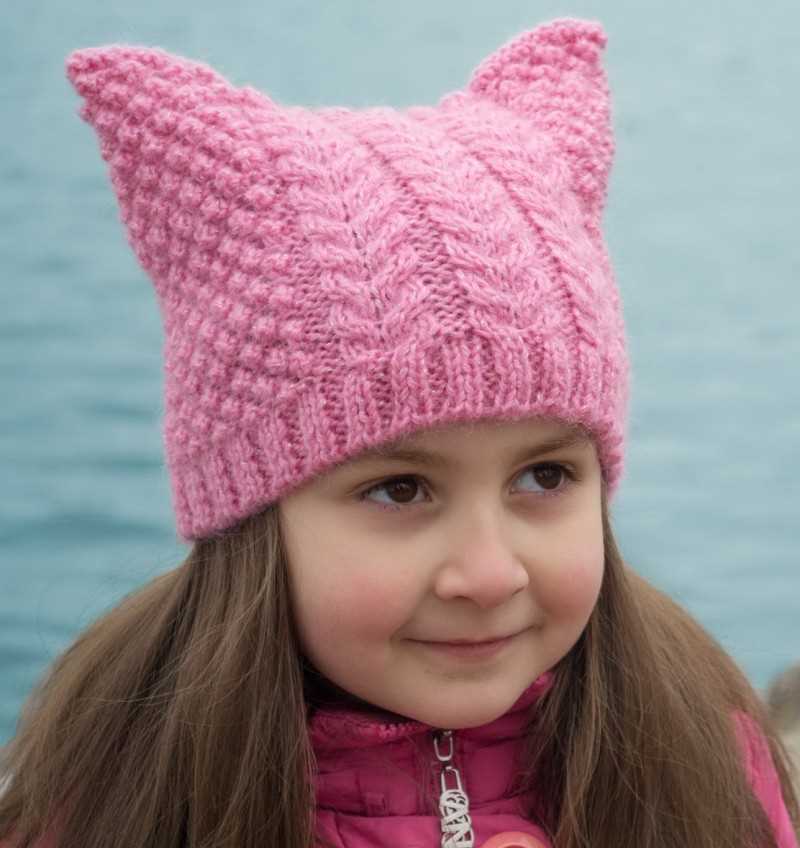
4. Pom-poms: Pom-poms are a classic accessory that can be added to the top of a mohair hat. They can be made using mohair yarn for a coordinated look or contrasting yarn for a pop of color. Pom-poms add a playful and cozy element to the hat while also serving as a practical way to keep the ears warm.
5. Ribbons or bows: For a feminine touch, consider adding ribbons or bows to the mohair hat. These can be tied around the base or used as a decorative element on the brim. Bow details can make the hat look more elegant and add a charming finishing touch.
With these various options for adding decorative elements to a mohair hat, knitters can customize their creations to suit their style and preferences. By experimenting with different techniques and incorporating unique touches, each hat can become a one-of-a-kind accessory that stands out in a crowd.
Incorporating Colorwork
Colorwork is a technique that involves knitting with multiple colors to create patterns or designs in your knitting project. It can add visual interest and complexity to your knitted items, and it’s a great way to experiment with different colors and textures.
Choosing Colors
When it comes to colorwork, choosing the right colors is essential. You want to select colors that complement each other and create a visually appealing contrast. Consider using a color wheel to help you choose complementary or contrasting colors. Experimenting with different color combinations can be a fun and creative process.
Fair Isle Knitting
Fair Isle knitting is a popular colorwork technique that originated in the Fair Isle region of Scotland. It involves knitting with two colors in the same row to create intricate patterns. Typically, only two colors are used per row, with one color carried along the back of the work while the other is being knitted. The floats of yarn on the back give the knitted fabric its characteristic texture.
Intarsia Knitting
Intarsia knitting is another colorwork technique that involves using blocks of color to create designs or shapes. Unlike Fair Isle knitting, which uses multiple colors in the same row, Intarsia knitting requires separate bobbins or balls of yarn for each color block. This technique is often used to create larger, more complex designs and images.
Combining Colorwork Techniques
You can also combine different colorwork techniques in your knitting projects to create unique effects. For example, you could use Fair Isle knitting for a background pattern and add Intarsia knitting for a focal point or motif. The possibilities are endless, and experimenting with different techniques can help you develop your knitting skills and create beautiful, one-of-a-kind pieces.
Embellishing with pom poms or tassels
If you have completed your mohair hat and are looking to add a little extra flair, consider embellishing it with pom poms or tassels. These fun and playful additions can take your hat to the next level of style and uniqueness. Pom poms and tassels can be made from the same mohair yarn or you can choose a contrasting color to create a bold statement.
Creating pom poms is easy and can be done using a variety of techniques. One popular method is to use a pom pom maker, which allows you to easily wrap the yarn around a template and secure it in the center, before cutting the loops and fluffing the pom pom. Another option is to use a fork or a piece of cardboard to wrap the yarn around and create a pom pom. Whichever method you choose, make sure to securely attach the pom poms to your hat, using a needle and thread or by sewing them directly onto the fabric.
If you prefer tassels, they can be made by wrapping yarn around a piece of cardboard or your fingers, before tying it off at one end and cutting through the loops at the other. You can vary the length and thickness of the tassels to create different effects. To attach the tassels to your hat, simply thread the tied end through the fabric and secure it with a knot or by sewing it in place.
Both pom poms and tassels can be placed strategically around the hat, for example at the top or along the brim, or you can go all out and cover the entire hat with them for a truly unique look. Experiment with different sizes, colors, and placements to find the perfect combination that reflects your personal style.
Finishing touches and blocking the hat
Once you have completed knitting the hat, it’s time to add some finishing touches and block it to give it a polished look. These final steps will help enhance the shape and texture of the hat.
1. Weave in loose ends: Trim any excess yarn and use a yarn needle to weave in the loose ends on the inside of the hat. This will ensure that the hat looks neat and tidy.
2. Block the hat: Blocking is an important step to shape and even out the stitches in your knitted hat. There are several methods for blocking, but the most common one is to dampen the hat slightly and then lay it flat on a towel. Gently shape the hat to the desired size and dimensions, making sure that the ribbing and any other details are properly aligned. Leave the hat to dry completely before removing it from the towel.
3. Add embellishments (optional): If you want to personalize your hat, you can add embellishments such as pom-poms, buttons, or a leather patch. Sew them securely onto the hat using a yarn needle and matching yarn.
By following these steps, you can make your mohair hat look and feel its best. Enjoy wearing your cozy and stylish creation!