
If you’re a beginner knitter looking for a fun and easy project, look no further than this free knit skirt pattern. This pattern is perfect for those who are new to knitting or those who want a quick and satisfying project. With just a few basic stitches and some simple shaping, you’ll have a stylish and comfortable skirt in no time.
One of the best things about this free knit skirt pattern is that it’s customizable. You can choose the length and width of the skirt to fit your own preferences and body type. The pattern also includes instructions on how to add a ribbed waistband and hem for added style and a better fit.
Whether you’re knitting for yourself or looking for a thoughtful handmade gift, this easy knit skirt pattern is a fantastic option. With its simple construction and customizable features, you’ll be able to create a beautiful and unique skirt that you’ll love to wear or give to someone special. So grab your knitting needles and get started on this fun and rewarding project today!
Easy Knit Skirt Pattern Free
If you’re looking for a simple knitting project that you can complete in no time, an easy knit skirt pattern is the way to go. Whether you’re an experienced knitter or new to the craft, this free pattern is perfect for all skill levels. With just a few basic stitches and some quality yarn, you’ll be able to create a stylish and comfortable skirt that you can wear all year round.
To start, gather your materials: knitting needles in the appropriate size for your desired gauge, a tape measure, and a ball of yarn in the color and weight of your choice. Once you have your materials ready, you can begin casting on stitches. The pattern will provide you with the exact number of stitches needed for your size, so be sure to follow the instructions carefully.
Once you’ve cast on your stitches, you’ll start working the pattern, which typically consists of a combination of knit and purl stitches. Depending on the pattern, you may also need to incorporate increases or decreases to shape the skirt. Be sure to keep track of your rows and stitch count as you go along to ensure that your skirt turns out the correct size and shape.
When you’ve finished knitting the main body of the skirt, it’s time to bind off your stitches and sew any seams if necessary. Then, it’s simply a matter of adding any desired finishing touches, such as a waistband or decorative edging. Once you’ve completed these final steps, you’ll have a beautiful knit skirt that you’ll be proud to wear and show off.
With an easy knit skirt pattern, you can create a stylish and comfortable garment that reflects your personal style. Whether you choose a solid color or a fun striped design, the possibilities are endless. So grab your needles and yarn and get started on this rewarding knitting project!
The Basics of Knitting
Knitting is a popular craft that involves creating fabric by interlacing yarn or thread with a pair of knitting needles. It is a versatile skill that allows you to create a variety of garments and accessories, including sweaters, scarves, hats, and blankets. Whether you are a beginner or an experienced knitter, understanding the basics of knitting is essential for success in this creative pursuit.
To start knitting, you will need a few essential tools: knitting needles and yarn. Knitting needles come in various sizes, typically ranging from 2 mm to 25 mm in diameter, and can be made of different materials such as wood, metal, or plastic. Yarn comes in different weights and fibers, each suited for different projects. It’s important to choose the appropriate needle size and yarn weight for your desired project, as this will affect the final result.
Casting On
- Hold the knitting needle with the yarn in your right hand. Leave a tail of yarn about 6 inches long.
- Make a slipknot by forming a loop with the yarn and pulling the loose end through the loop. Slide the slipknot onto the knitting needle.
- Hold the knitting needle with the slipknot in your right hand. Insert the needle into the slipknot, going from front to back.
- With your left thumb and index finger, grab the loose end of the yarn and bring it over the top of the needle, creating a loop.
- Drop the slipknot off the right-hand needle, while holding the new loop with your left thumb and index finger.
- Repeat steps 3 to 5 until you have cast on the desired number of stitches for your project.
Knitting
- Hold the knitting needle with the cast-on stitches in your right hand, and the empty needle in your left hand.
- Insert the right-hand needle into the first stitch on the left-hand needle, going from left to right.
- With your right hand, bring the yarn over the right-hand needle, and use the needle to pull the loop of yarn through the stitch.
- Slide the stitch off the left-hand needle and onto the right-hand needle.
- Repeat steps 2 to 4 until all stitches have been transferred to the right-hand needle.
- Continue knitting each stitch in the same manner, moving stitches from the left-hand needle to the right-hand needle.
- When you reach the end of the row, switch the needles so that the needle with the stitches becomes the left-hand needle, and the empty needle becomes the right-hand needle.
- Repeat steps 2 to 7 until you have completed your knitting project.
Choosing the Right Yarn

When it comes to knitting a skirt, choosing the right yarn is essential in creating a garment that not only looks good but also feels comfortable and fits well. With so many different yarn options available, it can be overwhelming to decide which one to use for your project. However, by considering factors such as fiber content, weight, and texture, you can make an informed decision and find the perfect yarn for your knit skirt.
Fiber Content
The fiber content of the yarn should be one of the first things to consider. Different fibers have various characteristics that can affect the final product. For example, if you want a lightweight and breathable skirt, you might opt for a yarn made of cotton or linen. These fibers are known for their breathability and can be great choices for warm weather skirts. On the other hand, if you’re looking for warmth and durability, a yarn with wool or acrylic content might be more suitable. Wool offers excellent insulation properties, while acrylic is known for its softness and easy care.
Weight
The weight of the yarn is another important factor to consider. The weight refers to the thickness of the yarn and can impact the drape and fit of the finished skirt. Lighter weight yarns, such as lace or fingering weight, will result in a more delicate and airy skirt. These yarns are often used for creating lacy patterns or intricate designs. On the other hand, if you prefer a chunkier and more substantial skirt, you might choose a yarn in a heavier weight category, such as worsted or bulky. These yarns will create a thicker fabric with more structure.
Texture
The texture of the yarn can also play a role in the overall appearance of the knit skirt. Smooth and even yarns are ideal for showcasing stitch patterns and creating a polished look. If you want a skirt with some added interest and texture, you might consider using a yarn with a bouclé or tweed effect. These yarns can create a unique and visual appeal to your project. Additionally, considering the stitch pattern you plan to use for your skirt can also influence the type of yarn you choose. Some stitch patterns may look better with a smoother yarn, while others may benefit from a yarn with more texture.
Overall, choosing the right yarn for your knit skirt is an important decision that can greatly impact the outcome of your project. By carefully considering the fiber content, weight, and texture of the yarn, you can ensure that your skirt turns out exactly how you envision it, both in terms of appearance and comfort.
Picking the Perfect Needles
When it comes to knitting, one of the most important decisions you will make is choosing the right needles. The type of needles you choose can greatly affect the outcome of your project, as well as your knitting experience. Here are some tips to help you pick the perfect needles for your next knit skirt:
1. Material Matters
The material of the needles can make a big difference in your knitting. Common options include bamboo, wood, metal, and plastic. Bamboo and wood needles are known for their lightweight and warm feel, making them great for delicate projects like skirts. Metal needles, on the other hand, provide a smooth surface that allows yarn to slide effortlessly, making them ideal for fast knitters. Plastic needles are budget-friendly and durable, making them a good choice for beginners.
2. Size is Key
Choosing the right needle size is crucial for achieving the desired gauge in your knitting. The size of the needles will determine the size of your stitches and ultimately the fit of the finished skirt. Always refer to the pattern for the recommended needle size. If you tend to knit tightly, you may need to go up a needle size, while looser knitters may need to go down. It’s also a good idea to swatch before starting your project to ensure you are using the correct needle size for the desired gauge.
3. Circular or Straight
When it comes to knitting a skirt, you have the option of using either circular needles or straight needles. Circular needles are a popular choice for seamless knitting, as they allow you to knit in the round and avoid the need for seaming. They also distribute the weight of the project more evenly, making them more comfortable for larger projects. However, if you prefer the traditional feel of straight needles or if the pattern calls for straight needles, they can still be a great option.
By considering the material, size, and type of needles, you can ensure that you pick the perfect needles for your knit skirt project. Remember to always read the pattern and swatch before starting to ensure the best results!
Getting Started: Casting On
Before you can begin knitting your easy knit skirt, you will need to cast on. Casting on is the process of creating the first row of stitches on your knitting needles. There are several methods you can use to cast on, but the most common method for beginners is the long-tail cast on.
To start the long-tail cast on, you will need to estimate the amount of yarn you will need for your skirt. This can be done by wrapping the yarn around your needle a certain number of times – usually recommended in the pattern. Once you have determined the length of yarn needed, make a slip knot at one end of the yarn and place it on one of your knitting needles.
With the slip knot secure on your needle, hold the needle with the slip knot in your right hand, and the other needle in your left hand. Insert the tip of the left needle into the slip knot from below, and cross it over the right needle. With your right hand, bring the yarn over the left needle and hold it in place with your thumb.
Slip the right needle under the loop on the left needle, and bring the yarn over the right needle. Take the loop off the left needle and pull the yarn through to create a new stitch. Repeat this process for the desired number of stitches, according to the pattern instructions. Once you have cast on all the required stitches, you are ready to start knitting your easy knit skirt!
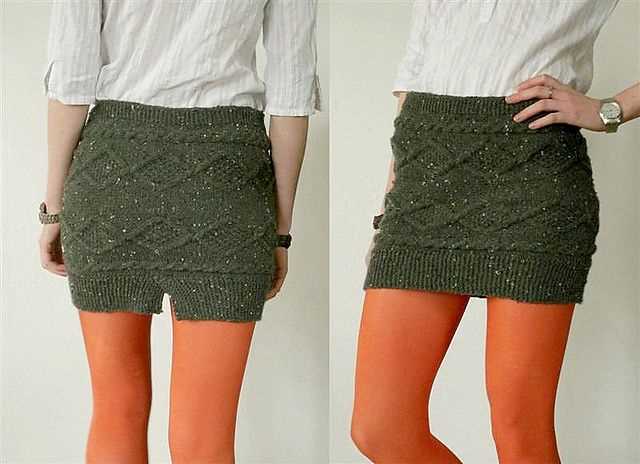
Knitting the Waistband
Once you have completed knitting the body of the skirt, it is time to start working on the waistband. The waistband not only adds a finishing touch to the skirt, but it also helps to keep it securely in place when wearing.
To begin, measure your waist and determine the number of stitches needed to fit comfortably around it. You can use a measuring tape to get an accurate measurement. Once you have the measurement, you can calculate the number of stitches per inch and multiply it by the desired waist size to get the total number of stitches needed.
Next, you will need to decide on the width of the waistband. Typically, a waistband for a knit skirt is about 1-2 inches wide. You can choose a ribbed pattern, such as a 1×1 or 2×2 rib, for a stretchy and comfortable waistband.
Using a circular needle that is appropriate for your yarn weight, cast on the required number of stitches for the waistband. Join in the round, being careful not to twist the stitches, and place a marker to indicate the beginning of the round.
Continue working in your chosen rib pattern for the desired length of the waistband. You can try the waistband on as you go to ensure it fits comfortably and adjust accordingly. Once the waistband is the desired length, you can bind off the stitches in pattern.
To give the waistband a more polished look, you can fold it in half and sew the non-bound off edge to the wrong side of the skirt using a tapestry needle. This will create a clean, finished edge and help the waistband to lay flat against the body.
With the waistband complete, your knit skirt is now ready to be enjoyed! You can pair it with a cozy sweater or a simple blouse for a stylish and comfortable outfit.
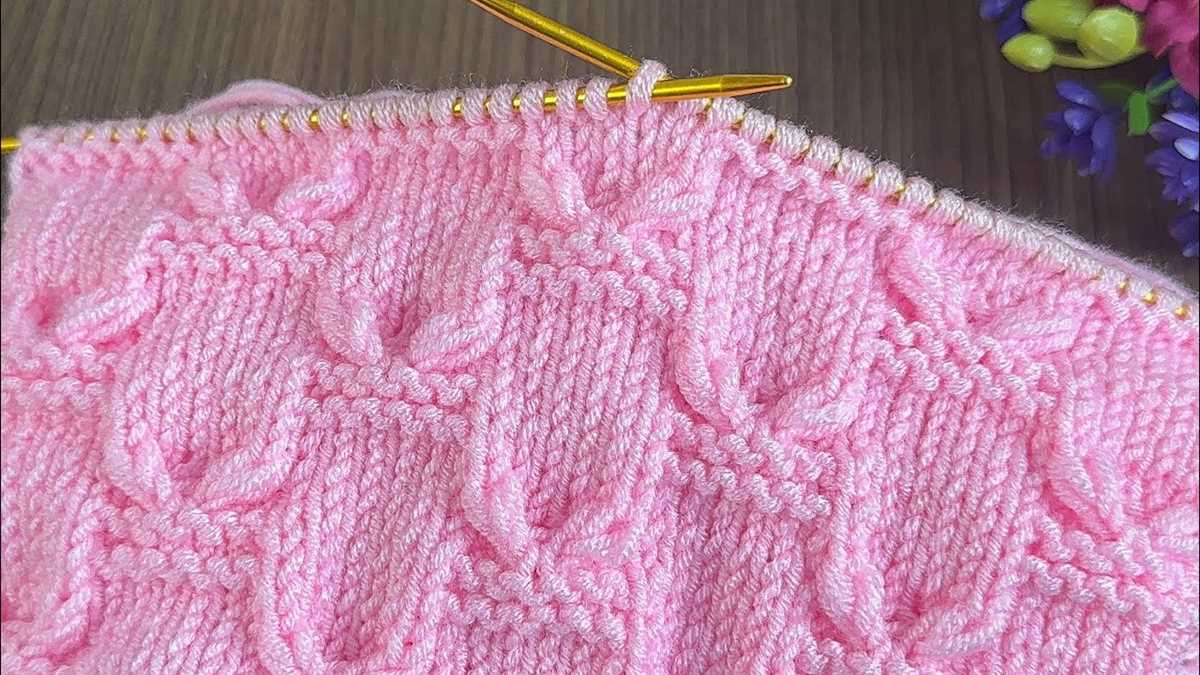
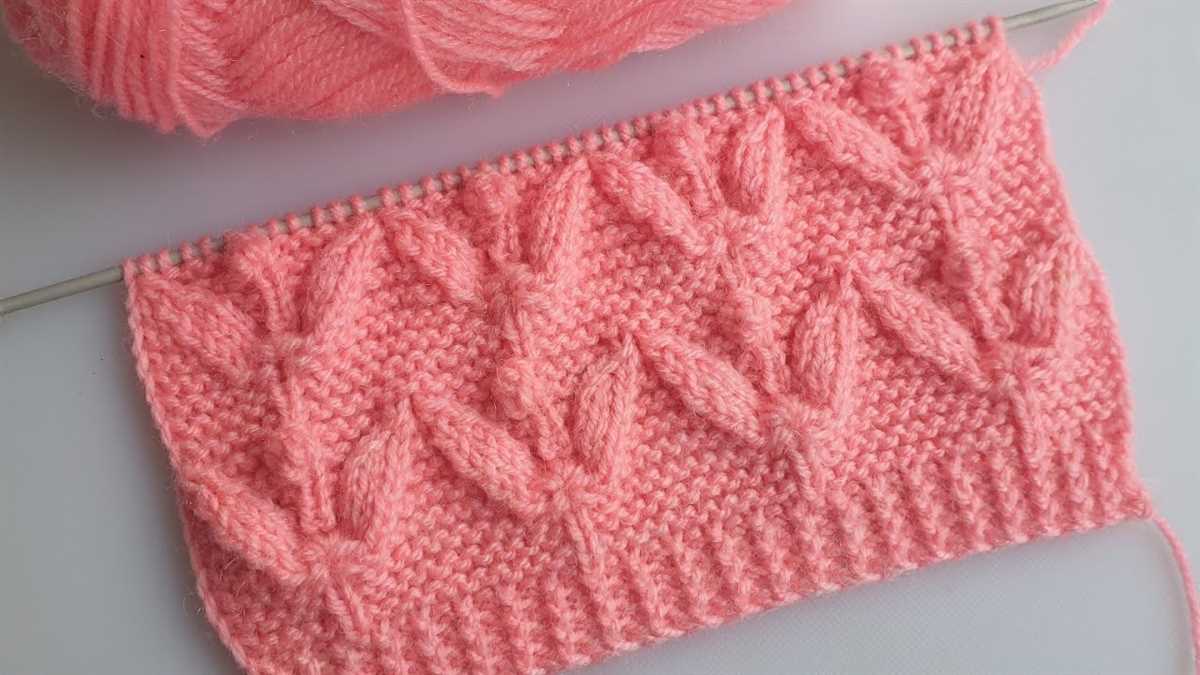
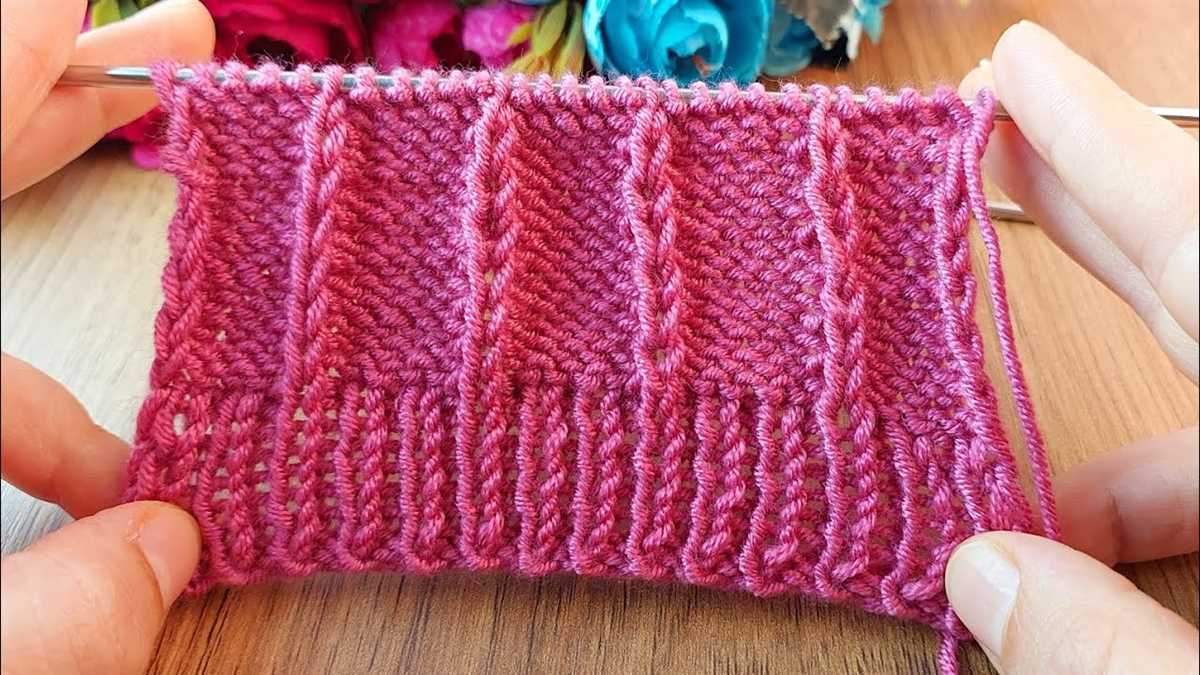
Adding Stitch Patterns
Once you have mastered the basic knit stitch and purl stitch, you can start adding in different stitch patterns to create unique and interesting textures on your knit skirt. There are endless possibilities when it comes to stitch patterns, so let your creativity run wild!
Ribbing: Ribbing is a classic stitch pattern that adds a stretchy and flexible texture to your knit fabric. It is commonly used for cuffs, waistbands, and hems. To create ribbing, alternate between knitting and purling stitches in a specified pattern. The most common ribbing pattern is K1, P1, but you can also try K2, P2 or other combinations.
Lace: Lace stitch patterns are perfect for adding a delicate and feminine touch to your knit skirt. Lace patterns typically involve a combination of yarn overs, decreases, and increases to create an openwork design. You can find various lace stitch patterns in knitting stitch dictionaries or online resources. Just make sure to follow the lace pattern chart or written instructions carefully to achieve the desired effect.
Other Stitch Patterns to Consider:
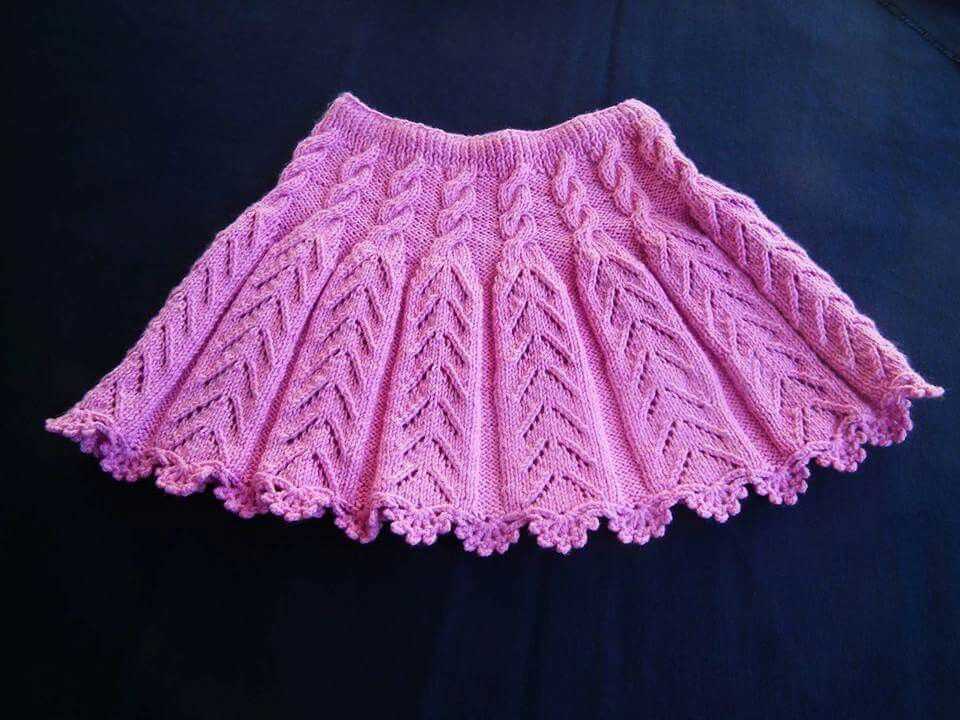
- Cables: Cables are a popular stitch pattern that create a twisted, rope-like texture on the knit fabric. By crossing stitches over each other, you can create intricate cable designs. There are many cable patterns to choose from, ranging from simple to complex.
- Seed Stitch: Seed stitch is a textured stitch pattern that creates a bumpy and reversible fabric. It involves alternating between knit and purl stitches in a specified pattern. Seed stitch can add a lot of visual interest to your knit skirt.
- Garter Stitch: Garter stitch is created by knitting every row. It produces a dense and squishy fabric that lays flat without curling. This stitch pattern is often used for borders or as an all-over pattern for a simple and classic look.
Remember, the stitch pattern you choose will greatly influence the final look and feel of your knit skirt. Some stitch patterns may be more suitable for certain types of yarn or garment styles, so take that into consideration when selecting your stitch pattern. Don’t be afraid to experiment and try out different stitch patterns until you find the one that you love!
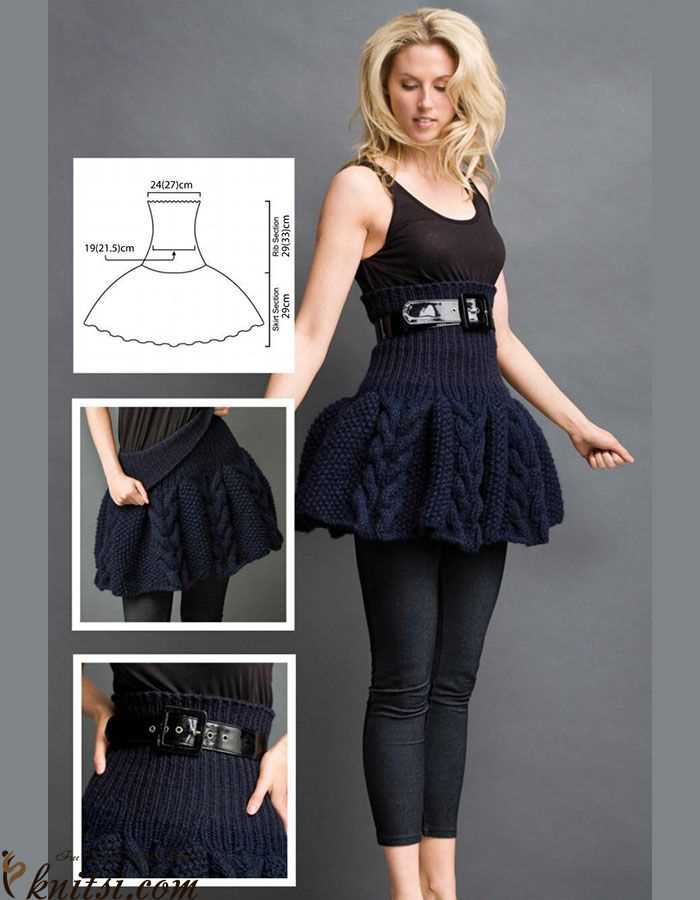
Shaping and Increasing
When knitting a skirt, shaping and increasing is an important technique to ensure a proper fit and desirable silhouette. By strategically adding stitches, you can create curves and flares that enhance the drape and movement of the skirt.
One common method of shaping is through increases. There are several ways to increase stitches in knitting, such as yarn overs, make one (M1) increases, or knitting into the front and back of a stitch. Depending on the desired effect, you can choose the most suitable method to achieve the desired result.
Adding Flare
To add flare to a skirt, you can gradually increase the number of stitches as you go down the length of the skirt. This can be done by incorporating regular increases at specific intervals or using a gradual shaping technique such as a triangle or bell-shaped increase. This will create a widening effect towards the hemline, giving the skirt a more voluminous and flowing appearance.
Creating a Fitted Waist
To shape the waist of a skirt, you can use decreases to create a tapered effect. By decreasing stitches evenly on each side of the waistband, you can achieve a snug fit that accentuates the waistline. This can be done through techniques such as knitting two stitches together (k2tog), slip slip knit (ssk), or knit front and back (kfb) decreases. Experiment with different decrease methods to find the one that works best for your desired waist shaping.
Adjusting Length
When adjusting the length of a skirt, you can incorporate shaping to create a flattering fit. For example, you can increase the number of stitches gradually towards the hip area to create a slight A-line shape, or decrease stitches gradually towards the hemline for a more tapered look. Additionally, you can add pleats or gathers at specific intervals to create visual interest and texture.
Remember to always take accurate measurements and gauge swatches to ensure your knitting project fits properly. Don’t be afraid to experiment with shaping and increasing techniques to achieve the desired fit and style for your knit skirt.
Creating a Flared Skirt
A flared skirt is a versatile and stylish addition to any wardrobe. Whether you prefer a feminine and flowy look or a more structured and tailored style, a flared skirt can be easily customized to suit your individual taste and body shape. With a few simple steps, you can create your own flared skirt that is both comfortable and fashionable.
To start, you will need a basic pattern for a skirt. There are many resources available online where you can find free easy knit skirt patterns. Look for a pattern that includes measurements and instructions for creating a flared silhouette. Pay attention to the waist and hip measurements, as these will determine how the skirt will fit and flare out from the body.
Once you have your pattern, it’s time to choose your fabric. Knit fabrics are a great choice for a flared skirt, as they have a nice drape and stretch, which allows for ease of movement and a comfortable fit. Choose a fabric that suits the style you’re going for, whether it be a solid color, a bold print, or a subtle pattern.
After you have your fabric, you will need to cut out your pattern pieces. Follow the instructions on your pattern, taking care to cut accurately and neatly. Take note of any markings or notches on the pattern, as these will help you with the construction of the skirt.
Next, it’s time to sew your skirt together. Follow the instructions provided with your pattern, using a sewing machine or a serger to stitch the seams. Take your time and ensure that your stitches are straight and even, as this will affect the overall look and fit of the skirt.
Once the seams are stitched, you can finish the edges of your skirt. This can be done by either serging the edges or using a zigzag stitch on your sewing machine. This will prevent fraying and give your skirt a professional finish.
Finally, it’s time to hem your skirt. Turn up the bottom edge of the skirt and sew a straight stitch or use a blind hem stitch to secure it in place. Try on the skirt and make any necessary adjustments to the hem length to ensure that it falls at your desired length.
With these simple steps, you can create a beautiful and flared knit skirt that is perfect for any occasion. Experiment with different fabrics and patterns to create a unique and personal garment that reflects your individual style. Enjoy the process of making your own clothing and take pride in wearing something that you have created with your own hands.
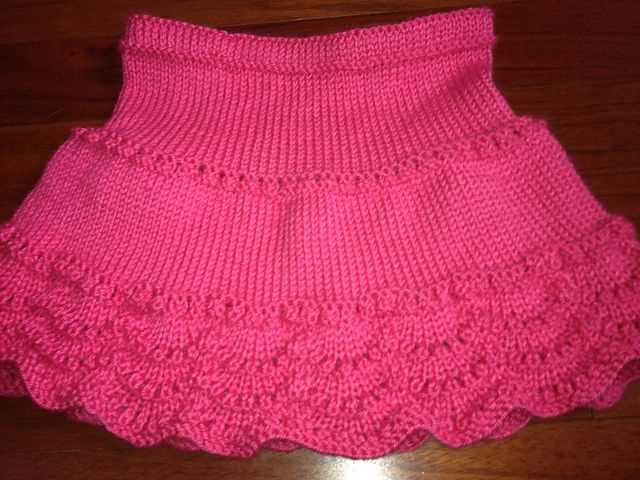
Knitting the Hemline
When it comes to knitting a skirt, one of the most important parts to consider is the hemline. The hemline not only gives the skirt a finished look, but it also affects how the skirt hangs and drapes on the body. There are several techniques and patterns that can be used to create a beautiful and well-finished hemline for your knitted skirt.
One common technique for knitting the hemline is to use a folded hem. This involves knitting a few rows of ribbing or garter stitch at the bottom of the skirt, and then folding the fabric up and sewing it in place. This creates a double-layered hemline that is not only visually appealing, but also adds weight and stability to the skirt.
Another technique that can be used for knitting the hemline is to create a picot edge. This involves knitting a row of stitches, and then casting off a few stitches in the next row. The cast off stitches are then picked up and knit in the following row, creating a decorative picot edge. This technique adds a delicate and feminine touch to the hemline of the skirt.
In addition to these techniques, there are also many free knitting patterns available online that provide step-by-step instructions for creating different hemlines. It’s important to choose a pattern that matches the style and drape of your skirt, as well as your skill level as a knitter. With a little bit of practice and patience, you can create a beautiful and professional-looking hemline for your knitted skirt.
Finishing Touches: Binding Off
As you near the end of your knitting project, it’s important to know how to properly bind off your stitches to complete the piece. Binding off, also known as casting off, is the process of securing the last row of stitches so that they don’t unravel. This final step gives your knitting a neat and finished look.
To bind off, simply knit the first two stitches as you normally would. Then, using the left needle, lift the first stitch over the second stitch and off the needle. Continue knitting one stitch and then lifting the previous stitch over until you have only one stitch remaining on the right needle. Cut the yarn, leaving a tail of a few inches, and pull it through the last stitch to secure it.
To create a stretchy bind off, you can use a larger needle size or try a different technique, such as the stretchy bind off or the Russian bind off. These methods allow for more flexibility and give you a looser edge, which can be beneficial for projects like socks or garments that require a bit of stretch.
Once you have finished binding off all of your stitches, be sure to weave in any loose ends by threading them onto a tapestry needle and sewing them into the back of your work. This will hide the ends and ensure that your knitting stays securely in place.
By mastering the art of binding off, you can confidently complete your knitting projects and achieve a polished and professional finish. With practice, you’ll become more comfortable with this essential technique and be able to apply it to a variety of projects.
Sewing and Finishing the Skirt
Once you have completed knitting the skirt, it is time to sew it together and finish off any remaining details. Here are the steps to follow:
1. Sewing the Side Seams
Begin by folding the skirt in half lengthwise, with the right sides facing each other. Align the edges and pin in place. Using a sewing machine or a hand needle and thread, sew a straight stitch along the side seams, from the top to the bottom of the skirt. Remove the pins as you go and backstitch at the beginning and end of the seam for added durability.
2. Hemming the Skirt
To create a neat and finished hem, fold up the bottom edge of the skirt by about 1 inch. Press the fold with an iron to create a crease. Then, fold up the edge one more time, this time by about 1/2 inch. Pin in place and sew a straight stitch along the folded edge to secure the hem. Trim any excess fabric if necessary.
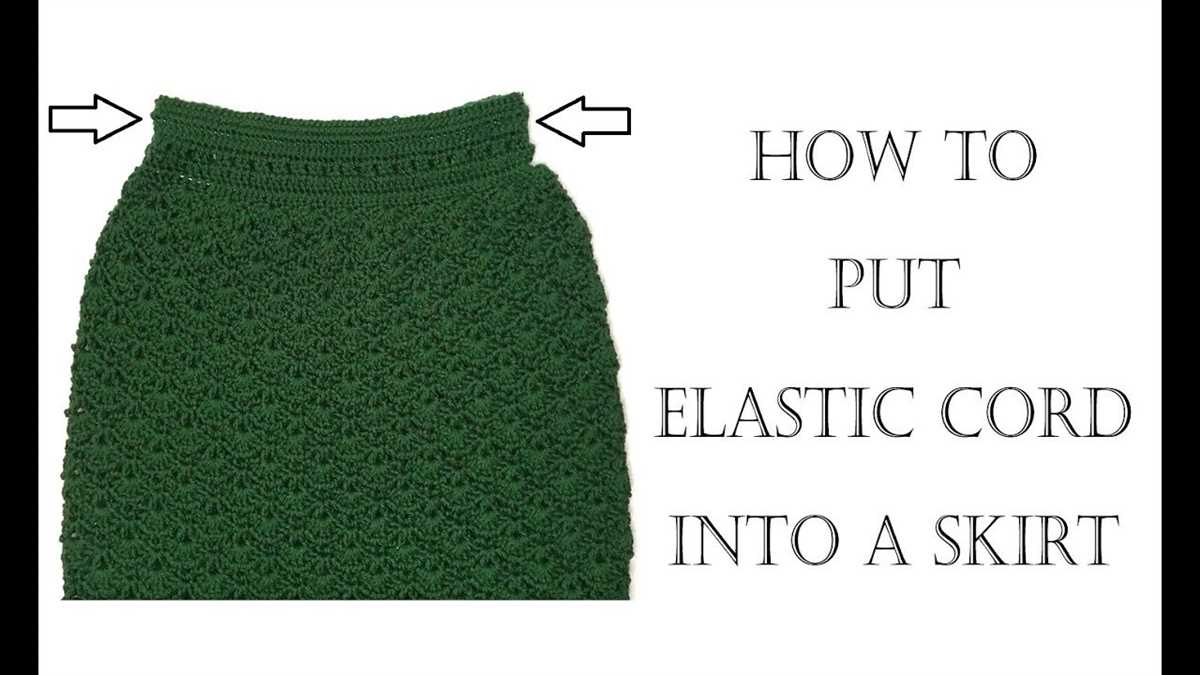
3. Adding a Waistband
If your skirt pattern includes a waistband, now is the time to attach it. Fold the top edge of the skirt over by about 1 inch and press with an iron. Then, fold it over one more time, this time by the width of the waistband, typically 1 to 2 inches. Pin the folded edge in place and sew a straight stitch along the bottom edge of the waistband, leaving a small opening for inserting elastic if desired. Alternatively, you can sew in a zipper or create a buttonhole and add a button for closure.
With these steps, your knitted skirt is ready to be worn! Make sure to try it on and make any necessary adjustments to the fit before completing the finishing touches. Enjoy your handmade creation and show off your knitting skills!
Tips and Troubleshooting

Knitting a skirt can be a rewarding and enjoyable project. However, it can also present some challenges along the way. Here are some tips and troubleshooting suggestions to help you navigate any issues you may encounter:
Tips:
- Read through the entire pattern before starting to ensure you understand all the instructions.
- Make a gauge swatch to ensure your stitches and rows match the pattern’s requirements.
- Use stitch markers or different color yarn to easily identify different sections of the skirt.
- Take regular breaks to prevent hand fatigue and maintain good tension.
- Block your skirt once it is completed to even out the stitches and give it a polished look.
Troubleshooting:
- If your skirt is turning out too big, try going down a needle size or adjusting your tension.
- If your skirt is turning out too small, try going up a needle size or adjusting your tension.
- If you encounter a mistake in your knitting, use a crochet hook or a spare knitting needle to carefully drop down stitches and fix the error.
- If you run out of yarn before completing the skirt, check your gauge and compare it with the pattern’s requirements to determine if you used more yarn than anticipated.
- If you are having trouble with a specific stitch or technique, there are many online tutorials and videos available to help you master it.
Remember, knitting is a skill that improves with practice. Don’t be discouraged if you encounter difficulties along the way. With patience and perseverance, you can create a beautiful and unique knit skirt that you can be proud of!