
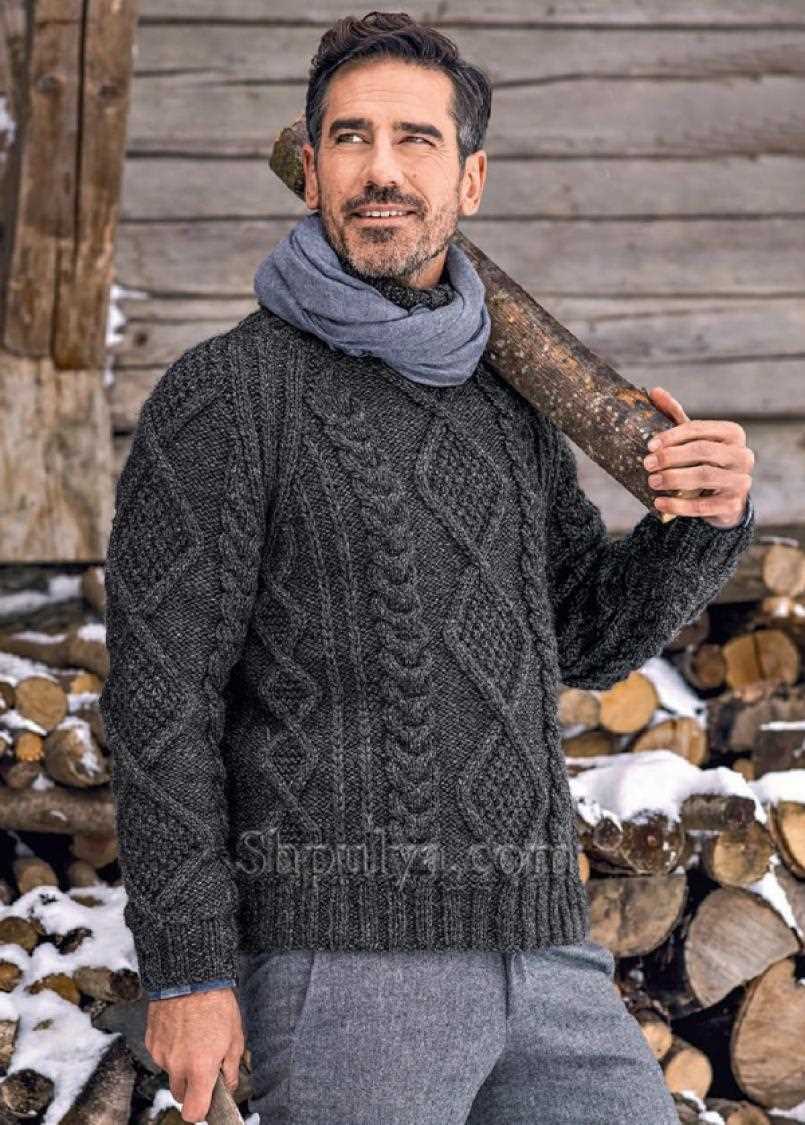
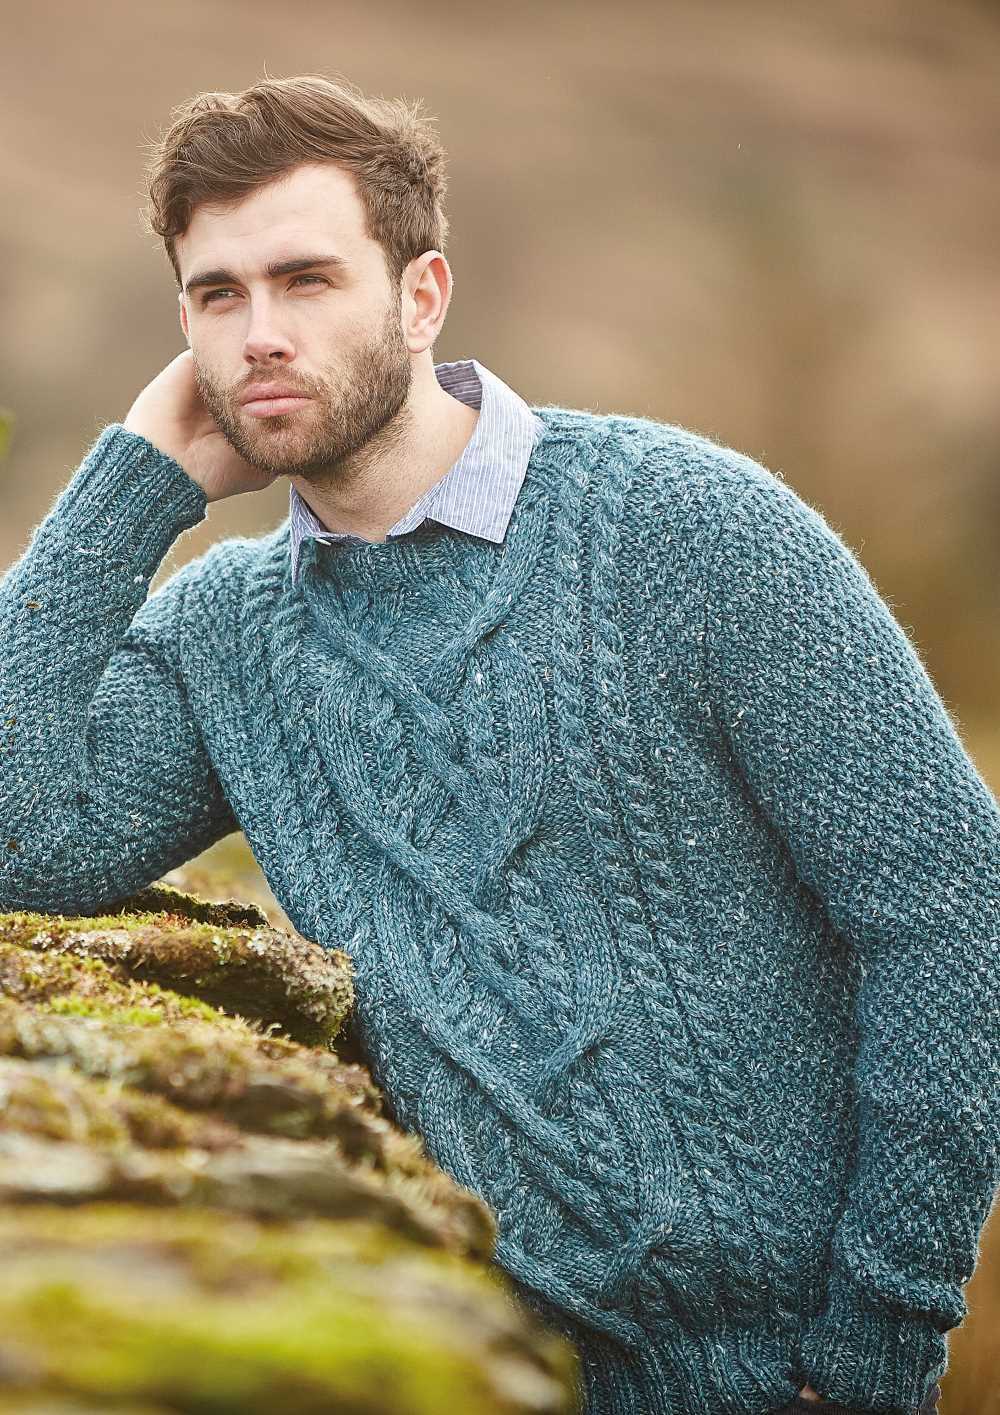
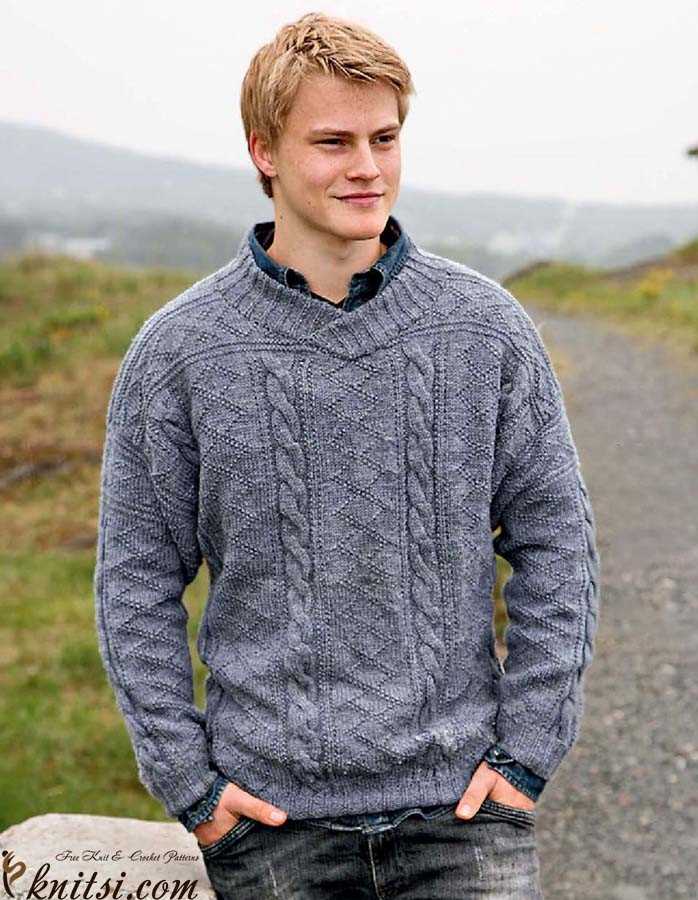
Knitting can be a fun and rewarding hobby, and one of the most popular things to knit is a sweater. Sweaters are versatile and can be worn in any season, making them a staple in any wardrobe. One classic style that never goes out of fashion is the cable knit sweater.
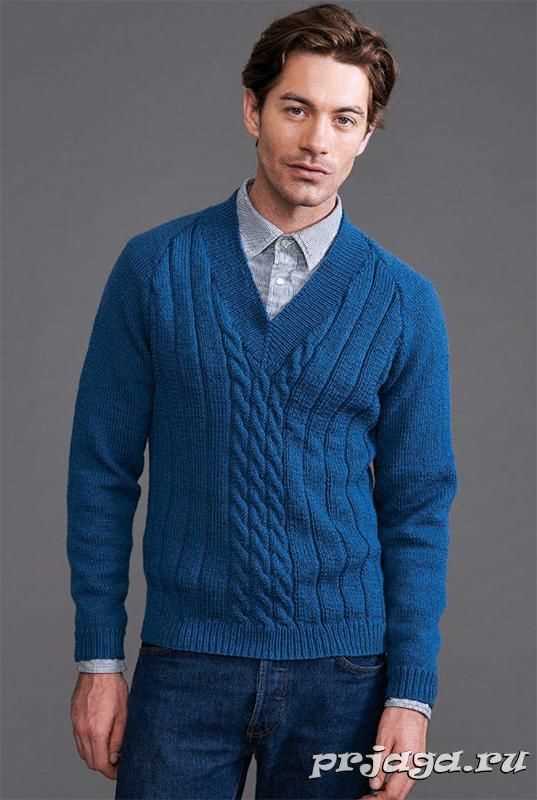
Cable knit sweaters are known for their intricate patterns and cozy warmth. They are perfect for keeping you warm during chilly winter months or layering over a shirt on a cool summer evening. Plus, they add a touch of sophistication and style to any outfit.
If you’re looking to create your own cable knit sweater, you’re in luck! There are plenty of free patterns available online that cater specifically to men. Whether you’re an experienced knitter or just starting out, there’s a pattern out there that will suit your skill level.
Men’s Cable Knit Sweater Pattern Free
If you’re looking for a stylish and cozy sweater that you can knit yourself, look no further than a men’s cable knit sweater pattern. Cable knitting is a technique that creates a textured pattern using crossing stitches, resulting in a visually interesting and warm garment. With a free pattern, you can save money and have the satisfaction of creating your own unique piece.
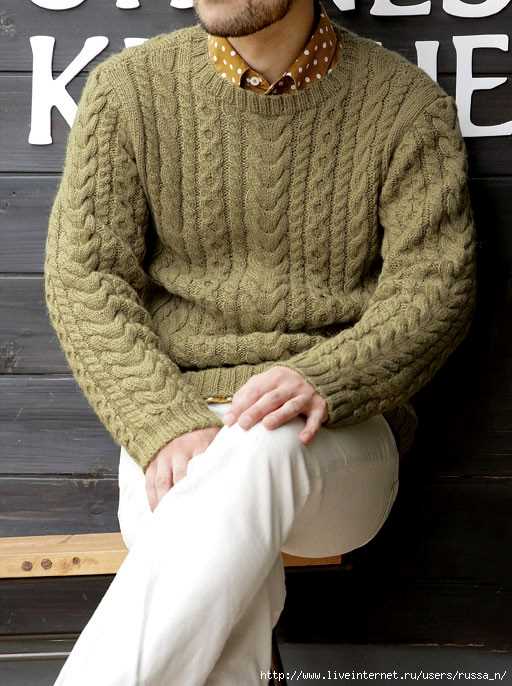
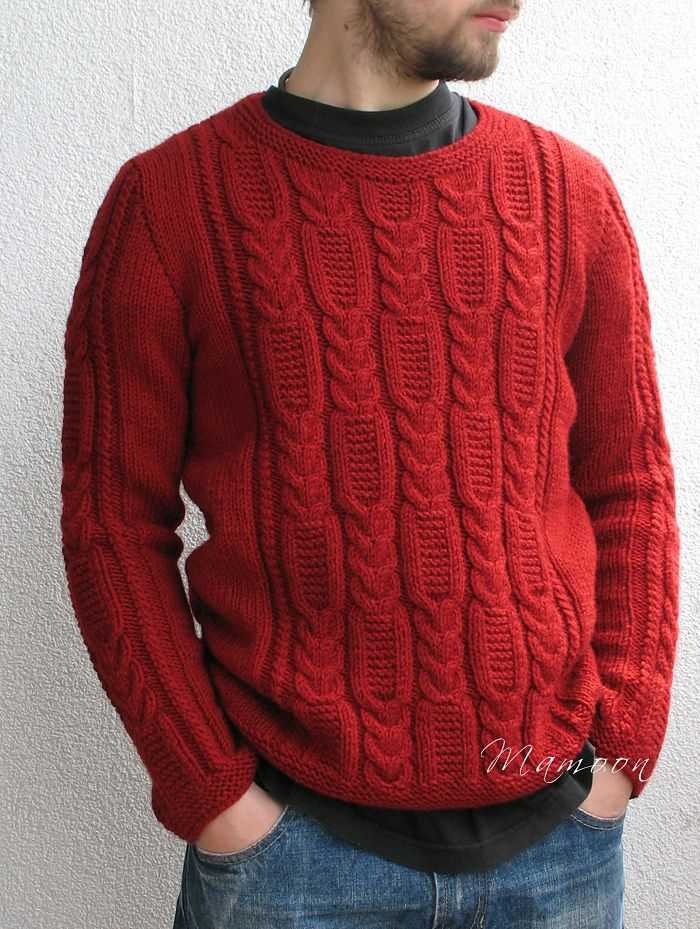
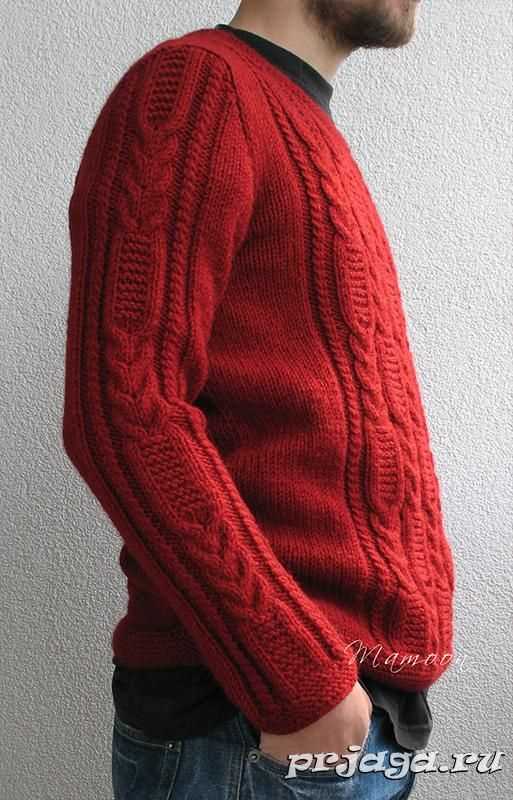
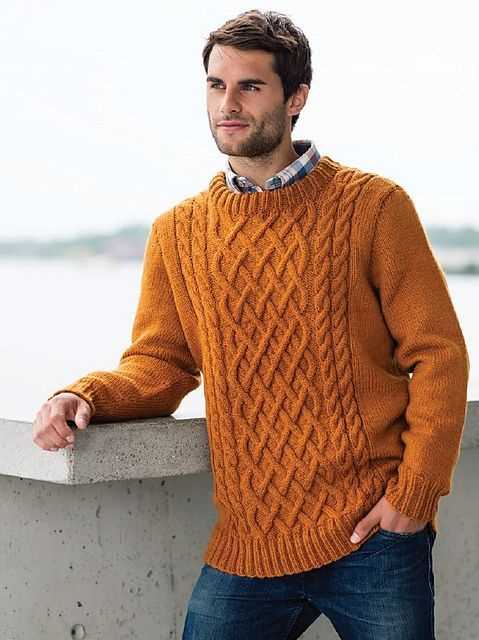
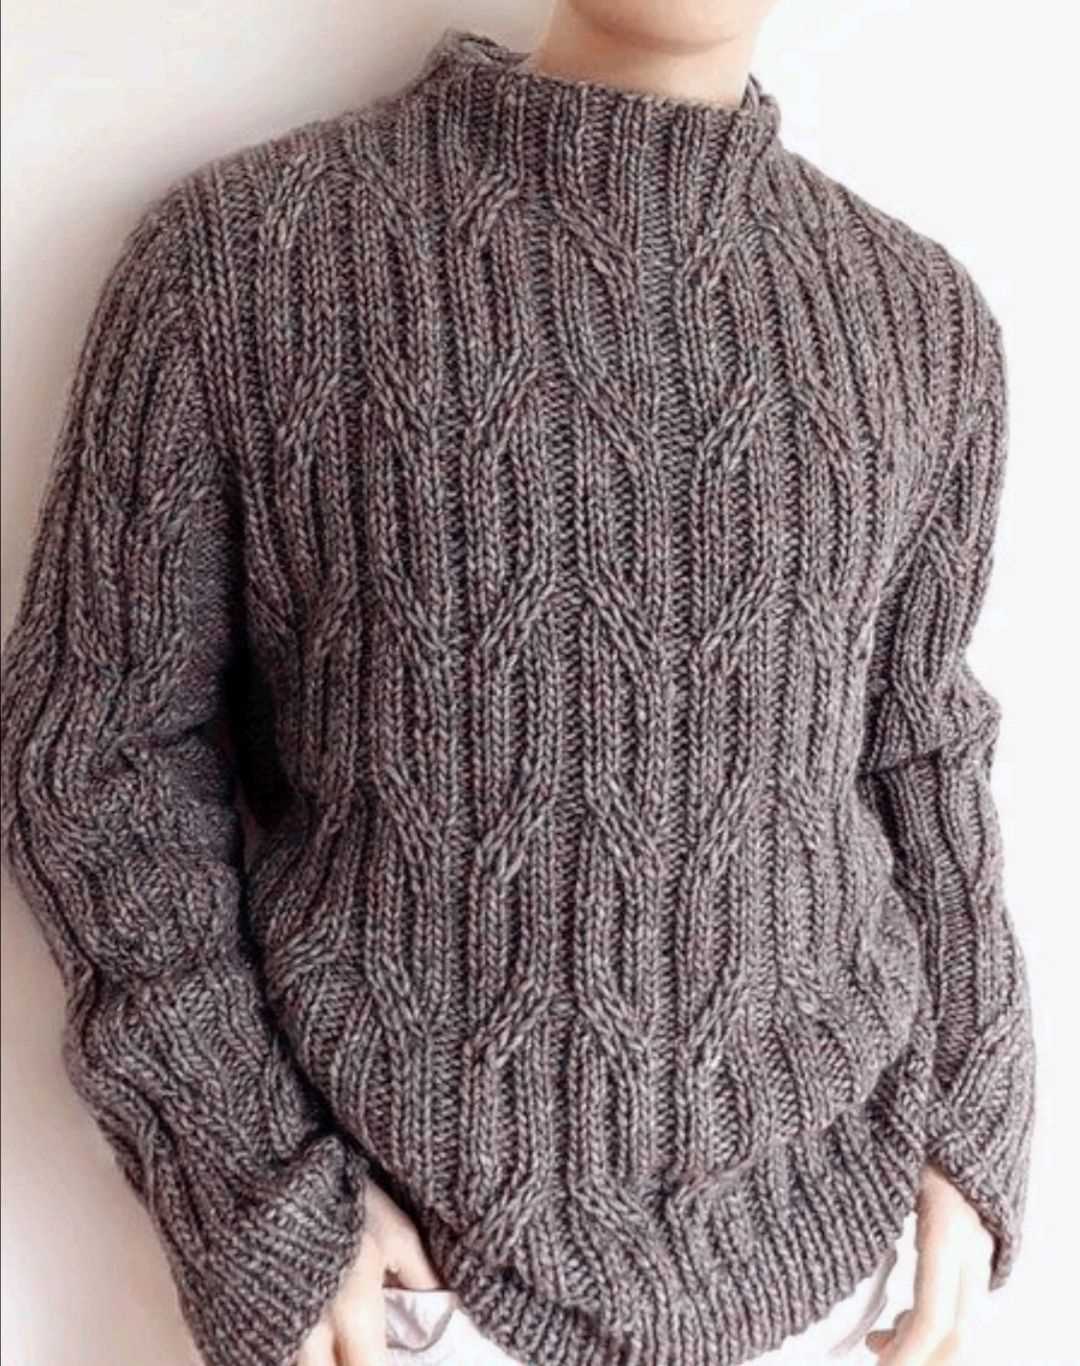
One popular men’s cable knit sweater pattern is the classic crewneck style. This sweater features a simple cable design on the front panel, with a plain back and sleeves. The pattern usually includes instructions for a range of sizes, so you can make a sweater that fits perfectly. For added style, you can customize the color of the yarn to match your personal taste.
To knit a men’s cable knit sweater, you’ll need some basic knitting skills and materials. Start by choosing a yarn that is suitable for the pattern and the desired warmth of the sweater. The pattern will specify the recommended yarn weight and quantity. You’ll also need a set of knitting needles in the appropriate size and any additional tools, such as a cable needle, that may be required for the pattern.
Materials:
- Yarn in the desired color and weight
- Knitting needles in the recommended size
- Cable needle (if required)
- Scissors
- Tapestry needle
Once you have gathered all your materials, you can start knitting your men’s cable knit sweater following the pattern instructions. The pattern will guide you through the process, specifying the different stitches and techniques required. Cable knitting can be a bit more challenging than basic knitting, so it’s a good idea to practice the cable stitch on a small swatch before starting the sweater.
As you work on your men’s cable knit sweater, you’ll see the intricate cable pattern come to life. This classic style is perfect for colder seasons and can be dressed up or down depending on the occasion. With a free pattern, you can create a timeless and personalized sweater that will keep you warm and stylish for years to come.
Understanding Cable Knitting
Knitting cables is a technique that creates beautiful and intricate patterns in your sweater. It involves crossing stitches over each other, creating a twisted effect that adds depth and dimension to your knitting project. Understanding cable knitting can help you create unique and eye-catching designs.
The basic concept of cable knitting is to work a set of stitches out of order, temporarily holding them on a cable needle or a spare piece of yarn while you work other stitches. Then, you knit or purl the held stitches in a different order, creating the cable twist. The pattern will specify how many stitches to hold, where to hold them, and the order in which to knit or purl them.
When working with a cable pattern, it is important to understand the symbols and abbreviations used. For example, a ‘C4F’ means to slip 2 stitches onto a cable needle and hold them in front of your work, knit the next 2 stitches from the left-hand needle, and then knit the 2 stitches from the cable needle. Similarly, a ‘C4B’ means to slip 2 stitches onto a cable needle and hold them in back of your work, knit the next 2 stitches from the left-hand needle, and then knit the 2 stitches from the cable needle.
To create the cable pattern, you will need to follow a chart or written instructions. The chart will show you the stitches and the order in which to work them. It typically consists of a grid with symbols representing different stitches. Each symbol corresponds to a specific cable crossing or twist. On the other hand, written instructions will tell you step by step how to work each stitch and cable cross.
Once you understand the basics of cable knitting, you can experiment with different cable patterns and create unique designs in your men’s cable knit sweater. Whether you choose a simple single cable or a complex multi-cable pattern, cable knitting adds texture and interest to your knitting projects.
Materials Needed for a Cable Knit Sweater

Knitting your own cable knit sweater is a rewarding project that allows you to create a personalized and stylish garment. To get started, you will need a variety of materials to complete the project. Here is a list of the essential materials you’ll need:
- Yarn: Choose a high-quality yarn suitable for a cable knit sweater. Look for a yarn that is soft, warm, and durable. You can select the color of yarn that matches your personal style and preference.
- Knitting Needles: You will need a set of knitting needles in the appropriate size for your chosen yarn. Cable knit sweaters typically require larger needles to achieve the desired gauge.
- Cable Needle: A cable needle is a special type of needle used to create the distinctive cable patterns in your sweater. It is essential for manipulating the stitches during the cable knitting process.
- Tape Measure: Accurate measurements are crucial for creating a well-fitted sweater. A tape measure will help you determine the correct size and length for your sweater.
- Stitch Markers: Stitch markers are small rings or clips that help you keep track of specific stitches or sections of your pattern. They are especially useful when working with complex cable patterns.
- Scissors: A pair of sharp scissors is necessary for cutting yarn and trimming any loose ends. Make sure they are handy and easy to reach while you work.
- Yarn Needle: A yarn needle, also known as a tapestry needle, is used for weaving in loose ends and sewing seams together. Choose a needle with a large eye that can accommodate the thickness of your yarn.
With these materials on hand, you will be well-prepared to begin your cable knit sweater project. Remember to read the pattern carefully and follow the instructions closely to achieve the desired result. Happy knitting!
Choosing the Right Yarn for Your Sweater
When it comes to knitting a cable knit sweater for men, choosing the right yarn is essential to ensure the final result is as cozy and durable as possible. There are several factors to consider when selecting yarn for your sweater project, including fiber content, weight, and color options.
Fiber Content: One of the most important aspects of choosing yarn for a sweater is the fiber content. Wool is a popular choice as it is warm, breathable, and can retain its shape well. For those who prefer a vegan option, acrylic yarn can be a great alternative. Cotton is also a good choice for a lighter sweater that can be worn in milder weather.
Weight: The weight of the yarn will determine the thickness and warmth of the finished sweater. Bulky weight yarns are ideal for chunky cable knits, while worsted weight yarns work well for medium-weight sweaters. Consider the climate and the intended use of the sweater when selecting the yarn weight.
Color Options: Choosing the right color for your sweater is a personal preference, but it’s important to consider how the color will look in the cable knit pattern. Traditional cable knits often look best in neutral or earthy tones, as these colors highlight the intricate pattern. However, if you want to make a bold statement, vibrant or contrasting colors can add a modern twist to your sweater.
Quality: Finally, it’s important to choose a high-quality yarn that will withstand wear and tear over time. Look for yarns that have good stitch definition and resistance to pilling. Reading reviews and getting recommendations from experienced knitters can help you identify yarns that are known for their quality.
Overall, selecting the right yarn for your cable knit sweater is crucial to achieve the desired look and feel. Consider the fiber content, weight, color options, and quality of the yarn to ensure your sweater is not only stylish but also comfortable and long-lasting.
The Right Needles for Cable Knitting
Cable knitting is a technique that involves creating intricate patterns and designs by crossing stitches over each other. To achieve these stunning cable patterns, it’s essential to have the right needles. Here, we’ll discuss the types of needles that are most suitable for cable knitting.
Circular Needles: Circular needles are a popular choice for cable knitting, as they allow you to comfortably knit larger projects. The flexible cable connecting the two needle tips allows you to hold a significant number of stitches, making it easier to create complex cable patterns without feeling cramped. Circular needles are particularly useful when knitting garments like sweaters or blankets.
Double-Pointed Needles: Double-pointed needles are another option for cable knitting, especially when working on smaller projects like hats or gloves. These needles have pointed tips on both ends, allowing you to knit in the round without a cable connecting them. This makes them ideal for creating cables on smaller items where using circular needles may be cumbersome.
Interchangeable Needles: Interchangeable needles are a versatile option for cable knitting as they come with interchangeable needle tips and cables of various lengths. This allows you to customize the needle length depending on your project’s size and stitch count. With interchangeable needles, you can easily switch from knitting cables on larger projects to working intricate cables on smaller items.
In conclusion,
Choosing the right needles for cable knitting can significantly impact the outcome of your project. Circular needles are excellent for larger projects, while double-pointed needles work well for smaller items. Interchangeable needles provide flexibility and versatility, making them a great investment for cable knitters. So, consider the type of project you’re working on and choose the appropriate needles to enhance your cable knitting experience.
Getting Started: Casting On
Before you can start knitting your men’s cable knit sweater, you will need to cast on your stitches. Casting on is the process of creating the initial row of loops on your knitting needle. There are various methods for casting on, but the long tail cast on is a commonly used technique for sweaters.
Long Tail Cast On
To begin the long tail cast on, you will need to measure out a tail of yarn that is approximately three times the width of your finished piece. This extra length allows for enough yarn to create the loops and maintain tension throughout your work.
Hold the end of the yarn in your dominant hand and create a slipknot by making a loop with the yarn, pulling the end through the loop, and tightening the knot. Slide this loop onto your knitting needle and hold it in your non-dominant hand.
With your dominant hand, insert the needle into the loop from left to right and then wrap the working yarn around your thumb and index finger. Take the yarn that is attached to the ball and wrap it around your index finger in the opposite direction.
Next, bring the needle under your thumb and index finger and pull it through the loop on your thumb. Release your thumb and tighten the stitch by pulling gently on the working yarn. Repeat this process for the desired number of stitches, making sure to maintain consistent tension.
Once you have cast on all the necessary stitches, you are ready to begin knitting the first row of your men’s cable knit sweater. Make sure to follow the pattern instructions carefully to create the proper cable pattern and achieve the desired fit.
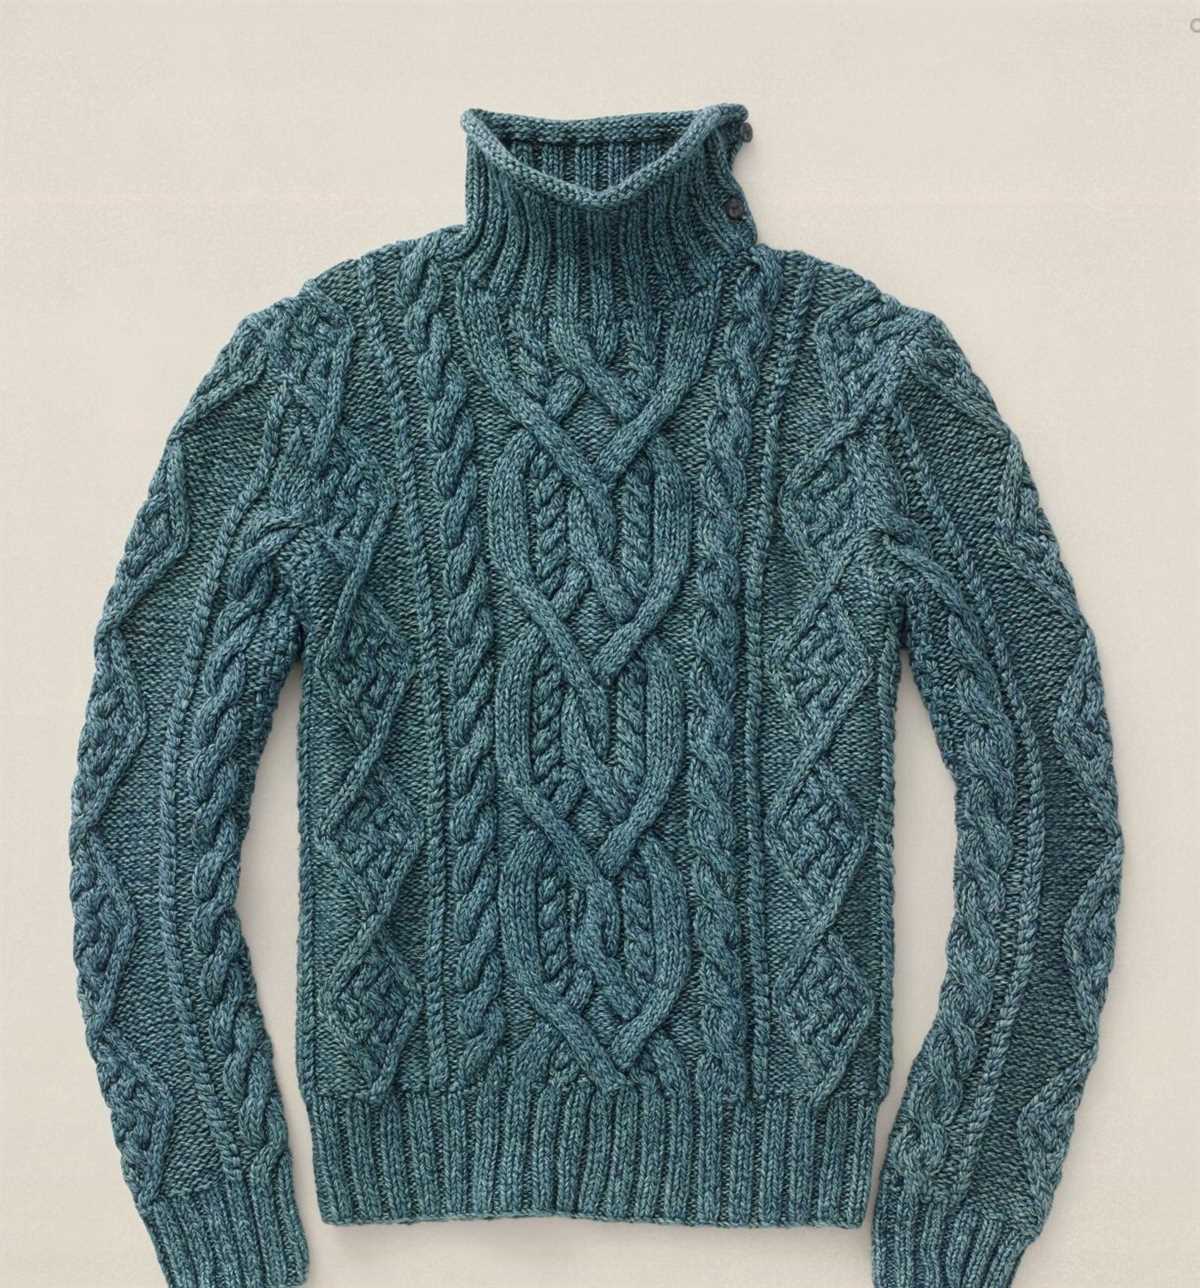
Creating the Cable Knit Pattern
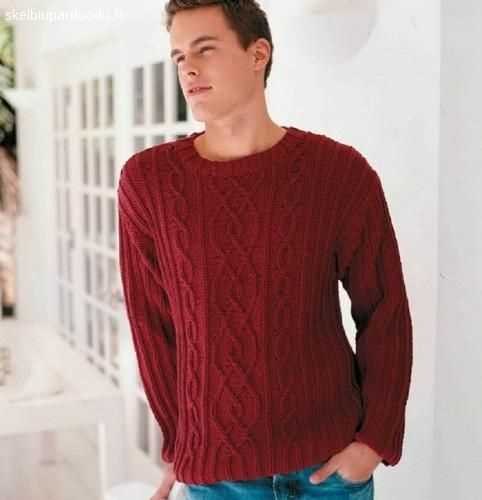
The cable knit pattern is a popular choice for men’s sweaters due to its classic and masculine look. This pattern is created by crossing stitches over each other to create a twisted design that resembles cables. Although it may look complicated, it is actually quite simple to knit once you understand the basic concept.
To create a cable knit pattern, you will need to work with a cable needle, which is a short needle with a pointed or rounded end. Start by casting on the required number of stitches for your sweater pattern. Then, follow the knitting instructions to complete the ribbed hem or other desired stitch pattern.
Once you reach the designated row for the cable pattern, you will begin crossing the stitches. The cable pattern will typically be written as a series of numbers and symbols, indicating how many stitches to cross and in which direction. For example, a common cable pattern may instruct you to “slip 3 stitches onto the cable needle and hold in front, knit the next 3 stitches, then knit the 3 stitches from the cable needle.”
Continue following the cable pattern instructions row by row until you have completed the desired length of the sweater. Remember to always count your stitches and keep track of the pattern to ensure accuracy. Once you have finished the cable knit pattern, you can continue knitting the remaining sections of the sweater, such as the sleeves and collar, using other stitch patterns or plain stockinette stitch.
The cable knit pattern adds texture and interest to a men’s sweater, making it a timeless and stylish choice. Whether you choose a simple 4-stitch cable or a more intricate design, the cable knit pattern will elevate your knitting skills and create a unique garment that is sure to receive compliments. So grab your needles, some cozy yarn, and start knitting your own cable knit men’s sweater today!
Adding Shaping to Your Sweater
When knitting a men’s cable knit sweater, it’s important to consider adding shaping to ensure a better fit. Shaping can be done by adding increases or decreases at specific points in the pattern, such as the waist or shoulders.
Using Increases: To add shaping to the waist of the sweater, you can use increases. These can be done by knitting into the front and back of a stitch, or by using the make-one increase method. By adding increases on both sides of the waist, you can create a more fitted look that flatters the body.
Using Decreases: Another way to add shaping to your sweater is by using decreases. Decreases can be done by knitting two stitches together or by using the slip-slip-knit method. By adding decreases at the shoulders, you can create a more tailored fit and prevent the sweater from looking boxy.
Planning Your Shaping: Before you start adding shaping to your sweater, it’s important to plan where you want the increases and decreases to be placed. You can use stitch markers to mark the specific points where you want to add shaping, such as the sides of the waist or the shoulders. This will help ensure that your shaping is symmetrical and evenly distributed across the sweater.
Testing Your Shaping: Once you’ve added the shaping to your sweater, it’s a good idea to try it on to check the fit. If the shaping isn’t quite right, you can easily undo the increases or decreases and make any necessary adjustments. It’s always better to take the time to test your shaping before continuing with the rest of the pattern.
By adding shaping to your men’s cable knit sweater, you can create a more tailored and flattering fit. Whether you choose to use increases or decreases, taking the time to plan and test your shaping will ensure that your finished sweater looks and feels great.
Joining the Sleeves and Body
Once you have completed knitting the sleeves and body of your cable knit sweater, it’s time to join them together. This is an important step in creating a cohesive and seamless garment. There are several methods you can use to join the sleeves and body, but one common technique is called mattress stitch.
To use mattress stitch, start by laying your sweater pieces flat with the wrong sides facing out. Position the sleeves and body so that the edges to be joined are aligned. Thread a tapestry needle with yarn that matches your sweater, and begin by inserting the needle under the first horizontal bar of the edge stitch on the body piece. Then, insert the needle under the corresponding horizontal bar on the sleeve piece, creating a loop of yarn. Repeat this process along the entire length of the seam, pulling the yarn snugly each time to ensure a tight and secure join.
You can also use a different method called backstitch to join the sleeves and body. With backstitch, you start by overlapping the edges of the sleeve and body pieces and pinning them together. Then, using a running stitch, sew along the overlapped edges, making sure to catch both layers of fabric. This will create a strong and durable seam that will hold up well over time.
Whether you choose to use mattress stitch or backstitch, it’s important to take your time and sew the seams carefully. This will ensure that your cable knit sweater looks professional and well-finished. Once the sleeves and body are joined, you can move on to completing the collar and any other finishing touches before enjoying your cozy and stylish new sweater.
Finishing Touches: Ribbing and Blocking
When it comes to knitting a men’s cable knit sweater, the finishing touches are what bring the garment to its full potential. Two important steps in the finishing process are adding ribbing and blocking.
Ribbing
Ribbing is a technique commonly used in knitting to create a stretchy and flexible edge on garments. It is often used for cuffs, collars, and hems. For a men’s cable knit sweater, adding ribbing to the cuffs and hem can give the sweater a polished and professional look.
To create ribbing, you will need to switch to a smaller needle size and knit a different stitch pattern. The most common ribbing pattern is the knit 2, purl 2 (K2, P2) rib. This pattern creates columns of knitted stitches alternating with columns of purled stitches, resulting in a stretchy and textured effect.
When adding ribbing to your men’s cable knit sweater, make sure to measure the desired length and carefully calculate the number of stitches needed. This will ensure that the ribbing fits snugly and is proportional to the rest of the sweater.
Blocking
Blocking is an essential step in finishing any knitted garment, including a men’s cable knit sweater. It involves reshaping and setting the stitches by wetting the garment and then laying it out to dry in the desired shape.
To block a men’s cable knit sweater, start by filling a basin or sink with lukewarm water and a gentle detergent. Place the sweater in the water and gently press it down to ensure it is fully submerged. Let it soak for about 15-30 minutes, then carefully remove the sweater and gently squeeze out excess water.
- Lay the sweater flat on a clean towel and gently stretch it to its desired shape, making sure to reshape any cables or patterns.
- Pin the edges of the sweater to the towel to keep it in place. Use rust-proof pins to prevent any potential staining.
- Allow the sweater to dry completely, which can take up to 24 hours depending on the thickness of the yarn and the humidity of the environment.
Blocking will help even out the stitches, relax any tension, and give the sweater a finished and professional look. It is also an important step in ensuring that the cables and patterns of the men’s cable knit sweater stand out and maintain their shape.
Tips and Tricks for a Perfect Cable Knit Sweater
Knitting a cable knit sweater can be a challenging project, but with the right techniques and tips, you can create a beautiful and well-fitted garment. Here are some tips to help you achieve the perfect cable knit sweater:
1. Choose the Right Yarn
Choosing the right yarn is crucial for the success of your cable knit sweater. Look for a yarn that has good stitch definition and will show off the cable patterns. Avoid yarns that are too slippery, as they can make it difficult to keep the tension while knitting the cables.
2. Swatch and Measure
Always make a gauge swatch before starting your cable knit sweater. This will help you determine the correct needle size and stitch count to achieve the desired measurements. Take accurate measurements of your body and compare them to the sizing chart provided in the pattern. Adjust your needle size or stitch count as necessary to achieve a proper fit.
3. Use Cable Needles
Invest in a set of cable needles to make the cable knitting process easier. Cable needles are specifically designed to hold stitches in the front or back of your work while you cross the cables. They come in different shapes and sizes, so choose the ones that feel comfortable and secure in your hands.
4. Keep an Eye on Tension
Maintaining consistent tension is crucial in cable knitting. If your tension is too loose, the cables will appear saggy, and if it is too tight, the fabric will pucker and distort the cable patterns. Pay close attention to your tension and adjust it as needed throughout your knitting.
5. Block your Finished Sweater

Blocking is an essential step to achieve a professional finish for your cable knit sweater. After finishing your knitting, wet block or steam block the sweater to even out the stitches and open up the cable patterns. This will give your sweater a polished and well-finished look.
By following these tips and tricks, you can successfully knit a perfect cable knit sweater that fits well and showcases your knitting skills. Remember to take your time, practice the cable techniques, and enjoy the process of creating a handmade masterpiece.