
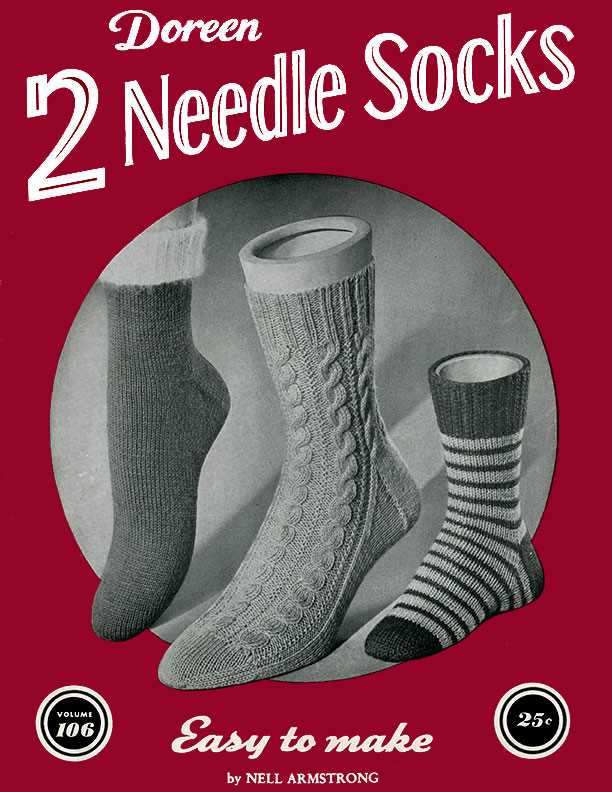
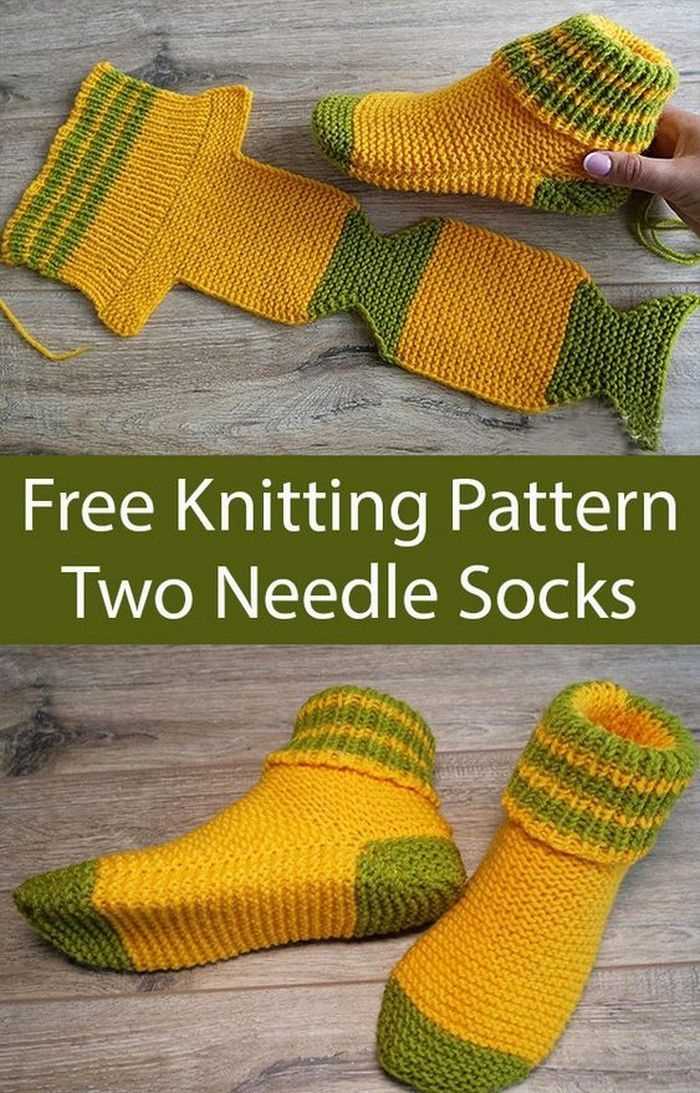
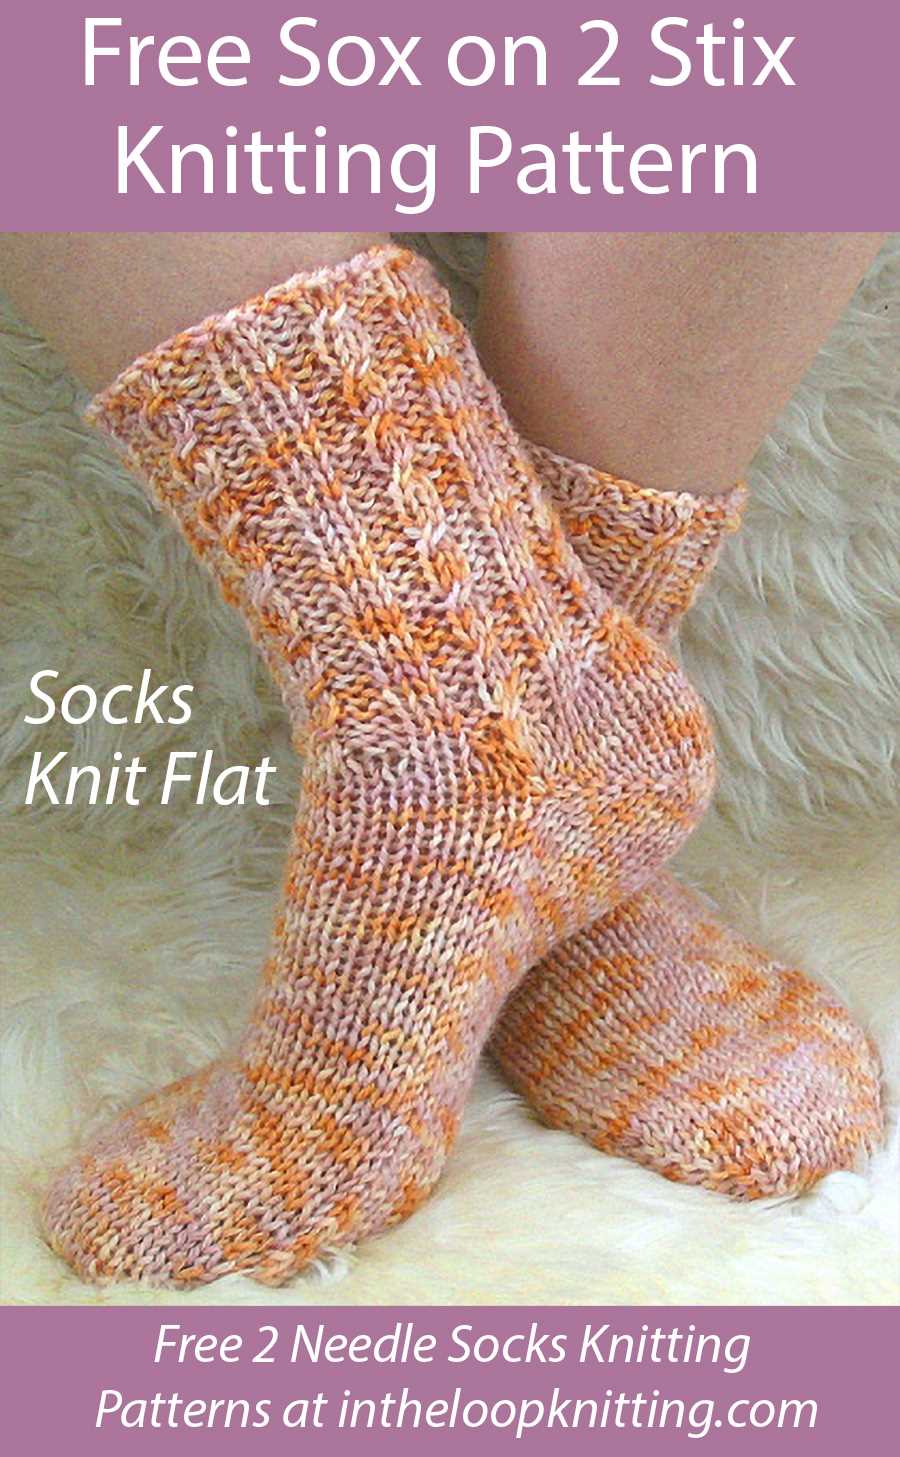
If you’re a fan of knitting and are looking for a new project to try, knitting socks on two needles is a great option. Not only is it a practical way to keep your feet warm, but it’s also a fun and rewarding knitting challenge. Plus, with the wide variety of free knitting patterns available online, you’ll never run out of options for creating unique and stylish socks.
Knitting socks on two needles, also known as the flat knitting method, is a popular technique among knitters of all skill levels. Unlike knitting socks in the round on double-pointed needles or using circular needles, this method allows you to create socks using only two straight needles. This makes it an ideal choice for beginners or those who prefer a more traditional approach to knitting.
One of the great things about knitting socks on two needles is that you can easily customize the pattern to fit your foot perfectly. Whether you prefer ankle socks, knee-high socks, or something in between, you can adjust the length and width of the sock to suit your preferences. With a little practice and experimentation, you’ll be able to create socks that are not only comfortable but also stylish.
In this article, we’ll explore some of the best free knitting patterns available for socks on two needles. From basic patterns for beginners to more complex patterns for experienced knitters, you’re sure to find something that catches your eye. So grab your yarn and needles, and get ready to knit yourself a cozy pair of socks!
Free Knitting Patterns Socks on Two Needles
When it comes to knitting socks, there are several techniques to choose from. One popular method is to use two needles, also known as the straight needle method. This technique is perfect for knitters who prefer working with straight needles or who may not yet feel comfortable using double-pointed needles or circular needles.
There are many free knitting patterns available for socks on two needles. These patterns range in difficulty and style, so whether you’re a beginner or an experienced knitter, you can find a pattern that suits your needs. Some patterns are simple and straightforward, while others may incorporate more intricate stitch patterns or design elements.
Here are a few examples of free knitting patterns for socks on two needles:
- Basic Ribbed Socks: This pattern is perfect for beginners and features a simple ribbed design. It’s a great project for practicing basic sock construction and is easily customizable.
- Lace Panel Socks: If you’re looking for a more advanced pattern, lace panel socks are a great choice. These socks incorporate a delicate lace pattern that adds a touch of elegance to your knitting.
- Colorwork Socks: For knitters who enjoy working with different colors, colorwork socks are a fun project to try. You can experiment with different color combinations and create unique and eye-catching designs.
- Cabled Socks: Cables add texture and interest to any knitted project, and socks are no exception. Cabled socks are a great way to challenge your knitting skills and create cozy and warm socks.
Whatever your knitting skill level or personal preference, there’s a free knitting pattern for socks on two needles that’s perfect for you. So grab your needles and yarn, and start knitting your own cozy and stylish pair of socks today!
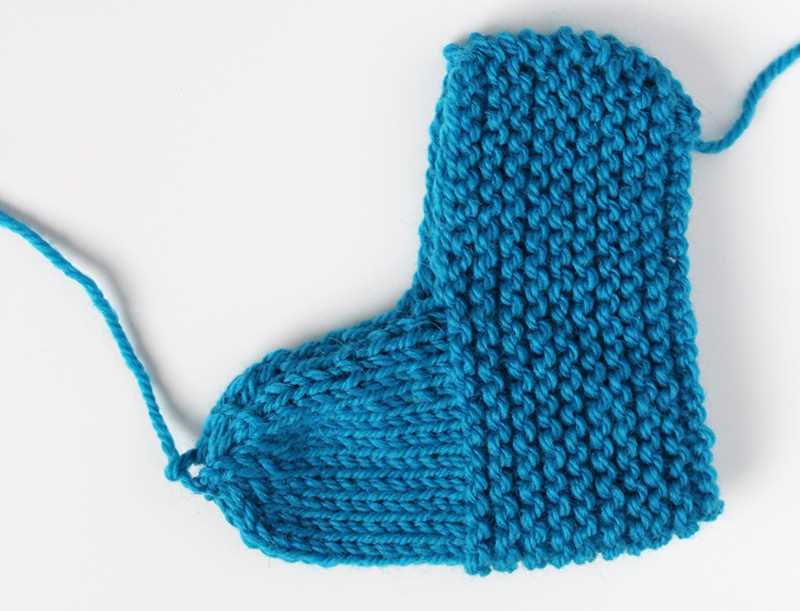
Basic Socks Pattern
Knitting is a versatile and enjoyable craft that allows you to create beautiful and practical items. One popular project for knitters is socks, and with this basic socks pattern, you can create your own cozy and comfortable footwear. This pattern is designed for knitting socks on two needles, making it accessible for beginners and experienced knitters alike.
Materials:
- Yarn in the color and weight of your choice
- Size 8 (US) knitting needles
- Tapestry needle
- Scissors
Instructions:
- Cast on 60 stitches using the long-tail cast-on method.
- Divide the stitches evenly onto two needles, 30 stitches on each needle.
- Join the round by knitting the first stitch with the working yarn from the left needle, being careful not to twist the stitches.
- Continue knitting in the round using the stockinette stitch (knit one round, purl one round) until the sock measures approximately 2 inches from the cast-on edge.
- Begin the heel flap by knitting across the first 15 stitches on the first needle.
- Turn the work and purl back across the 30 stitches on the wrong side.
- Repeat steps 5 and 6 for a total of 30 rows.
- Shape the heel by turning the work and knitting 17 stitches, then knitting 2 stitches together. Knit 1 stitch, turn the work, purl 3 stitches, purl 2 stitches together, purl 1 stitch, turn the work, knit 4 stitches, and so on, following this pattern until all stitches have been worked.
- Knit across the heel stitches and continue knitting in the round until the sock measures approximately 7 inches from the cast-on edge.
- Shape the toe by decreasing 4 stitches every other round until 16 stitches remain on each needle.
- Cut the yarn, leaving a long tail. Thread the tail through a tapestry needle, slip the stitches onto the needle, and pull tight to close the toe. Weave in any loose ends.
- Repeat steps 1-11 for the second sock.
With this basic socks pattern, you can have fun experimenting with different yarns and colors to create a variety of socks for yourself or as gifts for others. Happy knitting!
Ribbed Socks Pattern
Ribbed socks are a classic knitting project that is both practical and stylish. The ribbed texture adds a touch of sophistication to the socks, making them perfect for wearing with both casual and formal outfits. Plus, knitting socks on two needles is a great way to challenge your knitting skills and create something functional.
Materials:
- 2.5mm knitting needles
- Fingering weight yarn in the desired color
- Tapestry needle
- Scissors
Instructions:
- Cast on 60 stitches using the long-tail cast on method.
- Work in a K2, P2 rib pattern for the entire sock. This creates the classic ribbed texture.
- Continue working in the K2, P2 rib pattern for the desired length of the sock, measuring from the back of the heel.
- Shape the toe by decreasing as follows: K2, P2, K2, P2 together, repeat to end of round.
- Continue decreasing in this manner every other round until you have a total of 20 stitches remaining.
- Thread the tapestry needle with the yarn tail and weave it through the remaining stitches, pulling tight to close the toe.
- Weave in any remaining yarn ends and trim excess.
The ribbed socks pattern is a versatile design that can be customized to fit any size foot. Simply adjust the number of cast on stitches and continue with the K2, P2 rib pattern. Whether you’re knitting socks for yourself or as a gift, this pattern is sure to be a hit.
Cable Socks Pattern
Socks are a great knitting project, and cable socks add an extra level of interest and complexity to your knitting. This cable socks pattern is designed to be knit on two needles, making it accessible to knitters of all skill levels.
Materials:
- 2 skeins of fingering weight yarn
- Size 2 knitting needles
- Cable needle
- Tapestry needle
Instructions:
- Cast on 64 stitches.
- Knit 2, purl 2 ribbing for 1 inch.
- Begin the cable pattern:
- Row 1: K4, p2, k12, p2, k4, p2, k12, p2.
- Row 2: P4, k2, p12, k2, p4, k2, p12, k2.
- Row 3: K4, p2, slip 6 stitches onto cable needle and hold in front, k6, k6 from cable needle, p2, k4, p2, slip 6 stitches onto cable needle and hold in back, k6, k6 from cable needle.
- Rows 4-6: Repeat Rows 2 and 3.
- Continue repeating Rows 2 and 3 until the sock measures 6 inches from the cast on edge.
- Begin the heel flap:
- Row 1: Slip 1, knit to the end of the row.
- Row 2: Slip 1, purl to the end of the row.
- Repeat Rows 1 and 2 for a total of 32 rows.
- Turn the heel:
- Row 1: Slip 1, knit 18, ssk, k1, turn.
- Row 2: Slip 1, purl 5, p2tog, p1, turn.
- Row 3: Slip 1, knit 6, ssk, k1, turn.
- Row 4: Slip 1, purl 7, p2tog, p1, turn.
- Continue in this manner, knitting or purling one more stitch before the decrease on each row, until all stitches have been worked. You will end with a purl row.
- Continue on the instep:
- Knit across the heel stitches, pick up and knit 16 stitches along the side of the heel flap, knit across the 32 instep stitches, pick up and knit 16 stitches along the other side of the heel flap. You should now have 80 stitches on your needles.
- Begin the cable pattern again, repeating Rows 2 and 3 until the sock measures 8 inches from the back of the heel.
- Begin the toe:
- Decrease Row 1: K1, ssk, knit to the last 3 stitches, k2tog, k1.
- Decrease Row 2: Purl.
- Repeat Decrease Rows 1 and 2 until you have 32 stitches remaining.
- Continue decreasing by knitting 2 together on every knit row and purling 2 together on every purl row until you have 8 stitches remaining.
- Break the yarn and thread through the remaining stitches. Weave in ends.
These cable socks are sure to impress with their intricate design and cozy warmth. Whether you’re a beginner looking to practice your cable knitting skills or an experienced knitter looking for a new project, these socks are a great choice. Happy knitting!
Lace Socks Pattern
If you’re looking to add some elegance to your sock collection, then lace socks are the way to go. These delicate and intricate patterns are perfect for special occasions or for adding a touch of sophistication to your everyday outfits. Luckily, there are many free knitting patterns available for lace socks that can be worked on two needles, making them accessible for all skill levels.
One popular lace socks pattern is the “Feather and Fan Lace Socks”. This pattern features a beautiful lace design that resembles feathers, creating a unique and eye-catching look. The pattern is worked over a multiple of 16 stitches and includes instructions for both a super fine yarn and a fine yarn option, allowing you to customize the socks to your desired thickness. The Feather and Fan Lace Socks pattern is perfect for those who are looking to challenge their knitting skills and create a stunning pair of socks.
Another option for lace socks is the “Diamond Lace Socks” pattern. This pattern showcases a beautiful diamond-shaped lace motif that adds a touch of elegance to the socks. The pattern is worked over a multiple of 12 stitches and includes instructions for both a fingering weight yarn and a sport weight yarn, giving you flexibility in choosing the right yarn for your project. The Diamond Lace Socks pattern is ideal for those who are new to lace knitting and want to try their hand at creating a delicate and intricate design.
Key features of a lace socks pattern:
- Delicate and intricate lace design
- Instructions for working on two needles
- Customizable for different yarn weights
- Challenges knitting skills
- Elegant and sophisticated look
Fair Isle Socks Pattern
If you enjoy knitting socks, you’ll love trying out the Fair Isle socks pattern. This traditional knitting technique features intricate colorwork that adds beautiful detail to your socks. The pattern typically uses two different colors of yarn and incorporates repeating geometric or nature-inspired motifs.
To knit Fair Isle socks, you’ll need to be familiar with knitting in the round on double-pointed needles. The pattern begins at the cuff and continues down to the toe, giving you a cozy and stylish finished product. The Fair Isle technique requires you to carry both colors of yarn across each row, creating a float on the back of the work. This technique adds warmth and durability to the socks as well.
Materials:
- 2 colors of sock weight yarn
- Size US 2 (2.75 mm) double-pointed needles
- Tapestry needle
Instructions:
- Using color A, cast on 64 stitches and divide evenly onto 4 double-pointed needles.
- Join in the round and work 2×2 ribbing (knit 2, purl 2) for 1 inch.
- Switch to color B and begin Fair Isle pattern. Work the charted pattern or create your own design.
- Continue knitting in the round, following the Fair Isle pattern, until the sock measures desired length.
- Shape the toe by decreasing stitches evenly. Divide the stitches onto 3 needles and work decreases until you have 16 stitches remaining.
- Use the Kitchener stitch to graft the toe closed.
- Weave in any loose ends and your Fair Isle socks are ready to wear!
The Fair Isle socks pattern allows for endless creativity and customization. You can experiment with different color combinations and motifs to make each pair of socks unique. Whether you’re a seasoned knitter or just starting out, knitting Fair Isle socks is a rewarding project that produces stunning results.
Colorwork Socks Pattern
Socks are a popular knitting project, and adding colorwork can make them even more fun and stylish. This colorwork socks pattern is designed to be knit on two needles, making it accessible to knitters of all skill levels. The pattern includes instructions for a basic colorwork design, as well as suggestions for customizing the pattern to create your own unique socks.
Materials:
- 2 skeins of fingering weight yarn in contrasting colors
- Set of size US 2 knitting needles
- Tapestry needle
- Stitch markers
- Scissors
Instructions:
- Cast on 64 stitches using the first color. Divide the stitches evenly between two needles.
- Join in the round, being careful not to twist the stitches.
- Knit 2, purl 2 ribbing for 1 inch.
- Begin the colorwork pattern, following the chart or written instructions provided. Use the second color for the contrasting design.
- Continue knitting in the round, following the colorwork pattern, until the sock measures the desired length.
- Shape the toe by decreasing stitches evenly across each needle.
- When only a few stitches remain, cut the yarn and thread it through the remaining stitches, tightening to close the toe.
- Weave in any loose ends and block the socks to shape.
Note: Feel free to experiment with different color combinations and designs to make these socks your own. You can also add additional stitches or repeat the colorwork pattern more times to adjust the size of the socks.
Socks with Eyelet Pattern
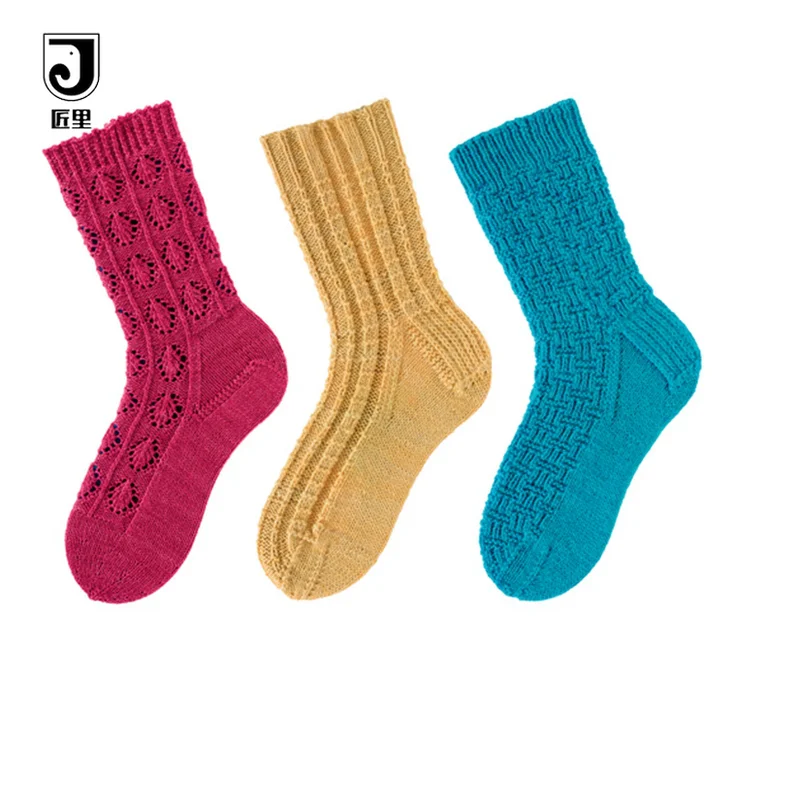
Knit socks are not only cozy and warm, but they can also be a stylish fashion accessory. If you’re looking for a knitting project that allows you to showcase your skills and create a unique pair of socks, consider trying socks with an eyelet pattern.
An eyelet pattern is a design that incorporates small, decorative holes into the fabric. These holes create an airy and delicate texture, making them perfect for lightweight socks that can be worn during warmer months or as dress socks. The eyelet holes also allow the socks to stretch and breathe, ensuring a comfortable fit.
To make socks with an eyelet pattern, you’ll need a basic knowledge of knitting techniques such as knitting in the round, knit and purl stitches, and yarn overs. The eyelet pattern can be worked into any part of the sock, including the cuff, leg, heel, or toe. You can choose to create a subtle eyelet pattern by incorporating a few eyelet rounds or go for a more intricate design with eyelet panels or motifs.
There are many free knitting patterns available online that provide instructions and charts for socks with an eyelet pattern. These patterns often include details such as the recommended yarn, needle size, and gauge. You can customize the pattern by choosing your favorite sock yarn and adjusting the needle size to achieve the desired tension.
Knitting socks with an eyelet pattern can be a rewarding project that allows you to express your creativity and create a unique pair of socks. Whether you’re a beginner knitter or an experienced one, give socks with an eyelet pattern a try and enjoy the process of creating a beautiful and functional accessory.
Toe-Up Socks Pattern
If you’re looking for a versatile and customizable pattern for knitting socks on two needles, the toe-up socks pattern is a great choice. This pattern allows you to start knitting from the toe and work your way up to the cuff, giving you the freedom to adjust the length and fit of the socks to your liking.
Materials: To knit toe-up socks, you will need a set of double-pointed or circular knitting needles, sock yarn in your choice of color, a tape measure, and a yarn needle for finishing.
Toe: To start the toe of the sock, you will cast on stitches, typically using a provisional cast on method. This allows you to easily pick up the stitches later to continue knitting the foot. Once the toe is complete, you will begin working in the round and increase stitches evenly across the row until you reach the desired width for your foot.
Foot: After completing the toe, you will continue knitting in the round, working straight until you reach the desired length for the foot. This is where you can customize the pattern by adding different stitch patterns or adjusting the width of the sock if needed.
Heel: Once the foot is complete, you will start working on the heel. There are various techniques you can use for the heel, including short rows or a flap and gusset construction. Choose the method that you are most comfortable with or experiment with different techniques to find your preferred style.
Cuff: After finishing the heel, you will continue knitting in the round to create the cuff of the sock. The length of the cuff can be adjusted to your preference, whether you prefer a shorter ankle sock or a longer knee-high style. Feel free to add ribbing or any other decorative elements to the cuff as well.
When you have completed the cuff, you can bind off the stitches and weave in any loose ends. Try on your finished socks to ensure the fit is comfortable and make any adjustments if necessary. With the toe-up socks pattern, you have the freedom to create a pair of socks that fit your feet perfectly and showcase your knitting skills.
Cuffed Socks Pattern
If you’re looking for a fun and easy knitting project, try making a pair of cuffed socks using two needles. This pattern is perfect for beginners or anyone who prefers to knit socks with straight needles instead of double-pointed needles. The cuffed design adds a cute and cozy touch to the socks, making them a stylish accessory for colder days.
To start this project, you’ll need a set of size 8 knitting needles and a skein of worsted weight yarn. You can choose any color or pattern you like to personalize your socks. The pattern is worked from the top down, so you’ll begin by knitting the cuff.
Instructions:
- Cast on 40 stitches using the long tail cast on method.
- Knit 2, purl 2 ribbing for 2 inches to create the cuff.
- Continue knitting in stockinette stitch (knit one row, purl one row) until the sock measures 5 inches from the cast on edge.
- Decrease for the heel by knitting 8 stitches, knitting two stitches together, knitting 16 stitches, knitting two stitches together, and then knitting the remaining 8 stitches. This will leave you with 38 stitches.
- Turn the work and purl the next row.
- Repeat steps 4 and 5 until you have 18 stitches remaining.
- Next, knit across the 18 stitches and place the remaining 20 stitches on a stitch holder or spare needle. These will be worked later to create the toe.
- Knit in stockinette stitch for 2 inches, then decrease for the toe by knitting 6 stitches, knitting two stitches together, knitting 6 stitches, knitting two stitches together, and knitting the remaining 4 stitches.
- Repeat step 8 until you have 8 stitches remaining.
- Bind off the stitches and weave in any loose ends.
Once you’ve finished one sock, repeat the pattern to make the second one. Once both socks are complete, you can wear them with pride or gift them to a loved one. These cuffed socks are not only a cozy accessory but also a great way to showcase your knitting skills!
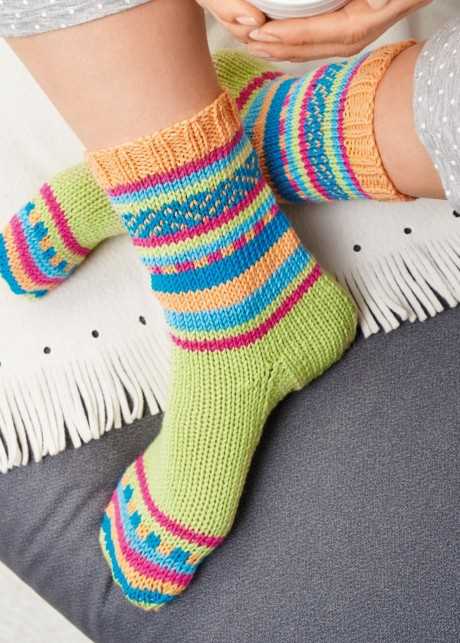
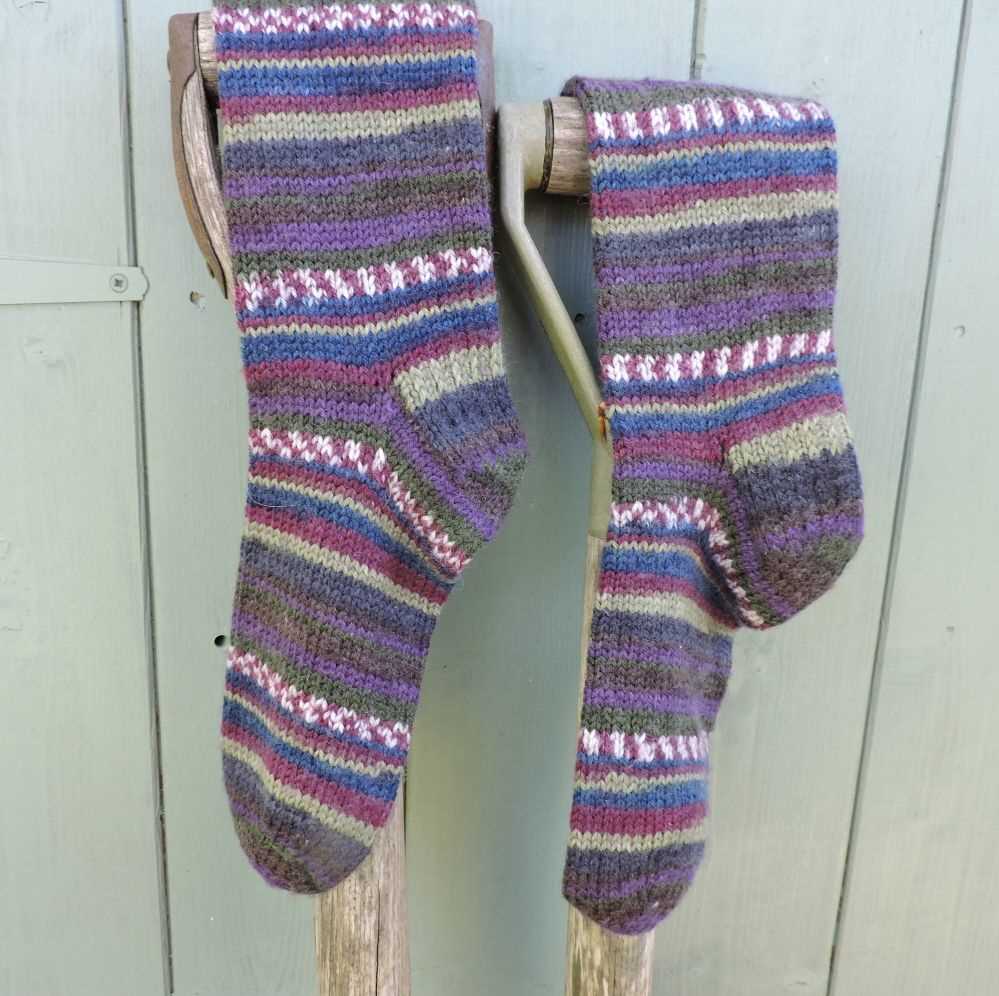
Socks with Stripes Pattern
Knitting socks with stripes can add a fun and playful element to your knitting project. Whether you’re looking to use up leftover yarn or create a bold and colorful sock design, stripes can offer endless possibilities. With this free knitting pattern, you can create socks with stripes using only two needles.
To start, gather your materials. You will need a pair of knitting needles, a set of double-pointed needles (optional), and yarn in your desired colors. It’s always best to choose yarn that is suitable for socks, such as wool or a wool-blend, for durability and comfort.
Once you have your materials ready, cast on the required number of stitches. The number of stitches will depend on the size of the sock you’re making. You can reference a sizing chart to determine the appropriate number of stitches for your desired size. Begin knitting the cuff of the sock in a desired stripe pattern, alternating between the different colors of yarn.
- Tip: To create neat and even stripes, make sure to carry the non-working yarn along the edge of your work, twisting it with the main color yarn at the beginning of each color change.
Continue knitting the leg of the sock in the stripe pattern until it reaches the desired length. Once the leg is complete, you can start working on the heel flap and turn, following your preferred method. Remember to maintain the stripe pattern throughout the sock.
After completing the heel, continue knitting the foot of the sock in the stripe pattern until it reaches the desired length. Finally, finish off the toe using a decrease method of your choice. Weave in any loose ends, and voila! You have completed a pair of striped socks using only two needles.
Experiment with different color combinations and stripe patterns to create unique and personalized socks. Whether you prefer thin, subtle stripes or bold, contrasting ones, this pattern allows for endless creativity. Enjoy the process of knitting socks with stripes and showing off your stylish and handmade creations.
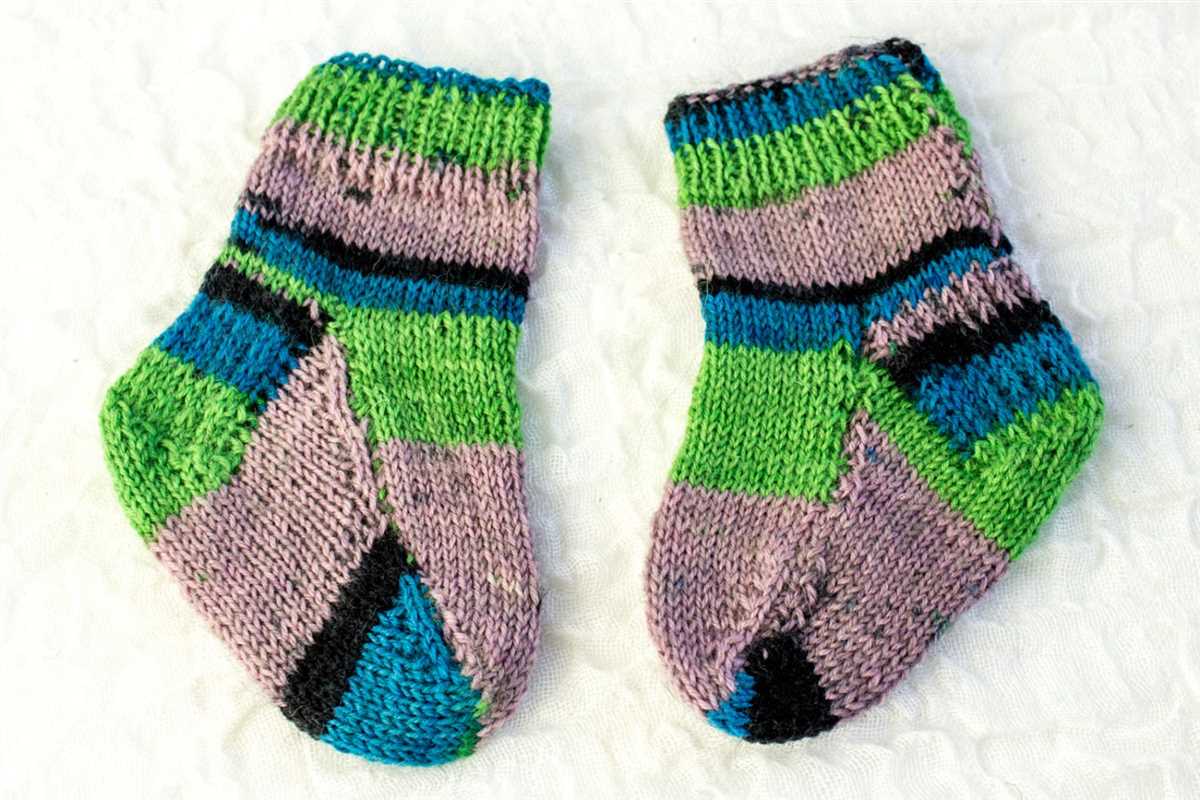
Short Socks Pattern
Short socks are a versatile and practical accessory that can be worn year-round. They are perfect for warmer weather or for those who prefer a shorter sock length. With this free knitting pattern, you can create your own short socks using just two needles.
This pattern is suitable for knitters of all skill levels and can be easily customized to fit any foot size. The simple design features a ribbed cuff, a textured stitch pattern on the leg, and a basic heel and toe construction.
Materials
- Yarn: Choose a light or medium-weight yarn in your preferred color.
- Needles: A pair of straight or circular knitting needles in the appropriate size for your yarn.
- Scissors
- Tapestry needle
Instructions
- Cast on the desired number of stitches, keeping in mind that the sock should fit snugly but comfortably.
- Work a few rows of ribbing (k1, p1 or k2, p2) to create a stretchy cuff.
- Switch to a textured stitch pattern of your choice for the leg. This could be a simple knit and purl pattern or a more complex stitch pattern.
- Continue knitting in the leg pattern until the sock reaches the desired length.
- Work a basic heel flap and turn, following a traditional heel construction method.
- Shape the toe using decreases, until you have a few stitches left. Graft the toe closed using the Kitchener stitch.
- Weave in any loose ends and trim excess yarn.
These short socks are a quick and satisfying project that can be completed in no time. They make great gifts or a treat for yourself. The possibilities for customization are endless, so feel free to get creative with different stitch patterns, color combinations, or yarn choices. Happy knitting!
Q&A:
Can I knit socks using two needles?
Yes, you can definitely knit socks using two needles. It is a traditional method of knitting socks and is also known as the “flat” or “back-and-forth” method. This method involves knitting the sock in separate sections and then sewing them together at the end.
Are there any free knitting patterns available for socks on two needles?
Yes, there are many free knitting patterns available for socks on two needles. You can find these patterns on various websites, knitting forums, and craft blogs. Some popular websites for free knitting patterns include Ravelry, Knitting Pattern Central, and LoveKnitting. These patterns come in different styles, sizes, and difficulty levels, so you can choose the one that suits your preferences.
What materials do I need to knit socks on two needles?
To knit socks on two needles, you will need yarn, knitting needles, a tapestry needle for sewing, and scissors. For the yarn, it is best to choose a soft and durable sock yarn that is specifically designed for socks. As for the knitting needles, you can use either straight or circular needles, depending on your preference. Make sure to choose a needle size that matches the gauge mentioned in the pattern you are using.
Can beginners knit socks on two needles?
Yes, beginners can definitely knit socks on two needles. While it may require some practice and patience, knitting socks on two needles is a great way to learn the basics of sock knitting. There are many beginner-friendly patterns available that provide step-by-step instructions and detailed explanations. Additionally, there are numerous online tutorials and videos that can help beginners understand the techniques involved in knitting socks on two needles.