
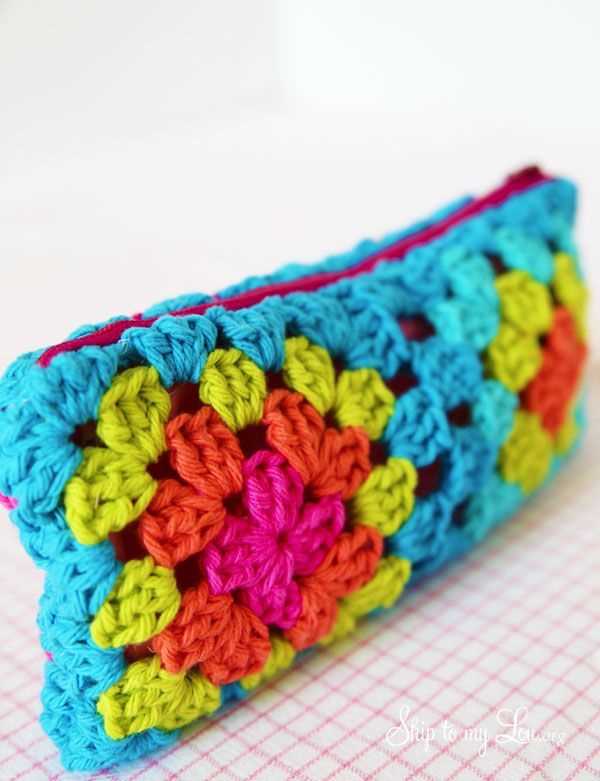
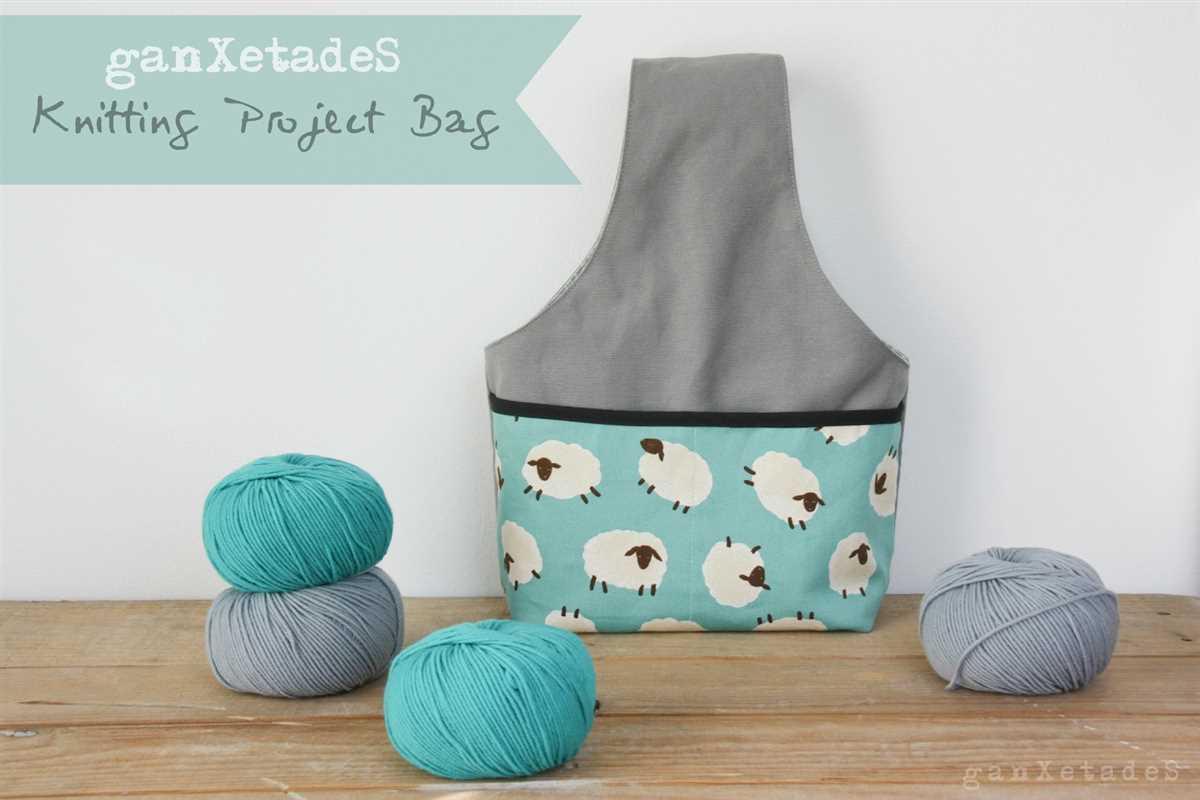
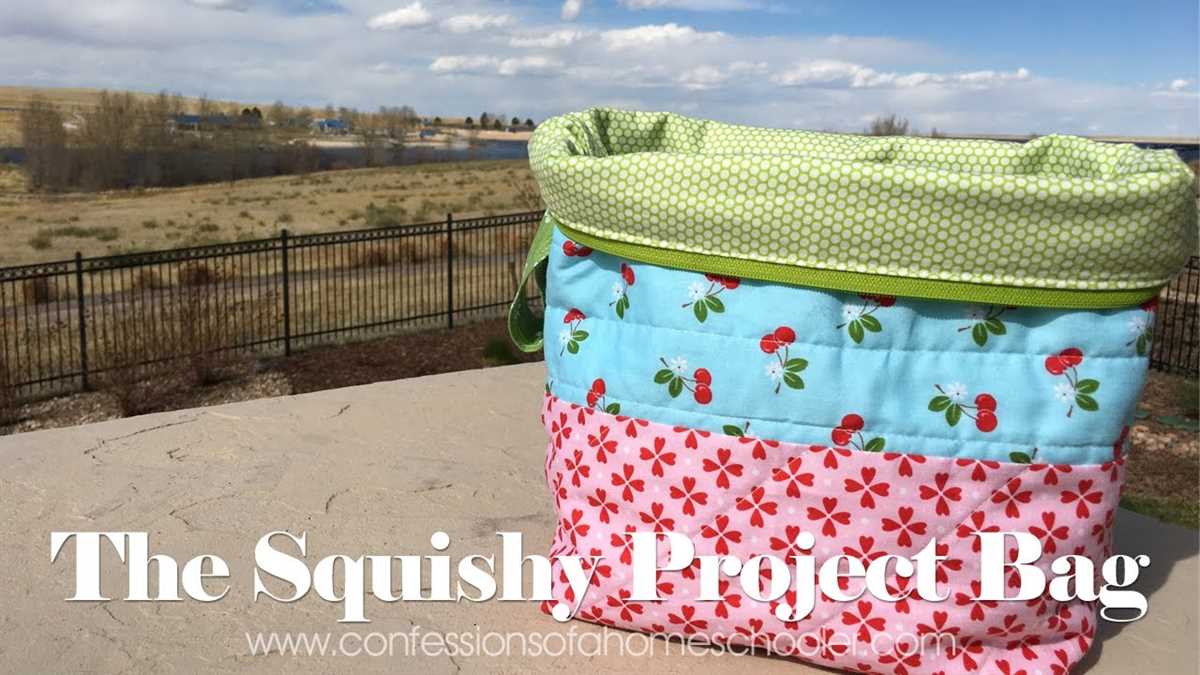
If you are tired of your knitting projects getting tangled and messy, it’s time to make yourself a zippered knitting project bag. This handy bag will keep all your knitting supplies organized and easily accessible. Plus, the zippered closure ensures that nothing falls out or gets lost. Whether you are a beginner or an experienced knitter, this bag is a must-have.
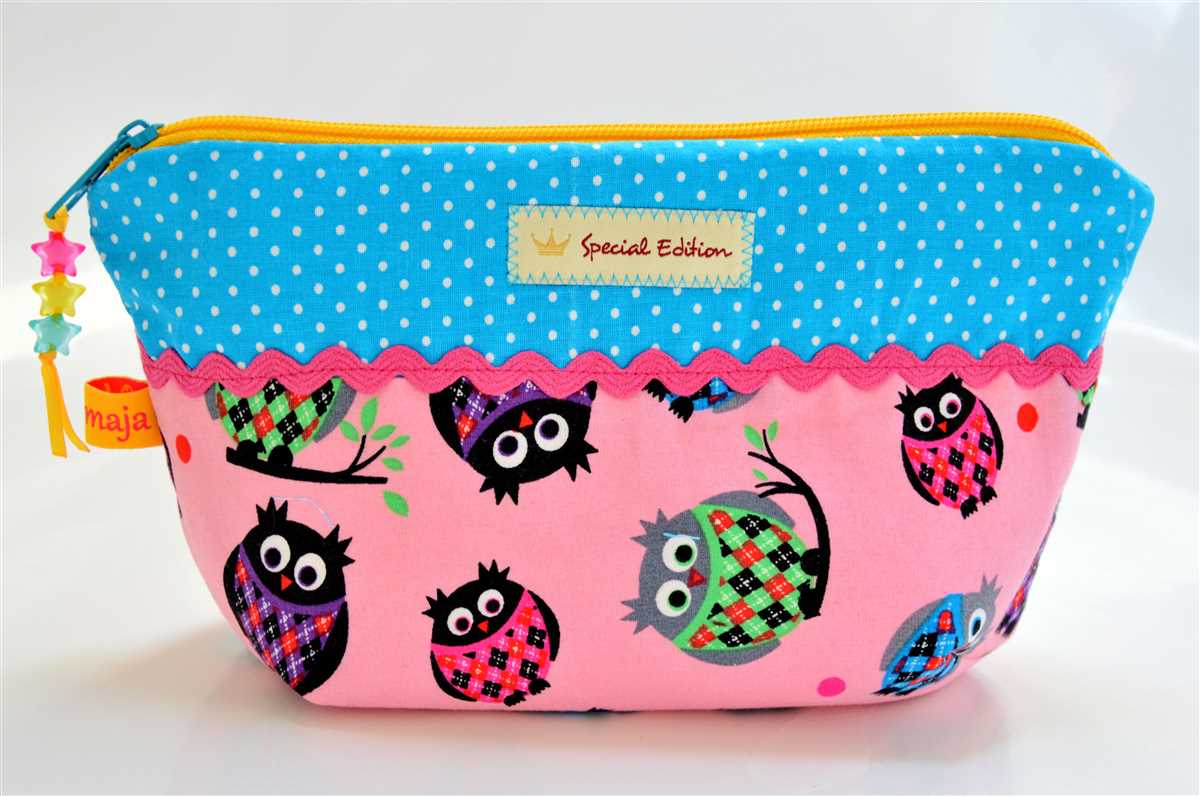
One of the best things about this knitting project bag is that it is not only practical, but also customizable. You can choose your favorite fabric and embellishments to make a bag that reflects your personal style. Plus, it’s a great opportunity to use up some of those fabric scraps you have lying around. The bag can be made in any size you prefer, depending on the size of your knitting projects. You can also add pockets or compartments to hold your needles, scissors, and other knitting accessories.
The zippered knitting project bag pattern is easy to follow, even for beginners. All you need is some basic sewing skills and a sewing machine. The pattern includes step-by-step instructions with clear illustrations, making it easy to create your own bag. Plus, there are plenty of online tutorials and videos available to help you along the way. Once you have made one bag, you will want to make more for all your knitting projects.
Overview of a Zippered Knitting Project Bag Pattern
In the world of knitting, having a reliable and practical project bag is essential. A zippered knitting project bag is a popular choice among knitters as it offers both convenience and security for their knitting projects. This overview will provide a detailed look at a typical zippered knitting project bag pattern, highlighting its key features and benefits.
Materials: To create a zippered knitting project bag, you will need a sewing machine, fabric of your choice, lining fabric, zipper, interfacing, and thread. This pattern allows for customization, so you can select fabrics that suit your personal style and preferences.
Step 1: Cutting the fabric

Measure and cut the fabric: Begin by measuring and cutting the main fabric, lining fabric, and interfacing according to the specified dimensions in the pattern. The main fabric will form the outer layer of the bag, while the lining fabric provides a soft interior for your knitting projects. The interfacing adds structure and stability to the bag.
Prepare the zipper: Cut the zipper to match the width of the bag opening. You may need to shorten the zipper if necessary. To do this, sew a new stop at the desired length and cut off the excess. Alternatively, you can purchase zippers in the correct size for your bag.
Step 2: Assembling the bag
Attach the interfacing: Fuse or sew the interfacing to the main fabric pieces according to the pattern instructions. This will provide structure and support to the bag.
Attach the zipper: Position the zipper face down on the right side of the main fabric piece, aligning the edges. Sew the zipper in place using a zipper foot on your sewing machine. Repeat this step for the other main fabric piece and the other side of the zipper.
Step 3: Finishing touches
Sew the bag: With right sides together, sew the main fabric pieces together, leaving an opening in the lining for turning the bag right side out. Make sure to backstitch at the beginning and end to secure the seams. Trim any excess fabric and clip corners for a neater finish.
Turn the bag right side out: Carefully pull the bag through the opening in the lining to turn it right side out. Use a pointy object to push out the corners and edges for a crisp finish.
Finish the bag: Sew the opening in the lining closed either by machine or hand stitching. Press the bag to remove any wrinkles and unevenness.
In conclusion, a zippered knitting project bag pattern provides knitters with a stylish and functional bag for storing and transporting their knitting projects. By following this pattern and adding your own personal touches, you can create a unique bag that suits your knitting needs.
Choosing the Right Fabric for Your Project Bag

When it comes to making a zippered knitting project bag, choosing the right fabric is essential. The fabric you choose will determine the durability, functionality, and overall appearance of the bag. Here are some factors to consider when selecting the fabric for your project bag.
Durability
One of the most important considerations when choosing fabric for a project bag is its durability. Since knitting supplies can be quite heavy and the bag will be used frequently, you’ll want to choose a fabric that can withstand regular use. Look for fabrics that are sturdy and have a tight weave. Canvas, denim, and nylon are all good options that can handle the weight of your knitting projects.
Functionality
Another factor to consider is the functionality of the fabric. Think about how you will be using the project bag and what features you want it to have. If you want your bag to be water-resistant, look for fabrics that have a waterproof coating or are made from synthetic materials like nylon or polyester. If you prefer a more natural look and feel, consider using cotton or linen fabrics. And if you want your bag to have a bit of stretch, choose a fabric with some elastane or spandex content.
Appearance

Last but not least, the appearance of the fabric is a crucial consideration. You want a fabric that not only looks good, but also reflects your personal style. Consider the color, pattern, and texture of the fabric when making your decision. Some knitters prefer bright and vibrant fabrics, while others prefer more subtle and neutral tones. There are also various patterns available, such as florals, geometrics, and stripes, to suit different preferences. Ultimately, choose a fabric that makes you excited to carry your knitting projects around!
By considering factors like durability, functionality, and appearance, you can choose the right fabric for your zippered knitting project bag. Whether you prioritize strength and longevity, desire specific features, or want a fabric that reflects your personal style, there is a wide range of options available to suit your needs.
Measuring and Cutting the Fabric
Before you start sewing your zippered knitting project bag, you’ll need to measure and cut the fabric. This step is crucial to ensure that your bag is the right size and has enough room to hold all of your knitting supplies.
First, gather all of the materials you’ll need: fabric, scissors, measuring tape, and a sewing machine. Lay out the fabric on a flat surface and smooth out any wrinkles or creases. It’s important to work with a clean and even surface to ensure accurate measurements.
Step 1: Measure the Dimensions
Start by measuring the dimensions of the bag you want to create. Consider the size of your knitting projects and how much space you’ll need for your supplies. Measure the desired width, height, and depth of the bag using a measuring tape.
Tip: You can also measure an existing bag that you like the size of and use those measurements as a guide.
Step 2: Add Seam Allowance
Before cutting the fabric, it’s important to add seam allowance to each side of the dimensions. This extra fabric will be used to sew the bag together and ensure a sturdy construction. A seam allowance of ½ inch to 1 inch is usually sufficient.
Step 3: Cut the Fabric
Now that you have the dimensions and added seam allowance, use the scissors to carefully cut the fabric. Take your time and make sure the edges are straight and even. If you’re using a patterned fabric, align the pattern as desired before cutting.
Note: If your bag has separate pieces for the front, back, and sides, make sure to cut each piece according to the measurements and with the added seam allowance.
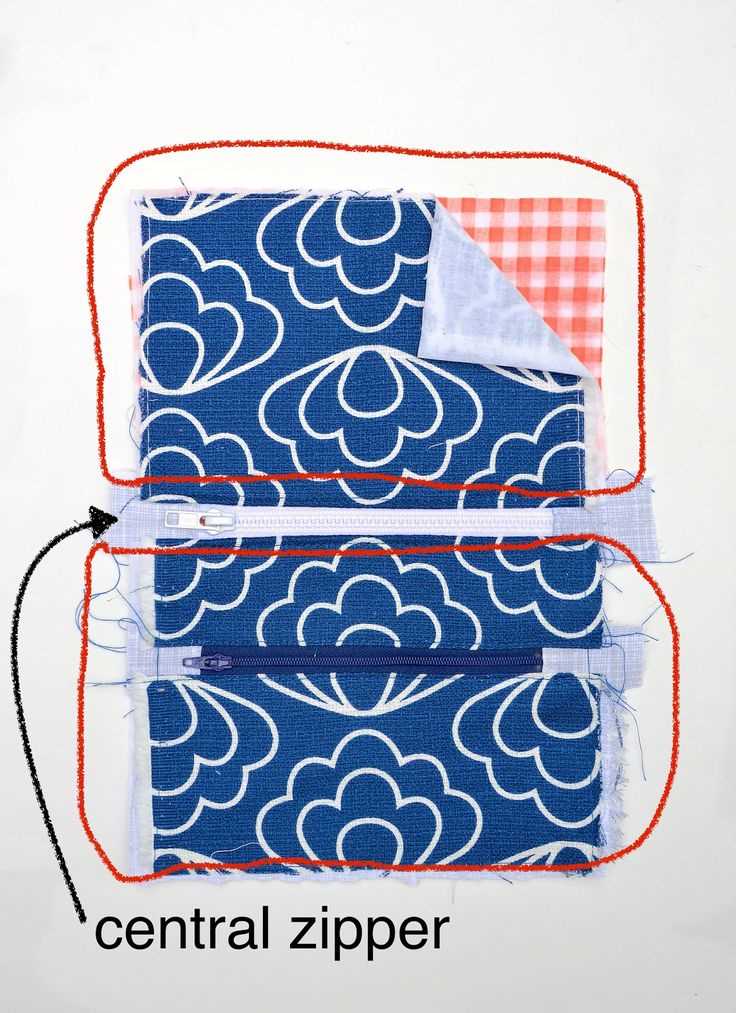
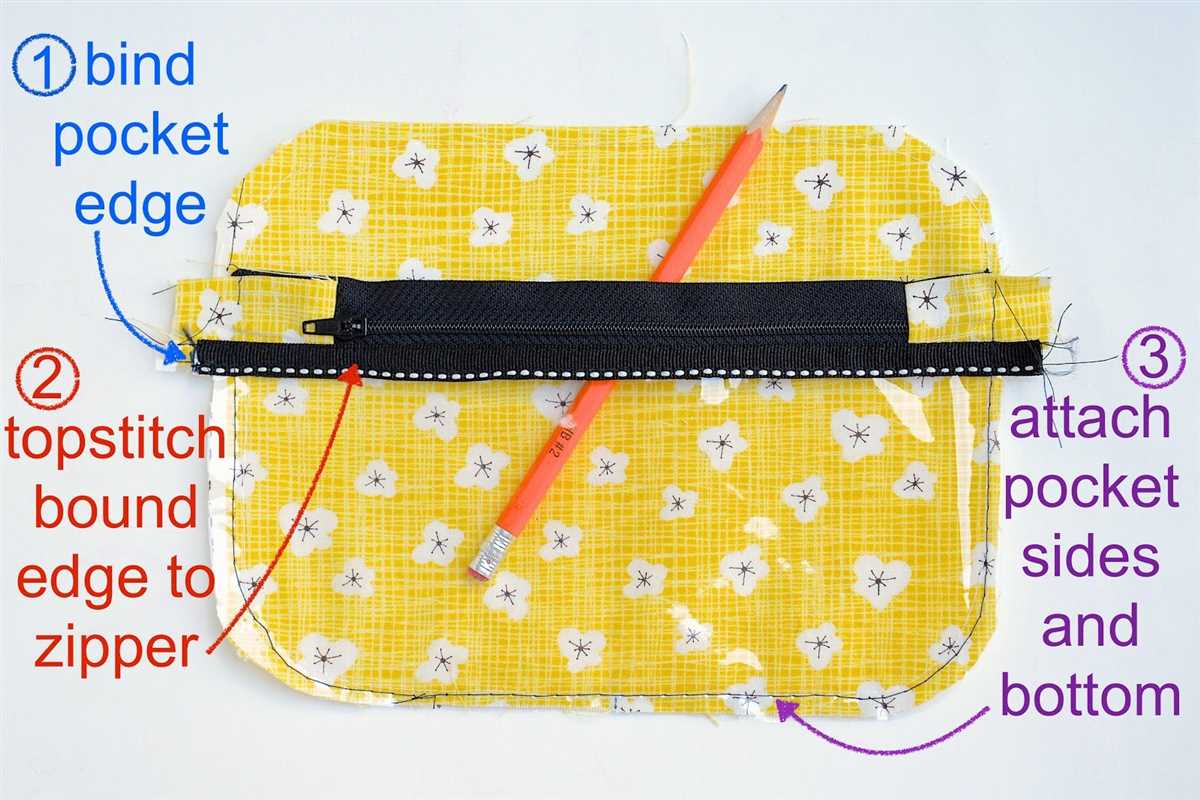
Adding a Zipper to the Bag
For knitters who are looking to add a functional and secure closure to their knitting project bags, a zipper is an excellent choice. A zipper provides a way to easily open and close the bag, while also keeping the contents safe and protected.
Materials:
- Zipper
- Matching thread
- Needle
- Pins
The first step in adding a zipper to the bag is to gather the necessary materials. You will need a zipper that is the appropriate length for your bag, matching thread, a needle, and pins. Once you have all of your materials, you can begin the process of attaching the zipper to the bag.
Begin by placing the zipper face down on the wrong side of the fabric, aligning the top edge of the zipper with the top edge of the bag. Use pins to secure the zipper in place, making sure that it is straight and centered. Next, thread your needle with matching thread and begin sewing the zipper to the fabric. Sew along both sides of the zipper, making sure to backstitch at the beginning and end to secure the stitches.
After the zipper is securely attached to the fabric, you can trim any excess zipper length if necessary. Finally, flip the bag right side out and give it a test run by opening and closing the zipper. With a zipper added to your knitting project bag, you can now keep your knitting supplies organized and protected in style.
Sewing the Sides and Bottom of the Bag
Once you have cut out the pattern pieces for your zippered knitting project bag, it’s time to start sewing the sides and bottom of the bag together. Begin by pinning the side panels to the front panel, right sides together. Make sure to align the edges and corners accurately.
Using a sewing machine, stitch along the pinned edges, leaving a ¼ inch seam allowance. Backstitch at the beginning and end to secure the stitches. Repeat this process for the other side panel, attaching it to the front panel.
Next, pin the bottom panel to the front and side panels, matching the corners and edges. Sew along the pinned edges, again using a ¼ inch seam allowance and backstitching at the beginning and end.
Once the front, side, and bottom panels are sewn together, repeat the process with the corresponding panels on the back of the bag.
After sewing the sides and bottom, trim the seam allowances and clip the corners to reduce bulk. Press the seams open or to one side for a clean finish. Your bag is now ready for the next step in the construction process.
Creating Pockets for Extra Storage
When it comes to knitting project bags, having extra storage is always a plus. One way to create additional space is by adding pockets to your bag. Pockets allow you to keep your knitting tools, such as stitch markers, scissors, and measuring tape, organized and easily accessible.
Here are a few ideas on how to create pockets for your zippered knitting project bag:
- Interior Slip Pockets: Adding slip pockets to the interior of your bag is a great way to store smaller items like stitch holders or spare needles. These pockets can be made from fabric or mesh and can be sewn or glued onto one or both sides of the bag.
- Zippered Pockets: Zippered pockets provide a secure storage option for items that you want to keep safe and in place. These pockets can be sewn onto the interior or exterior of your bag and can hold larger items like knitting pattern books or your phone.
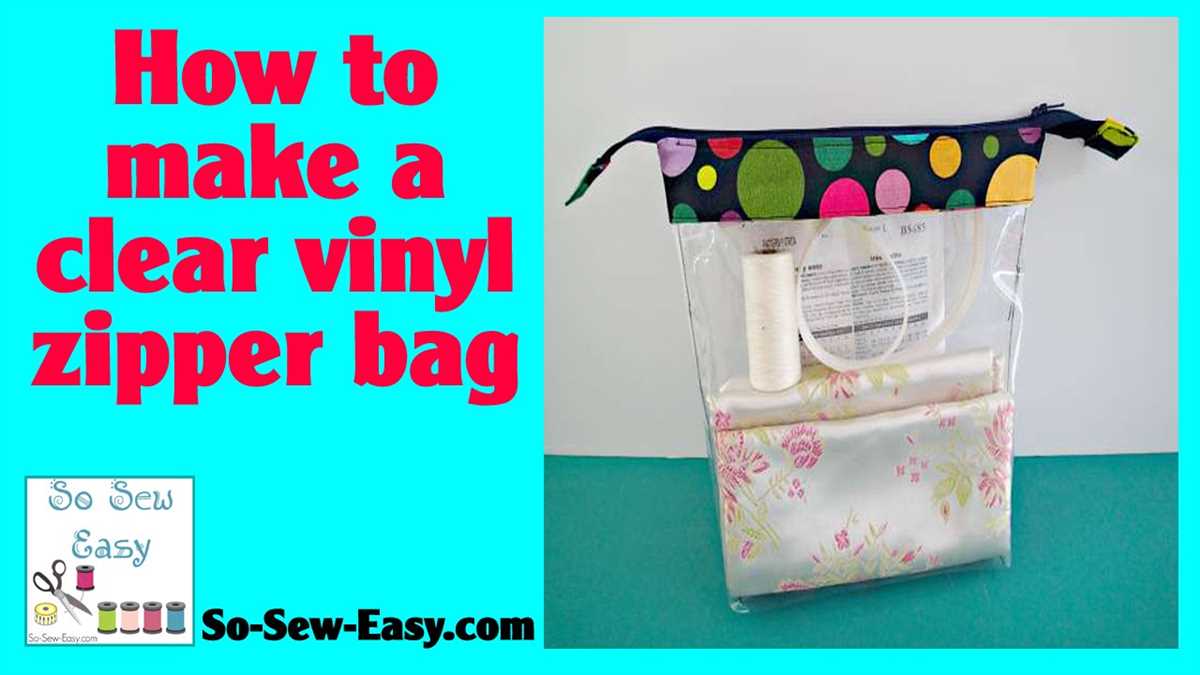
- Clear Vinyl Pockets: If you want to be able to see what’s inside your pockets without rummaging through them, clear vinyl pockets are a great option. These pockets can be attached to the inside of your bag and are perfect for storing small notions like stitch markers or tapestry needles.
- Multi-Pocket Panels: Another way to create extra storage is by adding multi-pocket panels to the interior of your bag. These panels can be sewn in and have multiple pockets of different sizes to accommodate various knitting tools and accessories.
By adding pockets to your zippered knitting project bag, you can keep your knitting tools and accessories organized and easily accessible. Whether you choose to sew or glue them in, pockets are a practical and functional addition to any knitting project bag.
Adding a Lining to the Bag
Adding a lining to your zippered knitting project bag is a great way to add stability and durability to the bag. It also gives a more finished look to the interior and protects your knitting projects from snagging on any rough seams or edges.
To add a lining to your bag, you will need to take some measurements of the interior of the bag. Measure the width and height of the bag as well as the depth or gusset. These measurements will determine the size of the lining fabric you need to cut.
Once you have your measurements, cut out the lining fabric using a sewing machine or by hand. It’s a good idea to add an extra inch or two to your measurements to account for seam allowances.
After you’ve cut out your lining fabric, you can start sewing it together. Begin by sewing the side seams together, right sides facing each other. Then sew the bottom seam, leaving a small opening for turning the lining right side out.
With the lining turned right side out, you can now place it inside the bag and pin it in place. Carefully sew the lining to the bag along the top edge, making sure to catch both the lining and the bag fabric.
Once the lining is securely attached to the bag, you can sew up the opening on the bottom seam of the lining. Trim any excess fabric and threads, and your lined zippered knitting project bag is now complete!
Embroidering or Personalizing the Bag

Adding embroidery or personalization to your zippered knitting project bag can make it truly unique and special. There are several ways you can go about adding your personal touch to the bag.
Embroidery
One option is to embroider your initials or a small design onto the fabric of the bag. To do this, you will need an embroidery hoop, embroidery floss, a needle, and a design or pattern you want to use. Place the fabric in the embroidery hoop and secure it tightly. Thread the needle with your chosen floss color and begin stitching your design onto the fabric. You can use various stitches, such as satin stitch or backstitch, to create different effects. Take your time and carefully embroider your chosen design onto the bag, making sure to secure any loose ends of thread.
Personalization
If you don’t have the time or skill to embroider, there are other ways to personalize your bag. One option is to use iron-on patches or appliques. These can be easily attached to the fabric by following the instructions on the packaging. Another option is to use fabric markers or fabric paint to write or draw directly onto the bag. You could write your name, a favorite quote, or a fun design. Make sure to let the paint or marker dry completely before using the bag to prevent smudging.
Additionally, you could also sew on buttons, beads, or other embellishments to add some extra flair to your bag. This is a great way to use up any leftover buttons or beads from other knitting projects. Simply choose your desired embellishments and sew them onto the fabric securely.
Whether you choose to embroider, use iron-on patches, or add other embellishments, personalizing your zippered knitting project bag will make it distinctly yours. It will not only be a practical storage solution for your knitting projects but a beautiful and unique accessory as well.
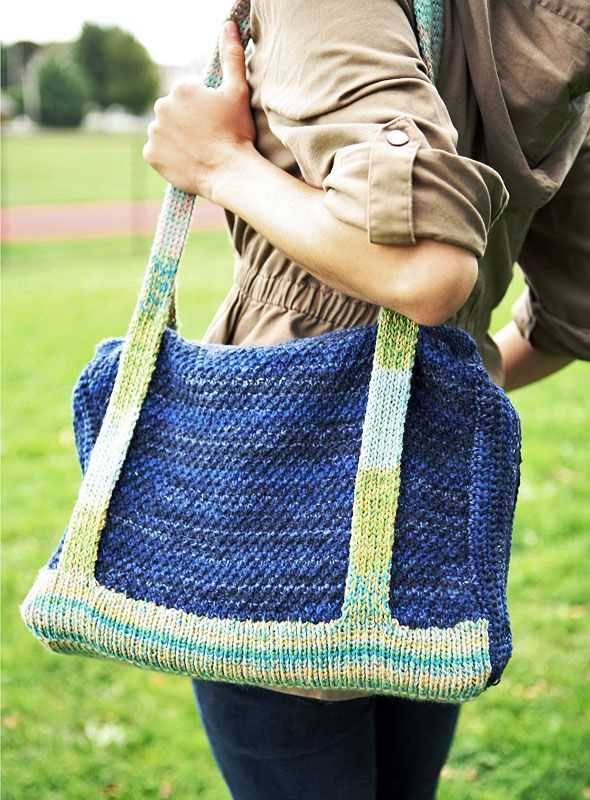
Attaching Handles or Straps
Adding handles or straps to your zippered knitting project bag can make it easier to carry and transport. There are several different methods you can use to attach handles or straps, depending on your preferred style and functionality.
Sewing on fabric handles: One option is to sew fabric handles directly onto the bag. To do this, measure and cut two strips of fabric to your desired length and width. Fold each strip in half lengthwise, right sides together, and sew along the long edge. Turn the handles right side out and press them flat. Then, position the handles on the bag where you want them to be and pin them in place. Sew around the edges of the handles to attach them securely to the bag.
Attaching leather or faux leather straps: If you prefer a more durable and stylish look, you can use leather or faux leather straps. Measure and cut two strips of leather or faux leather to your desired length and width. Use a leather punch or an awl to create holes in each end of the straps. Then, use metal hardware such as D-rings or lobster clasps to attach the straps to the bag. Secure the straps by sliding the metal hardware through the holes in the straps and attaching them to the bag with rivets or another type of fastener.
Finishing Touches: Topstitching, Hemming, and Pressing
Once you have completed the main construction of your zippered knitting project bag, it’s time to add the finishing touches that will give it a polished and professional look. Topstitching, hemming, and pressing are three essential techniques that will elevate your project bag to the next level.
Topstitching is a decorative stitch that adds strength and stability to the seams of your bag. It is typically done using a straight stitch along the edges of the fabric or along seams. To achieve a professional look, choose a thread color that complements your fabric and use a stitch length that is consistent throughout. By topstitching your bag, you not only reinforce the seams but also add a visually appealing detail that gives your project bag a finished look.
Hemming is another crucial step in completing your zippered knitting project bag. Hemming ensures that the raw edges of the fabric are neatly finished, preventing fraying and adding durability. To hem your bag, fold the raw edge of the fabric over twice and secure it with a straight stitch. For a clean and professional finish, press the hem with an iron before sewing it in place. Hemming not only enhances the appearance of your bag but also extends its lifespan by preventing wear and tear.
Pressing is a simple yet essential step in the finishing process. Using an iron, press the seams and edges of your project bag to remove any wrinkles and create crisp, professional-looking lines. Pressing not only improves the overall appearance of your bag but also helps to set topstitching and hems in place. Be careful not to drag the iron across the fabric, as this can stretch or distort the shape of your bag. Instead, use an up-and-down motion to gently press the fabric and seams.
By incorporating topstitching, hemming, and pressing into your finishing process, you can take your zippered knitting project bag from a basic homemade accessory to a high-quality and professional-looking piece. These techniques not only enhance the durability of your bag but also add a polished and refined touch that will make it stand out. So, take the time to perfect these finishing touches and enjoy the satisfaction of completing a project that looks as good as it functions.
Tips and Tricks for Sewing a Zippered Project Bag
Sewing a zippered project bag can be a fun and rewarding project for knitters. However, it can also be a bit tricky. Here are some tips and tricks to help you sew a zippered project bag with ease.
1. Choose the Right Fabric
When selecting fabric for your project bag, choose a sturdy fabric that can withstand the weight of your knitting projects. Cotton canvas or upholstery fabric are great options. Additionally, consider using a lining fabric to give your bag a polished finish.
2. Use a Quality Zipper
A quality zipper will make all the difference in the functionality and durability of your project bag. Opt for a nylon or metal zipper that is at least the same length as the width of your bag. Be sure to choose a zipper with a durable pull, as this will be the most used part of the bag.
3. Properly Interface the Bag
Adding interfacing to your bag will give it structure and stability. Use a medium to heavy weight interfacing and follow the manufacturer’s instructions for fusing it to your fabric. This will prevent the bag from becoming floppy and help it maintain its shape over time.
4. Use Bias Tape or Binding for a Neat Finish
To give your bag a professional-looking finish, consider using bias tape or binding to enclose the raw edges of the seams. This will prevent fraying and add durability to the bag. Choose a coordinating or contrasting color to add a pop of visual interest.
5. Add Pockets or Compartments
To maximize the functionality of your project bag, consider adding pockets or compartments. These can be used to store knitting needles, stitch markers, or other small knitting accessories. You can sew pockets directly onto the lining fabric or create detachable pockets that can be secured with snaps or buttons.
6. Test the Zipper Before Finishing

Before you sew the final seams of your project bag, test the zipper to ensure it opens and closes smoothly. This will give you the opportunity to make any necessary adjustments or fix any issues before it’s too late. Make sure the zipper opens and closes all the way and that there are no snags or catches.
By following these tips and tricks, you’ll be able to sew a zippered project bag that not only looks great but also functions well for all your knitting needs. Happy sewing!