
Knitting your own sweater is a rewarding and fulfilling endeavor. Not only do you get to customize the design and fit to your liking, but you also get the satisfaction of wearing something you made yourself. If you’re ready to take on a new knitting challenge, a zipper sweater is a great project to try.
A zipper sweater is a versatile garment that can be worn in any season. With a zipper closure, it offers an added level of functionality and practicality. Whether you’re a beginner knitter or an experienced one, there are plenty of patterns available to suit your skill level.
Before you start knitting your zipper sweater, it’s important to choose the right yarn and needle size for your project. Consider the type of fiber you want to use, as different fibers have different textures, weights, and properties. You’ll also want to make sure you have the right size needles to achieve the desired gauge.
Once you have your materials ready, you can start knitting your sweater according to the chosen pattern. Follow the instructions carefully, making sure to check your gauge as you go. Knitting a zipper sweater requires attention to detail and precision, so take your time and enjoy the process. With each stitch, you’ll be one step closer to a beautiful and cozy sweater.
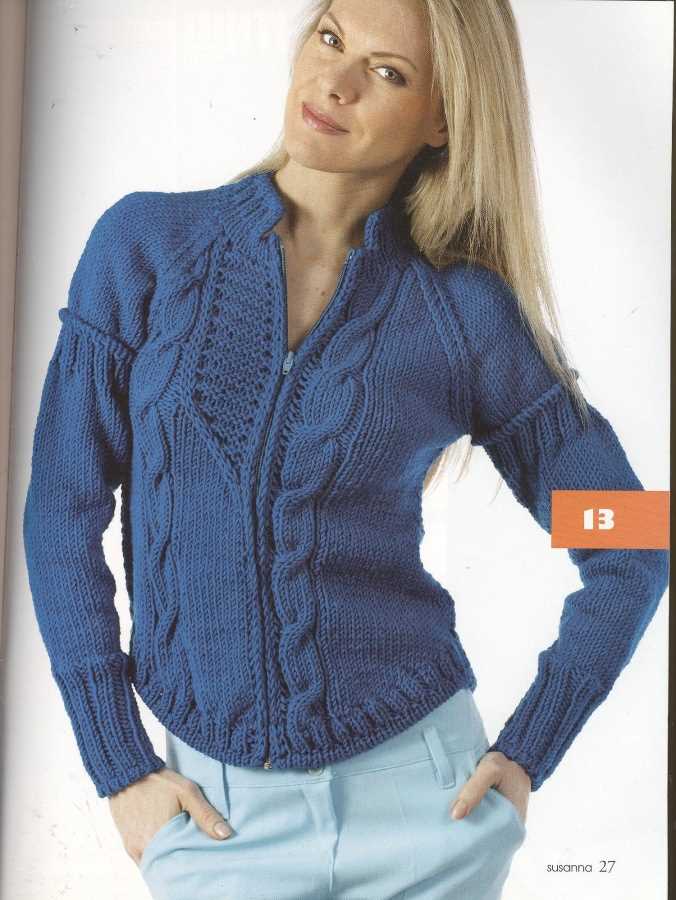
Zipper Sweater Knitting Pattern
A zipper sweater knitting pattern is a great project for knitters who want to create a stylish and versatile garment. Whether you are a beginner or an experienced knitter, a zipper sweater can be a fun and rewarding project to work on.
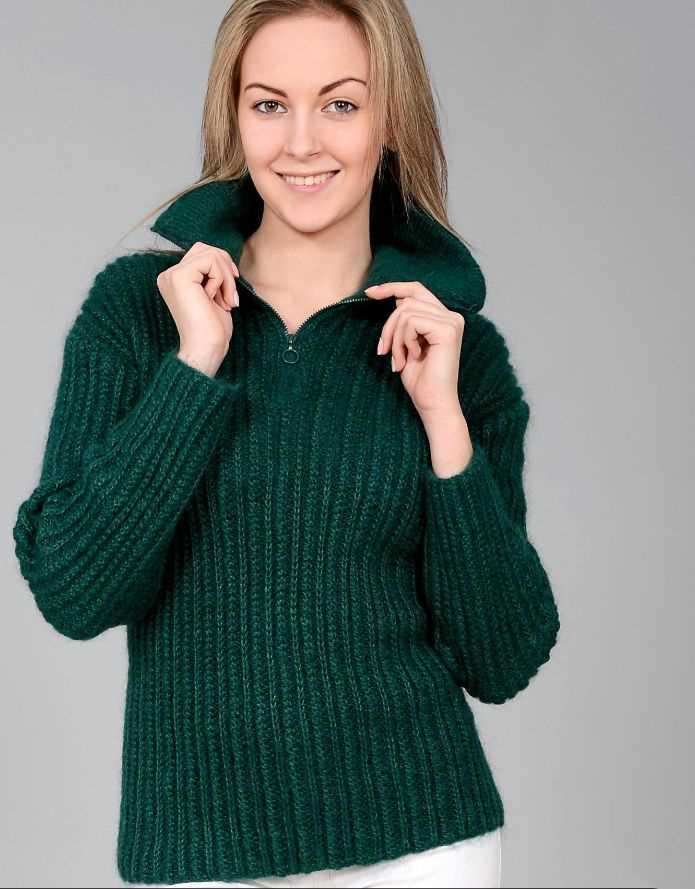
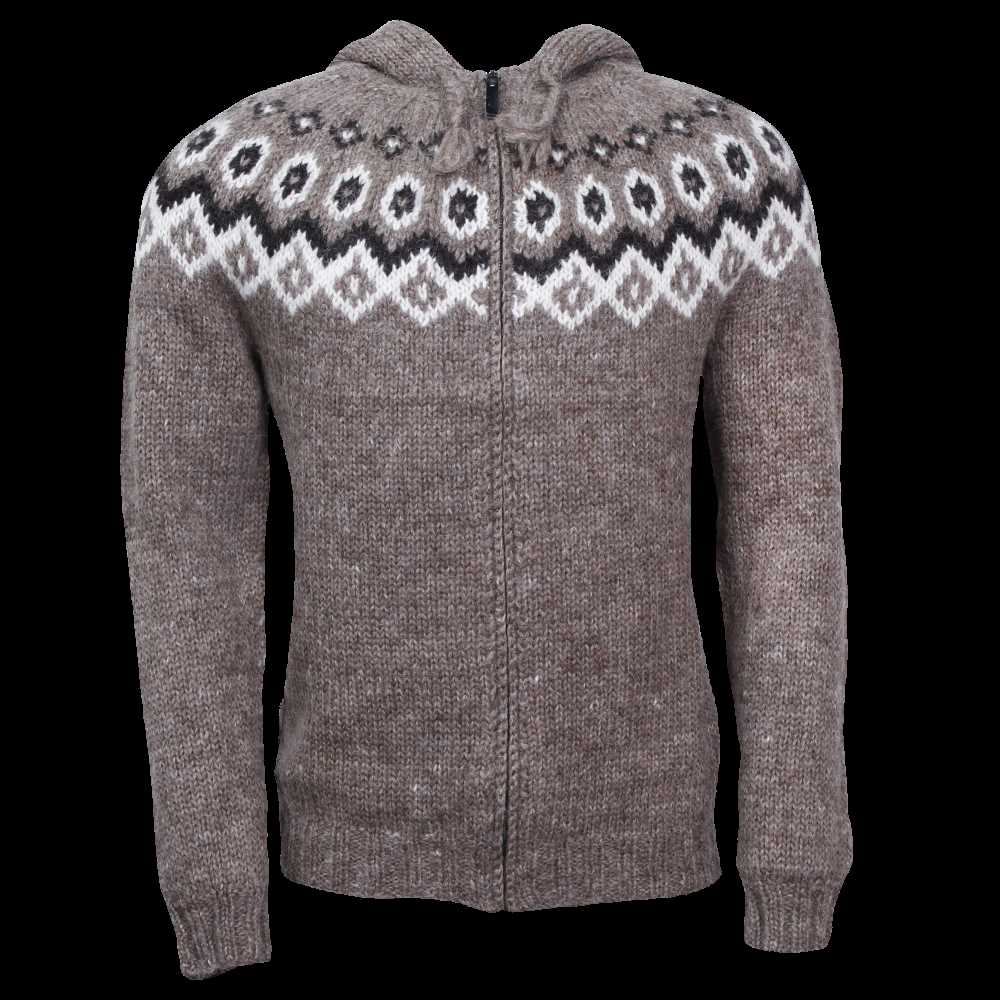
One of the key features of a zipper sweater is, of course, the zipper itself. Adding a zipper to a sweater gives it a modern and practical touch, allowing you to easily open and close the garment as needed. It also adds a unique and personalized detail to your sweater.
To start knitting a zipper sweater, you will need to choose a suitable yarn and needle size. A medium-weight yarn such as worsted or aran is often recommended for sweaters, as it provides a good balance between warmth and drape. As for the needle size, it will depend on your yarn choice and desired tension. Make sure to check the recommended gauge in the pattern to ensure your sweater will fit correctly.
When it comes to the actual knitting pattern, there are various options available. You can find both free and paid patterns online, or you can create your own design if you are experienced enough. Some patterns may include specific instructions for adding the zipper, while others may provide general guidelines that you can adapt to your needs.
Once you have selected your pattern and gathered your materials, you can start knitting your zipper sweater. Follow the instructions carefully, making sure to keep track of your stitch count and any shaping or stitch pattern changes. Take your time and enjoy the process, as knitting a sweater can be a relaxing and fulfilling activity.
Once your sweater is knitted and all the pieces are sewn together, it’s time to add the zipper. You will need a sewing needle and thread that matches your yarn color. Carefully sew the zipper onto the sweater, making sure it is aligned evenly and securely. Take your time with this step to ensure a neat and professional finish.
Once the zipper is in place, try on your sweater and make any necessary adjustments. You may need to steam or block your sweater to give it its final shape. Finally, proudly wear your completed zipper sweater and enjoy the comfort and style it brings to your wardrobe.
Choosing yarn and needles for your zipper sweater
When it comes to knitting a zipper sweater, choosing the right yarn and needles is important to ensure that your final product turns out just the way you want it. Here are some key factors to consider when making your selections.
Yarn weight and fiber content
First and foremost, consider the yarn weight and fiber content for your zipper sweater. The weight of the yarn will determine the overall thickness and warmth of the sweater, while the fiber content will affect both the feel of the garment and its care instructions. For a cozy and warm sweater, opt for a bulky or chunky yarn. For a lighter and more breathable sweater, choose a yarn with a lighter weight such as sport or DK. As for fiber content, wool is a popular choice for sweaters due to its warmth and durability, but there are also various other options available, such as acrylic, cotton, or blends.
Needle size
The needle size you choose for your zipper sweater will depend on the gauge or tension specified in the knitting pattern. Gauge refers to the number of stitches and rows per inch and is crucial for achieving the right fit and size of the sweater. Using a needle that matches the gauge stated in the pattern will ensure that your finished sweater matches the intended measurements. It’s always a good idea to make a gauge swatch before starting your sweater to ensure that you’re using the correct needle size. If your gauge differs from the pattern, you may need to adjust your needle size accordingly.
Additional considerations
In addition to yarn weight, fiber content, and needle size, there are a few more factors to consider when choosing materials for your zipper sweater. If you’re planning to add a zipper to your sweater, consider the weight of the zipper and make sure your yarn is sturdy enough to support it. Take into account any stitch patterns or designs in the pattern and choose a yarn that will showcase them well. Lastly, consider your personal preferences and any specific requirements you may have, such as allergies or ethical concerns.
- Consider yarn weight and fiber content for warmth and feel
- Choose needle size based on gauge specified in the pattern
- Take into account additional factors like zipper weight and stitch patterns
- Consider personal preferences and requirements
Getting started: casting on and creating the ribbed collar
Knitting a zipper sweater is a great project for those looking to expand their knitting skills and create a versatile and stylish garment. To get started, you will first need to cast on and create the ribbed collar. This part of the sweater not only adds a professional look to the final piece but also provides a comfortable and snug fit around the neck.
To cast on for the ribbed collar, you will need to choose a suitable yarn and needle size that match the desired gauge. It is recommended to use a smaller needle size than what is specified for the main body of the sweater, as this will help create a tighter and more defined ribbed pattern. Start by making a slip knot and placing it on one of the needles.
Next, hold the needle with the slip knot in your right hand and insert the empty needle through the slip knot, going from front to back. Using your right index finger, wrap the yarn around the needle counterclockwise, crossing it over the front of the needle. With your left thumb, gently pull the new loop created through the slip knot, forming a new stitch on the empty needle. Continue this process until you have cast on the required number of stitches for the ribbed collar.
Tip: It is important to keep your tension consistent while casting on to ensure an even and professional-looking ribbed collar. Pay attention to the tightness of your stitches and adjust as needed.
Once you have cast on the required number of stitches, you can begin working the ribbed collar. The most common ribbed pattern is the knit 1, purl 1 (K1, P1) rib. This pattern creates alternating knit and purl stitches, resulting in a stretchy and textured fabric. Knit the first stitch, then bring the yarn to the front of the work between the needles and purl the next stitch. Repeat this sequence of knit and purl stitches until you reach the end of the row.
Continue working in the K1, P1 rib pattern for the desired length of the collar, keeping in mind any shaping instructions provided in the knitting pattern. Remember to periodically check your gauge to ensure that the ribbed collar is consistent with the rest of the sweater. Once the ribbed collar is complete, you can move on to the next steps in the pattern, such as shaping the body or adding additional details.
Knitting the body of your zipper sweater
Once you have finished knitting the ribbed collar and selecting the right zipper for your sweater, it’s time to start knitting the body. The body of the sweater is where you will create the main fabric of the garment, and it’s important to follow the pattern and keep track of your stitches to ensure a proper fit.
Start by casting on the required number of stitches as specified in the pattern. You can use a long-tail cast-on or any other cast-on method of your choice. Make sure to distribute the stitches evenly on your knitting needles to ensure an even tension throughout the body of your sweater.
As you knit the body of the sweater, you will likely be working in a combination of knit and purl stitches to create different stitch patterns or textures. Pay close attention to the pattern instructions and make sure to work each row as indicated. If using a stitch pattern, it’s a good idea to create a swatch beforehand to ensure proper gauge and overall look of the stitches.
Keep track of your progress by using stitch markers or a row counter. This will help you stay organized and ensure that you don’t accidentally skip or repeat any rows. It’s also a good idea to periodically measure your work to ensure that you are knitting to the correct length and that your sweater will fit properly when finished.
When you reach the desired length for the body of your sweater, you can then move on to knitting the ribbed hem or any other finishing touches as specified in the pattern. The body of your zipper sweater is complete, and you are one step closer to having a cozy and stylish garment to wear!
Adding shaping to your zipper sweater
When knitting a zipper sweater, it’s important to add shaping to the garment to ensure a proper fit. Shaping helps create a more flattering silhouette and allows the sweater to conform to the natural curves of the body. Whether you’re adding waist shaping or bust darts, here are a few tips to help you incorporate shaping into your zipper sweater knitting pattern.
1. Determine the shaping placement: Before you begin knitting, decide where you want to add shaping to your sweater. For waist shaping, you can place the decreases and increases on the side seams or slightly towards the back. Bust darts are usually positioned on the front of the garment, starting from the underarm area and extending upwards.
2. Calculate the number of stitches: To add shaping, you’ll need to calculate the number of stitches to decrease or increase at specific intervals. The number of stitches will depend on your gauge and the desired shape. For waist shaping, you’ll typically decrease a few stitches evenly on each side and then gradually increase them back towards the underarm. For bust darts, you’ll increase gradually towards the dart point and then decrease back to the original stitch count.
3. Choose the type of shaping: There are different ways to add shaping to your zipper sweater, depending on the effect you want to achieve. Common shaping techniques include decreases and increases such as k2tog, ssk, M1, or yarn overs. Experiment with different methods to find the one that gives you the desired look and fit.
4. Maintain pattern continuity: When adding shaping to your sweater, it’s crucial to maintain the overall pattern continuity. Ensure that the stitch pattern remains consistent even when working the shaping rows. You may need to adjust the stitch pattern or incorporate additional stitches to maintain the design integrity.
5. Consider ease: When adding shaping, it’s important to consider the ease you want in your sweater. Ease refers to the amount of space between the body and the garment. For a fitted sweater, you may want to incorporate negative ease, where the sweater is slightly smaller than the actual body measurements. If you prefer a looser fit, opt for positive ease, where the sweater is slightly larger.
By following these tips, you’ll be able to add shaping to your zipper sweater and achieve a well-fitted garment that flatters your body shape. Remember to take accurate measurements, swatch for gauge, and adjust the pattern accordingly to ensure the best fit possible.
Creating the sleeves of your zipper sweater
When knitting a zipper sweater, one of the essential components to consider is the sleeves. The sleeves of a sweater play a crucial role in providing warmth and comfort to the wearer. In this section, we will discuss how to create the sleeves for your zipper sweater.
1. Determine the desired length: Before starting the sleeve, it is important to decide on the desired length. You can measure an existing sweater or refer to a size chart to determine the appropriate length for your sweater. Once you have the measurement, you can adjust your pattern accordingly.
2. Cast on stitches: To begin the sleeve, cast on the required number of stitches, as indicated in your knitting pattern. It is important to cast on the correct number of stitches to ensure a proper fit. You can use a cast-on method of your choice, such as the long-tail cast-on or the knitted cast-on.
3. Knitting the sleeve: Once you have cast on the stitches, you will proceed to knit the sleeve in the desired stitch pattern. This can be a simple stockinette stitch, a ribbed pattern, or any other pattern of your choice. Follow the instructions in your pattern to complete the sleeve in the desired length, making sure to check your gauge regularly to ensure an accurate fit.
4. Shaping the sleeve: As you knit the sleeve, you may need to shape it to create a more fitted look. This can be done through decreases or increases at specific points in the knitting. Follow the shaping instructions in your pattern or make adjustments as needed to achieve the desired shape and fit.
5. Finishing the sleeve: Once the desired length and shape of the sleeve have been achieved, it is time to finish it off. This typically involves binding off the stitches in a neat and even manner. You can use a basic bind-off method or explore different decorative bind-off techniques to add interest to the cuff of the sleeve.
6. Repeat for the second sleeve: After completing the first sleeve, repeat the process to create the second sleeve. It is important to maintain consistency in the length, stitch pattern, and shaping of both sleeves for a uniform look.
With these steps, you can confidently create the sleeves for your zipper sweater, ensuring a comfortable and stylish fit. Remember to follow your knitting pattern closely, but don’t be afraid to make adjustments as necessary to achieve your desired result.
Joining the sleeves to the body of your zipper sweater
Once you have completed knitting the body of your zipper sweater and the sleeves, the next step is to join the sleeves to the body. This is an important part of the knitting process as it helps to create a seamless and professional finish. Here are some steps to guide you through the process:
1. Prepare the sleeves and body: Before you start joining the pieces together, make sure that the sleeves and body are blocked and in their final shape and size. This will ensure that they align properly when you sew them together. If needed, you can use blocking pins or clips to hold the pieces in place.
2. Lay the sweater flat: Lay the sweater flat with the right sides facing up. Position the body piece on a flat surface and align the sleeve openings with the corresponding armholes on the body. The top of the sleeves should meet the shoulders of the body.
3. Sew the sleeves to the body: Using a tapestry needle or a crochet hook, start sewing the sleeves to the body using a mattress stitch or any other invisible seaming technique. Begin at the underarm and work your way up to the shoulders, ensuring that you sew through both layers of fabric to create a secure and seamless join.
4. Secure the ends: Once the sleeves are attached to the body, weave in any loose ends of yarn to ensure that they are not visible from the inside or outside of the sweater. You can use a crochet hook or tapestry needle to do this, making sure to secure the ends of the yarn securely.
5. Check for symmetry: After you have finished sewing the sleeves to the body, take a step back and check the sweater for symmetry. Make any necessary adjustments to ensure that the sleeves are aligned properly and that the join is smooth and even.
By following these steps, you will be able to successfully join the sleeves to the body of your zipper sweater, creating a professional-looking finished garment. Take your time and ensure that the seams are strong and even, as this will contribute to the overall quality and longevity of your knitted creation.
Knitting the ribbed cuffs and hem for your zipper sweater
When knitting a zipper sweater, one of the important elements to focus on is the ribbed cuffs and hem. These sections provide structure and elasticity to the garment, ensuring a comfortable fit and preventing the edges from rolling up. Here are some tips and steps to follow when knitting the ribbed cuffs and hem for your zipper sweater.
1. Choose the right yarn and needles: For ribbed cuffs and hem, it’s best to use a yarn that has good stretch and recovery, like a blend of wool and elastane. You’ll also need suitable needles, such as circular needles or double-pointed needles, depending on your preferred knitting method.
2. Determine the stitch pattern: Ribbed cuffs and hem are typically knitted using variations of rib stitch patterns, such as 1×1 or 2×2 ribbing. These patterns create alternating columns of knits and purls that give the fabric its elasticity. Decide on the stitch pattern you want to use before starting.
3. Cast on the required number of stitches: The number of stitches you cast on for the ribbed cuffs and hem will depend on your sweater’s size and the desired width. Follow the pattern instructions or make adjustments based on your measurements. It’s a good idea to use a stretchy cast-on method, such as the long-tail cast-on, to ensure flexibility.
4. Knit the rib stitch pattern: Once you have cast on, begin knitting the rib stitch pattern for the cuffs and hem. For a 1×1 rib, alternate between knitting one stitch and purling one stitch across each row. For a 2×2 rib, knit two stitches, purl two stitches, and repeat across each row. Continue knitting in the rib pattern until you reach the desired length.
5. Bind off and finish: When you have reached the desired length for the ribbed cuffs and hem, bind off all stitches using a stretchy bind-off method, such as the sewn bind-off or the suspended bind-off. This will ensure that the edges remain flexible and don’t feel tight. Weave in any loose ends and block the cuffs and hem to give them a polished look.
With these steps, you can create beautifully ribbed cuffs and hem for your zipper sweater. Remember to take accurate measurements and knit with attention to detail to ensure a professional finish. Enjoy the knitting process and the satisfaction of wearing a cozy and well-fitted sweater!
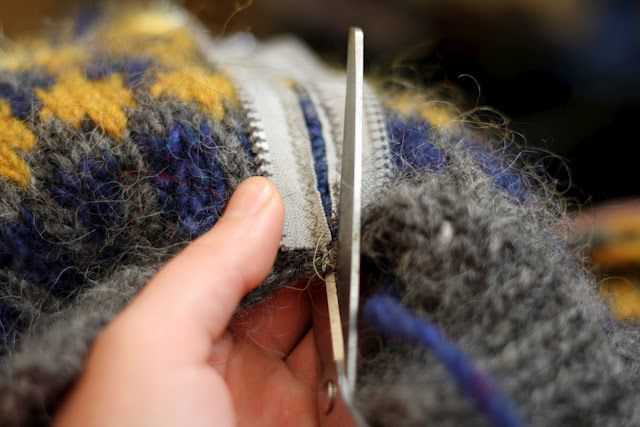
Adding a zipper to your sweater
If you have knitted a sweater and want to add a zipper for closure, it can be a great way to give your garment a polished and professional finish. Here are some steps to guide you through the process:
Gather the necessary materials
To add a zipper to your sweater, you will need a zipper that matches the length of the opening you want to close. Make sure to select a zipper that is appropriate for the weight and style of your sweater. Additionally, you will need a sewing needle, thread that matches the color of your yarn, and scissors.
Prepare your sweater
Before attaching the zipper, make sure that your sweater is complete and blocked. This will ensure that the sizing and shape are correct, and that the fabric is smooth and even. Blocking will also make it easier to sew the zipper onto the sweater.
Position the zipper
Start by laying your sweater flat and aligning the zipper with the opening. Use pins to hold the zipper in place, making sure that it is centered and straight. If your sweater has a collar or hood, make sure the zipper lines up correctly with those elements as well.
Sew the zipper
Using your sewing needle and thread, carefully stitch the zipper onto the sweater. You can use a whipstitch or a running stitch to secure the zipper to the fabric. Make sure to sew through both the sweater and the zipper tape, taking care to make your stitches neat and even. Repeat this process on the other side of the zipper.
Finishing touches
Once the zipper is securely attached, you can trim any excess fabric or thread. Test the zipper by opening and closing it to ensure that it functions properly. If desired, you can also add a tab or pull to the zipper for easier gripping.
Adding a zipper to your sweater can be a rewarding way to enhance the functionality and style of your garment. With some patience and attention to detail, you can create a professional-looking finished product that you will be proud to wear.
Finishing touches: blocking and weaving in ends
Once you have completed knitting your zipper sweater, there are a few finishing touches that will give it a professional and polished look. The two most important steps are blocking the sweater and weaving in the ends.
Blocking: Blocking is the process of shaping and stretching your knitted garment to its intended size and shape. It helps to even out the stitches, open up lace patterns, and give the sweater a more polished appearance. To block your zipper sweater, you will need to soak it in water or a blocking solution, gently squeeze out the excess moisture, and then lay it flat on a towel or blocking mat. Use pins to stretch the sweater to the desired dimensions, making sure to align the edges and seams. Allow the sweater to dry completely before removing the pins.
Weaving in ends: Weaving in ends is the process of securing and hiding the loose yarn tails that are left after you finish knitting. It is important to weave in the ends neatly and securely to ensure that they do not unravel or become visible from the right side of the garment. To weave in the ends, thread the yarn tail onto a yarn needle and carefully sew the tail into the back of the stitches, following the path of the yarn. Make sure to weave in the ends on the wrong side of the sweater and avoid pulling the yarn too tightly, as this can distort the fabric. Trim the excess yarn tails close to the work.
By blocking your zipper sweater and weaving in the ends properly, you can give your knitted garment a polished and professional finish. These final steps may take a little extra time and effort, but they are well worth it to achieve a beautifully finished sweater that you can be proud of.
Tips and Tricks for Knitting a Perfect Zipper Sweater
Knitting a zipper sweater can be a challenging but rewarding project for any knitter. Whether you are new to knitting or have been doing it for years, it’s important to pay attention to the details to ensure a perfect finished product. Here are some tips and tricks to help you along the way:
1. Choose the Right Yarn
When knitting a zipper sweater, it’s essential to choose the right yarn for the project. Consider the weight and fiber content of the yarn, as well as the desired drape and warmth of the finished sweater. A yarn with a good stitch definition and durability is ideal for showcasing the zipper and ensuring longevity of the garment.
2. Take Accurate Measurements
Before starting your zipper sweater, take accurate measurements of the intended wearer. This will help you determine the appropriate size and ensure a proper fit. Measure the chest, waist, and hips, as well as the desired length of the sweater. Taking the time to measure carefully will prevent any fitting issues later on.
3. Practice Seaming Techniques
Seaming is an important part of knitting a zipper sweater. Practice different seaming techniques, such as mattress stitch or slip stitch crochet, to find the method that yields the best results for your project. A neat and invisible seam will give your sweater a professional finish.
4. Use Stitch Markers
Stitch markers can be extremely helpful when knitting a zipper sweater, especially when working on complex stitch patterns or shaping. They can help you keep track of stitch counts and ensure that you are knitting the correct number of stitches in each section. Use them to mark the beginning and end of the zipper, as well as any other important points in the pattern.
5. Keep Tension Consistent
Consistent tension is crucial when knitting a zipper sweater, especially if you want the finished garment to have an even appearance. Pay attention to your tension throughout the project and make sure your stitches are not too loose or too tight. Experiment with different needle sizes if necessary to achieve the desired tension.
By following these tips and tricks, you can knit a perfect zipper sweater that is not only functional but also stylish. Enjoy the process and take pride in your finished masterpiece!
Variations and customization options for your zipper sweater
If you’re looking to put your own spin on a zipper sweater knitting pattern, there are plenty of variations and customization options to explore. By making a few modifications, you can create a unique and personalized sweater that reflects your own style and preferences.
1. Choose your zipper: The type of zipper you use can greatly impact the overall look and functionality of your sweater. Consider opting for a contrasting color or a metallic zipper for a bold and eye-catching effect. You can also experiment with different zipper lengths and styles, such as an exposed zipper or a hidden zipper for a more seamless finish.
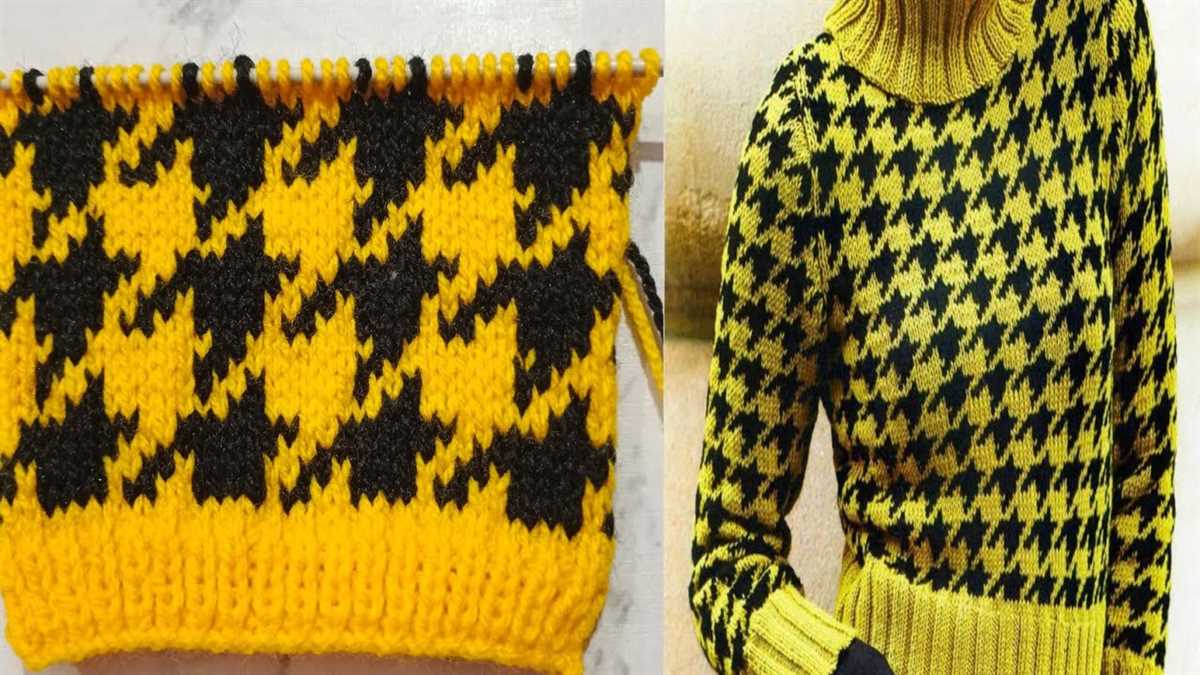
2. Add colorwork: Incorporating colorwork into your zipper sweater can add depth and visual interest. Consider knitting stripes, Fair Isle patterns, or even intarsia designs into your sweater. This allows you to experiment with different color combinations and create a truly unique piece.
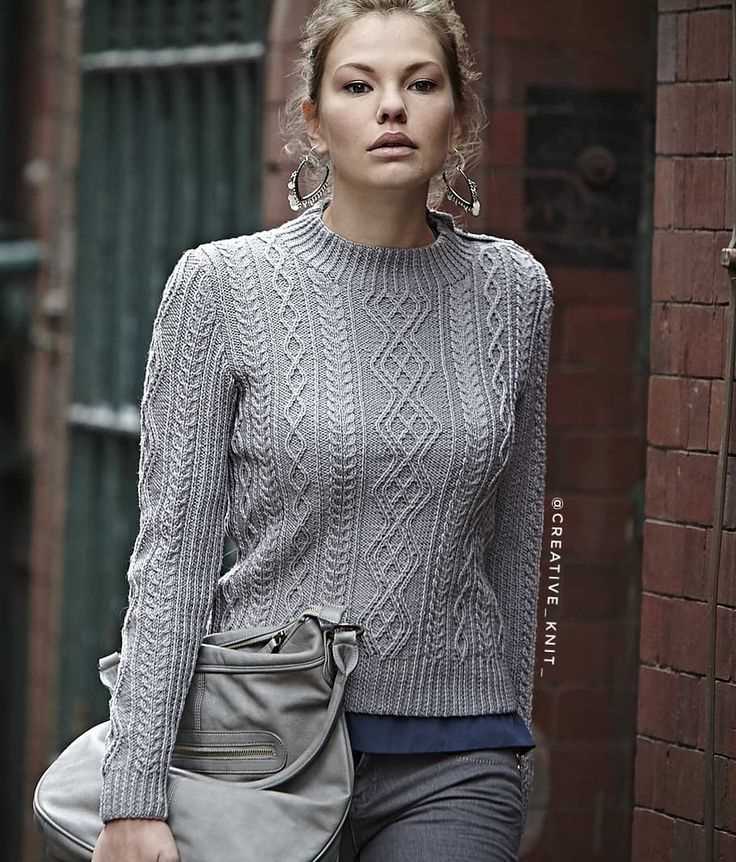
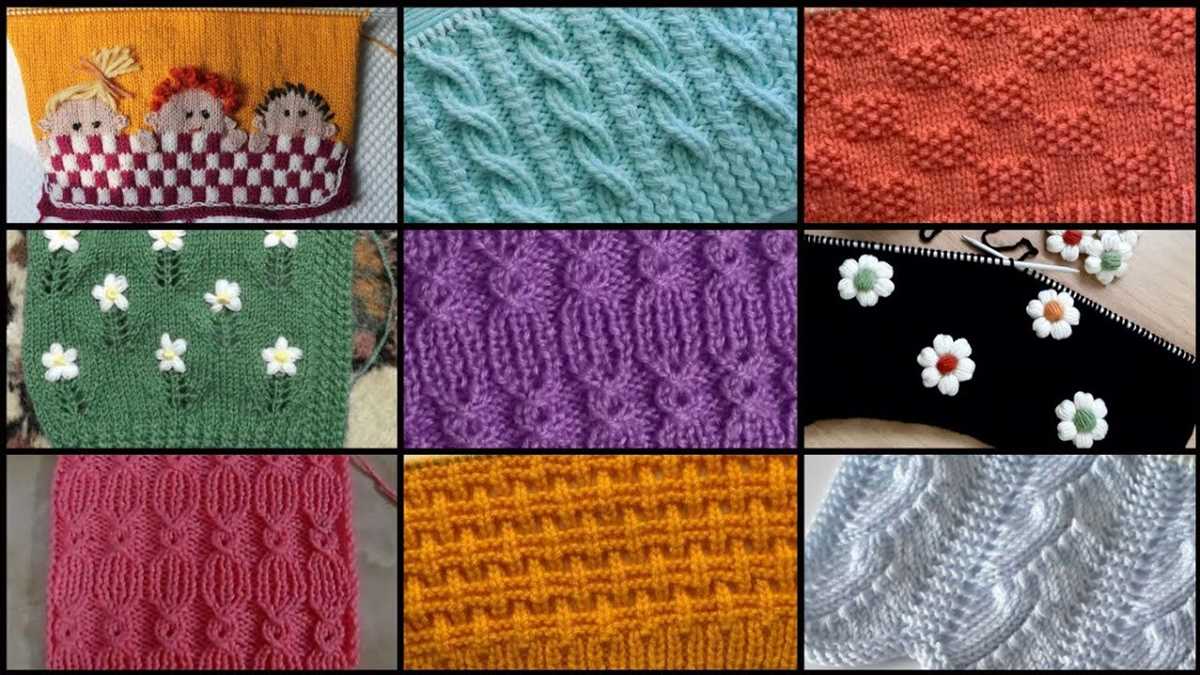
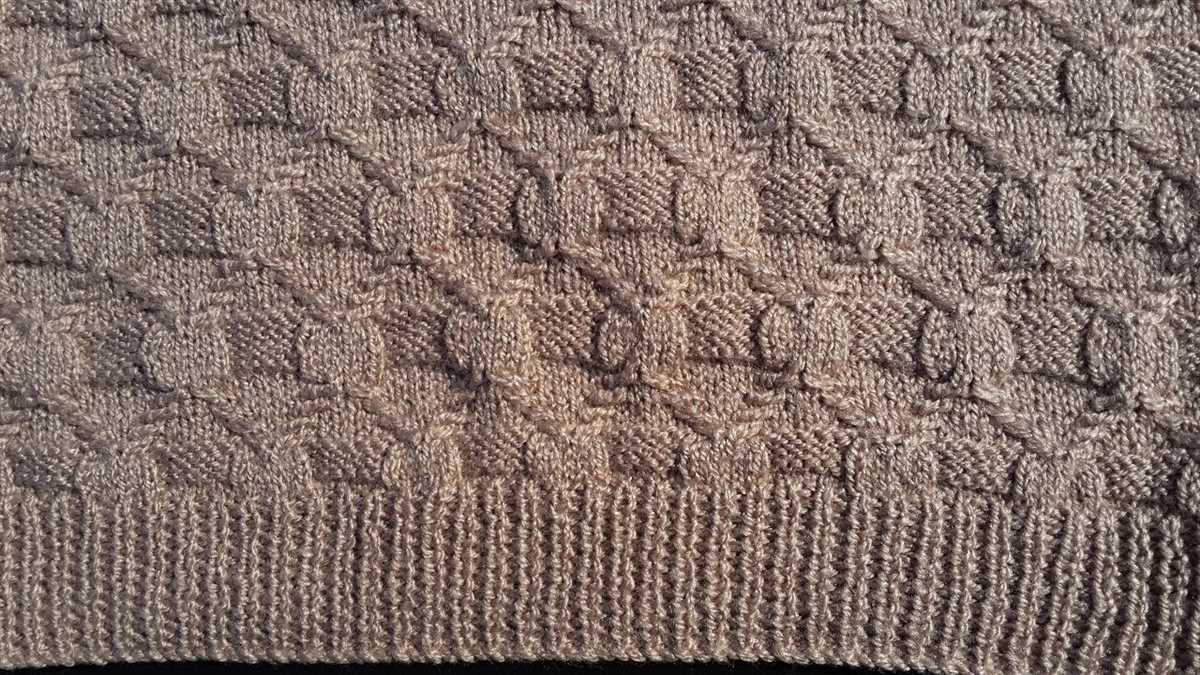
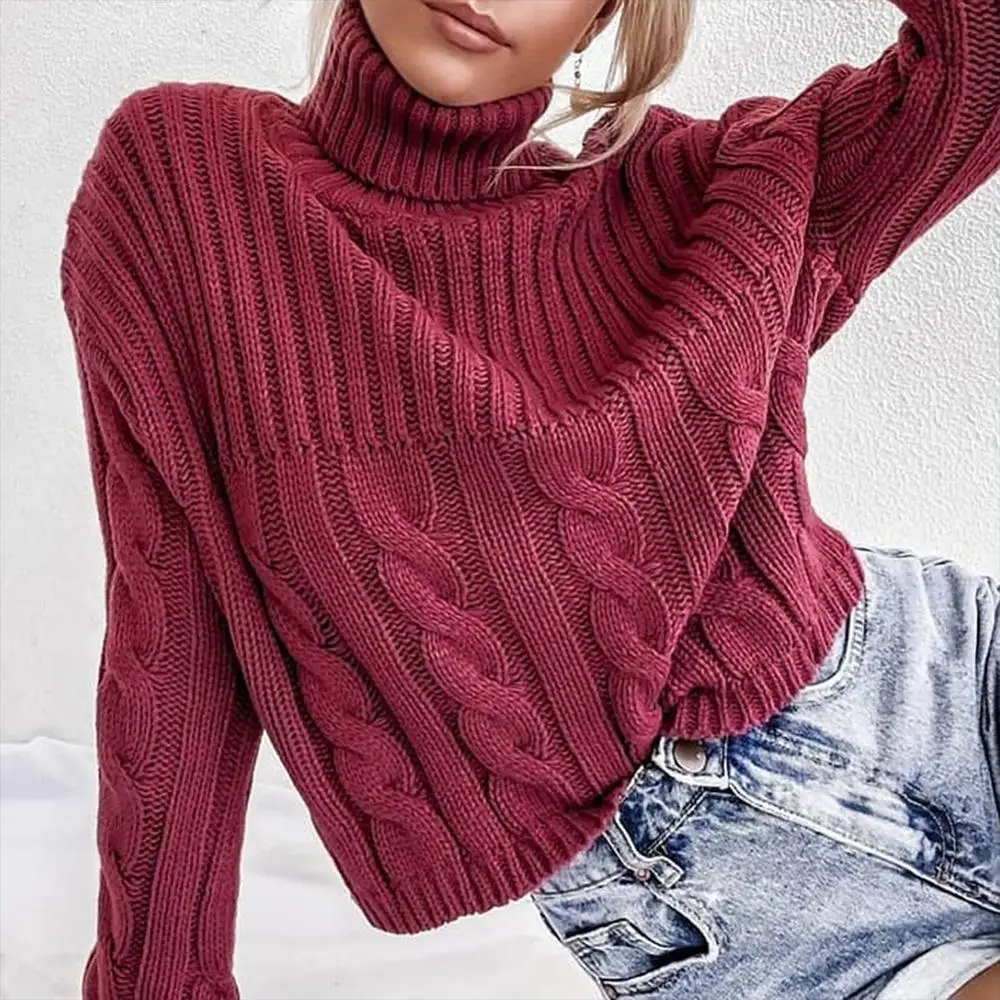
3. Play with texture: Texture can elevate the look of your sweater and add dimension. Experiment with different stitch patterns, such as cables, ribbing, or lace, to create a visually captivating sweater. You can also mix different textures by combining different yarn weights or using a combination of smooth and textured yarns.
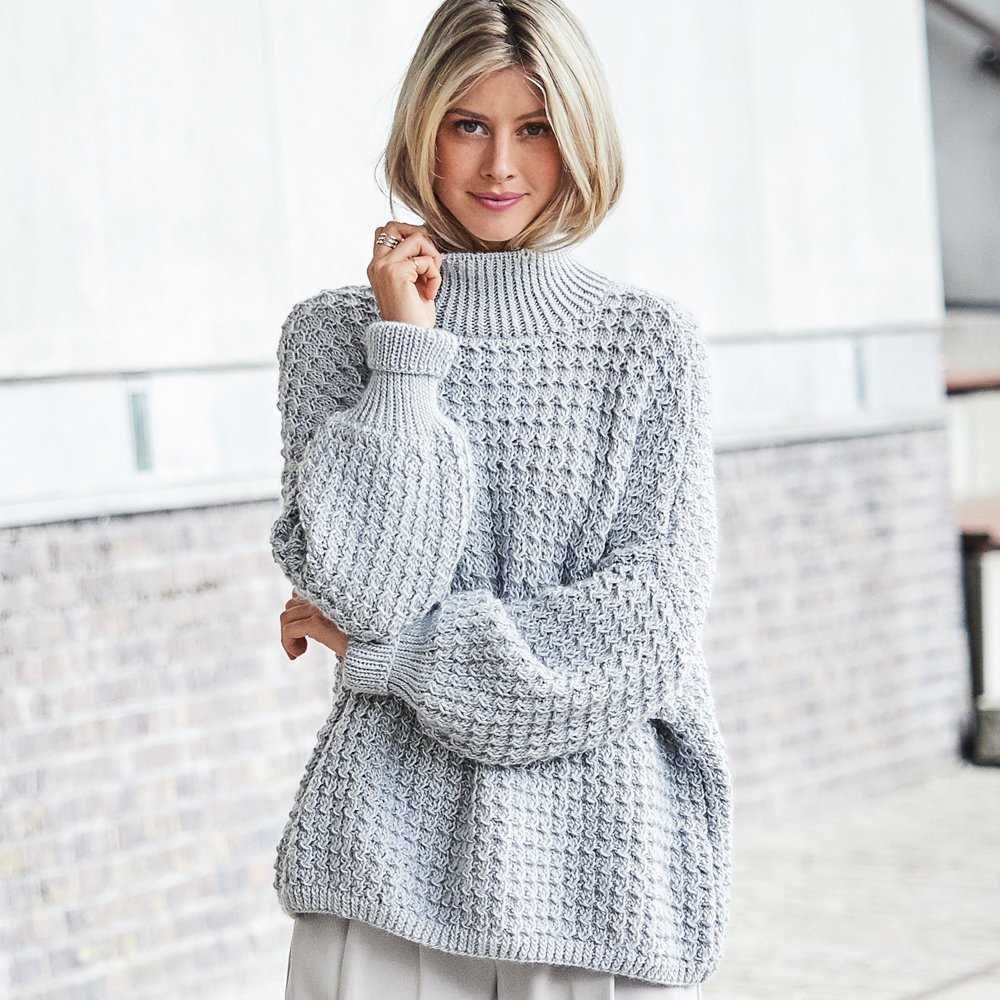
4. Customize the fit: One of the advantages of knitting your own sweater is the ability to customize the fit. Adjust the length, width, and shaping of the sweater to suit your body type and preferences. You can also experiment with different necklines, sleeve lengths, and even the addition of pockets or other embellishments.
5. Embellishments and details: Consider adding embellishments and details to make your sweater truly unique. You can add buttons, beads, embroidery, or even appliques to give your sweater a personal touch. These small additions can make a big impact and allow you to showcase your creativity.
Remember, the beauty of knitting is the ability to make each project your own. With these customization options, you can create a zipper sweater that is not only functional but also a reflection of your personal style and creativity.
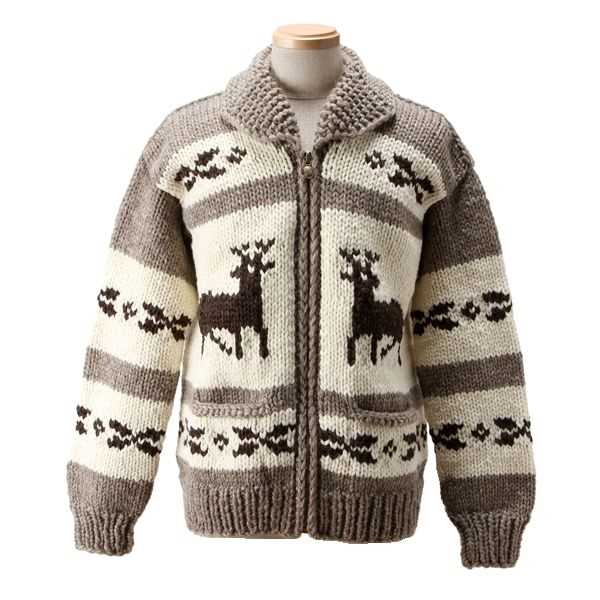
Inspiration and resources for your next zipper sweater project
Zipper sweaters are a classic and versatile addition to any wardrobe. Whether you’re a beginner looking for your first sweater project or an experienced knitter looking for a new challenge, there are plenty of options to choose from. Here, we’ve compiled some inspiration and resources to help you get started on your next zipper sweater project.
Inspiration
There are countless designs and styles to inspire your zipper sweater project. From cozy chunky knits to sleek and modern cardigans, you can find endless possibilities. One way to find inspiration is to browse knitting patterns. Many knitting websites and magazines offer a wide range of zipper sweater patterns to choose from. You can also check out social media platforms like Instagram and Pinterest to see what other knitters have created.
Resources
If you’re new to knitting or need a refresher, there are plenty of resources available to help you learn the skills needed for your zipper sweater project. Online tutorials and video classes are a great way to learn at your own pace and from the comfort of your own home. You can also join local knitting groups or take in-person classes if you prefer a more hands-on approach.
When it comes to finding the right materials for your zipper sweater, your local yarn shop is a great place to start. They can provide guidance on yarn choices and help you find the right gauge for your project. Online yarn stores also offer a wide selection of yarns and can provide detailed information on yarn weight and fiber content.
Don’t forget to check out online communities and forums where knitters gather to share tips, ask questions, and showcase their finished projects. These communities can offer valuable advice and support throughout your zipper sweater knitting journey.
Conclusion
With the right inspiration and resources, your next zipper sweater project is sure to be a success. Whether you’re knitting for yourself or creating a special gift for someone else, the satisfaction of completing a beautiful and functional garment is unbeatable. So gather your supplies, choose your pattern, and get ready to embark on a knitting adventure!