
Knitting is a popular craft that allows individuals to create beautiful and functional items with just a few simple tools and some skeins of yarn. One of the most versatile and stylish items that you can knit is a wristlet. Wristlets are small fingerless gloves that cover the wrists and hands, providing warmth and comfort while leaving the fingers free for movement.
With a wristlet knitting pattern, you can create a wide variety of designs and styles to suit your personal taste and needs. Whether you prefer a simple and classic look or want to experiment with different stitches and patterns, there is a wristlet knitting pattern out there for you. Plus, knitting your own wristlets allows you to customize the size, color, and materials used, making them truly unique and one-of-a-kind.
Wristlets are not only fashionable but also practical. They are perfect for chilly days when you need a little extra warmth without sacrificing dexterity. They can be easily slipped on and off, making them convenient for those who need to use their fingers frequently, such as when typing on a keyboard or using a smartphone. With a wristlet knitting pattern, you can create a stylish accessory that is both fashionable and functional.
So if you’re looking for a new knitting project, why not give wristlets a try? With their versatility, comfort, and style, wristlets are the perfect accessory for any time of the year. Whether you’re a beginner knitter or have years of experience, there is a wristlet knitting pattern out there that is just right for you. So grab your knitting needles and get ready to create your own cozy and stylish wristlets!
Wristlet Knitting Pattern: How to Create a Stylish Wrist Accessory
Knitting your own wristlet is a fun and creative way to add a stylish accessory to your wardrobe. Whether you’re a beginner or an experienced knitter, there are plenty of wristlet patterns available that cater to all skill levels.
One of the key benefits of knitting wristlets is that you can customize them to your liking. You can choose your favorite colors, textures, and patterns to create a unique accessory that reflects your personal style.
To start knitting your wristlet, you will need some basic knitting supplies, such as knitting needles, yarn, and a stitch marker. You can find a variety of wristlet patterns online or in knitting books. These patterns usually include step-by-step instructions, stitch diagrams, and any additional details you may need to complete the project.
Once you have chosen your pattern, it’s time to begin knitting. You will typically start by casting on the required number of stitches and then follow the pattern’s instructions for each row. This may involve simple knitting stitches, such as knit and purl, or more complex techniques such as cables or lace patterns.
As you work through the pattern, you will gradually shape the wristlet by increasing and decreasing stitches. This will create the desired width and length for a comfortable fit on your wrist.
Once you have finished knitting the wristlet, you will usually need to sew the ends together to create a loop that can be slipped over your hand. You may also choose to add buttons, beads, or other embellishments to enhance the design.
Overall, knitting a wristlet can be a rewarding and enjoyable project. It allows you to express your creativity, while also producing a practical accessory that can be worn all year round. So why not give it a try and create your own stylish wrist accessory?
Choosing the Right Yarn and Needles for Your Wristlet
When it comes to knitting a wristlet, it’s important to choose the right yarn and needles to ensure a successful and satisfying project. The choice of yarn will determine the overall look, feel, and durability of your wristlet, while the needles will affect the gauge and stitch definition. Here are some factors to consider when making your selection.
Type and Weight of Yarn
The type and weight of yarn you choose will depend on the desired look and functionality of your wristlet. If you want a lightweight and delicate wristlet, opt for a fingering or lace weight yarn. For a more substantial and warm wristlet, choose a worsted or bulky weight yarn. Consider the fiber content as well, as different yarns can offer different levels of stretch, breathability, and durability.
Needle Size
The needle size you use will determine the gauge of your wristlet and how tight or loose your stitches are. For a tighter and denser fabric, use smaller needles, while larger needles will result in a looser and more open fabric. The size of the needles should correspond to the recommended gauge for the yarn you’ve chosen. Be sure to check the pattern or yarn label for the suggested needle size, and also consider your personal knitting tension.
Considerations for Pattern
When choosing your yarn and needles, it’s important to take into account the specific pattern you’ll be using for your wristlet. Some patterns may require a specific yarn weight or fiber content to achieve the desired results. Additionally, certain stitch patterns or techniques may work better with certain yarns or needle sizes. Make sure to read and understand the pattern instructions before making your yarn and needle selections.
Experiment and Have Fun
Ultimately, the choice of yarn and needles for your wristlet should reflect your personal preferences and style. Don’t be afraid to experiment with different yarns and needle sizes to achieve the look and feel you desire. Knitting should be a fun and creative process, so enjoy the journey and don’t be afraid to make adjustments along the way to create the perfect wristlet.
Step-by-Step Guide to Knitting a Basic Wristlet
Knitting a wristlet is a fun and practical project that can be completed in just a few hours. Whether you’re a beginner or an experienced knitter, this step-by-step guide will help you create a basic wristlet that is both stylish and functional.
Materials Needed:
- Size 8 knitting needles
- One skein of worsted weight yarn
- Tapestry needle
- Scissors
Step 1: Cast On
To begin, cast on 30 stitches using the long-tail cast-on method. This will create the foundation row for your wristlet.
Step 2: Knit in Rib Stitch
Once you have cast on your stitches, begin knitting in a rib stitch pattern. This can be done by knitting one stitch, then purling the next stitch, and repeating this pattern until the end of the row. Continue knitting in this rib stitch pattern for approximately 1 inch.
Step 3: Switch to Stockinette Stitch
After knitting in the rib stitch pattern, switch to stockinette stitch by knitting every stitch in the next row. Continue knitting in stockinette stitch until the piece measures approximately 5 inches from the cast-on edge.
Step 4: Begin Decreasing
Once your wristlet measures 5 inches, it’s time to start decreasing. To decrease, knit two stitches together at the beginning and end of every other row until you have 10 stitches remaining on your needles.
Step 5: Bind Off
After you have decreased to 10 stitches, bind off using your preferred method. Cut the yarn, leaving a long tail, and thread it through the tapestry needle. Slip the needle through the remaining stitches, removing them from the knitting needles.
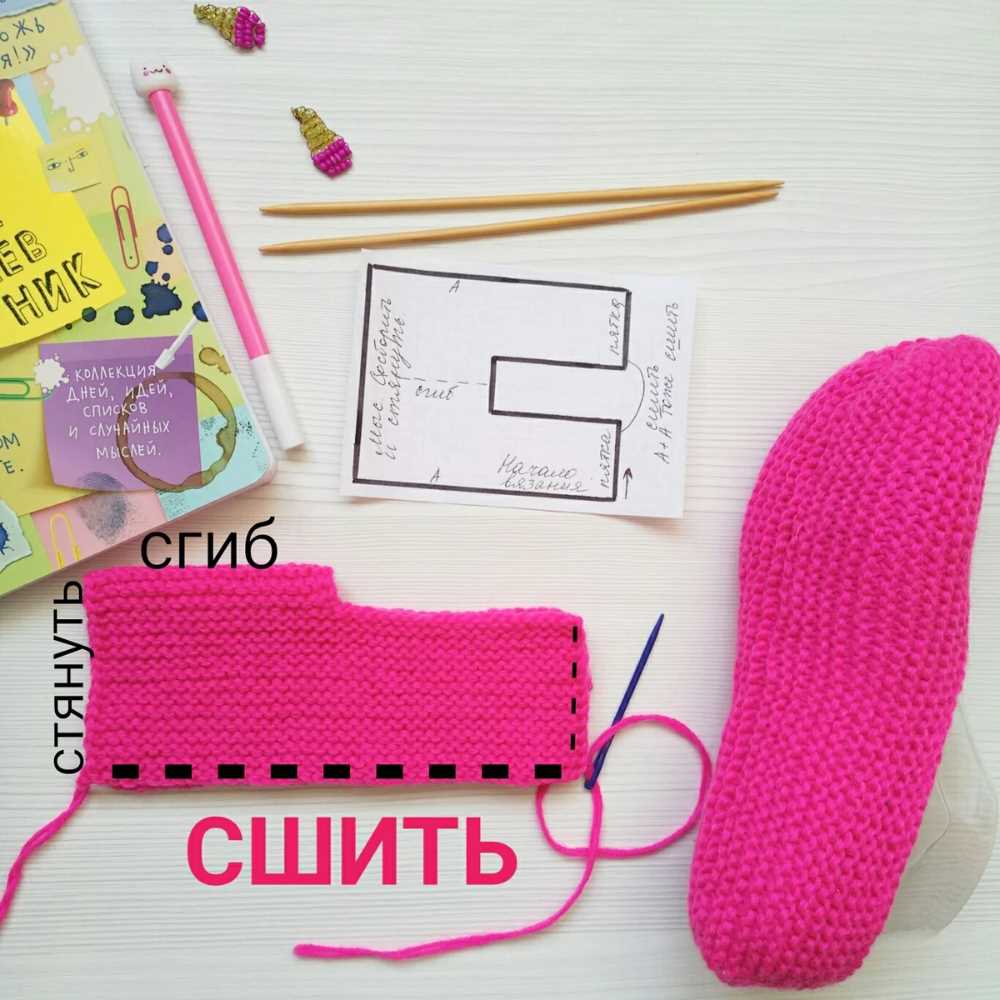
Step 6: Finishing Touches
To finish your wristlet, fold it in half with the right sides facing each other. Use the tapestry needle to sew the side seams together, leaving a small opening for your thumb. Once the side seams are sewn, weave in any loose ends and trim any excess yarn.
And there you have it – a basic knitted wristlet! This versatile accessory can be customized with different yarn colors and stitch patterns to match your personal style. Whether you’re keeping your hands warm or adding a stylish touch to your outfit, this wristlet is sure to become a favorite accessory.
Adding Texture and Pattern to Your Wristlet
When it comes to knitting a wristlet, there are endless possibilities for adding texture and pattern to make your project unique and visually appealing. Whether you prefer a simple and elegant design or something more intricate and eye-catching, incorporating different stitches and techniques can take your wristlet to the next level.
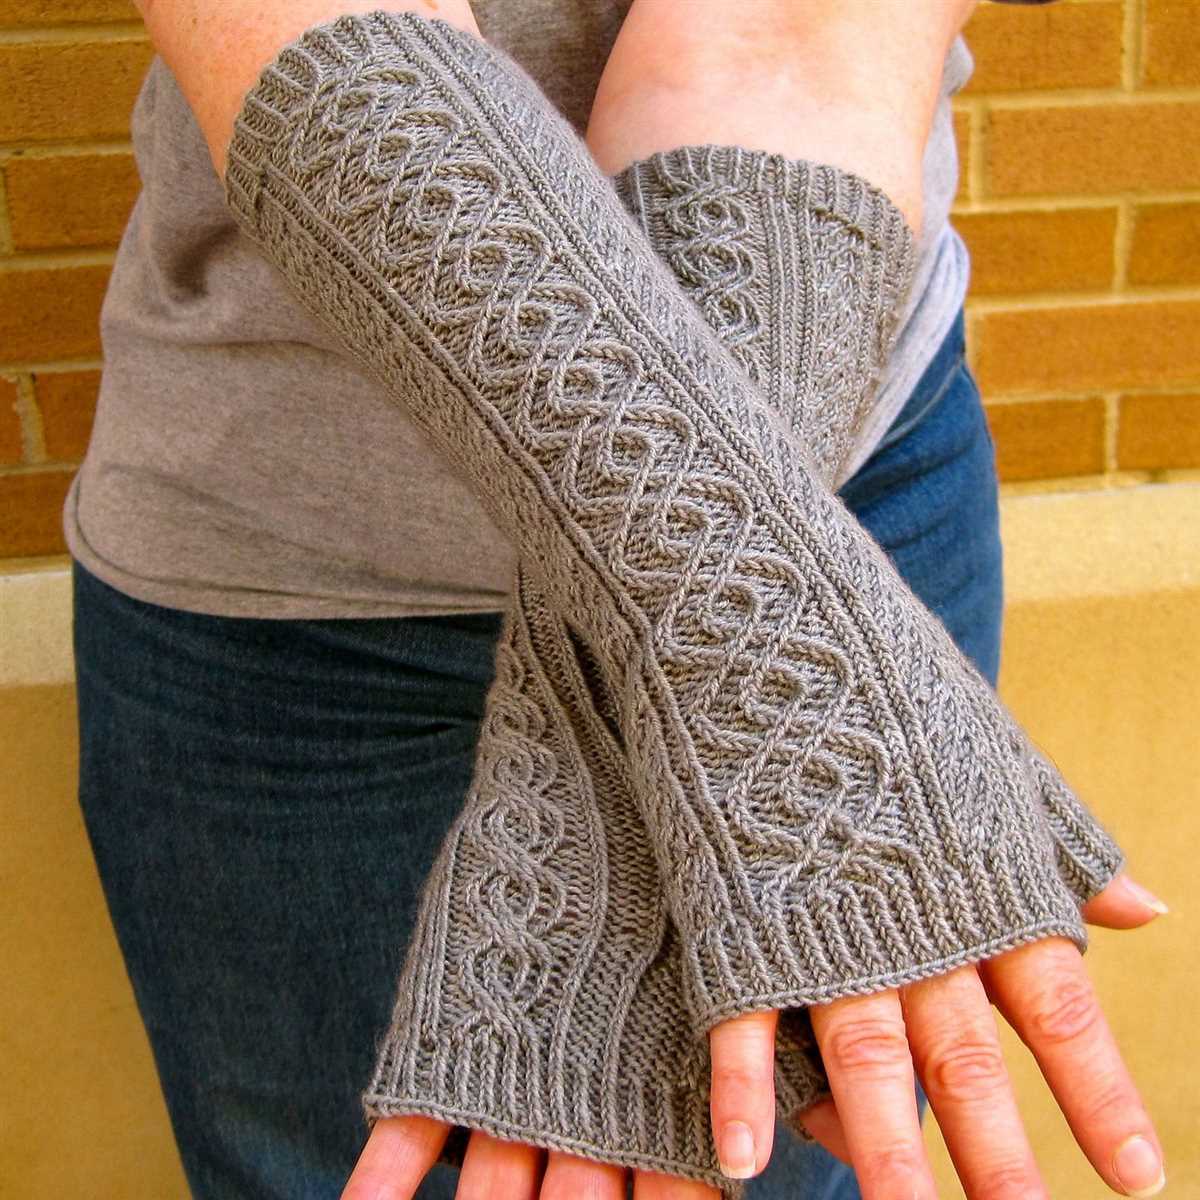
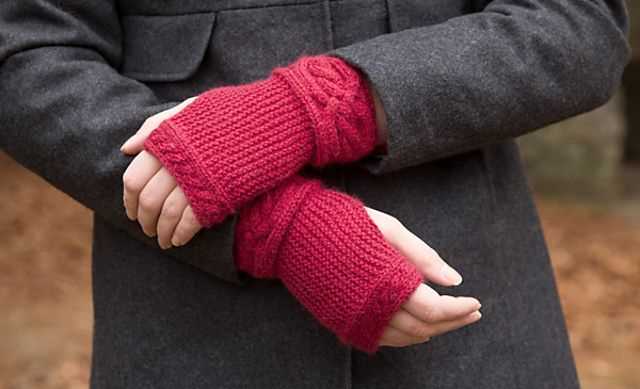
Cables: One way to add texture to your wristlet is by incorporating cable stitches. Cables are created by crossing a set of stitches over one another, creating a twisted effect that adds depth and dimension to your knitting. You can choose from a variety of cable patterns, from basic twists to more complex braids, depending on the level of difficulty you are comfortable with.
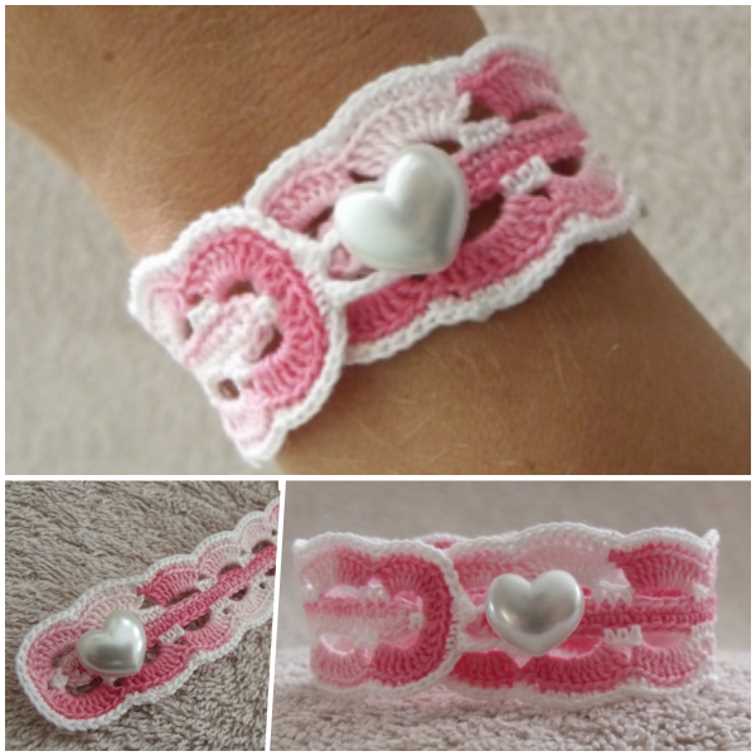
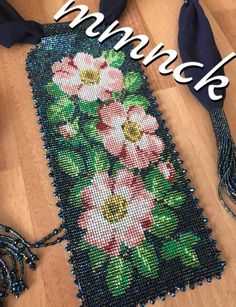
Lace: If you prefer a more delicate and feminine look, lace patterns are a great option. Lace stitches are created by strategically adding yarn overs and decreases to create an openwork design. The result is a light and airy fabric that adds a timeless elegance to your wristlet. From simple eyelets to intricate floral motifs, there are countless lace patterns to choose from to suit your personal style.
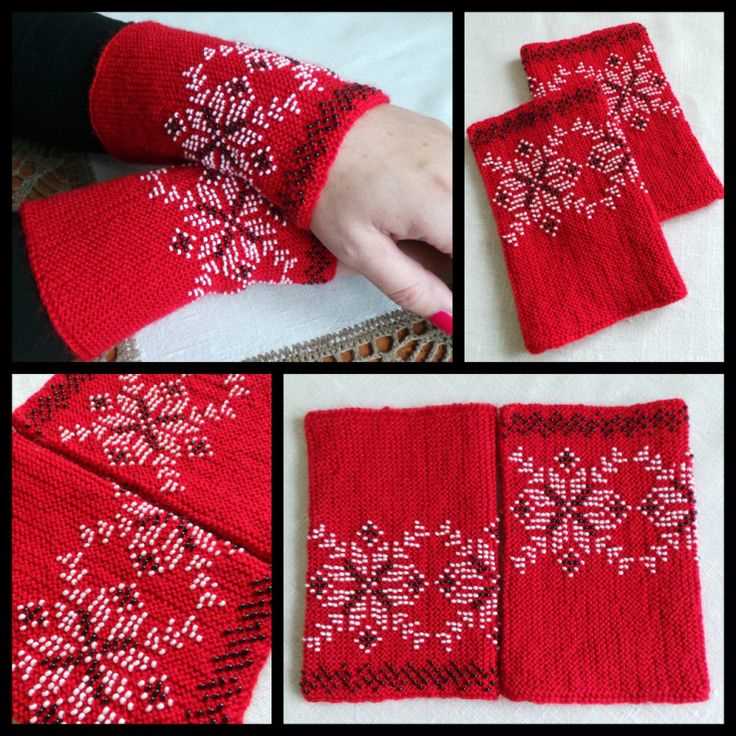
Colorwork: Another way to add visual interest to your wristlet is through colorwork. By combining different colors in your knitting, you can create beautiful patterns and designs. Fair Isle, for example, is a traditional technique that involves using two or more colors in a single row to create intricate patterns. Intarsia, on the other hand, allows you to create individual motifs or pictures within your knitting. Experiment with different color combinations and techniques to achieve the desired effect.
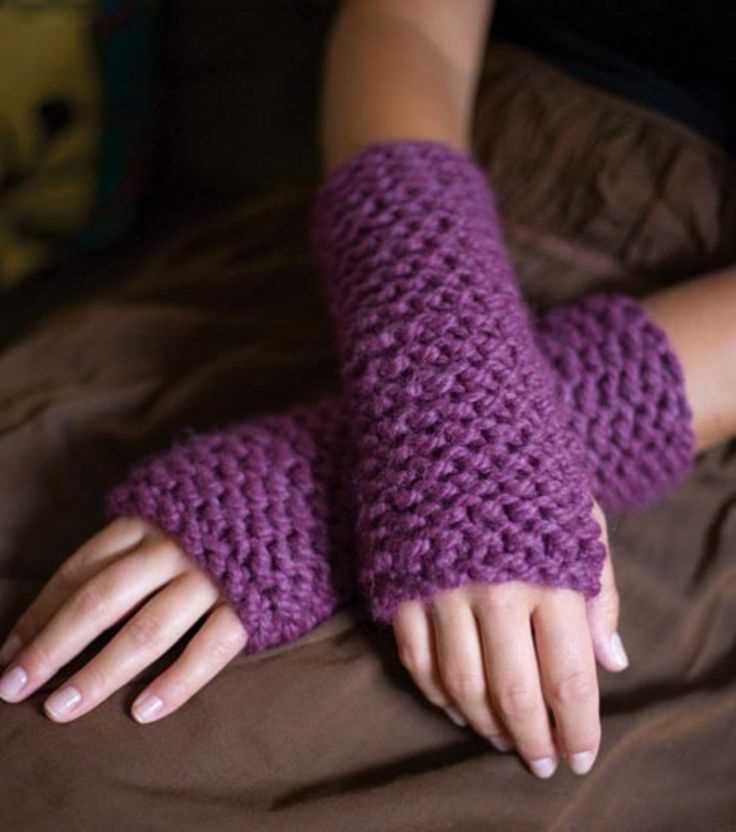
Texture Stitches: If you prefer a more tactile feel to your wristlet, incorporating texture stitches is a great option. Raised stitches such as bobbles or popcorn stitches can add a three-dimensional element to your knitting. Alternatively, you can experiment with different stitch patterns such as seed stitch or moss stitch to create a subtle texture that is visually appealing.
Overall, adding texture and pattern to your wristlet allows you to personalize your project and showcase your knitting skills. Whether you choose to incorporate cables, lace, colorwork, or texture stitches, the possibilities are endless. Have fun experimenting with different techniques and patterns to create a wristlet that is uniquely yours. Happy knitting!
Using Colorwork Techniques in Your Wristlet Design
Colorwork is a popular technique in knitting that allows you to create beautiful and intricate patterns using multiple colors of yarn. When designing a wristlet, incorporating colorwork can add a unique and eye-catching element to your project. By carefully selecting your color palette and utilizing different colorwork techniques, you can create a wristlet that is both stylish and personalized.
Choosing your color palette
Before you begin your wristlet design, it’s important to choose a color palette that complements your personal style and the overall look you want to achieve. Consider the occasion for which you will be wearing the wristlet and the colors that will work well with your wardrobe. You can opt for a bold and vibrant color scheme or go for a more subtle and sophisticated combination. Whatever you choose, make sure the colors harmonize well together and create a visually appealing design.
One popular approach to colorwork is the Fair Isle technique, which involves knitting with two or more colors in a row. This technique allows you to create intricate patterns and motifs on your wristlet, adding depth and texture. You can experiment with different color combinations and placement to achieve the desired effect.
Implementing colorwork techniques
There are various colorwork techniques you can incorporate into your wristlet design, depending on the level of complexity you desire. If you’re new to colorwork, you might want to start with simple techniques such as stripes or color blocks. These techniques involve knitting with two or more colors in separate sections of your wristlet, creating a visually appealing contrast.
If you’re looking for a more intricate design, you can try techniques such as stranded colorwork or intarsia. Stranded colorwork involves carrying multiple colors along the back of your work, while intarsia allows you to create color blocks within your wristlet design. Both techniques require careful attention to tension and yarn management, but can result in stunning and unique patterns.
Remember to swatch your colorwork patterns before starting your wristlet to ensure that the colors and motifs are coming out as desired. Swatching also gives you the opportunity to practice your tension and determine the appropriate needle size for your project.
Final touches
Once you have incorporated colorwork into your wristlet design, you can add some final touches to enhance its overall look. This can include adding a contrasting color for the edging or incorporating additional details such as beads or embroidery. These finishing touches can elevate your wristlet from a simple accessory to a personalized and unique piece.
With careful planning and execution, incorporating colorwork techniques into your wristlet design can result in a stunning and one-of-a-kind accessory. Don’t be afraid to experiment with different color combinations and techniques to create a wristlet that truly reflects your style and creativity.
Creating a Lace Wristlet: Tips and Tricks
Knitting a lace wristlet can be a fun and rewarding project for knitters of all skill levels. Whether you’re a beginner or an experienced knitter, there are a few tips and tricks that can help ensure your lace wristlet turns out beautifully.
Choose the Right Yarn
When knitting a lace wristlet, it’s important to choose the right yarn. Opt for a yarn that is lightweight and has a good drape, such as a silk or bamboo blend. These types of yarns will enhance the delicate and airy look of the lace pattern.
Select the Right Needles
The type of needles you use can greatly impact the outcome of your lace wristlet. For lace knitting, it’s best to use needles with a sharp tip, such as lace needles or needles with a pointy end. This will make it easier to work intricate lace stitches and ensure clean and precise stitch definition.
Block Your Work
Blocking is an essential step in lace knitting, and it can make a significant difference in the final appearance of your wristlet. Once you’ve finished knitting your lace wristlet, gently soak it in water and lay it flat to dry. Use blocking pins to shape the lace pattern and smooth out any uneven stitches. This will help open up the lace and give it a more polished and professional look.
Keep Track of Your Pattern
With lace knitting, it’s easy to lose track of where you are in the pattern, especially when working complex lace stitches. To avoid mistakes and ensure an accurate and consistent lace pattern, use stitch markers or a row counter to keep track of your progress. This will make it easier to catch any mistakes early on and make necessary adjustments.
Practice Patience
Lace knitting can be intricate and time-consuming, so it’s important to practice patience throughout the process. Take breaks when needed, and don’t be discouraged if you make mistakes along the way. Remember that knitting is a craft that requires practice and perseverance, and with time, you will improve your lace knitting skills.
By following these tips and tricks, you can create a lace wristlet that showcases the beauty and elegance of lace knitting. So grab your needles, choose a lovely lace pattern, and get ready to knit a stunning accessory that you’ll be proud to wear or give as a gift!
Adding Embellishments and Decorations to Your Wristlet
When it comes to knitting a wristlet, you have the opportunity to add a personal touch by incorporating embellishments and decorations into your design. These decorative elements can take your wristlet from ordinary to extraordinary, making it a unique accessory that reflects your style and personality.
Here are some ideas for adding embellishments and decorations to your wristlet:
- Embroidery: Consider adding embroidered designs to your wristlet using colorful yarn. You can create intricate patterns, flowers, or even initials to personalize your wristlet.
- Beads and Sequins: Adding beads and sequins can give your wristlet a touch of sparkle and glamour. You can sew them onto your wristlet or incorporate them into your knitting pattern for a more seamless look.
- Pom-poms: Attach small pom-poms to the corners or edges of your wristlet to add a fun and playful element. You can use contrasting or complementary colors to make your pom-poms stand out.
- Ribbons and Bows: Tie ribbons or bows around the closure of your wristlet to add a feminine and stylish touch. Choose ribbons in different widths and textures to create an eye-catching design.
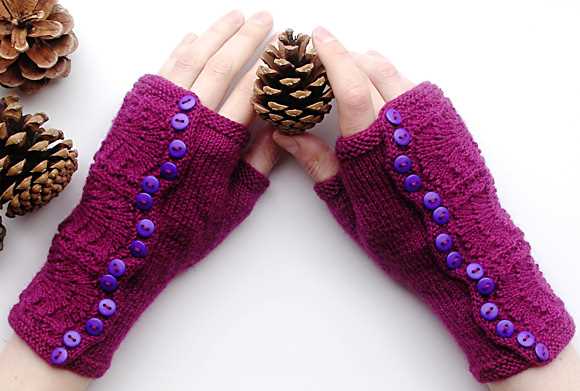
- Buttons: Sewing buttons onto your wristlet can not only serve as a decorative element but also as a functional closure. Choose buttons in different shapes, sizes, and colors to add visual interest to your wristlet.
Remember, when adding embellishments and decorations to your wristlet, consider the overall design and balance. You don’t want to overcrowd your wristlet with too many decorations, as it may become overwhelming. Choose one or two elements that complement your wristlet and enhance its overall appearance.
How to Adjust the Size and Fit of Your Wristlet
When knitting a wristlet, it’s important to ensure that it fits comfortably around your wrist. Fortunately, adjusting the size and fit of your wristlet is relatively easy. Here are some tips to help you customize your wristlet pattern:
1. Gauge Swatch
Start by knitting a gauge swatch using the specified yarn and needle size in your pattern. Measure the number of stitches per inch and rows per inch to determine your gauge. This will help you calculate the necessary adjustments for a perfect fit.
2. Adjusting the Number of Stitches
To make your wristlet larger or smaller, you can adjust the number of stitches cast on. If you want to make the wristlet larger, cast on additional stitches in multiples of the pattern’s stitch repeat. If you want to make it smaller, cast on fewer stitches. Just keep in mind that adding or subtracting stitches will affect the overall pattern and design.
3. Modifying the Length
If you need to adjust the length of your wristlet, you can easily do so by working more or fewer rows. Simply add or subtract rows before or after the cuff section, depending on where you want the wristlet to end. Keep in mind that altering the length may also affect the overall pattern, so make sure to adjust accordingly.
4. Changing the Yarn Weight
If you’re unable to achieve the desired size and fit with the recommended yarn weight, try using a different weight of yarn. Thicker yarn will create a larger wristlet, while thinner yarn will result in a smaller one. However, keep in mind that changing the yarn weight will also affect the fabric’s drape and overall appearance, so consider these factors before making any adjustments.
By following these tips, you can easily customize the size and fit of your wristlet to suit your needs and preferences. Don’t be afraid to experiment and make adjustments along the way to ensure a wristlet that fits you perfectly.
Finishing Touches: Blocking and Seaming Your Wristlet
Once you have completed knitting your wristlet, there are a few finishing touches that can take your project to the next level. Blocking and seaming are two important steps that will help ensure that your wristlet looks polished and professional.
Blocking
Blocking is the process of shaping and stretching your knitting to achieve the desired size and shape. It can help even out your stitches and give your wristlet a more finished appearance. To block your wristlet, you will need to soak it in lukewarm water for 10-15 minutes, gently squeeze out the excess water, and then lay it flat on a clean towel. Use pins to shape the wristlet and allow it to dry completely. Blocking will help open up any lace or cable stitches, and give your wristlet a smooth and even texture.
Seaming
Seaming is the process of joining the different pieces of your wristlet together to create a seamless finished product. Depending on the pattern you are using, you may need to seam the sides, bottom, and/or top of your wristlet. To seam your wristlet, use a tapestry needle and the same yarn that you used for knitting. Start by aligning the edges you want to seam and use a whipstitch or mattress stitch to sew them together. Take your time and ensure that your seam is neat and even. Once you have finished seaming, weave in any loose ends to give your wristlet a clean and professional look.
By taking the time to block and seam your wristlet, you can transform it into a beautiful and functional accessory. These finishing touches will not only enhance the appearance of your wristlet but also ensure that it fits well and holds its shape over time. With some patience and attention to detail, you can create a wristlet that you will be proud to wear or gift to someone special.
Wristlet Styling Ideas: How to Wear and Pair Your Knitted Accessory
Now that you have mastered the art of knitting wristlets, it’s time to explore various ways to wear and pair your knitted accessory. Wristlets are not only functional but also stylish, making them versatile additions to any outfit. Whether you want to add a touch of warmth to your winter ensemble or make a fashion statement, wristlets are a perfect choice.
Here are some styling ideas to help you make the most of your knitted wristlets:
- Layered Look: Pair your wristlets with a long-sleeved shirt or sweater for a layered look. This adds depth to your outfit and allows you to show off your wristlets while keeping warm.
- Color Coordination: Choose wristlets in a color that complements your outfit. Opt for neutral shades, such as black, gray, or beige, for a classic and versatile look. If you want to make a bold statement, go for vibrant colors that contrast with your clothing.
- Contrasting Textures: Experiment with combining different textures in your outfit. For example, pair your knitted wristlets with a leather jacket or a silk blouse to create an interesting contrast.
- Mix and Match: Don’t be afraid to mix and match patterns and prints. Pair your wristlets with a striped or plaid shirt for a fun and eclectic look, or match them with a floral dress to add a touch of whimsy.
- Accessorize: Add other accessories, such as a statement necklace or a beanie hat, to complete your look. Coordinate the colors or styles of your accessories to create a cohesive and fashionable ensemble.
- Formal Occasions: Wristlets can also be styled for more formal occasions. Pair them with a dress or a tailored blazer for a sophisticated and elegant look. Opt for wristlets in a luxurious yarn, such as cashmere, to elevate your outfit.
In conclusion, wristlets are versatile accessories that can be styled in numerous ways to suit your personal taste and the occasion. Whether you prefer a casual or formal look, there is a wristlet styling idea for every occasion. So, have fun experimenting and showcasing your knitting skills with your stylish wristlets!
Q&A:
What is a wristlet knitting pattern?
A wristlet knitting pattern is a set of instructions that guide you in knitting a small, tube-like accessory that covers the wrist. It is usually worn on one or both wrists and can be used as a fashion statement or for practical purposes such as keeping the wrists warm.
How do I read a wristlet knitting pattern?
To read a wristlet knitting pattern, you will need to be familiar with basic knitting terminology and techniques. The pattern will provide instructions on the type of yarn and needles to use, as well as the stitches and techniques required. It will also include a stitch pattern or design to create the desired look for the wristlet.
Can I customize a wristlet knitting pattern?
Yes, you can customize a wristlet knitting pattern to suit your preferences. You can choose different colors of yarn, adjust the size, or modify the stitch pattern to create a unique design. Just make sure to gauge your changes properly to ensure the final product turns out as desired.
Are wristlet knitting patterns suitable for beginners?
Wristlet knitting patterns can vary in difficulty, but there are many patterns available that are suitable for beginners. Look for patterns labeled as “easy” or “beginner-friendly,” as they will typically use basic stitches and techniques that are easier to master. Starting with a simpler pattern can help you build the necessary skills and confidence before moving on to more complex designs.
What are some popular wristlet knitting patterns?
Some popular wristlet knitting patterns include basic ribbed wristlets, cable-knit wristlets, lace wristlets, and colorwork wristlets. These patterns can be found in knitting books, magazines, and online knitting communities. Additionally, you can find countless free wristlet knitting patterns on various knitting blogs and websites.
What is a wristlet knitting pattern?
A wristlet knitting pattern is a set of instructions and guidelines that allows you to knit a wrist cuff or wrist warmer. It typically includes information on the type and size of yarn to use, the recommended needle size, the stitch pattern to follow, and the number of rows or rounds to knit to achieve the desired length. It may also include instructions for any decorative details or finishing techniques.