
Knitting a sweater from the top down is a popular technique that allows for easy customization and a seamless finish. With this free knitting pattern, you can create your own top down sweater, perfect for staying warm and stylish during the colder months.
The top down construction means that you will start knitting at the neckline and work your way down to the hem. This allows you to try on the sweater as you go, making adjustments for the perfect fit. Whether you prefer a crew neck, a V-neck, or a turtleneck, this pattern can be easily customized to suit your personal style.
This free knitting pattern includes instructions for a range of sizes, ensuring that you can create a sweater that fits you perfectly. The pattern also includes detailed instructions and helpful tips, making it accessible for knitters of all skill levels. So whether you’re a beginner or an experienced knitter, you can confidently tackle this top down sweater project.
Top Down Sweater Knitting Pattern Free
Are you looking for a free knitting pattern for a top-down sweater? Look no further! We have a great collection of top-down sweater patterns that are available for free. Whether you’re a beginner or an experienced knitter, you’ll find a pattern that suits your skill level and style.
Knitting a sweater from the top down has many advantages. First, you can try it on as you go, ensuring a perfect fit. Second, you can customize the length of the sleeves, body, and neckline to your liking. Third, you can easily adjust the pattern to accommodate different yarn weights and gauges.
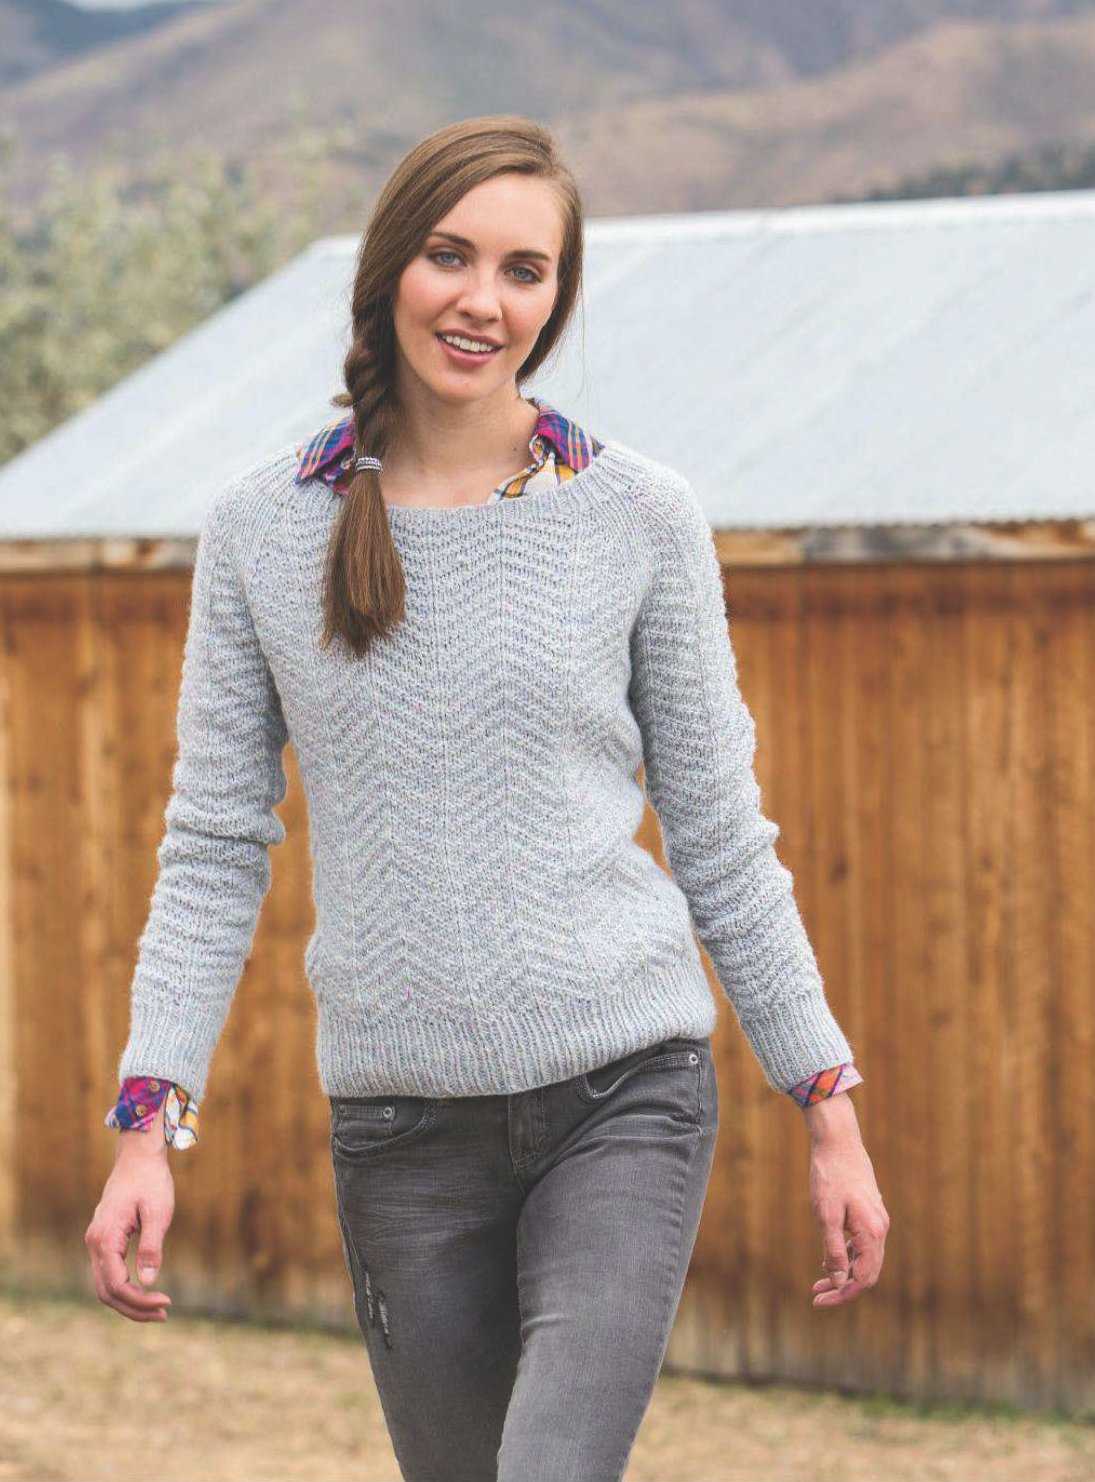
One popular top-down sweater pattern is the “Raglan Sweater.” This pattern features a classic raglan construction, where the sleeves and body are knit seamlessly from the top down. It’s a versatile design that can be dressed up or down, depending on the yarn and stitch pattern you choose.
If you prefer a more feminine style, you might like the “Lace Panel Sweater” pattern. This pattern incorporates delicate lace panels along the sleeves and body, adding a touch of elegance to your wardrobe. The top-down construction allows for easy customization, so you can adjust the length of the lace panels to suit your preferences.
If you’re new to knitting or prefer a simpler design, the “Basic Top-Down Sweater” pattern is a great choice. This pattern is perfect for beginners, as it uses basic stitches and requires minimal shaping. It’s a versatile design that can be dressed up or down, depending on the yarn and color you choose.
These are just a few examples of the many top-down sweater patterns available for free. Whether you’re looking for a classic design or something more modern, you’re sure to find a pattern that suits your style and skill level. So grab your knitting needles and start creating your own top-down sweater today!
Why Choose a Top Down Sweater?
When it comes to knitting a sweater, there are many different approaches and techniques to choose from. One popular method is the top down construction, which offers several advantages for knitters. Whether you’re a beginner or an experienced knitter, a top down sweater pattern can be a great choice for your next project.
1. Versatility and Customization: One of the main benefits of knitting a top down sweater is the ability to customize the fit and style to suit your preferences. By starting at the neckline and working towards the hem, you have the opportunity to try the sweater on as you go and make adjustments as needed. You can easily modify the length, sleeves, and neckline to create a sweater that fits your body shape perfectly.
2. Avoid Seaming: Another advantage of top down sweaters is the absence of seams. With this construction method, you knit the entire sweater in one piece, eliminating the need to sew pieces together at the end. This not only saves time and effort but also creates a seamless and polished final result.
3. Faster Progress: Knitting a top down sweater can also be faster compared to other construction methods. Since you start at the neckline and work your way down, the rows become smaller as you progress, making each subsequent row quicker to complete. This can be motivating for knitters and allows for faster progress and a shorter overall knitting time.
4. Easy Pattern Modifications: With a top down sweater, it’s easier to modify the pattern to suit your preferences. You can easily adjust the stitch pattern, add or remove details, or experiment with different yarn weights and colors. This flexibility allows you to make the sweater truly unique and tailor it to your personal style.
In conclusion, a top down sweater offers versatility, customization, and the opportunity to avoid seaming. It allows for faster progress and offers easy modifications to the pattern. Whether you’re a beginner or an experienced knitter, a top down sweater pattern can be a rewarding and enjoyable project.
Advantages of Knitting a Sweater from the Top Down
Knitting a sweater from the top down offers several advantages over other construction methods. One of the main benefits is that it allows for greater customization and fit. When starting from the top, you have the ability to try on the sweater as you go and make adjustments based on your own body measurements. This ensures that the sweater will fit you perfectly and flatter your figure.
Another advantage of knitting from the top down is that it allows for easy modification and experimentation. Since you are working from the top, you can easily make changes to the length, width, or shape of the sweater as you go along. This gives you the freedom to be creative and adapt the pattern to your own preferences.
Knitting from the top down is also a time-saving technique. Using this method, you can avoid the need for sewing or seaming pieces together at the end. The construction is seamless, which not only saves time but also creates a more polished and professional-looking finished product.
Additionally, knitting a sweater from the top down can be more intuitive and easier to follow for beginners. Starting from the top allows you to focus on one section at a time, making it less overwhelming than starting with the entire body or sleeves. This can give beginners a sense of accomplishment and motivation to continue with their knitting projects.
In summary, knitting a sweater from the top down offers the advantages of greater customization, easy modification, time-saving construction, and a more intuitive process for beginners. Whether you are an experienced knitter or just starting out, this technique provides a versatile and enjoyable way to create a beautiful and well-fitting sweater.
Materials and Tools Needed
When starting a top-down sweater knitting project, it’s important to gather all the necessary materials and tools beforehand. Here is a list of the items you’ll need:
Yarn:
- Main yarn: Choose a yarn that suits your desired final look and feel of the sweater. It should be soft, durable, and in a weight that will work with your chosen pattern.
- Contrasting yarn: Sometimes, you may want to add some color accents or stitch patterns to your sweater using a contrasting yarn. Make sure to select a contrasting color that complements the main yarn.
Knitting Needles:
- Circular needles: You’ll need a set of circular needles in the appropriate size for your chosen pattern. The length of the needles will depend on the size of your sweater. Make sure they are long enough to comfortably accommodate all the stitches.
- Double-pointed needles (DPNs): DPNs are often used for knitting smaller sections of the sweater, such as sleeves or neckline. Choose a set of DPNs in the same size as your circular needles.
Stitch Markers:
- Locking stitch markers: These markers are used to mark specific stitches, such as the beginning of the round or stitch patterns. They can easily be opened and closed.
- Removable stitch markers: These markers are useful for marking areas where you may want to make adjustments, or for marking the underarm stitches.
Tapestry Needle:
A tapestry needle, also known as a yarn needle or darning needle, is needed for weaving in ends and seaming the sweater if necessary.
Scissors:
A pair of sharp scissors is essential for cutting the yarn and trimming any excess.
Having all these materials and tools ready will ensure a smooth and enjoyable knitting experience as you create your own top-down sweater.
Getting Started: Casting On

Before you begin knitting your top down sweater, you need to cast on your stitches. Casting on is a technique used to create the first row of stitches on your knitting needle. There are several different methods you can use to cast on, but for this pattern, we will be using the long tail cast on method.
Materials:
- Yarn of your choice
- Knitting needles in the appropriate size
- Tape measure or ruler
- Tapestry needle
Long Tail Cast On:
- Start by making a slip knot on your knitting needle. To do this, create a loop with the yarn and insert your knitting needle through the loop. Pull the yarn tight to create a knot on the needle.
- Hold the needle with the slip knot in your right hand and the tail of the yarn in your left hand. With your left hand, take the tail end of the yarn and drape it over your thumb and index finger.
- With your right hand, take the working end of the yarn and pass it under your thumb and index finger, creating a loop.
- Bring the needle behind the loop and insert it from left to right through the loop.
- With your right hand, bring the working end of the yarn over the needle and pull it through the loop. Slide the loop onto the needle.
- Repeat steps 3-5 until you have cast on the desired number of stitches for your sweater.
Once you have cast on all of your stitches, you are ready to move on to the next step of your top down sweater knitting pattern. Make sure to count your stitches to ensure you have the correct number before continuing with the pattern.
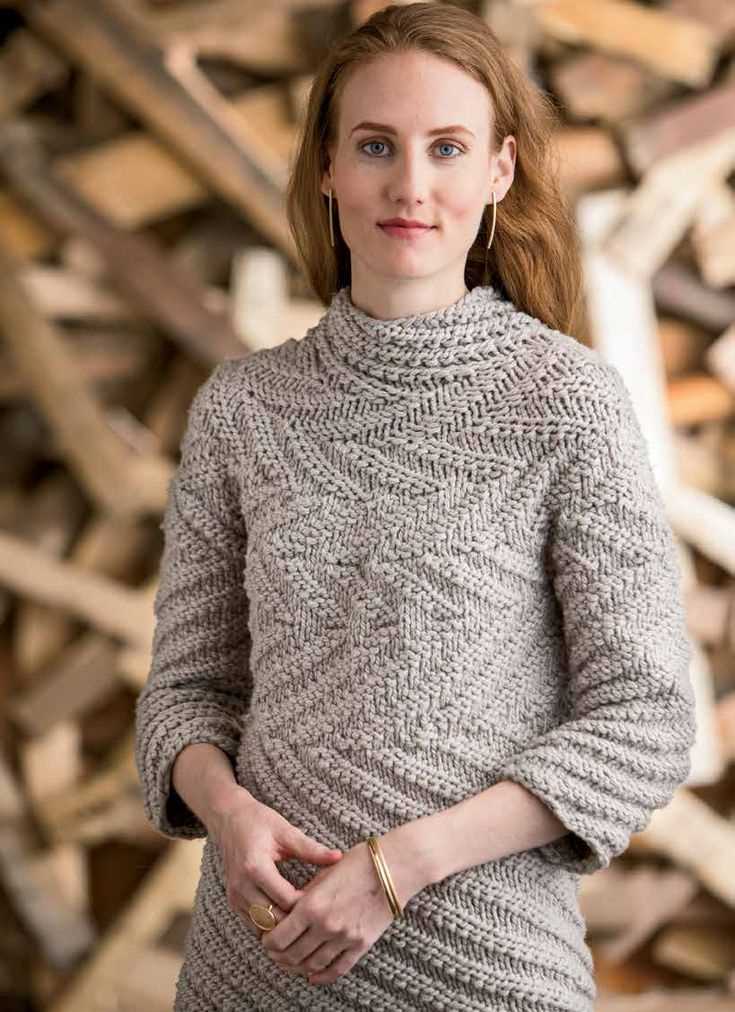
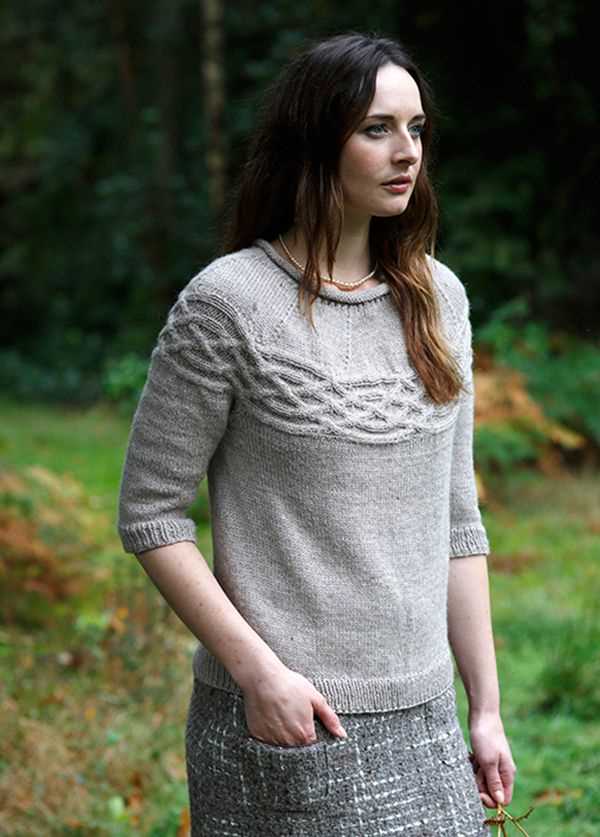
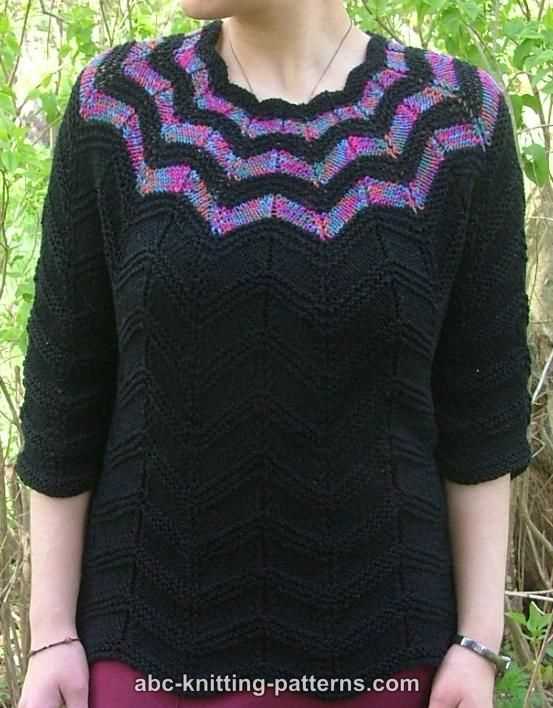
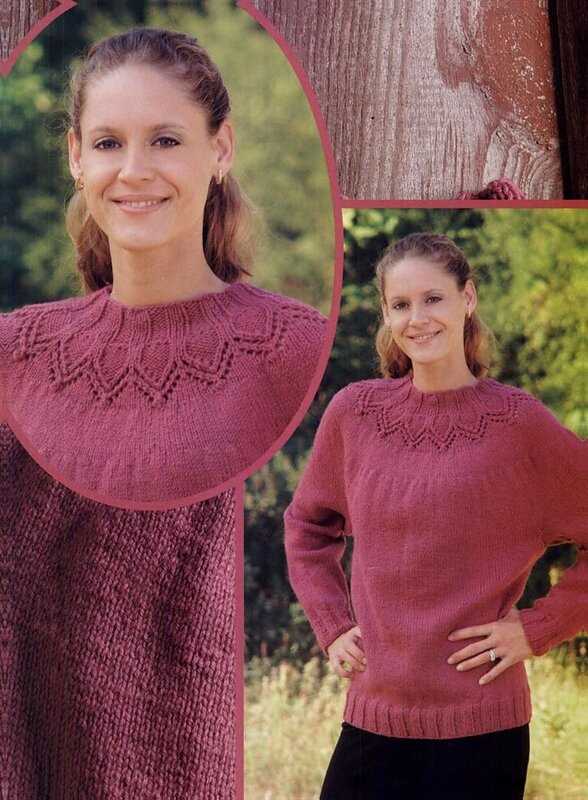
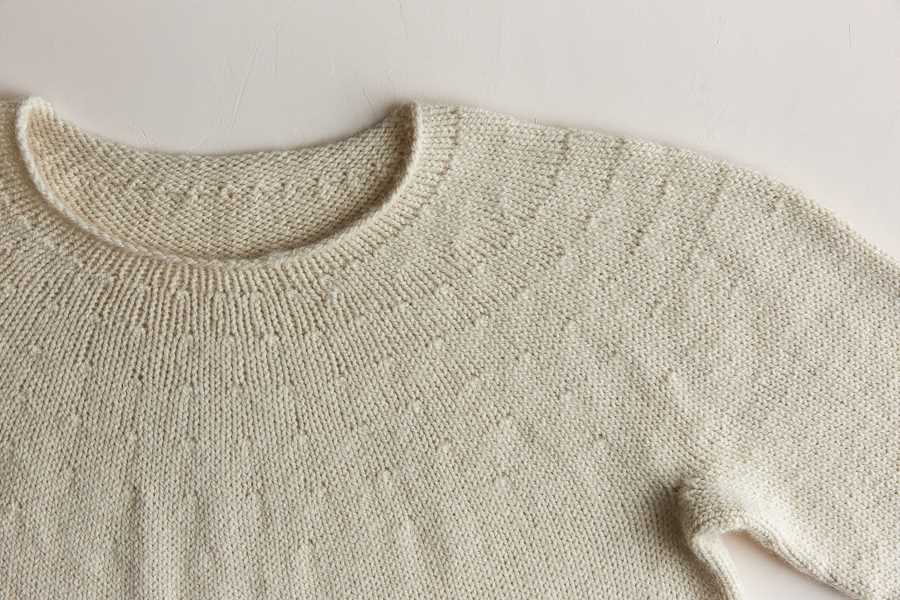
Knitting the Yoke
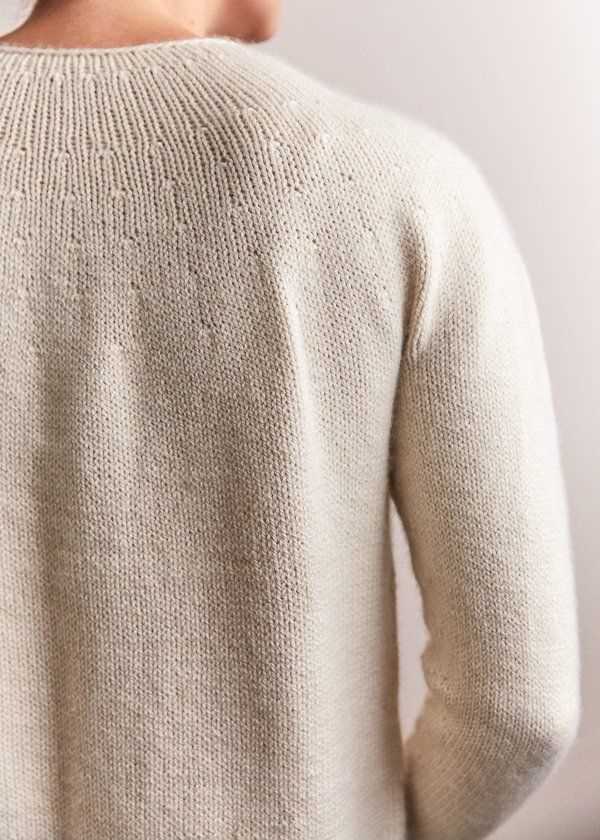
When knitting a top-down sweater, the yoke is typically the first part of the sweater that is worked. The yoke refers to the section of the sweater that covers the shoulders and upper chest. It is where the shaping is done to create the neckline and fit of the sweater.
The yoke is usually worked in the round, starting from the neckline and gradually increasing in stitches to create the desired width. The increases are often done using a technique called “raglan shaping”, where increases are made at certain intervals to create diagonal lines that extend from the underarm to the neckline.
There are many different patterns and stitch designs that can be used for the yoke of a top-down sweater. Some popular options include cables, lace, colorwork, or simple stockinette stitch. The choice of stitch pattern can depend on the desired style and complexity of the sweater.
When following a top-down sweater pattern, it is important to carefully read and understand the instructions for the yoke before beginning. Pay attention to any specific shaping instructions or stitch patterns that may be used. It can also be helpful to take accurate measurements of your body or a well-fitting sweater to ensure that the yoke will fit properly.
Overall, knitting the yoke of a top-down sweater can be an exciting and creative process. It allows you to customize the fit and design of your sweater from the very beginning, making it a truly unique and personalized garment.
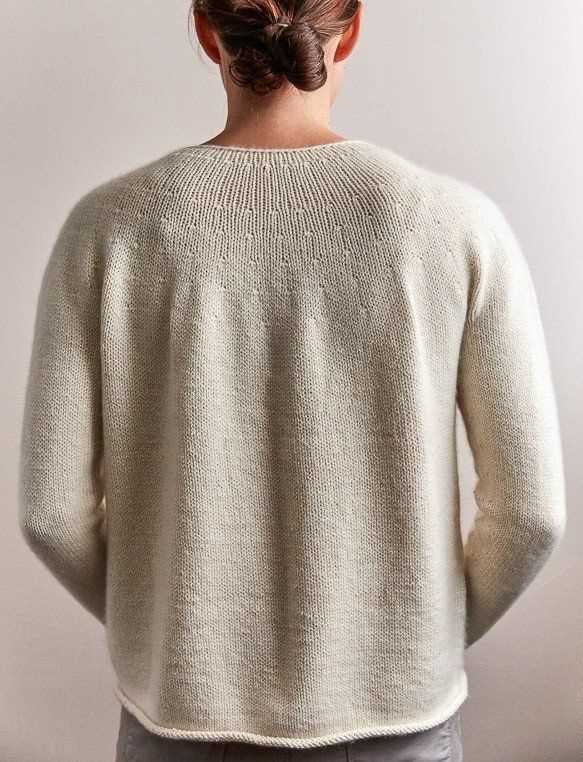
Shaping the Body

When knitting a top-down sweater, shaping the body is an important step to ensure a flattering fit. There are several ways to shape the body, including increasing or decreasing stitches to create curves or a fitted waist. One common method is to use raglan shaping, which involves increasing stitches evenly along the raglan lines to create a diagonal line that extends from the underarm to the neckline. This creates a seamless transition between the sleeves and the body of the sweater.
Another method of shaping the body is through the use of waist shaping. This involves decreasing stitches at the sides of the sweater to create a more fitted silhouette. Waist shaping can be done by decreasing evenly on each side, or by using specific stitch patterns such as darts or princess seams. By strategically decreasing stitches, you can create a tailored and feminine look.
To ensure a proper fit, it’s important to take accurate measurements of your body before starting the shaping process. This includes measuring your bust, waist, and hip circumference, as well as the length from your underarm to your desired sweater length. By comparing these measurements to the pattern instructions, you can determine the number of stitches to increase or decrease and at what intervals.
When shaping the body, it’s important to keep track of your stitch count and placement of increases and decreases. You may find it helpful to use stitch markers to mark the raglan lines or waist shaping points to keep track of your progress. Additionally, it’s important to try on the sweater periodically to ensure a proper fit and make any necessary adjustments along the way.
Overall, shaping the body is an essential step in top-down sweater knitting. Whether you prefer raglan shaping, waist shaping, or a combination of both, it’s important to take accurate measurements and carefully follow the pattern instructions to achieve the desired fit. With some time and attention to detail, you can create a beautifully fitted sweater that flatters your body shape and showcases your knitting skills.
Creating the Sleeves
Once you have completed the body of the sweater, it’s time to move on to creating the sleeves. The sleeves are an important part of the sweater construction, as they provide warmth and comfort to the wearer.
To start, you will pick up stitches along the armhole edge of the body. Be sure to use a needle size that matches the gauge of your sweater to ensure a proper fit. Once you have picked up the stitches, you will begin working in the round, using your chosen stitch pattern.
As you work on the sleeves, you will need to shape them to fit the arm. This is typically done by increasing or decreasing stitches at regular intervals. The top down construction allows you to try on the sweater as you go, making it easier to adjust the fit of the sleeves. Make sure to measure your arm circumference and length to ensure a proper fit.
After you have completed the desired length of the sleeves, you can finish them off by binding off the stitches in a neat and tidy manner. You can choose to add ribbing or a decorative edge to the cuff of the sleeves for a polished look. Once the sleeves are complete, you can try on your sweater and make any necessary adjustments. Now your top down sweater is almost complete!
Adding Extra Details: Cables, Ribbing, and Colorwork
If you want to add extra details to your top-down sweater knitting pattern, there are a few different techniques you can try. Cables, ribbing, and colorwork are all popular options that can add visual interest and texture to your design.
Cables
Cables are a great way to add a classic, timeless look to your sweater. They create a three-dimensional texture that can be eye-catching and beautiful. To create cables, you will need to work with a cable needle or use a cable without a cable needle technique. With a cable needle, you cross a certain number of stitches over or under each other to create the cable twist. Without a cable needle, you can manipulate the stitches directly on the needle to create the twist. You can choose from a variety of cable patterns, such as simple twists or more intricate designs.
Ribbing
Ribbing is a versatile technique that adds stretch and structure to your sweater. It is commonly used for cuffs, hems, and necklines. Ribbing is created by alternating knit and purl stitches in a specific pattern. The most common ribbing patterns are 1×1 ribbing (alternating knit and purl stitches), 2×2 ribbing (two knit stitches followed by two purl stitches), and 3×3 ribbing (three knit stitches followed by three purl stitches). Ribbing can be used to create a fitted look or add a decorative touch to your sweater.
Colorwork
Colorwork is a technique that involves knitting with multiple colors to create patterns or designs. It can be as simple as knitting stripes or as complex as creating intricate Fair Isle or intarsia patterns. You can use colorwork to add visual interest to your sweater, highlight certain areas, or create a unique and personalized design. To work with multiple colors, you will need to carry the unused colors along the back of the work or use a colorwork technique like duplicate stitch to add the design after the main knitting is complete.
Adding cables, ribbing, or colorwork to your top-down sweater can elevate the design and make it truly one-of-a-kind. Experiment with different techniques and patterns to create a sweater that reflects your personal style and preferences.
Finishing Touches: Neckline and Hem
When it comes to finishing a top-down sweater, the neckline and hem are two of the most important details. They can greatly impact the overall look and fit of the garment. Here are some tips and techniques to consider when it comes to finishing these areas.
Neckline
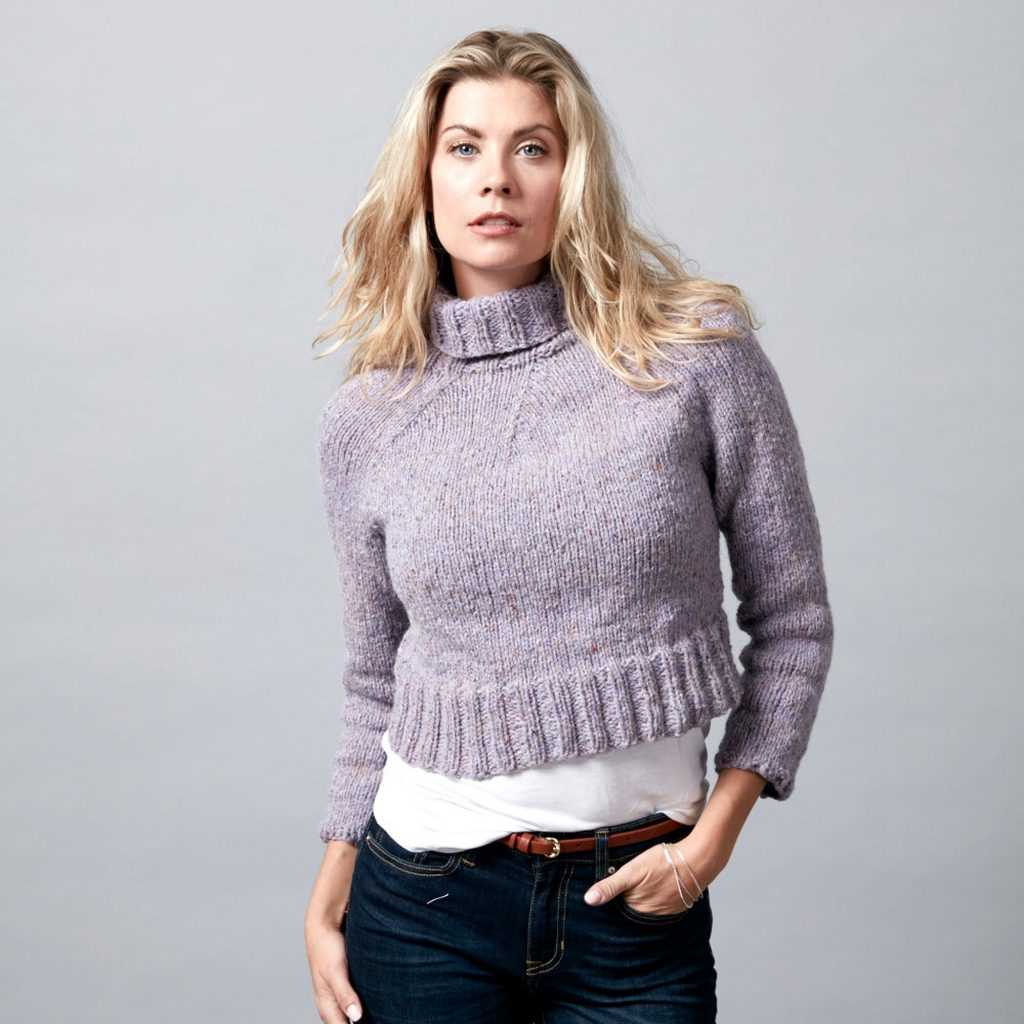
The neckline of a sweater can be modified to suit your personal style and preference. A popular option is the crew neck, which sits at the base of the neck and gives a classic, timeless look. Another option is the V-neck, which creates a flattering shape and adds a touch of elegance to the sweater. For a more modern and casual look, consider a boat neck or scoop neck.
There are several ways to finish the neckline of a top-down sweater. One common method is to pick up stitches along the edge of the neckline and then work a few rows of ribbing or another decorative stitch pattern. This helps to stabilize the edge and prevent it from stretching out over time. Another option is to use a bind-off method, such as the picot bind-off or the tubular bind-off, to create a clean and polished edge.
Hem
The hem of a top-down sweater refers to the bottom edge of the garment. It is important to choose a hem that complements the overall design and style of the sweater. A simple folded hem is a classic choice, as it adds a clean and polished finish. Another option is to add a decorative edging, such as a picot or scalloped edge, for a more feminine and delicate look.
When finishing the hem, it is important to consider the desired length of the sweater. If you want a longer length, you may need to add additional rows or rounds to the hem before finishing it off. On the other hand, if you want a cropped or shorter length, you may need to bind off the stitches earlier or decrease the number of rows.
Overall, the neckline and hem of a top-down sweater are crucial finishing touches that can greatly enhance the final look of the garment. By choosing the right neckline and hem and using the appropriate finishing techniques, you can create a sweater that is both stylish and comfortable to wear.
Blocking and Care Instructions
Blocking is an essential step in finishing your top-down sweater. It helps to shape the garment and give it a polished look. To block your knitted sweater, follow these steps:
1. Wet Blocking
Fill a sink or basin with lukewarm water and add a gentle wool wash or mild detergent. Immerse the sweater in the water, making sure it is fully submerged. Gently squeeze the water through the fibers, but avoid wringing or twisting the sweater. Let it soak for about 15-20 minutes.
After soaking, remove the sweater from the water and gently squeeze out the excess water. Place the sweater on a clean towel and roll it up, pressing down firmly to remove more water. Unroll the towel and lay the sweater flat on another clean towel, shaping it to its desired dimensions.
2. Dry Blocking
Once the sweater is in the desired shape, use blocking pins to secure it in place. Place the pins along the edges and any specific areas that need shaping. Allow the sweater to air dry in a well-ventilated area, away from direct sunlight or heat sources.
It is important to follow the care instructions for your specific yarn and sweater. In general, hand-washing or dry cleaning is recommended for knitted garments. Avoid using harsh detergents or bleaching agents, as they can damage the fibers. Instead, use a gentle wool wash or mild detergent designed for delicate fabrics.
When storing your sweater, always fold it neatly and place it in a breathable garment bag or drawer. This will help prevent any stretching or snagging. Avoid hanging it on a hanger, as this can distort the shape of the garment.
With proper care and blocking, your top-down sweater will maintain its shape and last for years to come. Happy knitting!
Adapting the Pattern: Customization Options
While the provided top-down sweater knitting pattern is a great starting point, you may want to customize it to suit your preferences and style. Here are some customization options that you can consider:
Varying the Sleeve Length
If you prefer a different sleeve length than what is specified in the pattern, you can easily modify it. Simply measure the desired length from your shoulder to where you want the sleeve to end, and adjust your knitting accordingly. Keep in mind that the stitch gauge may be affected, so make sure to check your measurements to ensure a proper fit.
Adding or Removing Waist Shaping
If you want to create a more fitted or relaxed silhouette, you can add or remove waist shaping. To add shaping, decrease or increase stitches evenly across the waist section of the sweater. To remove shaping, maintain the same number of stitches throughout the waist section. Remember to adjust the stitch count accordingly to maintain the stitch pattern.
Changing the Neckline
If you prefer a different neckline than the one specified in the pattern, you can customize it to your liking. Options include a crew neck, V-neck, boat neck, or scoop neck. To change the neckline, you will need to adjust the stitch count and shaping accordingly. Refer to a knitting resource or pattern for your desired neckline for specific instructions.
Adding or Modifying Stitch Patterns
If you want to incorporate different stitch patterns into your sweater, feel free to do so. You can replace the stitch pattern in the original pattern with a new one, or add additional stitch patterns to create a more intricate design. Make sure to adjust the stitch count and repeat of the stitch pattern to maintain the overall sizing of the sweater.
When customizing the top-down sweater knitting pattern, it’s important to keep track of your modifications and make notes so that you can recreate the design in the future if desired. Additionally, swatching and checking your gauge before starting the project will help ensure that your modifications will result in a well-fitting garment.