
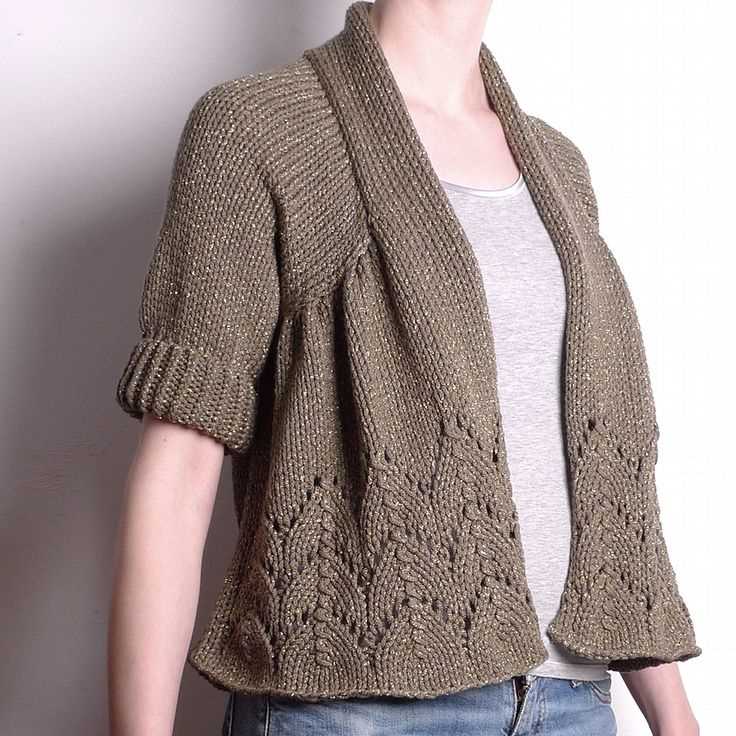
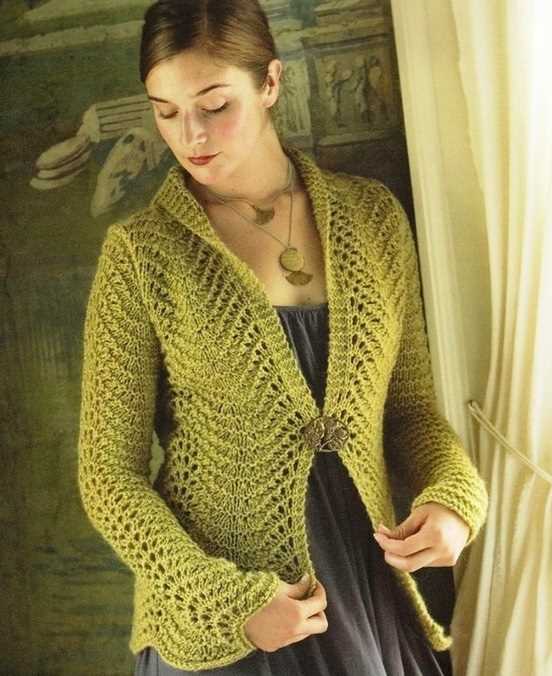
Knitting can be a great way to relax and unwind, and what better way to do so than by creating your own cozy and stylish cardigan? The tie front cardigan is a classic wardrobe staple that adds a touch of elegance to any outfit.
With this knitting pattern, you can easily create your own tie front cardigan. Whether you are a beginner or an experienced knitter, this pattern is suitable for all skill levels. The pattern includes detailed instructions and step-by-step photos to guide you through the process.
The tie front cardigan is a versatile piece that can be dressed up or down depending on the occasion. Pair it with jeans and a t-shirt for a casual look, or wear it over a dress for a more formal ensemble. The tie front detail adds a feminine touch and allows you to customize the fit of the cardigan.
This pattern is designed to be knit with worsted weight yarn, making it a quick and satisfying project. The cardigan is knit in one piece from the bottom up, with the sleeves added separately. The pattern includes tips and tricks for blocking and finishing your cardigan to ensure a professional-looking result.
Tie Front Cardigan Knitting Pattern
If you enjoy knitting and want to create a cozy and stylish piece, a tie front cardigan is a perfect project for you. This knitting pattern allows you to make a cardigan with a unique tie front detail, adding a touch of elegance to your wardrobe.
With this pattern, you can customize the size and length of your cardigan to fit your preferences. Whether you prefer a cropped style or a longer, flowing cardigan, this pattern gives you the flexibility to create the perfect piece for your needs.
To start knitting your tie front cardigan, you will need a set of knitting needles and your preferred yarn. The pattern typically uses a medium weight yarn, but you can experiment with different yarn weights to achieve different looks and textures. It’s also helpful to have a set of stitch markers and a tapestry needle for finishing touches.
The first step is to cast on the required number of stitches, following the pattern instructions. You will then proceed to work the body of the cardigan, creating the desired length and shaping by following the provided stitch pattern.
Once the body is complete, you will move on to the sleeves, which will be worked separately and then attached to the body. The pattern will guide you through the process of knitting the set-in sleeves and joining them to the cardigan.
Finally, you will add the finishing touches to your tie front cardigan, including the tie closures and any desired embellishments. The pattern may include instructions for creating buttonholes or other closure options, allowing you to personalize your cardigan even further.
Overall, the tie front cardigan knitting pattern is a versatile project that allows you to create a stylish and cozy garment to add to your wardrobe. With different yarn choices and customization options, you can make a cardigan that perfectly suits your style and preferences.
Why Choose a Tie Front Cardigan?
A tie front cardigan is a versatile and stylish addition to any wardrobe. With its unique design and adjustable fit, it offers a fashionable way to layer up in the colder months or add an extra touch of style to any outfit. Here are a few reasons why you should consider choosing a tie front cardigan.
1. Adjustable Fit
One of the key advantages of a tie front cardigan is its adjustable fit. The front ties allow you to cinch in the waist or leave it loose, depending on your preference. This makes it easy to create a flattering silhouette that suits your body shape. You can also adjust the tightness of the ties as needed throughout the day, providing you with flexibility and comfort.
2. Versatile Styling Options
A tie front cardigan can be styled in various ways to create different looks. You can leave it open and layer it over a basic top or dress for a casual and relaxed vibe. Alternatively, you can tie it in a knot or a bow to add a feminine and playful touch to your outfit. It can be easily paired with jeans, skirts, or dresses, making it a versatile piece that can be dressed up or down for different occasions.
3. Added Detail and Visual Interest
The tie front design of the cardigan adds an extra detail and visual interest to your ensemble. It creates a focal point at the waist, accentuating your curves and adding a stylish element to your overall look. The ties can be in the same fabric as the cardigan or in a contrasting color or pattern, allowing you to customize the cardigan to your personal style.
In summary, a tie front cardigan offers an adjustable fit, versatile styling options, and added detail and visual interest. It is a practical and fashionable choice that can elevate any outfit and add a touch of sophistication to your wardrobe. Whether you’re looking for a cozy layering piece or a statement-making accessory, a tie front cardigan is a great choice.
Materials You’ll Need
Before you start knitting your tie front cardigan, make sure you have the following materials on hand:
- Yarn: Choose a soft and comfortable yarn that is suitable for the cardigan pattern. The amount of yarn required will depend on the size you plan to knit and the stitch gauge.
- Knitting Needles: You will need a pair of straight or circular knitting needles in the size recommended in the pattern. Make sure the needles are comfortable to work with and suitable for the yarn you have chosen.
- Tapestry Needle: A tapestry needle is essential for weaving in loose ends and adding finishing touches to your cardigan.
- Stitch Markers: Stitch markers will help you keep track of your stitches and make it easier to follow the pattern instructions.
- Scissors: A pair of sharp scissors will be needed for cutting the yarn and trimming any excess.
- Measuring Tape: A measuring tape will come in handy for checking your gauge, as well as for measuring the cardigan’s dimensions as you progress.
- Buttons or other Fasteners: If your cardigan pattern includes a button-up front, make sure you have the appropriate number and size of buttons. Alternatively, you can use other types of fasteners, such as toggles or hooks.
Having these materials prepared and organized before you start knitting will help ensure a smooth and enjoyable knitting experience. Take the time to gather these supplies, and you’ll be ready to create your own beautiful tie front cardigan!
Choosing the Perfect Yarn
When it comes to knitting, choosing the right yarn can make all the difference. The type of yarn you choose will not only impact the overall look and feel of your finished project, but it will also affect how easy or difficult the knitting process is. Here are some key factors to consider when selecting the perfect yarn for your tie front cardigan knitting project.
1. Fiber Content
The fiber content of your yarn determines its characteristics and performance. Common yarn fibers include wool, cotton, acrylic, and blends. Each fiber has its own strengths and weaknesses, so it’s important to consider factors such as warmth, breathability, and ease of care. For a tie front cardigan, you might want to choose a yarn that is soft, warm, and easy to care for, such as a wool/acrylic blend.
2. Weight and Gauge
Another important factor to consider is the weight of the yarn and the recommended gauge. The weight of the yarn refers to its thickness, which can range from lace weight (very fine) to super bulky (very thick). The recommended gauge indicates the number of stitches and rows needed to achieve a specific measurement. For a tie front cardigan, you’ll want to choose a yarn that matches the recommended gauge to ensure a proper fit and drape.
3. Color and Texture
The color and texture of the yarn can also greatly impact the overall look of your tie front cardigan. Consider the color palette that you want to work with and choose a yarn that complements your desired aesthetic. Additionally, think about the texture of the yarn and how it will add depth and interest to your knitting project. Whether you prefer a smooth, even texture or a more textured look, there are plenty of yarn options available to suit your needs.
By considering these factors and doing some research, you can find the perfect yarn for your tie front cardigan knitting project. Remember to also take into account your personal preferences and knitting skills to ensure an enjoyable and successful knitting experience. Happy knitting!
Gauge and Sizing
The gauge for the tie front cardigan is crucial to ensure that the finished garment has the correct measurements. To achieve the right gauge, it is important to use the recommended yarn and knitting needles mentioned in the pattern.
The gauge for the tie front cardigan knitting pattern is 20 stitches and 28 rows per 4 inches in stockinette stitch. This means that for every 20 stitches you knit, it should measure 4 inches in width. Additionally, for every 28 rows you knit, it should measure 4 inches in height.
It is important to check your gauge before starting the project, as different knitters may have varying tension in their knitting. You can knit a gauge swatch using the recommended needles and yarn, and measure it to see if it matches the specified gauge. If your gauge is off, you may need to adjust your needle size to achieve the correct gauge.
The tie front cardigan is designed to be a loose-fitting garment with a relaxed drape. The sizing for the pattern comes in several sizes ranging from XS to XXL, with finished bust measurements of 34, 38, 42, 46, and 50 inches respectively. Additionally, the pattern includes instructions on how to customize the length of the cardigan to suit your preferences.
Gauge
- Recommended gauge: 20 stitches and 28 rows per 4 inches in stockinette stitch.
- Check your gauge before starting the project to ensure correct measurements.
- Adjust needle size if needed to achieve the specified gauge.
Sizing
The tie front cardigan pattern comes in multiple sizes:
- XS: 34-inch finished bust measurement.
- S: 38-inch finished bust measurement.
- M: 42-inch finished bust measurement.
- L: 46-inch finished bust measurement.
- XL: 50-inch finished bust measurement.
The pattern also includes instructions on customizing the length of the cardigan.
Getting Started
Before starting your tie front cardigan knitting project, it is important to gather all the necessary materials and tools. You will need a set of knitting needles in the appropriate size for your yarn, as well as the specified yarn for the pattern. It is recommended to choose a soft and cozy yarn that will create a comfortable cardigan.
Once you have your materials ready, take some time to familiarize yourself with the knitting pattern. Read through the instructions and make sure you understand the abbreviations and techniques used. If there are any unfamiliar terms, consult a knitting glossary or online resources for clarification. It may also be helpful to highlight or mark important sections of the pattern to keep track of your progress.
Next, make sure you have the correct measurements for the cardigan. Take your bust and waist measurements to ensure the cardigan will fit properly. If needed, adjust the pattern to accommodate your measurements. This may involve casting on more or fewer stitches or altering the length of certain sections.
Before starting the project, it is also a good idea to make a gauge swatch. This will help you determine if your tension and yarn choice are correct for the pattern. Follow the instructions for the gauge swatch provided in the pattern and compare it to the specified gauge. If your swatch does not match, you may need to adjust your needle size.
Once you have gathered your materials, reviewed the pattern, and made any necessary adjustments, you are ready to begin knitting your tie front cardigan. Follow the pattern instructions step by step, taking your time to create a beautiful and well-fitting garment. Happy knitting!
Knitting the Back Panel
When knitting the back panel of a tie front cardigan, it is important to start with the correct number of stitches. The pattern will typically provide the specific number of stitches required for the size you are making. Before starting, it is a good idea to check your gauge to ensure that you will end up with the correct measurements. This can be done by knitting a swatch and measuring the number of stitches and rows per inch using the recommended yarn and needle size.
Once you have the correct number of stitches on your needles, you can start knitting the back panel. The back panel is usually worked in stockinette stitch, which means that you will knit one row and purl one row to create a smooth, flat fabric. It is important to keep an eye on your stitch count and ensure that you are knitting the correct number of rows to achieve the desired length. The pattern will usually provide information on how many rows to knit before shaping the armholes or working the neck shaping.
- Cast on the specified number of stitches.
- Row 1: Knit across all stitches.
- Row 2: Purl across all stitches.
- Repeat rows 1 and 2 until you reach the desired length.
- Follow the pattern instructions for shaping the armholes or working the neck shaping.
It is important to keep track of your progress and check the measurements as you go. This will help ensure that your back panel turns out the correct size and shape. Once you have completed the back panel, you can move on to knitting the front panels and sleeves to complete your tie front cardigan.
Knitting the Front Panels
When knitting the front panels of the tie front cardigan, you will need to follow the specific pattern instructions. Start by casting on the required number of stitches as indicated in the pattern. This will typically be the same number of stitches as the back panel. Ensure that you have the correct size knitting needles for the pattern, as this will affect the gauge and the overall size of the finished cardigan.
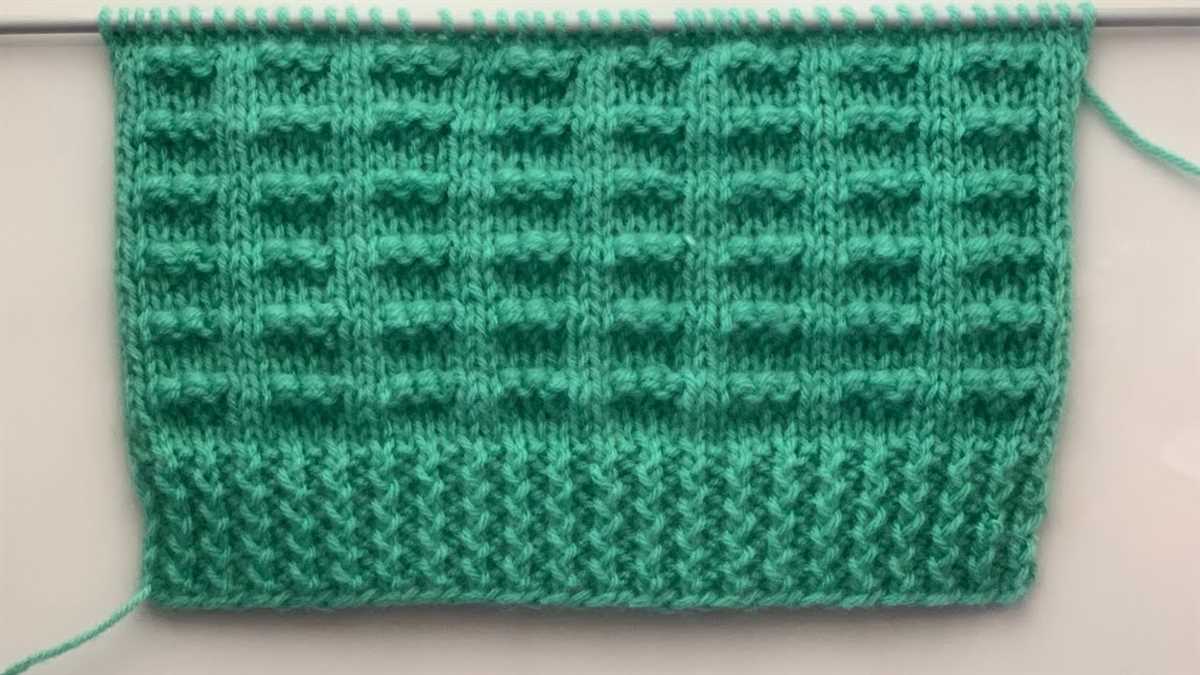
Once you have cast on the stitches, you will begin working in the specified stitch pattern. This could be stockinette stitch, garter stitch, or a more intricate lace or cable pattern. Follow the pattern’s instructions for the stitch pattern, making sure to repeat any necessary rows or sections as indicated. It is important to keep track of your rows using stitch markers or other methods to ensure accuracy.
If the front panels involve shaping, such as increases or decreases, the pattern will instruct you on when and where to make these adjustments. Pay close attention to these instructions, as they will affect the fit and shape of the cardigan.
Continue knitting the front panels according to the pattern until you reach the desired length. At this point, you may need to bind off the stitches, or the pattern may instruct you to leave some stitches on hold for later construction. It is important to keep the tension consistent throughout the front panels to ensure an even finished product.
Remember to refer back to the pattern instructions frequently as you knit the front panels to ensure accuracy and to create a beautiful tie front cardigan.
Joining the Panels and Adding Sleeves

After completing the front and back panels of the tie front cardigan, it is time to join them together to create the main body of the cardigan. Lay the panels flat with the right sides facing each other and use a tapestry needle to stitch them together along the shoulder seams. Make sure to secure the ends of the yarn to prevent unraveling.
Next, it’s time to add the sleeves to the cardigan. With the right side facing up, pick up stitches along the armhole edge using your knitting needles. The number of stitches you pick up will depend on the size of your cardigan and the desired fit of the sleeves. It’s important to maintain an even number of stitches to easily distribute the decreases and increases.
Once you have picked up the necessary stitches, you can start working on the sleeves. Follow the pattern instructions to knit the desired length of the sleeves, making sure to incorporate any necessary shaping techniques such as increases or decreases. Pay attention to the pattern’s gauge to ensure the sleeves match the desired size.
After completing both sleeves, it’s time to attach them to the main body of the cardigan. Lay the cardigan flat with the wrong side facing up and align the center of each sleeve with the shoulder seam. Use a tapestry needle and the same yarn used for the body to carefully seam the sleeves to the armhole, matching the stitch pattern as closely as possible.
To finish off the cardigan, weave in any loose ends and block the garment to give it a polished look. Following these steps will result in a beautifully finished tie front cardigan that is ready to be worn and enjoyed.
Adding the Tie Front Detail
In order to create the tie front detail for the cardigan, you will need to follow a specific pattern. Begin by working the required number of rows and stitches for the body of the cardigan. Once you have reached the desired length, it’s time to add the tie front detail.
To create the ties, you will need to cast on a certain number of stitches using the yarn of your choice. The exact number of stitches will depend on the size of the cardigan and the desired width of the ties. Once you have cast on the stitches, you will then work in a specific stitch pattern to create the desired texture for the ties.
For example, you can use a simple garter stitch or a ribbed pattern to give the ties some stretch and hold. Work the desired number of rows in this stitch pattern, making sure to maintain the correct tension and check the width of the ties as you go.
Next, you will need to secure the ties to the front of the cardigan. This can be done by sewing or attaching the ties to the inside edge of each front panel. Pay close attention to the placement and spacing of the ties to ensure that they are evenly distributed and provide a secure closure for the cardigan.
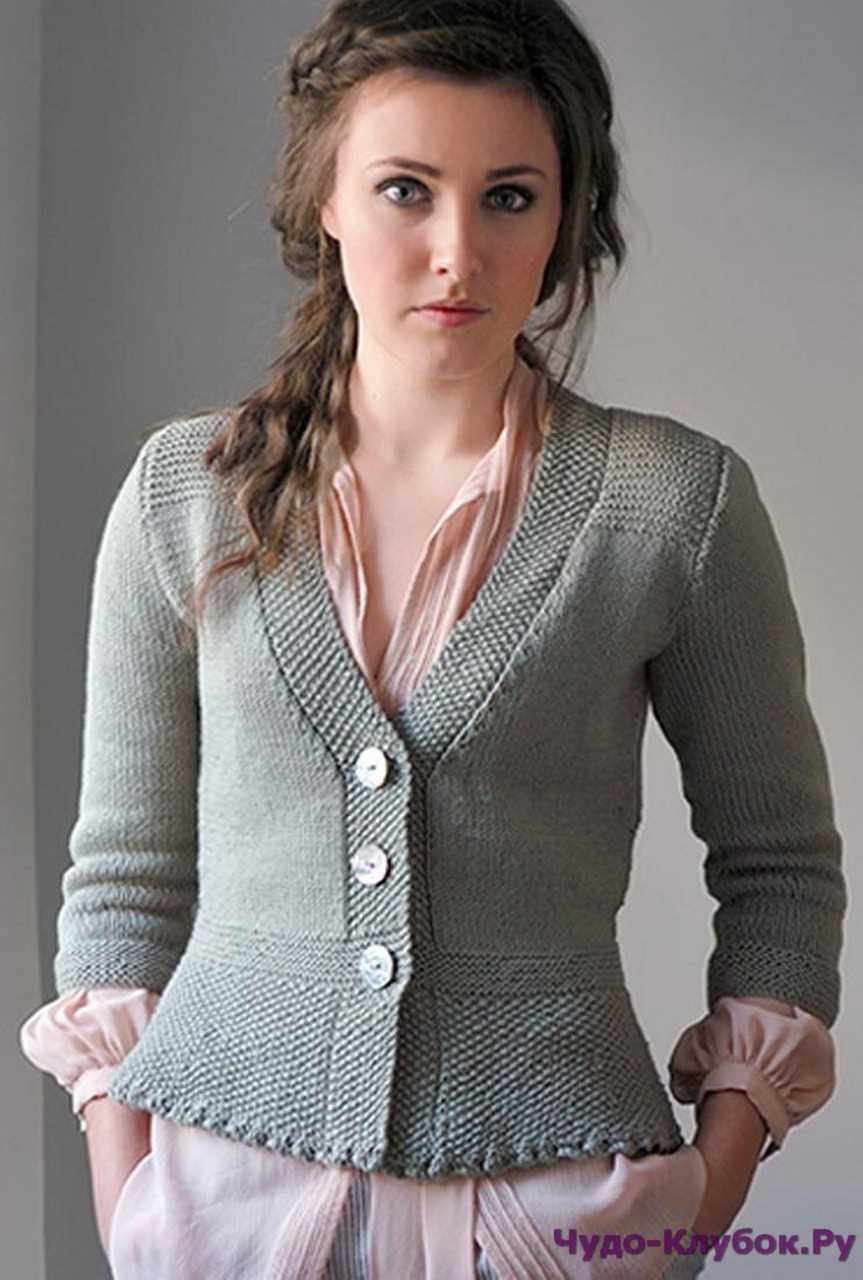
Additionally, you may choose to add some button or clasp closures to the front of the cardigan for extra security and style. This can be done by sewing buttons or attaching clasps to the front panels, making sure to align them with the tie front detail.
In conclusion, adding the tie front detail to your cardigan can be a fun and creative way to customize your knitting project. By following a specific pattern and carefully attaching the ties, you can create a stylish and functional garment that will be a unique addition to your wardrobe.
Finishing Touches
When it comes to completing your tie front cardigan, the finishing touches are what bring the whole garment together. From the buttons to the edging, each detail adds its own unique touch to your finished piece.
- Buttons: Choose buttons that complement the color and style of your cardigan. Whether you opt for traditional, vintage-inspired buttons or modern, minimalist ones, they can make a big impact on the overall look of your cardigan.
- Edging: Consider adding a contrasting color or pattern along the edges of your cardigan for a pop of visual interest. You can use a different yarn or stitch pattern to create a border that frames the front panels and adds a polished look to your cardigan.
- Collar: Depending on your preference, you can knit a classic collar, a shawl collar, or a simple ribbed neckline. Experiment with different collar styles to see which one complements your cardigan design the best.
- Labels and tags: For an extra personalized touch, sew in a label or attach a small tag with your own logo or name. This can add a professional touch to your knitting project and make it feel even more special.
By paying attention to these finishing touches, you can elevate your tie front cardigan to a whole new level. Take your time to choose the right buttons, experiment with edging options, and add any extra personal touches that make your cardigan truly unique.
Styling and Wearing Your Tie Front Cardigan
One of the great things about the tie front cardigan is its versatility. You can easily dress it up or down depending on the occasion. Whether you’re going for a casual look or something more refined, this cardigan can be the perfect addition to your outfit.
If you’re aiming for a more casual look, pair your tie front cardigan with a simple white t-shirt or tank top and a pair of jeans. This combination is perfect for a day of running errands or grabbing coffee with friends. You can also add some sneakers or ankle boots to complete the relaxed vibe.
For a more put-together look, try wearing your tie front cardigan with a blouse and tailored pants. This combination is great for a day at the office or a more formal event. You can add some heels or loafers to elevate the outfit and create a polished look.
Another option is to layer your tie front cardigan over a dress. This is a great way to add some warmth and style to your favorite summer dresses. You can choose a cardigan in a contrasting color to make a statement or opt for a neutral shade for a more classic look. Don’t forget to tie the front of the cardigan to cinch in your waist and create a flattering silhouette.
Overall, the tie front cardigan is a versatile and stylish piece that can be worn in various ways. Whether you’re going for a casual or dressy look, this cardigan is a great addition to any wardrobe. Experiment with different combinations and have fun creating different outfits with your tie front cardigan!
Share Your Finished Project
Once you’ve completed your tie front cardigan, we’d love to see your finished project! Sharing your work not only allows you to showcase your skills and creativity, but it also provides inspiration for other knitters who may be considering making this pattern.
Here are a few options for sharing your finished tie front cardigan:
- Social Media: Take a photo of your completed cardigan and share it on your favorite social media platform. Be sure to use the hashtag #TieFrontCardiganKnitPattern so that others can easily find your post.
- Ravelry: Ravelry is a popular online community for knitters and crocheters. Create a project page for your tie front cardigan and upload photos to share with other members.
- Knitting Forums: Participate in knitting forums or online knitting communities and share photos of your finished project. You can also offer insights and tips on working with the pattern.
- Blogging: If you have a knitting blog or personal website, write a blog post about your tie front cardigan. Include photos, your thoughts on the pattern, and any modifications you made.
Remember, sharing your finished project is a great way to connect with other knitters, gain feedback, and inspire others. We can’t wait to see what you create with the tie front cardigan knitting pattern!