
If you love knitting and are looking for a new project, why not try your hand at knitting a T-shirt? T-shirts are a versatile and essential wardrobe staple, and knitting your own allows you to customize the fit, style, and colors to your liking. Best of all, we have a free knitting pattern for a T-shirt that you can use!
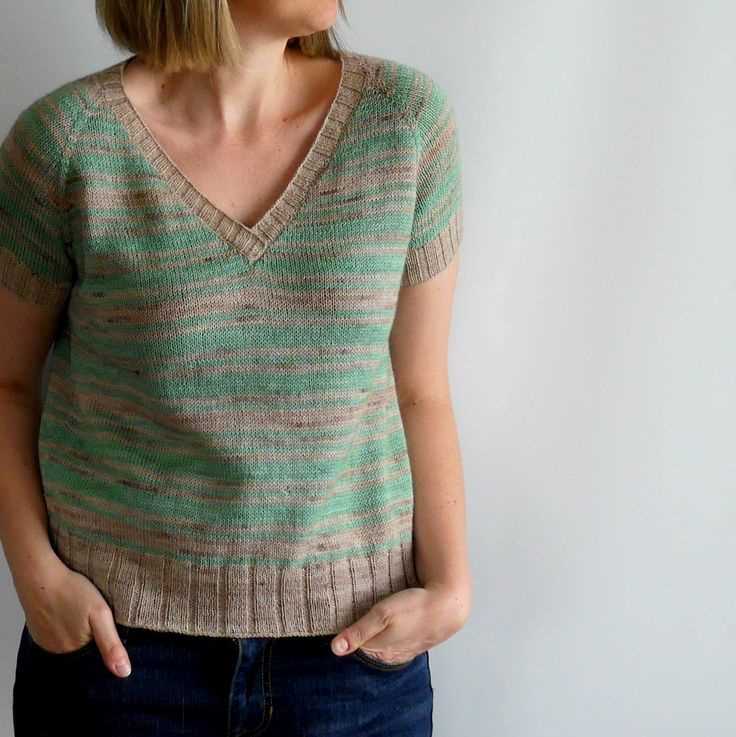
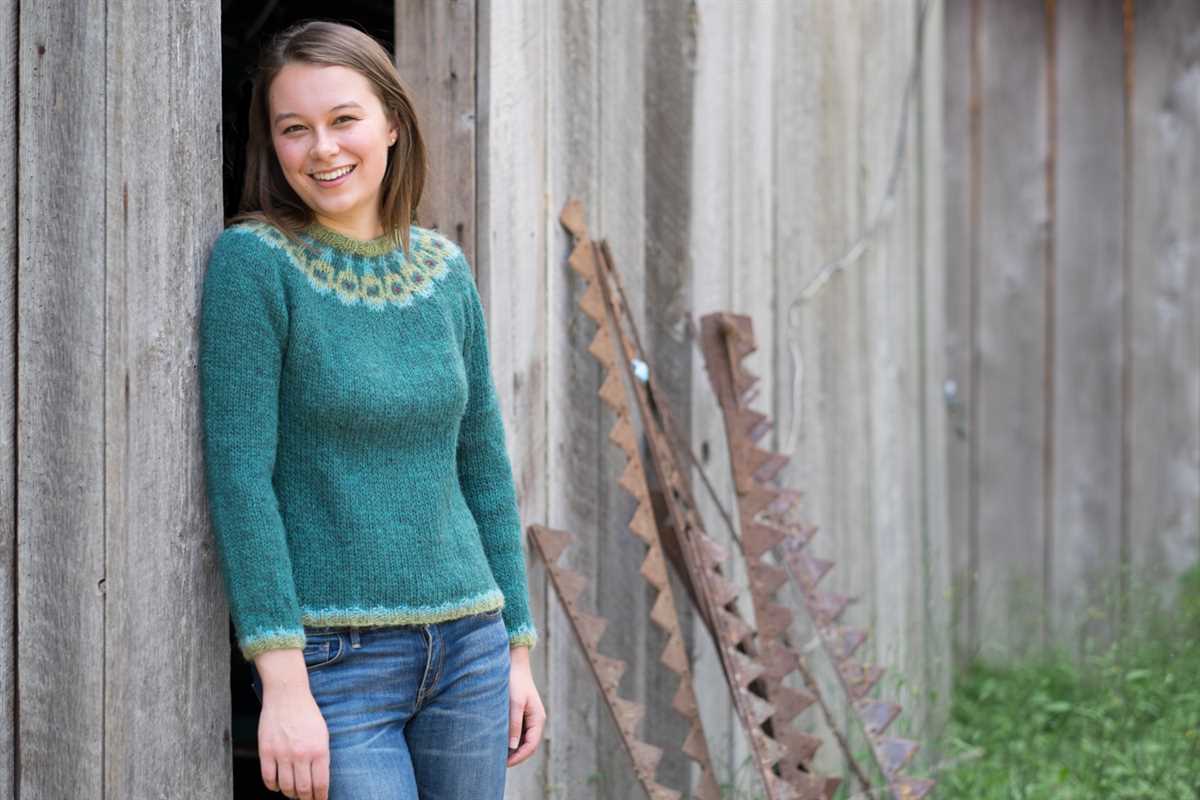
This T-shirt knitting pattern is suitable for all skill levels, from beginners to more advanced knitters. The pattern includes detailed instructions and a helpful chart, making it easy to follow along. Whether you prefer short sleeves, long sleeves, or no sleeves at all, this pattern can be adapted to your desired length. You can also choose from a variety of necklines, including crew neck, V-neck, or boat neck.
The pattern calls for a soft and breathable cotton yarn, making it perfect for warm weather wear. Our T-shirt knitting pattern also provides guidance on how to create a flattering fit, ensuring that your finished garment looks and feels great. With this pattern, you’ll be able to make a stylish and comfortable T-shirt that you can wear with pride.
Finding the right yarn
When it comes to knitting a T-shirt, finding the right yarn is essential. The yarn you choose will determine the overall look, feel, and drape of the finished garment. There are several factors to consider when selecting yarn for your T-shirt knitting project.
Fiber composition
The first thing to consider is the fiber composition of the yarn. Different fibers have different characteristics, which will affect the final product. For a T-shirt, you’ll want to choose a yarn that is lightweight, breathable, and comfortable against the skin. Cotton, linen, and bamboo are all popular choices for T-shirt knitting, as they have these qualities.
Gauge and weight

Another important factor is the gauge and weight of the yarn. The gauge refers to the number of stitches and rows per inch, and it’s important to match the gauge specified in the knitting pattern. This will ensure that the T-shirt fits properly and has the intended drape. The weight of the yarn, such as fingering weight or sport weight, will also impact the final outcome of the project.
Color and texture

The color and texture of the yarn can also play a role in the overall look of the T-shirt. Consider whether you want a solid color or a variegated yarn, and think about how the color will complement your skin tone. Additionally, the texture of the yarn can add interest and dimension to your project. You may want to choose a yarn with a smooth, matte finish, or one with a slight sheen or texture.
Yardage and cost
Lastly, consider the yardage and cost of the yarn. Make sure you have enough yarn to complete your T-shirt project, taking into account any extras you may need, such as for sleeves or neckline. Additionally, consider your budget and choose a yarn that fits within your price range.
By considering these factors and taking your personal preferences into account, you’ll be able to find the perfect yarn for your T-shirt knitting project.
Choosing the right needles

When it comes to knitting a T-shirt, choosing the right needles can make all the difference in the final result. The type and size of needles you use can affect the drape, texture, and overall fit of the garment. Here are a few things to consider when selecting your needles for a T-shirt knitting project.
Type of needles:
- Straight needles: Straight needles are the most commonly used type of knitting needles. They are typically made of metal, wood, or plastic and come in various lengths. Straight needles are ideal for smaller projects or for those who prefer to knit flat pieces.
- Circular needles: Circular needles consist of two needle tips connected by a flexible cable. These needles are versatile and can be used for both flat and circular knitting. Circular needles are especially useful for knitting larger projects, such as a T-shirt, as the cable allows for the stitches to be easily distributed and worked across the length.
Size of needles:
The size of the needles you choose will depend on the gauge and tension you want to achieve. A larger needle size will create a looser, more open fabric, while a smaller needle size will result in a tighter, denser fabric. The recommended needle size for a T-shirt knitting pattern will usually be provided in the instructions. It is important to check your gauge before starting the project to ensure that your finished garment will have the correct measurements.
Material of needles:
Knitting needles are available in various materials, each with its own characteristics. Here are a few common options:
- Metal needles: Metal needles, such as aluminum or stainless steel, are known for their smooth surface and durability. They allow the stitches to glide easily, making them suitable for faster knitting.
- Wooden needles: Wooden needles are popular for their warmth and natural feel. They have a slightly grippier surface, which can help prevent stitches from sliding off. Wooden needles are often favored by those who appreciate a slower knitting pace.
- Plastic needles: Plastic needles are lightweight and affordable. They are a good option for beginners or for those who prefer a lighter knitting experience.
When choosing your needles, consider your personal preferences, the type of yarn you are using, and the desired outcome of your project. Experimenting with different needle sizes and materials can help you achieve the perfect T-shirt knitting pattern free result.
Understanding the knitting gauge
When it comes to knitting patterns, understanding the knitting gauge is essential for achieving the desired finished product. The knitting gauge refers to the number of stitches and rows that can be achieved in a specific measurement, usually per inch or per four inches. It is crucial to match the gauge indicated in the pattern to ensure the correct size and fit of the knitted item.
The knitting gauge is influenced by several factors, including the type of yarn used, the needle size, and the tension of the knitter. Different yarns and needle sizes can produce varying gauges, so it is important to check the gauge before starting a project. Knitters may need to adjust their needle size or tension to match the gauge specified in the pattern.
Factors affecting the knitting gauge:
- Yarn: The thickness and fiber content of the yarn can impact the gauge. Thicker yarns generally require larger needles and fewer stitches per inch, while thinner yarns usually require smaller needles and more stitches per inch. Yarns with different fiber content, such as wool or cotton, may also behave differently when knitted.
- Needle size: The size of the needles used can also affect the gauge. Larger needles create looser stitches and result in fewer stitches per inch, while smaller needles create tighter stitches and more stitches per inch. It is important to use the needle size recommended in the pattern for accurate gauge.
- Tension: The tension or tightness of the knitter’s stitches also plays a role in the gauge. Some knitters naturally have looser stitches, while others have tighter stitches. Knitters may need to adjust their tension to match the gauge specified in the pattern. This can be achieved by consciously knitting looser or tighter or by using larger or smaller needle sizes.
Understanding and achieving the correct knitting gauge is crucial for ensuring that the finished item matches the size and fit intended by the pattern. By considering the factors that affect the gauge and making any necessary adjustments, knitters can create beautiful and well-fitting garments.
Casting on for the body

When it comes to casting on for the body of your knitted t-shirt, there are a few different methods you can use. One popular option is the long tail cast on, which creates a neat and stretchy edge. To do this, you’ll need to estimate the amount of yarn you’ll need for the cast on, as the tail of your yarn will be used to create the loops. Hold the tail end of the yarn in your right hand and the working end in your left hand. Make a slip knot and place it on the left-hand needle. Then, using your right hand, bring the needle behind the working yarn and through the loop on the left-hand needle, creating a new loop. This process is repeated until you have the desired number of stitches on your needle.
Another option for casting on for the body is the cable cast on. This method creates a firm and stable edge, which can be beneficial for garments that need structure. To use the cable cast on, begin by making a slipknot and placing it on the left-hand needle. Insert the right-hand needle into the slipknot from front to back, as if to knit. Then, wrap the working yarn around the right-hand needle and pull it through the slipknot, creating a new stitch. Slide this new stitch onto the left-hand needle, and repeat the process until you have the desired number of stitches.
Regardless of the method you choose, it’s important to ensure that your cast on stitches are evenly spaced and not too tight or too loose. This will help to ensure that your knitted t-shirt has a professional and polished finish. Once you’ve cast on for the body, you’ll be ready to start knitting the main portion of the t-shirt, following the pattern instructions.
Lorem ipsum dolor sit amet, consectetur adipiscing elit.
Lorem ipsum dolor sit amet, consectetur adipiscing elit. Duis ac posuere velit, non suscipit risus. Suspendisse dignissim semper felis, eu dapibus mauris. Nam nunc lacus, fermentum et tempus ac, sollicitudin a nisl. Mauris lobortis, leo a consequat efficitur, dui mi gravida mauris, id euismod orci sapien nec justo. Aliquam erat volutpat. Sed sagittis eros eget ligula consequat, vitae consectetur justo elementum. Maecenas rutrum, mi a interdum vestibulum, dui metus porttitor risus, eget molestie nisi nunc sit amet leo. Vivamus congue velit in dolor maximus eleifend. Nullam sed lorem arcu. In hac habitasse platea dictumst. Aliquam sit amet massa id nisi euismod tincidunt. Morbi mattis turpis id justo euismod, ac ullamcorper sapien consectetur. Ut eleifend venenatis lorem, et mattis metus iaculis ac. Integer hendrerit orci quis libero mattis tincidunt.
When knitting the body of the T-shirt, start by casting on the required number of stitches, as specified in the knitting pattern. It is important to ensure that your tension matches the gauge provided in the pattern, as this will determine the size and fit of the finished garment. Once you have cast on the stitches, you can begin knitting the body in the desired stitch pattern.
As you work, it’s important to regularly check your tension to ensure that you are knitting to the correct measurements. This can be done by measuring a swatch of your knitting and comparing it to the dimensions provided in the pattern. Adjust your needle size if necessary to achieve the correct tension.
To shape the body of the T-shirt, you may need to increase or decrease stitches at certain points. This is typically done by working specific stitch patterns, such as increases or decreases, in the designated areas. Be sure to follow the pattern instructions carefully to ensure that you are shaping the T-shirt correctly.
Continue knitting the body until you have reached the desired length, as specified in the pattern. Once you have finished knitting the body, you can bind off the stitches and move on to the next section of the T-shirt, such as the sleeves or neckline. Remember to follow the pattern instructions for finishing techniques, such as blocking or seaming, to achieve a professional and polished final result.
Shaping the Armholes
When knitting a T-shirt, one important step is shaping the armholes. This is done to create a comfortable fit and to allow for movement of the arms. There are several ways to shape the armholes, depending on the desired style and design of the T-shirt.
Method 1: Decreasing Stitches
One common method is to decrease stitches gradually on each side of the armhole area. This can be done by knitting two stitches together at the beginning and end of each row, or by using other decreasing techniques such as slip slip knit (SSK) or knit two together (K2tog). By decreasing stitches, the fabric is shaped to create a slight curve that accommodates the shape of the arm.
Method 2: Binding Off Stitches
Another method is to bind off a certain number of stitches on each side of the armhole area. This can be done by knitting to the desired bind-off point, then using a tapestry needle to slip the remaining stitches off the needle and secure them by weaving in the yarn. This creates a straight edge and is commonly used for sleeveless T-shirts or tank tops.
Method 3: Short Rows
In some T-shirt designs, short rows can be used to shape the armholes. Short rows involve knitting partway across the row, then turning the work and knitting back in the opposite direction. This creates a curved shape without the need for decreasing or binding off stitches. Short rows can be used to shape the top of the armhole, creating a more tailored and fitted look.
Overall, shaping the armholes is an important step in knitting a T-shirt. The method chosen will depend on the desired style and design, as well as the knitter’s skill level and preference. By carefully shaping the armholes, the T-shirt will fit properly and be comfortable to wear.
Knitting the sleeves
When it comes to knitting a T-shirt, one of the most important components to consider are the sleeves. The sleeves not only provide comfort and flexibility, but they also add a stylish touch to the overall design. It is important to follow a clear pattern and pay attention to the measurements to ensure a perfect fit.
1. Selecting the sleeve pattern: There are various sleeve patterns that can be used for knitting a T-shirt, such as short sleeves, three-quarter sleeves, and long sleeves. It is important to choose a pattern that complements the style and purpose of the T-shirt. For example, short sleeves are ideal for summer wear, while long sleeves are suitable for colder seasons.
2. Measuring for the sleeves: Before starting to knit the sleeves, it is crucial to take accurate measurements to ensure a proper fit. The measurements needed include the circumference of the arm at the bicep, the length of the arm from the shoulder to the desired sleeve length, and the circumference of the wrist. These measurements will help determine the number of stitches and the shaping required for the sleeves.
3. Knitting the sleeves: Once the measurements are taken and the appropriate pattern is selected, it is time to start knitting the sleeves. The pattern will provide instructions on the number of stitches to cast on and the specific stitch pattern to follow. It is important to follow the pattern carefully, including any shaping instructions for the sleeve cap.
4. Finishing the sleeves: After knitting the required length for the sleeves, it is time to finish them off. This can be done by binding off the stitches, or by using a ribbing technique for added stretch and a polished look. The finishing touch can also include adding any desired embellishments, such as buttons or cuffs, to complete the sleeves.
By following these steps and paying attention to the details, you can create perfectly fitted and stylish sleeves for your knitted T-shirt.
Joining the sleeves and body
Once you have finished knitting the sleeves and body of the T-shirt separately, it’s time to join them together. This is an important step in the construction of the T-shirt and will help give it a professional finish.
To join the sleeves and body, you will need to carefully align the stitches of each piece. This can be done by placing stitch markers on each side to mark the corresponding stitches. Then, using a yarn needle, you can sew the pieces together using a whip stitch or mattress stitch.
It’s important to ensure that the seams are strong and secure to prevent any unraveling. You can reinforce the seams by going over them a few times or by using a double strand of yarn. This will help make the T-shirt more durable and long-lasting.
Note: Make sure to try on the T-shirt as you join the pieces to ensure the fit is correct. This is especially important if you have made any modifications to the pattern or if you are knitting for someone else.
Once you have finished joining the sleeves and body, you can continue knitting the neckline and any other finishing touches. Following the pattern instructions, you can add ribbing or other edgings to complete the T-shirt.
By following these steps and taking your time, you can achieve a polished and professional look for your knitted T-shirt. Enjoy the process and have fun showcasing your knitting skills!
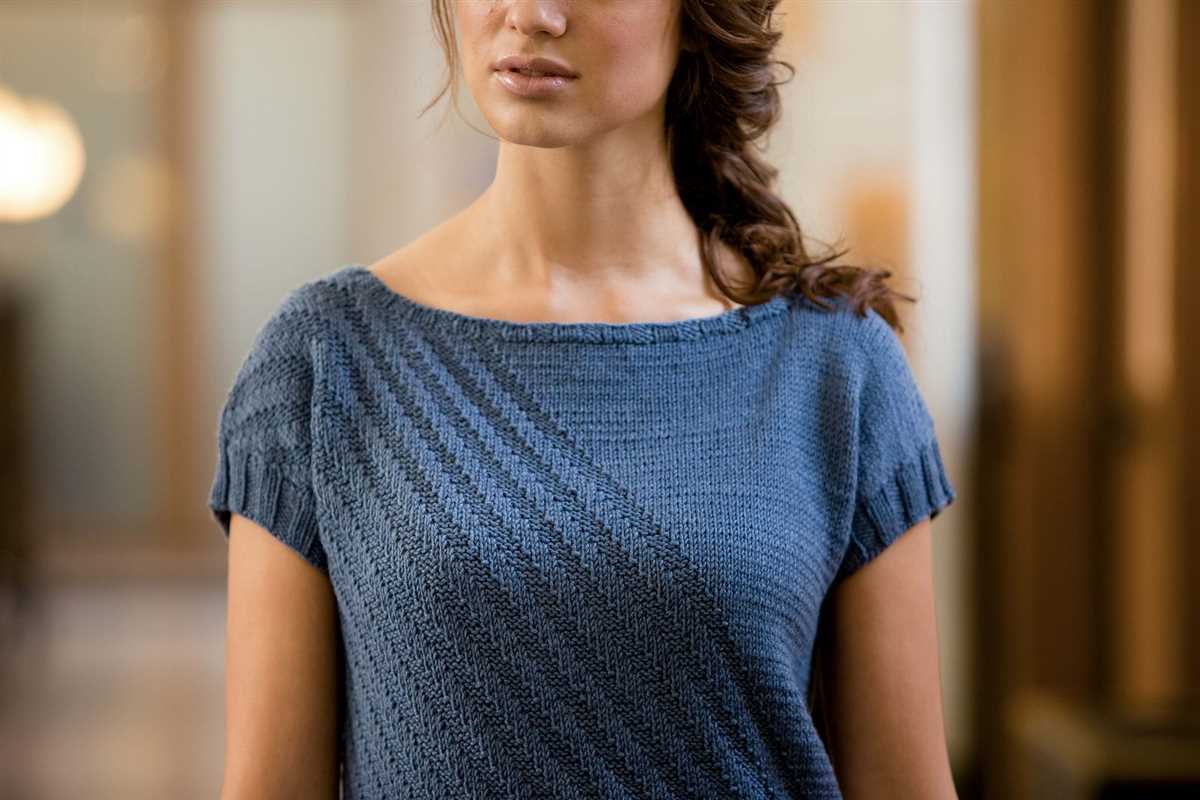
Adding the neckline
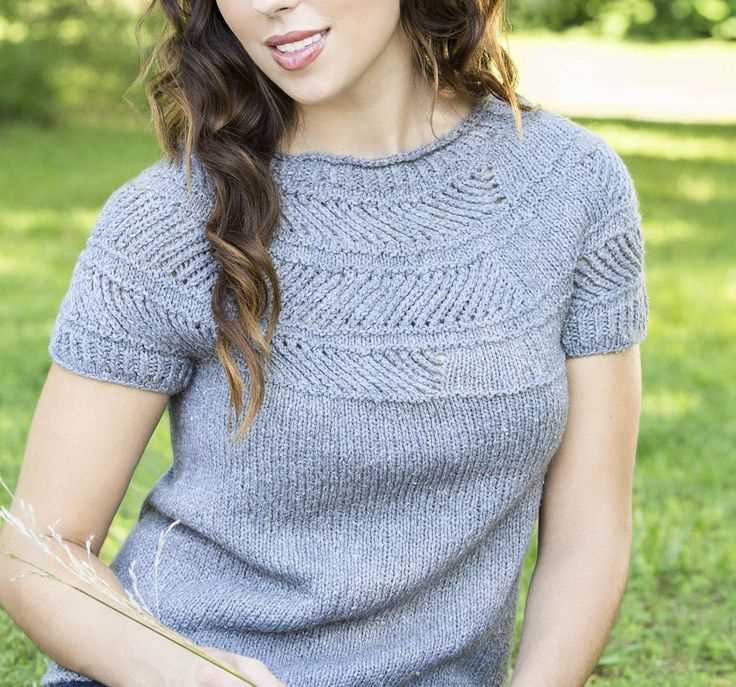
When knitting a t-shirt, one of the crucial steps is adding the neckline. The neckline not only provides comfort but also contributes to the overall aesthetic appeal of the garment. There are several techniques that can be used to create a neckline, depending on the desired style and complexity.
A common method for adding a neckline is to pick up stitches along the edges of the neck opening. This is typically done using a smaller needle size to ensure a neater and more secure edge. By picking up stitches evenly, a symmetrical and well-finished neckline can be achieved.
Neckline options
One option for a neckline is the classic crew neck. This style sits at the base of the neck and is typically a simple, round shape. It can be knitted in ribbing or a simple stockinette stitch, depending on the desired effect. The crew neck is a versatile choice that suits many different body types and styles of clothing.
Another option is the V-neck, which features a diagonal neckline that plunges down the chest. This style can be created by decreasing stitches on either side of the neckline, or by working short rows. The V-neck is often a more elegant and feminine neckline option, perfect for dressier t-shirts or sweaters.
Regardless of the chosen neckline style, it is important to properly finish the edges to prevent stretching or sagging over time. This can be achieved by knitting a few rows of ribbing or using a ribbed bind-off method. Taking the time to carefully finish the neckline will ensure that the t-shirt not only looks great but also maintains its shape over time.
Finishing touches
Once you have completed knitting your T-shirt, it’s time to add the finishing touches to give it that professional look.
Here are a few tips to help you give your T-shirt the perfect finishing touches:
- Blocking: Before you start adding any finishing touches, it’s important to block your T-shirt. Blocking helps even out stitches and shapes the garment. You can wet block or steam block your T-shirt, depending on the fiber you used. Follow the blocking instructions for your specific fiber to ensure the best results.
- Seaming: If your T-shirt is knit in separate pieces, you will need to seam them together. Use the mattress stitch or a method of seaming that matches the pattern instructions. Take your time and ensure your seams are neat and secure.
- Neckline: The neckline of your T-shirt is an important detail. Depending on your pattern, you may need to add a ribbed collar, a crew neck, or a V-neck. Follow the pattern instructions to create a clean and professional neckline.
- Sleeves: If your T-shirt has sleeves, you will need to finish them by picking up stitches along the armhole and knitting the desired length. Follow the pattern instructions to ensure a proper fit and finish.
- Hemming: Finally, hem your T-shirt to give it a polished look. You can use a simple single or double fold hem, or experiment with different decorative options like picot edging or a rolled hem.
Remember to weave in any loose ends and give your T-shirt a good block and press before wearing or gifting it. With these finishing touches, your T-shirt will look like it was made by a professional!