
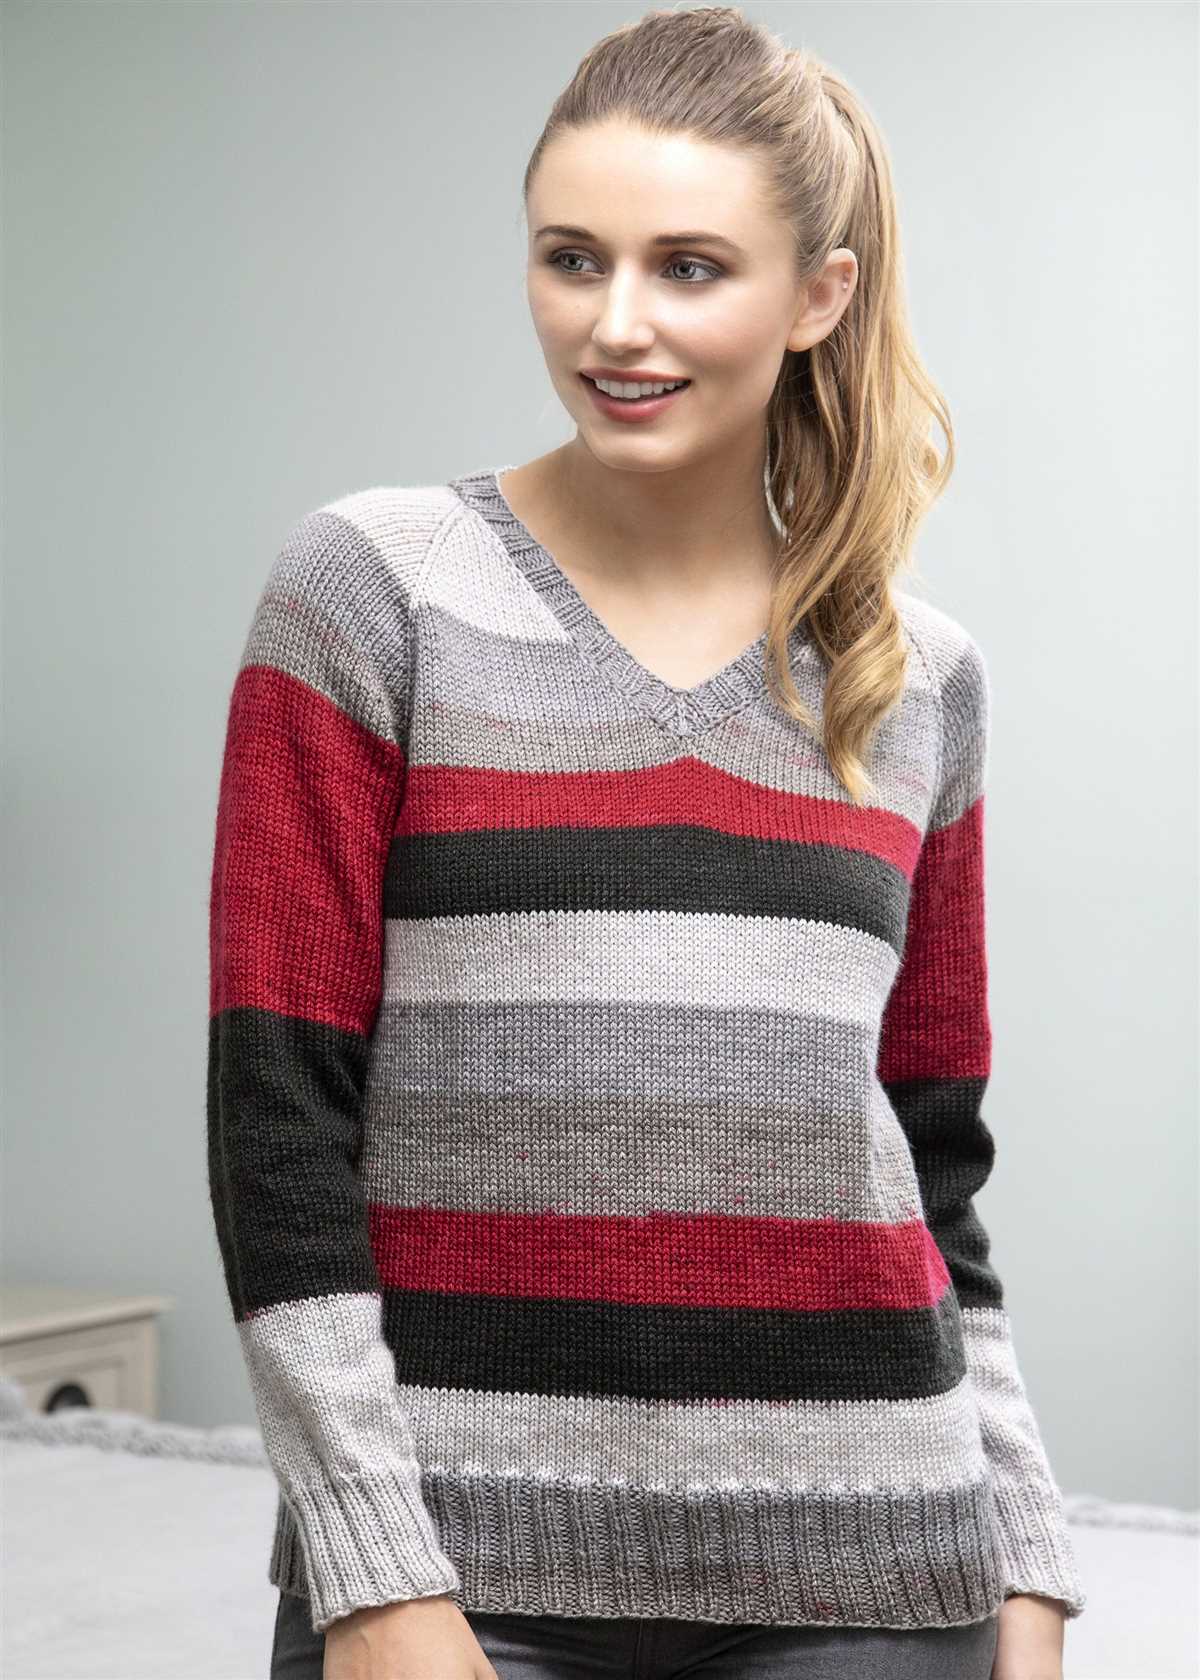
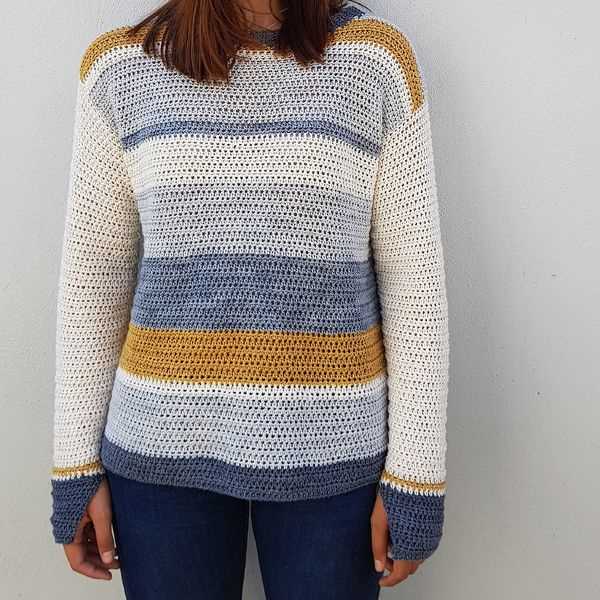
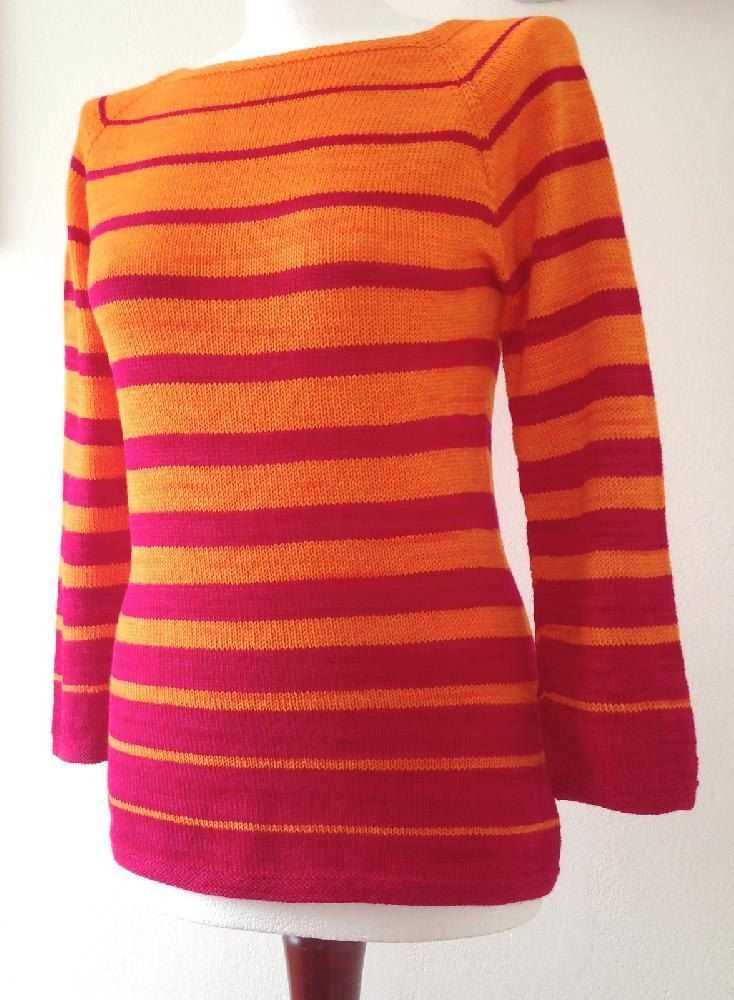
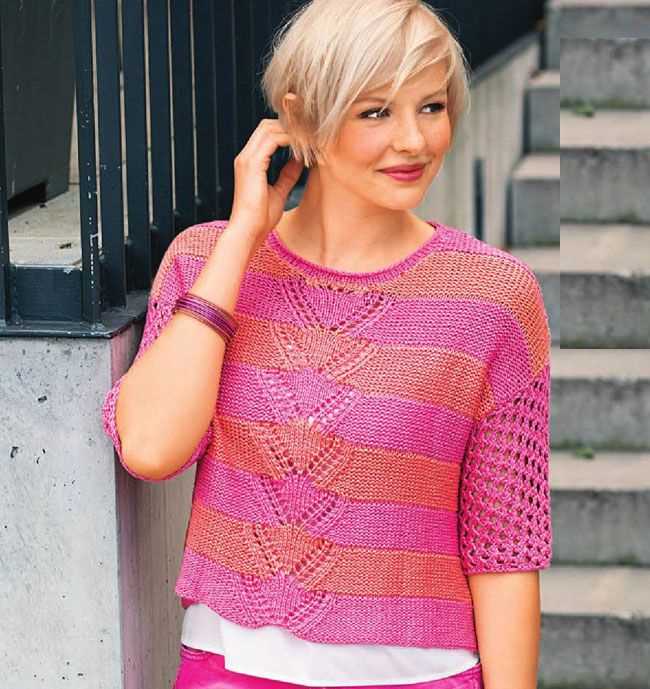
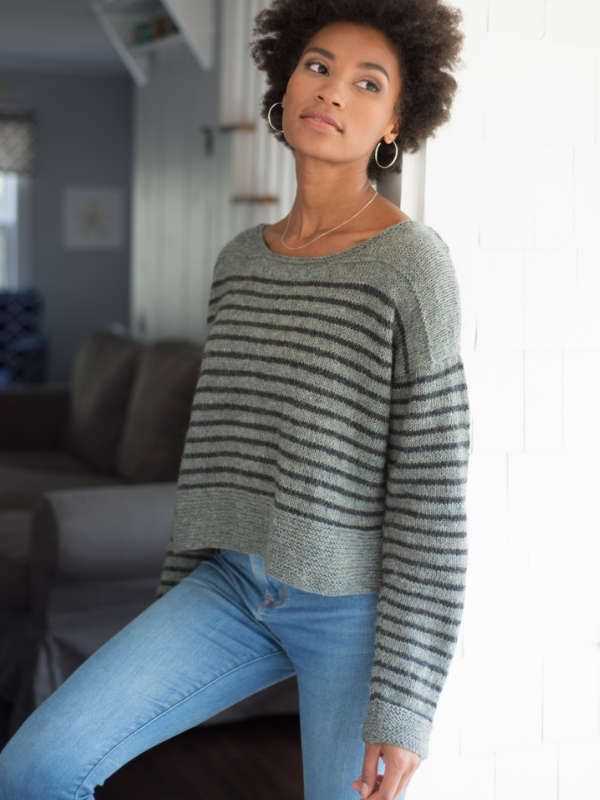
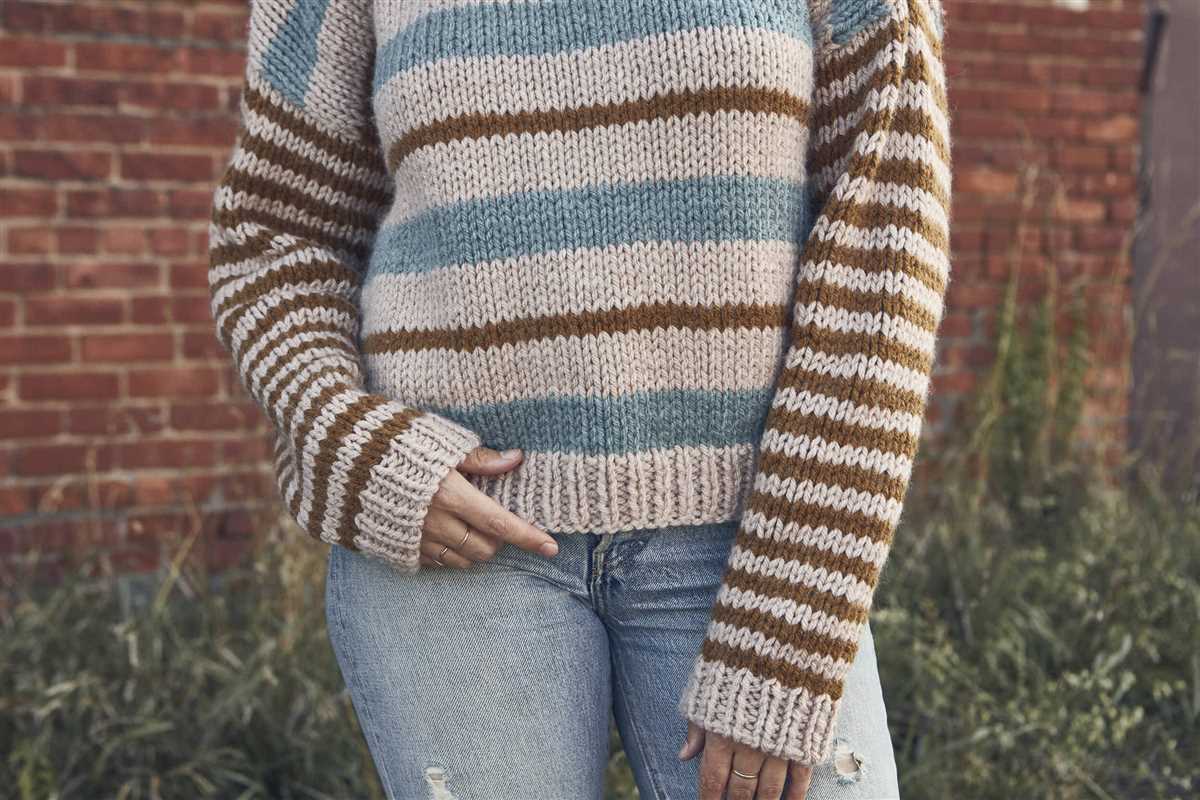
If you’re looking for a fun and stylish project to work on, look no further than a striped sweater. This classic garment is a perfect addition to any wardrobe, and with our free knitting pattern, you can create your very own. Whether you’re a seasoned knitter or just starting out, this pattern is suitable for all skill levels.
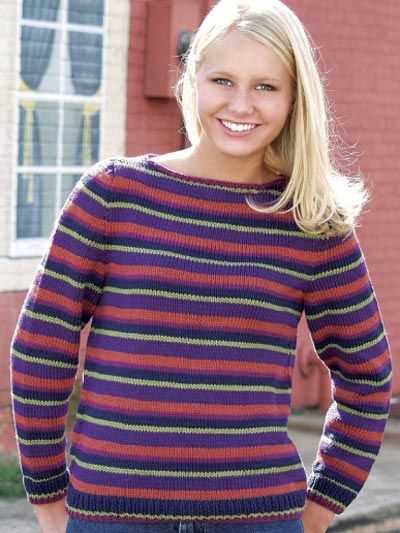
Our striped sweater knitting pattern features alternating stripes of different colors, creating a bold and eye-catching design. The pattern includes detailed instructions and a chart, making it easy to follow along and create a sweater that fits perfectly. You can choose your favorite colors or use up any leftover yarn from previous projects.
Knitting a sweater may seem like a daunting task, but with this free pattern, it’s easier than ever. The pattern includes tips and techniques to help you along the way, such as how to change colors seamlessly and how to create a professional-looking finish. Whether you’re knitting for yourself or for a loved one, this striped sweater is sure to impress.
So why wait? Grab your knitting needles and yarn and get started on your very own striped sweater today! With our free pattern, you’ll be able to create a beautiful and unique garment that you’ll love wearing for years to come.
Striped Sweater Knitting Pattern Free
If you’re looking for a free knitting pattern to make a stylish and versatile striped sweater, you’re in luck! We have a fantastic pattern that you can follow to create your own beautiful sweater. With its classic stripes and cozy design, this sweater will surely become a wardrobe favorite.
To start, gather your materials, including your favorite yarn in two contrasting colors. You’ll also need knitting needles in the appropriate size, a tapestry needle for finishing, and stitch markers to help keep track of your progress. Once you have everything you need, you’re ready to get started on your new project!
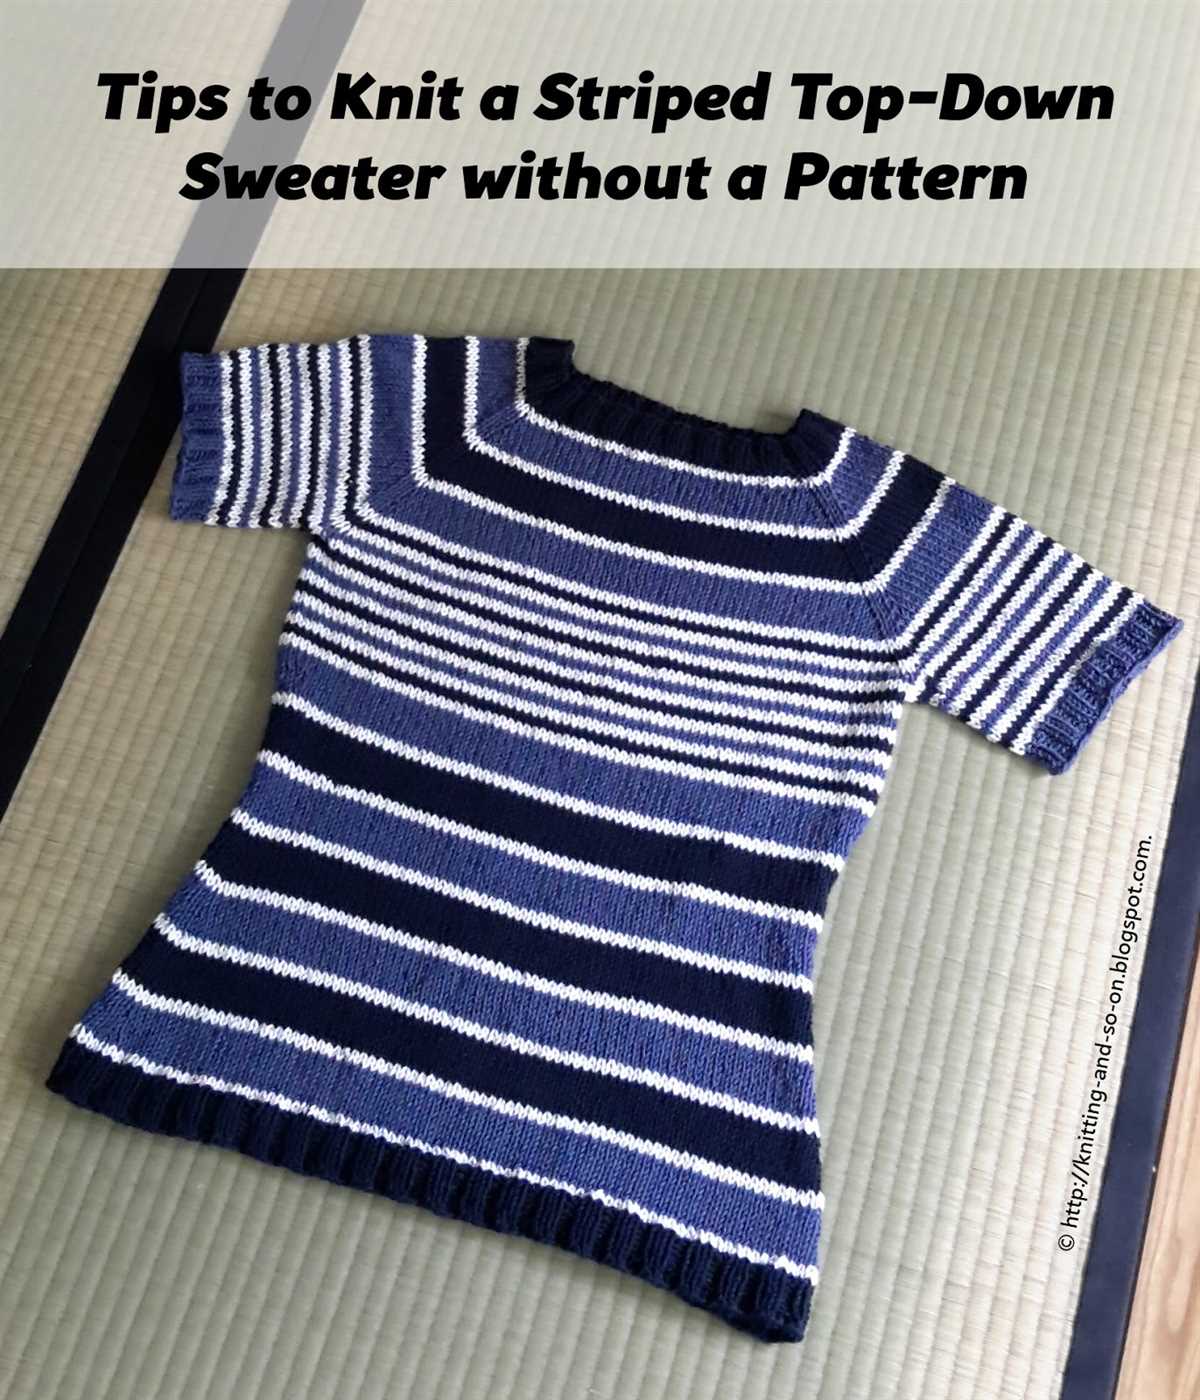
The striped sweater knitting pattern is suitable for knitters of all skill levels. It provides detailed instructions and includes both written directions and a diagram for easy reference. The pattern also offers tips and tricks to help you achieve the best possible results.
Begin by casting on the required number of stitches, and then follow the pattern’s instructions for the ribbing at the hem, the body of the sweater, and the sleeves. As you work, you’ll switch between the two yarn colors to create the striped effect. The pattern will guide you on when and how to switch colors, so you can achieve clean and even stripes.
Once you’ve finished knitting all the pieces, it’s time to assemble your sweater. Use the tapestry needle to sew the seams and join the sleeves to the body. The pattern will provide step-by-step instructions to make this process as smooth as possible.
Finally, add any finishing touches, such as blocking the sweater to ensure it holds its shape and weaving in any loose ends. Once you’ve completed these final steps, you can proudly wear your handmade striped sweater and show off your knitting skills!
The free striped sweater knitting pattern is a great way to practice your knitting techniques and create a stylish garment that you’ll love wearing. Whether you’re a beginner or an experienced knitter, this pattern will provide a fun and rewarding project for you to enjoy.
Choose your Yarn
When it comes to knitting a striped sweater, one of the most important decisions you’ll make is choosing the right yarn. The yarn you choose will not only determine the overall look and feel of your sweater, but also its durability and warmth. With so many options available, it can be overwhelming to know where to start. Here are a few things to consider when selecting your yarn.
Fiber Content
The first thing to think about when choosing yarn for your striped sweater is the fiber content. Different fibers have different properties and will affect the final outcome of your knitting project. Some popular options include:
- Wool: Wool is a traditional choice for sweaters as it is naturally warm and resilient. It comes in various weights and can be blended with other fibers for added softness or strength.
- Cotton: Cotton is a great choice for lightweight and breathable sweaters, especially in warmer climates. It is also hypoallergenic, making it suitable for those with sensitive skin.
- Acrylic: Acrylic yarn is known for its affordability and wide range of colors. It is easy to care for and is often used for children’s clothing or projects that require frequent washing.
- Alpaca: Alpaca yarn is soft, luxurious, and warm. It is hypoallergenic and ideal for those who are more sensitive to wool. However, it can be more expensive and requires proper care to maintain its quality.
Weight and Gauge
The weight of the yarn you choose will affect both the look and the fit of your striped sweater. Thicker yarns will create a bulkier fabric, while lighter yarns will produce a more delicate result. It’s important to consider the pattern’s recommended gauge and adjust your needle size accordingly to achieve the desired outcome. Keep in mind that using a different weight of yarn may result in a different fit or appearance, so it’s best to swatch and compare before starting your project.
Color Choices

Finally, the colors you choose for your striped sweater will play a significant role in the overall aesthetic. You can opt for classic combinations like black and white or experiment with bold, vibrant colors for a more statement-making piece. Consider how the colors work together and if they complement your personal style and wardrobe. Creating swatches with different color combinations can help you visualize how they will look when knitted up.
With these considerations in mind, you’ll be well-equipped to choose the perfect yarn for your striped sweater knitting project. Whether you prioritize warmth, durability, or style, there’s a yarn out there that will meet your needs and bring your vision to life.
Select Knitting Needles
When starting a knitting project, selecting the right knitting needles is crucial for achieving the desired results. The size, length, and material of the needles can all affect the outcome of your knitting. Taking the time to choose the right needles for your project will ensure that your stitches are even and consistent throughout.
Size: One of the first things to consider when selecting knitting needles is the size. The size of the needles will determine the gauge of your knitting and the final size of your project. Needle sizes are measured in millimeters or US sizes, with smaller numbers indicating smaller needles. The size of the needles will depend on the thickness of the yarn you are using and the desired drape or density of the fabric.
Length: The length of your knitting needles can also have an impact on your project. Generally, longer needles are used for large or wide projects such as blankets or shawls, while shorter needles are used for smaller projects like socks or hats. The length of the needles will also affect the ease with which you can work certain stitches and techniques.
Material: Knitting needles can be made from a variety of materials, each with its own benefits and drawbacks. Some common materials include metal, wood, and plastic. Metal needles are often smooth and durable, making them ideal for faster knitting. Wood needles are lightweight and warm to the touch, making them comfortable to use for longer periods. Plastic needles are generally less expensive and can be a good option for beginners. The material you choose may depend on personal preference and the type of yarn you are working with.
- Consider the size of the needles relative to the thickness of your yarn and the desired fabric.
- Choose the length of the needles based on the size and type of your project.
- Take into account the benefits and drawbacks of different needle materials.
- Experiment with different needle sizes and materials to find what works best for you.
By selecting the right knitting needles for your project, you can ensure that your knitting experience is enjoyable and the final result is exactly what you envisioned. Take the time to explore different options and find what works best for you and your knitting style.
Measurements and Gauge
Before you start knitting your striped sweater, you need to take accurate measurements of your body. This will ensure that the finished sweater fits you perfectly. Use a tape measure to measure your bust/chest, waist, hips, arm length, and back length. Note down these measurements as you will need them for reference later.
In addition to taking measurements, it’s also important to check your gauge. Gauge refers to the number of stitches and rows per inch that you get when knitting with a particular yarn and needle size. To determine your gauge for this striped sweater pattern, make a gauge swatch using the same stitch pattern as the sweater and the recommended needle size. Measure the number of stitches and rows in a 4×4 inch square and compare them to the gauge specified in the pattern. If your gauge doesn’t match, you may need to adjust your needle size to achieve the correct gauge.
Remember that getting the right measurements and gauge is crucial for the success of your striped sweater project. Taking accurate measurements and checking your gauge will ensure that the sweater fits you well and looks exactly as intended in the pattern. Don’t skip this step, as it can save you a lot of time and frustration in the long run.
Cast On Stitches
When starting a knitting project, one of the first steps is to cast on stitches. Casting on is the process of creating the foundation row of stitches on the knitting needle. This provides the base for the knitted fabric to be created.
There are different methods to cast on stitches, and the choice depends on the specific pattern or personal preference. Some common methods include the long-tail cast on, the knitted cast on, and the cable cast on. Each method has its own advantages and creates a unique edge for the knitted piece.
The long-tail cast on is a popular method that creates a stretchy and neat edge. It requires a long tail of yarn, which is used to create the stitches on the needle. This method is versatile and can be used for a wide range of projects.
The knitted cast on is a simple method that creates a less stretchy but stable edge. It involves knitting stitches onto the needle, which gives a similar appearance to the knit stitch. This method is great for projects where a firmer edge is needed.
The cable cast on is another method that creates a sturdy and even edge. It involves creating new stitches by using the cable method, where the yarn is twisted around the needle. This method is often used for projects that require a defined edge, such as the beginning of a ribbed pattern.
Once the stitches are cast on, the knitter can proceed with the rest of the pattern, following the instructions for each row. The cast-on row provides the foundation for the project and sets the stage for the beautiful knitted fabric to come.
Knit the Ribbing
The ribbing is an essential part of knitting a striped sweater. It adds structure and elasticity to the sweater, ensuring a snug and comfortable fit. To knit the ribbing, you will need to use a smaller needle size than the one you used for the main body of the sweater. This will create a tighter and more defined ribbed pattern.
Instructions

1. Start by casting on the required number of stitches for the ribbing. This is usually a multiple of the ribbing pattern you are using. For example, if you are using a 2×2 ribbing pattern, you will need to cast on a multiple of 4 stitches.
2. Begin knitting the ribbing pattern by alternating between knit and purl stitches. For a 2×2 ribbing pattern, you will knit 2 stitches and then purl 2 stitches. Repeat this pattern until you reach the desired length for the ribbing.
3. Make sure to keep your tension consistent throughout the ribbing to ensure an even and professional finish. It can be helpful to place a stitch marker at the beginning of each round to help you keep track of your stitches.
4. Once you have finished knitting the ribbing, you can switch to the larger needle size to continue knitting the main body of the sweater. The ribbing will provide a seamless transition between the ribbed section and the rest of the sweater.
5. Remember to always follow the specific instructions provided in the knitting pattern you are using, as different patterns may have variations in the ribbing technique or stitch count.
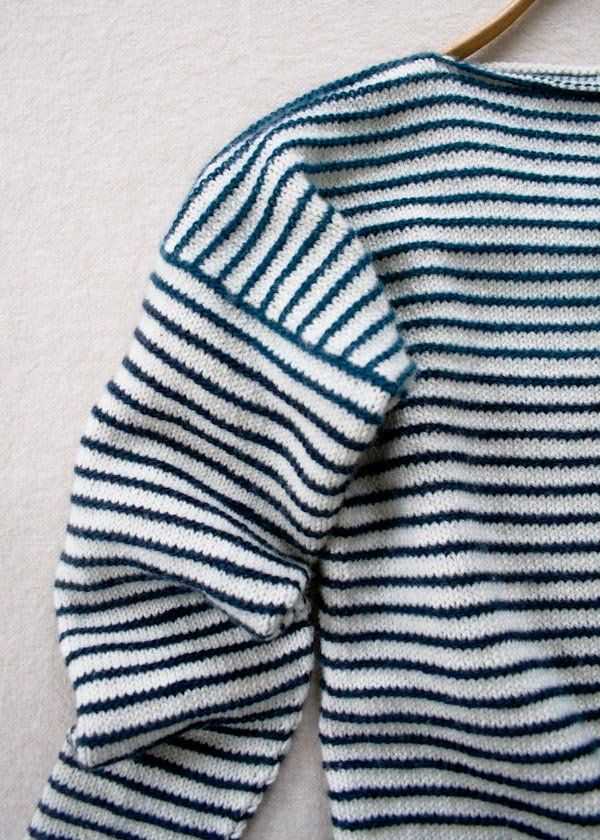
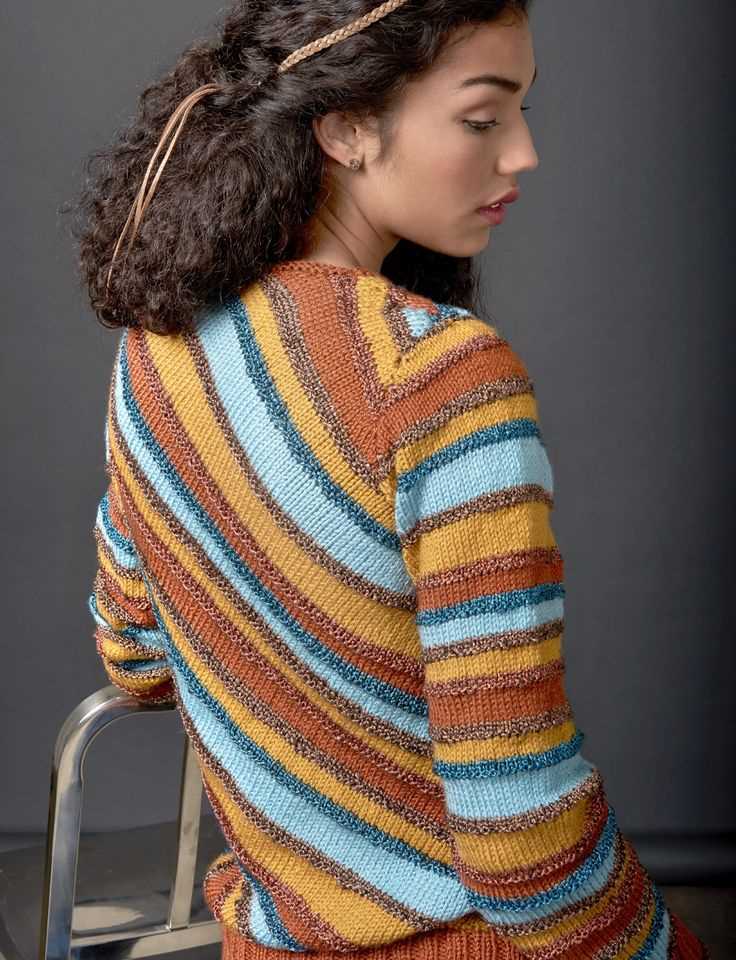
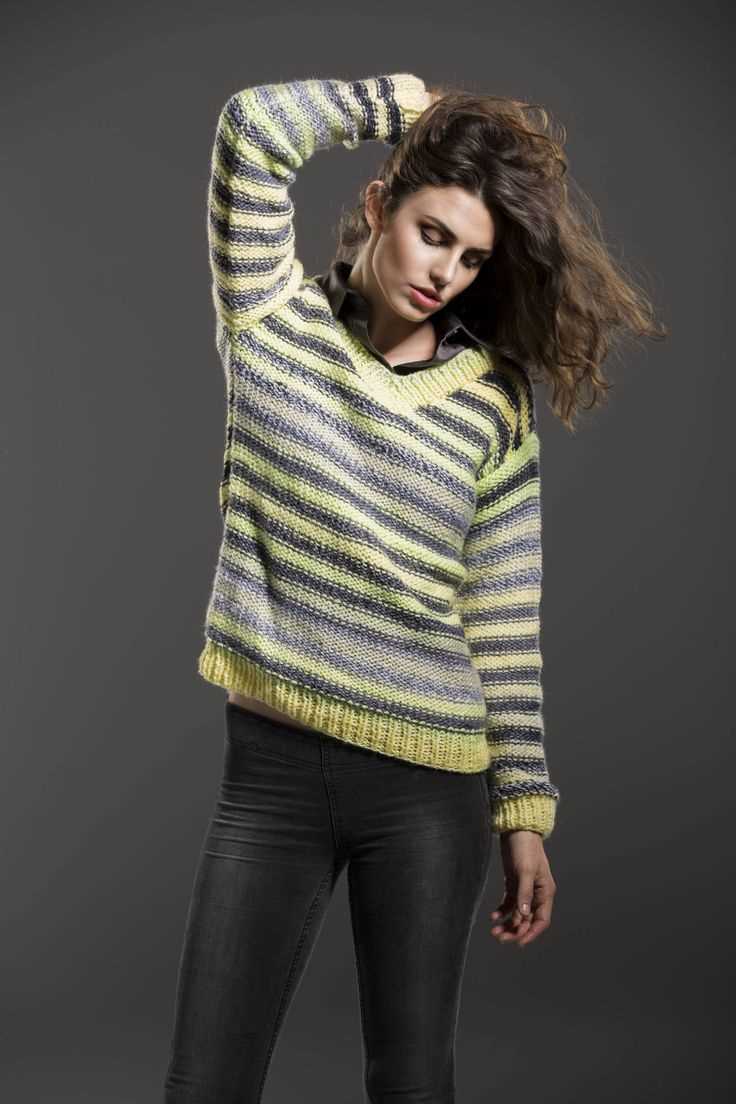
Create Stripes
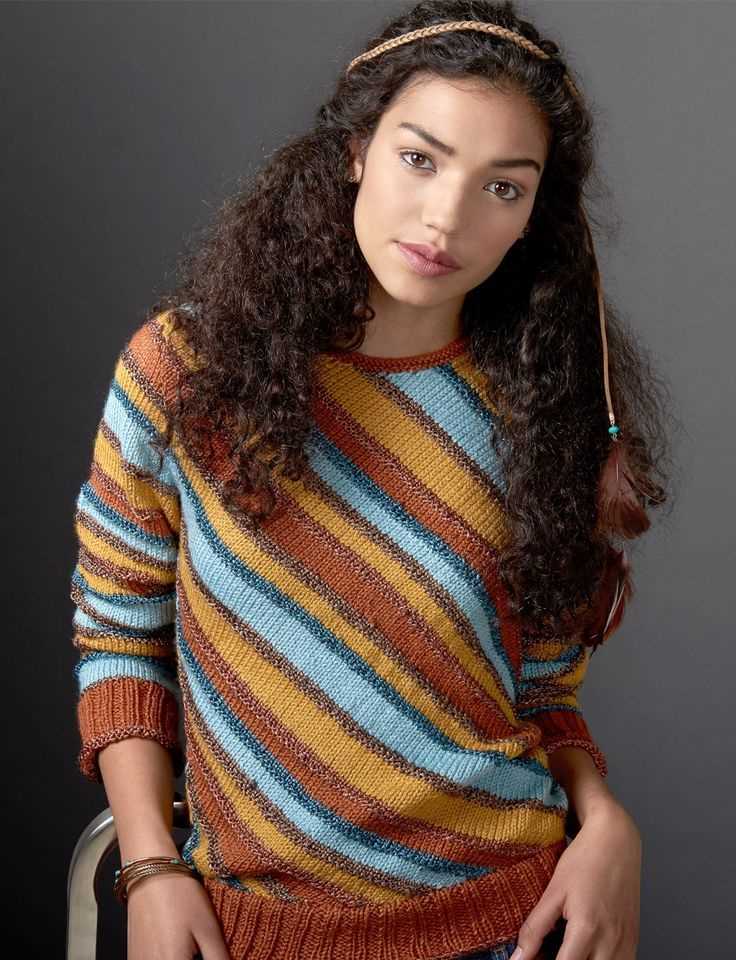
Striped patterns are an exciting way to add visual interest to your knitted projects. Whether you’re making a sweater, hat, or scarf, incorporating stripes can completely transform the look of your design. With a variety of color combinations and widths to choose from, you can create endless possibilities.
When creating stripes, it’s important to consider the color palette you want to work with. You can either use contrasting colors for a bold and striking effect or choose colors that are similar for a more subtle and understated look. Experimenting with different color combinations can be a fun way to express your creativity and style.
To create stripes, you can use a variety of knitting techniques. One popular method is the basic knit and purl stitch, where you alternate between the two stitches to create a raised texture. Another technique is the slip-stitch pattern, where you slip certain stitches instead of knitting them to create a staggered effect. Additionally, you can explore different stitch patterns such as the basketweave or chevron to create unique and eye-catching stripes.
When working with stripes, it’s important to keep track of your rows and colors. You can use a stitch marker or yarn scraps to mark the beginning of each stripe and make it easier to count your rows. This will help ensure that your stripes are evenly spaced and consistent throughout your project.
Whether you’re a beginner or an experienced knitter, adding stripes to your knitting projects can be a fun and rewarding experience. They allow you to play with color and pattern, and the end result is a unique and personalized garment or accessory. So go ahead, grab your knitting needles and start creating stunning stripes.
Knit the Body
Once you have completed the ribbing for the bottom hem of the sweater, it’s time to move on to knitting the body. With the main color yarn, continue knitting in stockinette stitch for the desired length of the sweater. You can refer to the pattern for specific measurements, but generally the body should be long enough to reach the hips or desired length.
To knit the body, simply knit every row in stockinette stitch. This means that you knit one row and then purl one row. Repeat this pattern until the body of the sweater reaches the desired length. This creates a smooth, even fabric that is comfortable to wear and shows off the beautiful stripes of the sweater.
As you knit, be sure to check your gauge to ensure that the sweater will fit properly. If your gauge is too loose, try using smaller needles, and if your gauge is too tight, try using larger needles. It’s important to achieve the correct gauge to ensure that the sweater has the right fit and proportions.
Keep in mind that knitting the body of the sweater may take some time, especially if the sweater is long. Take breaks as needed, but remember to keep track of your progress and remain consistent with your knitting tension. As you approach the end of the body, make sure to leave enough yarn for knitting the ribbing for the neckline and sleeves.
Knit the Sleeves
When knitting a striped sweater, one of the important steps is to knit the sleeves. The sleeves are an essential part of the overall design and can greatly contribute to the overall look of the garment.
Materials: Before getting started, gather all the necessary materials, including the yarn in the desired colors for the stripes, knitting needles in the appropriate size, stitch markers, and scissors.
To begin knitting the sleeves, cast on the required number of stitches onto the knitting needles. It is important to keep in mind the desired fit and size of the sleeves, as this will determine the number of stitches to cast on. Use stitch markers to separate the different sections of the sleeves.
Pattern: Follow the knitting pattern to create the stripes on the sleeves. This may involve switching between different colors of yarn at specified intervals. Make sure to keep track of the pattern and count the rows to ensure consistency throughout the sleeves.
Note: Depending on the design, the sleeves may require shaping, such as decreases or increases, to achieve the desired fit. Refer to the pattern instructions for any shaping details and follow them accordingly.
Continue knitting the sleeves until reaching the desired length. This will depend on personal preference and the design of the sweater. Once the desired length is reached, bind off the stitches and secure any loose ends. Repeat the same steps for the other sleeve.
Finishing: After knitting and securing both sleeves, it is time to join them to the body of the sweater. This can be done through seaming or by picking up stitches along the armholes to attach the sleeves. Follow the pattern instructions for the specific joining method.
Once the sleeves are joined and the sweater is complete, make sure to block the garment to even out the stitches and give it a professional finish. This can be done by gently soaking the sweater in lukewarm water, removing the excess water, and laying it flat to dry.
Add the Collar
Now that you have finished knitting the main body of the sweater, it’s time to add the collar. This is an important step as the collar will give the sweater its finished look. Follow these instructions to add the collar to your striped sweater.
Instructions:
- Start by picking up stitches along the neckline of the sweater. To do this, insert your needle into the first stitch, yarn over, and pull through to create a loop. Repeat this process along the entire neckline until you have picked up the desired number of stitches.
- Once you have picked up the stitches, you can begin knitting the collar. You can use the same stitch pattern as the main body of the sweater, or choose a different stitch for contrast. Knit the desired number of rows for the collar, making sure to maintain the same tension as the rest of the sweater.
- When you have finished knitting the collar, bind off the stitches to secure the edge. You can use a regular bind-off method or try a decorative bind-off to add an extra touch.
- After binding off, you may choose to block the collar to ensure it lays flat and has a neat appearance. Follow the blocking instructions for your specific yarn to achieve the best results.
- Once your collar is complete and blocked, your striped sweater is ready to wear! Try it on and admire your handiwork. The collar will add a polished touch to your knitted creation and make it ready to showcase.
Adding the collar is the final step in completing your striped sweater. With the collar in place, your sweater will have a polished and professional finish. Follow the instructions carefully to ensure a neat and well-fitting collar. Soon, you’ll be able to proudly wear your handmade, striped sweater and show off your knitting skills!
The finishing touches for your striped sweater
After you have completed the knitting portion of your striped sweater, it’s time to add the finishing touches. These final steps will ensure that your sweater looks polished and professional.
1. Blocking: Before you move on to the finishing steps, it’s important to block your sweater. Blocking involves wetting the garment and then gently shaping it to the desired size and dimensions. This helps to even out the stitches and give the sweater a neat and crisp appearance. Follow the blocking instructions provided with your pattern or refer to general blocking techniques for guidance.
2. Seaming: Once your sweater has dried and been blocked, it’s time to seam it together. Using the mattress stitch or another appropriate seaming technique, join the front and back pieces at the shoulders, sides, and sleeves. Take care to align the stripes as you seam. This will create a seamless look and ensure that the pattern flows smoothly across the entire sweater.
3. Neckline and cuffs: With the main body of the sweater complete, it’s time to finish the neckline and cuffs. You can choose to add ribbing, a facing, or another decorative edge treatment. Follow the pattern instructions for your specific design, or get creative and add your own personal touch. This is a great opportunity to create a unique and customized look for your sweater.
4. Finishing details: Finally, add any desired finishing details to your striped sweater. This could include buttons, pockets, or other embellishments. Carefully sew on buttons so that they align with the buttonholes and are evenly spaced. If adding pockets, ensure that they are positioned symmetrically and securely attached. These little details can make a big difference in the overall appearance of your finished sweater.
By taking the time to complete these finishing touches, you will elevate your striped sweater from a basic knit garment to a professional-looking, stylish piece that you can be proud to wear. Enjoy the process and have fun adding your own personal flair to your finished creation!
Block and Seam
The blocking and seaming process is an important step in creating a beautiful and professional-looking striped sweater. By blocking your knitted pieces before seaming, you can ensure that the sweater will have a uniform shape and size, and that the stitches will lay flat.
To block your knitted pieces, you will need to wet them and shape them to the correct measurements. This can be done by filling a basin with lukewarm water and adding a few drops of wool wash. Gently submerge the pieces in the water and let them soak for about 10-15 minutes. Then, remove the excess water by rolling the pieces in a towel and pressing down gently. Lay the pieces flat on a blocking mat or towel and use pins to shape them to the correct measurements, following the pattern instructions.
Once your pieces are blocked and dry, you can start seaming them together. First, match up the corresponding edges of the front and back pieces and use a tapestry needle and the same yarn to sew them together using a mattress stitch. This stitch creates an invisible seam that blends seamlessly into the fabric. It’s important to be patient and take your time to ensure that the stitches are even and the seam is secure.
After sewing the front and back pieces together, you can seam the sleeves and shoulders. Again, use the mattress stitch to create invisible seams. Make sure to match up the stripes and line them up perfectly before stitching. For the sleeves, start by seaming the top edges together, and then sew them onto the body of the sweater. Finally, sew the side seams together, starting from the bottom hem and working your way up to the underarm.
By following these blocking and seaming techniques, you can create a beautifully finished striped sweater that is sure to be a favorite in your wardrobe. Take your time and enjoy the process, and soon you’ll have a cozy and stylish sweater to show off.
Enjoy your Striped Sweater!
Now that you have completed your striped sweater using this free knitting pattern, it’s time to enjoy the fruits of your labor! You have created a beautiful and unique garment that showcases your knitting skills and personal style. Whether you made it for yourself or as a gift for someone special, your striped sweater is sure to bring warmth and joy.
When wearing your striped sweater, you can pair it with jeans for a casual and cozy look, or dress it up with a skirt and boots for a more polished outfit. The versatility of a striped sweater allows you to easily transition between different occasions and styles. It can be worn as a standalone piece or layered over a shirt or dress, making it suitable for both autumn and winter seasons.
Here are a few tips to help you make the most of your striped sweater:
- Wash it with care: Follow the care instructions provided with the yarn you used to wash your striped sweater. This will help maintain its quality and keep it looking its best.
- Accessorize: Have fun accessorizing your striped sweater with scarves, hats, and gloves. These accessories can add an extra touch of style and warmth to your outfit.
- Experiment with layering: Try layering your striped sweater over different tops to create new looks. You can play with contrasting colors or mix and match patterns for a unique and eye-catching ensemble.
- Share your creation: If you’re proud of your striped sweater, don’t hesitate to share your creation on social media or with friends and family. Your hard work deserves to be celebrated!
Remember, knitting is a craft that brings comfort and creativity together. The process of making a garment from scratch is not only satisfying but also a great way to relax and unwind. So, take a moment to admire and appreciate your striped sweater, and embrace the joy of wearing something you made with love.
Happy knitting and enjoy your new striped sweater!
Q&A:
Where can I find a free striped sweater knitting pattern?
You can find a free striped sweater knitting pattern on various websites, such as Ravelry, Knitty, and LoveCrafts. These websites offer a wide range of patterns for different skill levels and styles, so you can easily find a striped sweater pattern that suits your preferences.
What materials do I need to knit a striped sweater?
To knit a striped sweater, you will need yarn in different colors, knitting needles in the appropriate size for your pattern, stitch markers, a tapestry needle for weaving in ends, and scissors. The specific materials required may vary depending on the pattern you choose, so make sure to check the pattern for any additional materials or tools needed.
Are there any specific knitting techniques required for a striped sweater?
While there may not be any specific techniques required solely for knitting a striped sweater, it is helpful to have some knowledge of basic knitting techniques such as increasing, decreasing, and color changes. If you are new to knitting, there are plenty of online tutorials and resources available that can guide you through these techniques and help you create a beautiful striped sweater.
Can I customize the colors and size of a striped sweater pattern?
Yes, you can definitely customize the colors and size of a striped sweater pattern. Most knitting patterns provide instructions for different sizes, allowing you to choose the one that best fits your measurements. As for the colors, feel free to get creative and choose the ones you prefer. You can follow the pattern exactly or modify it to create your own unique striped sweater.