
You may have heard of the popularity of knitting, but have you ever delved into the world of yarn knit patterns? Whether you’re a beginner, an experienced knitter, or simply interested in exploring a new hobby, yarn knit patterns offer a wide range of designs and techniques to try. From intricate lace stitches to cozy cable knits, there’s something for everyone to create and enjoy.
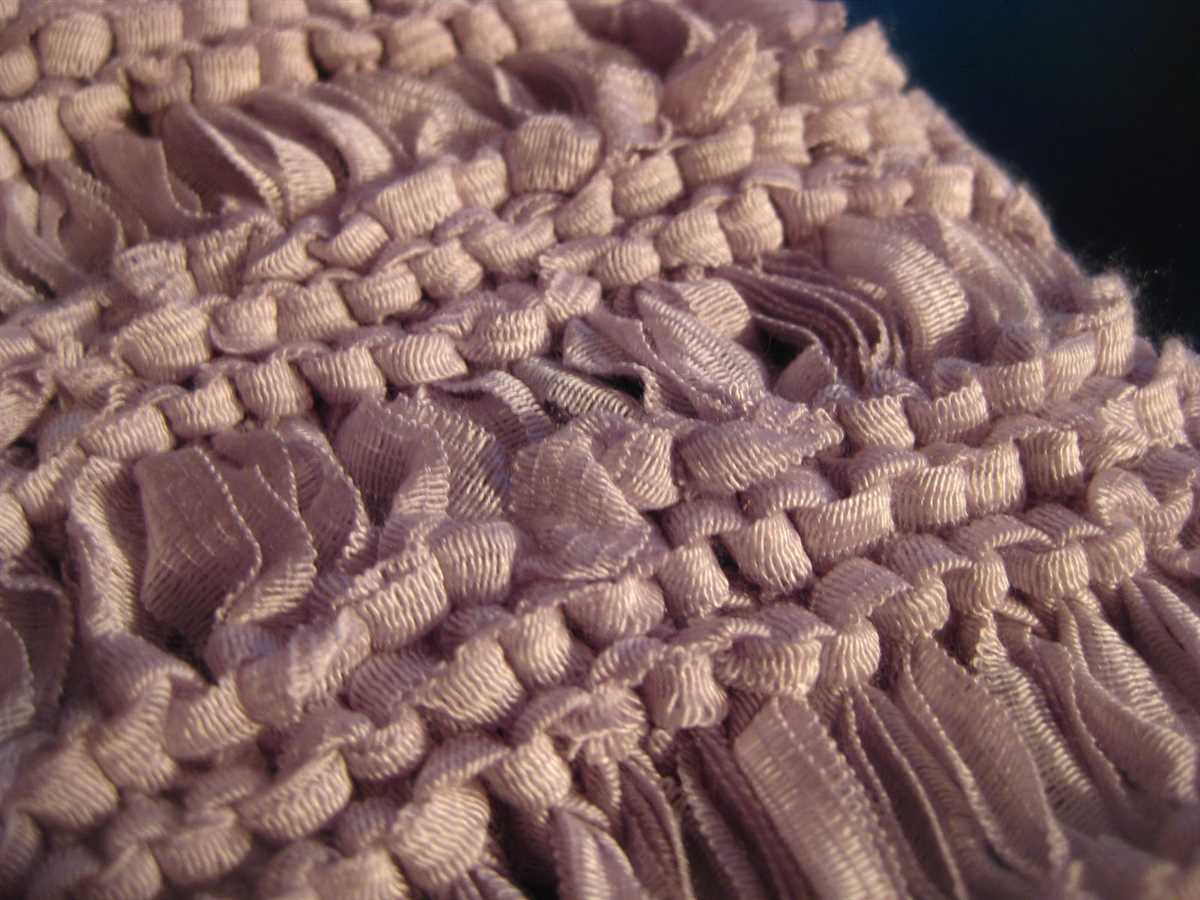
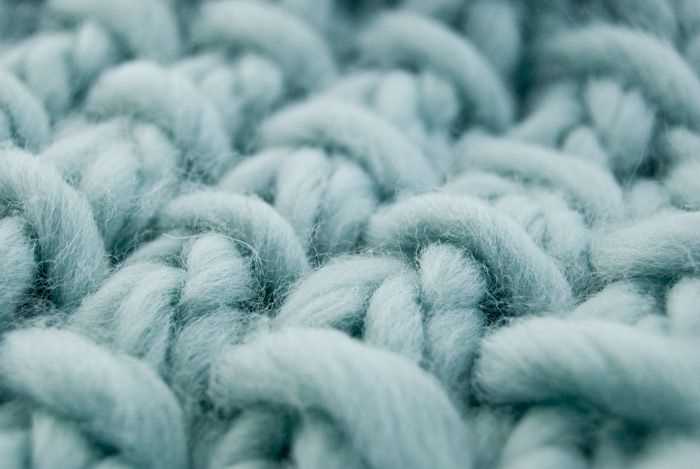
Before you dive into the world of yarn knit patterns, it’s essential to understand the basics. Every pattern starts with the foundation: the stitches. Knitting stitches can be as diverse and varied as the colors and textures of yarn itself. From the simple garter stitch to the more complex brioche stitch, each stitch creates a unique texture and pattern.
Once you’ve mastered the stitches, it’s time to dive into the technique of soaking and blocking your finished knitted projects. Soaking your knits helps relax the fibers, improve the drape of the fabric, and set the stitches for a more polished and professional finish. Blocking, on the other hand, involves shaping and drying your knits to ensure they maintain the desired shape and size. This crucial step can make a significant difference in the overall appearance and fit of your finished project.
Now that you have your stitches and technique down, it’s time to explore the world of yarn knit patterns. Whether you’re looking for a cozy sweater to snuggle up in or a delicate lace shawl to show off your skills, there are countless patterns available to suit your tastes and preferences. With the rise of online knitting communities, you can easily find patterns, join groups, and connect with fellow knitters who share your passion for this timeless craft.
Stitch Soak Scrub Yarn Knit Patterns
The world of knitting offers a variety of techniques and patterns to create beautiful and unique pieces. Whether you’re a beginner or an experienced knitter, there’s always something new to learn and explore. One important aspect of knitting is understanding different stitches and how they can be used to create different textures and designs.
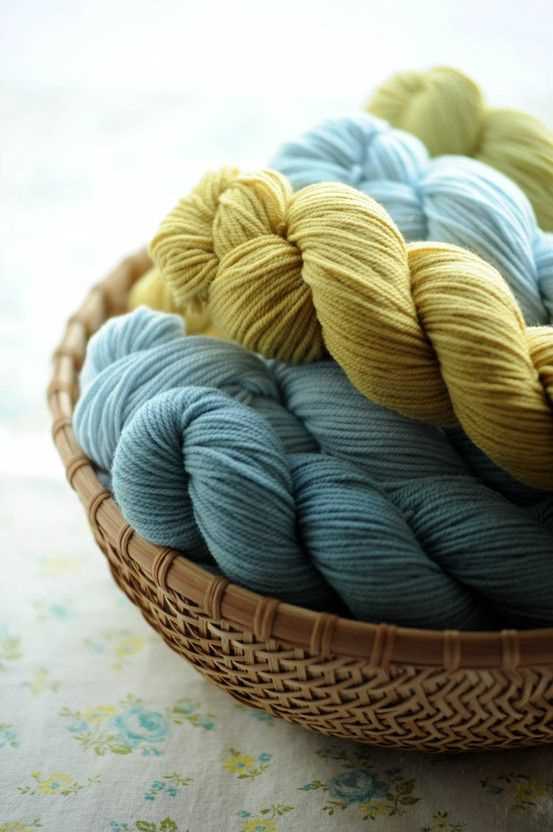
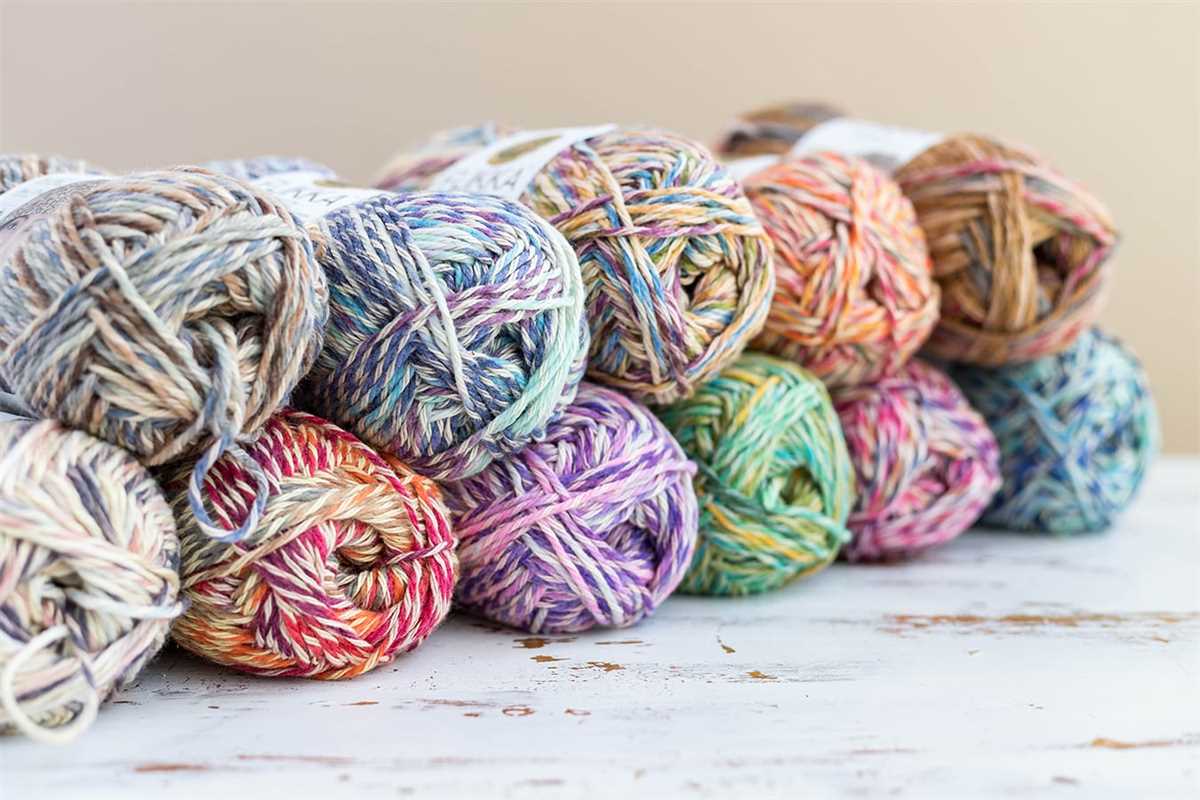
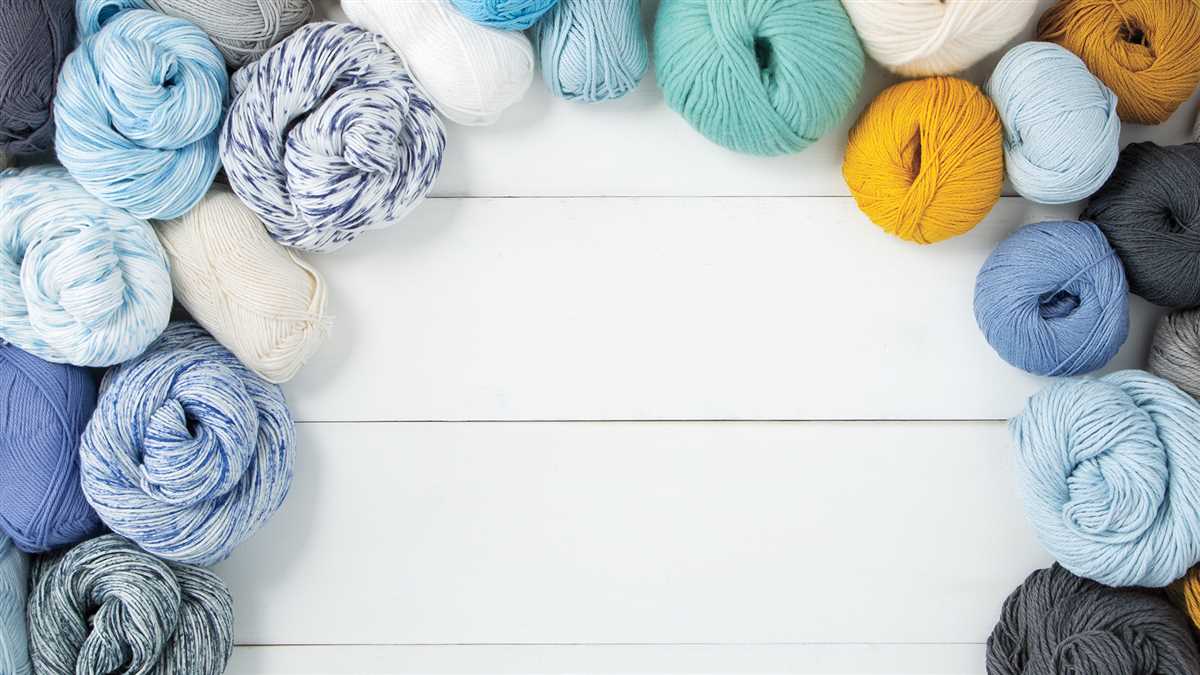
When starting a knitting project, it’s important to choose the right type of yarn for the desired outcome. There are various types of yarn available, each with its own characteristics, such as thickness, fiber content, and color options. By carefully selecting the yarn, you can achieve the desired look and feel of your finished project.
Soaking and blocking your knitted piece is an essential step in the finishing process
Once your knitting is complete, it’s time to give it a little TLC with a soak. Soaking your knitted piece in lukewarm water with a mild detergent or wool wash helps relax the fibers, smooth out any uneven tension, and remove any dirt or oils that may have accumulated during the knitting process. After soaking for about 15-30 minutes, gently squeeze out excess water and lay the piece flat to dry.
Another crucial step in the knitting process is scrubbing, particularly when working with natural fibers like wool. Scrubbing helps to “full” the fibers, which means to compact and strengthen them, resulting in a more durable and professional-looking finished piece. To scrub your knitted item, place it in a basin of lukewarm water with a bit of detergent or wool wash, and gently rub or agitate the piece with your hands. Be careful not to twist or wring the fibers, as this can cause them to stretch or lose their shape.
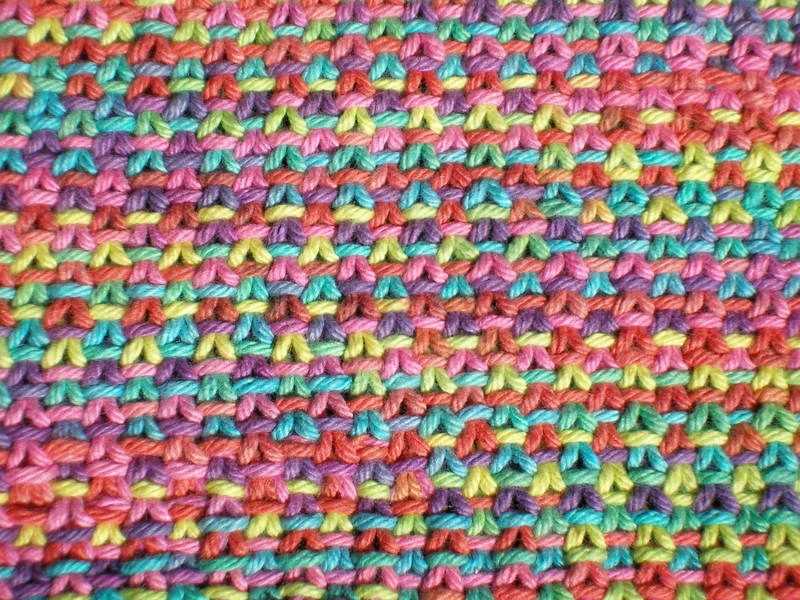
Lastly, there is an endless array of yarn knit patterns available for all skill levels. From simple scarves and hats to intricate lace shawls and cable sweaters, there’s a pattern out there for every project and style. Following a pattern provides a roadmap for your knitting journey and ensures that your finished piece turns out just as you envisioned.
The Basics of Stitching
When it comes to knitting or crocheting, understanding the basics of stitching is essential. Whether you are a beginner or an experienced crafter, having a solid foundation in stitching techniques will allow you to create beautifully crafted pieces. From simple stitches to more complex patterns, mastering stitching techniques will open up a world of possibilities for your creativity.
Types of Stitches:
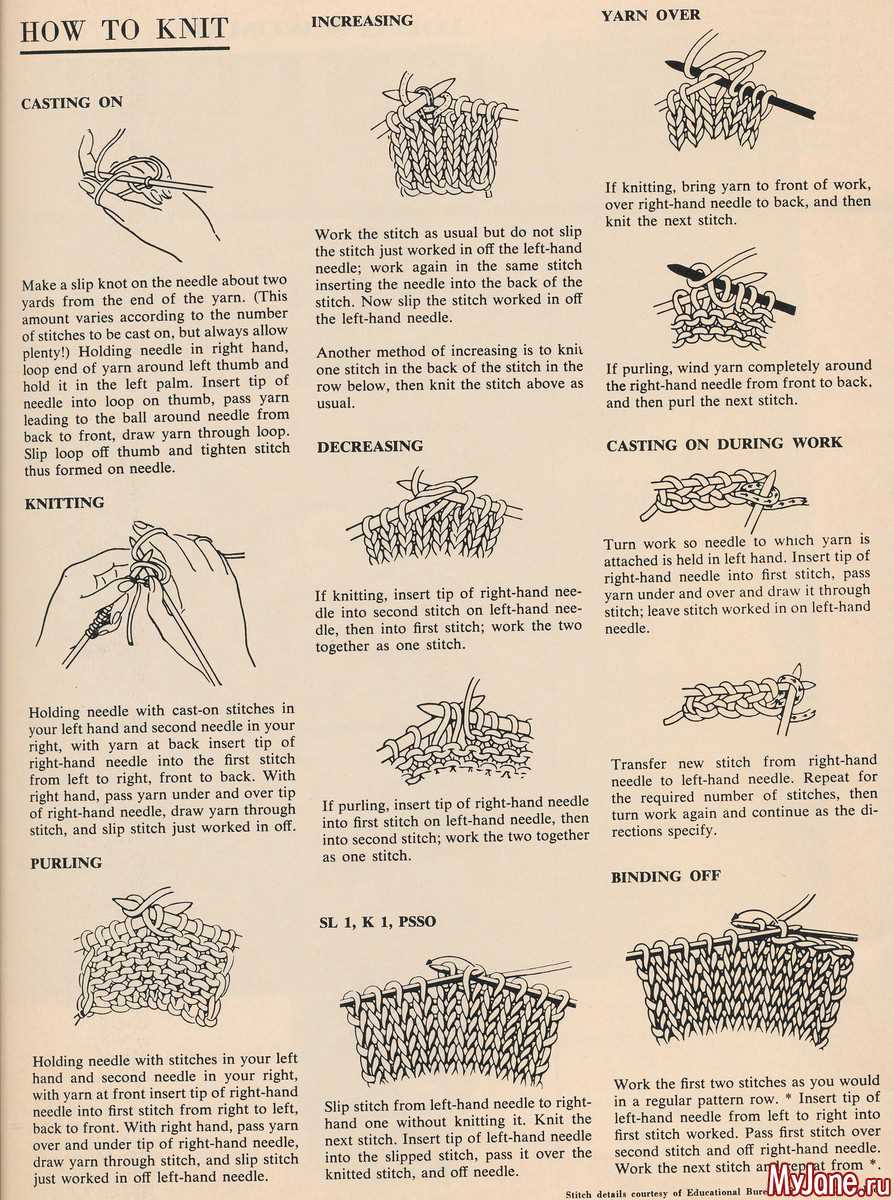
There are a wide variety of stitches used in knitting and crocheting, each with its own unique characteristics and purposes. Some common types of stitches include the knit stitch, purl stitch, slip stitch, and double crochet stitch. These stitches form the foundation of many patterns and can be combined to create intricate designs. It is important to become familiar with these stitches and practice them regularly to improve your skills.
Tools and Materials:
To start stitching, you will need some basic tools and materials. For knitting, you will need knitting needles, which come in different sizes depending on the thickness of the yarn you are using. Crocheting requires a crochet hook, which also comes in various sizes. In addition, you will need yarn in the color and weight specified in your pattern. It is important to choose the right tools and materials to ensure the best results in your stitching project.
Reading Patterns:
When working on a stitching project, it is essential to be able to read patterns. Patterns provide instructions on how to create a specific design, including which stitches to use and in what order. They also often include charts or diagrams to help visualize the pattern. Learning how to read and understand patterns will enable you to tackle more complex projects and create beautiful, intricate designs.

Practice and Patience:
As with any skill, mastering stitching techniques takes practice and patience. It can take time to develop precision and consistency in your stitches. Don’t get discouraged if your first few projects don’t turn out exactly as planned – use them as learning experiences and opportunities for improvement. The more you practice, the better you will become, and the more complex and beautiful patterns you will be able to create.
In conclusion, stitching is a fundamental skill in knitting and crocheting. By understanding the basics of stitching, familiarizing yourself with different types of stitches, and practicing regularly, you will be well on your way to creating stunning handmade creations. Whether you are knitting a cozy blanket, crocheting a stylish hat, or trying out intricate lace patterns, stitching is the key to bringing your creative visions to life.
Soaking Yarn for Better Results
When it comes to knitting or crocheting with yarn, one important step that often gets overlooked is soaking the yarn before starting your project. Soaking yarn can have several benefits and can greatly improve the overall quality and outcome of your finished piece.
Why should you soak yarn?
- Relaxing the fibers: Soaking the yarn helps relax the fibers and removes any tension or kinks that may have developed during the manufacturing process. This makes the yarn softer, more pliable, and easier to work with.
- Getting rid of excess dye: Soaking the yarn can help remove any excess dye that may be present. This is especially important for vibrant or dark-colored yarns that have a higher chance of bleeding onto the finished project.
- Evening out the yarn: Soaking can help even out the yarn’s twist and texture, resulting in a more consistent and uniform appearance in your final piece.
How to soak yarn effectively:
- Choose the right temperature: Fill a basin or sink with room temperature water. Avoid using hot or cold water, as extreme temperatures can cause the yarn to shrink or felt.
- Add a gentle cleanser: Use a mild detergent or specially formulated yarn wash to clean the yarn. Avoid harsh chemicals that can damage fibers.
- Submerge the yarn: Place the skein or hank of yarn into the water, ensuring that it is fully submerged. Gently squeeze the yarn to ensure that the water penetrates all fibers.
- Let it soak: Allow the yarn to soak for at least 20-30 minutes, or follow the instructions provided by the yarn manufacturer.
- Rinse and dry: After soaking, remove the yarn from the water and gently squeeze out any excess moisture. Lay it flat on a clean towel to air dry, avoiding direct sunlight.
Incorporating the step of soaking yarn into your knitting or crocheting routine can make a significant difference in the overall quality of your finished projects. Taking the time to relax the fibers, remove excess dye, and ensure evenness can result in smoother stitches, more vibrant colors, and a more professional-looking final piece.
Scrubbing Techniques for Cleaning Knit Items
When it comes to cleaning knit items, it is important to use the right scrubbing techniques to ensure that the delicate fabric is not damaged. Here are some effective methods for scrubbing knit items to remove dirt and stains without causing harm.
Gentle Soaking
The first step in scrubbing knit items is to gently soak them in lukewarm water. Fill a basin or sink with water and add a mild detergent specifically designed for delicate fabrics. Place the knit item in the water and let it soak for about 15 minutes to allow the detergent to penetrate and loosen any dirt or stains.
Soft Scrubbing
After the knit item has soaked, it is time to start scrubbing. However, it is important to be gentle to avoid stretching or damaging the fabric. One effective scrubbing technique is to use a soft-bristled brush or a clean sponge. Gently scrub the fabric in a circular motion, focusing on any areas with stubborn stains. Use light pressure and avoid scrubbing too vigorously.
Spot Treatment
If there are specific areas on the knit item that require extra attention, spot treatment with a stain remover can be effective. Apply a small amount of stain remover directly to the stained area and gently scrub with a soft-bristled brush. Be sure to follow the instructions on the stain remover product and test it on a small, inconspicuous area of the knit item first to ensure it does not cause any discoloration or damage.
Final Rinse
After the scrubbing process, it is important to thoroughly rinse the knit item to remove any detergent or residue. Rinse the fabric under cool running water, gently squeezing out any excess water. Avoid twisting or wringing the fabric, as this can cause it to lose its shape. Once the knit item is fully rinsed, gently press it between towels to remove any remaining water before laying it flat to dry.
By using these scrubbing techniques, you can effectively clean your knit items without causing any damage. Remember to always read and follow the care instructions on the label of the knit item to ensure the best cleaning method is used.
The Importance of Choosing the Right Yarn
When it comes to knitting, one of the most important decisions you can make is choosing the right yarn for your project. The yarn you select can greatly impact the final outcome of your knitted item, from its appearance to its durability. With so many different types of yarn available, it can be overwhelming to choose the perfect one. However, taking the time to consider a few key factors can help ensure that you select the best yarn for your specific project.
First and foremost, consider the fiber content of the yarn. Different fibers have different properties and characteristics, which can affect everything from the drape of a garment to its warmth. For example, wool is a common yarn choice for many knitters due to its excellent insulating properties and ability to retain warmth even when wet. On the other hand, cotton yarn is breathable and lightweight, making it ideal for summer garments. Understanding the fiber content and its attributes will help you make an informed decision.
Next, think about the weight and thickness of the yarn.

- A thicker yarn will create a knitted item that is bulkier and heavier, while a thinner yarn will result in a lighter, more delicate finished piece.
- The weight of the yarn will also affect the size of needles you need to use and the gauge of your stitches. It’s important to match the weight of the yarn to the appropriate needle size for the best results.
- Additionally, consider the yardage of the yarn. Depending on your project, you may require a certain amount of yarn to complete it. Make sure to check the yardage on the yarn label and purchase enough to avoid running out in the middle of your project.
Lastly, consider the color and texture of the yarn. The color of the yarn can greatly impact the overall appearance of your project, so choose a color that complements your style and the intended use of the knitted item. Texture, on the other hand, refers to the feel of the yarn in your hands. Softer, smoother yarns may be more comfortable to work with, while textured yarns can add dimension to your knitting. Ultimately, the color and texture choices are up to personal preference.
In conclusion, choosing the right yarn for your knitting project is essential for achieving the desired outcome. By considering factors such as fiber content, weight, yardage, color, and texture, you can ensure that your finished garment or accessory meets your expectations and stands the test of time.
Common Knit Patterns for Beginners
Knitting is a popular craft that allows you to create beautiful and functional items. If you’re a beginner, it’s important to start with simple knit patterns that will help you practice the basic stitches and techniques. Here are some common knit patterns that are perfect for beginners:
1. Garter Stitch Scarf
The garter stitch is the most basic stitch in knitting and is perfect for beginners. It’s created by knitting every row, resulting in a squishy and textured fabric. A garter stitch scarf is an ideal project to practice this stitch and get used to holding the knitting needles correctly.
2. Stockinette Stitch Hat
The stockinette stitch is another essential stitch in knitting. It creates a smooth and flat fabric with knit stitches on the right side and purl stitches on the wrong side. A stockinette stitch hat is a great project for beginners to learn how to alternate between knit and purl stitches and create a basic hat shape.
3. Seed Stitch Dishcloth
The seed stitch is a simple pattern that creates a textured fabric with alternating knit and purl stitches. It’s great for beginners who want to practice switching between these two basic stitches. A seed stitch dishcloth is a small and practical project that allows you to practice the seed stitch and create a useful item for your home.
4. Ribbed Headband
Ribbing is a technique that creates a stretchy and elastic fabric. It’s commonly used for cuffs, collars, and headbands. A ribbed headband is an easy project for beginners to practice knitting ribbing and create a stylish accessory.
These are just a few examples of common knit patterns for beginners. Remember to start with simple projects and gradually challenge yourself as you become more comfortable with the basic stitches. Happy knitting!
Advanced Knit Patterns for Experienced Crafters
For experienced crafters who have mastered the basics of knitting, advanced knit patterns offer a new level of challenge and creativity. These patterns go beyond simple stitches and basic designs, allowing crafters to explore intricate techniques and create stunning pieces of knitwear.
Stitch Patterns: Advanced knit patterns often incorporate complex stitch patterns, such as cables, lace, and colorwork. These stitches require careful attention to detail and precision in execution. Crafters can experiment with different stitch combinations to create unique textures and designs in their projects.
Soaking and Blocking: To achieve the best results with advanced knit patterns, it’s crucial to properly soak and block the finished project. Soaking the knitwear in lukewarm water and a gentle detergent helps to relax the stitches and even out any uneven tension. Blocking, which involves shaping the wet knitwear and allowing it to dry in the desired shape, helps to enhance the stitch definition and drape of the fabric.
Scrubs and Yarns: When working on advanced knit patterns, choosing the right yarn is key. Scrubs made from high-quality natural fibers, such as merino wool or cashmere, will give the final project a luxurious feel and excellent drape. Different yarn weights can also be used to create different effects, such as using bulky yarn for cozy winter accessories or lace-weight yarn for lightweight and delicate garments.
Knit Patterns: Advanced knit patterns encompass a wide range of projects, from intricate sweaters and cardigans to delicate lace shawls and socks. These patterns often require a deep understanding of construction techniques, such as seamless knitting, advanced shaping, and intricate stitch patterns. Knitters can challenge themselves with complex designs, pushing their skills and creativity to new levels.
Overall, advanced knit patterns provide experienced crafters with an opportunity to expand their knitting skills and create truly unique and stunning pieces of knitwear. Whether it’s mastering complex stitch patterns, using high-quality yarns, or tackling intricate construction techniques, advanced knitting offers endless possibilities for creativity and personal expression.
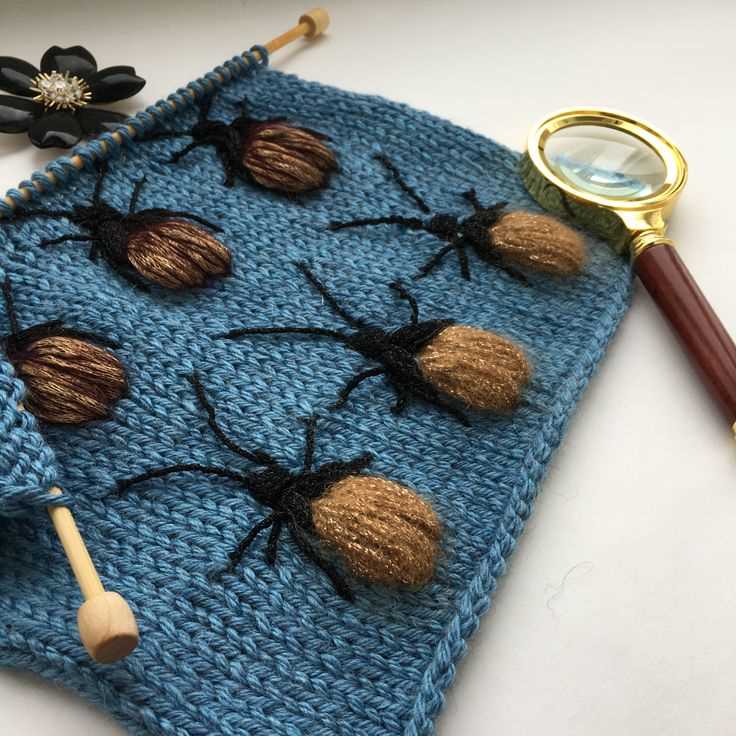
Creating Unique Patterns with Different Stitch Combinations
When it comes to knitting, the possibilities are endless. With a wide variety of stitches to choose from, knitters can combine different stitch patterns to create unique and intricate designs. By experimenting with different stitch combinations, knitters can showcase their creativity and create one-of-a-kind pieces.
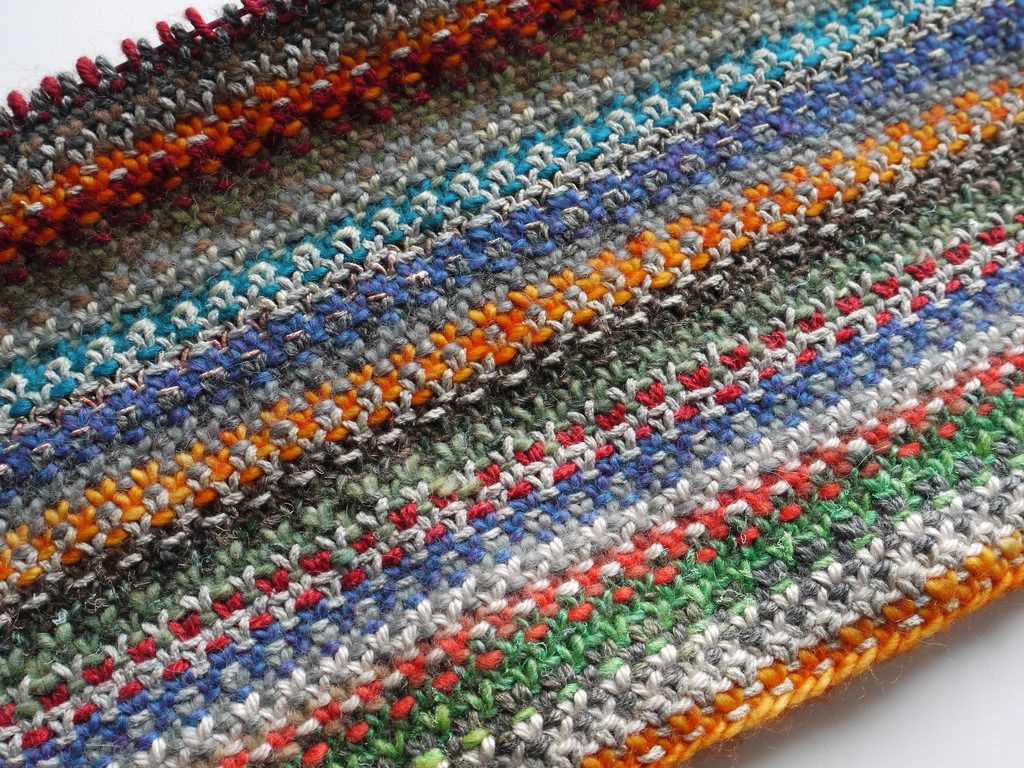
One way to create unique patterns is by combining different types of stitches, such as cables, lace, and colorwork. Cables add depth and texture to a knitted piece, while lace creates delicate and airy patterns. Colorwork, on the other hand, allows knitters to incorporate multiple colors into their design, resulting in stunning and vibrant patterns.
Using a combination of stitches not only adds visual interest to a knitting project but also allows for customization. By selecting stitches that complement each other, knitters can create patterns that suit their style and preferences. For example, combining a simple stockinette stitch with a lace pattern can create a beautiful contrast between smooth and textured sections.
Here are a few examples of stitch combinations that can be used to create unique patterns:
- Cable and lace: By alternating cable stitches with lace stitches, knitters can create a pattern that has both texture and airiness.
- Colorwork and texture: Incorporating colorwork with textured stitches, such as seed stitch or moss stitch, can result in a visually striking pattern.
- Ribbing and lace: Combining ribbing stitches with lace stitches can create a pattern that is both structured and delicate.
Experimenting with different stitch combinations is not only a fun way to explore new knitting techniques, but it also allows knitters to create personalized and unique patterns. By combining different stitches, textures, and colors, knitters can create pieces that stand out and showcase their individuality.
Tips for Effective Yarn Selection in Knitting
Choosing the right yarn is crucial for the success of a knitting project. The type, weight, and fiber content of the yarn can greatly affect the final result. Here are some tips to help you make an effective yarn selection:
1. Consider the Project:
Before choosing the yarn for your knitting project, consider the nature of the project itself. Is it a hat, a scarf, or a sweater? Think about the desired drape, warmth, and durability of the finished item. For example, a lightweight, breathable yarn would be more suitable for a summer top, while a cozy, warm yarn would be better for a winter sweater.
2. Gauge and Needle Size:
Pay attention to the gauge and recommended needle size indicated on the knitting pattern. Different yarns have different thicknesses, and using the wrong yarn weight can result in a project that is too small or too large. Make sure to match the gauge of the pattern by swatching with your chosen yarn and adjusting your needle size if needed.
3. Fiber Content:
Consider the fiber content of the yarn and how it will affect the finished project. Natural fibers like wool, alpaca, and cotton have different qualities and characteristics. Wool provides warmth and elasticity, alpaca adds softness and drape, while cotton is breathable and great for summer garments. Synthetic fibers like acrylic and nylon can be a good choice for easy-care and machine-washable projects.
4. Color and Texture:
Take into account the color and texture of the yarn and how it will complement or enhance the design of your project. Solid colors tend to show stitch patterns more clearly, while variegated and self-striping yarns can add visual interest. Consider if you want a smooth, polished look or if you prefer a more textured, rustic feel.
By considering these factors and taking the time to choose the right yarn, you can ensure that your knitting projects turn out beautifully and meet your expectations.
How to Fix Common Knitting Mistakes
Knitting can be a relaxing and creative hobby, but it’s not uncommon to make mistakes along the way. Whether you’ve dropped a stitch, created an accidental hole, or have an uneven tension, there are ways to fix these common knitting mistakes and salvage your project.
1. Dropped Stitches: One of the most common mistakes in knitting is dropping a stitch. If you notice a dropped stitch, don’t panic. Take a crochet hook or a knitting needle that is slightly smaller than the ones you are using for your project and carefully loop the dropped stitch back up through the stitches above it, working from the bottom to the top. Once you’ve secured the dropped stitch, continue knitting as normal.
2. Accidental Holes: Accidentally creating holes in your knitting can be frustrating, but there are ways to fix them. To fix a hole, thread a tapestry needle with the same yarn and weave it through the surrounding stitches, duplicating the pattern or texture of your knitting as closely as possible. This will close up the hole and make it less noticeable.
3. Uneven Tension: Uneven tension is a common issue, especially for beginner knitters. To fix uneven tension, try blocking your finished project. Soak the knitting in lukewarm water, gently squeeze out the excess water, and then lay it flat to dry. As the knitting dries, the fibers will relax and even out the tension, making the finished project look more uniform.
4. Twisted Stitches: Twisted stitches can happen when you accidentally knit into the back of a stitch instead of the front. To fix a twisted stitch, insert the tip of the left needle into the front loop of the twisted stitch and carefully unravel it, then re-knit it correctly.
5. Miscounted Stitches: If you’ve miscounted your stitches and noticed it a few rows later, don’t worry. Use a stitch marker to mark the spot where the mistake occurred, then carefully rip back to that marker, fixing any stitches that were made incorrectly. Once you’ve fixed the mistake, place a new stitch marker and continue knitting.
Remember, mistakes happen to even the most experienced knitters. Don’t be discouraged if you find yourself making a mistake in your project. With a little patience and these tips, you can fix common knitting mistakes and continue enjoying your knitting journey.
Finishing Touches: Blocking and Edging Techniques
After spending hours knitting or crocheting a beautiful piece, it’s important to give it the finishing touches it deserves. Blocking and edging techniques can make all the difference in the final appearance of your project, ensuring that it looks polished and professional. Here, we will explore the importance of blocking, as well as various edging techniques you can use to enhance your knitted or crocheted items.
Blocking
Blocking is the process of shaping your finished pieces by wetting or steaming them and allowing them to dry in the desired shape. This technique is essential for achieving an even and smooth appearance. It helps to even out stitches, open up lace patterns, and give your project a more polished look.
There are several methods of blocking, depending on the fiber content of your yarn and personal preference. Wet blocking involves soaking your project in water, gently squeezing out the excess moisture, and laying it flat to dry. Steam blocking uses steam from an iron or steamer to shape the piece. Both methods can be effective, but it’s important to follow the specific instructions for your yarn to avoid damaging it.
Edging Techniques
Edging techniques add a finishing touch to your knitted or crocheted items. They can range from simple ribbing or garter stitch borders to more intricate lace or cable patterns. Here are a few popular edging techniques:
- Ribbing: Adding a ribbed border can create a stretchy and structured edge to your piece.
- Garter Stitch: A garter stitch border adds a simple and clean finish to your project.
- Lace: Lace edging can add an elegant and delicate touch to your project, perfect for shawls or scarves.
- Cables: Cabled borders can create a decorative and textured edge, perfect for sweaters or blankets.
When choosing an edging technique, consider the overall design and style of your project. You want the edging to complement the main body of your piece and enhance its overall appearance.
Conclusion
Blocking and edging techniques are the final steps in completing a knitted or crocheted project. Blocking helps to shape and even out stitches, while edging techniques add a finishing touch. Taking the time to block and choose the right edging can transform your handmade piece into a professional-looking item. So don’t skip these important steps and enjoy the satisfaction of a beautifully finished project!
Q&A:
What does it mean to soak yarn?
To soak yarn means to submerge it in water to clean, soften, or prepare it for knitting or other crafts.
What is yarn made of?
Yarn can be made from various materials, such as wool, cotton, acrylic, or a blend of different fibers.
What is the purpose of scrubbing yarn?
Scrubbing yarn can be done to remove dirt or stains, to fluff up the fibers, or to create a specific texture for a project.
What are knit patterns?
Knit patterns are detailed instructions or designs that guide the creation of knitted items, such as sweaters, scarves, or hats. They specify the stitches, rows, and techniques to be used.