
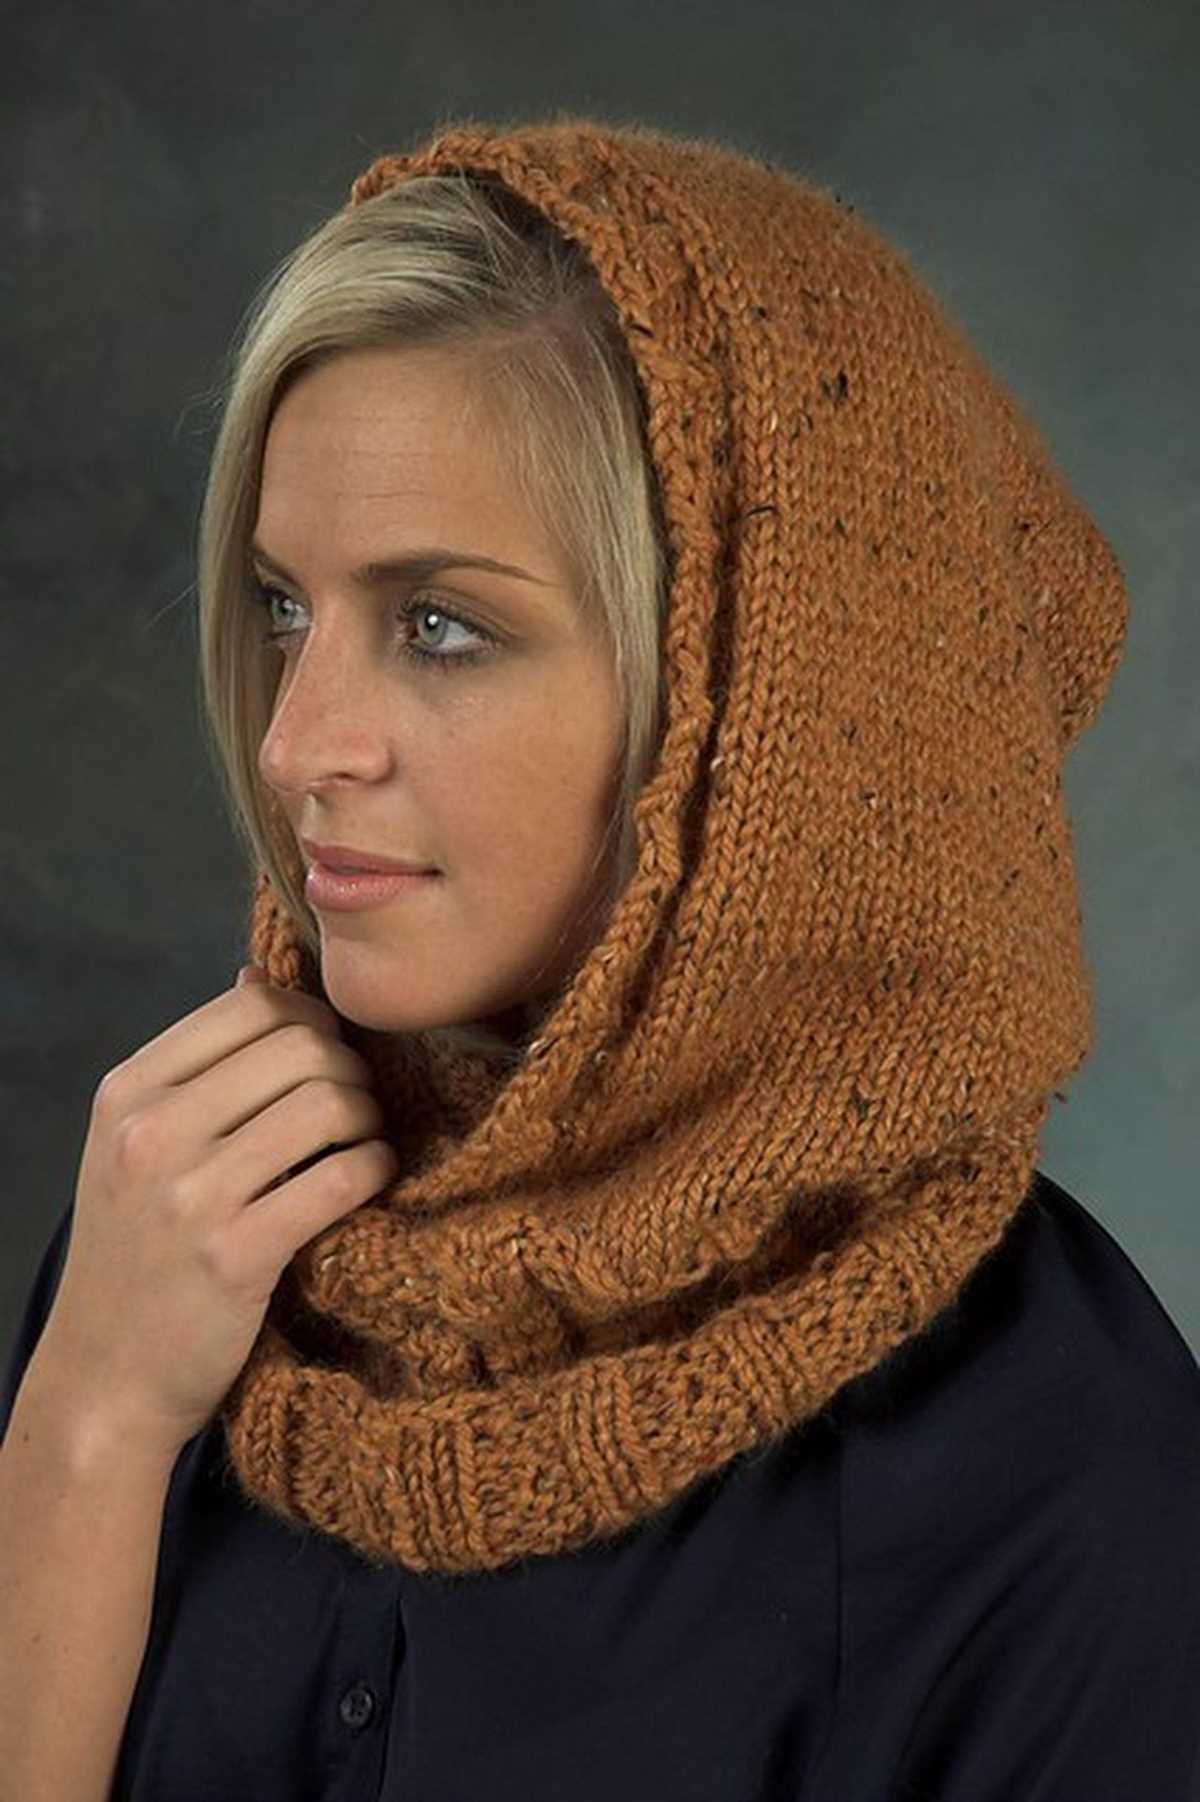
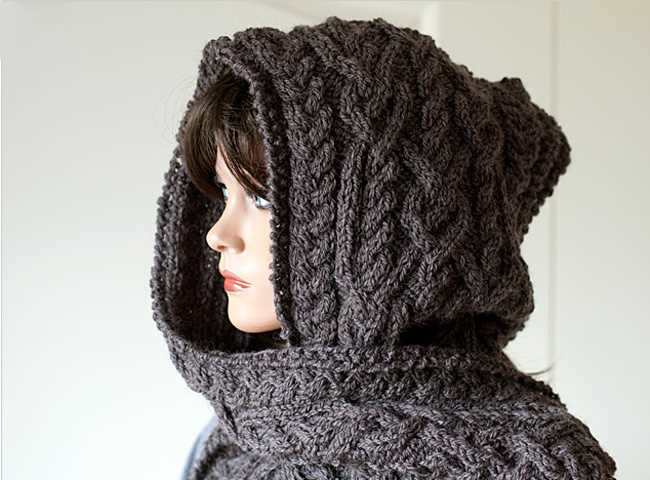
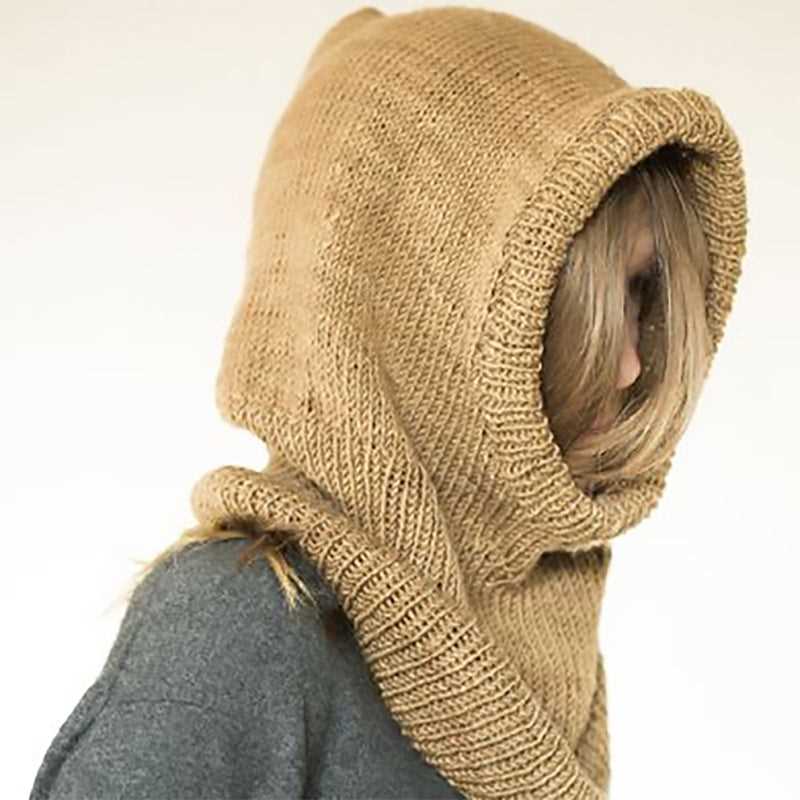
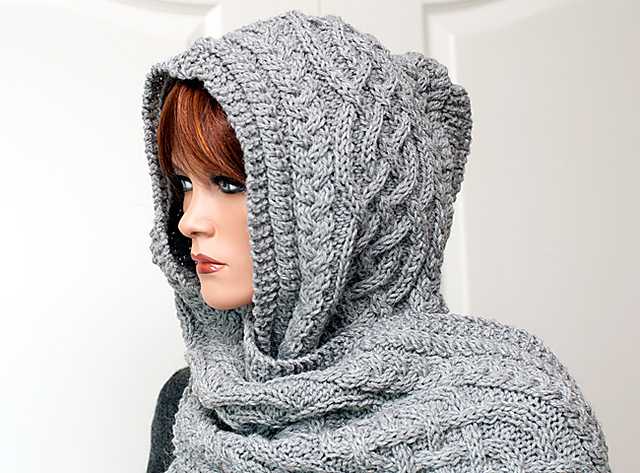
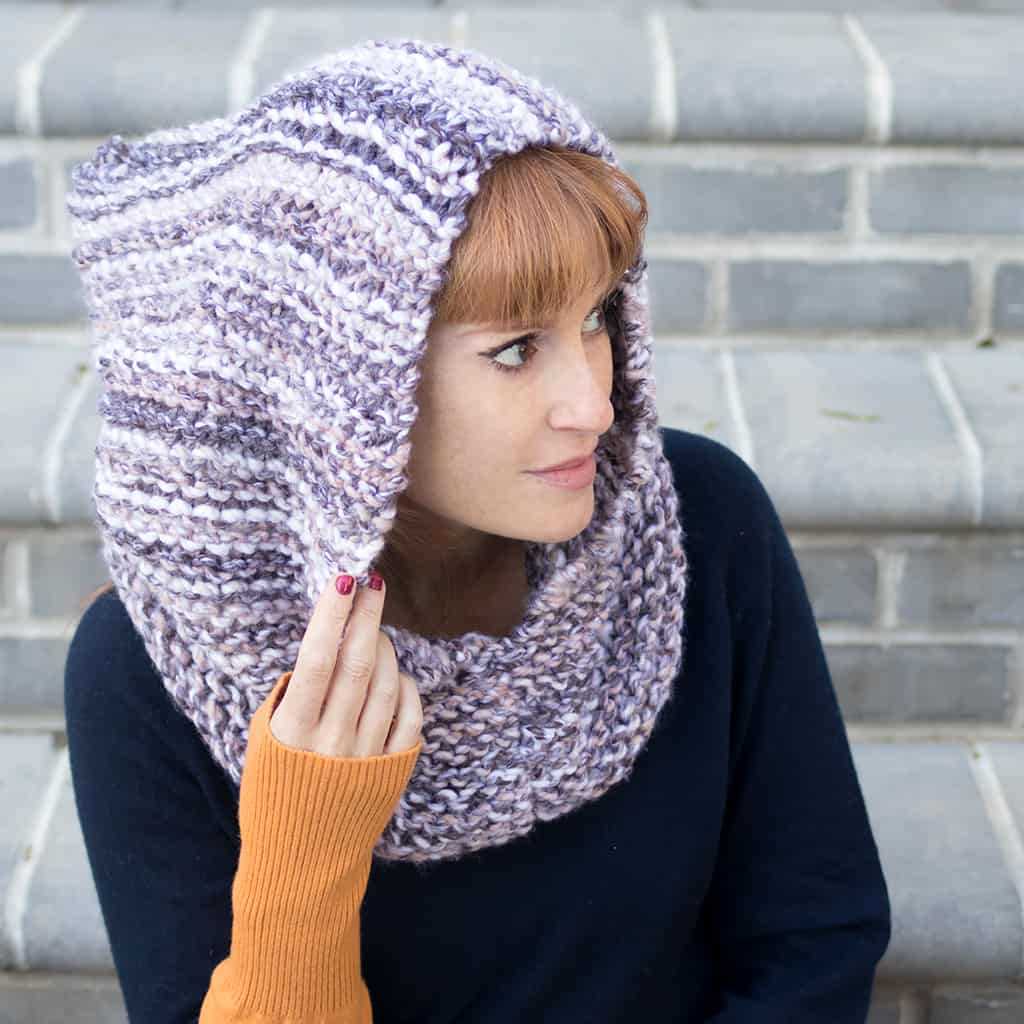
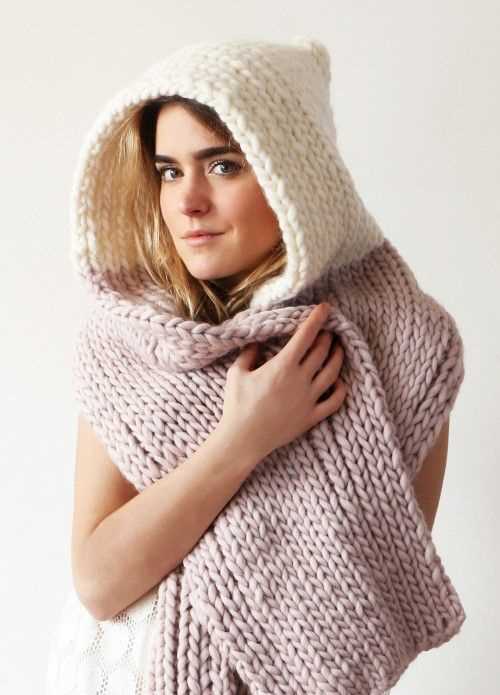
Knitting is a popular hobby that not only calms the mind but also allows for the creation of beautiful and functional items. If you are looking for a fun and practical project to work on, a snood with a hood might be just what you need. A snood is a versatile accessory that can be worn around the neck or pulled up to cover the head, while the added hood provides extra warmth and protection from the elements.
This knitting pattern is suitable for both beginners and experienced knitters alike. With basic knitting stitches and techniques, you can create a cozy and stylish snood with a hood that will keep you warm during the cold winter months. The pattern allows for customization, so you can choose the colors and yarn weight that you prefer. Whether you want to make a snood for yourself or as a thoughtful gift for a loved one, this pattern is the perfect choice.
Not only will knitting a snood with a hood keep you warm, but it will also give you a great sense of accomplishment. Knitting is a meditative and relaxing activity that can be enjoyed alone or with friends. As you work on this project, you will see the snood with hood gradually taking shape, and you will feel a sense of pride in your handiwork. So grab your knitting needles, choose your favorite yarn, and get ready to create a fashionable and functional accessory that you will love to wear!
Snood with Hood Knitting Pattern
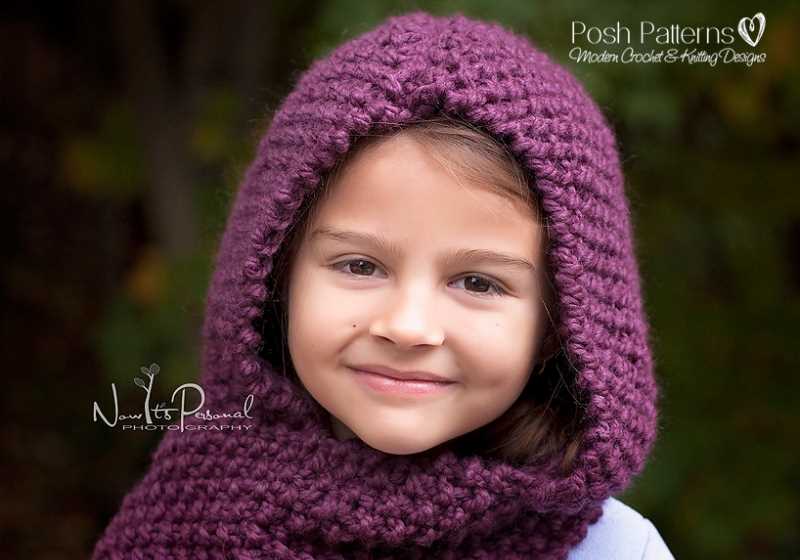
Stay cozy and stylish with a snood with hood knitting pattern. A snood is a versatile accessory that can be worn as a cowl around the neck or pulled up over the head as a hood. This knitting pattern combines the best of both worlds, providing warmth and coverage in colder weather.
The snood with hood knitting pattern is a perfect project for intermediate knitters looking to expand their skills. The pattern typically involves using circular or double-pointed needles to create a seamless tube. You will need to be comfortable working with various stitches, such as knit, purl, and ribbing.
Materials:
- Size 8 (5mm) circular or double-pointed knitting needles
- Approximately 300 yards of worsted weight yarn
- Stitch markers
- Tapestry needle
Instructions:
- Cast on 100 stitches.
- Join in the round, being careful not to twist the stitches. Place a stitch marker to indicate the beginning of the round.
- Work in a 2×2 ribbing pattern (knit 2, purl 2) for 4 inches.
- Switch to stockinette stitch (knit every round) and continue until the snood with hood measures approximately 16 inches from the cast-on edge.
- Begin decreasing for the hood by knitting 2 stitches together at the beginning and end of every other round until there are 32 stitches remaining.
- Continue knitting in stockinette stitch until the hood measures approximately 8 inches.
- Switch back to the 2×2 ribbing pattern and work for 4 inches.
- Bind off in pattern.
- Weave in loose ends and block the snood with hood if desired.
Your snood with hood is now ready to wear! This versatile accessory can be pulled up over the head for extra warmth or worn as a stylish cowl around the neck. Experiment with different yarn colors and textures to customize your snood with hood to match your personal style.
| Size | Finished Circumference | Length from Cast-on Edge to Hood | Hood Length |
|---|---|---|---|
| Adult | 22 inches | 16 inches | 8 inches |
| Child | 18 inches | 12 inches | 6 inches |
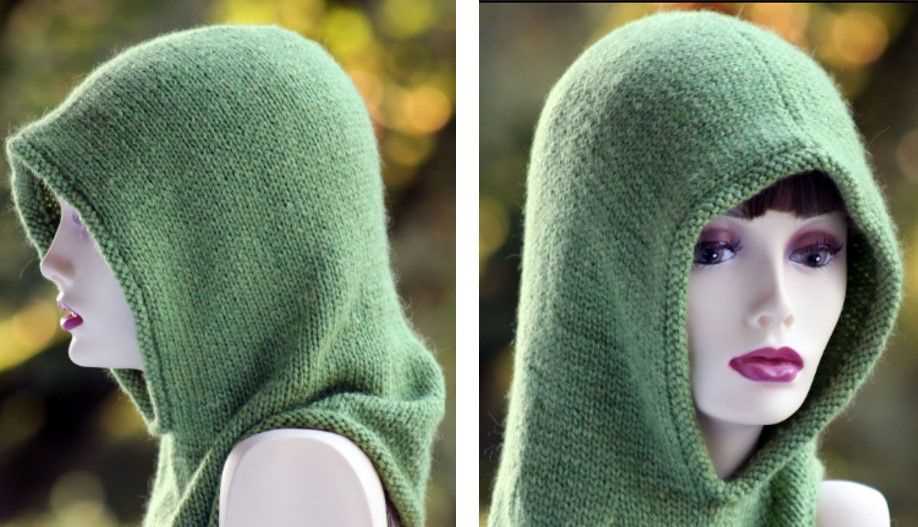
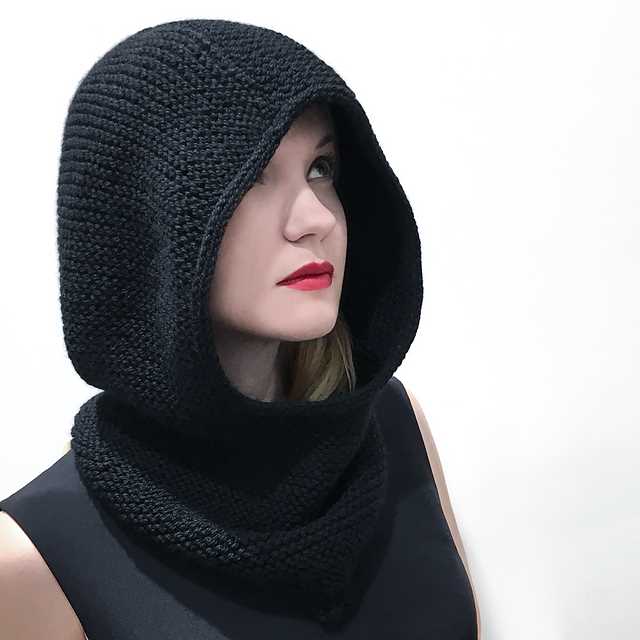
What is a Snood?

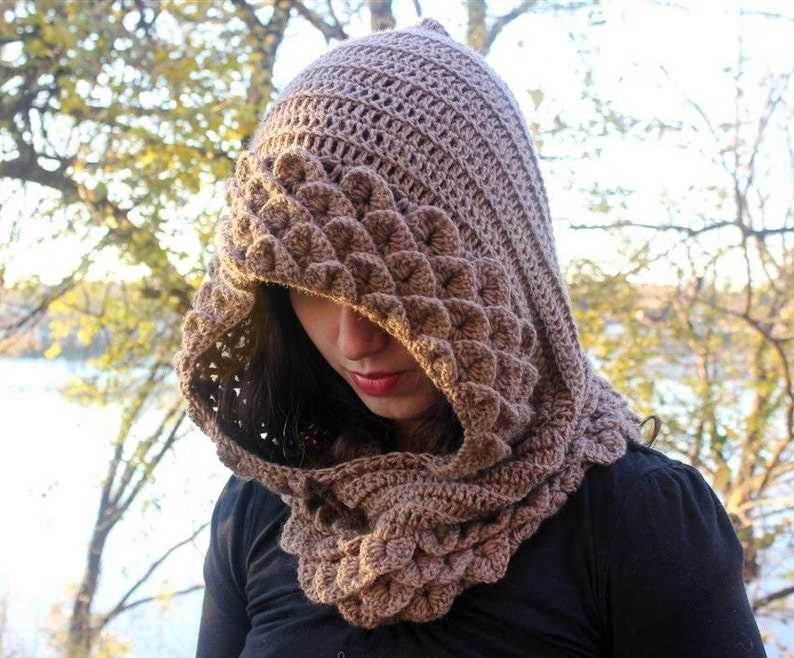
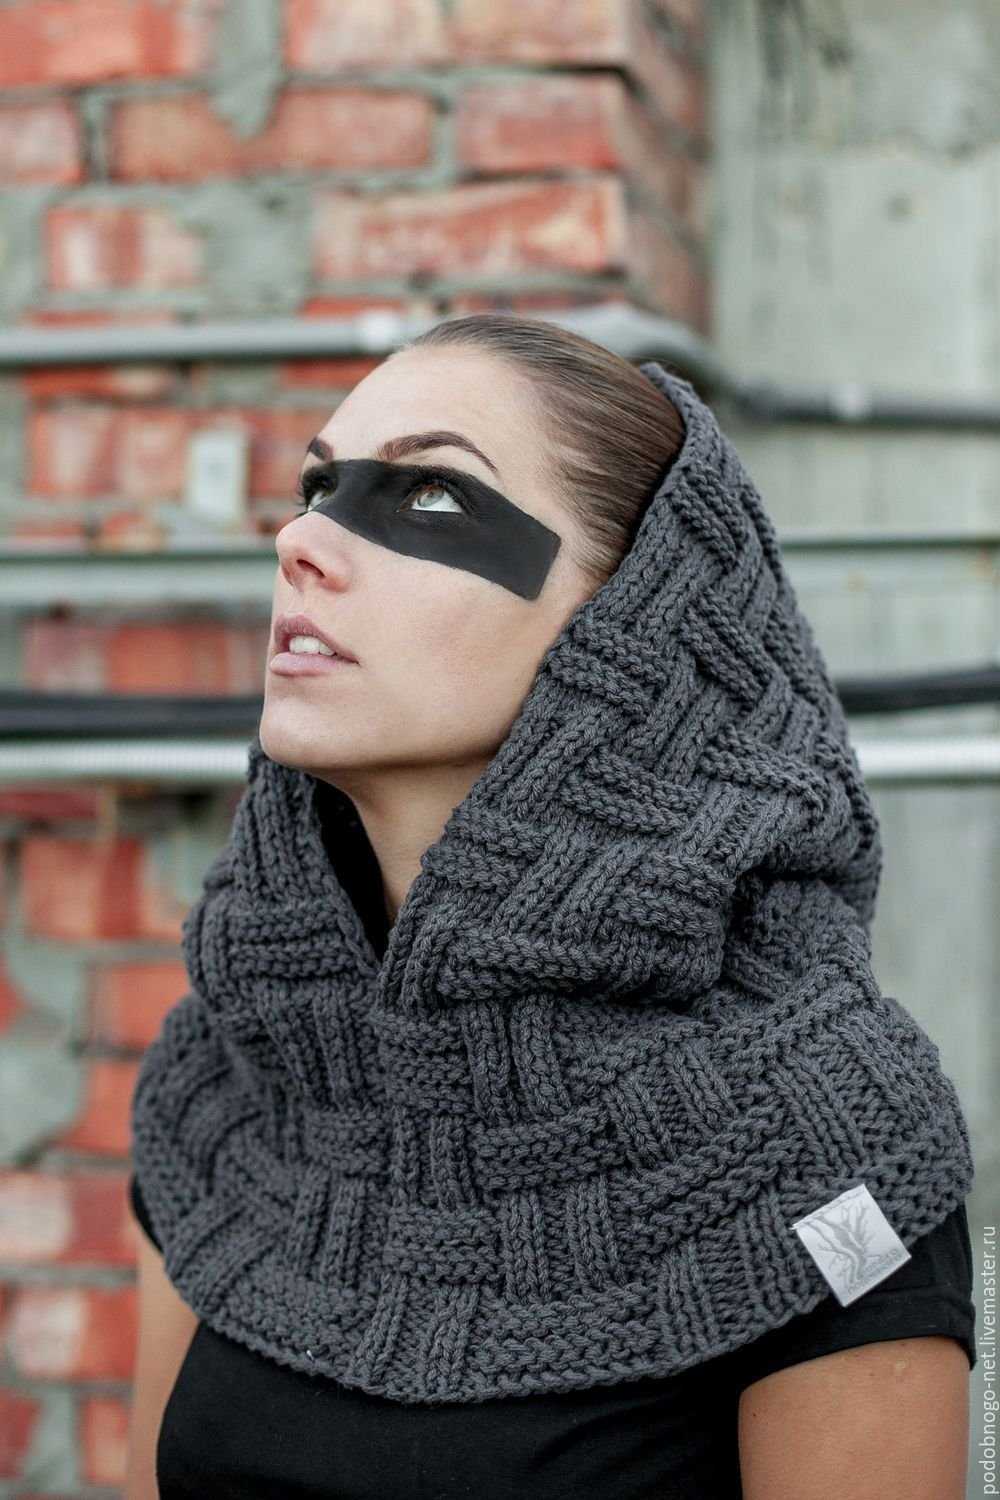
A snood is a type of headgear that is typically made of fabric and worn around the neck or head. It is designed to provide warmth and protection from cold weather, making it a popular accessory for outdoor activities. Snoods can come in various shapes and styles, but one common type is a snood with a hood, which combines the functionality of a scarf and a hat in one garment.
A snood with hood knitting pattern is a set of instructions that guides knitters on how to create their own snood with a hood. These patterns provide a detailed list of materials needed, as well as step-by-step instructions on knitting techniques. Knitting a snood with a hood allows knitters to customize the color, texture, and design of their headgear, making it a unique and personal accessory.
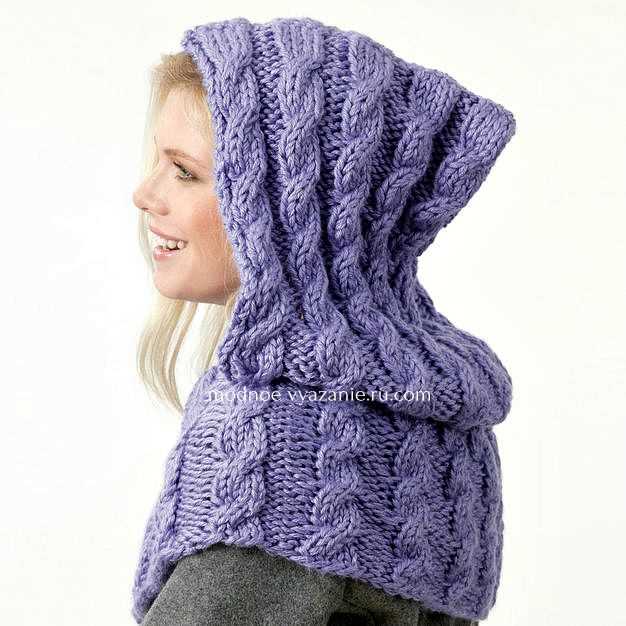
When choosing a snood with hood knitting pattern, it’s important to consider the skill level required. Beginner-friendly patterns usually have simpler stitches and instructions, while more advanced patterns may involve more complex techniques. Some patterns also include special techniques, such as cable knitting or colorwork, to add extra visual interest to the snood.
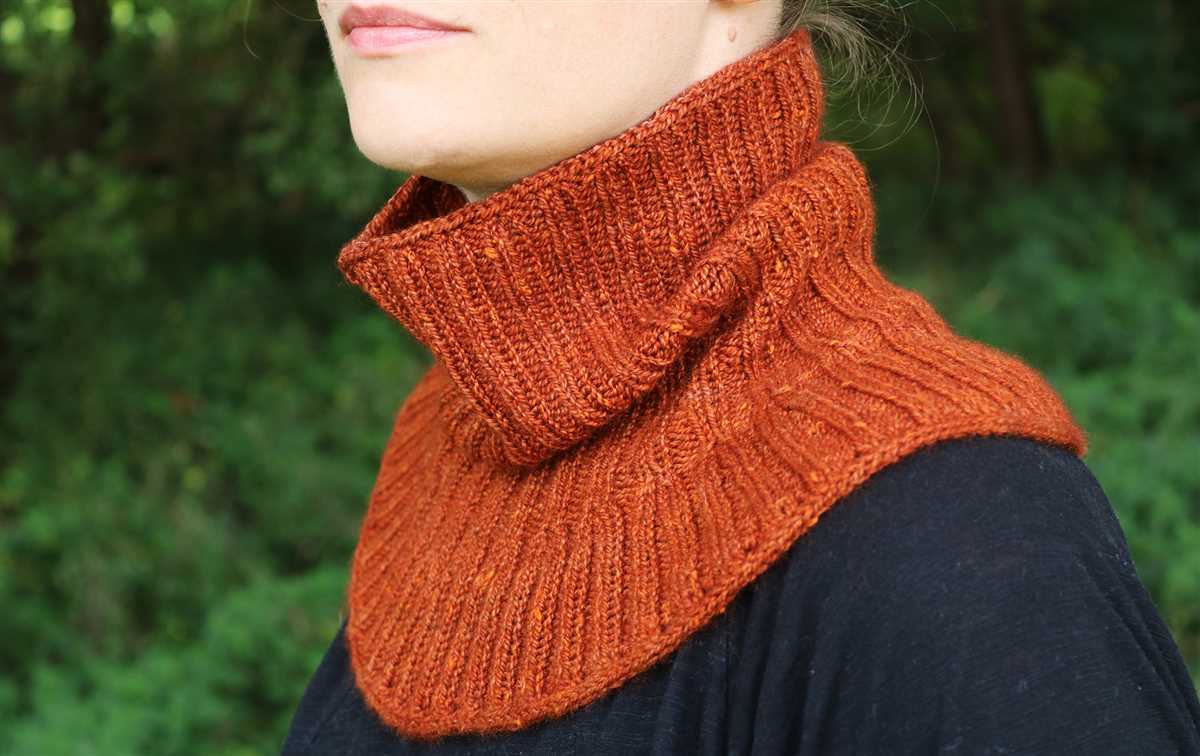
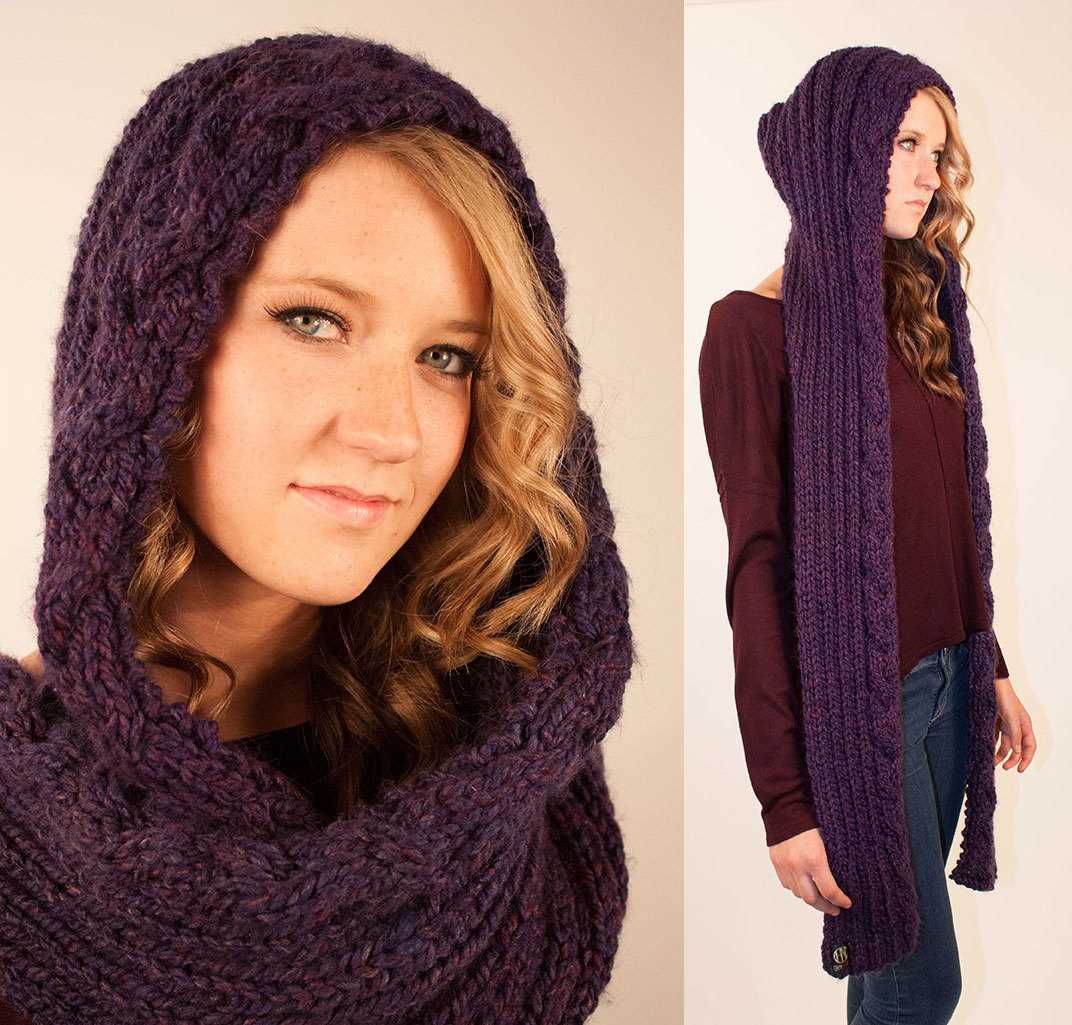
Snoods with hoods can be versatile accessories, as they can be worn in different ways. They can be worn with the hood down, like a regular snood, or pulled up to cover the head and ears for added warmth. The hood can also be used to create different styles, such as draping it over the shoulders or tying it under the chin. This makes the snood with hood a practical and stylish choice for colder temperatures.
Benefits of a Snood with a Hood
A snood with a hood is a versatile accessory that offers numerous benefits. Whether you are looking for added warmth, protection from the elements, or a stylish fashion statement, a snood with a hood can provide it all. This unique combination of a snood and a hood offers many advantages over traditional scarves or hoods.
1. Enhanced warmth and insulation
One of the main benefits of a snood with a hood is its ability to provide enhanced warmth and insulation. The double layer of fabric created by the snood combined with the additional coverage of the hood ensures that your head, neck, and face are kept warm and protected from cold winds, making it ideal for chilly winter days or outdoor activities in colder climates.
2. Versatility and convenience

A snood with a hood offers versatility and convenience, as it can be worn in various ways to suit your needs and preferences. You can wear it as a full snood by pulling the hood up over your head, or you can wear it as a simple snood by folding the hood down and wearing it around your neck. This versatility allows you to adapt to different weather conditions and style choices effortlessly.
3. Protection from the elements
Another advantage of a snood with a hood is its ability to provide protection from the elements. The hood offers shielding from rain, snow, and wind, keeping your hair, face, and neck dry and protected. Additionally, the snood portion provides an extra layer of insulation and warmth, ensuring that you stay comfortable even in harsh weather conditions.
4. Fashionable and stylish
A snood with a hood is not only functional but also fashionable. It adds a trendy and stylish touch to any outfit, elevating your overall look. With a variety of colors, patterns, and materials available, you can find a snood with a hood that matches your personal style and complements your wardrobe. Whether you prefer a cozy knit snood or a sleek faux fur hood, there is a snood with a hood out there for everyone.
5. Easy to wear and maintain
Lastly, a snood with a hood is easy to wear and maintain. Simply slip it over your head, adjust the hood to your preferred fit, and you’re good to go. Unlike traditional scarves that can come loose or require constant readjustment, a snood with a hood stays securely in place, ensuring hassle-free wear. In terms of maintenance, most snoods with hoods can be easily cleaned by following the care instructions provided, making them a convenient and practical accessory.
Choosing the Right Yarn for Your Snood with Hood

When it comes to knitting a snood with hood, one of the most important decisions you’ll need to make is choosing the right yarn. The yarn you choose will not only determine the final look and feel of your snood, but it will also affect how warm and durable it is. With so many options available, it can be overwhelming to know where to start. But don’t worry, we’re here to help!
1. Consider the fiber: The first thing to consider when choosing yarn for your snood with hood is the fiber. Different fibers have different properties, so it’s important to think about what you want from your snood. If you’re looking for warmth, consider using a wool or alpaca yarn, as these fibers are known for their insulation properties. If you want a softer and more luxurious feel, you might opt for a cashmere or silk yarn. Consider your own preferences, as well as any allergies or sensitivities you have, when choosing the fiber.
2. Think about the weight: The weight of the yarn is another important factor to consider. Snoods with hoods are typically worn in colder weather, so you’ll want to choose a yarn that is thick and warm. Bulky or super bulky weight yarns are great options for snoods, as they will provide the warmth needed to keep you cozy. However, if you prefer a lighter and more breathable snood, you can opt for a DK or worsted weight yarn. Keep in mind that the weight of the yarn will also affect the size of the knitting needles you’ll need.
3. Check the yardage and gauge: Before purchasing your yarn, it’s important to check the yardage and gauge information. The yardage will tell you how much yarn you’ll need to complete your snood, while the gauge will tell you how many stitches and rows you should have per inch. These two factors are crucial for ensuring that your snood turns out the right size and that you have enough yarn to complete the project. Make sure to check the pattern for the specific yardage and gauge requirements, as these can vary depending on the design.
4. Consider the color and texture: Finally, don’t forget to consider the color and texture of the yarn. The color you choose will play a big role in the overall look of your snood, so take some time to think about what will best complement your wardrobe and personal style. Additionally, the texture of the yarn can add an extra dimension to your snood. Whether you prefer a smooth and sleek yarn or something with more texture like a boucle or tweed, make sure to choose a yarn that matches your desired aesthetic.
In conclusion, choosing the right yarn for your snood with hood is an important decision that will impact the final outcome of your project. Consider the fiber, weight, yardage, gauge, color, and texture when making your decision, and don’t be afraid to experiment and have fun with different options. Happy knitting!
Selecting the Appropriate Needle Size
Choosing the right needle size is an important step in knitting a snood with a hood. The needle size will determine the gauge or tension of your knitting, which in turn affects the size and fit of the final product. It is crucial to select the correct needle size in order to achieve the desired outcome.
When selecting a needle size, you should consider the yarn weight and the desired fabric density. Thicker yarns generally require larger needles, while thinner yarns work best with smaller needles. However, it is always recommended to refer to the pattern instructions for the recommended needle size to use.
If the pattern does not specify a needle size, you can determine the appropriate size by making a gauge swatch. To do this, cast on a few stitches and work a small sample using the intended stitch pattern. Measure the number of stitches and rows per inch and compare it to the gauge specified in the pattern. If your sample has fewer stitches and rows than the pattern, try knitting with a smaller needle size. If your sample has more stitches and rows, try a larger needle size. Repeat this process until you achieve the correct gauge.
Additionally, it is important to consider your own knitting tension. Some knitters naturally have looser or tighter tension, which can affect the size of their knitting. If you tend to knit tightly, you may need to use larger needles to achieve the correct gauge, while if you knit loosely, you may need smaller needles.
In summary, selecting the appropriate needle size requires consideration of the recommended needle size in the pattern, making a gauge swatch, and taking into account your own knitting tension. By carefully choosing the right needle size, you can ensure that your snood with a hood turns out the way you envision it.
Gauge and Measurements
Before starting the snood with hood knitting project, it is important to first determine the correct gauge. This is the number of stitches and rows per inch that should be achieved with the specified yarn and needles. The gauge can vary depending on the tension of the knitter, so it is advisable to make a gauge swatch and measure it accurately. Using a ruler or measuring tape, count the number of stitches and rows within a 4-inch square to determine the gauge. Adjust the needle size if necessary to achieve the correct gauge.
The measurements for the snood with hood can vary depending on the desired fit and style. The pattern should provide guidelines for the finished measurements, including the length and width of the snood as well as the depth of the hood. It is important to take accurate measurements of the head circumference and length from the base of the neck to the desired hood depth. These measurements will ensure a proper fit and comfortable wear when the snood with hood is completed. Following the pattern’s instructions for the measurements will result in a snood with hood that fits perfectly.
Getting Started – Casting On
Before you can start knitting your snood with a hood, you will need to cast on your stitches. Casting on is the first step in any knitting project and is essential for creating the foundation row of stitches.
To cast on for your snood with a hood, you will need your chosen yarn and a pair of knitting needles. Begin by making a slipknot, which will serve as your first stitch. Place the slipknot on one of your knitting needles and hold the needle in your right hand.
Next, insert your left hand needle into the slipknot from left to right, going under the right-hand needle. Bring the yarn over the left-hand needle, creating a loop around it. Slip the loop onto the right-hand needle, pulling it snugly to create your first cast-on stitch.
Continue this process, creating additional cast-on stitches until you have reached the required number for your snood with a hood. It may be helpful to count the stitches as you go to ensure accuracy.
Once you have completed casting on, you are ready to begin knitting your snood with a hood. Make sure to follow the pattern instructions carefully, as they will guide you through the specific stitches and techniques needed to create your cozy and stylish snood with a hood.
Knitting the Body of the Snood
Once you have completed knitting the hood of the snood, it’s time to move on to the body. This is where the snood will start taking shape and become a cozy accessory for those chilly days.
Start by picking up stitches along the edge of the hood. Using a circular needle, insert it into the first stitch and make sure to pick up stitches evenly along the edge. It’s important to keep track of the number of stitches you pick up to ensure an even distribution around the snood.
Next, it’s time to start knitting in the round. Join the round by knitting the first stitch from the circular needle and the last stitch you picked up together. This will create a seamless transition between the hood and the body of the snood.
Continue knitting in the round, following the stitch pattern specified in the knitting pattern. You can get creative with different stitch patterns and textures to make your snood unique. This is where your knitting skills and imagination come into play.
As you knit, keep an eye on the length of the snood. You may need to measure it against your neck to ensure it reaches the desired length. This can be done by placing the snood around your neck and adjusting as needed.
Once you have reached the desired length, it’s time to finish off the body of the snood. Follow the instructions in the knitting pattern to bind off the stitches in a neat and tidy manner. This will give your snood a polished look and prevent any unraveling.
With the body complete, you’re one step closer to having your very own snood with hood. Now all that’s left is to weave in any loose ends and give it a gentle blocking to even out the stitches. And just like that, you’ll have a stylish and cozy accessory to keep you warm during the colder months. Happy knitting!
Shaping the Hood
When knitting a snood with a hood, shaping the hood is an important step to ensure a comfortable and well-fitting design. The hood is typically created by gradually decreasing stitches on either side of the piece, and sometimes by adding additional increases at the center to create a rounded shape.
To shape the hood, you will need to follow the pattern instructions for decreasing stitches. This may involve decreasing a certain number of stitches at regular intervals, or using specific stitch patterns to create the desired shape. It is important to carefully read and understand the pattern before starting the shaping process.
One common technique for shaping the hood is to decrease stitches at the edge of the work. This can be done by knitting two stitches together, or by slipping one stitch and then knitting the next stitch and passing the slipped stitch over. These decrease stitches are typically worked on both sides of the hood, gradually reducing the number of stitches and creating a tapered shape.
Depending on the pattern, you may also need to add additional increases at the center of the hood to create a rounded shape. This can be done by knitting into the front and back of a stitch, or by using other increase techniques. These increases are usually worked in the center of the hood, helping to create a gentle curve that fits comfortably over the head.
As you work on shaping the hood, it is important to check your gauge and make any necessary adjustments to ensure the finished piece will fit properly. You may also need to try the piece on periodically to check the fit and make any further adjustments.
Finishing Touches – Binding Off
After knitting the snood with hood pattern, the final step is binding off the stitches to secure them in place and create a neat edge. When binding off, it’s important to maintain an even tension to avoid an overly tight or loose edge.
To bind off, start by knitting the first two stitches as normal. Then, using the left needle, lift the first stitch over the second stitch and off the right needle. This binds off one stitch. Continue knitting the next stitch and repeating this process of lifting the previous stitch over the current stitch until only one stitch remains on the right needle.
Once you have bound off all the stitches, cut the working yarn, leaving a tail that is at least 6 inches long. Thread this tail through the last stitch and pull it tight to secure the bind off. Weave in any remaining ends to ensure a clean finish.
For a decorative edge, you can also try a different bind off method such as the picot bind off or an i-cord bind off. These techniques add a decorative trim to the edge of the snood with hood and can enhance the overall look of the finished project.
- Picot bind off: To create a picot edge, bind off two stitches, then cast on two stitches by using the backward loop method. Repeat this pattern of binding off two stitches and casting on two stitches until all the stitches have been bound off. This creates a series of small loops along the edge.
- I-cord bind off: An i-cord bind off creates a rounded, tube-like edge. To do this, you will need double-pointed or circular needles. Knit the first three stitches onto a separate needle, then slide these stitches back to the left end of the needle. *Knit the first two stitches together, knit the third stitch, then slide all three stitches back to the left end of the needle. Repeat from * until all stitches have been bound off.
Whichever bind off method you choose, take the time to carefully execute it to ensure a polished and professional-looking finish to your snood with hood.
Sewing and Attaching the Hood
Once you have completed knitting the main body of the snood, it’s time to move on to sewing and attaching the hood. First, gather all the materials you will need, including a tapestry needle and matching yarn or thread. Make sure that the hood piece is the correct size and shape to fit the snood. If necessary, make any adjustments or alterations before proceeding.
Start by folding the hood piece in half along the center seam and pinning it in place. This will help you align the hood correctly when you attach it to the snood. Using the tapestry needle, thread it with yarn or thread that matches the color of the snood. Begin sewing the hood to the snood by stitching along one side of the center seam. Use a whip stitch or any other preferred stitching method, making sure to secure the ends of the yarn or thread.
Continue sewing around the hood, matching the edges to the edges of the snood. Take your time to ensure that the stitches are neat and even, maintaining a consistent tension throughout. It may be helpful to pin the hood in place before sewing to keep it secure. As you reach the end of the hood, trim any excess yarn or thread and secure the final stitches.
Once you have finished sewing the hood, give it a gentle tug to make sure it is securely attached to the snood. Check for any loose or missed stitches and make any necessary repairs. Finally, give the snood with hood a good pressing to smooth out any wrinkles and ensure a polished finish.
Styling and Wearing Your Snood with Hood
Once you have completed your snood with hood knitting pattern, it’s time to style and wear your creation. The snood with hood can be a versatile and fashionable accessory to keep you warm and stylish during the colder months. Here are a few tips on how to style and wear your snood with hood.
1. Pair it with a coat or jacket: The snood with hood can be worn with a variety of outerwear, such as a coat or jacket. Choose a coat or jacket that complements the color of your snood with hood to create a cohesive and stylish look.
2. Experiment with different ways to wear it: The snood with hood can be worn in different ways to suit your personal style and the weather conditions. You can wear it as a traditional snood by wrapping it around your neck, or you can pull it up over your head to use the hood. Play around with different styling options to find what works best for you.
3. Add accessories: To elevate your snood with hood outfit, you can add accessories such as hats, gloves, or jewelry. Choose accessories that complement the color and style of your snood with hood for a coordinated and put-together look.
4. Keep it casual or dress it up: The snood with hood can be dressed up or down depending on the occasion. Pair it with jeans and a cozy sweater for a casual look, or wear it with a dress and heels for a more formal outfit. The snood with hood is a versatile accessory that can be styled to suit any occasion.