
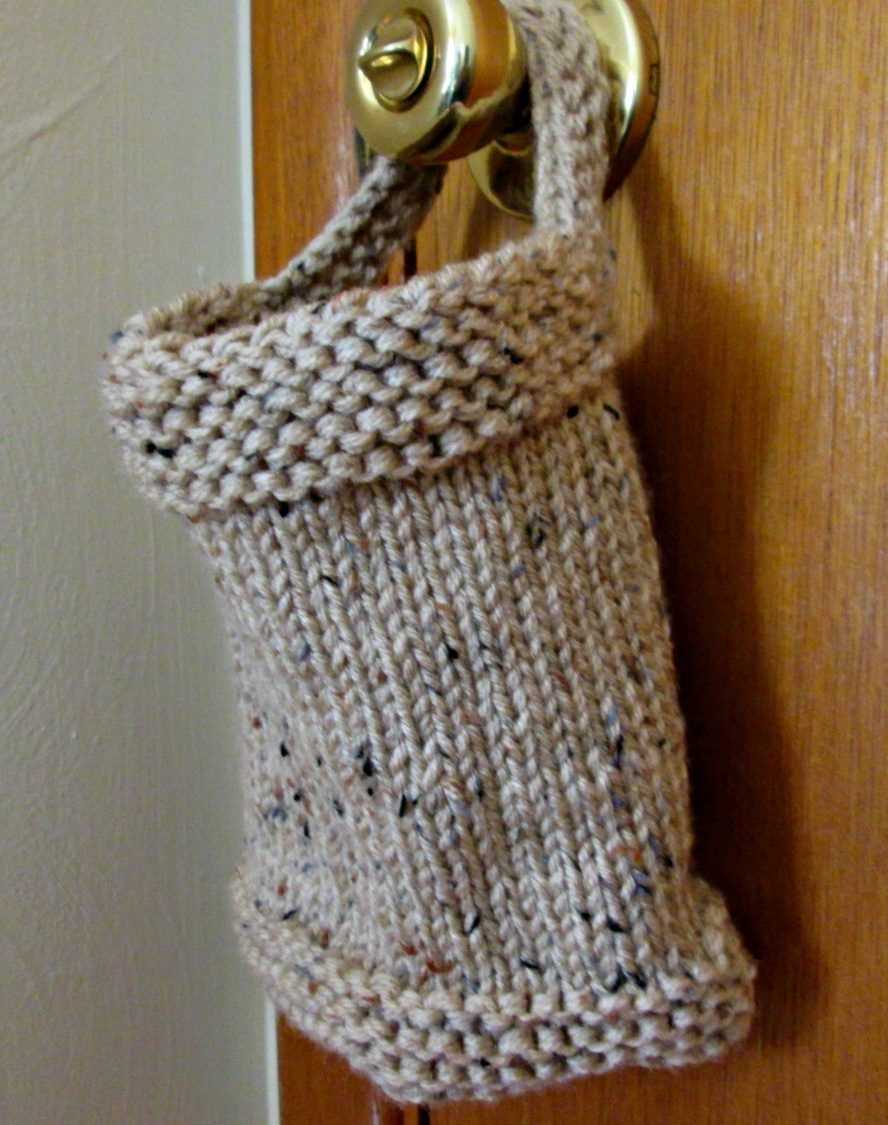
If you’re looking for a quick and easy knitting project, this small knit pouch is perfect for you. With just a few basic stitches, you can create a cute and functional accessory that is both stylish and practical. Whether you need a small bag to hold your keys and wallet or a cute pouch to store your knitting needles, this pattern is versatile and can be easily customized to fit your needs.
This pattern is ideal for beginners who are just starting to learn how to knit. It uses simple techniques such as knitting and purling, and requires just a small amount of yarn. You can choose any type of yarn you like, whether it’s soft and cozy or vibrant and colorful. With this pattern, you can experiment with different colors and textures to create a unique and personalized pouch.
The small knit pouch pattern is also a great way to use up leftover yarn from other projects. Instead of letting those small scraps go to waste, you can turn them into something beautiful and practical. This pattern is a great stash-buster and will help you reduce waste while still enjoying the creative process of knitting.
Small Knit Pouch Pattern: Create a Stylish and Functional Accessory

If you are looking for a fun and practical knitting project, consider making a small knit pouch. This pattern is a great way to showcase your knitting skills while creating a stylish and functional accessory. Whether you need a small bag to hold your essentials or a unique gift for a friend, this small knit pouch pattern offers versatility and creativity.
One of the best things about this pattern is its simplicity. With just a few basic knitting techniques, you can easily create a beautiful pouch that is both sturdy and visually appealing. The pattern typically involves knitting in the round, which means you won’t need to worry about seaming or finishing. This makes it a great project for both beginner and experienced knitters.
To create this small knit pouch, you will need:
- Size US 8 (5mm) knitting needles
- DK weight yarn in your choice of color
- Tapestry needle
- Stitch markers
- Scissors
Instructions:
- Start by casting on 48 stitches on your knitting needles.
- Join the round, being careful not to twist the stitches.
- Knit in the round for 4 inches, or until the desired length of the pouch.
- Switch to a contrasting color to create a decorative border. Knit 2 rounds in the contrasting color.
- Switch back to the main color and knit for 2 more inches.
- Bind off all stitches and weave in any loose ends.
- Add a drawstring or button closure if desired.
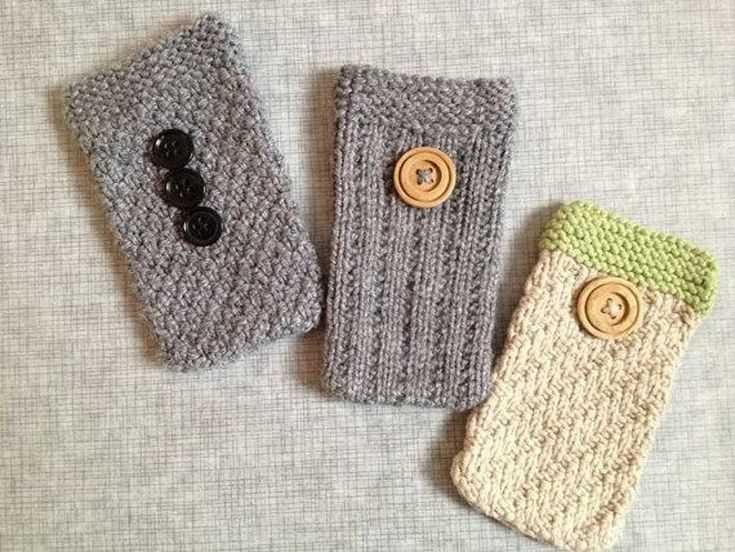
Once you have completed the basic pattern, you can get creative and customize your small knit pouch to your liking. Add a simple embroidery design, experiment with different yarn weights and textures, or even incorporate beads or buttons for added flair. The possibilities are endless!
With this small knit pouch pattern, you can create a stylish and functional accessory that is perfect for holding small essentials such as keys, coins, or makeup. It is also a great way to use up leftover yarn, making it a cost-effective and eco-friendly project. So grab your knitting needles and get ready to make a unique and versatile pouch that you will love to show off!
Gather Your Materials
Before you start knitting your small knit pouch, you will need to gather all the necessary materials. Here is a list of items you will need:
- Yarn: Choose a yarn that is suitable for your project. You can use any type of yarn, but it is recommended to use a soft and durable yarn that will withstand regular use.
- Knitting Needles: You will need a pair of knitting needles in the appropriate size for your chosen yarn. The size of the needles will depend on your gauge and the thickness of the yarn.
- Tapestry Needle: A tapestry needle will be used for weaving in ends and sewing up any seams.
- Scissors: A pair of sharp scissors will be necessary for cutting any excess yarn.
- Measuring Tape: A measuring tape or ruler will be needed for checking your gauge and measuring the finished size of your pouch.
- Stitch Markers (optional): Stitch markers can be useful for marking specific stitches or sections of your knitting.
- Buttons or Other Embellishments (optional): If you want to add buttons or other decorative elements to your pouch, make sure you have them on hand.
Once you have gathered all your materials, you will be ready to start knitting your small knit pouch. Make sure you have everything you need within reach so that you can work on your project smoothly and without any interruptions.
Choose Your Pattern and Yarn
When it comes to making a small knit pouch, the pattern and yarn you choose can greatly affect the final product. There are so many options available, and you can customize your pouch to match your personal style and preferences.
Pattern: There are countless small knit pouch patterns available online and in knitting books. You can find patterns for basic pouches, as well as patterns with more intricate designs and embellishments. Some patterns may include a zipper or a button closure, while others may have a drawstring or snap fastener. Consider the level of difficulty and the techniques required before choosing a pattern that suits your skill level and interests.
Yarn: The yarn you choose for your small knit pouch is also an important consideration. You can opt for a traditional wool yarn for a cozy and classic look, or you can choose a soft acrylic or cotton yarn for a lightweight and easy-to-care-for pouch. You may also want to consider the color and texture of the yarn. A variegated yarn can add visual interest to your pouch, while a solid-colored yarn allows any embellishments or patterns to stand out.
Once you have chosen your pattern and yarn, you can start knitting your small pouch. Follow the pattern instructions carefully, making sure to maintain an even tension and gauge to achieve the desired size and shape. Enjoy the process of creating your own unique and functional small knit pouch!
Knit the Base of the Pouch
In this section, you will learn how to knit the base of the pouch. Start by casting on the required number of stitches, as indicated in the pattern. For this small knit pouch pattern, you may need to cast on around 40 stitches.
Once you have cast on the desired number of stitches, begin by knitting every row in the required stitch pattern. The stitch pattern may vary depending on the design of the pouch, but common options include garter stitch, stockinette stitch, or a simple rib stitch.
If the pattern calls for shaping the base of the pouch, you will need to follow the instructions provided. This may involve decreasing or increasing stitches at specific intervals to create the desired shape. Make sure to carefully read and understand the pattern instructions before proceeding.
Continue knitting in the specified stitch pattern and shaping the base of the pouch until you have reached the desired length. The length will vary depending on your personal preference and the intended use of the pouch.
Once you have completed knitting the base of the pouch, you can proceed to the next step in the pattern, which may involve knitting the sides or adding additional details such as a drawstring or closure. Follow the pattern instructions to complete the small knit pouch.
Knit the Sides of the Pouch
Now that you have completed knitting the base of the pouch, it’s time to move on to knitting the sides. This is where the pouch will start taking shape and become more recognizable as a small knit pouch.
To knit the sides, you will continue working with the same knitting needles and yarn that you used for the base. Start by picking up stitches along one side of the base. Insert the needle into the first stitch on the side, wrap the yarn around the needle, and pull it through to create a new stitch. Repeat this process until you have picked up the desired number of stitches, depending on the size of the pouch you want to create.
Once you have picked up stitches along one side, turn your work and start knitting the next row. You can choose to knit all stitches in this row, or you can create a pattern by alternating knit and purl stitches. This will add some texture to the sides of your pouch. Continue knitting rows in this manner until the sides reach the desired height.
To finish off the sides, you can choose to create a border. This can be done by knitting a few rows in a contrasting color or by adding a decorative stitch pattern. Once you are satisfied with the height and appearance of the sides, you can bind off all the stitches to secure them in place.
Remember to knit the sides of the pouch with the same care and attention to detail as you did with the base. This will ensure that the final result is a beautifully knitted small pouch that can be used for various purposes, such as holding small items or as a gift bag for special occasions.
Add a Decorative Pattern or Design
Adding a decorative pattern or design to your small knit pouch can add a personal touch and make it unique. There are various ways to incorporate patterns and designs into your project.
Intarsia or Fair Isle: If you are an experienced knitter, you can try adding an intarsia or Fair Isle pattern to your pouch. Intarsia involves knitting different colored blocks or shapes, while Fair Isle incorporates multiple colors and intricate patterns. These techniques can be used to create beautiful and eye-catching designs on your pouch.
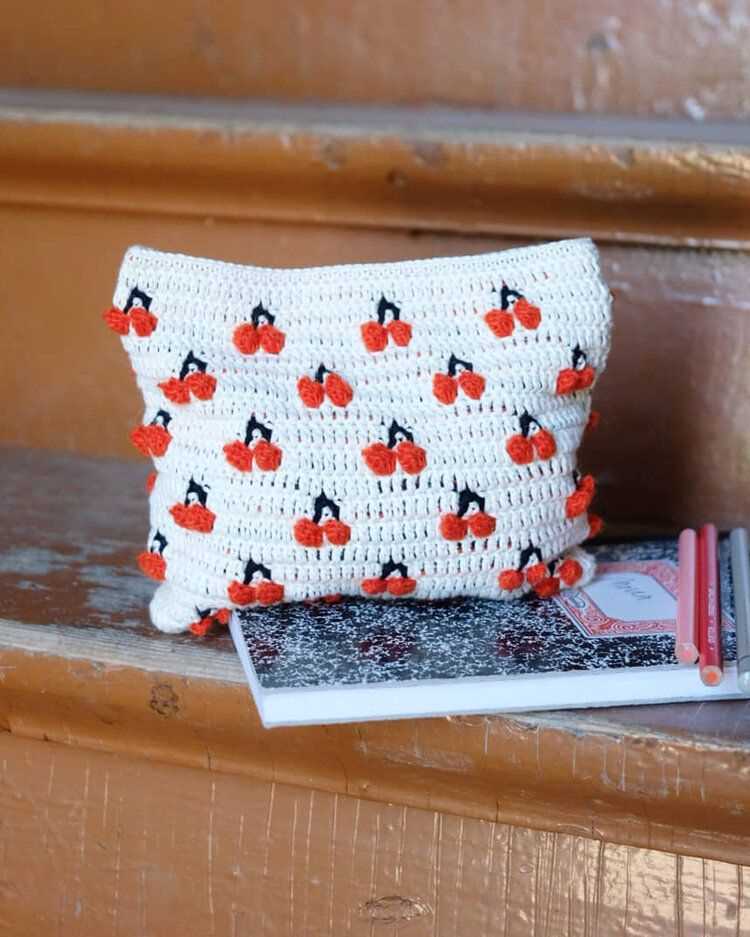
Colorwork: Another option is to use different colors of yarn to create a colorwork pattern on your pouch. You can experiment with stripes, geometric shapes, or even polka dots. Colorwork adds visual interest and can be a fun way to play with different shades and hues.
Embroidery: If you prefer a softer and more delicate look, you can add embroidery to your pouch. Embroidery allows you to create intricate designs using various stitches and threads. You can add flowers, leaves, or other motifs to your pouch to make it truly unique.
Embellishments: In addition to patterns, you can also add embellishments to your small knit pouch. You can sew on buttons, beads, or sequins to add some sparkle and texture. You can also use ribbons, lace, or pompoms to give your pouch a more whimsical and playful look.
Personalization: Finally, don’t forget to personalize your pouch by adding initials, names, or meaningful symbols. This can be done through embroidery, intarsia, or even by using duplicate stitch. Personalizing your pouch not only adds a decorative element but also makes it a special and meaningful keepsake.
Incorporating a decorative pattern or design into your small knit pouch allows you to showcase your creativity and make it truly one-of-a-kind. Whether you choose to experiment with colorwork, embroidery, or other techniques, adding a personal touch will make your pouch stand out and become a cherished item.
Create the Pouch Closure
To complete your small knit pouch, you will need to create the closure. The closure is an important element of the pouch as it keeps your belongings secure inside. There are several options for creating the closure, depending on your preferences and the style of the pouch.
One popular option is to use a drawstring closure. To create a drawstring closure, you can knit a small tube that fits through a series of eyelets or buttonholes along the opening of the pouch. The tube can be made using a contrasting color yarn or the same yarn as the pouch. Thread the drawstring through the eyelets or buttonholes, and then pull it tight to close the pouch.
If you prefer a more secure closure, you can use a button or snap closure. To create a button closure, sew a small button on one side of the pouch opening and create a corresponding buttonhole on the other side. This will allow you to fasten the button through the buttonhole to secure the pouch. For a snap closure, sew a snap fastener on one side of the pouch opening and the corresponding snap on the other side. This will allow you to snap the pouch shut.
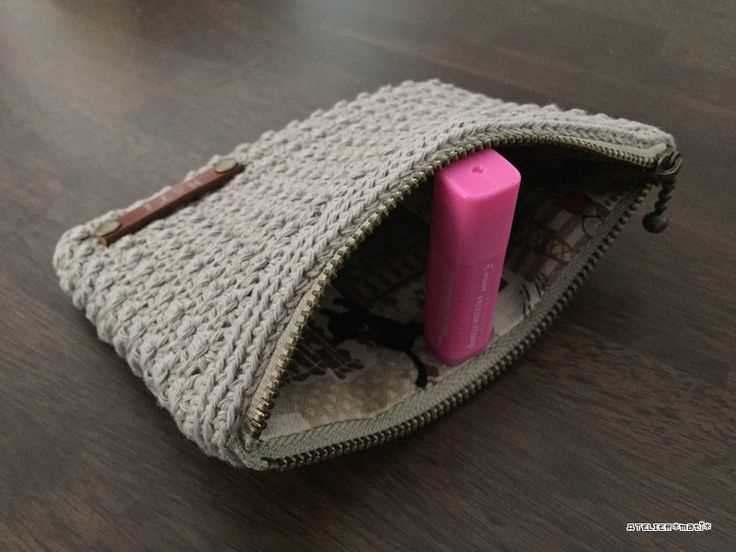
Another option for a closure is a zipper. Adding a zipper to the pouch will provide a more durable and secure closure. To add a zipper, you will need to sew it onto the edges of the pouch opening. Make sure to leave a small opening at the top of the pouch for easy access to your belongings. Sew the zipper securely in place, and then zip it up to close the pouch.
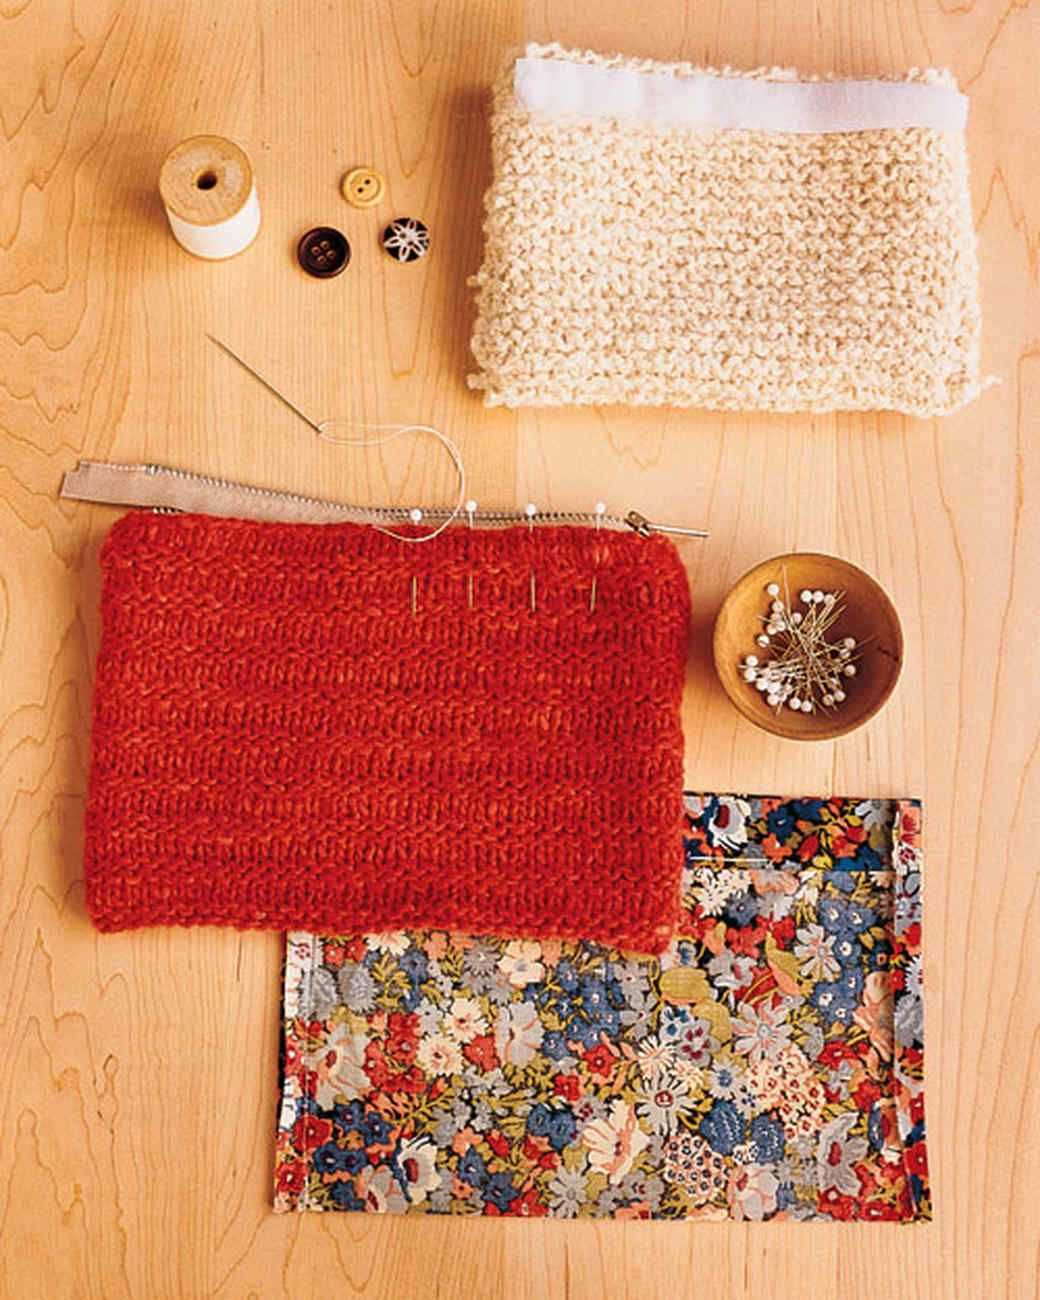
Finish the Pouch with a Lining (optional)
Adding a lining to your small knit pouch is completely optional, but it can add a nice finished touch and help to protect the contents of the pouch. If you decide to add a lining, here are a few steps to follow:
Materials Needed:
- Fabric of your choice
- Scissors
- Needle and thread or sewing machine
- Pins
Instructions:
- Begin by selecting a fabric that complements your knit pouch. You can choose a plain or patterned fabric, depending on your preference.
- Measure the inside of your pouch to determine the dimensions of the lining fabric. Add a small seam allowance to your measurements.
- Cut the fabric according to your measurements. You will need two pieces for the front and back of the pouch, and two pieces for the sides.
- Pin the fabric pieces together, with the right sides facing inwards. Sew along the edges, leaving a small opening for turning the fabric right-side out.
- Trim any excess fabric and clip the corners to reduce bulk. Turn the fabric right-side out through the opening.
- Press the lining with an iron to flatten any wrinkles and give it a neat appearance.
- Insert the lining into your knit pouch, making sure it fits snugly. Fold the top edge of the lining over the top edge of the pouch and secure it with pins.
- Using a needle and thread or a sewing machine, sew along the top edge to attach the lining to the pouch. Be careful not to sew through both layers of the pouch.
- Remove the pins and check that the lining is securely attached. Trim any loose threads.
With the lining in place, your small knit pouch is now complete and ready to use. The lining adds a professional finish and helps to protect the contents of the pouch, making it a versatile and practical accessory.
Block and Shape the Pouch
After completing the knitting of your small pouch, the next step is to block and shape it to give it a neat and professional finish. Blocking is a process where you wet the knitted fabric and stretch it to the desired shape and size. This helps even out any uneven stitches and creates a more polished look.
To block your small knit pouch, you will need a flat surface, such as a blocking board or an ironing board covered with a towel. Lay your pouch flat on the surface, making sure the edges are straight and even. Fill a spray bottle with lukewarm water and lightly mist the pouch, making sure to dampen it evenly.
Once the pouch is damp, use your fingers to gently shape it into the desired shape. Smooth out any wrinkles or bumps by gently pulling the fabric. If you want the pouch to have a certain shape, such as rounded edges or a curved bottom, use pins to hold it in place while it dries. Pin the edges securely to maintain the shape.
Allow the pouch to dry completely before removing the pins. This usually takes a few hours or overnight, depending on the humidity. Once dry, your small knit pouch should be perfectly shaped and ready to use. The blocking process not only improves the appearance of the pouch but also helps it retain its shape over time.
Attach a Strap or Handle (optional)
If you want to add a strap or handle to your small knit pouch, there are several ways to do so. You can either knit a separate strap or handle and attach it to the pouch, or you can use a ready-made strap or handle and sew it onto the pouch. Here are some options for attaching a strap or handle:
- Knit a Strap or Handle: If you want to customize the strap or handle, you can knit one using the same yarn and needles as the pouch. You can make it any length and width you prefer, depending on how you want to carry the pouch. Once you have finished knitting the strap or handle, you can sew each end onto the pouch using a tapestry needle.
- Use a Ready-Made Strap or Handle: If you prefer a quicker option, you can use a ready-made strap or handle. You can find various options in craft stores or online. Choose a strap or handle that matches the size and style of your small knit pouch. To attach it, you will need a tapestry needle and thread that matches the color of the pouch. Sew each end of the strap or handle securely onto the sides of the pouch.
Whether you decide to knit a strap or handle or use a ready-made one, make sure to securely attach it to the pouch to ensure it can hold the weight of the contents. Additionally, consider the length and width of the strap or handle, as it should be comfortable for you to carry the pouch. With a strap or handle attached, you can easily carry your small knit pouch wherever you go, keeping your essentials organized and accessible.
Personalize Your Pouch with Embellishments (optional)
One of the great things about knitting your own pouch is the opportunity to make it uniquely yours. Adding embellishments to your pouch can give it a personal touch and make it stand out from the crowd. Whether you prefer a minimalist design or want to go all out with intricate details, there are countless options to choose from.
Buttons and beads: One of the simplest ways to add some flair to your pouch is by sewing on buttons or stringing beads onto the drawstring closure. You can choose buttons and beads in coordinating colors or go for a contrasting look. The choice is yours to make.
Embroidery: If you have some basic embroidery skills, you can add beautiful designs or patterns to your pouch using different colored threads. You can embroider your initials, flowers, geometric shapes, or any other design that speaks to your style. It’s a great way to showcase your creativity and make your pouch one-of-a-kind.
Pom-poms and tassels: For a playful and whimsical touch, you can make and attach pom-poms or tassels to the corners or sides of your pouch. You can use yarn in coordinating or contrasting colors to create these fun embellishments. You can even experiment with different sizes and textures to add more visual interest.
Patchwork: If you have some leftover yarn from previous projects, you can use them to create a patchwork design on your pouch. You can knit small squares or rectangles in different colors and stitch them together to form a unique pattern. It’s a great way to use up scraps and create a colorful and eclectic look.
Buttons and stitches: Another option is to incorporate buttons or stitches into the knitted fabric of your pouch. You can create buttonholes in the fabric and add buttons as decorative elements. Similarly, you can experiment with different stitch patterns to create texture and visual interest. Let your imagination run wild!
Remember, these embellishments are optional, and you can customize your pouch however you like. Use your favorite colors, experiment with different materials, and have fun expressing your unique style through your knitting. The possibilities are endless!
Show off Your Finished Small Knit Pouch
After following the small knit pouch pattern and spending time carefully knitting, it’s time to show off your finished creation! Whether you plan to use it for storing small essentials or to gift it to a loved one, your small knit pouch is sure to impress.
Before showcasing your small knit pouch, make sure to give it a quick inspection. Check for any loose stitches or uneven tension and make any necessary adjustments. Once you are satisfied with the quality of your pouch, it’s time to display it proudly.
To showcase your small knit pouch, consider the following ideas:
- Photographs: Take a well-lit photo of your small knit pouch against a clean background. Share it on social media, your personal blog, or in knitting communities to receive feedback and inspire other knitters.
- Wear or use it: Show off your small knit pouch by using it in your everyday life. Attach it to your bag as a cute accessory, use it to carry small items, or place it on a shelf for decoration.
- Gift it: If you created the small knit pouch as a gift, present it to the recipient and watch their face light up with joy. They will appreciate the time and effort you put into creating such a special gift.
- Create a display: Arrange your small knit pouch along with other hand-knit items or accessories to create a visually appealing display. This can be done on a shelf, in a glass case, or on a decorative tray.
Remember, the small knit pouch is a testament to your knitting skills and creativity. Be proud of your finished project and don’t hesitate to show it off. Let your small knit pouch serve as an inspiration to others and encourage them to embark on their own knitting journey.