
Knitting is a versatile and rewarding craft that allows you to create beautiful and functional items. One of the first stitches that beginner knitters learn is the knit stitch. The knit stitch creates a smooth and stretchy fabric, making it perfect for a variety of projects, from scarves and hats to sweaters and blankets.
While the knit stitch itself is simple, there are a variety of ways to use it to create interesting and unique patterns. Whether you’re a beginner looking to practice your skills or an experienced knitter looking for new ideas, simple knit stitch patterns can add texture and visual interest to your projects.
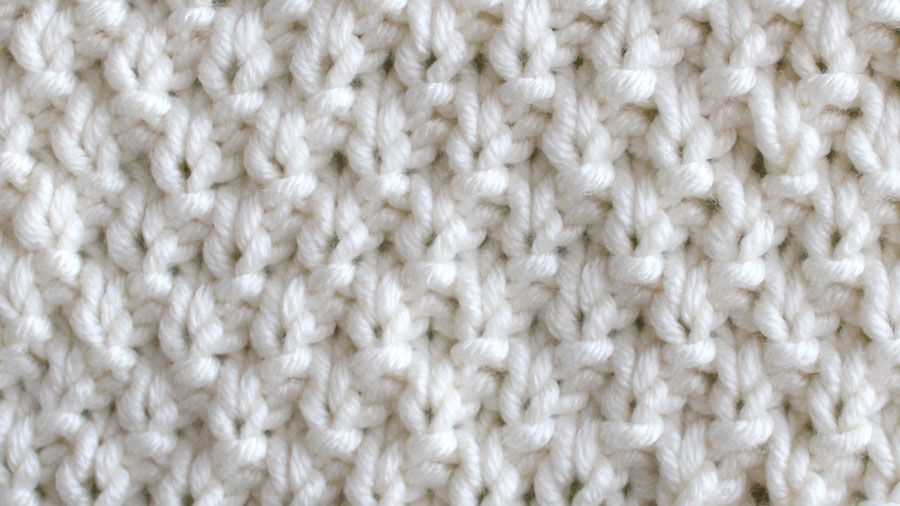
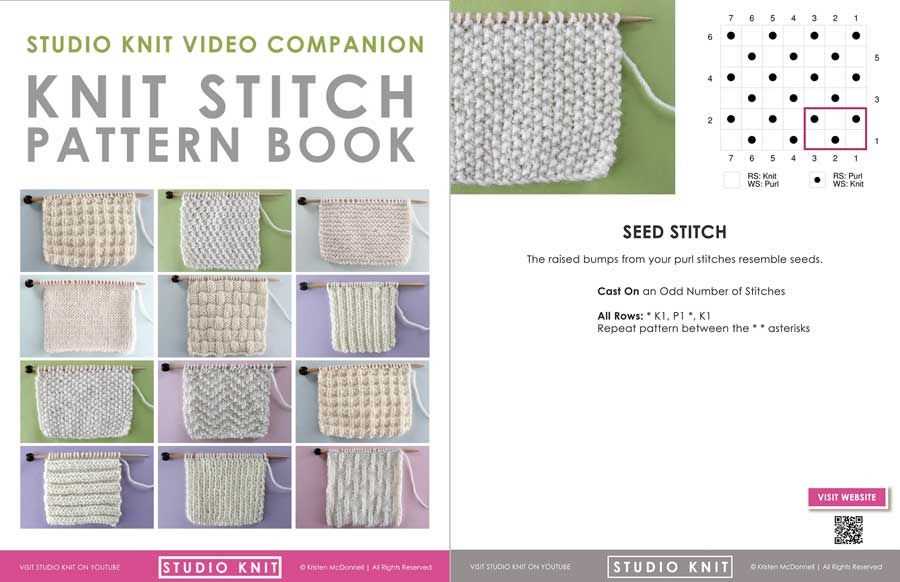
Some popular simple knit stitch patterns include garter stitch, ribbing, and seed stitch. Garter stitch is created by knitting every row, resulting in a bumpy texture that is reversible and stretches in both directions. Ribbing is a stretchy pattern created by alternating knit and purl stitches, often used for cuffs and hems. Seed stitch is a pattern of alternating knit and purl stitches, creating a textured fabric with small, raised bumps.
Simple Knit Stitch Patterns
Knitting is a popular hobby that allows you to create beautiful and unique items using just a pair of knitting needles and some yarn. One of the easiest and most versatile stitch patterns for beginners is the simple knit stitch. This stitch is the foundation of many other knitting patterns and is the first stitch that most knitters learn.
The simple knit stitch consists of inserting your needle through the loop on the left needle, wrapping the yarn around the right needle, and pulling the new loop through the old loop. This creates a smooth, textured fabric that is perfect for scarves, blankets, and other cozy projects. The simplicity of the knit stitch also makes it an ideal choice for beginners who are just starting to learn the basics of knitting.
1. Garter Stitch
The garter stitch is created by knitting every row, creating a fabric with a series of ridges. This stitch pattern is reversible, meaning that it looks the same on both sides, making it a great option for scarves or blankets that will be seen from both sides. The garter stitch is also a good choice for beginners because it is easy to knit and creates a sturdy, stretchy fabric.
2. Stockinette Stitch
The stockinette stitch is created by knitting one row and purling the next row, creating a smooth, flat fabric with a “v” pattern on one side and a smooth surface on the other side. This stitch pattern is commonly used for garments like sweaters and hats because it lays flat and has a nice drape. However, the stockinette stitch tends to curl at the edges, so it is important to add a border or use a different stitch pattern at the edges to prevent this from happening.
3. Ribbing
Ribbing is a stitch pattern that is commonly used for cuffs, waistbands, and collars because it creates a stretchy fabric that hugs the body. Ribbing can be created by alternating knit and purl stitches in a specific pattern, such as knitting two stitches and purling two stitches, or knitting one stitch and purling one stitch. This stitch pattern is a great option for adding texture and elasticity to your knitting projects.
Overall, simple knit stitch patterns like the garter stitch, stockinette stitch, and ribbing are versatile and beginner-friendly. They can be used to create a wide range of projects, from scarves and hats to sweaters and blankets. Whether you’re new to knitting or an experienced knitter looking for a quick and easy project, these simple stitch patterns are a great place to start.
Why Simple Knit Stitch Patterns are Great for Beginners
Learning how to knit can be a fun and rewarding experience, but it can also be quite overwhelming for beginners. With so many different stitch patterns and techniques to learn, it’s important to start with something simple and manageable. That’s where simple knit stitch patterns come in.
Easy to Learn: Simple knit stitch patterns, such as the garter stitch or stockinette stitch, are perfect for beginners because they are easy to learn and remember. These patterns typically involve repeating the same stitch throughout the entire project, making it easier to get into a rhythm and build confidence.
Minimal Mistakes: When you’re just starting out, it’s common to make mistakes while knitting. However, with simple knit stitch patterns, the chances of making major mistakes are reduced. Since there are fewer stitch variations and techniques involved, it’s easier to catch and fix any errors that may occur.
Improved Technique: Starting with simple knit stitch patterns allows beginners to focus on mastering the basic knitting techniques, such as how to hold the needles and the yarn. By practicing these fundamental skills, beginners can develop better control and coordination, setting a solid foundation for more complex stitch patterns in the future.
Quick Results: One of the great benefits of simple knit stitch patterns is that they often produce quick results. Since the stitches are easier to execute and the projects are typically smaller, beginners can see progress more quickly. This can be particularly motivating and encouraging for those who are new to knitting.
Endless Possibilities: While simple knit stitch patterns may seem basic, they offer endless possibilities for creativity. By combining different colors, yarns, or adding basic embellishments, beginners can customize their projects and create unique items. This allows for personal expression and the opportunity to experiment with different knitting techniques.
In conclusion, simple knit stitch patterns are an excellent choice for beginners to start their knitting journey. They are easy to learn, minimize mistakes, help improve technique, provide quick results, and allow for creativity. So grab your needles and yarn, and get started on your knitting adventure!
Basic Knit Stitch Patterns for Beginners
When starting out with knitting, it can be overwhelming to figure out where to begin. Luckily, there are a few basic knit stitch patterns that are perfect for beginners. These patterns are simple and easy to learn, but still create beautiful textures in your knitted fabric.
Garter Stitch: The garter stitch is one of the most basic knit stitch patterns. It is created by knitting every row, resulting in a fabric that has a bumpy texture. This stitch pattern is great for beginners because it is easy to execute and doesn’t require any purling. The garter stitch is commonly used for scarves, blankets, and dishcloths.
- Stockinette Stitch: The stockinette stitch is another essential knit stitch pattern. It is created by alternating rows of knitting and purling. When worked flat, the knit side of the fabric creates a smooth, V-shaped texture, while the purl side creates a bumpy texture. The stockinette stitch is commonly used for sweaters, hats, and socks.
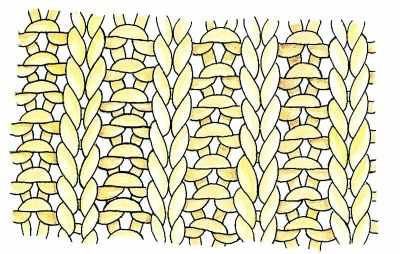
- Rib Stitch: The rib stitch is a versatile knit stitch pattern that creates a stretchy fabric with vertical columns of knits and purls. It is commonly used for the cuffs, collars, and hems of garments, as well as for creating the ribbing in socks. The most common rib stitch patterns are the 1×1 rib (alternating one knit stitch and one purl stitch) and the 2×2 rib (alternating two knit stitches and two purl stitches).
- Seed Stitch: The seed stitch is a simple and reversible knit stitch pattern that creates a textured fabric with small bumps. It is created by alternating knits and purls within the same row, and then repeating the same pattern on the next row. The seed stitch is often used for scarves, baby blankets, and washcloths.
These basic knit stitch patterns are perfect for beginners to practice and build their knitting skills. Once you feel comfortable with these patterns, you can start exploring more complex stitch patterns and techniques. Remember, knitting is a versatile craft that allows for endless creativity, so don’t be afraid to experiment and try new things!
How to Knit the Garter Stitch
The garter stitch is one of the simplest and most basic knitting stitch patterns. It is created by knitting every row, resulting in a fabric with a textured, bumpy appearance. This stitch pattern is ideal for beginners, as it is easy to learn and perfect for practicing your knitting skills.
To knit the garter stitch:
- Begin by casting on the desired number of stitches onto your knitting needle. You can choose any odd number of stitches for a balanced garter stitch.
- Hold the yarn in your right hand and insert the right needle into the first stitch on your left needle.
- Wrap the yarn around the right needle counterclockwise.
- Draw the right needle through the loop, bringing the new stitch onto the right needle.
- Slide the old stitch off the left needle, keeping the new stitch on the right needle.
- Repeat steps 2-5 for each stitch on the left needle until all stitches have been transferred to the right needle.
- When you have completed one row, turn your work around to begin the next row.
- Repeat the same process of knitting each stitch across the row until you have reached the desired length.
- To finish your project, bind off the stitches by knitting two together and passing the previous stitch over until only one stitch remains. Cut the yarn, leaving a tail, and pull it through the last stitch to secure it.
With the garter stitch, you can create a variety of projects such as scarves, blankets, and dishcloths. It is versatile and can easily be customized by changing the yarn, needle size, or adding other stitch patterns. So grab your knitting needles and start practicing this timeless and classic stitch pattern!
How to Knit the Stockinette Stitch
The stockinette stitch is one of the most basic and popular stitch patterns in knitting. It creates a smooth and even fabric with distinct rows of “V” shapes on the right side. The wrong side of the fabric has a bumpy texture, which is why the stockinette stitch is often used for reversible projects like scarves or blankets.
To knit the stockinette stitch, you only need to know two simple steps. First, you knit all stitches on the right side, and second, you purl all stitches on the wrong side. This creates a nice contrast between the two sides of the fabric. To start, cast on an even number of stitches for a flat piece or an odd number for projects knitted in the round.
To knit the right side, insert the right needle into the first stitch on the left needle from left to right. Wrap the yarn around the right needle counterclockwise and pull it through the stitch, slipping the original stitch off the left needle. Repeat this process for each stitch until the end of the row.
When you reach the wrong side, purling becomes the stitch of choice. Insert the right needle into the first stitch on the left needle from right to left. Wrap the yarn around the right needle clockwise and pull it through the stitch, slipping the original stitch off the left needle. Repeat this process for each stitch until the end of the row.
Continue alternating between knitting and purling rows to create the stockinette stitch pattern. Remember to knit the right side and purl the wrong side. Once you get the hang of it, you can experiment with different yarns, colors, and stitch counts to make your stockinette stitch projects unique and personal.
Knitting in the Round with the Seed Stitch
The seed stitch is a classic knitting pattern that creates a textured fabric. It is made up of alternating knit and purl stitches to create a raised, bumpy appearance. Knitting in the round with the seed stitch allows you to create a seamless tube of fabric, perfect for projects like hats, cowls, and sleeves.
To begin knitting in the round with the seed stitch, you will need a set of double-pointed needles (DPNs) or a circular needle, depending on your preference. Start by casting on an even number of stitches, as the seed stitch pattern requires an even number of stitches to work properly.
Once you have cast on your stitches, join the round by knitting the first stitch and slipping the last stitch onto the left needle. This creates a smooth, continuous round of knitting. Begin the seed stitch pattern by knitting the first stitch, then purling the next stitch. Continue alternating knit and purl stitches for the entire round.
When you reach the end of the round, simply continue knitting in the seed stitch pattern for as many rounds as desired. The texture of the seed stitch will continue to build as you work, creating a visually interesting fabric. Remember to always knit the first stitch of each round, regardless of whether it was knit or purled in the previous round.
Knitting in the round with the seed stitch is a great way to add texture to your knitting projects. Whether you’re working on a cozy hat or a warm cowl, the seed stitch pattern adds depth and interest to your finished piece. Experiment with different yarns and needle sizes to create unique variations of this classic stitch pattern.
Creating Textured Patterns with the Rib Stitch
The rib stitch is a popular knitting technique that can be used to create beautiful textured patterns. It is characterized by its vertical lines and stretchy, elastic qualities. There are several variations of the rib stitch, including the 1×1 rib, 2×2 rib, and the seed stitch. Each variation produces a different pattern and texture, making the rib stitch incredibly versatile.
One of the most common rib stitch patterns is the 1×1 rib. This pattern is created by alternating one knit stitch with one purl stitch across each row. The result is a fabric that has a lot of elasticity and stretch. The 1×1 rib stitch is commonly used for cuffs, collars, and edges of garments. The vertical lines created by this stitch pattern can add a subtle textural element to any knitting project.
To add more texture to your knitting, you can try the 2×2 rib stitch. This pattern is created by working two knit stitches followed by two purl stitches across each row. The 2×2 rib stitch creates a more pronounced texture with thicker vertical lines. It is commonly used for scarves, hats, and mittens, as it provides additional warmth and insulation.
Another option for creating textured patterns with the rib stitch is the seed stitch. This pattern is created by alternating one knit stitch with one purl stitch in the first row, and then switching to purling the knit stitches and knitting the purl stitches in the second row. This alternating pattern creates a bumpy texture that resembles scattered seeds. The seed stitch is commonly used for blankets, dishcloths, and baby clothing.
Overall, the rib stitch is a versatile and popular knitting technique for creating textured patterns. Whether you choose the 1×1 rib, 2×2 rib, or the seed stitch, each variation adds its own unique texture and design to your knitting projects. With a little practice, you can easily create beautiful and intricate patterns using the rib stitch.
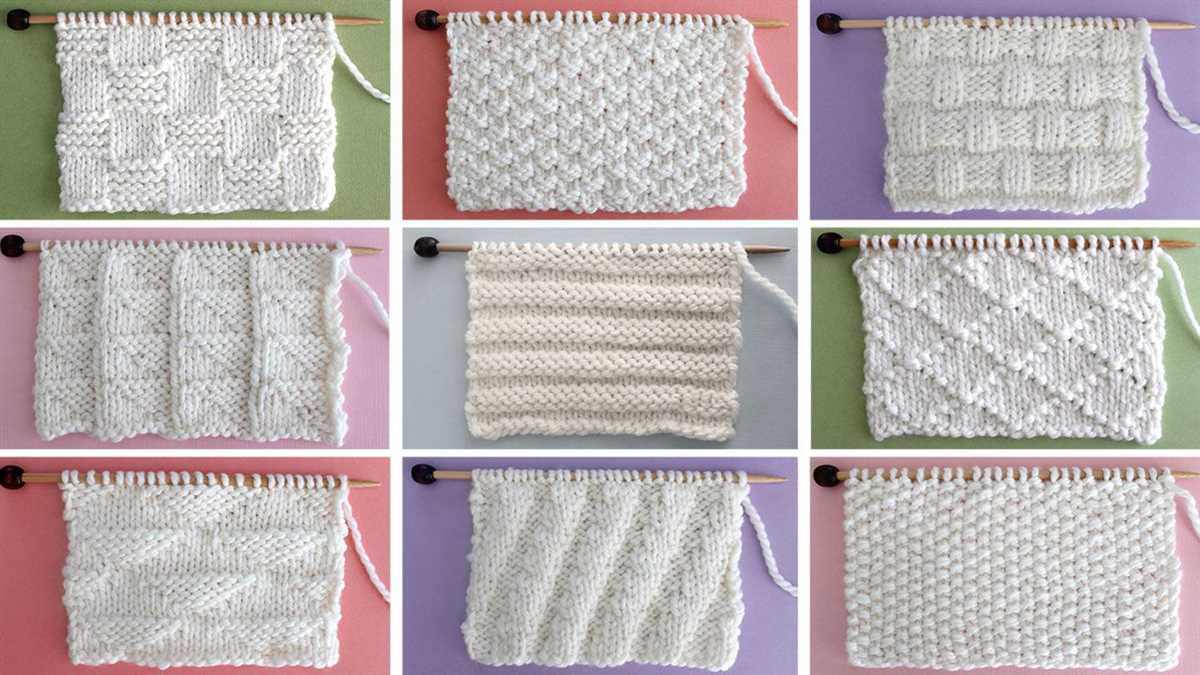
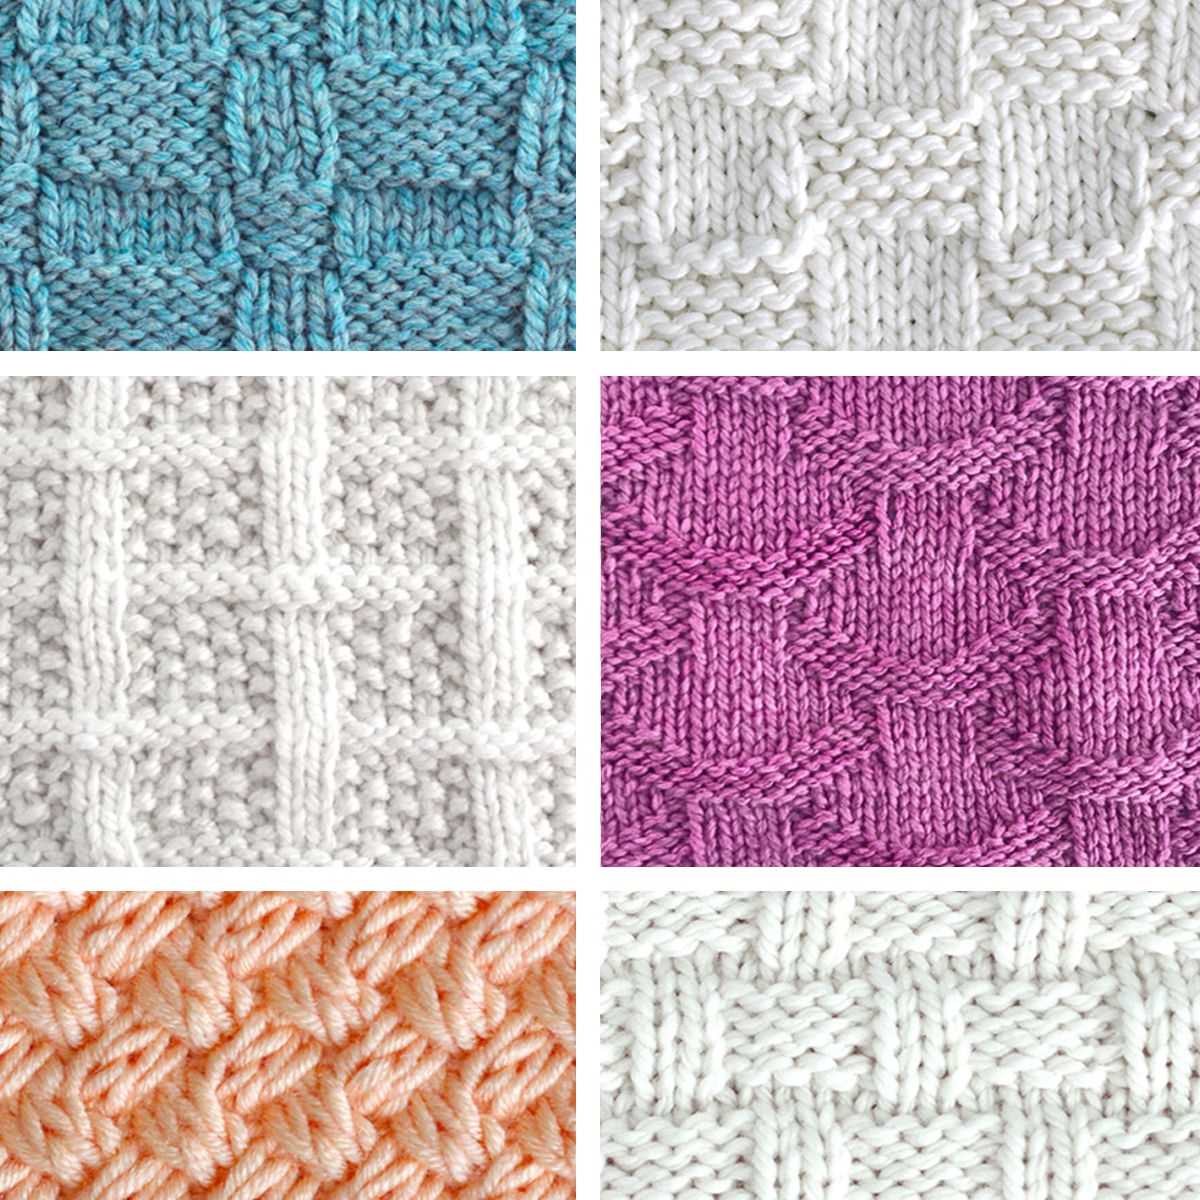
Adding Some Flair with the Basketweave Stitch
When it comes to knitting, the basketweave stitch is an excellent way to add some flair to your projects. With its alternating blocks of knit and purl stitches, this stitch creates a textured pattern that adds depth and visual interest to your knitted fabric. Whether you’re making a cozy blanket, a stylish scarf, or even a decorative pillow, the basketweave stitch is a versatile pattern that can elevate your knitting to the next level.
The beauty of the basketweave stitch lies in its simplicity. To create this stitch, you’ll alternate between knitting blocks of stitches and purling blocks of stitches. For example, a common basketweave pattern might involve knitting four stitches, then purling four stitches, and repeating this pattern across the row. You can adjust the size of your blocks depending on the effect you want to achieve, making this stitch highly customizable.
The basketweave stitch is a great choice for beginners who are looking to venture beyond basic knit and purl stitches. It’s easy to memorize the pattern, and once you get into a rhythm, you’ll find it quite meditative and relaxing to work on. Plus, the textured fabric created by the basketweave stitch looks impressive and complex, even though it’s relatively simple to execute.
If you’re ready to give the basketweave stitch a try, start with a small project like a dishcloth or a washcloth. This will allow you to practice the stitch without committing to a larger, more time-consuming project. Once you feel comfortable with the stitch, you can incorporate it into larger pieces like blankets or sweaters. With its interesting texture and unique look, the basketweave stitch is sure to become a favorite in your knitting repertoire.
Creating Eye-Catching Designs with the Cable Stitch
The cable stitch is an incredibly versatile and eye-catching knitting technique that can add depth and texture to any project. By crossing stitches over each other, you can create intricate and visually interesting patterns that are sure to stand out.
One popular way to incorporate the cable stitch into your designs is by using it as a central feature in a garment or accessory. For example, you can create a beautiful cable panel down the front of a sweater, or use it to add interest to the brim of a hat. By combining the cable stitch with other, simpler stitch patterns, you can create a truly unique and attention-grabbing piece.
Another way to utilize the cable stitch is by incorporating it into smaller, decorative elements within your project. For instance, you can use cables to create intricate borders or edgings on blankets or scarves. These details can make a simple design look more sophisticated and professional.
When working with cable stitches, it’s essential to pay attention to the pattern and keep track of your stitches. Cable needles, which are short, double-pointed needles, can be used to hold stitches while you cross them over. It’s also important to maintain an even tension to ensure that your cables stand out and don’t appear loose or sloppy.
In conclusion, the cable stitch is a fantastic technique for creating visually striking designs. Whether you choose to make it the centerpiece of your project or use it to add small details, incorporating cable stitches into your knitting can take your creations to the next level. With practice and attention to detail, you’ll be able to achieve stunning results with this versatile stitch pattern.
Knitting Simple Lace Patterns
Knitting lace patterns can add a touch of elegance and sophistication to any knitting project. While lace patterns may look complicated and intricate, there are actually many simple lace patterns that even beginner knitters can easily master. These patterns typically involve a combination of basic stitches and yarn overs, creating a delicate and airy fabric.
One popular simple lace pattern is the eyelet lace pattern. This pattern is created by alternating rows of knit stitches with rows of yarn overs and knit two together stitches. The yarn overs create small holes or eyelets in the fabric, giving it a lacy look. The eyelet lace pattern can be used to create beautiful scarves, shawls, or even light summer tops.
Another simple lace pattern is the feather and fan lace pattern. This pattern involves a series of increases and decreases, which create a ripple effect in the fabric. The feather and fan lace pattern is often used to create decorative edgings on blankets, baby clothes, or even socks. It can also be used to create a beautiful lacy throw or afghan.
When knitting lace patterns, it is important to use a lighter weight yarn to achieve a more delicate and airy fabric. Lace patterns also require careful attention to stitch count and pattern repeats, so it is helpful to use stitch markers or highlighter tape to keep track of your progress. With practice and patience, knitting simple lace patterns can become a rewarding and relaxing knitting technique.
Creating Colorful Patterns with the Stripe Stitch
One way to add a vibrant and eye-catching element to your knit projects is by incorporating the stripe stitch. The stripe stitch allows you to create bold and colorful patterns by alternating between different colored yarns. With this simple stitch, you can bring a new level of creativity to your knitting projects.
To create a stripe stitch, you will need at least two different colored yarns. Start by knitting a row with one color, and then switch to the next color in the following row. Repeat this pattern for as many rows as you desire, alternating between the two colors. This technique can be used to create vertical or horizontal stripes, or even diagonal patterns.
The possibilities with the stripe stitch are endless. You can experiment with different color combinations to create unique and personalized designs. Whether you choose contrasting colors for a bold statement or subtle shades for a more delicate look, the stripe stitch allows you to express your creativity and style.
Tips for Working with the Stripe Stitch
- Plan your color scheme beforehand: Before starting your project, take some time to plan out the colors you want to use and the order in which you will alternate them. This will help you visualize the final result and ensure that the colors work well together.
- Keep your tension consistent: It’s important to maintain consistent tension while working with the stripe stitch to achieve an even and professional-looking result. Pay attention to your tension as you switch between yarns to ensure that the stitches are not too loose or too tight.
- Weave in loose ends as you go: When changing colors, you will end up with loose ends that need to be woven in. To avoid a tangled mess at the end of your project, take the time to weave in the loose ends as you go along. This will make the finishing process much easier.
- Experiment with different stitch patterns: The stripe stitch can be used in combination with other stitch patterns to create even more intricate designs. Try incorporating different types of stitches, such as ribbing or lace, to add texture and interest to your project.
Whether you’re knitting a cozy scarf, a stylish sweater, or a decorative blanket, the stripe stitch is a versatile technique that can elevate your knitting projects to the next level. With its endless color possibilities and simple execution, this stitch is a great way to add an extra pop of color and creativity to your knitting repertoire.
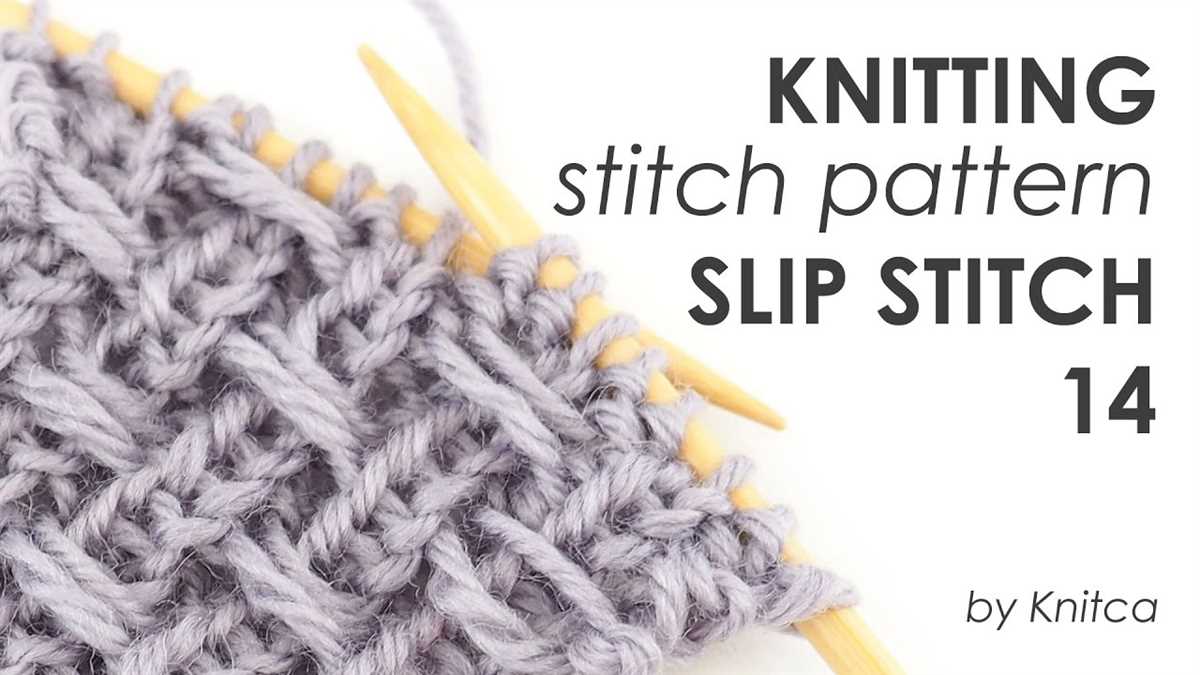
Using the Slip Stitch to Create Interesting Patterns

The slip stitch is a commonly used technique in knitting that can create interesting patterns and textures in your projects. By simply “slipping” a stitch from one needle to the other without knitting or purling it, you can achieve a variety of effects.
One way to use the slip stitch is by incorporating it into a simple knit stitch pattern. For example, you can create a slipped stitch rib by slipping the first stitch of every row and knitting the rest of the stitches. This creates a ridged texture that adds depth and interest to your project.
Slipped Stitch Rib pattern:
- Row 1: *Slip 1 stitch purlwise, knit 1. Repeat from * to end of row.
- Row 2: Knit all stitches.
- Repeat rows 1 and 2 for desired length.
Another way to utilize the slip stitch is by creating a slipped stitch mosaic pattern. This technique involves slipping stitches in a contrasting color to create a design or pattern. By combining slipped and knit stitches, you can achieve intricate and visually appealing results.
Slipped Stitch Mosaic pattern:
- Select two colors of yarn, A and B.
- Row 1 (Color A): *Knit 1, slip 1 with yarn in back. Repeat from * to end of row.
- Row 2 (Color B): *Slip 1 with yarn in front, purl 1. Repeat from * to end of row.
- Row 3 (Color B): *Knit 1, slip 1 with yarn in front. Repeat from * to end of row.
- Row 4 (Color A): *Slip 1 with yarn in back, purl 1. Repeat from * to end of row.
- Repeat rows 1-4 for desired length.
The slip stitch can add depth, texture, and visual interest to your knitting projects without requiring complex techniques. It’s a versatile stitch that can be easily incorporated into various patterns, from simple ribbing to more intricate mosaic designs. So, why not experiment with the slip stitch and see how it can enhance your knitting projects?