
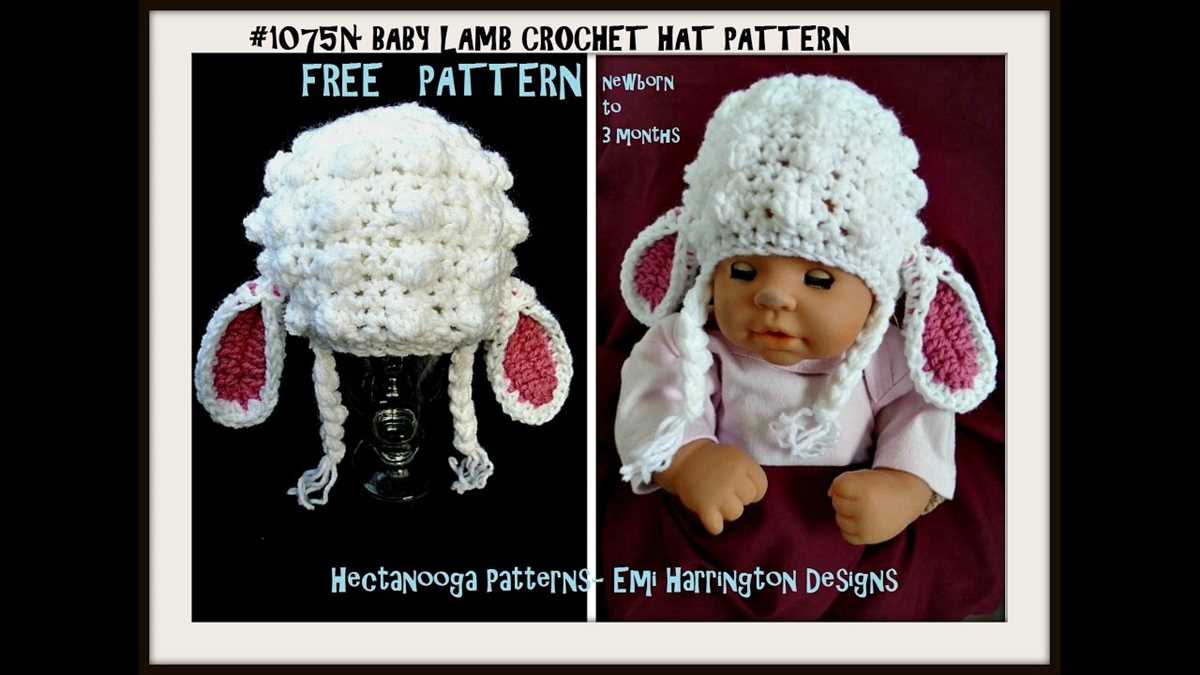
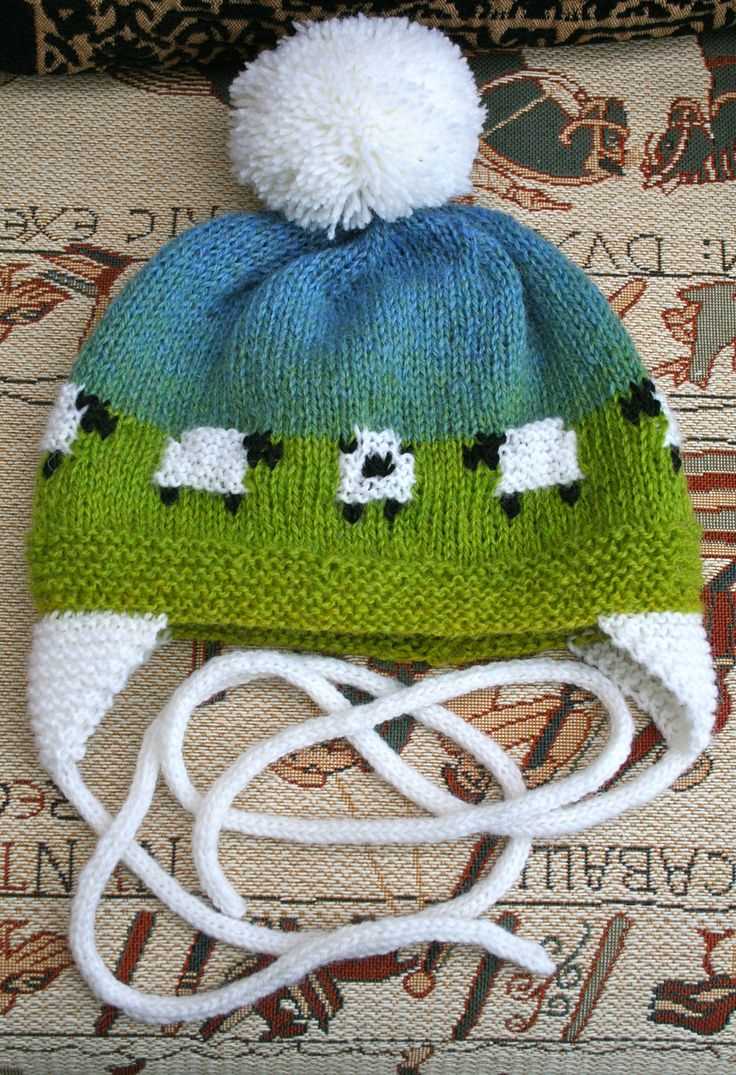
Are you looking for a cute and cozy knitting project? Look no further – we have the perfect pattern for you! This sheep hat knitting pattern is not only adorable but also free! It’s a great project for beginners and experienced knitters alike.
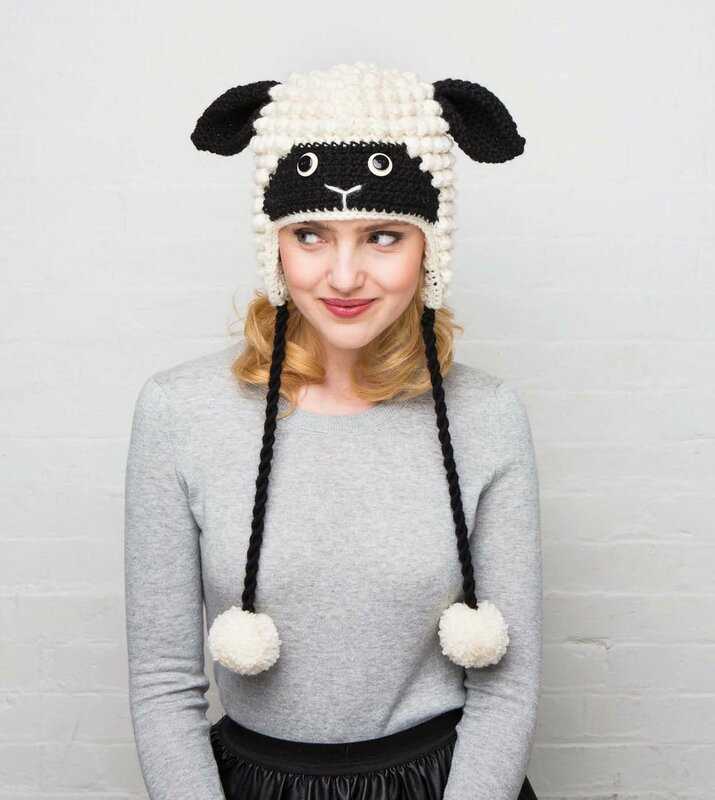
The pattern includes instructions for both child and adult sizes, so you can make a matching set for a parent and child or a fun gift for a friend. The hat features a fluffy sheep face with little ears and is sure to keep you warm during the colder months.
To make this hat, you’ll need basic knitting supplies such as yarn, knitting needles, and a tapestry needle. The pattern uses simple stitches like knit and purl, so even if you’re new to knitting, you’ll be able to follow along. We’ve also included helpful tips and step-by-step instructions to make the process as easy as possible.
So why wait? Start knitting your own adorable sheep hat today! Just download the free pattern below, gather your supplies, and get started. You’ll have a cute and cozy hat in no time. Happy knitting!
Sheep Hat Knitting Pattern Free
Knitting is a popular hobby that allows people to create unique and personalized garments and accessories. One popular item to knit is a sheep hat, which adds a touch of whimsy and fun to any outfit. If you’re looking for a free knitting pattern for a sheep hat, you’re in luck! There are several patterns available online that will guide you through the process of creating your very own sheep hat.
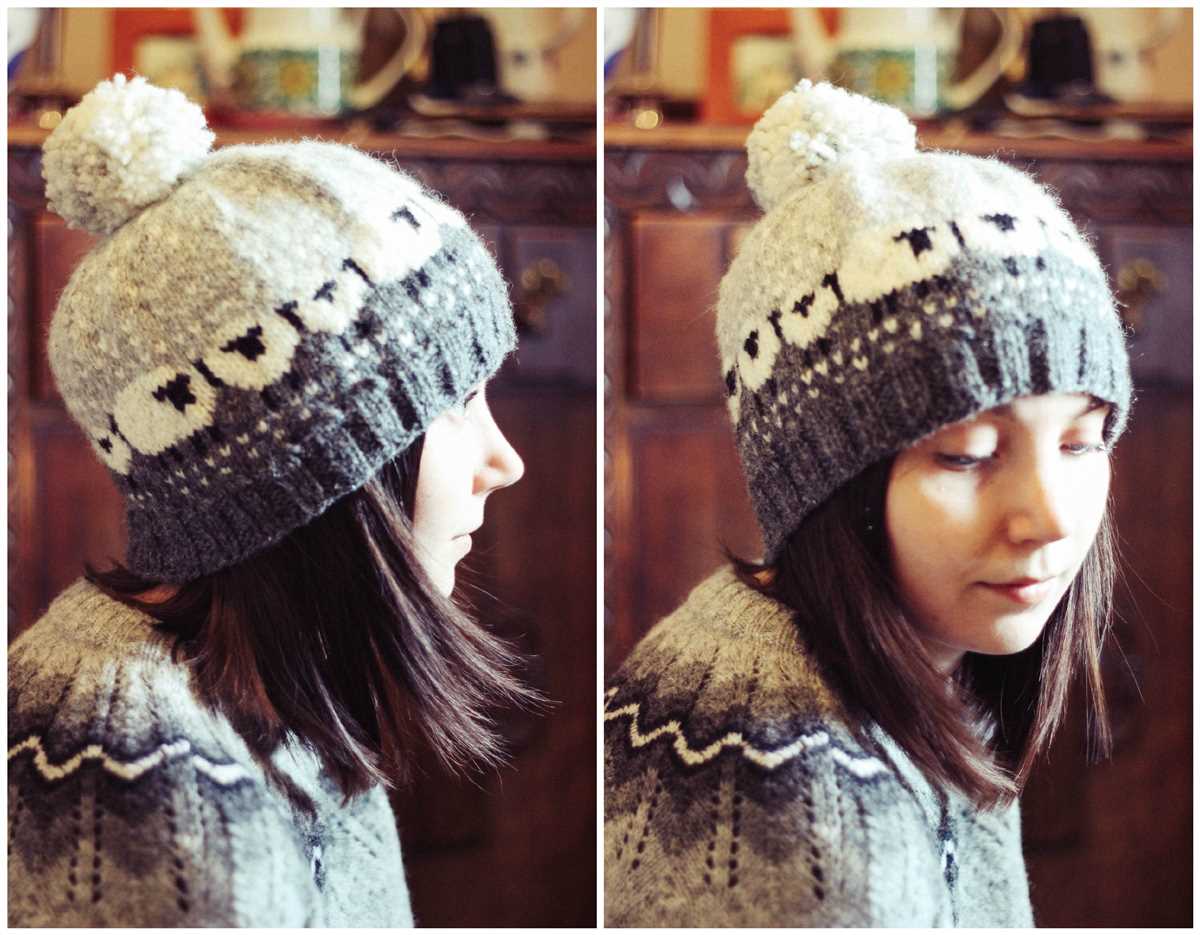
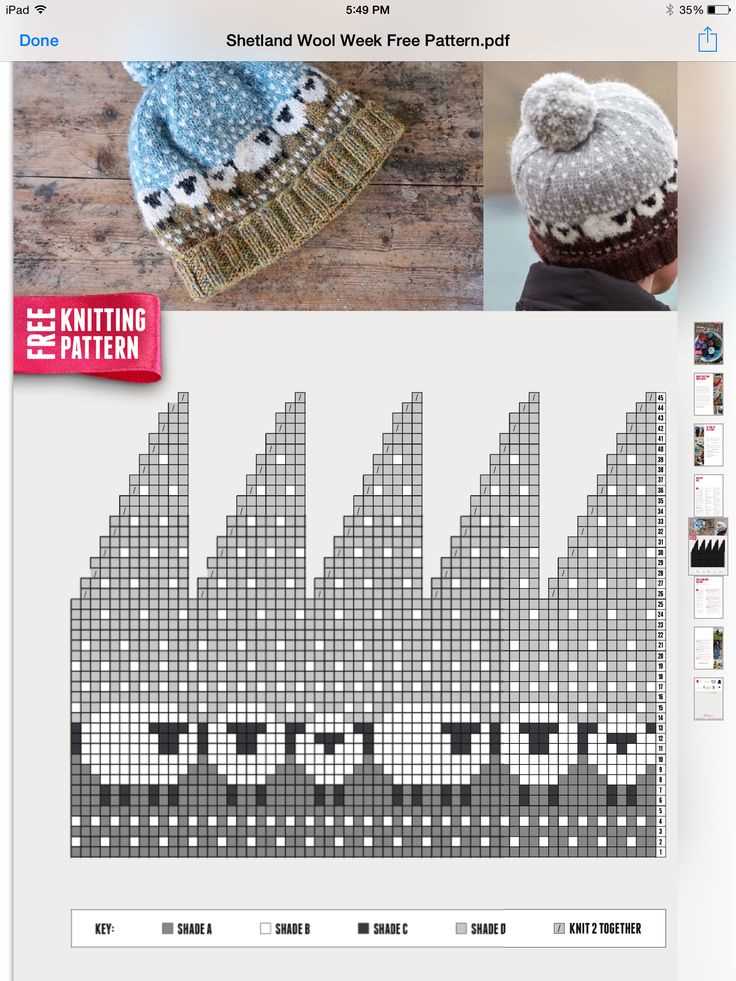
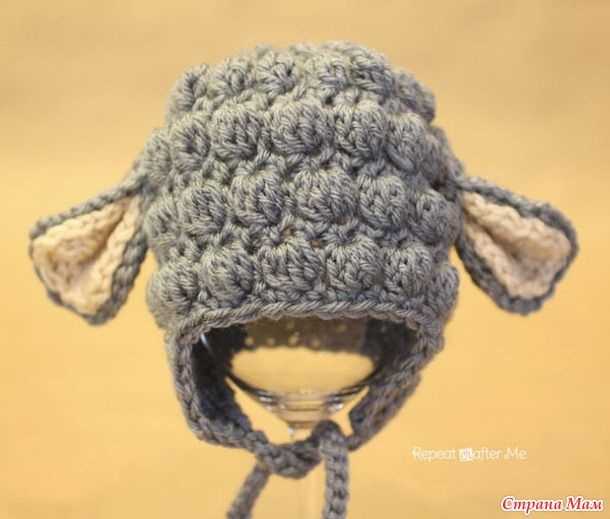
When it comes to knitting a sheep hat, there are a few key elements to consider. First, you’ll need to choose the right yarn. Opt for a soft, chunky yarn in white or cream for the body of the hat to mimic the wool of a sheep. You’ll also need a small amount of black yarn for the face and ears. Once you have your materials ready, it’s time to start knitting!
One popular free knitting pattern for a sheep hat involves knitting in the round to create the body of the hat. Start by casting on the desired number of stitches and join in the round. From there, you’ll follow a simple pattern of knit and purl stitches to create the ribbed brim of the hat. Once the brim is complete, you’ll switch to the main color and continue knitting in the round until you reach the desired length.
To create the sheep’s face and ears, you’ll use a combination of knitting and embroidery techniques. Start by knitting two small rectangles for the ears, which you’ll later sew onto the hat. Then, using the black yarn, embroider the sheep’s eyes, nose, and mouth onto the white body of the hat. Finally, sew the ears onto the top of the hat, and your sheep hat is complete!
Learn how to knit a cute sheep hat with this free pattern
If you enjoy knitting and want to create a fun and adorable accessory, look no further than this free sheep hat knitting pattern. With just a few simple steps, you can make a charming hat that is perfect for both children and adults alike.
To get started, gather your materials, including a set of knitting needles, yarn in your preferred color, and a pair of scissors. You’ll also need some basic knitting skills, such as casting on, knitting, purling, and binding off.
1. Cast on and knit the brim

- Start by casting on the desired number of stitches for the brim of the hat.
- Work in a rib stitch pattern (knit 1, purl 1) for a stretchy and comfortable fit.
- Continue knitting in the rib stitch pattern until the brim reaches your desired width.
2. Knit the body of the hat
- Switch to stockinette stitch (knit one row, purl one row) for the body of the hat.
- Continue knitting in stockinette stitch until the hat reaches the desired length.
- If you want to add earflaps to the hat, you can do so by knitting two extra sections on either side of the hat and then attaching them.
3. Shape the crown of the hat
- When the hat is long enough, it’s time to shape the crown.
- Decrease stitches evenly across each row by knitting two stitches together.
- Continue decreasing until you have a small enough number of stitches to gather at the top.
Once you’ve finished knitting, bind off your stitches and weave in any loose ends. You can customize your sheep hat by adding details like ears, eyes, and a nose using felt or embroidery. This charming accessory is sure to keep you warm and bring a smile to your face!
Gather all the necessary materials for your sheep hat

Before you start knitting your adorable sheep hat, make sure you have all the necessary materials on hand. Having everything ready will ensure a smooth and enjoyable knitting experience. Here is a list of the items you will need:
- Yarn: Choose a soft and bulky yarn in white or off-white color to mimic the fluffy sheep’s wool. A wool blend or acrylic yarn will work well for this project.
- Knitting Needles: Look for a pair of needles in the appropriate size for your yarn. A set of US size 10 or 11 needles should work well for most chunky yarns.
- Tapestry Needle: This needle will be used for weaving in ends and sewing up any seams.
- Scissors: A pair of sharp scissors is essential for cutting yarn and trimming any excess.
- Stitch Markers: These small plastic rings or loops can be used to mark specific stitches or sections of your pattern.
- Measuring Tape: Having a measuring tape handy will help you ensure your hat is the right size.
Once you have gathered all these materials, you will be ready to start knitting your sheep hat. Double-check your supplies to ensure you have everything you need, and then you can begin the fun and creative process of bringing your sheep hat to life!
Create the base for your sheep hat
When starting to knit your sheep hat, it’s important to create a solid base for the hat that will form the main body. To begin, you will need to gather your materials, including a set of knitting needles and a ball of yarn in your desired color. The size of the needles and thickness of the yarn will depend on your personal preference and the desired outcome of the hat.
Once you have your materials ready, you can start casting on stitches to create the base of the hat. The number of stitches you cast on will depend on the size of the hat you want to make and the desired tension of the fabric. Refer to the knitting pattern you are using to determine the recommended number of cast-on stitches. You can also use a stitch gauge to ensure the correct number of stitches per inch.
Step 1: Cast on the stitches
Begin by making a slip knot with your yarn and placing it on one of the needles. Hold the needle with the slip knot in your right hand and the other needle in your left hand. Insert the left needle into the slip knot from front to back, bringing the yarn behind the needle. With your right hand, wrap the yarn around the right needle, moving from front to back and over the left needle. Pull the right needle through the slip knot, creating a new stitch. Repeat this process until you have cast on the required number of stitches.
Step 2: Join the stitches in the round
After casting on the stitches, you will need to join them in the round to create a continuous loop. Hold both needles with the stitches in your left hand, making sure they are not twisted. Using your right needle, insert it into the first stitch on the left needle as if to knit. Wrap the yarn around the right needle and pull it through the stitch, transferring the stitch to the right needle. Continue knitting each stitch in this manner, joining the stitches in the round.
By following these steps, you will be able to create the base for your sheep hat. Once the base is complete, you can continue knitting the rest of the hat according to the pattern, adding the sheep details and shaping as necessary. Happy knitting!
Knit the body of the sheep hat
Now that you have completed the brim of the hat, it’s time to start knitting the body of the sheep hat. This is where the fun part begins as you will be creating the fuzzy texture of the sheep.
Using the main color of your choice, start knitting in rounds using the stockinette stitch. Remember to keep count of your stitches and use markers to help you keep track of the beginning of each round. It’s important to maintain a consistent tension throughout your knitting to ensure a neat and even texture.
Knit the required number of rounds:
1. Knit rounds 1-6: Continue knitting in stockinette stitch without any increases or decreases. This will help establish the shape of the hat.
2. Knit rounds 7-12: Begin adding the fuzzy texture to the hat. To do this, alternate between knitting with the main color and a fuzzy yarn. This will create a fluffy effect, mimicking the wool of a sheep.
3. Knit rounds 13-18: Continue alternating between the main color and the fuzzy yarn, creating the fuzzy texture as desired. Feel free to experiment with different lengths of fuzzy yarn to vary the texture.
4. Knit rounds 19-24: Transition back to using only the main color for a few rounds to create a smooth section before finishing the hat.
Continue knitting the body of the sheep hat, following the pattern as desired. Remember to regularly check the fit of the hat on your head to ensure it is the right size. Once you have reached the desired length, it’s time to move on to shaping the crown of the hat.
Add the details to make your sheep hat truly adorable
Once you have completed the basic knitting pattern for your sheep hat, it’s time to add the adorable details that will bring it to life. These extra touches will make your hat stand out and give it that special charm. Below are some suggestions for adding those finishing touches:
1. Embroider the face
Using black yarn or embroidery thread, carefully stitch on the eyes, nose, and mouth of your sheep. You can use small straight stitches for the eyes, a small triangle for the nose, and a simple smile for the mouth. Adjust the size and shape of the features to achieve the desired expression. This step will give your sheep hat a cute and playful face.
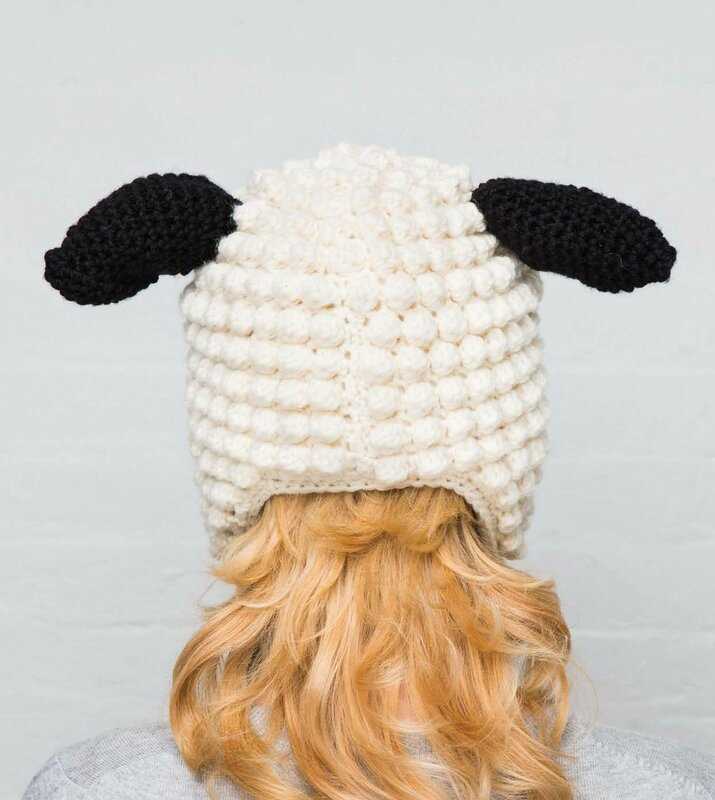
2. Attach the ears
To create the signature sheep ears, cut out two small oval shapes from white felt or fabric. Using a needle and thread, sew the ears onto the sides of the hat, positioning them just above the forehead. Be sure to securely attach them so they don’t fall off during wear. These ears will add a playful dimension to your sheep hat and make it look even more like a fluffy sheep.
3. Add a pompom tail
A fluffy pompom tail is a fun addition to any sheep hat. Using white yarn, make a medium-sized pompom and attach it securely to the back of the hat. This will give your sheep hat a whimsical touch and make it even more adorable. You can trim the pompom to your desired shape and fluffiness.
4. Create a flower crown
If you want to give your sheep hat a feminine touch, you can create a flower crown to adorn the top of the hat. Choose small fabric or crochet flowers in various colors and attach them to the brim or top of the hat using a hot glue gun or needle and thread. This will give your sheep hat a whimsical and unique look that is sure to turn heads.
Adding these details to your sheep hat will make it truly adorable and unique. Whether you choose to embroider the face, attach ears, add a pompom tail, or create a flower crown, these finishing touches will make your sheep hat stand out and bring a smile to anyone’s face.
Finish off your sheep hat with the perfect closure
After spending time knitting your adorable sheep hat, it’s important to give it the perfect closure to make sure it stays snug on your head. Here are a few options to consider:
1. Knitted Ties: Attach two long knitted ties to the sides of the hat, allowing them to be tied securely under the chin. This closure option not only adds an extra touch of cuteness, but also ensures that the hat stays in place, even on windy days.
2. Button and Loop: Sew a small loop onto one side of the hat and attach a button on the other side. This closure option provides a secure fastening while also adding a decorative element to your sheep hat. Choose a button that matches the color and style of your hat for a cohesive look.
3. Elastic Band: Sew an elastic band onto the bottom edge of the hat, allowing it to stretch and fit comfortably around your head. This closure option is easy to use and provides a secure fit, ensuring that your sheep hat stays in place throughout the day.
4. Snap Fasteners: Sew snap fasteners onto the ends of the hat, allowing them to snap securely together. This closure option is discreet and easy to use, while also providing a secure fastening. Choose snap fasteners in a color that blends with your hat for a seamless look.
Whichever closure option you choose, make sure to secure it firmly but not too tightly, ensuring comfort and a perfect fit for your adorable sheep hat. Have fun finishing off your knitting project and enjoy wearing your cozy creation in style!
Try different variations of the sheep hat pattern

If you’re looking to knit a sheep hat, there are many different variations of the pattern that you can try. Whether you’re a beginner or an experienced knitter, experimenting with different designs and techniques can add a personal touch to your final product. Here are a few ideas to get you started:
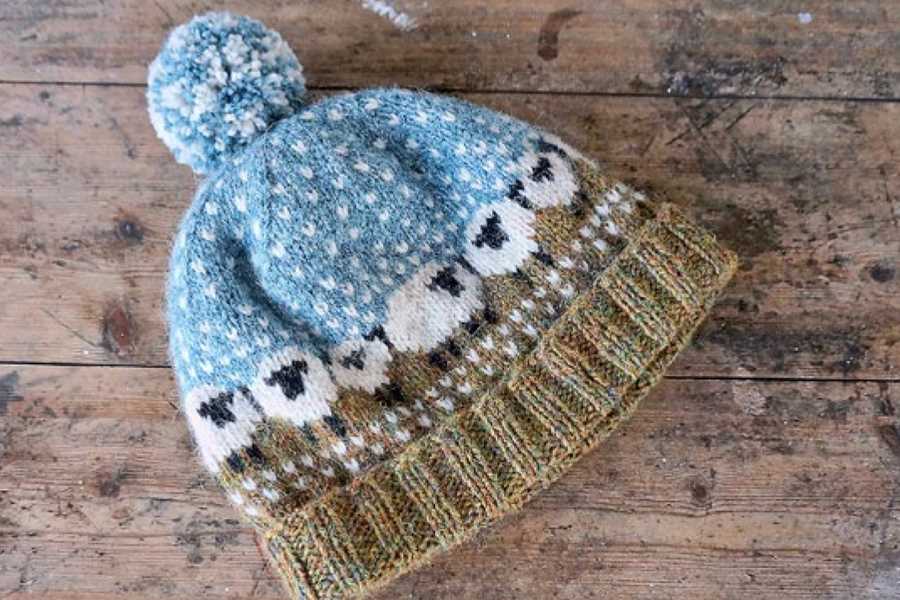
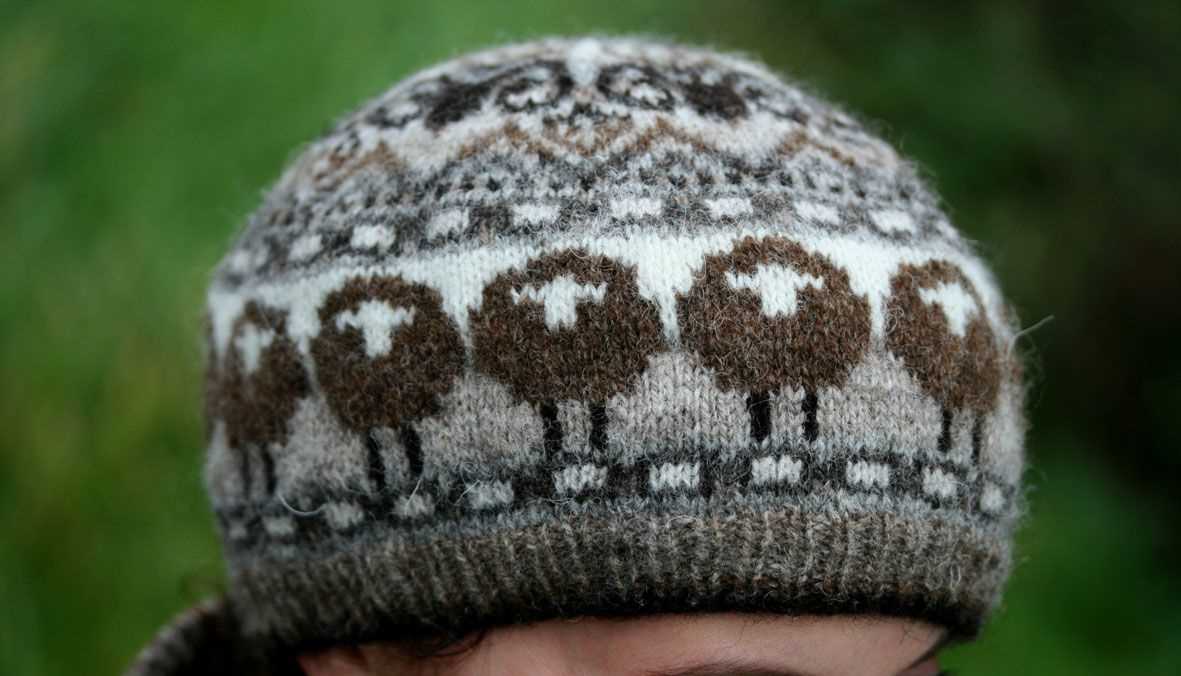
1. Colorwork Sheep Hat

Add some color to your sheep hat by incorporating colorwork techniques. You can create a sheep design using contrasting yarn colors for the body and face. This will make your sheep hat more vibrant and eye-catching.
2. Textured Sheep Hat
Instead of a plain stockinette stitch, you can add some texture to your sheep hat by using different stitch patterns. Consider using a seed stitch or a cable pattern to create a unique and visually interesting sheep design.
3. Embroidered Sheep Hat
If you enjoy embroidery, you can add some embroidered details to your sheep hat. Use yarn or embroidery floss to add eyes, a nose, and mouth to your sheep design. This will give your hat a more detailed and personalized look.
4. Chunky Sheep Hat
If you prefer a chunkier look, you can use a bulky yarn and larger knitting needles to create a cozy and warm sheep hat. This will give your hat a more relaxed and casual feel, perfect for cold winter days.
These are just a few ideas to get you started, but feel free to explore and experiment with different variations of the sheep hat pattern. Whether you choose to add color, texture, embroidery, or use a different yarn weight, the possibilities are endless. Have fun and enjoy the process of creating your own unique sheep hat!
Get Creative with Additional Embellishments for Your Sheep Hat
Once you have completed your sheep hat knitting pattern and have a cozy and adorable piece, you can take it to the next level by adding some creative embellishments. These extra touches can make your hat truly unique and showcase your personal style. Here are some ideas to get you started:
- Flower Accents: Attach small crocheted or knitted flowers to the brim or sides of the hat to add a touch of femininity and charm. You can use colorful yarns to create vibrant and eye-catching blooms.
- Pom-Poms: Add a fun and playful element to your sheep hat by attaching pom-poms to the ears. Using contrasting colors or making them in different sizes can make the pom-poms stand out and add an extra dose of cuteness.
- Buttons: Sew on some buttons in the shape of flowers, sheep, or other cute designs to add visual interest and texture. You can also use buttons in different colors and sizes to create a whimsical and eclectic look.
- Embroidery: Use embroidery thread to add intricate details to your sheep hat. You can embroider simple stitches like French knots or create more elaborate designs like flowers or sheep faces. This will give your hat a handmade and personalized touch.
- Ribbons and Bows: Attach ribbons or bows to the earflaps or tie one around the base of the hat for a charming and feminine touch. Choose ribbons in different colors, patterns, and textures to match your style and make a statement.
Remember, the key is to have fun and let your creativity shine when adding embellishments to your sheep hat. Experiment with different materials, colors, and textures to create a hat that truly reflects your personality. Whether you prefer a subtle and elegant look or a bold and playful one, there are countless options to explore. So grab your knitting needles, unleash your imagination, and make your sheep hat one-of-a-kind!
Show off your finished sheep hat and share your creation with others
After spending time carefully knitting your sheep hat, it’s time to show off your finished creation! Whether you’re making it as a gift or for yourself, sharing your work with others can be a rewarding experience. By displaying your sheep hat, you not only get to showcase your knitting skills but also inspire and motivate others to try their hand at knitting.
To share your sheep hat with others, consider taking photos of your finished project from different angles and in various settings. Play around with lighting and background to create visually appealing images. Once you’re happy with the photos, you can share them on your social media platforms, knitting forums, or even knitting groups. Don’t forget to mention the knitting pattern you used and any modifications you made along the way.
Another great way to share your sheep hat is by participating in knitting contests or challenges. Many knitting communities and websites host regular contests where you can submit your finished projects for a chance to win prizes or get featured on their platforms. Participating in these contests not only allows you to showcase your work but also connects you with other knitting enthusiasts who share your passion.
If you prefer a more personal approach, you can also wear your sheep hat proudly in public. Whether you’re going for a walk, running errands, or attending a knitting meetup, wearing your creation can spark conversations and attract attention. It’s a wonderful conversation starter and an opportunity to share your knitting journey with others.
Remember, sharing your finished sheep hat isn’t just about seeking validation or appreciation. It’s about inspiring and connecting with the knitting community. By sharing your work, you contribute to the rich tapestry of creativity and encourage others to embark on their own knitting projects. So, don’t be shy – show off your sheep hat and let your knitting skills shine!
Conclusion
Knitting a sheep hat can be a fun and rewarding project for all skill levels. Whether you are a beginner or an experienced knitter, this free pattern allows you to create a unique and adorable accessory that is sure to bring joy and warmth to your winter wardrobe.
Throughout the knitting process, you have the opportunity to embrace your creativity and personalize the hat according to your preferences. You can choose different colors of yarn to bring out your own style, or experiment with different stitch patterns to add texture and visual interest.
As you knit the sheep hat, you will experience a sense of accomplishment and satisfaction with each stitch. The repetitive motion of knitting can be soothing and relaxing, providing a therapeutic effect that can help reduce stress and promote mindfulness.
Once the hat is finished, the joy of wearing it is truly indescribable. Putting on a handmade item that you have created with your own hands is a unique and fulfilling experience. It’s a reminder of your creativity and the time and effort you put into making something special.
Not only will you feel proud wearing your sheep hat, but you will also receive compliments and admiration from others. The adorable sheep design is sure to bring smiles to people’s faces and spark conversations about your knitting skills.
So, why not give this free sheep hat pattern a try? Start your knitting journey today and enjoy the process of creating a cozy and cute accessory that you can treasure for years to come.