
If you’re a beginner in knitting and looking for a fun and practical project to start with, trying out a pot holder knitting pattern is a great idea. Pot holders are not only useful for protecting your hands from hot pots and pans, but they also make for lovely handmade gifts for family and friends. With a few basic knitting skills and some simple materials, you can create your own pot holders in no time.
Before you begin, it’s important to choose the right materials. Opt for a 100% cotton yarn, as it is durable, heat-resistant, and easy to clean. You’ll also need knitting needles in a suitable size for your chosen yarn, as well as a tapestry needle to sew up your finished pot holder. Once you have your materials ready, it’s time to start knitting!
This pot holder knitting pattern is ideal for beginners as it uses basic stitches and techniques. You’ll start by casting on the required number of stitches and then knit in garter stitch to create a simple and sturdy fabric. The pattern includes instructions for increasing and decreasing stitches, which will help you shape your pot holder. Finally, you’ll finish off by binding off your stitches and neatly sewing up the edges.
By following this pot holder knitting pattern for beginners, you’ll not only learn and practice essential knitting skills, but you’ll also have a useful and beautiful item to show for your efforts. So grab your needles and yarn, and get ready to enjoy the satisfying and creative process of knitting your very own pot holders!
Pot Holder Knitting Pattern Beginners
Knitting pot holders is a fun and useful project for beginners. Not only can you create something practical for your kitchen, but you can also learn and practice basic knitting techniques. Pot holders are essential for protecting your hands from hot dishes and pans, and by making your own, you can customize them to match your kitchen decor or give them as thoughtful handmade gifts.
To start knitting pot holders, you will need a set of knitting needles in a suitable size and cotton yarn. Cotton yarn is a great choice for pot holders because it is durable and heat-resistant. You will also need a pair of scissors and a yarn needle for finishing your project.
Knitting Stitch
The most common stitch used in pot holder patterns is the garter stitch. This stitch is simple and creates a dense fabric that is ideal for heat protection. To knit the garter stitch, you will simply knit every row. This repetitive stitch pattern makes it easy for beginners to practice their knitting skills and creates a nice texture for pot holders.
Pattern Instructions
When following a pot holder knitting pattern, it is important to read the instructions carefully and understand any abbreviations or special stitches used. Most patterns will start with casting on a certain number of stitches and then knitting in the garter stitch for a specific length. The pattern may also include instructions for creating a loop for hanging the pot holder and finishing techniques such as binding off and weaving in ends.
As a beginner, it may be helpful to start with a simple pot holder pattern that uses basic stitches. Once you feel comfortable with the garter stitch, you can try experimenting with different stitch patterns and designs to create more complex pot holders. The possibilities are endless, and with practice, you will soon be knitting beautiful and functional pot holders for yourself and others.
Choosing the right yarn and needles
When it comes to knitting pot holders, choosing the right yarn and needles is crucial for achieving the desired result. The right materials can make a big difference in the final product, ensuring that your pot holders are both functional and visually appealing.
Firstly, consider the type of yarn you want to use. For pot holders, it is important to use a durable and heat-resistant yarn. Look for yarns that are specifically labeled as “heat resistant” or “pot holder yarn” to ensure that they can withstand high temperatures without melting or getting damaged. Cotton yarns are a popular choice for pot holders due to their ability to withstand heat and their absorbency, which helps to protect your hands from burns. Additionally, cotton yarns are machine washable, making them easy to clean.
Needles Size
- For beginners, it is recommended to use medium-sized needles, usually around US size 8 (5mm).
- These needles are versatile and easy to work with, allowing for smooth and even stitches.
- If you prefer a tighter and more compact texture, you can opt for smaller needles, such as US size 7 (4.5mm).
- On the other hand, if you want a looser and more lightweight pot holder, larger needles like US size 9 (5.5mm) can be used.
Choosing the right yarn and needles is a crucial step in ensuring the success of your pot holder knitting project. By selecting a heat-resistant yarn and appropriately-sized needles, you can create pot holders that are both practical and visually pleasing. Take the time to consider the qualities you want in your pot holders and explore different yarn options to find the perfect match for your project.
Casting on Stitches
In knitting, casting on stitches is the first step to creating any project. It is the process of creating loops on the knitting needle, which will later be used to create the fabric. There are different methods to cast on stitches, but for beginners, the long-tail cast on method is commonly used.
The long-tail cast on method involves creating a slipknot on the needle and using both the working yarn and the tail yarn to create the first stitch. To cast on the desired number of stitches, the knitter measures a tail yarn that is approximately three times the width of the finished project. The yarn is held in a specific way, and the loops are created by wrapping the working yarn around the thumb and index finger, then pulling the loops through to form stitches.
Another commonly used method is the knitted cast on, which is also beginner-friendly. It involves starting with a slipknot and then using the knitting needles to knit stitches onto the working needle. This method is useful when the exact number of stitches needed is not predetermined, as it allows the knitter to cast on stitches as they go.
Once the stitches are cast on, the knitter can proceed to the next steps of the knitting pattern, such as knitting, purling, or following specific stitch patterns. Casting on stitches is an essential skill to learn in knitting, as it sets the foundation for the entire project and determines the size and shape of the final piece.
Knitting the first row
As a beginner knitter, it’s important to start with a solid foundation. The first row of your pot holder knitting pattern will set the stage for the rest of your project. Here’s a step-by-step guide to help you get started:
Casting on
Before you can begin knitting the first row, you’ll need to cast on your stitches. Hold your knitting needle in your right hand and make a slipknot with your yarn. Slide the slipknot onto the needle and tighten it. Insert your right hand needle into the slipknot from left to right and pull the yarn to create a new stitch. Repeat this process until you have the desired number of stitches on your needle.
Starting the pattern
Once you have cast on your stitches, it’s time to start knitting the first row of your pot holder. Begin by holding the needle with the stitches in your left hand and the empty needle in your right hand. Insert the right hand needle into the first stitch on the left hand needle, going from left to right. Wrap the yarn around the right hand needle from back to front, and then pull the right hand needle through the stitch, slipping the old stitch off of the left hand needle. Repeat this process until you have knitted all of the stitches on your left hand needle.
Finishing the first row
Continue knitting the first row of your pot holder pattern by repeating the process of inserting the right hand needle into the next stitch, wrapping the yarn, and pulling it through. Once you have knitted all of the stitches on your left hand needle, you have completed the first row. Take a moment to admire your work and make sure that all of your stitches are even and tight.
- Tip: It’s important to maintain an even tension as you knit the first row to ensure that your pot holder will have a consistent appearance.
- Note: If you make a mistake in the first row, don’t panic! Simply unravel the stitches back to the mistake and try again. Mistakes happen, even to experienced knitters.
Creating a Garter Stitch Pattern
The garter stitch is one of the most basic and versatile knitting patterns, making it perfect for beginners. With just two simple stitches — knit and purl — you can create a wide range of projects, including pot holders. Here’s how to create a garter stitch pattern.
To start, cast on an even number of stitches onto your knitting needle. This will be the width of your project. For a pot holder, you might want to cast on around 30 stitches. Make sure to leave a long enough tail for weaving in at the end.
Once your stitches are cast on, begin working the garter stitch pattern by knitting every row. To knit, insert the right needle into the first stitch on the left needle, wrap the yarn around the right needle, and pull the loop through the stitch. Repeat this for every stitch on the row.
After completing the first row, simply continue knitting every row until your project reaches the desired length. The garter stitch pattern creates a textured fabric that is thick and sturdy, making it perfect for pot holders. You can also add stripes or other variations to the pattern by switching yarn colors or using different knitting techniques.
Once your pot holder is the desired length, it’s time to bind off. To do this, knit the first 2 stitches as usual, then insert the left needle into the first stitch on the right needle. Lift it over the second stitch and off the needle. Continue knitting the next stitch, then lifting the previous stitch over until you reach the end of the row. Cut the yarn, leaving a long tail, and pull it through the last stitch to secure.
Finally, weave in any remaining yarn tails and trim off any excess. Your garter stitch pot holder is now complete and ready to be used in the kitchen or given as a gift. Enjoy the process of creating simple yet practical knitted items using the versatile garter stitch pattern.
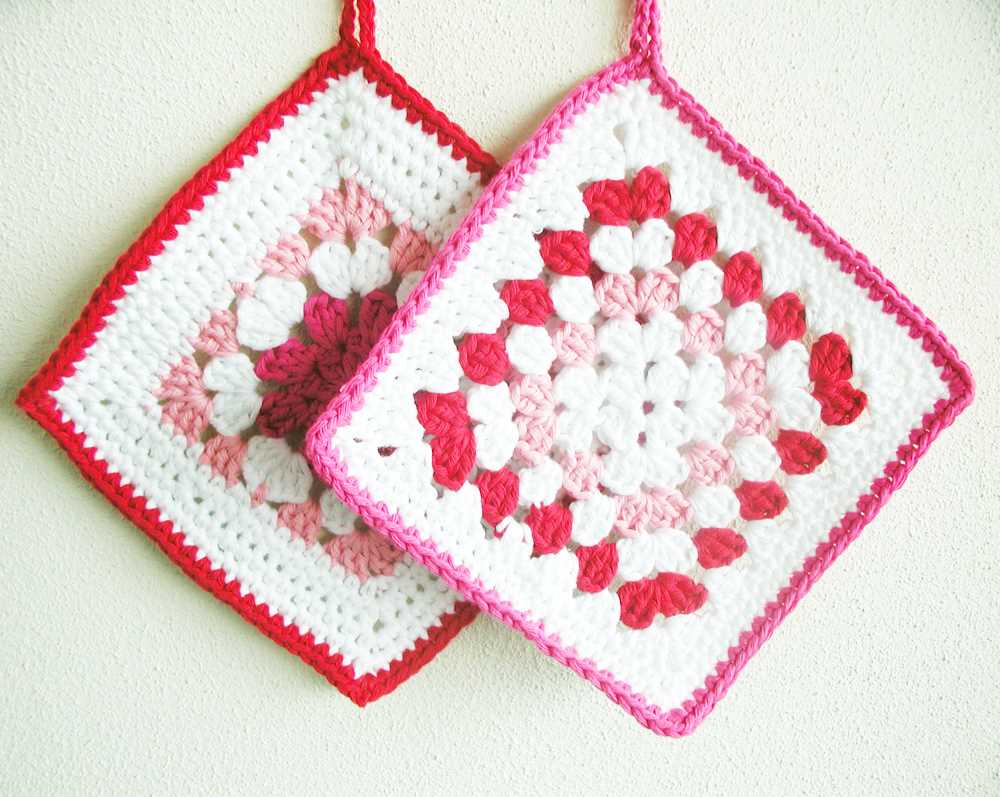
Incorporating color changes
Adding color changes to your pot holder knitting pattern can create interesting designs and patterns. There are several ways to introduce color changes, depending on the effect you want to achieve.
1. Stripes: One of the simplest color changes is to create stripes. Choose two or more colors and alternate them every few rows or rounds. This creates a modern and clean look.
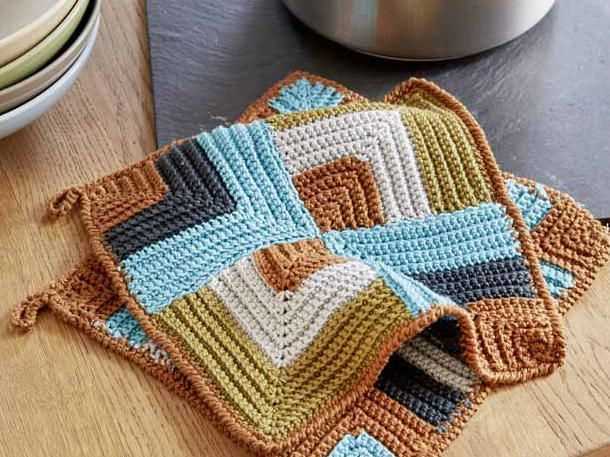
2. Fair Isle: Fair Isle is a traditional knitting technique that involves carrying multiple colors across the row or round. This creates intricate patterns and motifs. To achieve a Fair Isle effect, knit with one color at a time, but carry the other colors along the back of the work. Be careful not to pull the carried yarn too tightly, as it can distort the fabric.
3. Intarsia: Intarsia is another colorwork technique that involves knitting separate sections of different colors to create designs. Unlike Fair Isle, which carries the unused colors, in Intarsia, you use small bobbins or bobbins of yarn for each color section. This technique is best suited for larger areas of color changes or geometric designs.
When adding color changes, it’s essential to weave in the loose ends as you go to avoid a tangled mess at the end. You can either knit over the loose ends or weave them in afterward with a tapestry needle.
Experiment with different color combinations and techniques to create unique and personalized pot holders. Remember to practice and have fun with your color changes, and soon you’ll be creating beautiful and eye-catching designs!
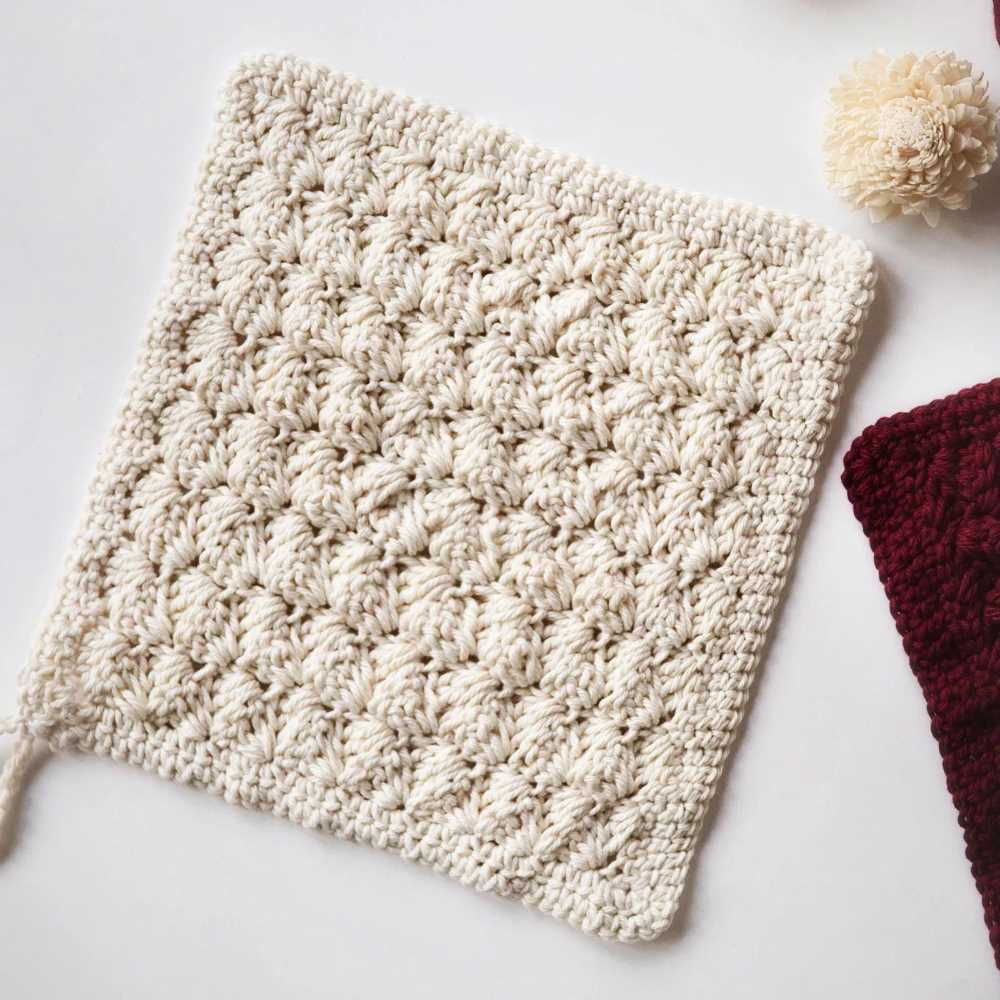
Adding texture with different stitches
When knitting pot holders, adding texture can not only make them more visually interesting, but also increase their functionality. Different stitches can create unique patterns and structures that enhance the grip and heat resistance of the pot holders.
One way to add texture is by using the seed stitch. The seed stitch is created by alternating between knit and purl stitches in a pattern. This stitch creates a bumpy texture that not only looks visually appealing, but also provides more surface area for gripping hot pots and pans.
Another stitch that can be used to add texture is the basketweave stitch. This stitch creates a woven-like pattern that resembles a basket. By knitting certain stitches and purling others, the basketweave stitch creates a thick and sturdy fabric that is perfect for pot holders. The alternating knit and purl stitches also create texture that helps with grip.
Incorporating cables into the pot holder pattern is another way to add texture. Cables are created by crossing stitches over each other, which creates a twisted pattern. The cables not only add visual interest to the pot holders, but also add thickness and structure to the fabric, making them more robust and heat resistant.
By incorporating different stitches like the seed stitch, basketweave stitch, and cables, pot holders can be transformed from simple functional items to stylish and textured accessories for the kitchen. These stitches not only add visual interest, but also enhance the functionality of the pot holders by increasing grip and heat resistance. Experimenting with different stitches can result in unique and personalized pot holders that are both practical and beautiful.
Shaping the pot holder
When knitting a pot holder, shaping is an important step to ensure that it fits well and functions properly. There are several techniques you can use to shape your pot holder, depending on the desired design and level of difficulty.
1. Decreasing stitches: This is the most common method used to shape a pot holder. To decrease stitches, you can knit two stitches together (k2tog) or slip one stitch knitwise, knit the next stitch, and pass the slipped stitch over (ssk). These techniques create a slanted decrease and are often used to shape the corners of the pot holder.
- 2. Increasing stitches: To create a pot holder with rounded edges, you will need to increase stitches. One common method is to make one stitch (M1). This is done by lifting the horizontal strand between two stitches onto the left needle, then knitting into the back of it. Another method is the knit front and back (kfb) increase, where you knit into the front and back of the same stitch to create two stitches out of one.
- 3. Short rows: Short rows can be used to shape the pot holder in a more complex way. By knitting or purling to a certain point, then turning the work and knitting or purling back in the other direction, you can create a curved or diagonal shape. This technique is often used to create textured patterns on the pot holder.
When shaping the pot holder, it is important to follow the pattern instructions carefully and keep track of your stitches. It may be helpful to use stitch markers or make notes on the pattern to ensure accuracy. Remember to check your gauge and make any necessary adjustments to achieve the desired size and shape of your pot holder.
Understanding basic knitting abbreviations
When learning to knit, understanding the various abbreviations used in knitting patterns is essential. These abbreviations are shorthand ways of expressing knitting techniques and stitches, and they allow for more efficient and concise pattern instructions. Here are some commonly used knitting abbreviations that beginners should familiarize themselves with:
1. K
The letter “K” stands for the knit stitch. This is one of the most basic knitting stitches and involves inserting the knitting needle through the front of the stitch on the left needle, wrapping the yarn around the right needle, and pulling the new loop through to create a new stitch.
2. P
The letter “P” represents the purl stitch. This stitch is similar to the knit stitch but creates a different texture. To purl, the yarn is wrapped around the front of the right needle before pulling it through the stitch on the left needle.
3. RS and WS
RS stands for the right side of the knitting, while WS represents the wrong side. These abbreviations are often used to indicate which side of the work should be facing out or which side should be worked for specific stitch patterns or shaping.
4. BO
BO stands for bind off, which is the process of finishing the edge of a knitted piece by removing stitches from the needle and creating an edge that won’t unravel. To bind off, stitches are knitted or purled and then passed over the previous stitch to create a smooth edge.
5. YO
YO is short for yarn over, which is an increase technique used to create eyelets or decorative holes in the knitting. To yarn over, the yarn is carried from the back to the front of the work, creating an extra loop on the needle.
By familiarizing yourself with these basic knitting abbreviations, you’ll be better equipped to understand and follow knitting patterns as a beginner. Remember to refer to a knitting abbreviation guide or glossary if you come across any unfamiliar abbreviations while working on a project.
Finishing off the pot holder
Once you have completed knitting your pot holder, it’s time to finish it off and make it ready for use in your kitchen. The finishing process involves a few simple steps to ensure that the pot holder is secure and durable.
Weave in loose ends: Start by weaving in any loose ends of yarn that may be sticking out from your knitting. This will prevent them from unraveling and give your pot holder a neat and polished look. Use a tapestry needle to thread the loose ends through the stitches on the back side of the pot holder and trim any excess yarn.
Block your pot holder: Blocking is an important step in knitting that involves shaping and sizing your finished piece. To block your pot holder, lay it flat on a clean and smooth surface. Use T-pins to gently stretch and shape the pot holder into the desired size and shape. Spray it lightly with water and let it dry completely before removing the pins.
Attach a hanging loop: Adding a hanging loop to your pot holder is a practical and convenient way to store it in your kitchen. To make a hanging loop, simply crochet a chain stitch of desired length. Attach one end of the chain stitch to a corner of your pot holder using a tapestry needle and secure it tightly. This loop will allow you to hang your pot holder on a hook or peg when not in use.
Final touches: Before you start using your pot holder, give it a thorough inspection to make sure all the stitches are secure and there are no loose ends. If you notice any areas that need reinforcement, use a tapestry needle to sew them up. Now your pot holder is ready to protect your hands and countertops from hot pots and pans in style!
Tips for Washing and Caring for Your Knitted Pot Holder
Proper care is important to ensure the longevity and performance of your knitted pot holder. Here are some tips to help you keep your pot holder in great condition:
1. Hand Washing is Best: Hand washing is the gentlest method for cleaning knitted items. Fill a basin or sink with lukewarm water and a mild detergent, then gently swish the pot holder in the water to remove dirt and stains. Avoid scrubbing or twisting the fabric, as this can cause stretching or damage to the stitches.
2. Avoid Machine Washing and Drying: Machine washing and drying can put unnecessary stress on the pot holder and may cause it to lose its shape or become misshapen. It is best to avoid machine washing and drying your knitted pot holder to preserve its quality.
- If machine washing is necessary: If you must machine wash your pot holder, place it in a mesh laundry bag to protect it from excessive agitation. Use the delicate or hand wash cycle with cold water and a mild detergent. After washing, reshape the pot holder and lay it flat to dry.
- Avoid using bleach: Bleach can damage the fibers and colors of your pot holder, so it is best to avoid using it.
3. Dry Flat: After washing, gently squeeze out excess water from the pot holder without wringing or twisting it, then lay it flat on a towel or drying rack to dry. This helps to maintain its shape and prevent stretching.
4. Store Properly: When not in use, store your knitted pot holder in a clean, dry place to avoid any potential damage from moisture or pests. Consider using a drawer or hanging it up in your kitchen for easy access.
5. Avoid Excessive Heat and Direct Sunlight: Heat and sunlight can fade colors and weaken the fibers of your pot holder. Avoid placing it near direct sunlight or sources of heat, such as radiators or stoves.
6. Spot Clean Stains: If you notice a stain on your pot holder, try spot cleaning it instead of washing the entire item. Use a gentle detergent and a clean cloth to gently blot the stain, being careful not to rub it. Rinse with water and let it air dry.
By following these tips, you can keep your knitted pot holder clean and in great condition for many uses to come!
Q&A:
What is a pot holder?
A pot holder is a small textile pad used to handle hot pots and pans.
Why would I want to knit my own pot holder?
Knitting your own pot holder allows you to customize the design and choose your own yarn colors. It can also be a fun and relaxing knitting project.
What skills do I need to knit a pot holder as a beginner?
As a beginner, you should be familiar with basic knitting stitches such as knitting and purling. You should also know how to cast on and bind off stitches. Following a simple knitting pattern should be easy for beginners.
Can you recommend a pot holder knitting pattern for beginners?
Sure! One simple pot holder knitting pattern for beginners is to cast on 30 stitches and knit every row until the piece measures 8 inches. Then, bind off all stitches and weave in the ends.