
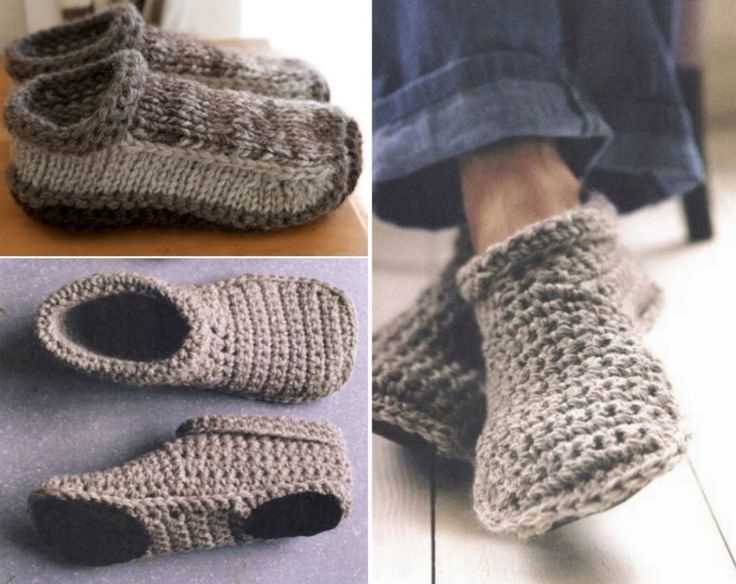
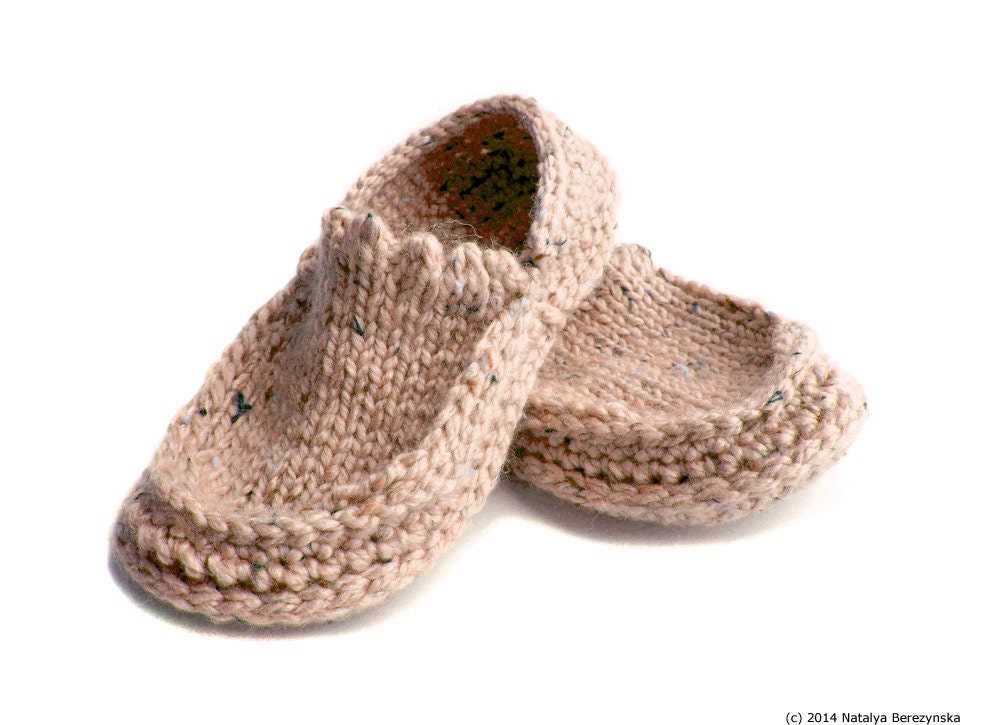
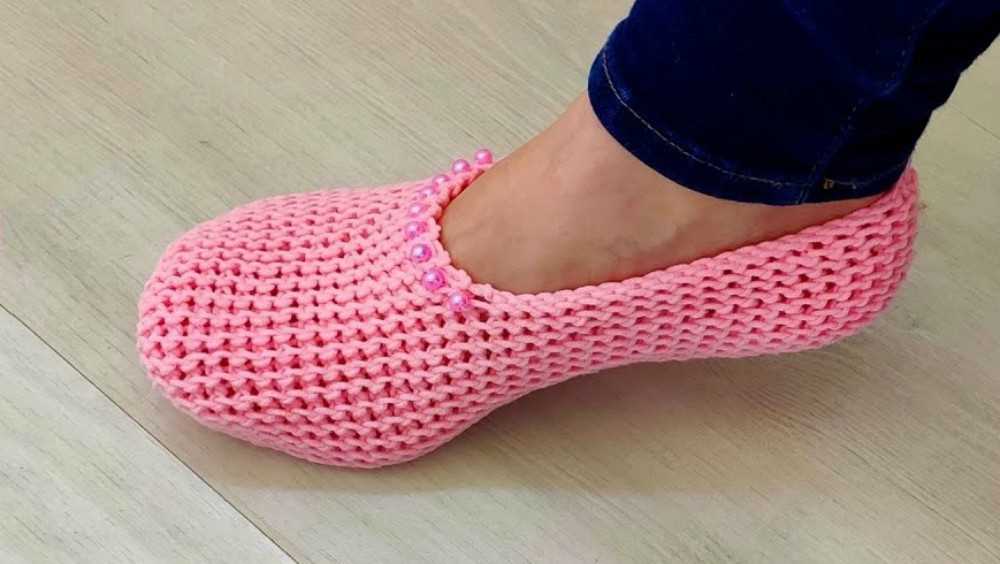
Knitting is a popular hobby for many people, and one of the most enjoyable things to make is a pair of knitted slippers. Not only are they cozy and warm, but they can also be customized to fit your personal style and taste.
Whether you’re a beginner or an experienced knitter, this pattern for knitted slippers is perfect for you. It’s a simple and straightforward design that can be easily adjusted to fit any foot size. Plus, it uses basic knitting stitches, making it a great project for knitters of all skill levels.
To get started, you’ll need some yarn and knitting needles. Choose a yarn that is soft and comfortable, such as wool or acrylic. As for the needles, size 6 or 7 is usually a good choice, but feel free to use whatever size you’re comfortable with.
The pattern itself is quite easy to follow. It starts off with a ribbed cuff, which ensures a snug fit around the ankle. Then, you’ll work on the foot of the slipper, which is made up of simple knit and purl stitches. Finally, you’ll shape the toe and finish off the slipper by sewing up the seams.
Choosing the right yarn and needles

When it comes to knitting slippers, choosing the right yarn and needles is crucial for a successful project. The yarn you choose will determine the overall comfort, warmth, and durability of your slippers, while the needles will affect the gauge and stitch definition. Here are some key points to consider when selecting the yarn and needles for your knitted slippers.
Yarn:
- Fiber content: Opt for yarns made from natural fibers like wool or cotton, as they offer excellent insulation and breathability. Superwash yarns are also a good choice, as they are machine washable.
- Weight: Choose a yarn weight that suits the intended use of your slippers. Bulky or chunky yarns are ideal for cozy, winter slippers, while fingering or sport weight yarns are better suited for lightweight, summer slippers.
- Texture: Consider the desired texture of your slippers. Smooth yarns will give a clean, polished look, while fuzzy or textured yarns can add interest and extra warmth.
- Color: The color of the yarn is purely a matter of personal preference. Opt for a color that makes you happy and matches your style.
Needles:

- Size: The needle size you choose will depend on the yarn weight and your desired gauge. Refer to the pattern instructions for the recommended needle size or adjust as needed to achieve the desired tension.
- Type: Straight or circular needles can be used for knitting slippers, depending on your preference. Circular needles are especially convenient for projects with a large number of stitches.
- Material: Choose needles made from a material that feels comfortable in your hands and suits your knitting style. Popular options include bamboo, wood, metal, and plastic.
- Length: The length of the needles should be suitable for the size of your slippers. For small to medium-sized projects, needles ranging from 9 to 14 inches in length are typically sufficient.
Taking measurements for a perfect fit
Before you start knitting your slippers, it’s important to take accurate measurements of the recipient’s foot to ensure a perfect fit. Every foot is different, so taking measurements is key to creating slippers that are comfortable and snug.
Here are the measurements you will need to take:
- Foot length: Measure the length of the foot from the heel to the longest toe. Make sure to measure both feet and use the larger measurement.
- Foot circumference: Measure the circumference of the widest part of the foot, typically around the ball of the foot.
- Instep circumference: Measure the circumference around the instep, which is the arch of the foot.
- Ankle circumference: Measure the circumference around the ankle at its widest part.
Once you have taken these measurements, you can use them to choose the appropriate size from the knitting pattern. It’s important to note that different patterns may have different sizing charts, so be sure to read the instructions carefully and select the size that corresponds to the measurements you have taken.
By taking accurate measurements and selecting the appropriate size, you can create slippers that fit like a glove and provide maximum comfort for the wearer. So take your time to measure carefully before starting your knitting project, and you’ll be on your way to making the perfect pair of slippers.
Casting on stitches
Before you can start knitting your slippers, you need to cast on the required number of stitches. Casting on is the process of adding stitches to your knitting needle and it is the first step in any knitting project. There are several different methods for casting on, but for this pattern, we will use the long tail cast on method.
To begin, you will need a pair of knitting needles and your yarn. Start by creating a slip knot, which will be the first stitch on your needle. To create a slip knot, make a loop with the yarn, then bring the end of the yarn through the loop and pull tight.
Long Tail Cast On:
- Hold the slip knot on your left-hand needle, with the working yarn coming from the back of the needle.
- With your right-hand needle, insert it into the slip knot from left to right, going under the yarn that is coming from the back.
- Wrap the yarn around your right-hand needle from left to right, going over the needle and catching the yarn with the tip of the needle.
- Bring the right-hand needle back out through the slip knot, taking the loop of yarn with it.
- Drop the loop off the left-hand needle, pulling it tight to create a new stitch on the right-hand needle.
- Repeat steps 2-5 until you have cast on the required number of stitches for your pattern.
Once you have cast on all the stitches, you are ready to begin knitting your slippers. Casting on is an essential skill in knitting, and once you have mastered the long tail cast on method, you will be able to start many different knitting projects with confidence.
Knitting the toe section
Knitting the toe section is an important step in creating a pair of knitted slippers. The toe section is where the slipper will form the rounded shape, providing comfort and space for your toes.
To start knitting the toe section, you will need to have the required number of stitches on your needles. It is important to follow the pattern instructions for the specific size you are making, as the number of stitches may vary.
Once you have the required number of stitches, you will begin shaping the toe. This is usually done by decreasing stitches gradually to create a rounded shape. The pattern will provide instructions on the specific decrease stitches you need to use and the number of rows to knit.
A common decrease stitch used in toe shaping is the knit two together (k2tog) stitch. This stitch involves knitting two stitches together as if they were one, effectively decreasing the stitch count by one.
As you knit the toe section, it is important to keep an eye on your stitches and follow the pattern instructions carefully. This will ensure that your slipper turns out the correct size and shape.
Creating the foot section
Once you have completed the cuff section of your knitted slippers, it’s time to move on to creating the foot section. This is where the slippers will start to take shape and fit snugly around your foot.
To begin, you will need to determine the desired length of your slippers. Measure the length of your foot from the back of the heel to the tip of your longest toe. This measurement will help you determine how many rows to knit for the foot section.
Using your preferred knitting stitch, begin knitting the foot section by following the pattern’s instructions. Be sure to maintain an even tension and check your gauge as you go along. This will ensure that your slippers will fit comfortably on your feet.
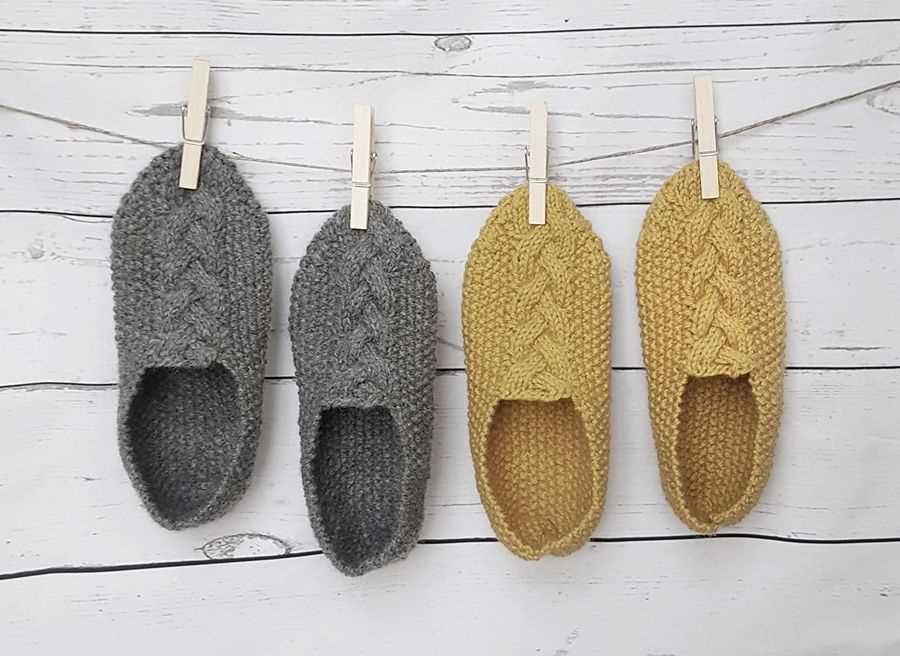
You may also choose to incorporate any design elements, such as cables or colorwork, into the foot section of your slippers. This is a great way to personalize your slippers and add some extra flair.
As you knit, periodically try on the slipper to check the fit. This will allow you to make any necessary adjustments to the length or width of the foot section. Remember, it’s important to have a snug fit, but not too tight that it becomes uncomfortable to wear.
Once you have completed the desired length for the foot section, it’s time to move on to shaping the toe section of your slippers. This will give your slippers a rounded shape and ensure a comfortable fit for your toes. Follow the pattern’s instructions for shaping the toe, making sure to decrease the stitches gradually for a smooth transition.
Adding a ribbed cuff
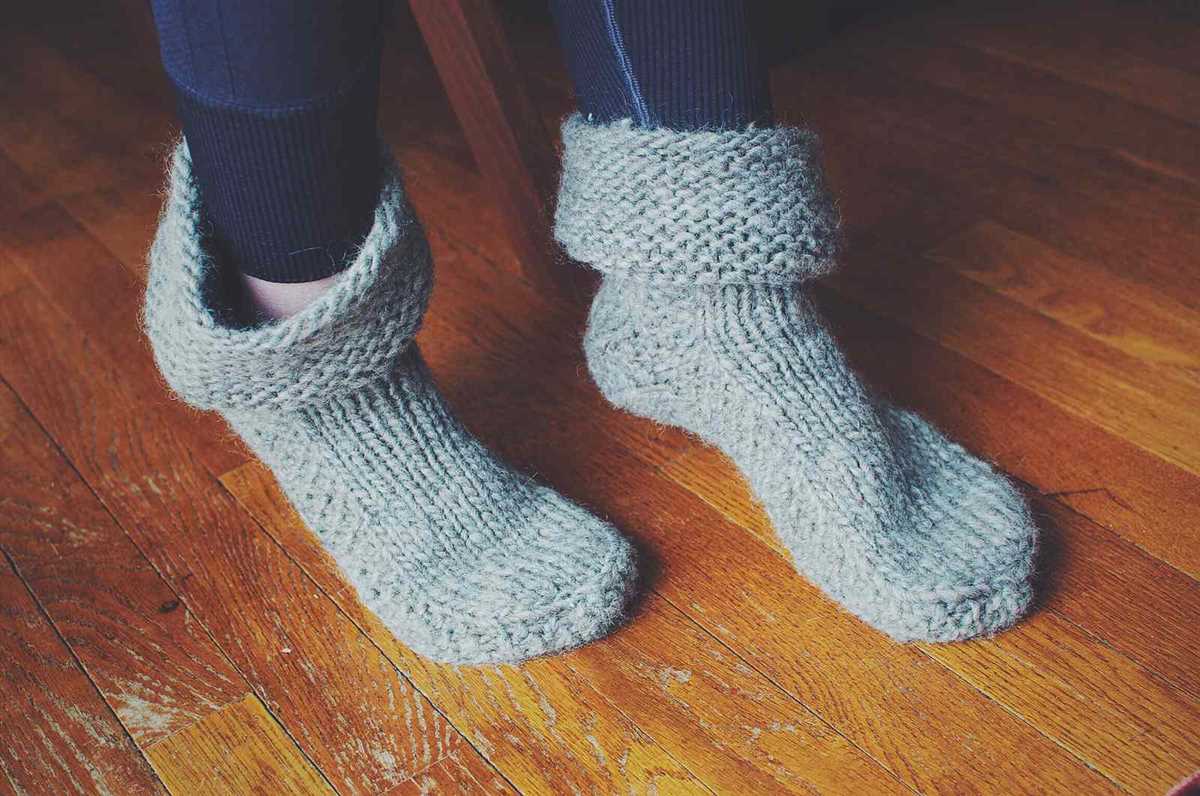
One popular way to add style and comfort to knitted slippers is by adding a ribbed cuff. This simple yet effective technique can elevate the overall look of your slippers and provide a secure fit around the ankles.
To create a ribbed cuff, you will need to switch to a smaller needle size to achieve a tighter gauge. This will ensure that the cuff has enough elasticity to comfortably hug the ankle. Begin by knitting a few rows in a rib stitch pattern, alternating between knit and purl stitches. The most common rib stitch patterns are 1×1 rib (knit 1, purl 1) or 2×2 rib (knit 2, purl 2). You can choose the style that you prefer.
Continue knitting the rib stitch pattern for the desired length of the cuff. It’s a good idea to measure your ankle circumference to ensure the cuff is the right size. You can also modify the length of the cuff based on personal preference – longer cuffs can provide extra warmth and support, while shorter cuffs can be more casual and easier to slip on and off.
Here are some key points to remember when adding a ribbed cuff:
- Switch to a smaller needle size to achieve a tighter gauge
- Choose a rib stitch pattern, such as 1×1 or 2×2 rib
- Knit the rib stitch pattern for the desired length of the cuff
- Measure your ankle circumference to ensure the cuff fits correctly
- Consider the length of the cuff for added style and functionality
By adding a ribbed cuff to your knitted slippers, you can create a polished finish and enhance the overall fit and comfort. Experiment with different rib stitch patterns and cuff lengths to find the style that suits you best. Whether you prefer a classic 1×1 rib or a stretchy 2×2 rib, the ribbed cuff is sure to add a touch of sophistication to your knitted slippers.
Shaping the heel
The heel of the knitted slippers is an important part that provides comfort and support to your feet. To shape the heel, you will need to follow a specific pattern and make several decreases and increases to create a snug fit.
Start by knitting the required number of stitches for the heel flap. This is usually a smaller number of stitches compared to the total number for the sole. Once you have completed the desired length for the heel flap, it’s time to shape the heel.
To shape the heel, you will work with a combination of decreases and short rows. Short rows involve knitting or purling across a certain number of stitches and then turning the work without working all the way to the end of the row. This creates extra fabric that will be used to mold the shape of the heel.
Follow the pattern instructions carefully to make the necessary decreases and wrap and turn stitches for the short rows. These techniques will help create a smooth and seamless shaping for the heel. It’s important to pay attention to the stitch count and the specific instructions for each row to ensure the correct shape is achieved.
Once the shaping is complete, you can continue knitting the rest of the foot and proceed with the remaining steps of the slipper pattern. The shaped heel will provide a comfortable fit and prevent the slippers from slipping off your feet.
Knitting the back of the slipper
One of the important parts of knitting slippers is the back, as it provides support and ensures a snug fit. To knit the back of the slipper, you will need to follow the pattern instructions and use the recommended yarn and needle size.
Begin by casting on the required number of stitches for the back of the slipper. This number may vary depending on the size and pattern you are following. Make sure to leave a long enough tail for weaving in later.
Now, you can start working on the back of the slipper using the specified stitch pattern. This could be ribbing, stockinette stitch, or any other pattern mentioned in the instructions. Follow the pattern stitch by stitch, row by row, to create the desired texture and shape.
As you continue knitting the back of the slipper, pay attention to any shaping instructions provided in the pattern. These may include increasing or decreasing stitches to shape the heel and ankle area. Make sure to mark these areas and follow the instructions carefully.
If the pattern requires, you may need to incorporate any additional elements such as gussets or eyelets for the slipper straps. These details will add function and style to the back of the slipper.
Finally, when you have completed the required number of rows or stitches for the back of the slipper, bind off your work. Cut the yarn, leaving a long tail for weaving in later. Remember to block or steam the finished piece, if necessary, to ensure it retains its shape.
Joining the Seams

Once you have completed knitting the pieces for your slippers, it’s time to join the seams to assemble the slippers. This is an important step to ensure that the slippers fit well and look neat.
The most common method for joining seams in knitting is called mattress stitch. To use this technique, lay the two pieces you want to join side by side with the right sides facing up. Thread a tapestry needle with a length of yarn that matches the color of your knitted pieces. Starting from the bottom edge of the work, insert the needle under the first horizontal bar of the edge stitch on one piece. Then, insert the needle under the corresponding horizontal bar on the other piece. Continue this way, alternating between the pieces, until the seam is complete.
Note: Make sure to align the stitches properly as you stitch. This will ensure that the seam is invisible from the right side of the work. Pull the yarn gently, but not too tightly, as you stitch to avoid distorting the fabric. Remember to work the same number of stitches on both sides of the seam to maintain the symmetry of the slipper.
If you prefer a bulkier look for your seams, you can use the whip stitch method. This method provides a visible seam and can add a decorative touch to your slippers. To use this technique, place the pieces to be joined side by side with the right sides facing up. Thread a tapestry needle with a length of yarn and insert it from the back of the work, going through both layers of the fabric. Bring the needle back up and over the edge of the top piece, then insert it back down through both layers again. Repeat this process, working from one side of the seam to the other, until the seam is complete.
Once you have finished joining the seams, weave in any loose ends and trim off any excess yarn. This will give your slippers a polished and finished look. Now your knitted slippers are ready to be enjoyed!
Adding non-slip soles
When it comes to knitted slippers, one important aspect to consider is adding non-slip soles. This is especially crucial if the slippers are intended for indoor use, as smooth or slippery surfaces can pose a safety hazard. Fortunately, adding non-slip soles to knitted slippers is a relatively simple process that can greatly improve their functionality.
There are several options to choose from when it comes to adding non-slip soles to knitted slippers. One popular method is to attach non-slip silicone pads to the bottom of the slippers. These pads have a sticky side that adheres to the knitted fabric and a textured side that provides traction. They are easy to apply and can be cut to size to fit the specific dimensions of the slippers.
Another option is to incorporate non-slip yarn into the sole of the slippers. Non-slip yarn is typically made with a combination of materials, such as acrylic and rubber, that help create friction when in contact with smooth surfaces. This type of yarn can be used for the entire sole or just on certain areas that come into direct contact with the ground.
A third option is to create a non-slip sole by felting the slippers. Felting involves shrinking the knitted fabric by subjecting it to heat, moisture, and agitation. This process tightens the fibers and creates a dense, sturdy fabric that is less prone to slipping. By felting the bottom of the slippers, you can create a natural non-slip surface without the need for additional materials.
- Attach non-slip silicone pads
- Incorporate non-slip yarn
- Create a non-slip sole by felting the slippers
In conclusion, adding non-slip soles to knitted slippers is an important step to ensure their functionality and safety. Whether you choose to use non-slip silicone pads, non-slip yarn, or felting techniques, these options can greatly improve the grip and traction of the slippers on smooth surfaces. Consider the specific needs and preferences of the wearer, and choose the method that best suits your project.
Embellishing your slippers
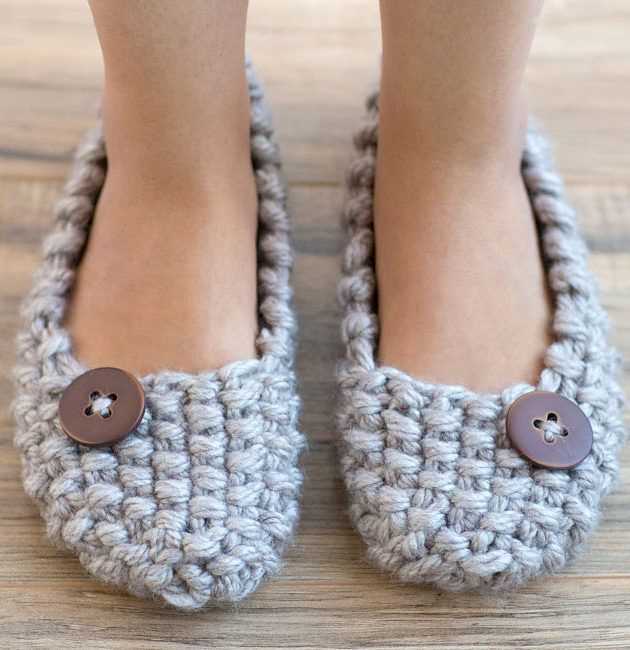
Once you have completed knitting your slippers using the pattern, you can take them to the next level by adding some embellishments. Embellishments can add a personal touch to your slippers and make them even more unique and special.
One popular way to embellish knitted slippers is to add decorative buttons. You can sew buttons of different shapes, sizes, and colors onto the front or sides of your slippers. This can create an eye-catching and playful look. If you want to go for a more elegant and sophisticated style, you can choose buttons with a metallic or pearl finish.
Another way to embellish your slippers is to attach appliques or patches. You can find a variety of appliques in craft stores or make your own using fabric scraps. Sewing on appliques can add an element of fun, such as flowers, animals, or geometric shapes, to your slippers. You can even try embroidery to create intricate patterns and designs on your slippers.
For those who love sparkles, adding rhinestones or sequins can be a fantastic option. Use fabric glue to carefully attach rhinestones or small sequins, either in a pattern or randomly, to your slippers. Be careful not to overload the slippers with heavy embellishments, as this may affect their shape and comfort.
- Consider using pompoms as embellishments. You can either purchase ready-made pompoms or make your own using yarn. Attach the pompoms to the edges, corners, or the top of your slippers for a fun and playful touch.
- You can also experiment with different yarns to create interesting textures and patterns. Try using variegated or self-striping yarns to add color and visual interest to your slippers.
- If you are feeling adventurous, you can even incorporate different knitting techniques into your slippers. Try adding cables, lace, or colorwork to create unique and eye-catching designs.
Remember, the options for embellishing your slippers are endless. Be creative and have fun with it. Choose embellishments that reflect your personal style and make your slippers truly one-of-a-kind.
Care instructions for your knitted slippers
Proper care and maintenance of your knitted slippers will ensure their longevity and keep them looking their best. Follow these care instructions to keep your slippers in pristine condition:
- Hand wash: It is recommended to hand wash your knitted slippers to prevent any damage or distortion. Use a gentle detergent and lukewarm water. Avoid using hot water as it can cause the slippers to shrink.
- Gently squeeze: After washing, gently squeeze out excess water from the slippers. Do not wring or twist them as it can misshape the slippers.
- Reshape: To maintain the shape of your slippers, stuff them with paper or a soft cloth while they are drying. This will help them retain their original form.
- Air dry: Allow your slippers to air dry naturally in a well-ventilated area. Avoid placing them in direct sunlight or near a heat source, as it can cause the slippers to fade or damage the yarn.
- Spot clean: If there are any minor stains or dirt on your slippers, spot clean them with a damp cloth and mild soap. Avoid using harsh chemicals or bleach as it can damage the color or texture of the slippers.
- Store properly: When not in use, store your knitted slippers in a cool, dry place to prevent any moisture or humidity damage. You can also use a dust bag or a shoe box to protect them from dust and other contaminants.
By following these care instructions, you can enjoy your knitted slippers for a long time and keep them looking cozy and stylish.