
If you are a fan of the adorable characters from My Little Pony and enjoy knitting, then this knitting pattern is perfect for you! Knitting your own My Little Pony can be a fun and creative project that allows you to customize the colors and accessories to create a unique character. Whether you are knitting for yourself or as a gift for a friend, this pattern will guide you step by step to create a cute and cuddly My Little Pony.
This knitting pattern is suitable for knitters of all levels, from beginners to more experienced knitters. If you are new to knitting, this pattern provides detailed instructions and tips to help you get started. For more advanced knitters, you can easily modify the pattern to add your own personal touches and embellishments. With a variety of stitches and techniques, this pattern is a great way to improve your knitting skills.
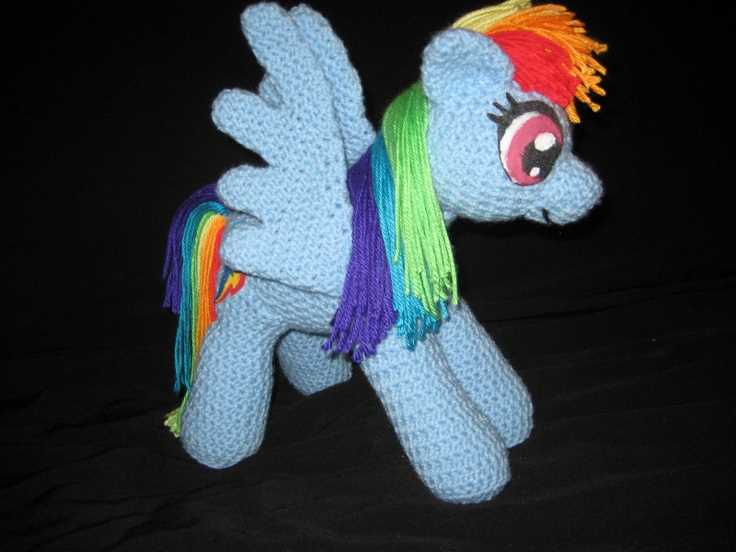
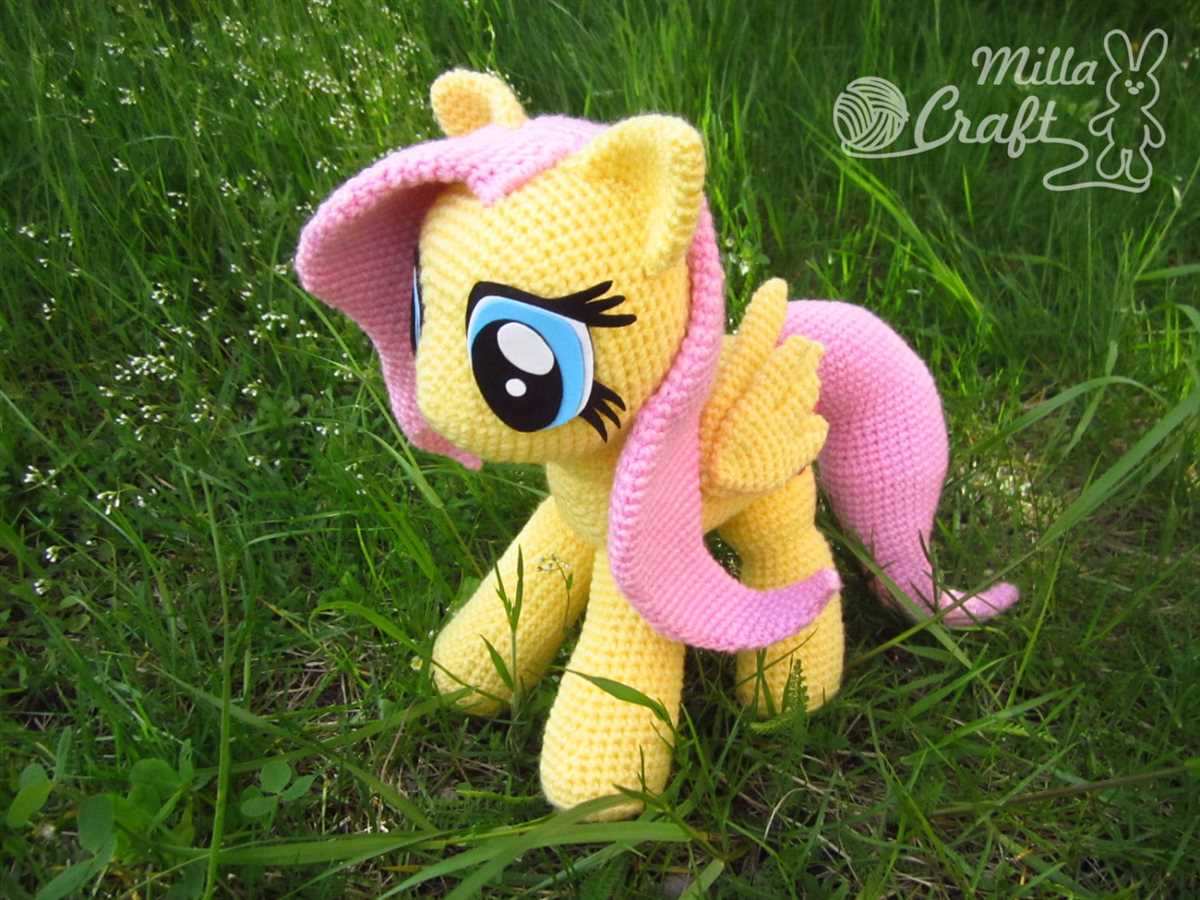
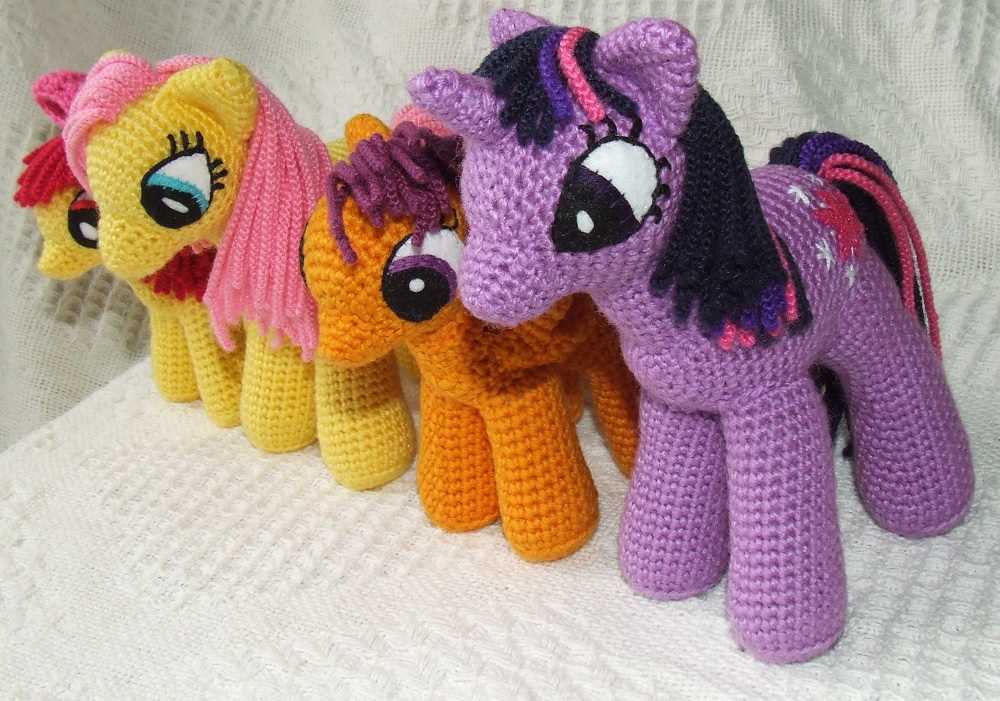
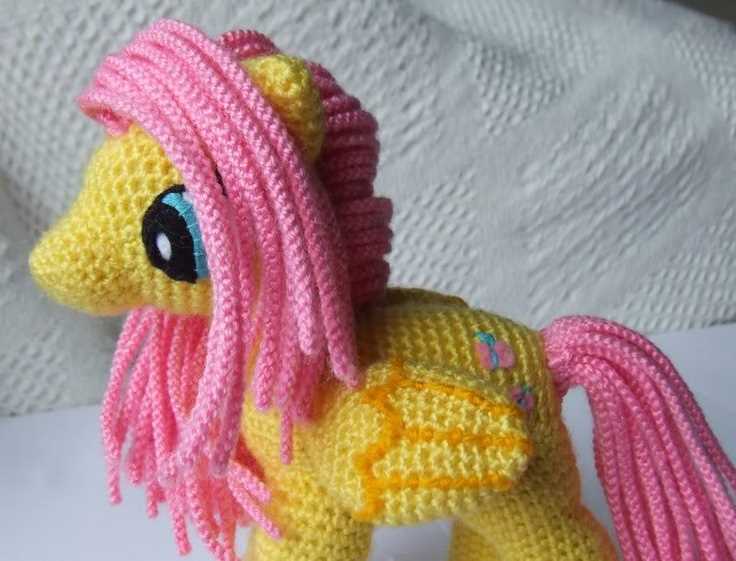
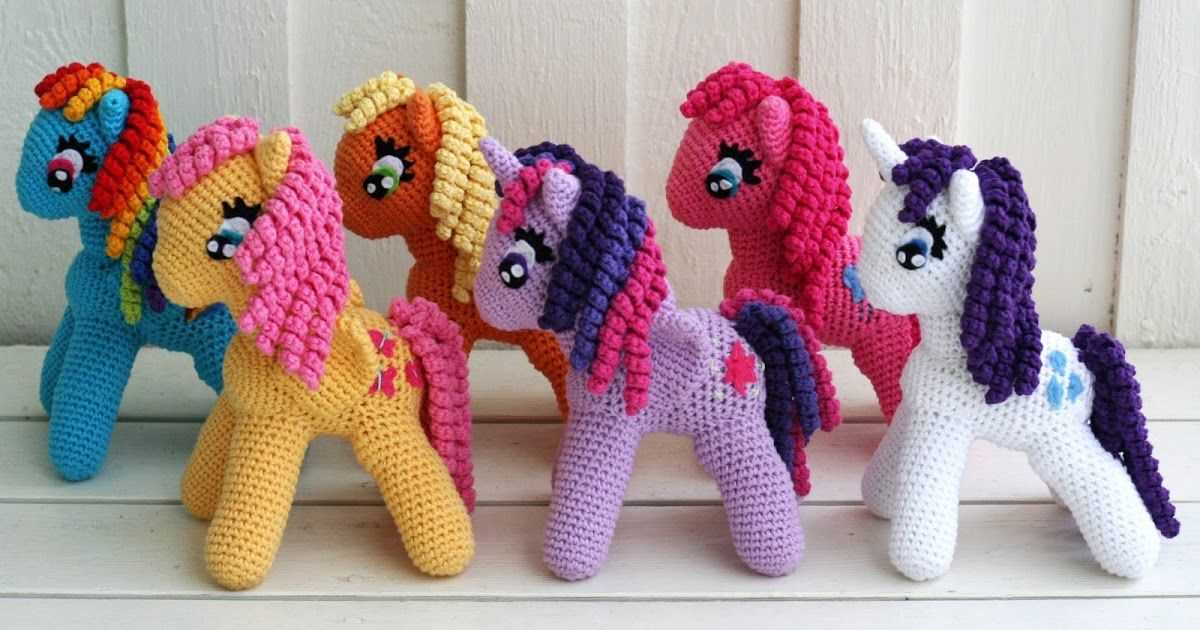
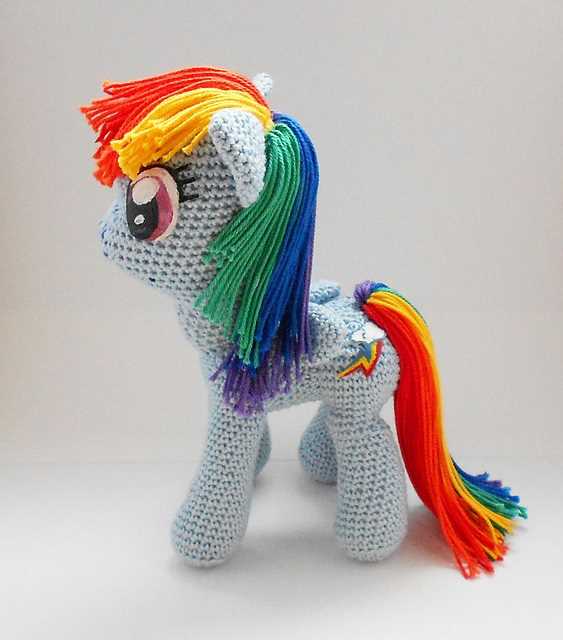
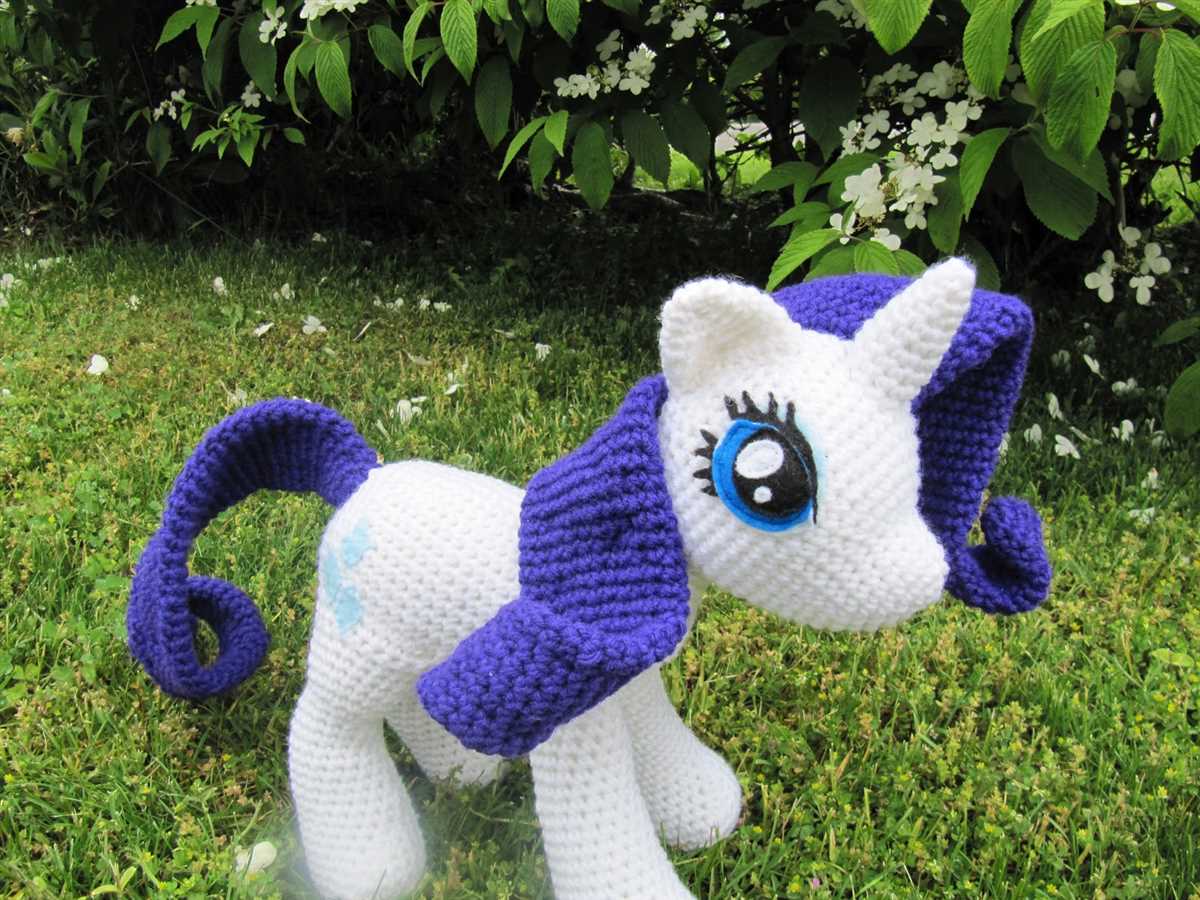
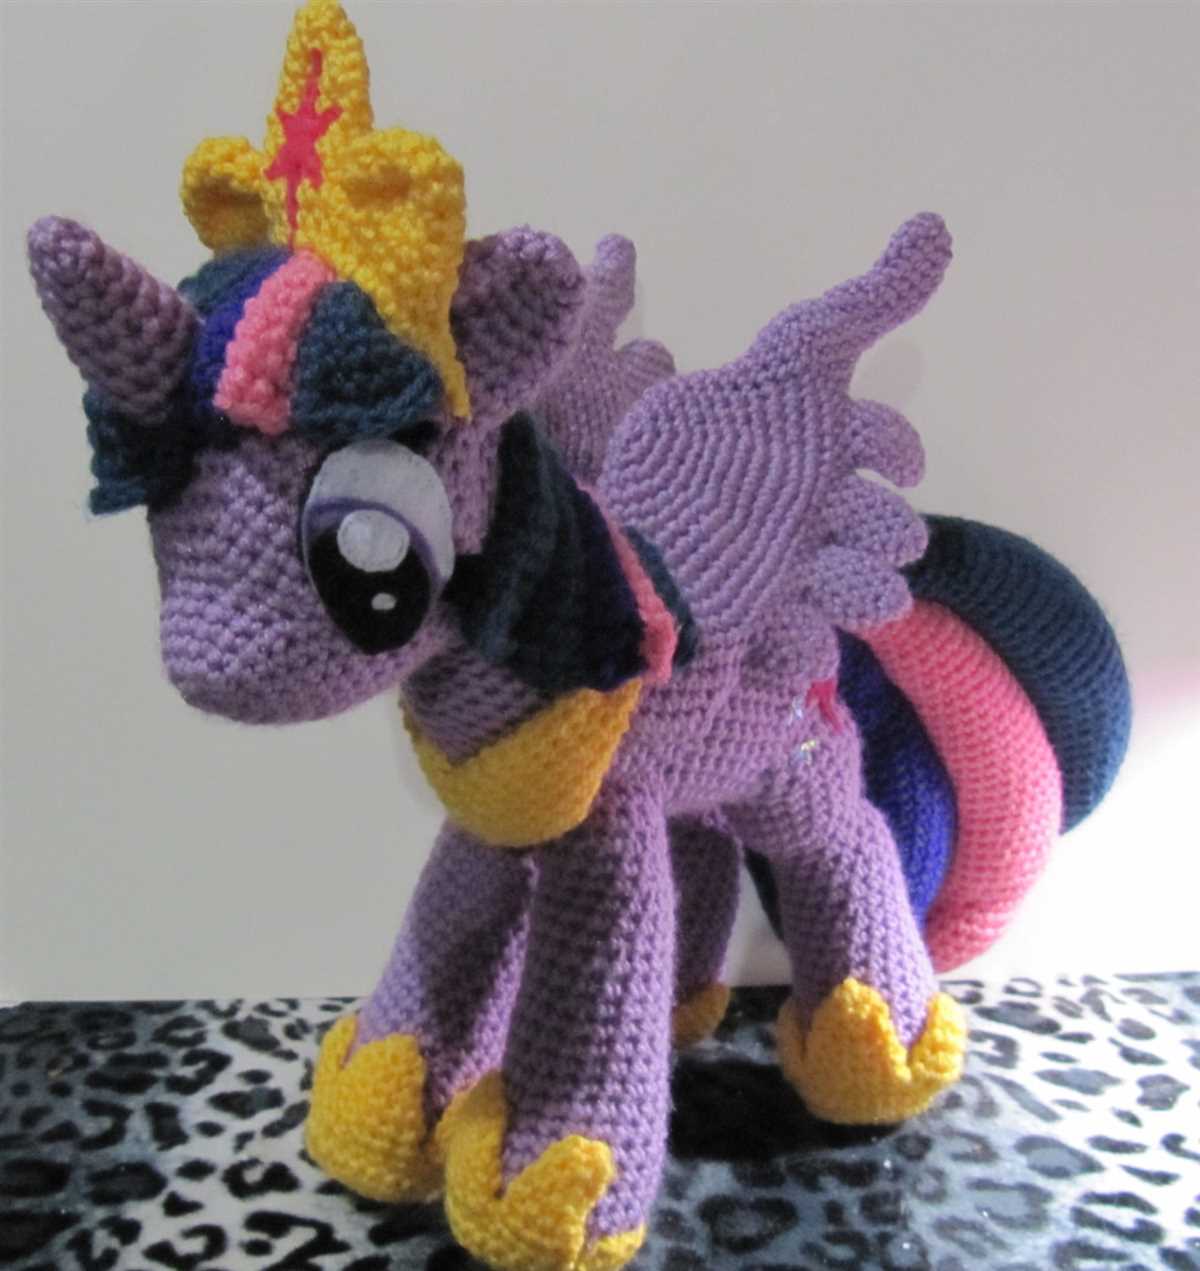
With this My Little Pony knitting pattern, you can create your favorite pony characters, such as Twilight Sparkle, Rainbow Dash, Pinkie Pie, and more. The pattern includes instructions for the body, mane, tail, and accessories, so you can bring these beloved characters to life. Knitting your own My Little Pony not only allows you to showcase your love for the show, but also gives you a one-of-a-kind toy that you can cherish for years to come.
My Little Pony Knitting Pattern

Knitting is a beloved craft that allows people to create beautiful and unique items with their own hands. One popular pattern that many knitting enthusiasts enjoy is the My Little Pony knitting pattern. This pattern allows you to create adorable little ponies, inspired by the beloved animated series.
The My Little Pony knitting pattern typically includes instructions for creating the body, head, mane, and tail of the pony. The body and head are usually knitted in one piece, with the mane and tail knitted separately and then attached. The pattern may also provide instructions for adding details such as the pony’s eyes and cutie mark.
To create a My Little Pony using the knitting pattern, you will need a few materials. These typically include knitting needles of an appropriate size for your chosen yarn, yarn in various colors to match the pony’s design, stuffing to fill the body and head, and a darning needle to sew the pieces together.
Many knitting enthusiasts enjoy creating My Little Pony toys using this pattern as they make wonderful gifts for children and fans of the show. The finished toys can be customized with different colors and accessories to match the recipient’s favorite pony characters from the series. Whether you’re a seasoned knitter or just starting out, the My Little Pony knitting pattern provides a fun and rewarding project that allows you to create something truly special.
Create Your Own My Little Pony
If you’re a fan of My Little Pony and enjoy knitting, why not combine your two passions and create your very own My Little Pony designs? With the help of a knitting pattern, you can bring these colorful and magical ponies to life with your own two hands.
One of the first steps in creating your own My Little Pony is to find a knitting pattern that suits your skill level and personal preferences. There are many websites and online communities dedicated to sharing My Little Pony knitting patterns, so you’ll have plenty of options to choose from. Whether you’re a beginner or an experienced knitter, there’s a pattern out there for you.
Choosing the Right Yarn and Needles
Once you’ve selected a pattern, it’s time to gather your materials. The type of yarn and needles you choose can greatly affect the final outcome of your pony, so it’s important to make informed decisions. Some patterns may recommend specific yarn weights or fiber types, so be sure to read the instructions carefully. Additionally, make sure you have the correct size knitting needles to achieve the desired gauge.
Following the Pattern and Adding Personal Touches
With your materials gathered, it’s time to start knitting! Follow the pattern instructions step by step, ensuring you understand each section before moving on. Pay special attention to any shaping or color changes, as these details will bring your pony to life. If you want to add some personal touches, feel free to modify the pattern to suit your preferences. Maybe you want to add a unique hairstyle or experiment with different colors – the choice is yours!
Finishing Touches and Displaying Your Creation
Once you’ve finished knitting your My Little Pony, take some time to give it a final touch. This may include sewing on details such as the eyes, mane, and tail, or adding any desired accessories. Once your pony is complete, you can proudly display it on a shelf or give it as a gift to a fellow pony enthusiast. Your handmade creation will surely bring joy and delight to any My Little Pony fan.
Creating your own My Little Pony through knitting can be a rewarding and fun experience. Not only will you end up with a beautiful and unique pony, but you’ll also have the satisfaction of knowing you made it with your own skills and creativity. So grab your knitting needles, choose a pattern, and start bringing these beloved characters to life!
Choose the Perfect Yarn
When it comes to knitting My Little Pony patterns, choosing the perfect yarn is essential to create a beautiful and comfortable toy. The right yarn will ensure that your project turns out just the way you want it and that your little pony will be soft and cuddly. Here are some factors to consider when selecting the yarn for your project:
1. Weight:
The weight of the yarn will determine the size and thickness of your finished toy. For My Little Pony patterns, a medium weight yarn, also known as worsted weight or aran weight, is commonly used. This type of yarn provides a good balance between being easy to work with and creating a plush and soft toy.
2. Fiber:
The fiber content of the yarn will affect the texture and durability of your toy. Natural fibers, such as wool or cotton, are often preferred for their softness and breathability. Acrylic yarns are also a popular choice as they are affordable and easy to care for. Consider the specific qualities you want for your little pony, such as hypoallergenic or machine washable, when choosing the fiber.
3. Color:
The color of the yarn is an important aspect to consider when knitting a My Little Pony. The vibrant and colorful nature of these toys is a big part of their appeal. Look for yarns that come in a wide variety of shades to help bring your little pony to life. Consider using multiple colors or variegated yarns to create interesting patterns and textures on your toy.
Overall, take your time to explore different yarn options and find the perfect one for your My Little Pony knitting project. By considering the weight, fiber, and color of the yarn, you can ensure that your finished toy is not only beautiful but also soft and huggable for endless hours of imaginative play.
Gather the Necessary Knitting Tools
Knitting needles: The first thing you will need for your My Little Pony knitting project is a set of knitting needles. These come in various sizes, so make sure to choose the appropriate size for your desired finished product. If you are unsure, it is best to consult the knitting pattern or ask an experienced knitter for guidance.
Yarn: Next, you will need to choose the right yarn for your project. My Little Pony dolls come in different colors, so select yarn in the colors that match your desired pony. It is important to choose a yarn that is soft and durable, as it will need to withstand regular play and handling.
Tapestry needle: A tapestry needle is an essential tool for knitting projects. This needle is used for sewing and weaving in loose ends of yarn. Make sure to choose a needle with a large eye to easily thread your yarn through.
Stitch markers: Stitch markers are useful for marking specific stitches or sections in your knitting. They come in various forms, such as plastic rings or locking markers. Using stitch markers can help you keep track of your progress and prevent mistakes.
Scissors: A good pair of sharp scissors is a must-have tool for any knitting project. You will need to cut yarn at various points during your project, so make sure to have a pair of scissors that is easy to handle and cuts cleanly.
Measuring tape: Accurate measurements are crucial for achieving the correct size and fit of your knitted My Little Pony. A measuring tape will help you measure the length and width of your work, ensuring that it matches the pattern’s specifications.
Row counter: A row counter is a handy tool for keeping track of the number of rows you have knitted. This is especially useful for complex patterns that require multiple rows of different stitches. A row counter can help you avoid confusion and ensure that you stay on track.
Start with the Pony Body
When knitting a My Little Pony, it is important to start with the body. The body will form the foundation of the pony and will be the starting point for adding other elements such as the head, mane, and tail.
To begin, you will need to gather the necessary materials: knitting needles, yarn in the desired colors, and a yarn needle for finishing. It is also helpful to have a stitch marker to keep track of your progress.
Step 1: Cast On
To start the body, cast on the required number of stitches using the main color yarn. This will vary depending on the size of the pony and your chosen knitting pattern. It is important to follow the pattern instructions carefully to ensure the correct number of stitches.
Once the stitches are cast on, place a stitch marker on the right-hand needle to mark the beginning of the round. This will help you keep track of the direction of your knitting.
Step 2: Knit the Body
Row 1: Knit all stitches in the round, making sure to keep the tension even. This will create the first row of the body.
Rows 2-8: Continue knitting all stitches in the round for a total of 8 rows. This will create the main body section of the pony.
Step 3: Shape the Body
To create the shaping of the body, you will need to follow the pattern instructions for increases and decreases at specific intervals. This will give the body a more realistic shape and create curves in the right places. Make sure to carefully read and follow the pattern instructions to ensure accurate shaping.
Continue knitting according to the pattern instructions until the body section is complete. Once finished, you can move on to the next step of knitting the head or follow the pattern instructions to add additional features such as embroidery for the eyes or cutie mark.
Knit the Legs and Mane
One of the most beloved characters in the My Little Pony universe is Applejack, and now you can bring her to life with this adorable knitting pattern. In this section, we will focus on knitting the legs and mane of the Applejack pony.
Legs: To start, cast on the required number of stitches for each leg. You can use double-pointed needles or circular needles depending on your preference. Knit in the round until the leg measures the desired length, and then bind off your stitches. Make sure to stuff each leg firmly with polyester filling to give it a nice shape.
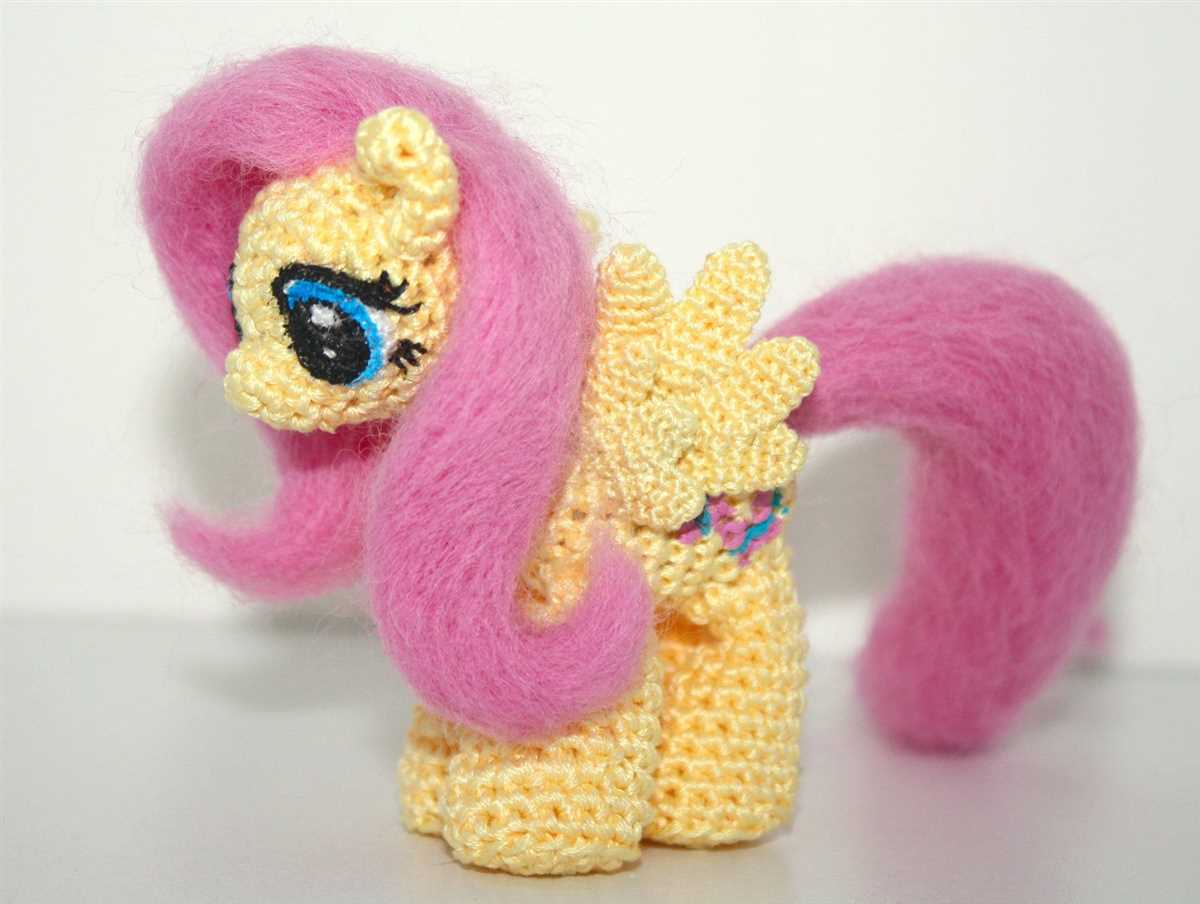
Mane: The iconic mane of Applejack is a defining feature of this character. To create the mane, you will need to knit several strands of yarn simultaneously to achieve a full and fluffy look. Cut strands of yarn in your desired colors and lengths. Using a darning needle, thread the strands through the top of the pony’s head and knot them securely. You can arrange the strands in a way that resembles the pony’s actual mane, layering them to create depth and texture.
Remember to leave some strands loose at the front of the pony’s head to mimic Applejack’s bangs. You can use a comb or your fingers to groom the mane and give it the desired shape. Play around with the yarn colors and lengths to add your own personal touch to the mane and make it unique to your Applejack pony.
Add the Facial Features
Adding the facial features is an important step in creating your My Little Pony knitting pattern. It brings character and personality to your finished piece. Start by stitching the eyes onto the head using your preferred method. You can use safety eyes, buttons, or embroider them with yarn. Position them evenly and secure them tightly so they won’t come off.
Next, it’s time to give your pony a smile. Using embroidery thread or yarn, stitch a curved line to create a smile. You can choose to make a small, subtle smile or a wide, cheerful smile depending on the expression you want to achieve. Remember to secure the ends of the thread or yarn tightly so the smile stays in place.
To complete the facial features, add the nostrils. Using a contrasting color of yarn or embroidery thread, make two small stitches or knots near the bottom of the muzzle to represent the pony’s nostrils. Position them evenly and securely attach them to ensure they don’t come loose.
Once you have added the eyes, smile, and nostrils, your My Little Pony knitting pattern will start to come to life. These simple yet essential facial features will give your pony its unique charm and make it instantly recognizable. Take your time and enjoy adding the finishing touches.
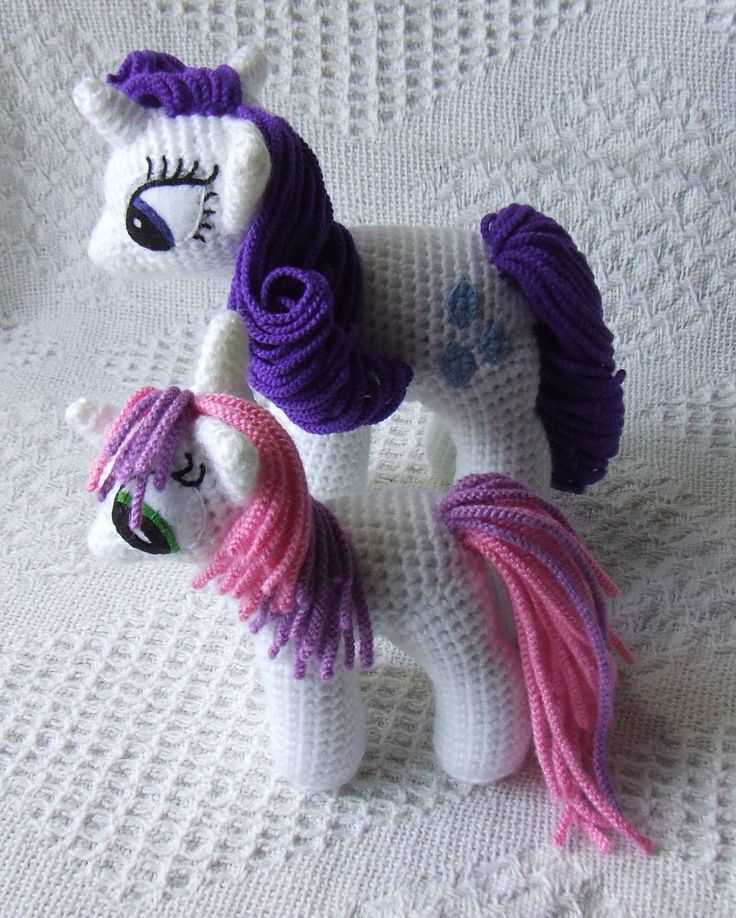
Embroider the Eyes and Cutie Marks
Embroidering the eyes and cutie marks is an important step in creating your own unique My Little Pony. It adds personality and detail to your knitted creation, bringing it to life. Here are some tips and techniques to help you achieve the best results:
1. Choosing the Right Colors:
Start by selecting embroidery floss or yarn in the desired colors for the eyes and cutie marks. Look for shades that closely match the original pony’s design. Pay attention to the details and use a color chart or reference image for accuracy.
2. Creating the Eyes:
To embroider the eyes, thread a needle with black embroidery floss or yarn. Begin by making a small knot at the back of the knitted fabric, then bring the needle up through the fabric where the eye should be placed. Use small, straight stitches to create the shape of the eye, keeping the stitches close together for a solid look. Repeat the process for the other eye.
3. Adding the Cutie Marks:
The cutie mark is a unique symbol or design that represents the pony’s special talent or personality. Using the chosen colors, thread a needle and start by making a small knot at the back of the fabric. Carefully embroider the cutie mark onto the desired area of the pony, following the original design. Use small stitches and take your time to ensure precision and neatness.
- For geometric shapes, such as stars, use straight stitches to outline the shape and fill it in with smaller stitches.
- For more intricate designs, like butterflies or musical notes, use a combination of straight stitches and satin stitches to create the desired effect.
- Refer to online tutorials or embroidery books for specific techniques and stitches to achieve different effects.
Remember to take breaks and step back to assess your embroidery work from a distance. This will help you see any areas that may need adjustment or improvement. With practice and attention to detail, you will be able to embroider the eyes and cutie marks of your My Little Pony knitting project with confidence, bringing your creation to life!
Finish the Mane and Tail
Once you have completed knitting the body and head of your My Little Pony, it’s time to add the finishing touches to the mane and tail. These are iconic features of the beloved characters and will bring your toy to life.
For the mane, you can choose to either knit or crochet it. Knitting will give a more textured look, while crocheting will create a smoother appearance. You can use a contrasting color or stick with the main body color. Simply create a strip of knitted or crocheted fabric, long enough to span from the back of the head to the neck, and sew it securely in place.
When it comes to the tail, you have a few options. You can use a yarn that matches the mane, or mix it up with different colors. One popular method is to create a long braid by dividing the yarn into three strands and braiding them together. Another option is to create individual strands by cutting lengths of yarn, tying them together in the middle, and attaching them to the back end of the pony.
If you want to take your pony’s appearance to the next level, you can also add accessories to the mane and tail. This could include ribbons, bows, or small flowers. Get creative and personalize your pony with unique touches that reflect its personality.
Tips for finishing the mane and tail:
- Make sure the mane and tail are securely attached, so they don’t come loose during play.
- Consider using a darning needle to sew the mane and tail in place, ensuring they are firmly attached to the toy.
- Experiment with different yarn textures and colors to give your pony a unique look.
- If you’re not confident in your knitting or crocheting skills, you can also use fabric or felt to create the mane and tail.
Sew the Legs and Body Together
Once you have completed knitting the legs and body of your My Little Pony, it’s time to sew them together. This step is crucial to achieving the final look of your toy.
1. Place the legs on either side of the body
Start by positioning the legs where you want them to be on the body. Make sure they are aligned properly, with the joints matching up. You can secure them in place using pins or a temporary stitch to keep them from shifting while you sew.
2. Thread your needle and knot the end
Take a threaded needle and knot the end securely to prevent it from slipping through the stitches. Use a color of thread that matches the yarn you used for your project.
3. Begin sewing
Starting on one side, insert the needle through one loop on the leg and then through the corresponding loop on the body. Pull the thread tight, but not too tight, to ensure the pieces are securely attached but still flexible. Repeat this stitching pattern along the entire length of the leg and body, making sure to catch both loops of each stitch.
4. Repeat for the other leg
Once one leg is sewn to the body, repeat the process for the other leg on the opposite side. Pay attention to the positioning and alignment to ensure symmetry in your toy.
5. Secure the stitches and trim the excess thread
Once both legs are securely attached, tie off the thread with a knot and trim the excess thread. You can also use a fabric glue or a knotting technique to further secure the stitches and prevent them from unraveling.
By following these steps, you will be able to sew the legs and body of your My Little Pony together, creating a sturdy and beautiful toy. Take your time and make sure to pay attention to the positioning and alignment to achieve the desired result.
Add Final Touches with Ribbons and Accessories
Once you have finished knitting your adorable My Little Pony toy, it’s time to add the final touches to make it even more special. Ribbons and accessories can be a fun and creative way to personalize your creation and bring it to life.
Ribbons: Choose ribbons in various colors and patterns to match your chosen pony design. You can use ribbons to create a beautiful mane for your pony by attaching them along the head and neck. You can also tie a ribbon around the pony’s neck as a cute bow or create a ribbon tail by tying multiple ribbons together.
Accessories: Give your My Little Pony its own unique style with accessories. You can make tiny hats or berets using small amounts of yarn and a crochet hook. Add beads or sequins for some sparkle and create miniature scarves or collars using leftover yarn. You can even make tiny saddlebags and fill them with miniature items like a tiny brush or comb.
By adding ribbons and accessories, you can customize your My Little Pony toy to reflect your own personal style or the preferences of the person you are making it for. Whether you want to create a playful and colorful design or a more elegant and sophisticated look, the options are endless. Get creative and have fun exploring different ways to bring your My Little Pony to life with these final touches!
Share Your Finished My Little Pony!
Now that you have finished knitting your very own My Little Pony, we would love to see it! Share your beautiful creation with the knitting community and inspire others to start their own projects.
Here’s how you can share your finished My Little Pony:
- Social Media: Post a photo of your finished pony on Instagram, Facebook, or Twitter. Use the hashtag #MyLittlePonyKnitting or #PonyKnittingPattern so that others can find and appreciate your work.
- Online Communities: Join online knitting communities such as Ravelry or knitting forums and share your project there. You can create a new thread or add your pony to an existing discussion. Don’t forget to include pictures and details about your knitting experience.
- Blog or Website: If you have a blog or website dedicated to knitting or crafts, create a blog post or dedicated page to showcase your My Little Pony. Share your experiences, tips, and tricks you learned during the process.
- Email: If you prefer a more personal interaction, send an email to your friends, family, or knitting buddies. Attach a photo of your finished pony and share your knitting journey with them. They will surely appreciate your talent and creativity.
Remember, sharing your finished project not only provides satisfaction and pride but also encourages and inspires others to try their hand at knitting. Your work might even impress someone who never thought they could knit!
So don’t be shy and show off your My Little Pony masterpiece. We can’t wait to see what you have created!