
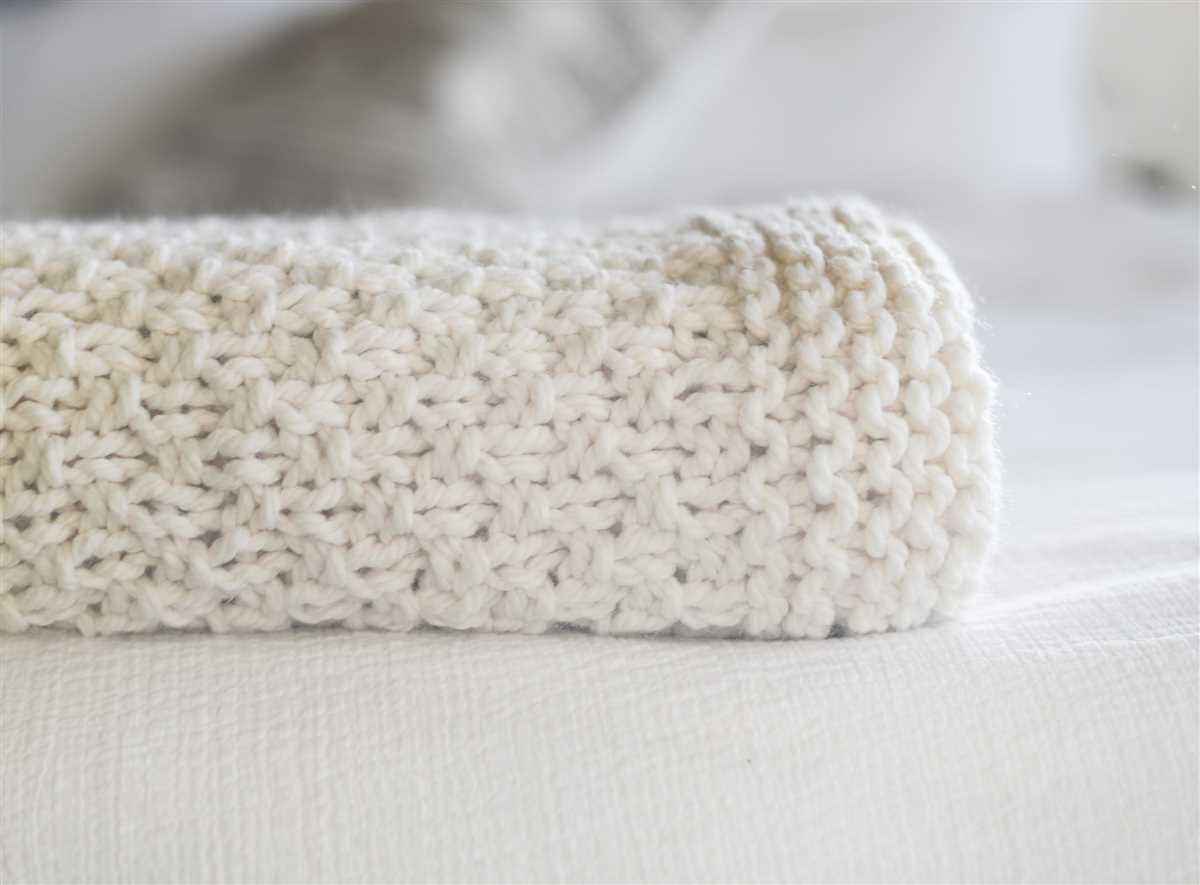
If you enjoy knitting and are looking for a new project, a moss stitch blanket is a great option. Moss stitch, also known as seed stitch, is a simple and versatile stitch pattern that creates a beautiful texture. The alternating knit and purl stitches create small seed-like bumps on the fabric, giving it a lovely and cozy look.
A moss stitch blanket can be made in any size, from a baby blanket to a large throw for your bed or couch. It can be knitted with any type of yarn and needle size, making it a great project for using up leftover yarn or trying out new materials.
In this article, we’ll provide you with a moss stitch blanket knitting pattern that you can easily follow. Whether you’re a beginner or an experienced knitter, this pattern will guide you through the steps to create your own beautiful and unique moss stitch blanket.
What is the moss stitch?
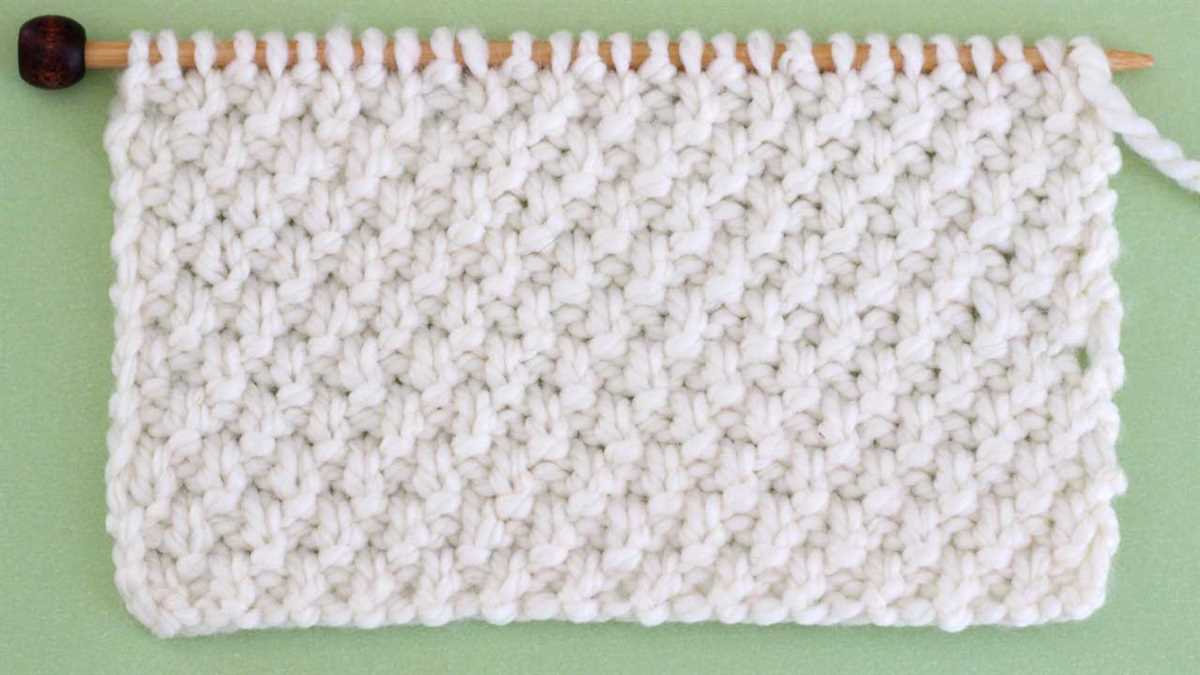
The moss stitch, also known as the seed stitch, is a simple and popular knitting pattern that creates a textured fabric with a bumpy, pebbly appearance. It is often used in a variety of projects, including blankets, scarves, and sweaters.
To make the moss stitch, you alternate between knitting and purling stitches in a specific pattern. The basic pattern for a moss stitch is to knit one stitch, then purl one stitch, and repeat this pattern across the row. In the next row, you knit the purl stitches and purl the knit stitches, creating a checkerboard effect.
The moss stitch is great for beginners because it only requires basic knitting skills and is easy to memorize. It is also a versatile stitch that can be adjusted to create different effects by changing the size of the needles or the type of yarn used.
- Benefits of the moss stitch:
- It creates a reversible fabric with a nice drape.
- It adds texture and interest to your knitting projects.
- It is a great stitch for showcasing variegated or textured yarns.
- It is suitable for both men’s and women’s garments and accessories.
Whether you are a beginner or an experienced knitter, the moss stitch is a versatile and timeless pattern that can add depth and texture to your projects.
Materials needed for the blanket
In order to knit the moss stitch blanket, you will need the following materials:
- Yarn: Choose a soft and cozy yarn in the color of your choice. Typically, a medium-weight yarn is recommended for this pattern. Make sure you have enough yarn to complete the desired size of the blanket.
- Knitting needles: You will need a pair of knitting needles suitable for the thickness of your chosen yarn. The size of the needles will depend on the tightness or looseness of your knitting style.
- Tapestry needle: A tapestry needle with a large eye will be used for weaving in the ends of the yarn and sewing up any seams if necessary.
- Scissors: A pair of sharp scissors will be needed for cutting the yarn.
- Measuring tape: Use a measuring tape to measure the size of your blanket as you go along and to ensure the desired dimensions are achieved.
These are the basic materials you will need to get started on your moss stitch blanket. It’s always a good idea to have extra yarn on hand in case you need to make any adjustments or repairs along the way. Gather these materials and you’ll be ready to start knitting your cozy and beautiful moss stitch blanket.
Choosing the right yarn
When knitting a moss stitch blanket, it is important to choose the right yarn that will not only provide warmth but also give the blanket a beautiful texture. The yarn you choose will greatly impact the overall look and feel of the finished product.
Weight: One of the first things to consider when choosing yarn for your moss stitch blanket is its weight. The pattern typically calls for a medium weight yarn (also known as worsted weight), as this will provide a balanced and sturdy fabric. However, you can also experiment with different weights to achieve different results. A lighter weight yarn will create a softer and more delicate blanket, while a heavier weight yarn will give the blanket a denser and warmer feel.
Fiber Content: Another important factor to consider is the fiber content of the yarn. The most commonly used yarn for blankets is acrylic, as it is affordable, easy to care for, and comes in a wide variety of colors. However, you can also opt for natural fibers such as wool or cotton for a more luxurious feel. Wool provides excellent warmth and breathability, while cotton is cool and hypoallergenic.
Texture: The texture of the yarn will also play a role in the final appearance of your moss stitch blanket. Smooth and tightly spun yarns will give the blanket a more polished and structured look, while yarns with a halo or fuzzy texture will add a cozy and rustic touch. Consider the overall aesthetic you want to achieve and choose a yarn with a corresponding texture.
Color: Lastly, but certainly not least, consider the color of the yarn. The color you choose will greatly impact the overall mood and style of the blanket. Neutral tones such as cream, gray, or beige will give the blanket a timeless and versatile look, while bold and vibrant colors can add a pop of personality to your knitting project. Consider the recipient’s preferences and the intended use of the blanket when selecting a color.
In conclusion, when choosing yarn for your moss stitch blanket, consider the weight, fiber content, texture, and color to ensure the finished product meets your expectations in terms of both appearance and functionality.
Recommended Needle Size
When knitting a moss stitch blanket, it is important to use the correct needle size in order to achieve the desired tension and gauge. The recommended needle size for this pattern is usually a US size 8 (5.0 mm) circular needle. However, it is always best to check the pattern instructions or gauge swatch to ensure the appropriate needle size is being used.
The reason that a US size 8 (5.0 mm) needle is often recommended for a moss stitch blanket is because it allows the stitches to be loose enough for the moss stitch pattern to show, but also tight enough to create a warm and cozy fabric. Using a smaller needle size may result in a tighter fabric, while using a larger needle size may result in a looser and more open fabric.
It is worth noting that needle sizes can vary depending on the knitter’s tension and the yarn being used. Therefore, it is always a good idea to knit a gauge swatch before starting the blanket to ensure the correct needle size is being used to achieve the desired measurements.
If in doubt, it is recommended to consult the knitting pattern or seek advice from a more experienced knitter or yarn shop staff to determine the best needle size for the moss stitch blanket project.
How to Cast On for a Moss Stitch Blanket
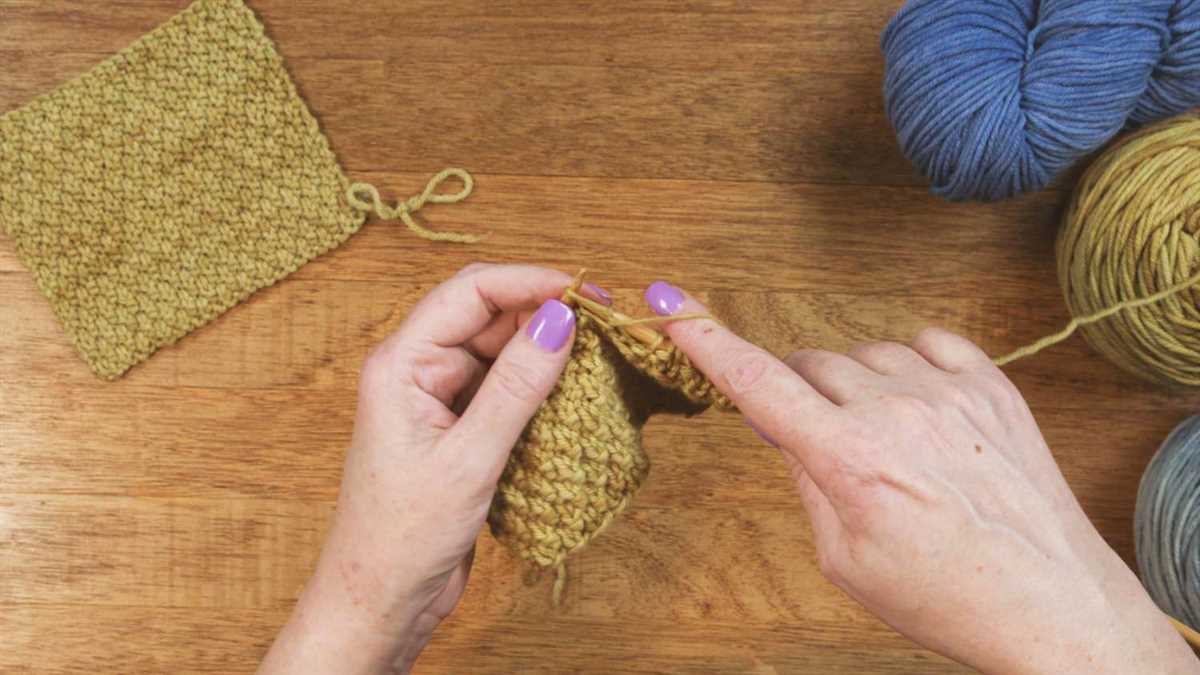
Before you can start knitting your moss stitch blanket, you need to cast on your stitches. Casting on is the process of creating the foundation row of stitches that will form the edge of your blanket. There are several different methods you can use to cast on, but in this tutorial, we will be using the long tail cast on method.
Materials You’ll Need
- Yarn: Choose a soft and cozy yarn that is suitable for a blanket. Make sure you have enough yarn to complete your project.
- Knitting needles: Use the size of needles recommended on your yarn label.
- Tape measure: This will be helpful for measuring the width of your blanket as you go.
- Scissors: You’ll need these to cut your yarn at the end of your project.
Step-by-Step Guide
- Create a slipknot: Start by creating a slipknot at the end of your yarn. Leave a long tail, as this will be used to cast on your stitches.
- Hold your needles: Hold one knitting needle in your right hand, and the other knitting needle in your left hand.
- Place the slipknot on the left needle: Insert the right needle through the loop of the slipknot, from front to back. Then, slip the loop onto the left needle.
- Position the yarn: Hold the tail of the yarn and the working yarn (the yarn attached to the ball) in your right hand. Leave a tail of yarn, approximately twice the width of your finished blanket, between your hands.
- Start casting on: Using your right hand, bring the right needle over the left needle, and then insert it under the working yarn.
- Bring the loop through: Bring the loop on the right needle through the loop on the left needle, and then drop the loop from the left needle. This will create a new stitch on the right needle.
- Repeat steps 5 and 6: Continue steps 5 and 6 until you have cast on the desired number of stitches for your blanket. Make sure to keep the stitches loose but even.
Once you have finished casting on, you are ready to start knitting your moss stitch blanket. Happy knitting!
Creating the moss stitch pattern
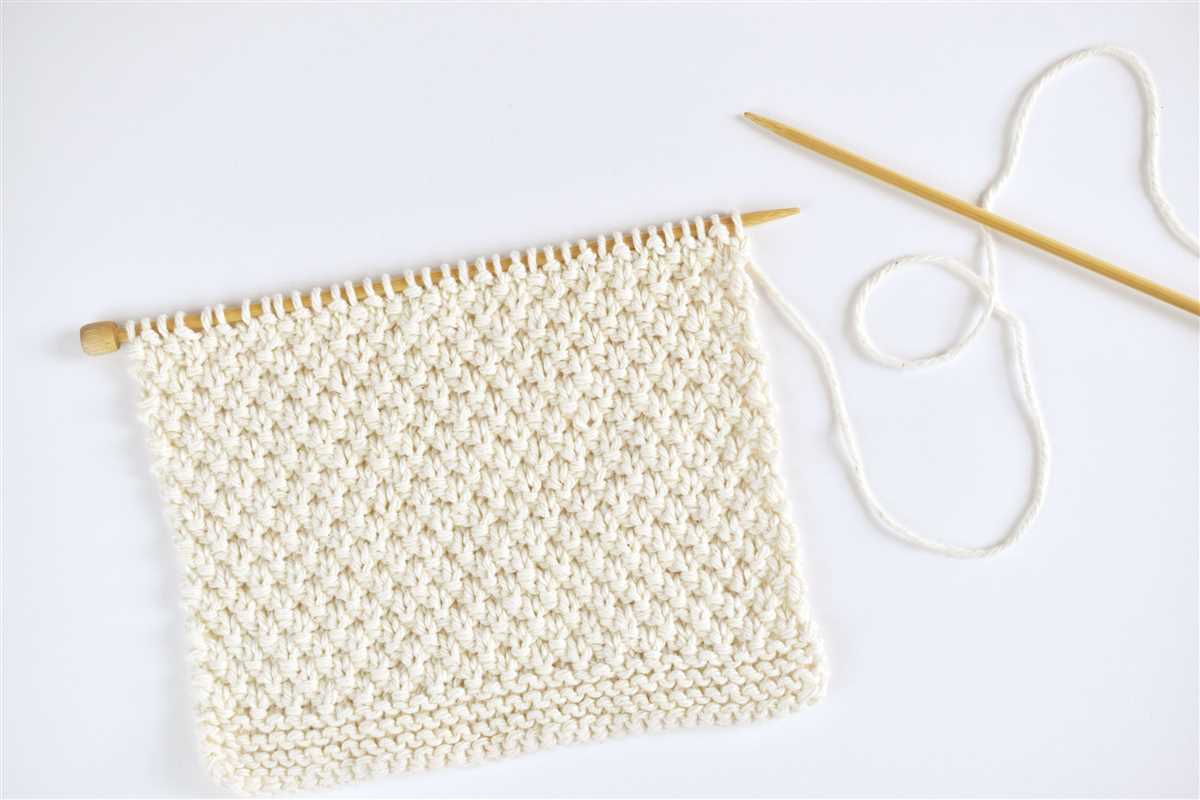
The moss stitch is a simple yet elegant pattern that can add texture and interest to your knitted projects. It consists of alternating knit and purl stitches in a specific sequence to create a raised, moss-like texture. This pattern is perfect for blankets, scarves, and other cozy accessories.
To create the moss stitch pattern, you will need a pair of knitting needles and yarn in your desired color. Begin by casting on an even number of stitches. The pattern works best with a multiple of two stitches, so you can easily repeat the sequence.
Step 1: Start by knitting the first stitch.
Step 2: Purl the next stitch.
Step 3: Repeat steps 1 and 2 until you reach the end of the row.
Step 4: For the next row, purl the first stitch and then knit the next stitch.
Continue repeating steps 1-4 for each row to create the moss stitch pattern. The alternating knit and purl stitches will create a staggered effect, resembling the texture of moss. This pattern is reversible, meaning it looks the same on both sides, making it perfect for projects where both sides may be visible.
Experiment with different yarn weights and needle sizes to achieve different effects with the moss stitch pattern. A thicker yarn and larger needles will create a chunkier, more textured look, while a thinner yarn and smaller needles will result in a daintier, more delicate appearance.
Increasing and Decreasing Stitches
In knitting, increasing and decreasing stitches are essential techniques that allow you to shape your project and add or subtract stitches as needed. These techniques are commonly used in patterns such as the moss stitch blanket.
Increasing Stitches
When you want to increase the number of stitches in your knitting, there are several methods you can use. One common method is the knit front and back (kfb) increase. To do this, you knit into the front of a stitch as usual, but before sliding it off the left needle, you insert the right needle into the back of the same stitch and knit it again. This creates two stitches out of one.
Another commonly used increase is the yarn over (yo). To do a yarn over, simply bring the yarn to the front of your work, then continue knitting the next stitch. This creates an eyelet and adds a stitch to your knitting.
Decreasing Stitches
When you want to decrease the number of stitches in your knitting, there are also several methods you can use. One common method is the knit two together (k2tog) decrease. To do this, you insert the right needle into the next two stitches as if to knit them together, then knit them as one stitch. This decreases the number of stitches by one.
Another commonly used decrease is the slip, slip, knit (ssk) decrease. To do this, you slip the next two stitches one at a time as if to knit, then insert the left needle into the front loops of both slipped stitches and knit them together. This also decreases the number of stitches by one.
Both increasing and decreasing stitches are important skills to learn and can open up countless design possibilities in your knitting. By mastering these techniques, you can create beautifully shaped and textured projects like the moss stitch blanket.
Creating a Border
Adding a border to your moss stitch blanket can enhance its finished look and provide a polished edge. There are several options to consider when creating a border, including using a different stitch pattern, adding additional rows of moss stitch, or incorporating a simple ribbing design.
1. Different Stitch Pattern: One option is to use a different stitch pattern for the border. This can create a contrast and draw attention to the edge of the blanket. For example, you could choose a rib stitch, garter stitch, or seed stitch pattern to complement the moss stitch body of the blanket.
2. Additional Rows of Moss Stitch: Another option is to add extra rows of moss stitch to create a wider border. You could choose to continue the moss stitch pattern as it is, or you could modify it by adding additional knit or purl stitches to create a variation in texture.
3. Ribbing Design: A simple ribbing design can also be used for the border. To create a ribbing border, alternate between knit and purl stitches in a specific pattern. This can add elasticity and structure to the edge of the blanket.
Whichever option you choose, it’s important to consider the overall look and feel of the blanket and select a border that complements the moss stitch pattern. You may want to experiment with different stitch patterns and sample swatches before deciding on the final design for your blanket’s border.
Blocking the Blanket
Blocking is an important step to finish off your moss stitch blanket and give it a polished look. It involves stretching and shaping the fabric to even out the stitches and make them more defined. This process also helps to relax and settle the yarn, allowing the blanket to drape nicely and lay flat.
To start blocking your blanket, you will need a large, clean surface where you can lay it flat. It could be a bed, a table, or even the floor, as long as it is clean and free from any obstructions. Lay a clean towel on the surface to protect your blanket from any dirt or debris.
First, wet your blanket by soaking it in lukewarm water for about 20 minutes. Use a gentle detergent or wool wash if desired. Gently squeeze out the excess water, but do not wring or twist the fabric.
Next, carefully stretch your blanket to its desired dimensions. You can use blocking mats or rustproof pins to secure the edges and corners in place. Make sure to measure the dimensions as you go, so you can achieve the size you want.
Note: It is important to read the care instructions for the specific yarn you used to knit your blanket. Some yarns may require different blocking methods or temperature settings.
Allow your blanket to dry completely before removing the pins or mats. This may take several hours or even overnight, depending on the yarn and the climate. Once dry, your moss stitch blanket will be beautifully blocked and ready for use or gifting.
- Prepare a clean surface
- Soak the blanket in lukewarm water
- Gently squeeze out the excess water
- Stretch the blanket to desired dimensions
- Secure the edges and corners with pins or blocking mats
- Read the care instructions for the yarn
- Allow the blanket to dry completely
Finishing touches
Once you have completed knitting your moss stitch blanket, it’s time to add the finishing touches to make it look polished and professional. One of the first things you’ll want to do is weave in any loose ends of yarn. This means taking a tapestry needle and threading it with the tail of yarn, then sewing it into the back of your work so that it is hidden. This will prevent any loose ends from unraveling over time and will give your blanket a neat appearance.
After weaving in the ends, you can also block your blanket to give it a smooth and even finish. Blocking involves wetting your blanket, then gently stretching and pinning it into shape. This can help to even out any uneven tension in your stitches and make the blanket look more professional. You can use blocking mats or towels to lay your blanket on, and pins or blocking wires to hold it in place. Make sure to let your blanket dry completely before removing the pins or wires.
If you want to add a border to your moss stitch blanket, you can do so by picking up stitches along the edges and knitting a few rows in a different stitch pattern. This can help to define the edges of the blanket and give it a finished look. You can choose to knit a simple garter stitch border, or get creative and try a different stitch pattern such as ribbing or seed stitch. Just make sure to match the stitch gauge of the border to the gauge of the moss stitch blanket.
Finally, consider adding a personalized touch to your moss stitch blanket by attaching a label or tag. You can sew in a fabric label with your name or initials, or use a pre-made label that says something like “Handmade with love”. This can add a special touch to your blanket and make it even more meaningful. You can also consider making a matching pillow or throw to complement your moss stitch blanket and create a coordinated set.
Tips and tricks
When knitting a moss stitch blanket, there are a few tips and tricks that can help make the process easier and more enjoyable. Here are some ideas to consider:
1. Choose the right yarn
Using a soft and cozy yarn can make a big difference in the final result of your moss stitch blanket. Look for a yarn that has a nice drape and is comfortable to the touch. Merino wool or acrylic blends are popular choices for blankets.
2. Use stitch markers
Stitch markers can be a useful tool when working with the moss stitch pattern. Placing a stitch marker after every repeat can help you keep track of your stitches and ensure that you are maintaining the correct pattern throughout the blanket.
3. Knit a small swatch
Before starting on your moss stitch blanket, it can be helpful to knit a small swatch to check your gauge. This will give you an idea of how many stitches and rows you will need to achieve the desired size. Adjust your needle size if necessary to ensure you are getting the correct gauge.
4. Avoid tight tension
The moss stitch pattern can be quite dense, so it’s important to avoid knitting too tightly. A looser tension will help create a more open and textured fabric. Experiment with your tension and make sure your stitches are not too tight or too loose.
5. Block your finished blanket
Blocking your moss stitch blanket is essential to help even out the stitches and give your blanket a polished look. Wet blocking is usually the best method for moss stitch. Gently wet the blanket, then lay it flat on a towel or blocking mats, pinning it into shape. Allow it to dry completely before removing the pins.
- Choose the right yarn
- Use stitch markers
- Knit a small swatch
- Avoid tight tension
- Block your finished blanket
Pattern Variations and Customization Ideas
There are endless possibilities for customizing your moss stitch blanket pattern to make it truly unique. Here are a few ideas to inspire you:
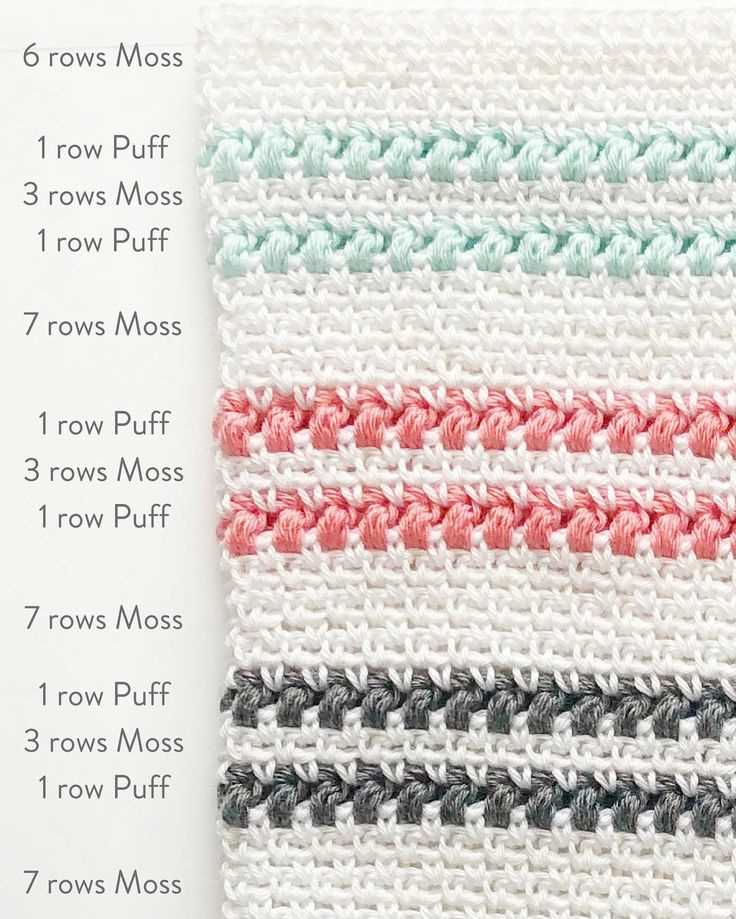
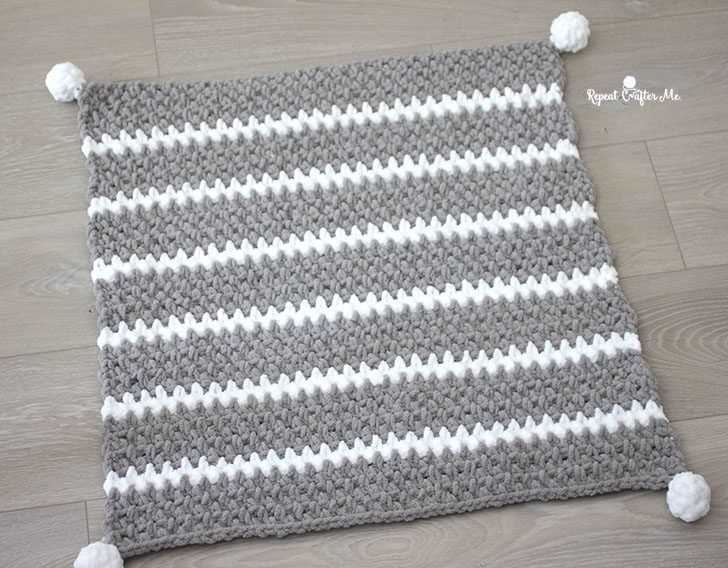
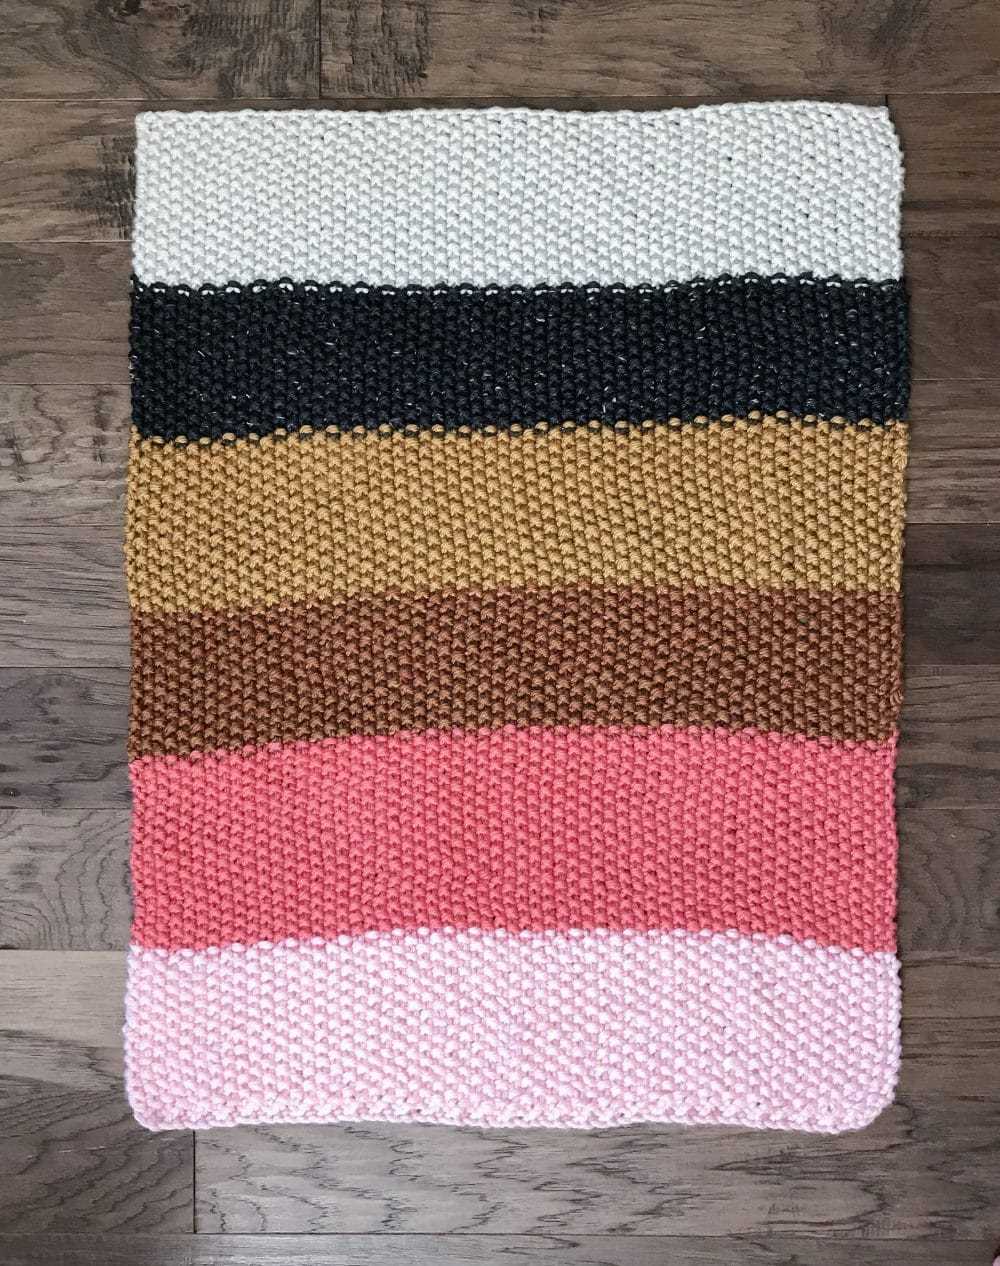
1. Color variations: Instead of using a single color for your blanket, you can experiment with different color combinations. Try using two or three different colors in a striped pattern, or create a gradient effect by using different shades of the same color.
2. Size variations: The basic moss stitch blanket pattern can be easily adjusted to make blankets of different sizes. If you want a larger blanket, simply cast on more stitches and knit more rows. For a smaller baby blanket, cast on fewer stitches and knit fewer rows.
3. Border options: To add a decorative border to your blanket, you can knit a few rows of ribbing or garter stitch before starting the moss stitch pattern. Alternatively, you can add a border of a different stitch pattern, such as seed stitch or basketweave.
4. Personalized details: You can also personalize your moss stitch blanket by adding initials, names, or other designs using duplicate stitch or intarsia techniques. This is a great way to create a special gift for a loved one.
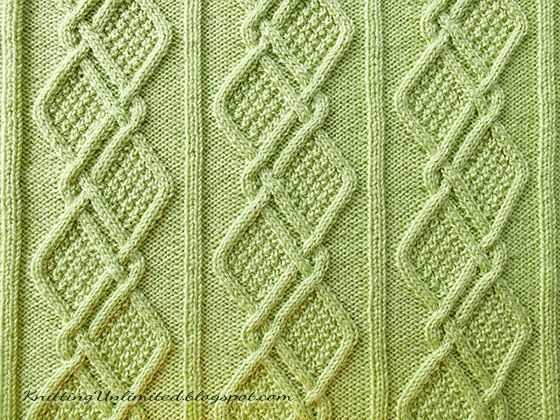
5. Texture variations: While the moss stitch pattern itself creates a beautiful texture, you can enhance it by adding other stitch patterns within the blanket. For example, you can insert panels of cable or lace patterns between sections of moss stitch.
With these pattern variations and customization ideas, you can create a moss stitch blanket that is truly one-of-a-kind. Whether you’re making it for yourself or as a gift, this versatile pattern allows you to unleash your creativity and make something truly special.