
Knitting is a relaxing and rewarding hobby that allows you to create beautiful and functional pieces. One popular knitting project is the knitted wrap with buttons pattern. The knitted wrap is a versatile accessory that can be worn in various ways, making it a perfect addition to your wardrobe. Whether you are a beginner knitter or an experienced one, this pattern is suitable for all skill levels.
The knitted wrap with buttons pattern is a fun and easy project to tackle. The pattern typically involves using simple knit and purl stitches to create a textured fabric. This results in a cozy and warm wrap that can be worn during the colder months. Additionally, the wrap is adorned with buttons, adding a stylish touch and allowing you to secure it in different ways.
With this pattern, you have the freedom to choose various yarns and colors to make the wrap truly unique. You can opt for a soft and chunky yarn for extra warmth or a lightweight yarn for a more breathable wrap. The choice is yours! Furthermore, by selecting different colors, you can create a wrap that complements your personal style.
What is a knitted wrap?
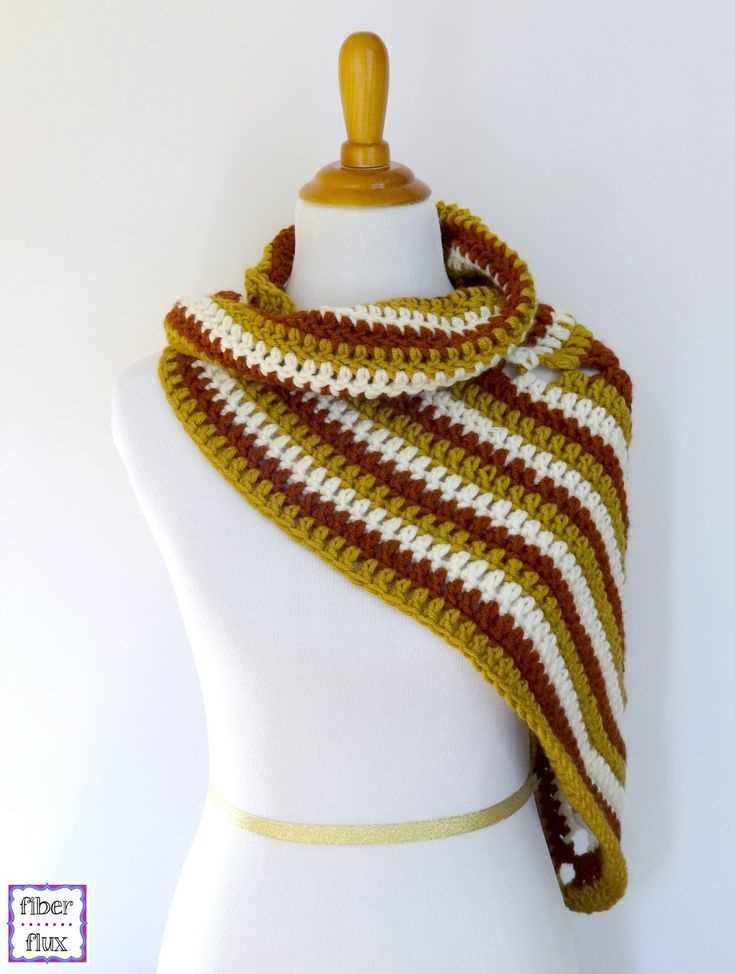
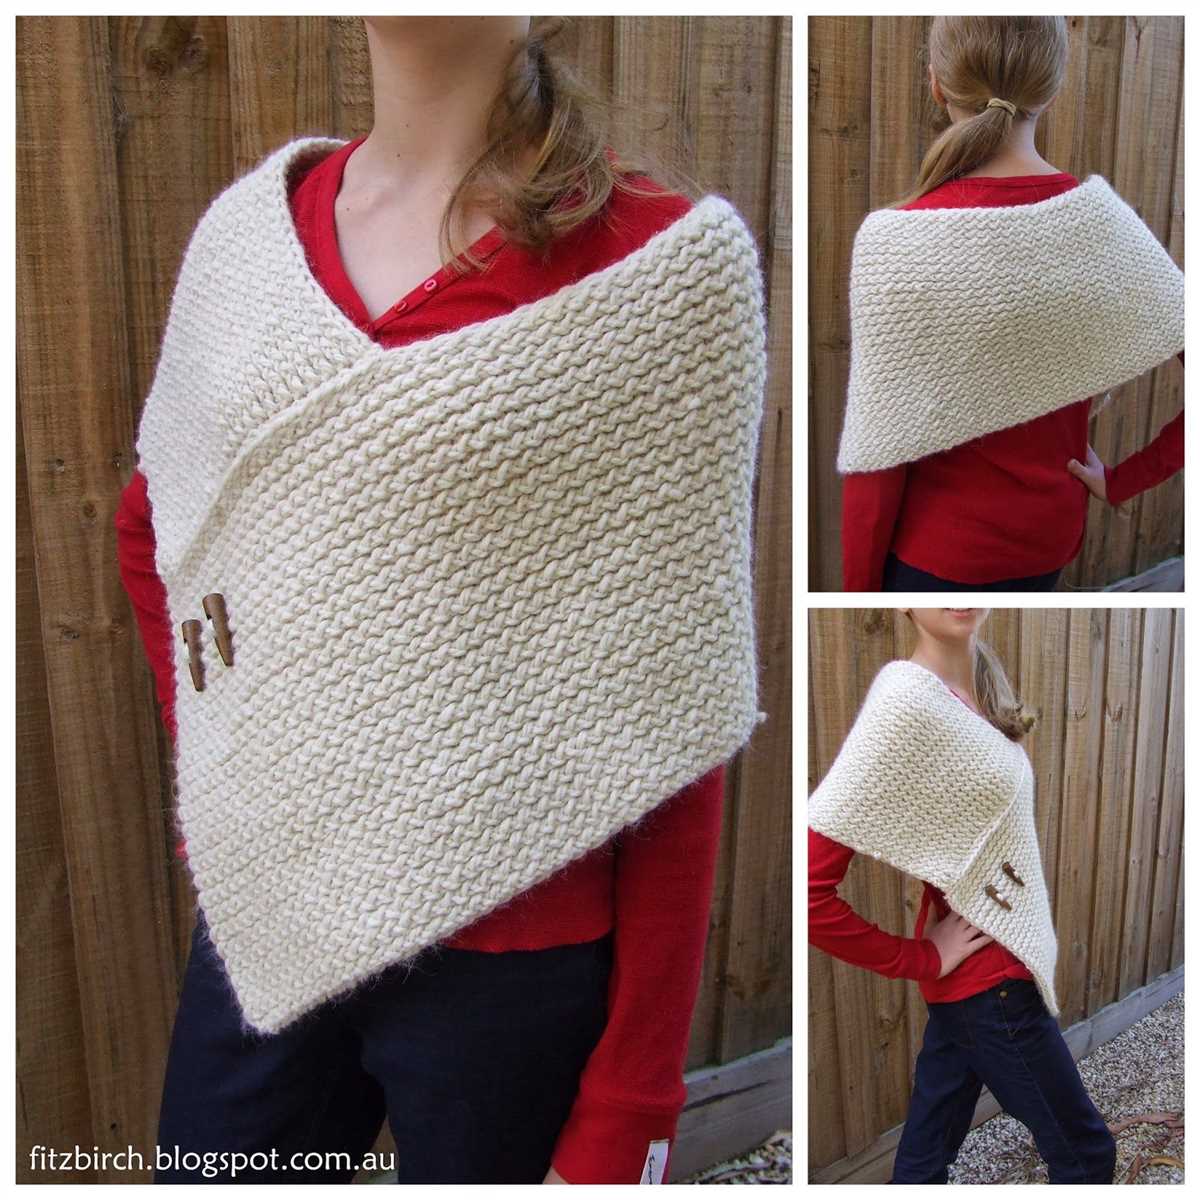
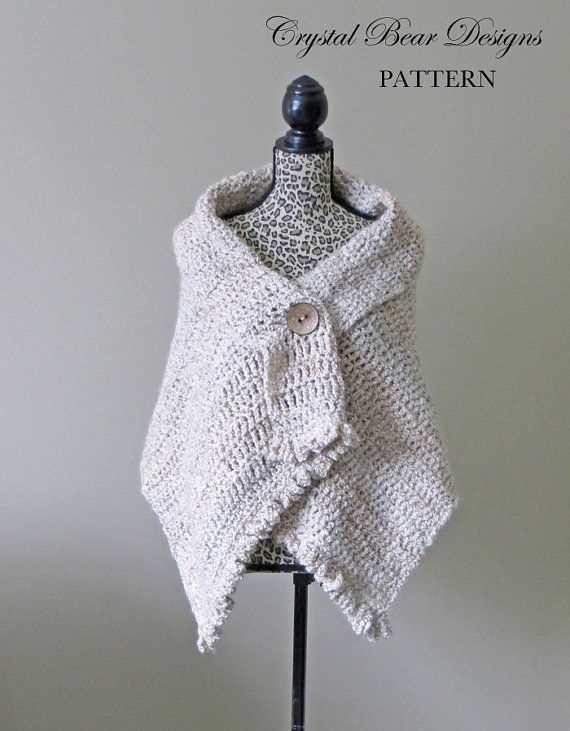
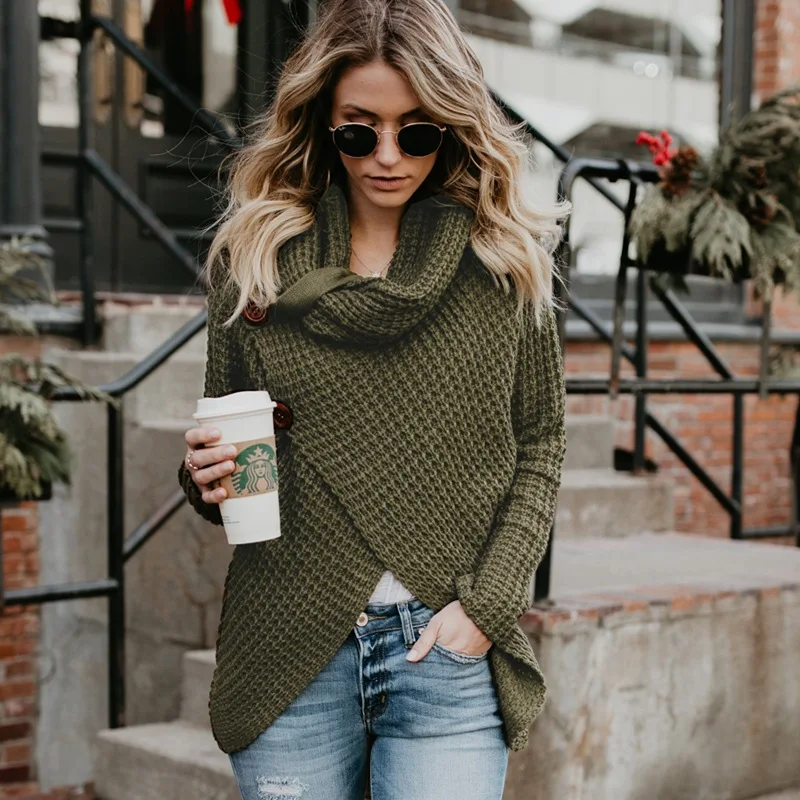
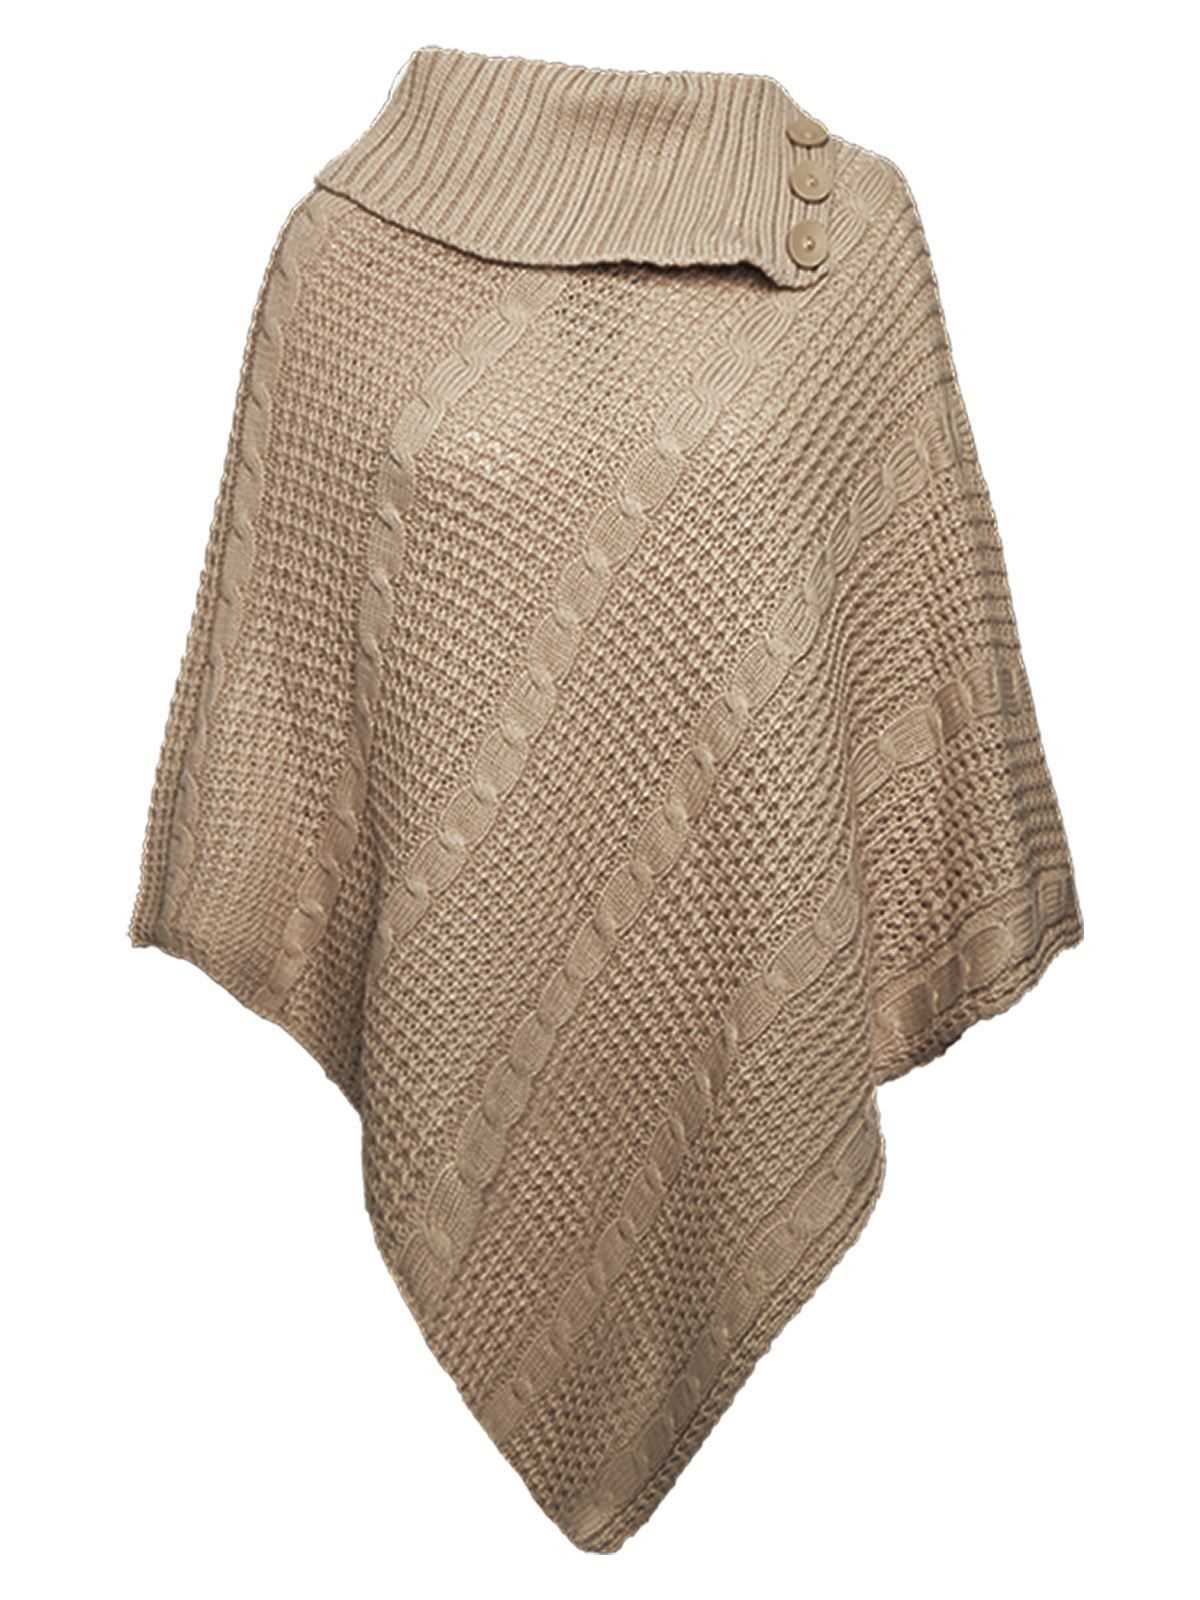
A knitted wrap is a versatile and stylish accessory that can be worn in multiple ways. It is a long, rectangular piece of fabric that is typically knitted using yarn and knitting needles. The wrap can be made from various materials, such as wool, acrylic, or cotton, depending on the desired texture and warmth.
One of the key features of a knitted wrap is its ability to be wrapped around the body, making it suitable for different weather conditions and occasions. It can be worn as a scarf, shawl, or even a cardigan, providing warmth and adding a fashionable touch to any outfit.
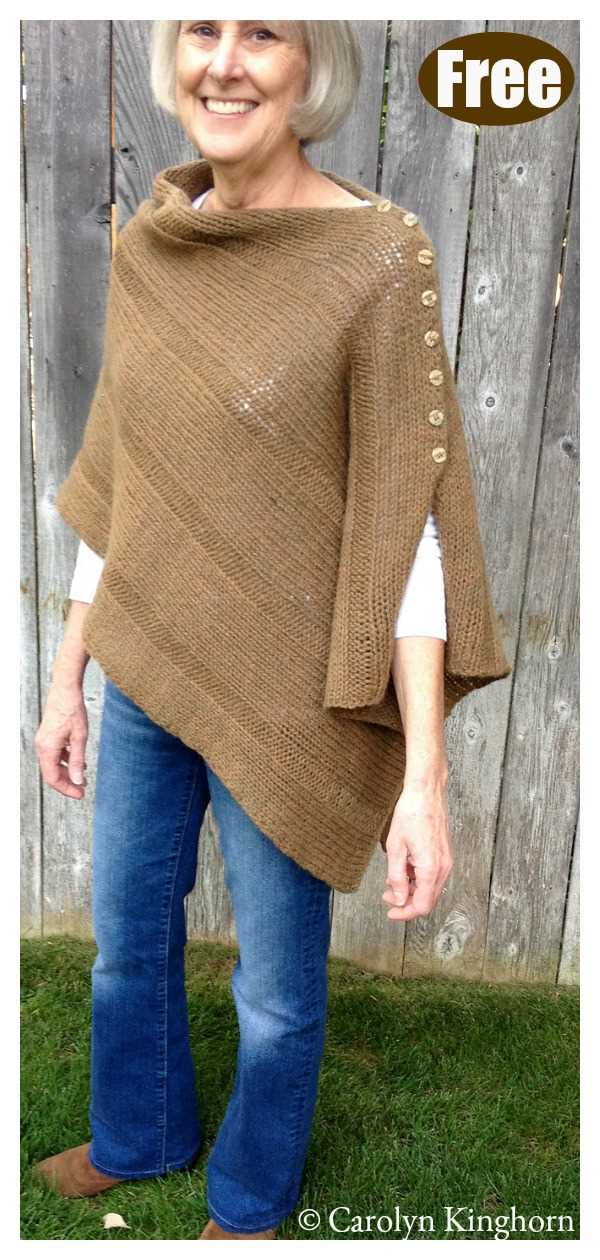
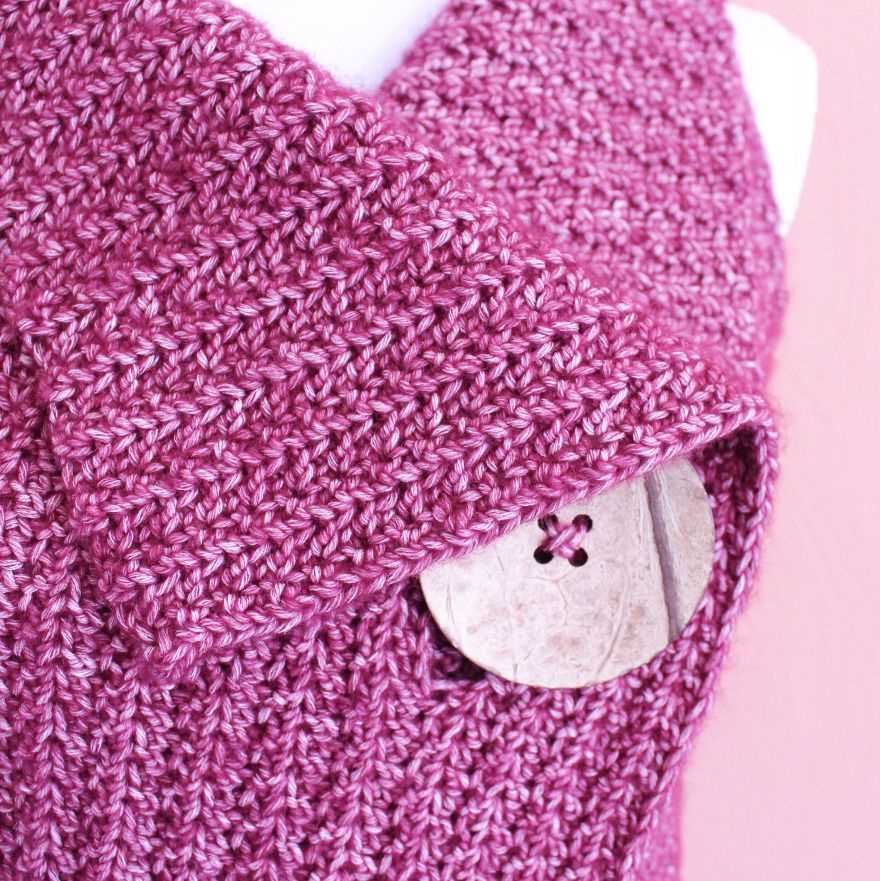
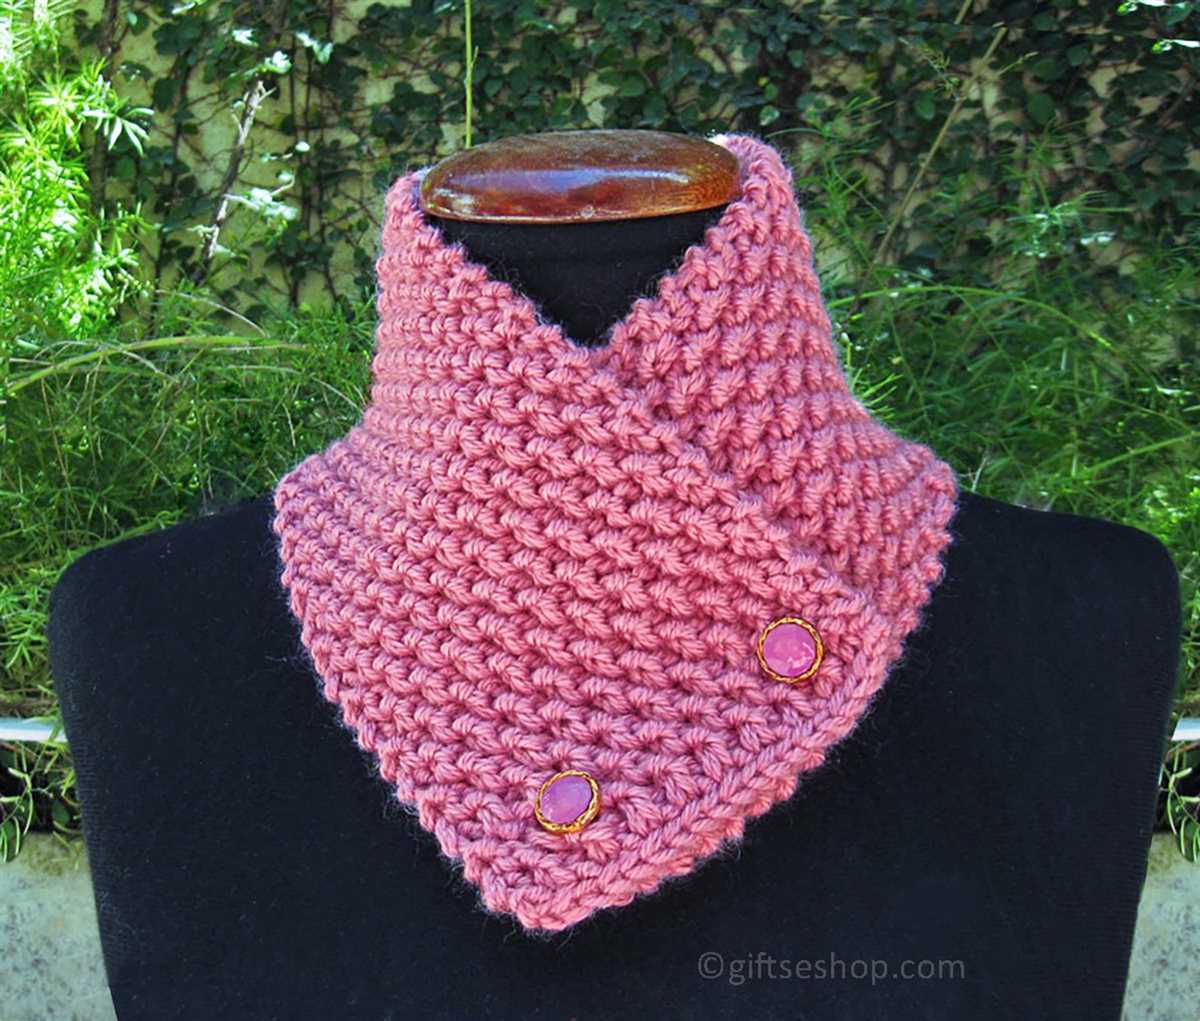
A knitted wrap is often adorned with buttons, which allow for different ways of wearing and securing the wrap in place. The buttons can be positioned strategically along the edges of the wrap, allowing for various buttoning options to create different looks and styles.
The versatility of a knitted wrap makes it a popular choice among knitters and fashion enthusiasts. Whether you prefer a cozy and chunky wrap for colder days or a lightweight and lacy wrap for warmer weather, there are countless patterns and designs available to suit your personal style and preferences.
Benefits of using buttons in knitted wraps
Knitted wraps are a popular accessory for keeping warm and adding style to an outfit. One of the key design elements of knitted wraps is the use of buttons. Buttons can provide several benefits when incorporated into a wrap design.
1. Versatility and Customization
Buttons allow for versatility and customization in knitted wraps. By choosing different types, sizes, and colors of buttons, you can easily personalize the wrap to match your style or the occasion. Additionally, buttons give you the option to close the wrap in different ways, such as a single button closure, multiple buttons, or even using the buttons as decorative accents without closing the wrap.
2. Functional and Practical
Buttons provide functionality and practicality to knitted wraps. They provide a secure closure, keeping the wrap in place while you wear it. This is particularly useful during colder weather, as it helps to retain warmth and prevent the wrap from slipping off. The button closure also allows for easy adjustments, giving you the flexibility to loosen or tighten the wrap as needed.
3. Adds Visual Interest
The use of buttons adds visual interest to knitted wraps. Buttons come in a wide variety of shapes, sizes, and designs, providing an opportunity to incorporate unique and eye-catching details into the wrap’s overall look. Whether you choose buttons with intricate patterns, vibrant colors, or unusual shapes, they can enhance the overall aesthetic appeal of the wrap and make it stand out.
4. Enhances Texture and Structure
Buttons can enhance the texture and structure of knitted wraps. They can serve as focal points, drawing attention to specific areas or details of the wrap. Furthermore, the presence of buttons can create a more defined shape and structure, particularly when placed strategically along the edges or at specific intervals. This can give the wrap a more polished and professional appearance.
In conclusion, buttons offer several benefits when used in knitted wraps. They allow for versatility and customization, provide functionality and practicality, add visual interest, and enhance the texture and structure of the wrap. Whether you’re knitting a wrap for yourself or as a gift, incorporating buttons can elevate the design and make it a truly unique accessory.
Why choose a knitted wrap with buttons?
A knitted wrap with buttons is a versatile and stylish accessory that can be a great addition to any outfit. Whether you’re looking for a cozy layer to add to your winter wardrobe or a lightweight cover-up for those cooler summer evenings, a knitted wrap with buttons can provide the perfect solution.
One of the main reasons to choose a knitted wrap with buttons is its versatility. Unlike other types of wraps or shawls, a wrap with buttons can be styled and worn in multiple ways. You can button it up for a more fitted and structured look or leave it open for a relaxed and effortless feel. This flexibility allows you to create different looks and experiment with various styles, making it a valuable addition to your wardrobe.
Another advantage of a knitted wrap with buttons is its practicality. The buttons not only add a decorative element but also serve a functional purpose. They allow you to secure the wrap in place, preventing it from slipping off your shoulders and providing added warmth and comfort. Additionally, the buttons can also be used to adjust the fit of the wrap, making it suitable for different body types and sizes.
Furthermore, a knitted wrap with buttons can be a fun and rewarding knitting project. Knitting your own wrap allows you to customize the design, color, and size according to your preferences. You can choose from a wide range of yarns and patterns to create a wrap that matches your personal style. Knitting can also be a therapeutic and relaxing activity, providing a sense of accomplishment when you see the finished product.
In conclusion, a knitted wrap with buttons is a practical and stylish accessory that offers versatility, functionality, and the opportunity for personalization. Whether you’re wearing it as a fashion statement or for practical reasons, a knitted wrap with buttons is a must-have item in any wardrobe.
Materials Needed for Knitted Wrap with Buttons
When it comes to crafting a knitted wrap with buttons, there are a few essential materials you’ll need to have on hand. These materials will ensure that you have everything you need to complete the project and create a beautiful and functional wrap.
1. Yarn:
Choose a yarn that is suitable for the pattern and the desired finished look of your wrap. Consider the fiber content, thickness, and color of the yarn. It’s important to select a yarn that is soft and comfortable to wear, as it will be in direct contact with your skin.
2. Knitting Needles:
You’ll need a pair of knitting needles in the appropriate size for your chosen yarn and pattern. It’s essential to use the correct needle size to achieve the desired tension and gauge for your wrap. Check your pattern for the recommended needle size, or use a gauge swatch to determine the best needle size for your yarn.
3. Buttons:
Choose buttons that complement the yarn and color of your wrap. Consider the size and style of buttons you want to use, as they will be a decorative element on your finished wrap. Select buttons that are sturdy and easy to sew onto the knit fabric.
4. Tapestry Needle:
A tapestry needle will come in handy for weaving in loose ends and sewing on buttons. Make sure to choose a needle with a large enough eye to accommodate your yarn.
5. Scissors:
A good pair of scissors is essential for cutting yarn and trimming any excess threads. Make sure to have a sharp pair of scissors that are easy to handle.
By gathering these essential materials, you’ll be well-prepared to begin knitting your wrap with buttons. With these supplies on hand, you’ll be able to create a beautiful and functional accessory that you can wear with pride.
Knitting Techniques for the Knitted Wrap with Buttons
When knitting a wrap with buttons, there are several knitting techniques that can help you achieve the desired look and fit. These techniques will ensure that your wrap is not only stylish, but also functional and comfortable to wear.
1. Casting On: Start by casting on the required number of stitches using a long-tail cast-on method. This method provides an elastic edge, which is important for the wrap to drape nicely.
2. Ribbing: Ribbing is a common technique used to add stretch and structure to knitted garments. It’s often used for cuffs, collars, and hems. For the knitted wrap with buttons, consider using a 2×2 ribbing pattern (knit 2 stitches, purl 2 stitches) to create a flexible and visually appealing edge.
3. Buttonholes: Incorporate buttonholes into your knitting pattern to allow for easy closure of the wrap. There are different methods for creating buttonholes, such as yarn over buttonholes or making eyelet buttonholes using double yarn overs. Choose a method that suits your preferred button size and placement.
4. Shaping: Depending on the desired fit and style of your wrap, you may need to incorporate shaping techniques. This can be done through increases and decreases, such as knitting two stitches together (k2tog) or making one stitch (M1). Shaping can help create a more flattering and tailored look.
5. Finishing: The finishing touches on your knitted wrap with buttons are just as important as the knitting itself. After completing the main body of the wrap, weave in any loose ends and block the wrap to give it a polished look. Sew the buttons securely using a matching thread to ensure they stay in place.
Incorporating these knitting techniques into your project will result in a beautifully crafted knitted wrap with buttons that you’ll be proud to wear or give as a gift. Experiment with different yarns, stitch patterns, and button designs to personalize your wrap and make it truly unique.
Cast on stitches
When starting the knitted wrap with buttons, the first step is to cast on the required number of stitches. This will determine the width of the wrap. The cast on stitches are the foundation of the project and provide stability to the edges. There are several methods for casting on stitches, but the most common ones are the long tail cast on and the knitted cast on.
The long tail cast on is a popular method because it creates a neat and elastic edge. To perform this cast on, you will need to estimate the length of yarn needed for the desired number of stitches, leaving a long tail. Using both strands of yarn, make a slipknot and place it on the left-hand needle. Insert the right-hand needle into the loop of the slipknot and wrap the yarn around the right-hand needle from back to front. Pull the loop through the slipknot and place it on the left-hand needle. Repeat this process for each stitch until you have cast on the required number of stitches.
The knitted cast on is another commonly used method that creates a firm and even edge. To perform this cast on, begin with a slipknot on the left-hand needle. Insert the right-hand needle into the slipknot and wrap the yarn around the right-hand needle from back to front. Pull the loop through the slipknot and place it on the left-hand needle, creating a new stitch. Repeat this process for each stitch until you have cast on the required number of stitches.
Knitting Stitch Patterns
Knitting stitch patterns are an important part of creating beautiful and unique knitted items. They add texture, depth, and visual interest to the finished project. There are countless stitch patterns to choose from, ranging from simple to complex, and each one can completely transform the look and feel of a knitted garment.
Lace stitch patterns are often used to create delicate and airy designs. They typically feature a combination of yarn overs and decreases to form a pattern of eyelets. Lace stitch patterns are perfect for lightweight shawls, scarves, and wraps, adding a touch of elegance to any outfit.
Cable stitch patterns are known for their intricate and twisted designs. They create a three-dimensional texture that is both cozy and visually appealing. Cable stitch patterns are commonly used in sweaters, hats, and blankets, adding a classic and timeless look to the finished piece.
Textured stitch patterns encompass a wide range of designs that create interesting and tactile surfaces. These patterns often involve combinations of knit and purl stitches, creating bumps, ridges, or raised patterns. Texture stitch patterns can be used in a variety of projects, from dishcloths and potholders to blankets and sweaters, adding both visual and tactile interest.
Colorwork stitch patterns involve using multiple colors of yarn to create intricate patterns or designs. Fair Isle and intarsia are two popular techniques for colorwork. Fair Isle creates a pattern using stranded knitting, while intarsia involves knitting separate sections of color. Colorwork stitch patterns can be used in a variety of projects, from hats and mittens to sweaters and blankets, adding a vibrant and eye-catching element to the finished piece.
Whether you’re a beginner or an experienced knitter, experimenting with different stitch patterns is a great way to enhance your knitting skills and create unique and beautiful projects. With so many stitch patterns to choose from, the possibilities are endless!
Shaping the Wrap
When knitting a wrap with buttons, it is important to shape the garment to ensure a good fit and a flattering drape. To do this, you will need to follow the pattern instructions for increasing and decreasing stitches at specific points in the knitting.
The shaping of the wrap is typically done by increasing stitches at the beginning and end of rows to create a wider shape. This is often done using the “make one” increase method, where you pick up a strand of yarn between two stitches and knit into it. This creates a new stitch and increases the overall stitch count. The specific instructions for increasing will vary depending on the pattern, so it is important to carefully follow the instructions given.
Once the wrap has been shaped to the desired width, it may also be necessary to decrease stitches to create a tapered shape or to create buttonholes. The method for decreasing stitches will typically be specified in the pattern instructions, but the most common method is to knit two stitches together. This combines two stitches into one and decreases the overall stitch count.
When shaping the wrap, it is important to keep track of the stitch count to ensure that the increases and decreases are done correctly and evenly. Using stitch markers or keeping a stitch count tally can help with this. It is also a good idea to periodically try on the wrap as you are knitting to check the fit and make any necessary adjustments.
Choosing the Right Yarn for Your Knitted Wrap with Buttons
When it comes to knitting a wrap with buttons, choosing the right yarn is essential to ensure that your finished project looks and feels its best. With so many different types of yarn available, it’s important to consider factors such as fiber content, weight, and texture.
Fiber Content: One of the first things to consider when selecting yarn for your knitted wrap is the fiber content. Different fibers have different properties, and each will give your wrap a different look and feel. For example, if you want a soft and cozy wrap, you might choose a yarn made from merino wool or an alpaca blend. If you’re looking for a lightweight and breathable wrap, cotton or linen yarn might be a better choice.
Weight: Another important factor to consider is the weight of the yarn. The weight of the yarn will determine how thick or thin your finished wrap will be. A fingering weight yarn will create a delicate and lightweight wrap, while a bulky weight yarn will result in a warm and chunky wrap. Consider the season and intended use of your wrap when selecting the weight of the yarn.
Texture: The texture of the yarn can also have a big impact on the overall look and feel of your knitted wrap. Yarns with a smooth texture will give your wrap a sleek and polished look, while yarns with a more textured or slubby appearance can add interest and dimension to your project. Consider the stitch pattern you plan to use and how the texture of the yarn will enhance or complement it.
Keeping these factors in mind, take some time to explore different yarn options that meet your criteria. Read reviews, visit local yarn shops, and feel the yarn in person to get a sense of its drape, softness, and overall quality. By choosing the right yarn for your knitted wrap with buttons, you can ensure that your finished project is both beautiful and enjoyable to wear.
Understanding yarn weight
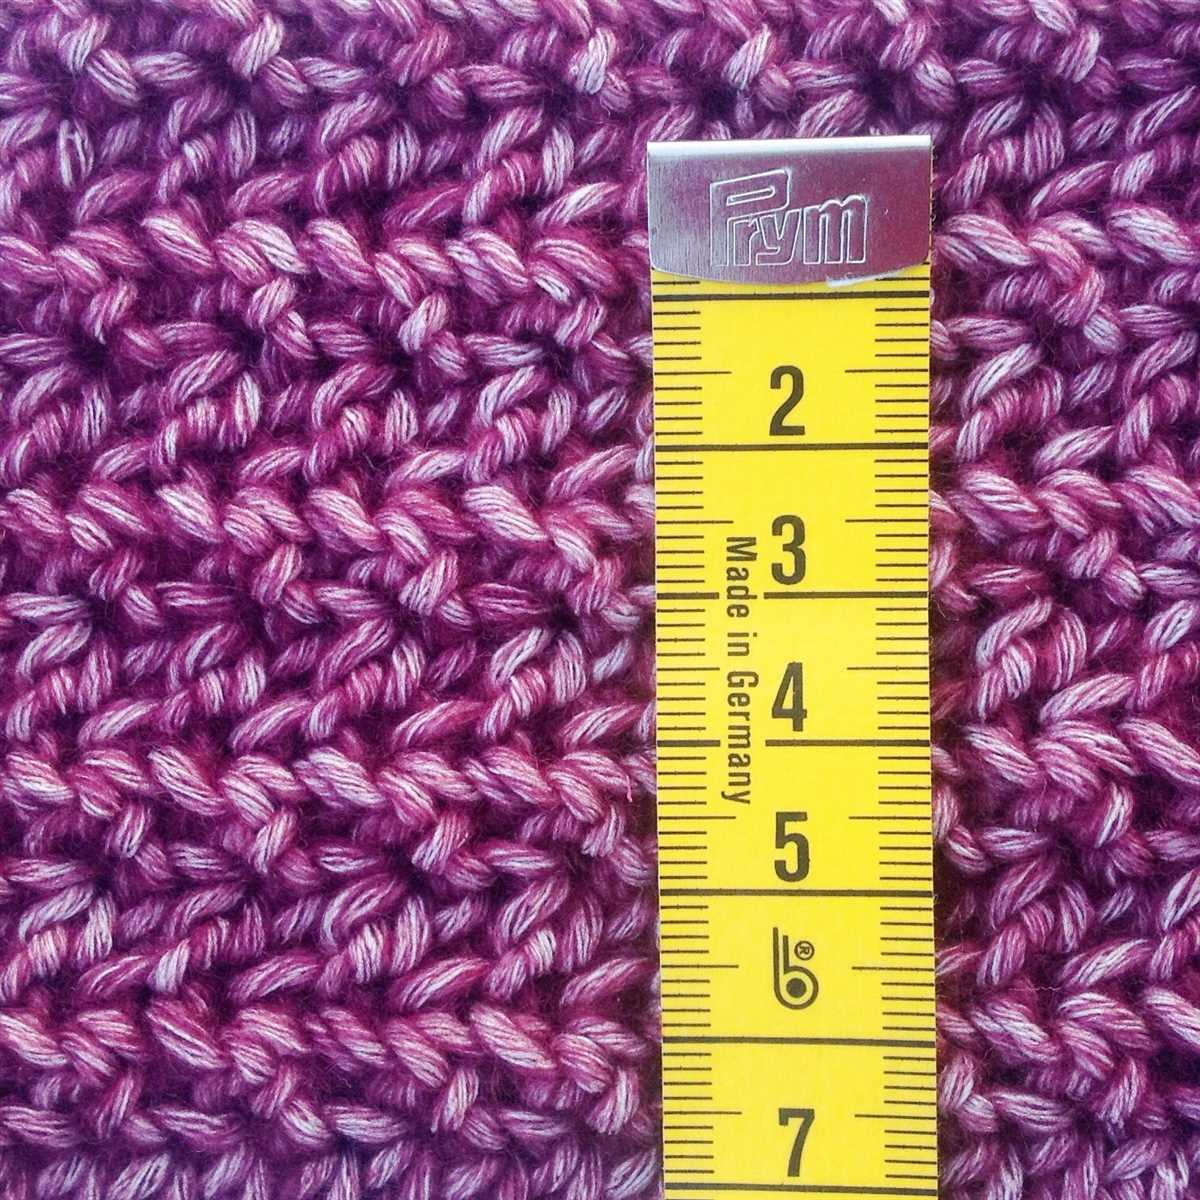
When it comes to knitting or crocheting, one of the most important factors to consider is the weight of the yarn. Yarn weight refers to the thickness or thinness of the yarn. This characteristic plays a crucial role in determining the outcome of your project, including its overall look, feel, and drape.
Yarn weight categories
Yarn weights are classified into different categories, ranging from lace to super bulky. Each category has its own specific characteristics and recommended uses. The industry standard used to classify yarn weight is the Craft Yarn Council’s system, which includes seven main categories: lace, fingering, sport, DK (double knitting), worsted/aran, bulky, and super bulky.
Finding the right yarn weight
Choosing the right yarn weight for your project is essential for achieving the desired results. It’s important to consider the pattern’s recommended yarn weight and gauge to ensure that your finished piece matches the intended size and texture. If you want a lighter and more delicate fabric, opt for lace or fingering weight yarn. For thicker and warmer items, choose bulky or super bulky weight yarn.
Remember to always check the ball band or label of the yarn for information on its weight, recommended needle or hook size, and gauge. This will help you make an informed choice and ensure the success of your knitting or crochet project.
Yarn weight and stitch definition
The weight of the yarn also affects the stitch definition of your project. Thinner yarns with higher yardage per gram allow for more intricate stitch patterns and finer details. On the other hand, thicker yarns may result in a more textured and chunky look. It’s important to choose a yarn weight that complements the stitch pattern and desired outcome of your project.
Experimenting with yarn weight
While it’s important to follow the recommended yarn weight for a pattern, don’t be afraid to experiment and try different weights to achieve unique effects. Mixing yarn weights can create interesting textures and visual interest in your projects. Just be mindful of the resulting drape and size of the finished piece.
Understanding yarn weight is crucial for any knitter or crocheter. It allows you to choose the right yarn for your project, achieve the desired results, and unleash your creativity by exploring different weight combinations.
Choosing the Right Fiber for your Knitted Wrap with Buttons Pattern
When it comes to knitting, choosing the right fiber for your project is just as important as selecting the right pattern. The type of fiber you choose will determine not only the look and feel of your finished wrap, but also its durability and care requirements. Here are some important factors to consider when selecting the fiber for your knitted wrap with buttons.
Fiber Type:
The first decision you’ll need to make is what type of fiber you want to use for your wrap. There are several options available, each with its own unique characteristics. Natural fibers like wool, alpaca, and cotton are popular choices due to their warmth, softness, and breathability. Synthetic fibers like acrylic and nylon are also commonly used, as they offer durability, easy care, and affordability. Consider your personal preferences and the intended use of the wrap when choosing the fiber type.
Weight and Gauge:
The weight of the yarn you choose will affect the overall drape and thickness of your wrap. Heavier yarns will result in a warmer and thicker wrap, while lighter yarns will create a more lightweight and breathable piece. Make sure to check the recommended gauge for your chosen pattern and match it with the yarn weight to ensure your wrap turns out the right size.
Care Instructions:
Consider the care requirements of the fiber you choose. Some fibers, like wool, may require special care such as hand washing or dry cleaning, while others, like acrylic, can be machine washed and dried. If you’re making the wrap as a gift or for someone who prefers easy care items, opt for a fiber that can withstand regular machine washing.
Color and Texture:
Finally, think about the color and texture you want for your wrap. Different fibers have different dye absorption properties, so keep that in mind when selecting your desired color. Additionally, certain fibers like alpaca or mohair can add a luxurious and textured look to your wrap, while others like cotton or linen offer a more smooth and polished appearance.
- Consider the fiber type, such as wool, alpaca, cotton, acrylic, etc. for your knitted wrap.
- Match the weight and gauge of the yarn to the recommended specifications of your pattern.
- Take into account the care requirements of the fiber, whether it can be machine washed or requires special care.
- Choose a color and texture that suits your preferences and desired aesthetic for the wrap.
Calculating yarn yardage
When starting a knitting project, it is important to have an idea of how much yarn you will need. Calculating yarn yardage can help you determine how many skeins or balls of yarn you should purchase for your project.
1. Check the pattern: The first step in calculating yarn yardage is to carefully read the pattern and make note of the recommended yarn and gauge. The pattern should provide information on the recommended yarn weight (such as worsted, bulky, or fingering), as well as the number of yards or meters per skein or ball. It may also provide information on the gauge, which is the number of stitches and rows per inch or centimeter. This information will be helpful in estimating the total yardage needed.
2. Determine the size: Next, determine the size of the finished project you are making. If the pattern provides multiple size options, make note of the measurements for the size you intend to knit. The size of the project can greatly influence the amount of yarn needed. Larger sizes will typically require more yarn than smaller sizes.
3. Calculate the total yardage: To calculate the total yardage needed, you will need to consider both the recommended yardage per skein or ball and the gauge. Multiply the number of skeins or balls required by the recommended yardage per skein or ball, and then divide by the gauge (in yards or meters per inch or centimeter). This will give you an estimate of the total yardage needed for your project. It is always a good idea to round up to ensure you have enough yarn.
Calculating yarn yardage may seem intimidating at first, but with careful attention to the pattern and some basic calculations, you can confidently determine how much yarn you will need for your knitting project.
Knitting the Buttonholes
Once you have finished knitting the main body of the wrap, it’s time to create the buttonholes. Buttonholes are essential for securing the wrap in place and adding a decorative element to your design. Follow these steps to knit the buttonholes:
- Decide on the number and placement of your buttonholes: Depending on the size of your wrap and the size of your buttons, you can choose how many buttonholes you want and where to place them along the edge of the wrap.
- Calculate the number of stitches for each buttonhole: Divide the total number of stitches along the edge of the wrap by the number of buttonholes you want. This will give you the number of stitches between each buttonhole.
- Mark the positions of the buttonholes: Use stitch markers or safety pins to mark the positions of the buttonholes along the edge of the wrap.
- Start knitting the buttonholes: When you reach the first marked position, work the following sequence of stitches: knit 2 together, yarn over, knit 2 together. This will create a small gap for the button to pass through.
- Continue knitting the remaining stitches: After completing the buttonhole, continue knitting the remaining stitches until you reach the next marked position.
- Repeat steps 4 and 5: Repeat the sequence of stitches for each buttonhole, making sure to maintain consistency in their size and placement.
- Finish the edge: Once all the buttonholes are complete, continue knitting the edge of the wrap according to the pattern instructions.
By following these steps, you can easily knit buttonholes that perfectly complement your knitted wrap. Remember to take your time and double-check your measurements and placement before starting the buttonhole sequence. Happy knitting!