
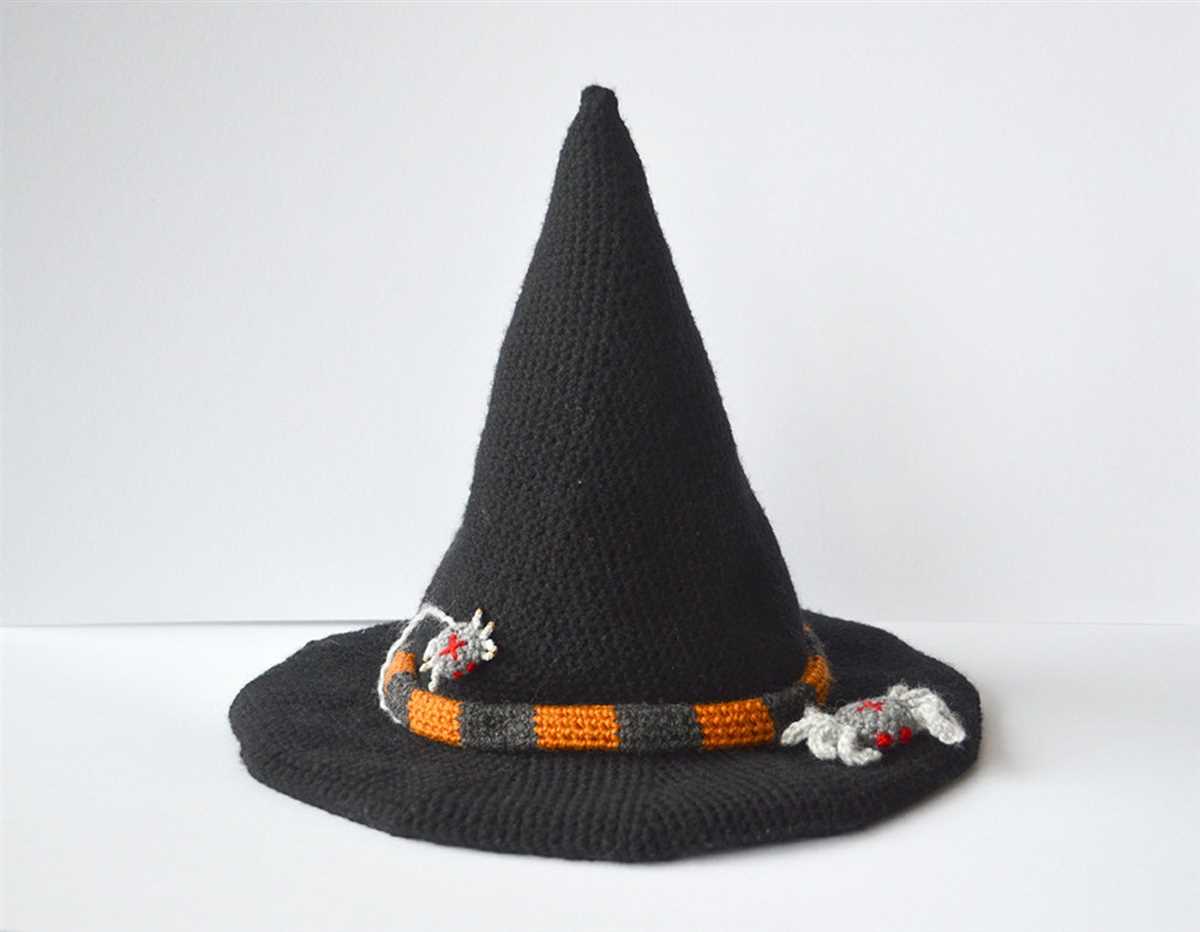
Halloween is just around the corner, and what better way to celebrate than by knitting your very own witch hat? Whether you’re dressing up as a classic witch or just looking to add a touch of whimsy to your fall wardrobe, this knitted witch hat pattern is the perfect project for you. With its pointy shape and wide brim, it’s sure to bring a magical touch to any Halloween costume or outfit.
This pattern is suitable for knitters of all skill levels, from beginners to advanced. It uses basic knit and purl stitches, along with simple decreases and increases, making it a great project for those who are just starting out with knitting. If you’re an experienced knitter, you can easily customize the pattern to add your own unique touch, such as adding stripes or a different color for the brim.
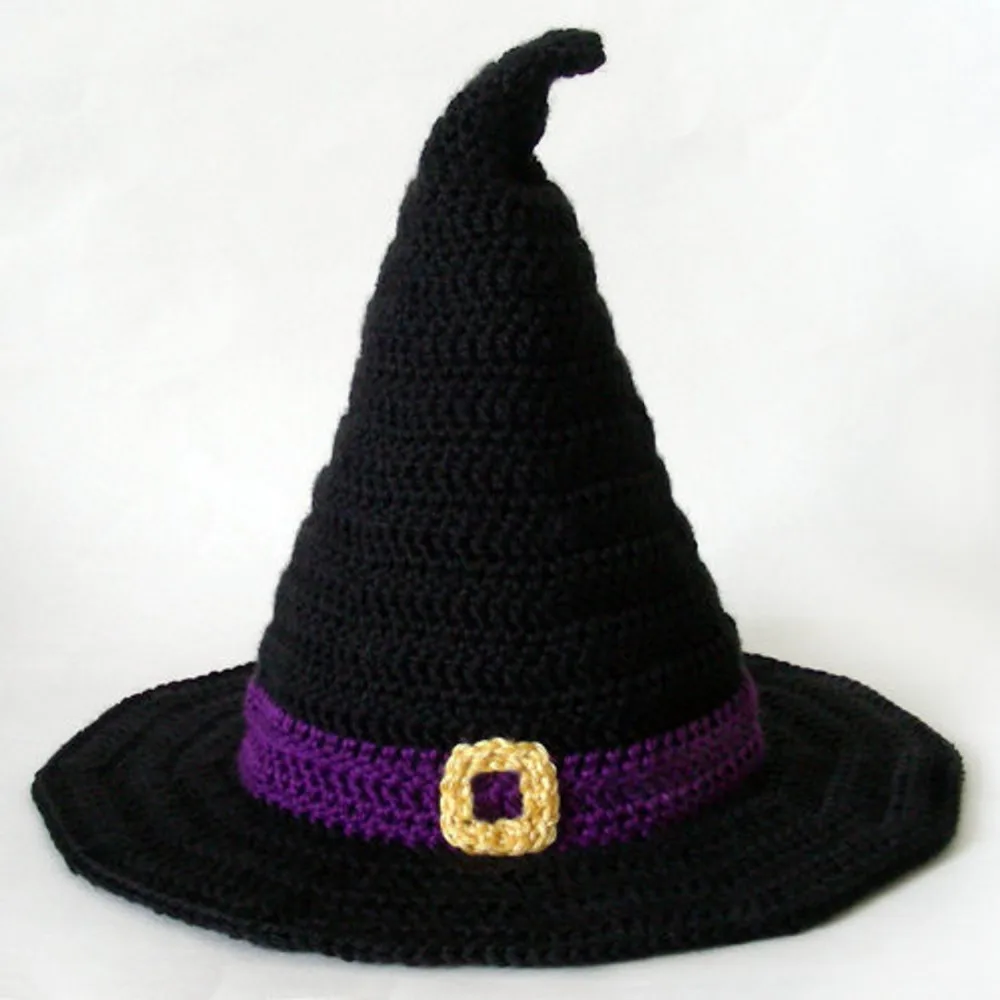
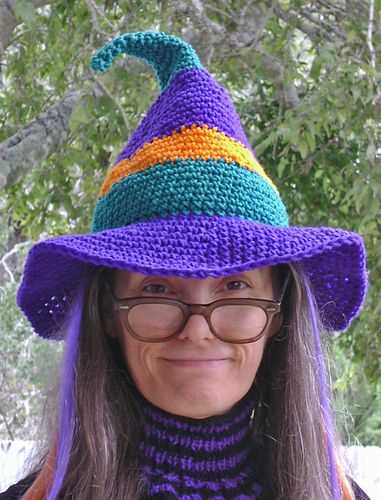
Knitting your own witch hat not only allows you to create a one-of-a-kind accessory, but it also gives you the opportunity to choose the perfect yarn for your project. For a classic witch hat look, opt for a deep black yarn made from wool or acrylic. If you want a more vibrant and playful hat, consider using a variegated yarn with bold colors. The choice is yours, and the possibilities are endless!
Knitted Witch Hat Pattern

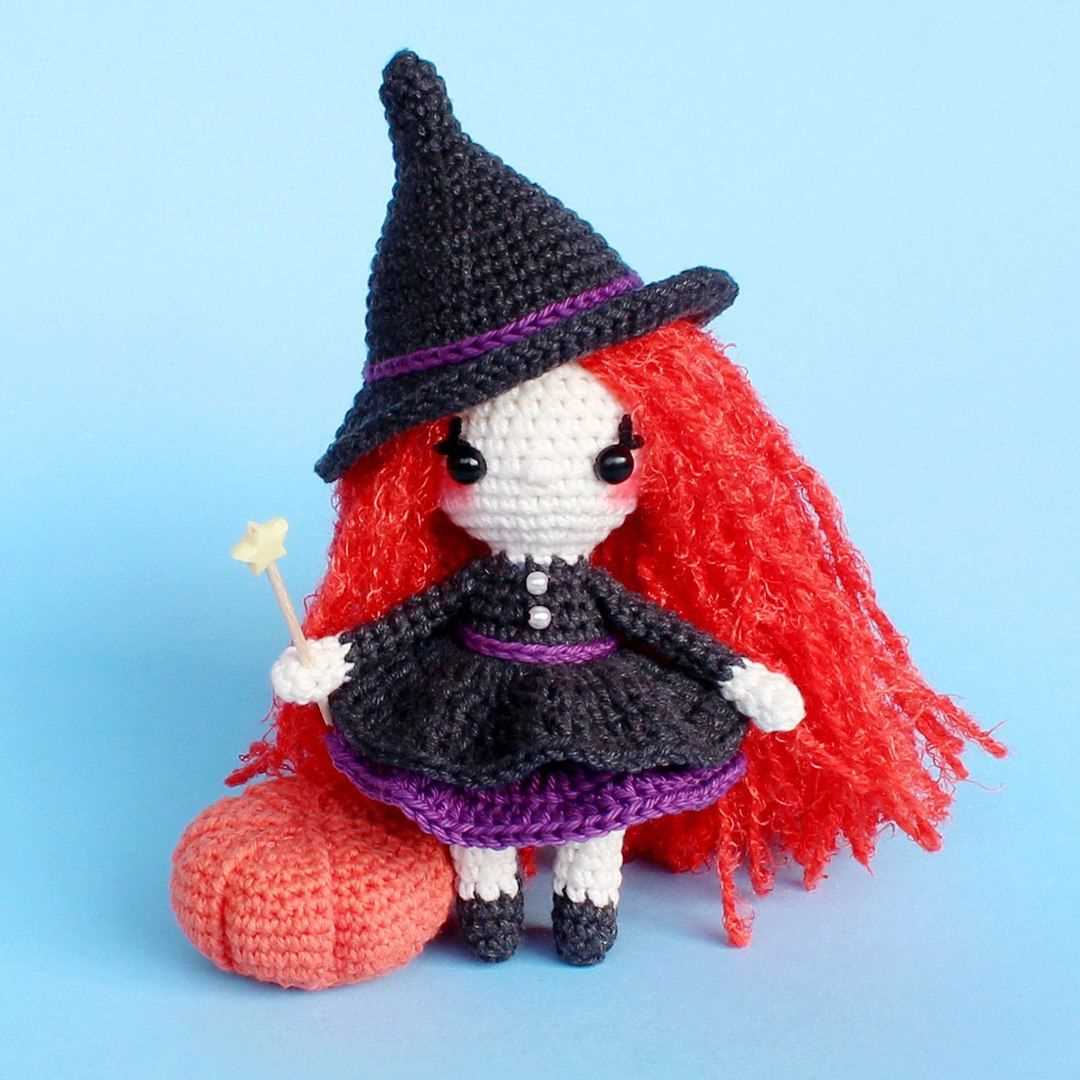
Are you ready to embrace your inner witch? This knitted witch hat pattern is the perfect accessory for Halloween or any other occasion where you want to channel some magical vibes. The pattern is easy to follow, making it a great project for knitters of all skill levels.
To get started, you’ll need a few basic knitting supplies. You’ll need a pair of knitting needles, yarn in your choice of color, and a tapestry needle for finishing. You can choose any color you like for your witch hat, but black or purple are classic choices that give off a spooky vibe.
Materials:
- Knitting needles (size may vary depending on the yarn you choose)
- Yarn in your choice of color
- Tapestry needle
- Stitch markers (optional)
Once you have your materials ready, it’s time to start knitting! The pattern begins with casting on stitches to create the brim of the hat. From there, you’ll work your way up to create the body of the hat, shaping it as you go to achieve the classic pointed witch hat shape.
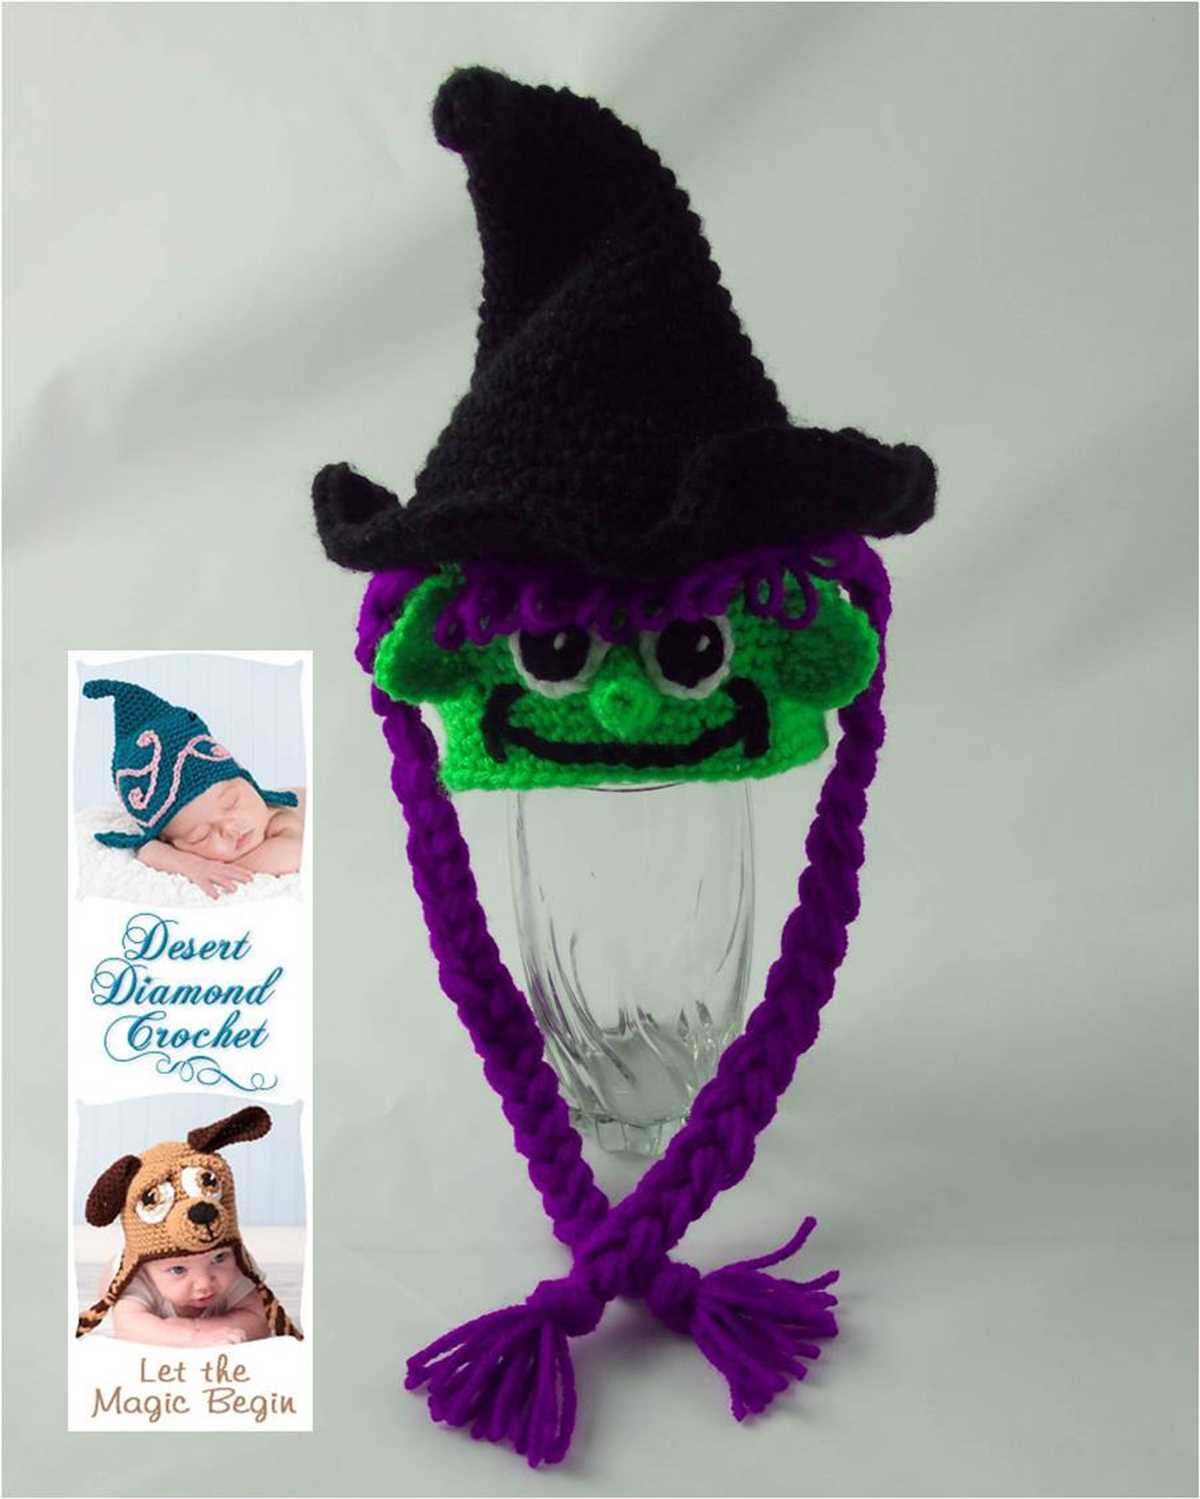
This pattern is customizable, so you can adjust the size of the hat to fit your head perfectly. You can also add embellishments like a ribbon or a decorative brim to make it your own. Whether you’re dressing up as a witch for Halloween or just love the witchy aesthetic, this knitted hat is sure to be a hit!
Materials
Before you start knitting your witch hat, you will need to gather the following materials:
- Yarn: You will need a medium weight yarn in the color of your choice. The yarn should be suitable for knitting needles of size US 8 (5mm). Choose a yarn that is soft and comfortable to wear.
- Knitting Needles: You will need a pair of knitting needles in size US 8 (5mm). Make sure the needles are suitable for the yarn you have chosen.
- Tapestry Needle: You will need a tapestry needle with a large eye for weaving in the ends of your yarn.
- Stitch Marker: A stitch marker can be helpful to mark your rounds as you knit the hat.
- Scissors: You will need a pair of scissors to cut your yarn.
- Measuring Tape: A measuring tape will be useful to measure your gauge and ensure your hat fits correctly.
- Pom Pom (optional): If you like, you can add a pom pom to the top of your witch hat. You can use a store-bought pom pom or make your own using yarn and a pom pom maker.
Tension/Gauge
It is important to obtain the correct tension or gauge when knitting your witch hat. To ensure that your hat fits properly, it is recommended to check your tension before starting the project. The pattern will specify the number of stitches and rows for a specific gauge. Use your US 8 (5mm) knitting needles and your chosen yarn to create a swatch of knitting in the specified gauge. Measure your swatch and adjust your needle size if necessary to achieve the correct tension.
Gauge

The gauge is an important aspect when knitting any pattern, including a knitted witch hat. It refers to the number of stitches and rows per inch (or centimeter) achieved by the knitter using a specific yarn and needle size. It is crucial to obtain the correct gauge to ensure that the finished project will have the desired measurements.
To determine the gauge, the knitter creates a swatch. This is a small piece of knitting worked with the chosen yarn and needles. The swatch should be at least 4 inches (10 cm) square and knitted in the stitch pattern specified for the project. After the swatch is completed, it is washed and blocked to mimic the final dimensions of the finished item.
Why is the gauge important?
The gauge helps the knitter to ensure that the hat will fit properly. If the gauge is too loose, the hat may turn out larger than intended. Conversely, if the gauge is too tight, the hat may end up being too small. The gauge also affects the overall drape and texture of the knitted fabric, so achieving the correct gauge is essential for the desired look of the hat.
How to measure gauge?
Measuring the gauge is relatively simple. Using a ruler or measuring tape, count the number of stitches and rows within the defined space. For example, if the pattern states that the gauge is 20 stitches and 24 rows per 4 inches (10 cm), measure 4 inches (10 cm) horizontally and vertically on the swatch. Count the number of stitches and rows within that space, and compare it to the desired gauge. If the stitch count matches but the row count differs, it may be necessary to adjust the tension or needle size to achieve the correct gauge.
Why should I swatch before starting the hat?
Swatching is an important and often overlooked step in knitting. It allows the knitter to ensure that the needles, yarn, and tension are appropriate for the project at hand. By investing time in swatching, the knitter can prevent disappointment and frustration that may arise from an ill-fitting or poorly executed project. Taking the time to swatch and achieve the correct gauge will ultimately result in a better-fitting and more satisfying finished knitted witch hat.
Cast On
Before starting to knit the witch hat, you need to cast on the required number of stitches. This is the first step in creating the base of your hat. There are different methods of casting on, but for this project, we will be using the long-tail cast on method.
Materials needed:
- Worsted weight yarn
- Size 8 circular knitting needles
- Tape measure
- Yarn needle
Step 1: Measure a long tail of yarn, approximately three times the width of the brim of your hat. This tail will be used to create the cast on stitches.
| Step 2: | Make a slip knot by making a loop with the tail end of the yarn, crossing the working end of the yarn over the loop, and pulling the working end through the loop. Place the slip knot on the knitting needle. |
| Step 3: | Hold the knitting needle with the slip knot in your right hand and the tail end of the yarn in your left hand. Insert the needle into the slip knot from left to right. |
| Step 4: | With your right hand, bring the working end of the yarn (the end attached to the ball of yarn) over the top of the knitting needle and to the front. |
| Step 5: | With your right hand, bring the working end of the yarn under the knitting needle and to the back, creating a loop around the needle. |
| Step 6: | With your right hand, bring the working end of the yarn over the top of the knitting needle and to the front again. |
| Step 7: | Continue steps 4-6 until the desired number of stitches have been cast on. Make sure to leave a long tail of yarn at the end for finishing. |
Once you have completed the cast on, your knitting is ready to begin. The stitches will be held on the circular knitting needles, allowing you to knit in the round and create the witch hat shape.
Ribbing

Ribbing is a knitting technique commonly used in hat patterns, including the knitted witch hat pattern. It creates a stretchy and flexible band that fits comfortably around the head. The ribbing is typically worked at the beginning of the hat and can be knitted using different stitch patterns, such as the classic knit-purl rib or the twisted rib.
To create ribbing, you will alternate between knitting and purling stitches in a specific pattern. This creates a textured fabric with raised ridges that provide elasticity. The most common ribbing pattern is the 1×1 rib, where you knit one stitch and purl one stitch in alternating rows. This pattern is often used in hat brims as it allows the hat to stretch and fit snugly on the head.
Ribbing can also be knitted in different widths, such as 2×2 or 3×1. The numbers before the “x” indicate how many knit stitches and purl stitches are repeated in the pattern. For example, in a 2×2 rib, you would knit two stitches and purl two stitches in alternating rows.
The ribbing section of the knitted witch hat pattern provides a functional and aesthetic element to the hat. It not only ensures a comfortable fit but also adds visual interest to the overall design. The ribbing can be customized based on personal preference, allowing knitters to experiment with different stitch patterns and widths to create a unique and stylish hat.
Main Body

A knitted witch hat is a fun and quirky accessory that can add a touch of whimsy to any outfit or costume. Whether you’re looking for a costume for Halloween or simply want to embrace your inner witch, knitting your own hat allows you to customize it to your own style and preferences. With the right pattern and a basic knowledge of knitting techniques, you can create a hat that is both comfortable to wear and visually appealing.
When choosing a pattern for your knitted witch hat, it’s important to consider both the skill level and the desired look. There are many different patterns available, ranging from simple and beginner-friendly to more complex and advanced. If you’re new to knitting, it’s a good idea to start with a basic pattern that uses basic stitches and techniques. As you gain more experience, you can try more complicated patterns with different stitch patterns and construction methods.
Choosing the Right Yarn
When it comes to selecting yarn for your knitted witch hat, there are a few factors to consider. The weight and fiber content of the yarn will determine the overall look and feel of the finished hat. For a more structured and stiff hat, you may want to choose a yarn that has some natural stiffness or is blended with a small amount of acrylic or nylon. If you prefer a softer and more slouchy hat, a yarn with a higher percentage of natural fibers like wool or alpaca may be more suitable.
It’s also important to consider the color of the yarn. Traditional witch hats are often black, but don’t be afraid to experiment with different colors to make your hat truly unique. You could choose a bold and vibrant color to make a statement, or opt for a more subtle and neutral shade for a more classic look. Ultimately, the choice of yarn color is up to your personal preference and the overall aesthetic you want to achieve.
Decreases
In order to shape the knitted witch hat, you will need to make decreases. Decreases are a common technique used in knitting to reduce the number of stitches on your needles. This creates a tapered shape, which is perfect for the pointy top of the witch hat. There are several ways to make decreases, but for this pattern, we will be using the k2tog (knit two together) decrease.
To make a k2tog decrease, simply insert your right needle into the next two stitches on your left needle as if to knit them together. Then, wrap the yarn around your right needle and pull it through both stitches at once. This combines the two stitches into one, effectively decreasing the stitch count by one.
When working the decreases for the witch hat, you will typically be decreasing on every other round. To do this, you will need to identify the stitches where the decreases should be made. This is usually done by counting a certain number of stitches in from the edge or using a stitch marker to mark the decrease points.
Once you have identified the decrease points, simply work the k2tog decrease on the appropriate stitches. Keep in mind that working decreases can sometimes affect the pattern or stitch count, so be sure to follow the instructions carefully to maintain the desired shape of the hat. As you continue to make decreases, you will notice the pointy top of the witch hat taking shape. Continue working the decreases until you reach the desired number of stitches for the top of the hat.
Brim
The brim of a witch hat is an essential part of its overall design and functionality. It serves to provide structure and shape to the hat, as well as adding a decorative element to the finished piece. The brim is typically wider than the body of the hat, creating a distinct silhouette that is instantly recognizable.
When making a knitted witch hat, the brim can be created using a variety of techniques. One common method is to start with a provisional cast-on and knit the brim in a ribbed pattern, such as 1×1 or 2×2 rib. This creates a stretchy and flexible brim that can be comfortably worn and easily adjusted to fit different head sizes.
Another option for the brim is to add a contrasting color or stitch pattern to create visual interest and add a pop of color to the hat. This can be done by changing colors or using a different stitch pattern, such as a garter stitch or a lace pattern, for the brim section.
It’s important to consider the size and shape of the brim when knitting a witch hat. A wider brim will provide more shade and protection from the sun, while a narrower brim will create a more streamlined and elegant look. The length of the brim can also vary, with shorter brims giving a more casual and playful vibe, while longer brims can create a more dramatic and mysterious effect.
Overall, the brim of a knitted witch hat is a versatile and important element of its design. Whether you choose a simple ribbed brim or experiment with different colors and stitch patterns, the brim is sure to add style and personality to your finished hat.
Finishing
Once you have completed knitting your witch hat, it’s time to finish it off and make it ready to wear. Here are some steps to follow:
- Weave in loose ends: Use a tapestry needle to weave in any loose ends of yarn from where you changed colors or finished off a section. This will create a neater appearance and prevent the yarn from unraveling.
- Block the hat: Wet blocking can help shape your hat and even out any uneven stitches. Gently soak the hat in lukewarm water and then lay it flat on a clean towel to dry. Shape the hat into its desired form, making sure the brim is flat and not curled.
- Add embellishments: To make your witch hat even more magical, you can add embellishments such as a ribbon, flowers, or witchy decorations. Use a hot glue gun or needle and thread to attach these embellishments securely to the hat.
- Try it on: Once your hat is completely dry and finished, try it on to ensure the fit is comfortable and snug. Adjust the brim if needed to achieve your desired look.
With these finishing touches, your knitted witch hat is now complete and ready to be worn for Halloween or any costume party. Get ready to cast some spells and embrace your inner witch!