
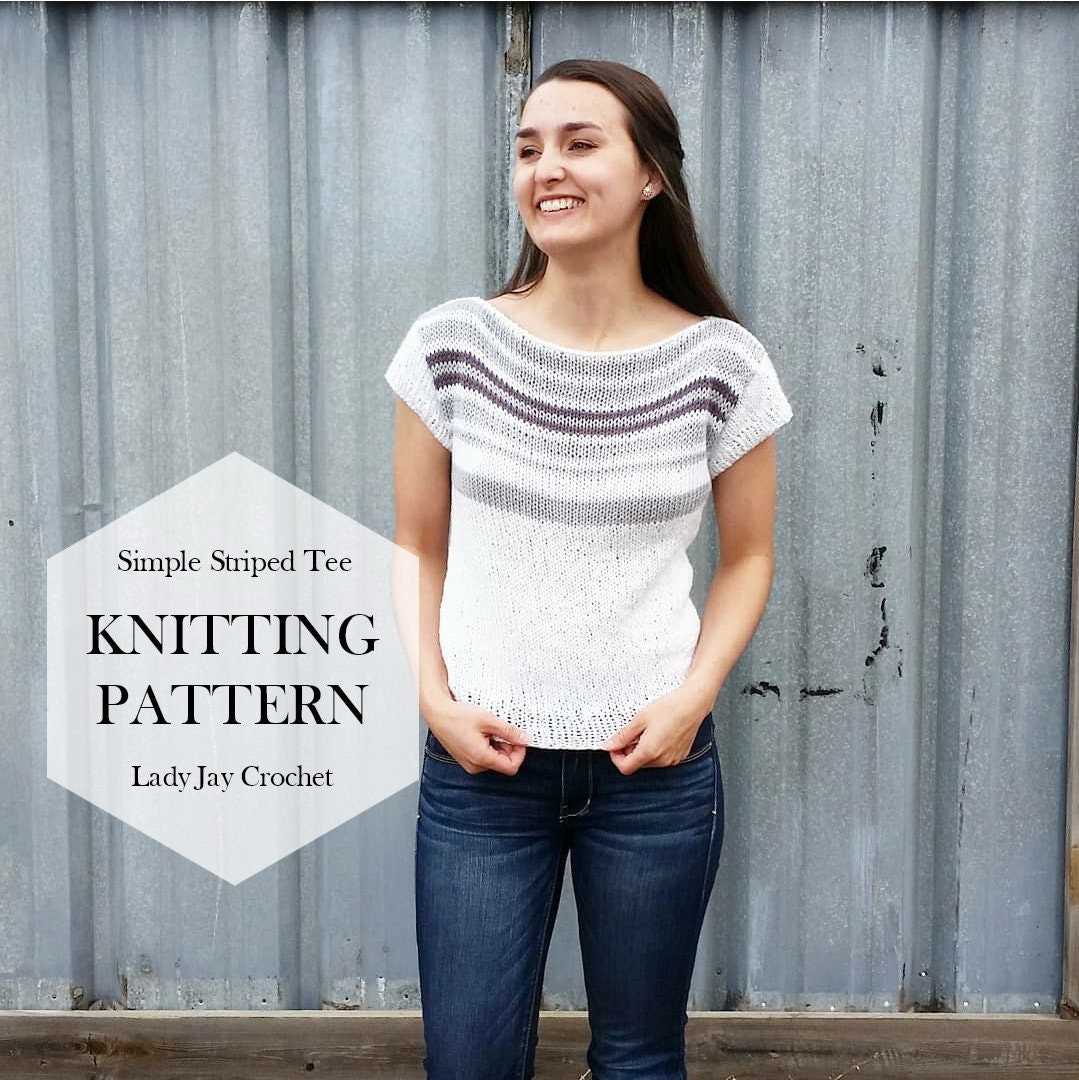
Knitting is a popular hobby that allows people to create beautiful and functional garments with just a few simple tools. One of the most versatile items in a knitter’s wardrobe is the t-shirt. A knitted tee can be worn in any season and can be made in a variety of stitch patterns and colors. Whether you’re an experienced knitter or just starting out, a knitted tee is a great project to try.
When choosing a pattern for a knitted tee, there are a few things to consider. The first is the type of yarn you want to use. There are countless options available, from soft and lightweight cotton to cozy and warm wool. The choice of yarn will determine the drape and weight of the finished garment, so consider the season and climate in your area. It’s also a good idea to swatch and check your gauge before starting the project to ensure the tee will fit properly.
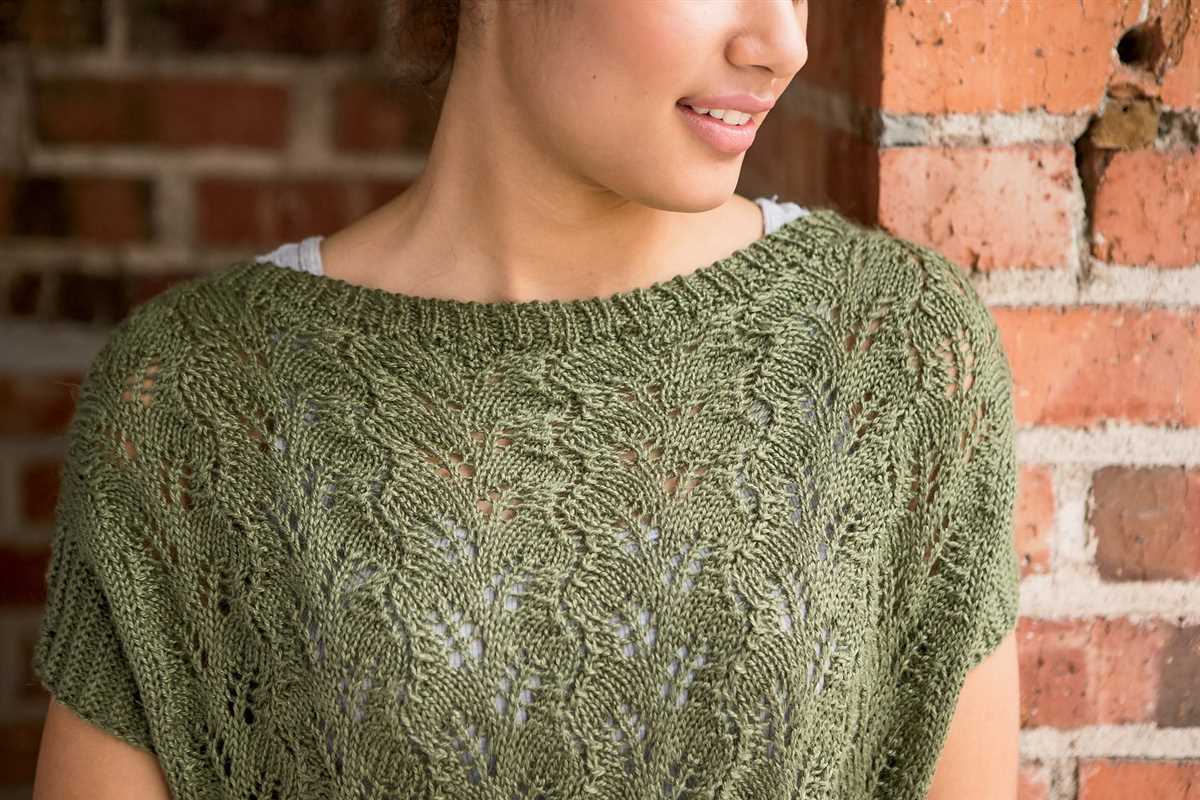
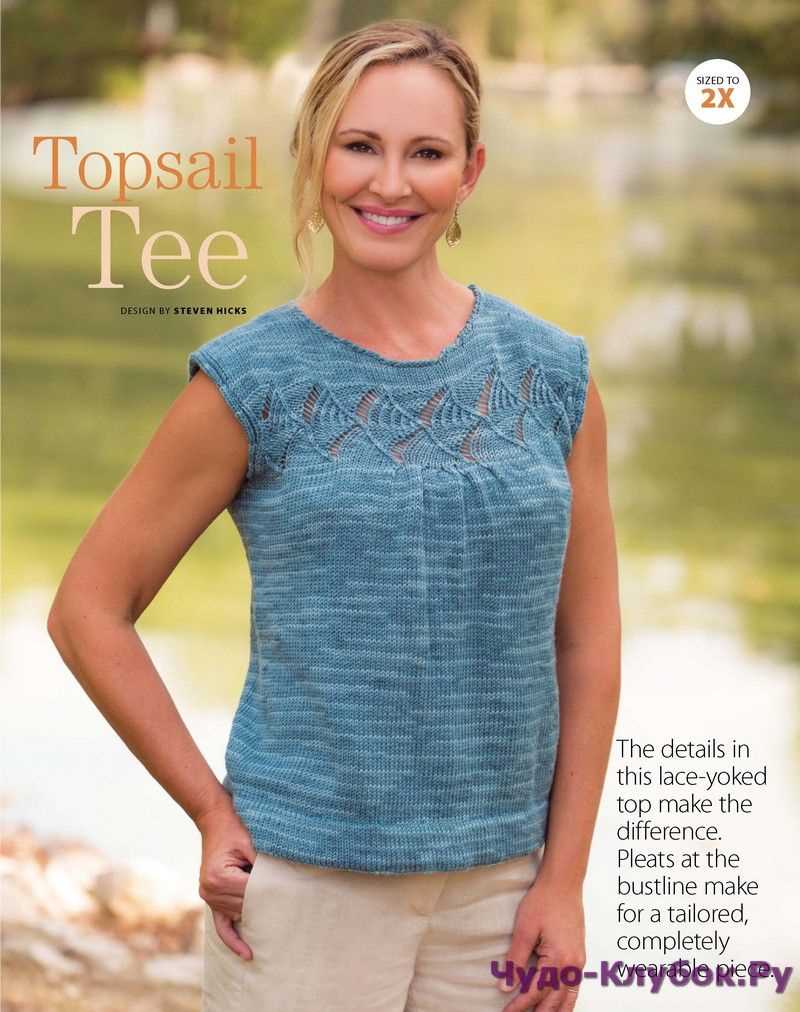
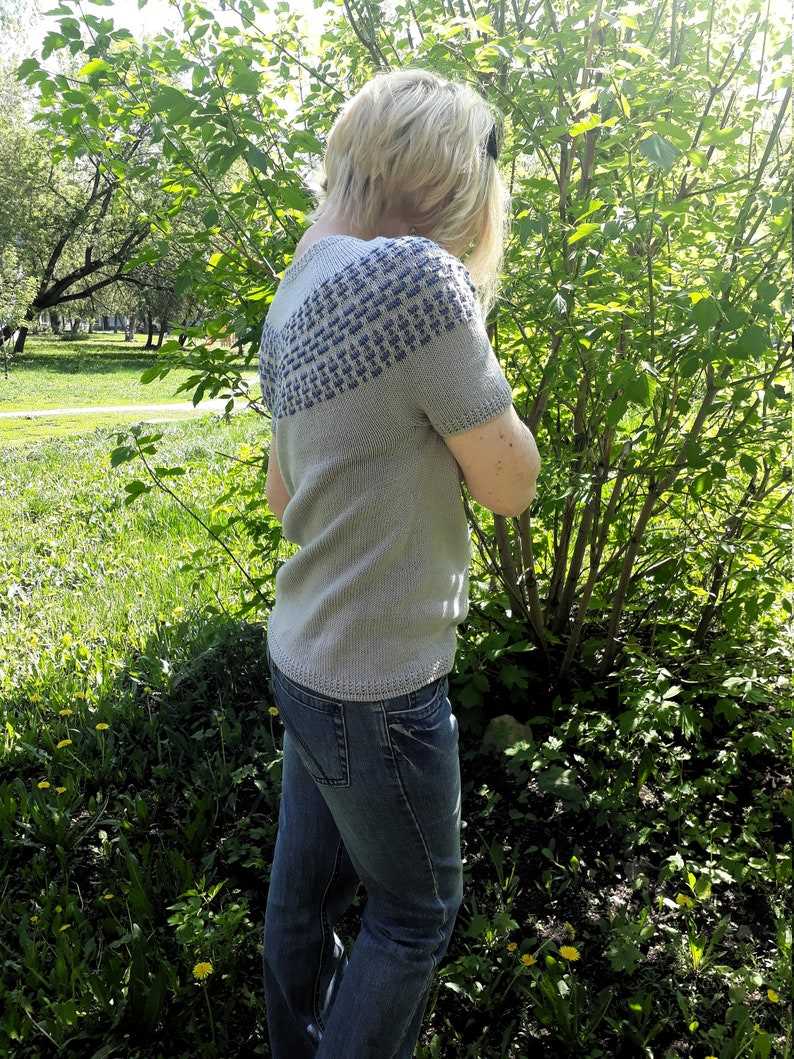
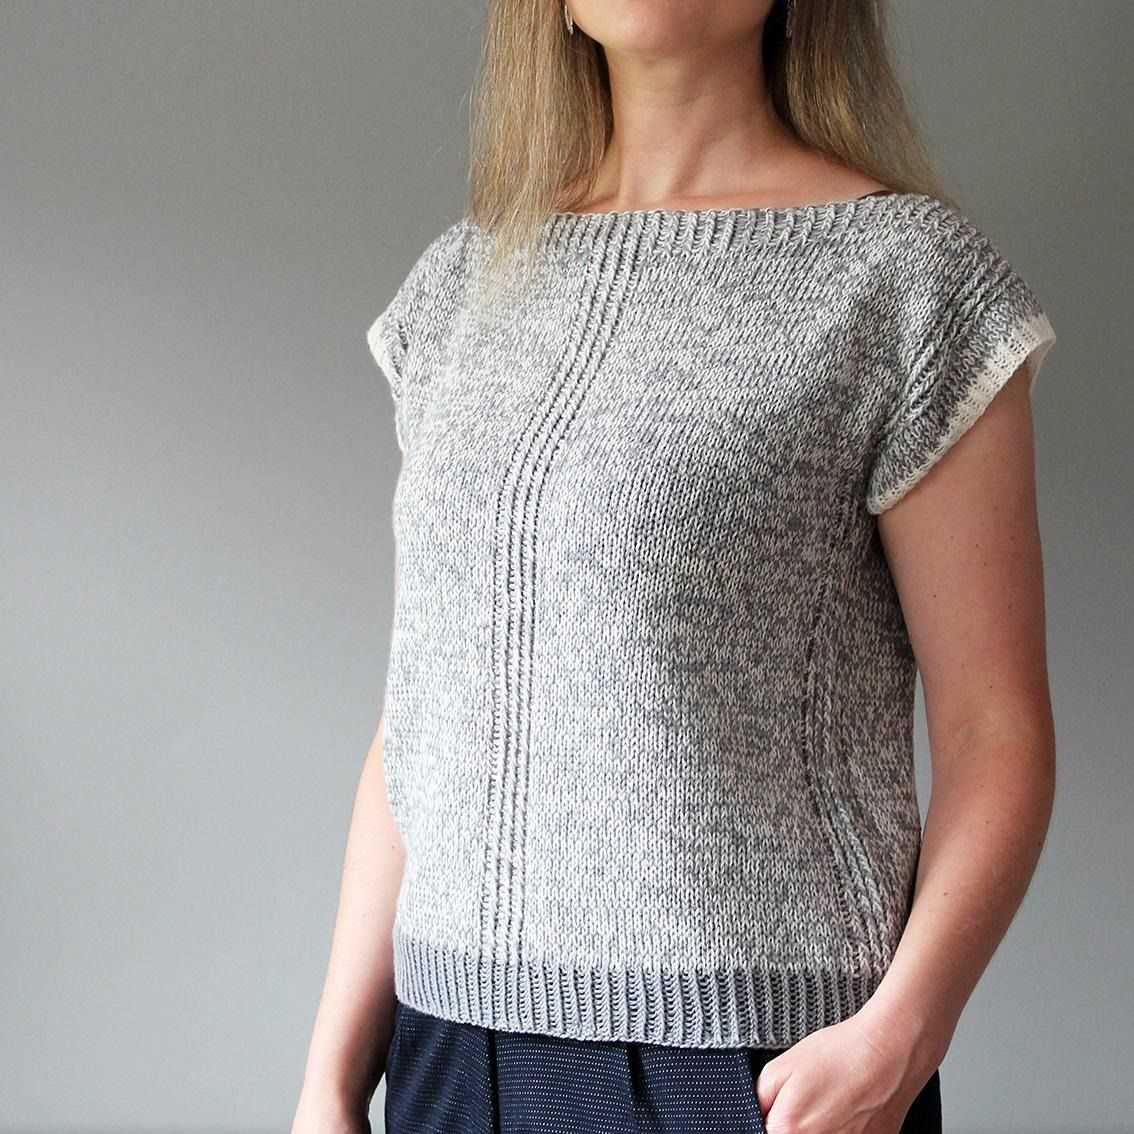
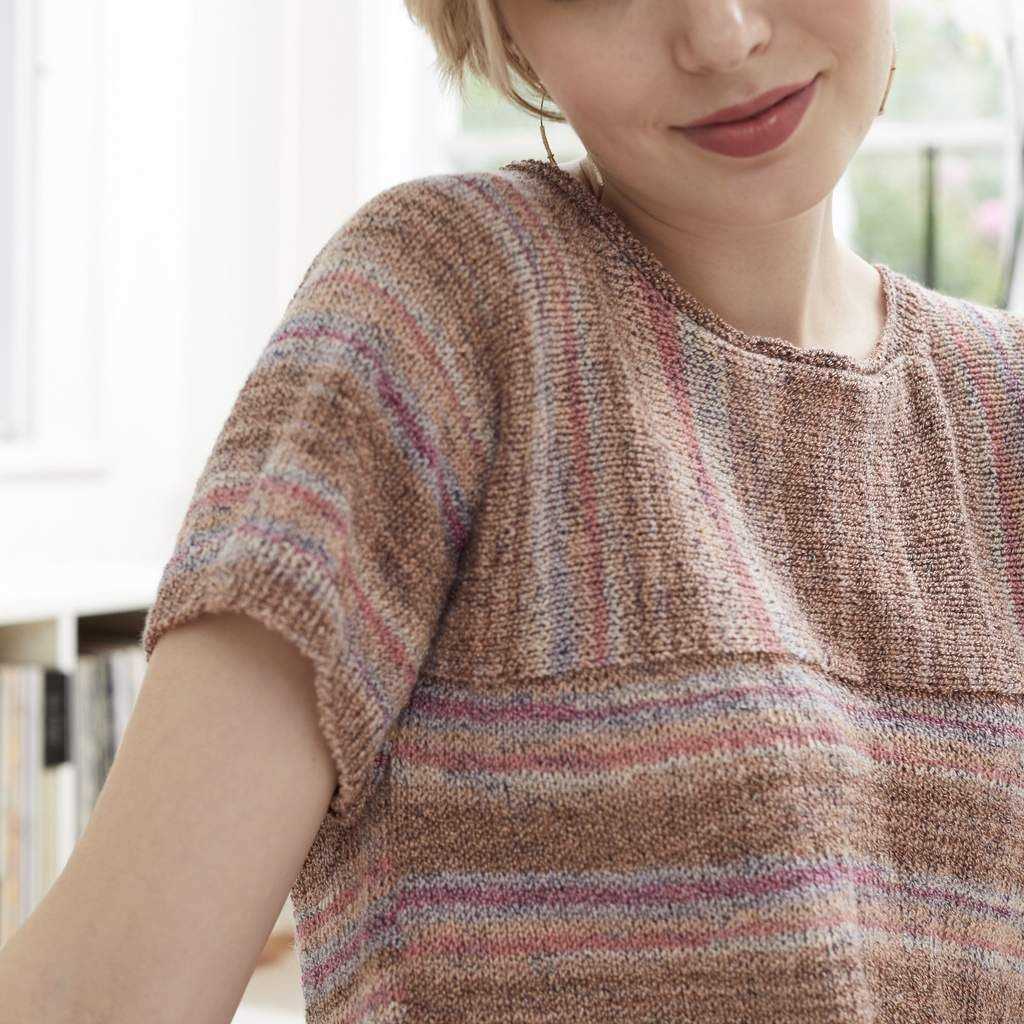
Another consideration when choosing a pattern is the stitch pattern. The stitch pattern will determine the look and texture of the fabric. Simple stockinette stitch is a popular choice for tees, as it creates a smooth and stretchy fabric. However, you can also experiment with lace patterns, cables, or even colorwork to add interest and detail to your tee. Just make sure that the stitch pattern is compatible with the yarn you’ve chosen.
How to Knit a Stylish Tee: A Comprehensive Pattern
Knitting your own stylish tee can be a rewarding and fulfilling project for any knitting enthusiast. With this comprehensive pattern, you’ll be able to create a beautiful and trendy tee that will make you the envy of your friends.
To start, gather all the necessary materials, including the appropriate yarn, knitting needles, and any additional embellishments or accessories you may want to add to your tee. Make sure to choose a soft and breathable yarn that is suitable for the season and desired drape of the tee.
Step 1: Casting On and Ribbing
Begin by casting on the required number of stitches, using a long-tail cast-on or any other preferred method. Next, work a few rows of ribbing to create a stretchy edge and add structure to the hem, collar, and cuffs of the tee. Depending on your preference, you can choose between a simple 1×1 or 2×2 ribbing pattern.
Step 2: Body and Shaping
Once the ribbing is complete, it’s time to work on the body of the tee. You can choose between a variety of stitch patterns, such as stockinette, garter stitch, or even lace, to create the desired texture and look. Remember to include any necessary shaping instructions, such as increases or decreases, to ensure a proper fit.
If you want to add waist shaping, you can incorporate decreases on the sides of the tee, gradually tapering towards the waist. This will create a more flattering and fitted silhouette. Don’t forget to try on your tee as you go to make sure it fits properly and make any necessary adjustments.
Step 3: Sleeves
After completing the body, it’s time to knit the sleeves. You can choose between short sleeves, long sleeves, or even sleeveless options, depending on your preference and the intended use of the tee. Follow the same stitch pattern used for the body, and don’t forget to incorporate any necessary shaping instructions, such as increases or decreases for a proper fit.
Step 4: Finishing Touches
Once all the knitting is complete, it’s time to add the finishing touches to your tee. This includes seaming the sides and sleeves, weaving in any loose ends, and blocking the tee to ensure a polished and professional look. You can also add optional embellishments, such as buttons, beads, or embroidery, to personalize your tee and make it truly unique.
By following this comprehensive pattern, you’ll be able to knit a stylish tee that fits you perfectly and reflects your personal style. Whether you’re a beginner or an experienced knitter, this project is sure to provide a fun and rewarding knitting experience. So grab your knitting needles and get ready to create a tee that you’ll love to wear!”
Choosing the Right Yarn
Choosing the right yarn is an important decision when knitting a tee. The type of yarn you choose can affect the drape, the fit, and the overall look of the garment. Here are some factors to consider when selecting yarn for your knitted tee:
Fiber Content:
The fiber content of the yarn will determine the characteristics of the finished tee. Different fibers have different levels of elasticity, softness, and breathability. Common options for knitting tees include cotton, linen, bamboo, and blends of these fibers. Cotton is often chosen for its breathability and ease of care, while linen offers a crisp and lightweight feel. Bamboo yarn is known for its softness and drape. Consider the qualities you desire in your tee and choose a yarn that aligns with those preferences.
Weight:
The weight of the yarn is another important consideration. It can impact the final size and drape of the tee. Lighter weight yarns, such as fingering or lace weight, will create a more delicate and lightweight fabric. On the other hand, heavier weight yarns, like worsted or bulky, can result in a warmer and denser tee. Consider the season or occasion for which you are knitting the tee and choose a yarn weight that suits your needs.
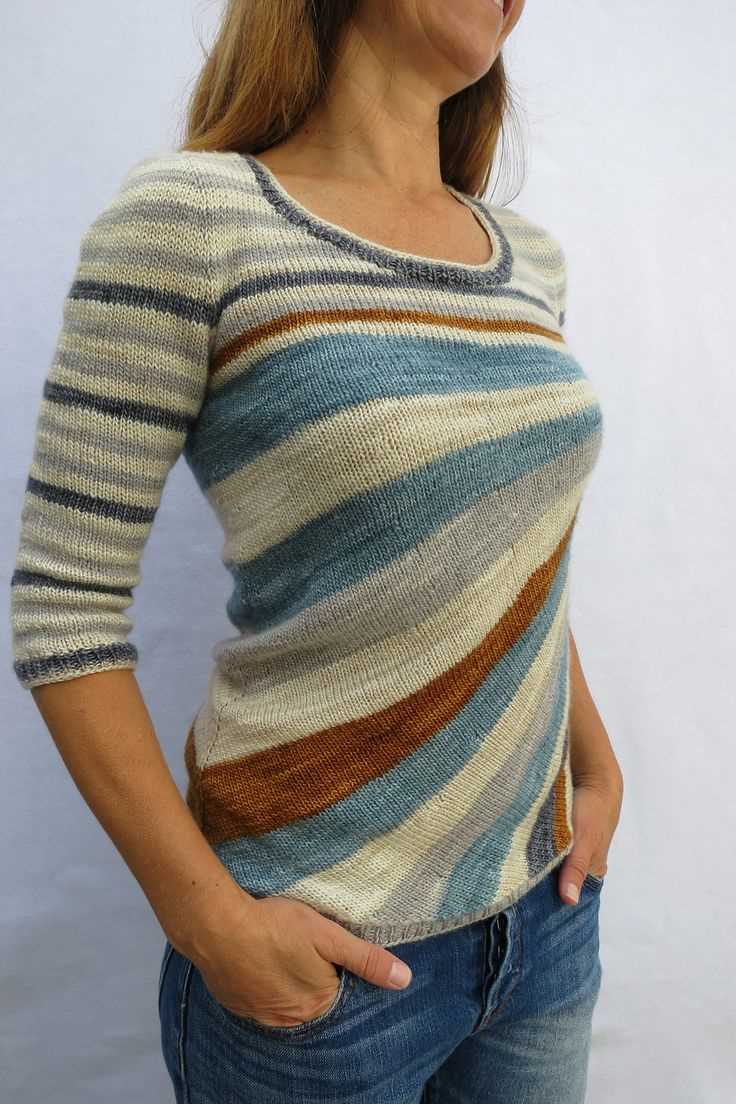
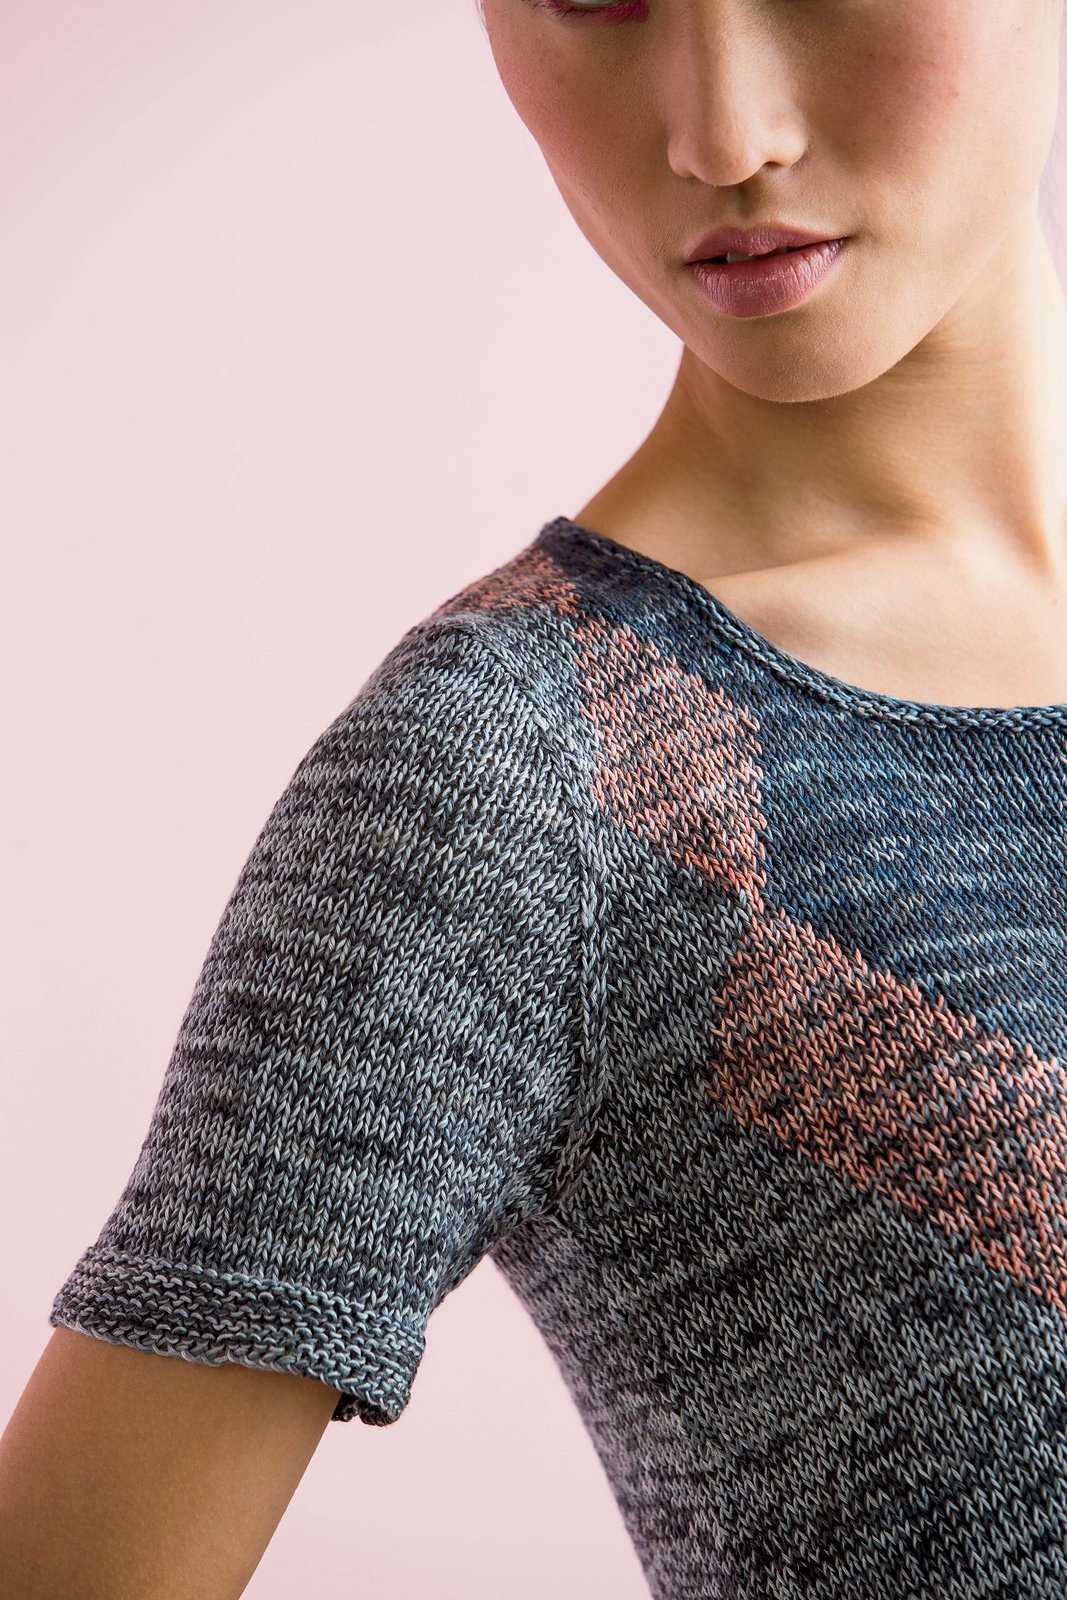
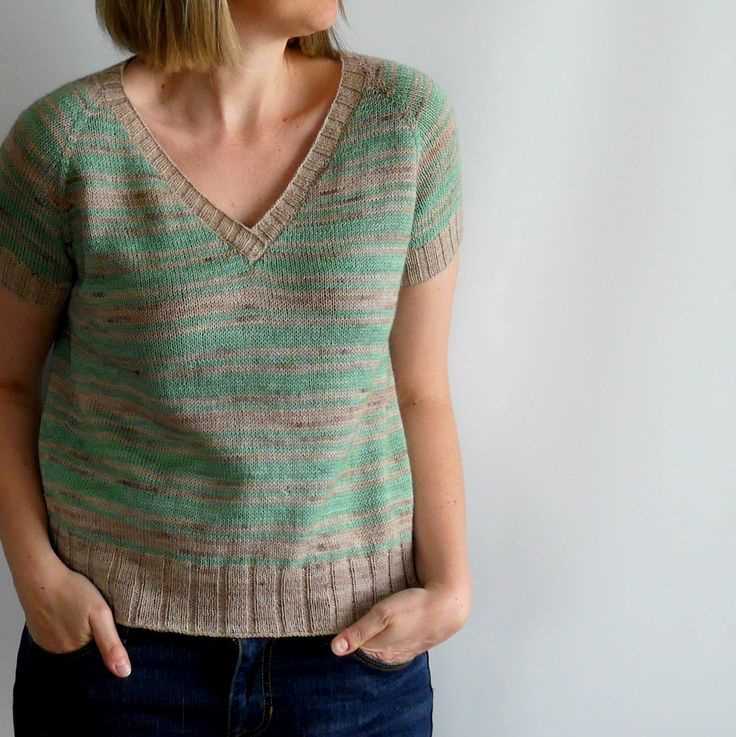
Color and Texture:
The color and texture of the yarn can greatly impact the visual appeal of the knitted tee. Solid-colored yarns tend to showcase stitch patterns and design elements more prominently, while variegated or self-striping yarns can add visual interest to a simple pattern. Likewise, the texture of the yarn, such as smooth or textured, can affect the overall look of the tee. Consider the style and design of your tee and choose a yarn color and texture that enhances the intended aesthetic.
By considering the fiber content, weight, color, and texture of the yarn, you can choose the right yarn to create a knitted tee that meets your desired fit, feel, and appearance. Take your time to explore different options and swatch with different yarns to find the perfect match for your project.
Knitting Tools and Techniques
Knitting is a popular craft that requires a few essential tools. To start knitting, you will need knitting needles, which come in different sizes and materials. The size of the needles you choose will depend on the yarn weight and the desired gauge of your project. Metal and wooden needles are the most common options, each offering its own benefits and drawbacks. Metal needles are durable and smooth, making them great for fast knitting, while wooden needles provide a warm feel and are less likely to slide out of stitches.
A crucial tool for knitting is a tape measure. You’ll need it to check your gauge and measure the length of your work. Another essential tool is stitch markers. They help you mark specific points in your knitting, such as the beginning of a round or the placement of a pattern repeat. Stitch holders or safety pins are also useful for holding stitches while you work on other parts of your project.
When it comes to knitting techniques, there are several basic stitches you should learn. The knit stitch and the purl stitch are the foundation of knitting. By combining these two stitches, you can create various patterns and textures. Another important technique is casting on, which is the process of creating the initial stitches on your needle. There are different methods for casting on, such as the long tail cast-on and the provisional cast-on.
Once you’ve mastered the basics, you can explore more advanced techniques, such as increasing and decreasing stitches, knitting in the round, and working with different stitch patterns. The possibilities in knitting are endless, and with the right tools and techniques, you can create beautiful and unique projects.
Tee Design and Measurements
When designing a knitted tee, it is important to start with accurate measurements. This will ensure that the tee fits properly and looks flattering on the wearer. Measurements to consider include the bust, waist, and hip circumference, as well as the length from the shoulder to the desired hemline. Taking these measurements on the intended wearer will provide the most accurate results.
Once the measurements are taken, the next step is to create a design that will showcase the knitted tee. This can include various elements such as stitch patterns, colorwork, or lace details. It is important to consider the overall style and look desired for the tee, as well as any specific preferences of the wearer. Drawing out the design on paper or using design software can help visualize how the tee will look.
When creating the pattern for the knitted tee, it is important to take into account the chosen stitch pattern and the intended measurements. This will determine the number of stitches and rows needed to achieve the desired fit and size. It is also important to include instructions for any shaping, such as decreases or increases, to ensure that the tee fits properly. Additionally, providing a gauge swatch and instructions for achieving gauge will help knitters to obtain the correct size and fit.
A well-designed knitted tee, with accurate measurements and a thoughtfully crafted pattern, will result in a stylish and flattering garment. By considering the overall design, measurements, stitch patterns, and shaping instructions, knitters can create a tee that is both enjoyable to knit and a joy to wear.
Creating the Back Panel
The back panel of the knitted tee is an essential component of the overall design, providing structure and support to the garment. To create the back panel, you will follow a specific pattern that outlines the required stitches and techniques.
First, you will cast on the necessary number of stitches for the size of the tee you are making. This will typically be provided in the pattern, along with any other initial instructions. Once you have cast on, you will begin working the desired stitch pattern for the back panel. This could be as simple as a basic stockinette stitch, or it could incorporate more complex stitch patterns such as cables or lace.
When working on the back panel, it is important to pay attention to the shaping and increases or decreases that may be required. These are typically indicated in the pattern and are used to create a better fit for the garment. You may need to decrease stitches at the neckline or armholes, or increase stitches for shaping the waist or hips. Following the pattern instructions carefully and keeping track of your stitches will ensure that the back panel is created correctly.
Once you have completed the required number of rows or reached the specified length for the back panel, you will typically bind off the stitches to secure the edge. This will create a neat and finished look to the panel. Make sure to follow the pattern instructions for any additional finishing touches, such as adding ribbing to the neckline or hem.
In summary, creating the back panel of a knitted tee involves casting on, following the designated stitch pattern, shaping as required, and finally binding off. Paying attention to the pattern instructions and keeping track of your stitches will result in a well-made and professionally finished back panel.
Knitting the Front Panel
Once you have completed the back panel of your knitted tee, it is time to move on to knitting the front panel. The front panel will have a similar design to the back panel, but with a few variations.
Start by casting on the required number of stitches for the front panel. You can refer to the pattern for the specific number of stitches needed. Use a medium-sized needle for this section, as it will create a slightly tighter fabric compared to the back panel.
Work the ribbing: Begin by working a few rows of ribbing at the hem of the tee. This will add elasticity and structure to the bottom edge. Follow the pattern instructions for the type of ribbing and the number of rows to work.
Establish the pattern: Once the ribbing is complete, you can begin working the main pattern for the front panel. This may involve a combination of knit and purl stitches, along with any additional stitch patterns mentioned in the pattern. Pay close attention to any shaping instructions, such as decreases or increases, to achieve the desired fit.
Add any stitch details: Depending on the design, the front panel may include additional stitch details such as cables, lace, or colorwork. Follow the pattern instructions carefully to incorporate these details correctly. Use stitch markers to keep track of pattern repeats and make adjustments as needed.
Shaping the neckline: Once the main pattern is complete, it is time to shape the neckline. This may involve working short rows, decreasing stitches, or creating a button placket. Follow the pattern instructions carefully to achieve the desired neckline shape.
Finish the front panel: Once the entire front panel is complete, bind off all stitches. Take care to match the tension and gauge of the back panel to ensure a balanced fit. Weave in any loose ends and block the front panel to shape and relax the stitches.
In summary, knitting the front panel of a knitted tee involves working the ribbing, establishing the main pattern, adding any stitch details, shaping the neckline, and finishing off the panel. Following the pattern instructions and paying attention to details will ensure a successful outcome.
Adding Sleeves to Your Tee
Adding sleeves to your knitted tee can be a great way to create a new look or add some extra warmth. Whether you prefer short sleeves, 3/4 sleeves, or long sleeves, there are various methods and patterns you can follow to achieve the desired sleeve length and style.
One option is to use a separate sleeve pattern and sew the sleeves onto the body of the tee. This method allows for more customization and flexibility in sleeve length and style. You can choose a sleeve pattern that matches the overall design of your tee or even experiment with different colors or textures for a unique look. Sewing the sleeves in place may require some skill and precision, but it can be a rewarding process that gives your tee a professional, polished finish.
Short Sleeves
If you prefer shorter sleeves for your tee, you can create them by reducing the number of rows or rounds in your sleeve pattern. Depending on the stitch pattern and gauge used for the body of the tee, you may need to make adjustments to ensure that the sleeves fit properly and have the desired length. It’s a good idea to try on the tee as you work on the sleeves to make sure they fit well and are the right length for your arms.
3/4 Sleeves
For 3/4 sleeves, you can start by working the sleeves to the desired length and then decreasing the number of stitches gradually to create a tapered effect. This can be achieved by working regular decreases, such as k2tog or ssk, at regular intervals. The number of decreases and intervals will depend on the desired width and shape of the sleeves. As with short sleeves, it’s important to try on the tee as you work on the sleeves to ensure a proper fit.
Long Sleeves
To add long sleeves to your tee, you can continue working on the sleeves until they reach the desired length. Depending on your preference, you can keep the sleeves straight or add shaping by increasing or decreasing stitches at certain points. If you choose to add shaping, be sure to adjust the number of increases or decreases evenly on both sides of the sleeves to maintain symmetry.
Overall, adding sleeves to your knitted tee can be a fun and creative process. Whether you’re looking to update an existing tee or create a new one from scratch, there are plenty of options and patterns available to help you achieve the look you want. With some planning and careful execution, you can easily transform your tee into a garment that suits your style and keeps you comfortable all year round.
Joining the Panels
Once you have knitted all the panels for your tee, it’s time to join them together to create the final garment. Before you start, make sure you have blocked the panels to ensure they are all the same size and shape. Blocking helps to give your tee a more polished and professional look.
To join the panels, you can use a variety of techniques such as sewing, grafting, or even knitting them together using a three-needle bind-off. The method you choose will depend on the pattern instructions and your personal preference.
If you decide to sew the panels together, use a tapestry needle and a matching yarn color. Start by placing the panels side by side, making sure the edges align properly. Use a whip stitch or mattress stitch to sew the panels together, taking care to make your stitches neat and tight. Remember to sew all the panels together in the same manner to create a cohesive look.
If your pattern calls for grafting the panels together, use the Kitchener stitch or a similar method. This technique seamlessly joins the panels by mimicking the look of knitted stitches. Follow the pattern instructions carefully to ensure you graft the panels correctly.
Another option is to use a three-needle bind-off, which creates a visually pleasing seam. To do this, hold the panels with the right sides facing each other and insert a third needle into both the first stitch of the front panel and the first stitch of the back panel. Knit these stitches together, then continue knitting one stitch from each panel together until all stitches are bound off. This method creates a strong seam that adds structural integrity to your tee.
Regardless of the method you choose, take your time and make sure the panels are joined securely. Once you have finished joining the panels, you can proceed with any additional finishing techniques required by the pattern, such as adding ribbing to the neckline or sleeves.
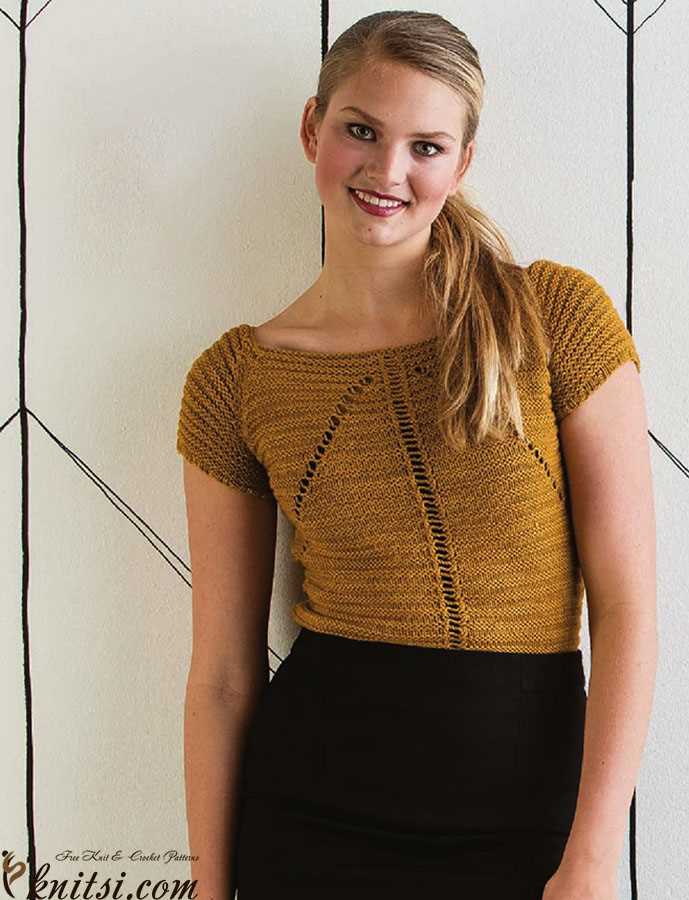
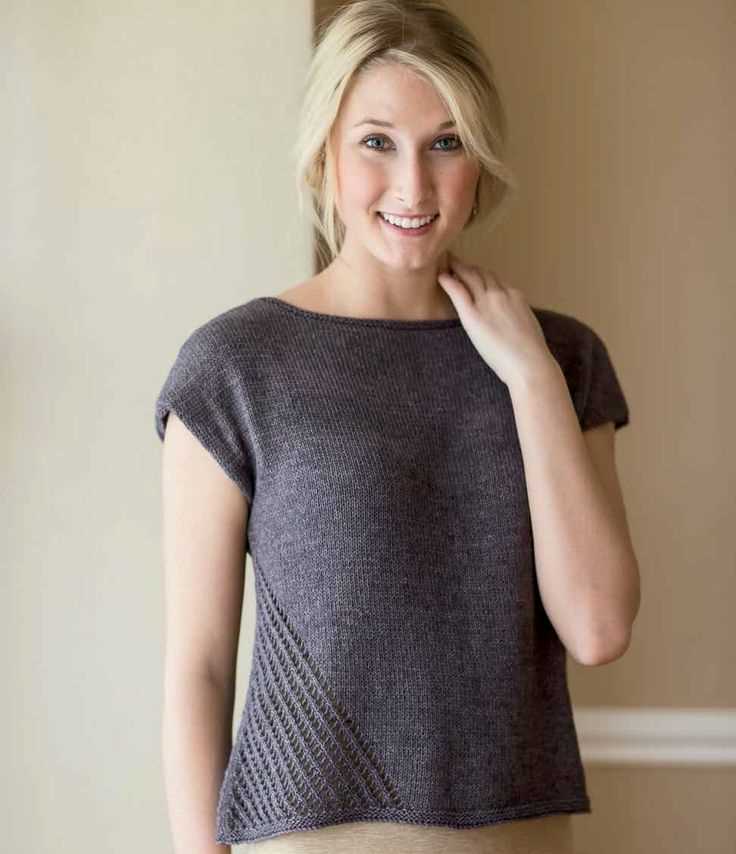
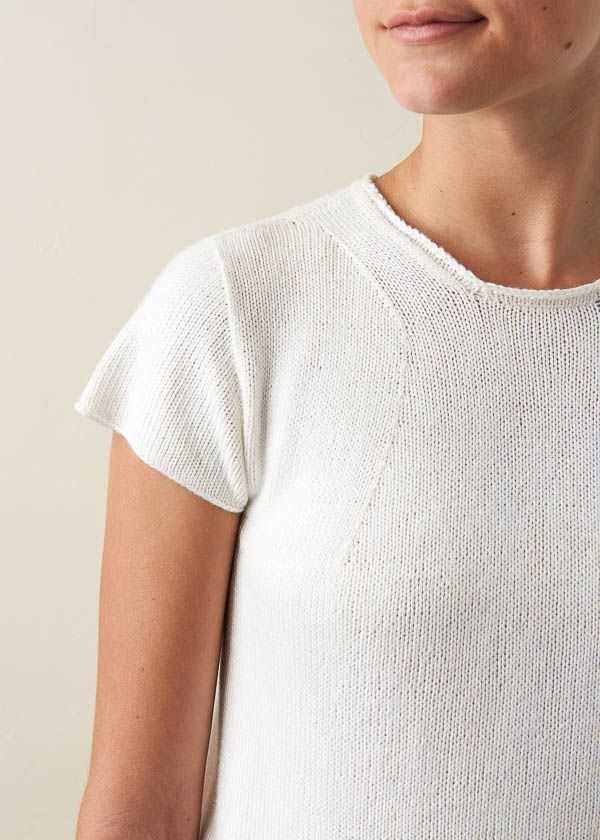
Finishing Touches: Neckline and Hem
When it comes to knitting a tee, the finishing touches can really make a difference in the final look and feel of the garment. One important aspect to consider is the neckline. The neckline can be knitted in different styles, such as a crew neck, V-neck, or scoop neck, depending on the desired look. It is common to use ribbing, such as a 1×1 or 2×2 rib, to create a neat and stretchy neckline. This not only adds visual interest but also helps the neckline to retain its shape over time.
The hem of the tee is another area to pay attention to. The hem can be knitted with a simple turn under and sewn edging, or with a decorative bind-off. A picot bind-off, for example, adds a delicate and feminine touch to the hem. Alternatively, a rolled hem can be created by knitting a few rows in garter stitch at the bottom of the tee. This creates a casual and relaxed look.
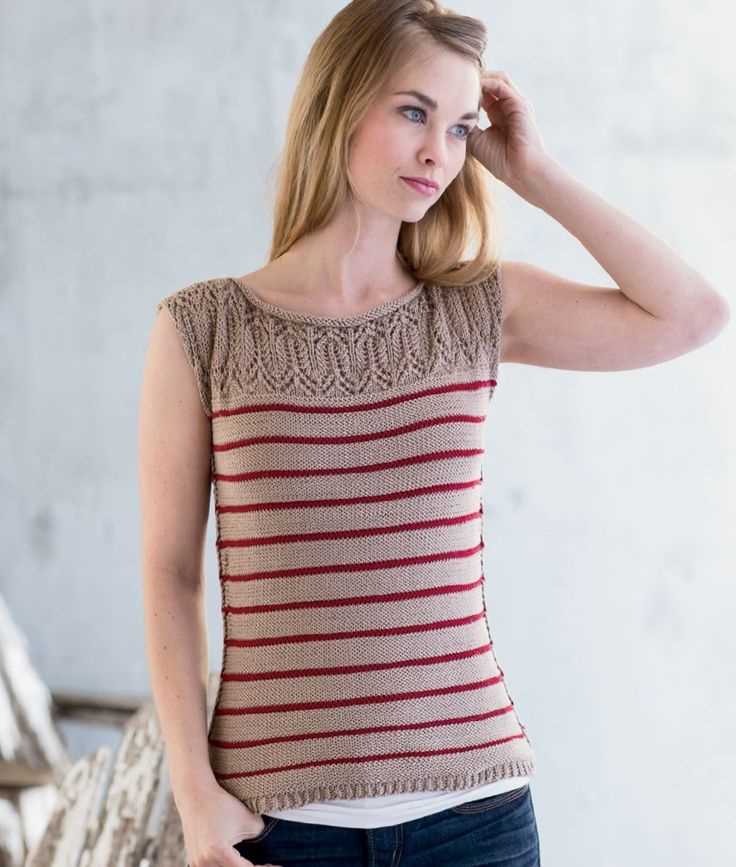
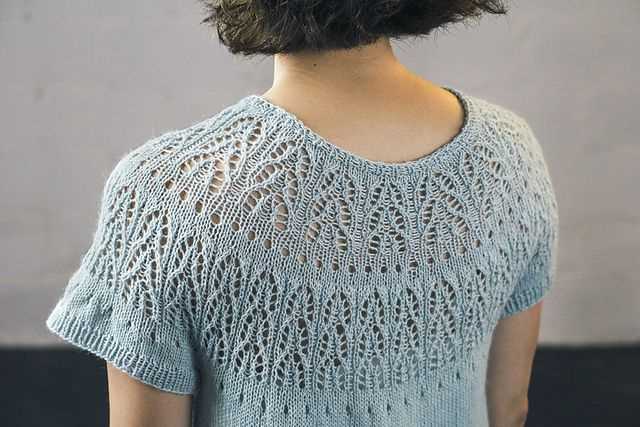
Additionally, there are options to add embellishments and details to the neckline and hem. For example, a contrasting color can be used for a stripe or trim. Lace or cable patterns can also be incorporated to add texture and interest. These details can take a basic knitted tee pattern to the next level and make it unique.
Overall, paying attention to the neckline and hem of a knitted tee can elevate the final product and create a polished and professional finish. By choosing the right style, using appropriate ribbing, and adding special touches, the neckline and hem can truly make the tee stand out.
Blocking and Caring for Your Knitted Tee
Blocking is an essential step in finishing your knitted tee to ensure that it retains its shape and fits properly. Blocking involves gently wetting the knitted fabric and then shaping it to the desired measurements. This process allows the stitches to relax and settle into place, resulting in a more even and professional-looking garment.
To block your knitted tee, start by filling a basin or sink with lukewarm water and adding a small amount of gentle detergent. Submerge the tee in the water, gently squeezing it to ensure that it is fully saturated. Let it soak for 10-15 minutes to allow the fibers to absorb the moisture. Avoid rubbing or agitating the fabric to prevent felting or distortion.
Next, remove the tee from the water and gently squeeze out the excess moisture. Avoid wringing or twisting the fabric, as this can cause it to stretch or lose its shape. Lay the tee flat on a clean towel and roll it up, pressing out any remaining water. Unroll the towel and carefully place the tee on a blocking mat or another flat surface.
Using rust-proof pins or blocking wires, stretch and shape the tee to the desired measurements. Pay special attention to the neckline, armholes, and hem to ensure they lie flat and even. Use a tape measure or knitting gauge to check the dimensions as you go.
Leave the tee to dry completely in a well-ventilated area, away from direct sunlight or heat sources. Drying time may vary depending on the fiber content of your tee and the ambient humidity level. Once dry, remove the pins or wires, and gently reshape the tee if necessary.
When it comes to caring for your knitted tee, it is important to follow the care instructions provided with the yarn you used. In general, handwashing is recommended to avoid excessive agitation and stretching. Use a mild detergent or shampoo formulated for delicate fabrics, and gently squeeze out excess water without wringing or twisting.
After washing, reshape the tee and lay it flat to dry on a towel or blocking mat. Avoid hanging the tee, as this can cause it to stretch out of shape. If necessary, you can also use a fabric softener or a wool wash to help maintain the softness and elasticity of the knitted fabric.
Regularly inspect your knitted tee for any signs of wear or damage, such as loose stitches or pilling. Repair these issues promptly to prevent further damage and ensure the longevity of your tee. Store it folded or rolled in a clean, dry place to prevent stretching or snagging.
By following these blocking and care instructions, you can keep your knitted tee looking its best and enjoy wearing it for years to come.
Variations and Customizations
Once you have mastered the basic knitted tee pattern, the options for customization are endless. Here are a few variations and ideas to inspire you:
1. Textured stitches
Add interest and dimension to your knitted tee by incorporating textured stitches. Experiment with cable stitches, lace patterns, or even simple garter or seed stitch sections.
2. Colorwork
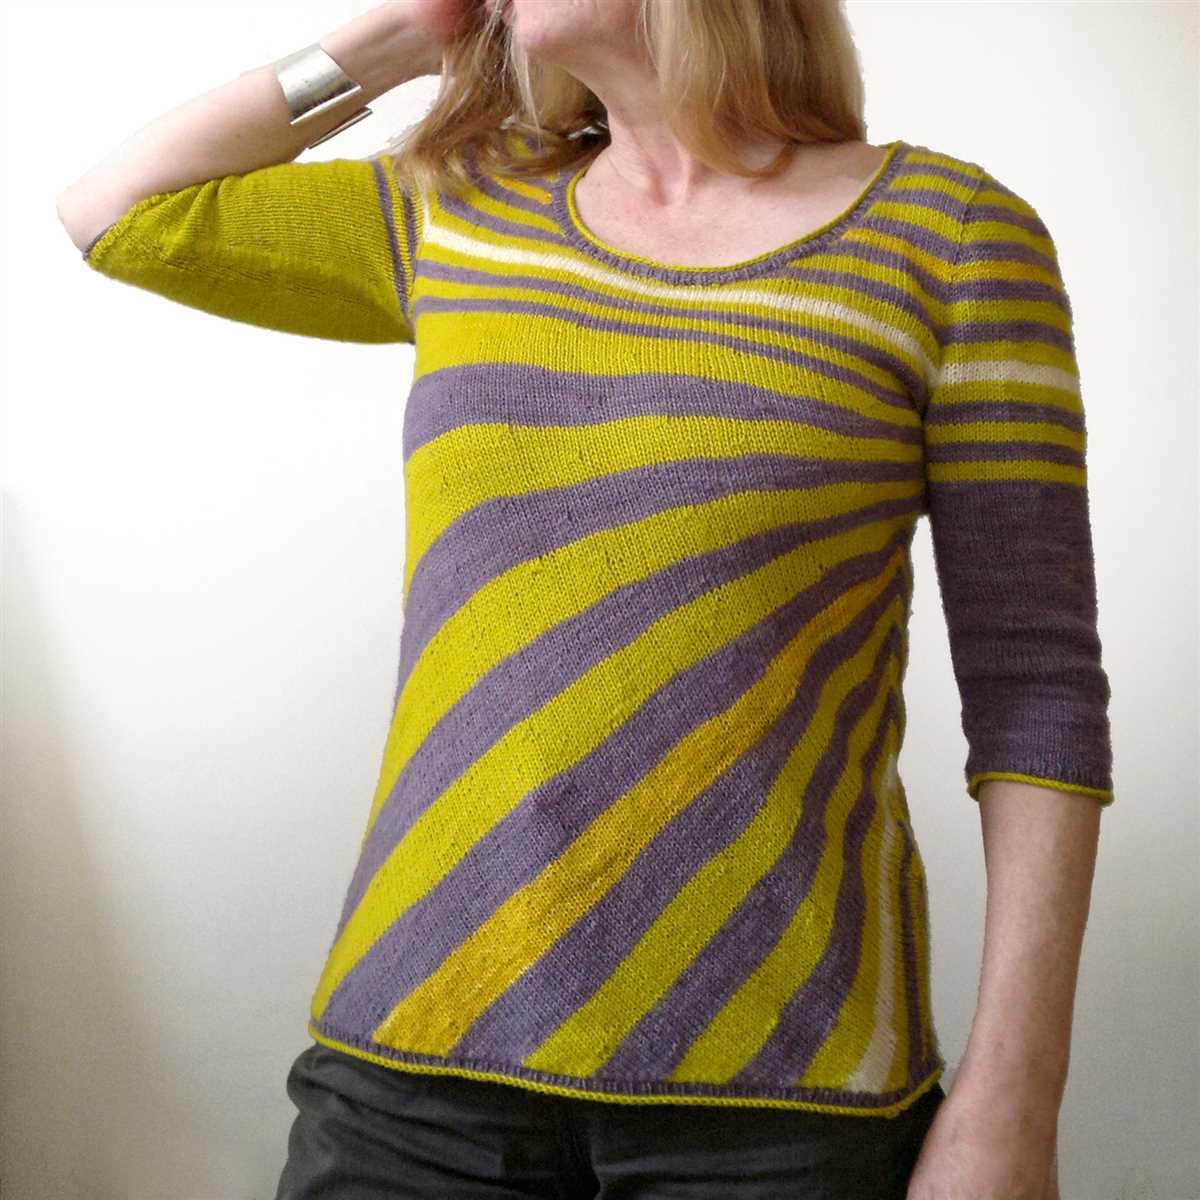
Introduce color to your knitted tee by using multiple yarns or incorporating colorwork techniques such as Fair Isle or intarsia. Play around with different color combinations to create unique and eye-catching designs.
3. Neckline variations
Change up the neckline of your knitted tee to suit your preferences. Try a boat neck, V-neck, scoop neck, or even a high neck with a button closure.
4. Sleeve options
Experiment with different sleeve lengths and styles. Try short sleeves, cap sleeves, three-quarter sleeves, or even bell sleeves. You can also add ribbing or cuffs to give the sleeves a finished look.
5. Hem details
Add interesting hem details to your knitted tee, such as a ribbed or picot edge. You can also try a hi-lo hem, where the front is slightly shorter than the back, or even add a ruffle or lace border.
Remember, these are just a few ideas to get you started. Don’t be afraid to let your creativity shine and come up with your own unique variations and customizations. Knitting is all about exploration and making something truly one-of-a-kind.
So grab your yarn and needles, and let your imagination run wild as you create your own personalized knitted tees!