
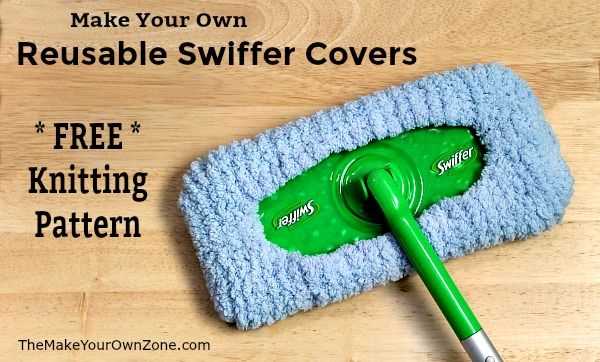
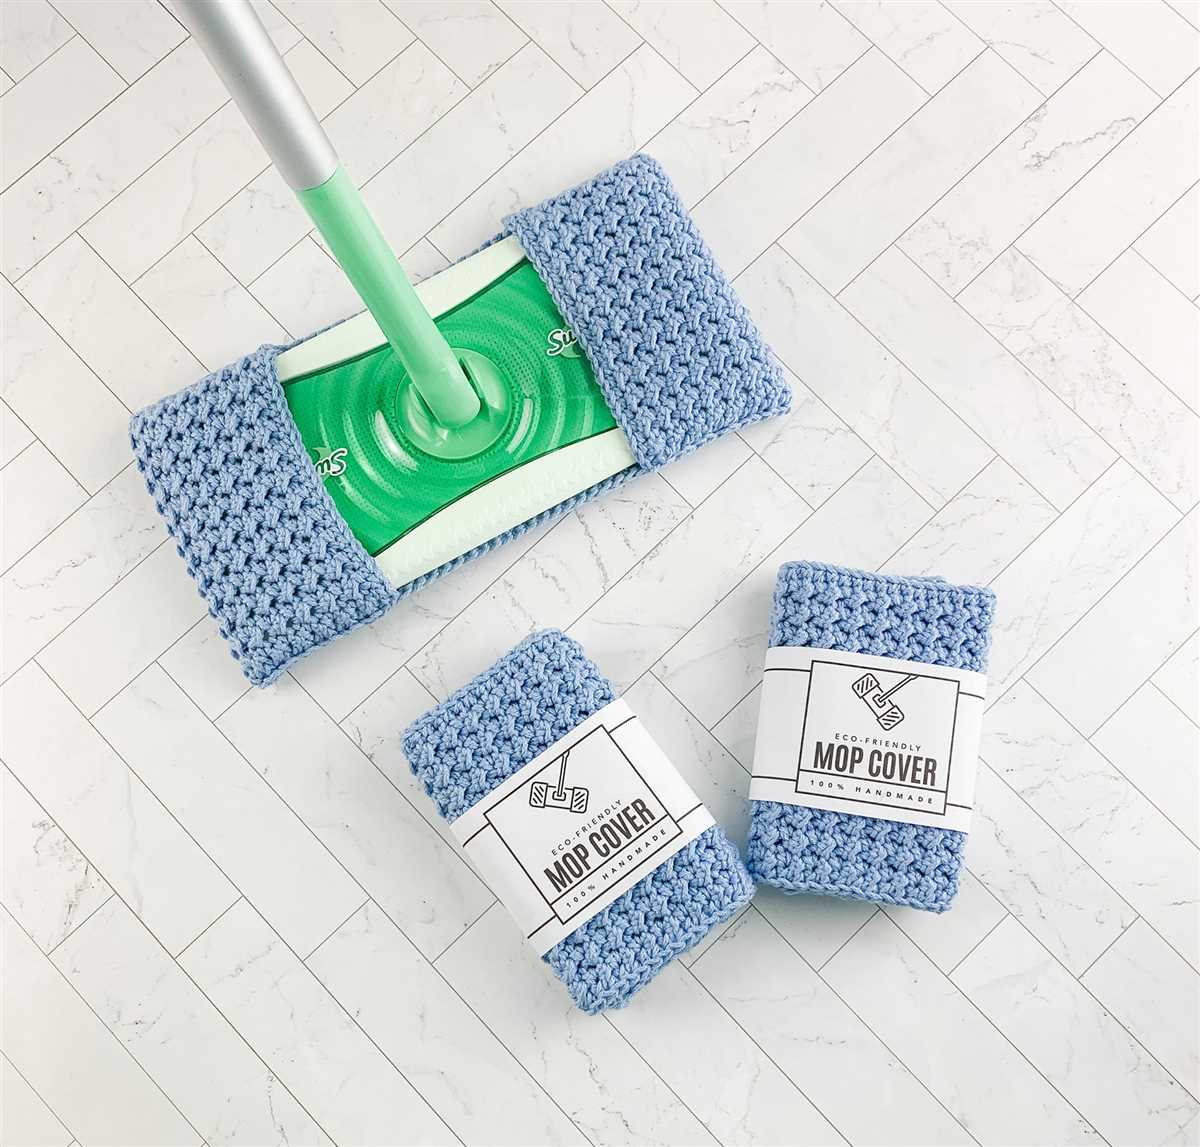
Are you tired of spending money on expensive disposable Swiffer pads? Why not make your own knitted Swiffer cover? Not only is it a sustainable and eco-friendly option, but it’s also a great way to use up leftover yarn from your knitting projects!
This knitted Swiffer cover pattern is simple and easy to follow, making it perfect for both beginners and experienced knitters alike. The cover is designed to fit standard Swiffer mops and can be easily removed and washed when needed.
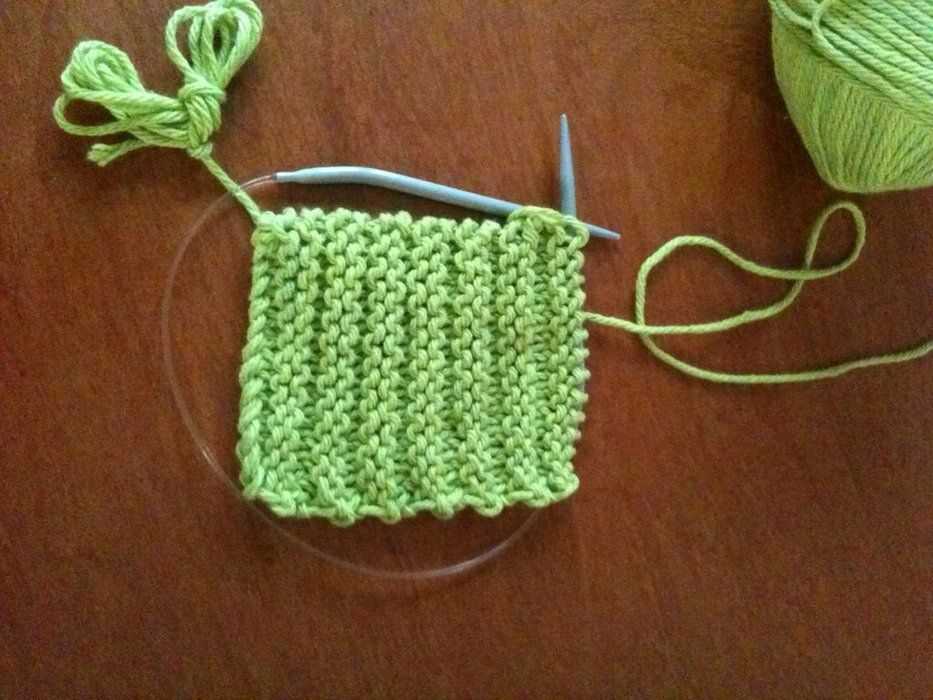
The pattern uses basic knitting techniques such as knit and purl stitches, making it a great project for beginners looking to practice their skills. And with the variety of colors and yarn weights available, you can customize your Swiffer cover to match your home decor or personal style.
So why not add a bit of handmade charm to your cleaning routine? With this knitted Swiffer cover pattern, you’ll never have to worry about running out of disposable pads again!
Knitted Swiffer Cover Pattern: Keep Your Floors Clean and Environmentally Friendly
Keeping your floors clean is an essential part of maintaining a hygienic and comfortable home. However, traditional floor cleaning methods often involve disposable cleaning pads that contribute to waste and harm the environment. With a knitted Swiffer cover, you can effectively clean your floors while reducing your carbon footprint and embracing a more sustainable lifestyle.
The knitted Swiffer cover pattern offers a simple and eco-friendly alternative to disposable cleaning pads. By using a cover that can be washed and reused, you eliminate the need for single-use products and reduce the amount of waste that ends up in landfills. Additionally, knitting your own Swiffer cover allows you to customize the size, color, and texture to fit your personal preferences and cleaning needs.
When knitting a Swiffer cover, there are various patterns available to suit different skill levels. Whether you’re a beginner or an experienced knitter, you can find a pattern that suits your abilities and helps you create a durable and effective cover. Patterns often include instructions for creating a ribbed texture or incorporating different stitches to enhance the cleaning power of the cover.
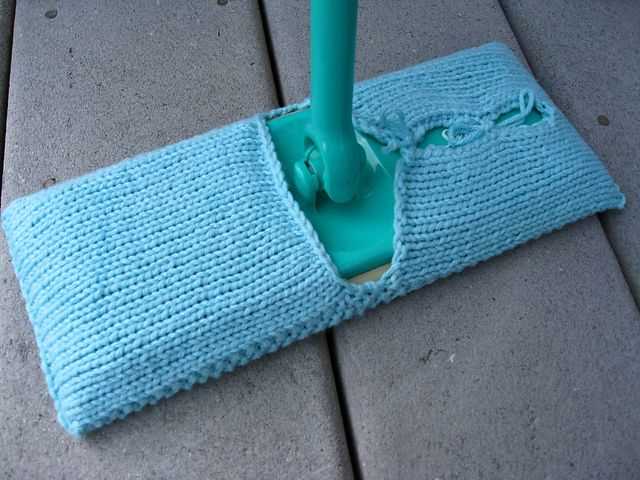
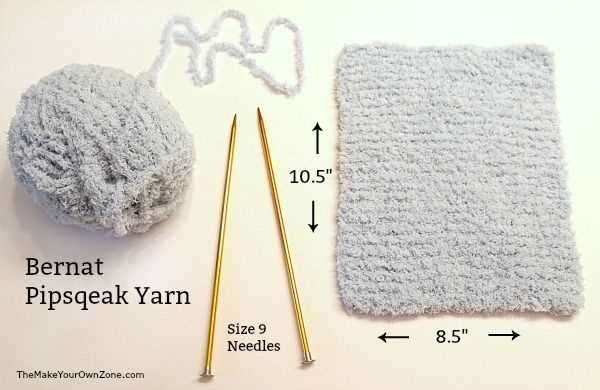
To knit a Swiffer cover, you will typically need basic knitting supplies such as yarn, knitting needles, and a tapestry needle. The pattern will guide you through the process, specifying the number of stitches to cast on, the type of stitches to use, and the dimensions of the final cover. Once completed, the cover can be easily attached to the Swiffer mop and used for cleaning various types of floors, including hardwood, tile, and laminate.
In conclusion, knitting a Swiffer cover is a practical and sustainable solution to keeping your floors clean. By choosing to use a knitted cover instead of disposable cleaning pads, you can minimize waste and contribute to a greener and more environmentally friendly home. So why not give it a try and add a touch of eco-consciousness to your cleaning routine?
Why Use a Knitted Swiffer Cover?
When it comes to cleaning, having the right tools can make all the difference. One such tool that has gained popularity in recent years is the Swiffer. This handy cleaning tool uses disposable pads to pick up dust, dirt, and pet hair from your floors. While convenient, these disposable pads can quickly add up in terms of cost and waste. That’s why many people are turning to knitted Swiffer covers as a more sustainable and economical option.
A knitted Swiffer cover offers several benefits. Firstly, it is reusable, meaning you can simply toss it in the washing machine when it gets dirty and use it again. This not only saves you money in the long run but also reduces the amount of waste that ends up in landfills. Additionally, the textured surface of a knitted cover provides better grip and helps to trap more dust and dirt, ensuring a more thorough clean. The soft yarn used in knitting also helps to prevent scratches on delicate surfaces, making it suitable for a variety of flooring types.
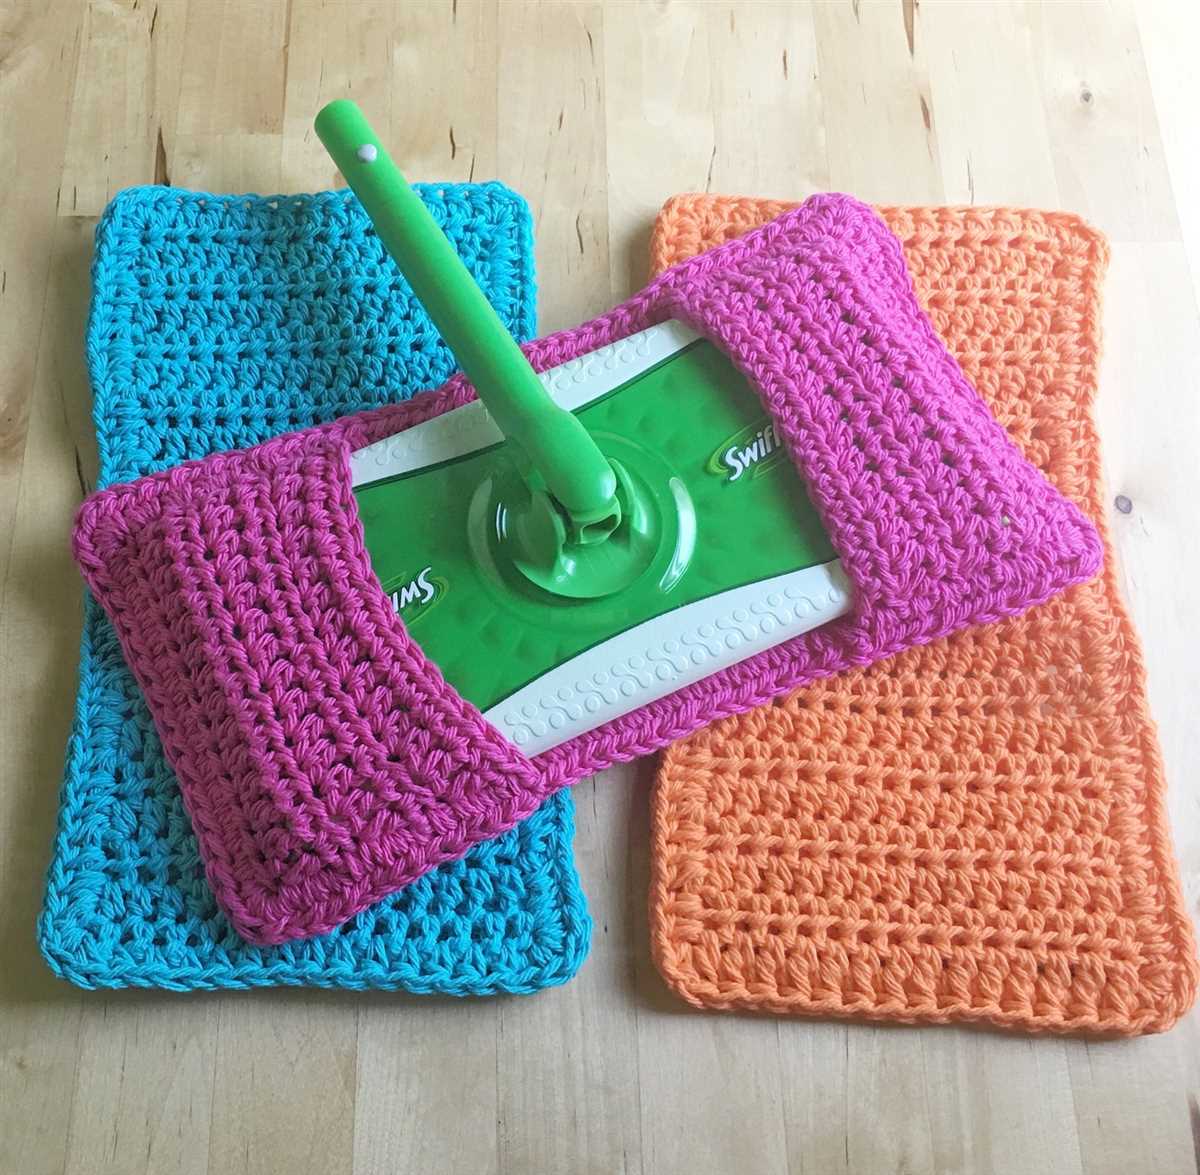
Knitting your own Swiffer cover is also a great way to personalize your cleaning routine. With a wide range of yarn colors and patterns to choose from, you can customize the cover to match your personal style or even create different covers for different rooms in your home. Not only does this add a touch of fun to your cleaning routine, but it also makes it easier to keep track of which cover needs to be washed or replaced.
In conclusion, using a knitted Swiffer cover is not only an environmentally friendly choice but also a practical and customizable option for keeping your floors clean. By opting for a knitted cover, you can save money, reduce waste, and add a personal touch to your cleaning routine.
Choosing the Right Yarn for Your Swiffer Cover
When it comes to knitting a Swiffer cover, choosing the right yarn is crucial in ensuring the effectiveness and longevity of your cleaning tool. The yarn you select will determine how well the cover traps dust and dirt, how easily it glides across surfaces, and how durable it is. Here are some factors to consider when picking the perfect yarn for your Swiffer cover:
1. Absorbency:
One of the key qualities to look for in a yarn for your Swiffer cover is its absorbency. You want a yarn that can absorb moisture effectively, as this will help in trapping and removing dirt and grime from your floors. Cotton yarns are often a good choice as they have excellent absorbency, making them ideal for wet mopping.
2. Softness:
While absorbency is important, you also want a yarn that is soft and gentle on your floors. Scratchy or rough yarn can potentially damage delicate surfaces, so opt for a softer yarn that will not scratch or leave marks as you clean. Look for yarns that are labeled as “soft” or “gentle” to ensure they won’t cause any harm.
3. Durability:
A Swiffer cover gets a lot of use, so you’ll want to choose a yarn that is durable and long-lasting. Consider yarns that are known for their durability, such as acrylic or nylon blends, to ensure that the cover can withstand regular use and washing without losing its shape or effectiveness.
4. Washability:
Since a Swiffer cover is meant to be reused, it’s essential to choose a yarn that is easy to wash and maintain. Look for yarns that are machine washable and can withstand frequent washing without losing their color or texture. This will ensure that your Swiffer cover stays clean and hygienic for a long time.
- Consider the absorbency, softness, durability, and washability when choosing a yarn for your Swiffer cover.
- Cotton yarns are great for absorbency, while softer yarns are gentle on floors.
- Opt for durable yarns like acrylic or nylon blends for a long-lasting cover.
- Make sure the yarn you choose is machine washable for easy cleaning.
Knitting Techniques for a Perfect Fit
When it comes to knitting a Swiffer cover, achieving a perfect fit is essential for its functionality. Here are some key knitting techniques that can help you create a cover that fits like a glove.
1. Gauge Swatch
Before starting your project, it’s important to knit a gauge swatch. Swiffer covers need to be snug to ensure effective cleaning, so it’s crucial to match the recommended gauge for the pattern. By knitting a swatch and measuring your stitches per inch, you can adjust your needle size or tension to achieve the desired gauge. Using the right gauge will ensure your cover fits the Swiffer mop perfectly.
2. Measurements
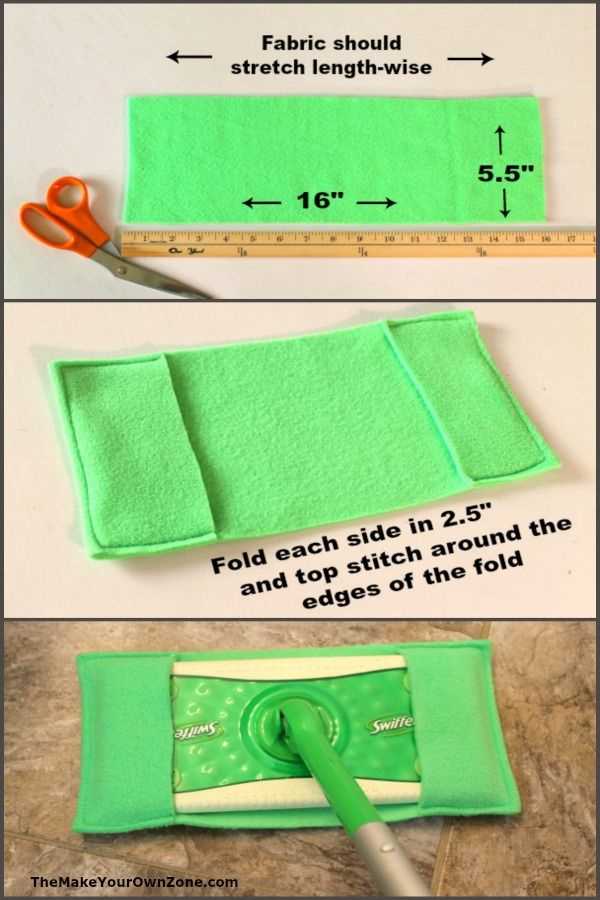
Accurate measurements are key to knitting a Swiffer cover that fits well. Measure the Swiffer mop head’s width and length to determine the ideal dimensions for your cover. Take into account any additional fabric or stretch required for a snug fit. With proper measurements, you can customize the pattern to create a cover that fits your Swiffer perfectly.
3. Stretchy Bind-Off
Using a stretchy bind-off method can ensure a snug fit for your Swiffer cover. The bind-off edge needs to have enough flexibility to stretch over the mop head without becoming loose or saggy. Techniques such as the suspended bind-off or the sewn bind-off can provide the necessary elasticity to achieve a perfect fit. Experiment with different bind-off methods to find the one that works best for your project.
4. Test-Fitting
While knitting your Swiffer cover, periodically test-fit it on the mop head. This will allow you to make any necessary adjustments along the way, ensuring a proper fit. If the cover is too loose or tight, you can modify your knitting pattern or make changes to the dimensions. Regular test-fitting will help you achieve the perfect fit for your Swiffer cover.
By incorporating these knitting techniques into your project, you can create a Swiffer cover that fits the mop head snugly, ensuring efficient cleaning and a professional finish.
Essential Knitting Supplies for Your Swiffer Cover
Knitting a cover for your Swiffer is a practical and eco-friendly way to keep your floors clean. To get started, you’ll need a few essential knitting supplies.
1. Knitting Needles

Choose the right knitting needles for your Swiffer cover project. Circular needles with a length of 16-20 inches are recommended for most designs. Make sure to select a needle size that matches the yarn you have chosen to knit your cover.
2. Yarn
Select a yarn that is both durable and absorbent for optimal cleaning performance. Cotton and acrylic blends are popular choices for Swiffer covers as they are easy to wash and maintain. Consider using a yarn in a color that complements your home decor.
3. Stitch Markers
Stitch markers are essential for keeping track of your knitting progress and patterns. They can be helpful in marking the beginning and end of rounds, as well as indicating specific stitch counts or pattern repeats.
4. Tapestry Needle
A tapestry needle is useful for weaving in loose ends and seaming your completed Swiffer cover. Make sure to choose a needle with a large enough eye to accommodate the thickness of your yarn.
5. Scissors
A pair of sharp scissors is necessary for cutting yarn and trimming any excess ends. Keep them handy to easily snip away any unwanted yarn and achieve a clean and polished finish.
With these essential knitting supplies, you’ll be well-equipped to knit a beautiful and functional cover for your Swiffer. Happy knitting!
Basic Knitting Stitches for Beginners
Learning to knit can be a rewarding and fulfilling hobby. To get started, it’s important to learn some basic knitting stitches. These stitches are the building blocks of all knitting projects and will help you create beautiful and intricate designs.
One of the most commonly used stitches is the knit stitch. This stitch creates a smooth and even fabric and is achieved by inserting the needle into the front of the stitch on the left needle, wrapping the working yarn around the right needle, and pulling it through, creating a new stitch on the right needle.
Another important stitch is the purl stitch. This stitch is the reverse of the knit stitch and creates a bumpy texture. To purl, the needle is inserted into the front of the stitch on the left needle, but this time the working yarn is wrapped around the right needle in the opposite direction. The yarn is then pulled through, creating a new stitch on the right needle.
Once you have mastered the knit and purl stitches, you can start exploring other types of stitches, such as the yarn over, which creates an eyelet or an increase in the fabric. The slip stitch is another useful stitch that can be used for various purposes, such as reducing the number of stitches or creating decorative edges.
By practicing these basic knitting stitches, you will gain confidence and be able to tackle more complex patterns and techniques. Don’t be afraid to make mistakes and experiment with different stitch combinations. Knitting is a versatile craft that allows for endless creativity, and with time and practice, you will be able to create beautiful and unique knitted projects.
Advanced Knitting Stitches for Experienced Knitters
Experienced knitters are always looking for new challenges and ways to push their skills to the next level. One way to do this is by learning and mastering advanced knitting stitches. These stitches can elevate any project and add intricate details and textures. Here are a few advanced knitting stitches that every experienced knitter should try:
Cable Stitch:
The cable stitch is a classic and timeless knitting technique that creates beautiful twisted patterns. By crossing stitches over each other, you can create intricate cables that can be used in various projects, such as sweaters, scarves, and blankets. Cable stitches require a bit of extra attention and concentration, but the end result is well worth the effort.
Lace Stitch:
Lace knitting is known for its delicate and airy patterns that resemble lace fabric. This technique involves creating decorative holes and eyelets by strategically increasing and decreasing stitches. Lace stitches can be used to add elegance and femininity to shawls, cardigans, and even socks. Working with lace patterns requires careful following of charts or written instructions, but the end result is truly stunning.
Fair Isle Stitch:
Fair Isle knitting, also known as stranded colorwork, is a technique that involves working with multiple colors in a single row. By carrying different strands of yarn along the back of the work, you can create intricate patterns and motifs. Fair Isle stitches are commonly used in traditional Nordic sweaters and accessories, adding a touch of color and complexity. This technique requires good tension control to avoid puckering and unevenness.
Brioche Stitch:
The brioche stitch is a reversible stitch that creates a lofty and squishy fabric with a unique texture. This stitch involves working with yarn overs and slipped stitches to create a ribbed pattern. Brioche knitting can be used to make cozy hats, scarves, and even sweaters. It may take some time to get the hang of the technique, but once mastered, it opens up a world of possibilities for creating eye-catching designs.
These advanced knitting stitches are just a few examples of the many techniques that experienced knitters can explore. By challenging themselves with new stitch patterns, experienced knitters can continue to grow their skills and create impressive and intricate projects.
Step-by-Step Knitting Instructions for Your Swiffer Cover
If you’re tired of constantly buying disposable Swiffer covers, why not try knitting your own reusable one? With just a few simple knitting techniques, you can create a cozy and eco-friendly cover for your Swiffer that will last for years to come. Follow these step-by-step instructions to get started.
Materials Needed:
- Yarn: Choose a soft, absorbent yarn that will effectively trap dust and dirt. Cotton or acrylic yarn works well for this project.
- Knitting Needles: You’ll need a pair of size 8 knitting needles, or a size that works well with your chosen yarn.
- Tape Measure: This will help you measure and ensure that your Swiffer cover fits perfectly.
- Scissors: You’ll need a pair of scissors to cut the yarn at the end of your project.
- Yarn Needle: A yarn needle will be used to weave in any loose ends and finish off your Swiffer cover.
Instructions:
- Measure: Begin by measuring the width and length of your Swiffer. This will help you determine the size of your knitted cover.
- Cast On: Using your chosen yarn and knitting needles, cast on the desired number of stitches. The number of stitches will depend on the width of your Swiffer and your knitting tension. A good starting point is to cast on 40 stitches.
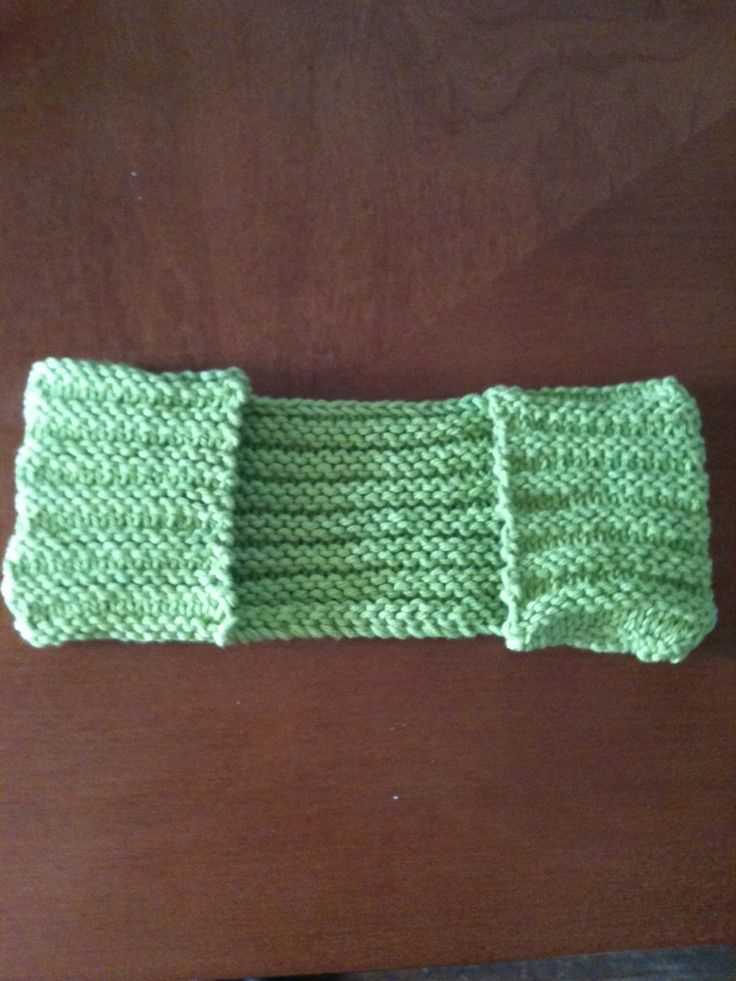
- Knit Rows: Once you have cast on, begin knitting rows using the knit stitch. Continue knitting until your cover reaches the desired length, which should be slightly longer than the length of your Swiffer.
- Shape the Corners: To create the corners of your Swiffer cover, you will need to decrease stitches. Starting from the center of one side, knit two stitches together, then knit the next row. Repeat this decrease on each side until you have reached the desired number of stitches for the width of your Swiffer.
- Bind Off: Once your cover has reached the correct width, it’s time to bind off. Cut the yarn, leaving a long tail. Thread the tail through the last stitch on your needle and pull tightly to secure.
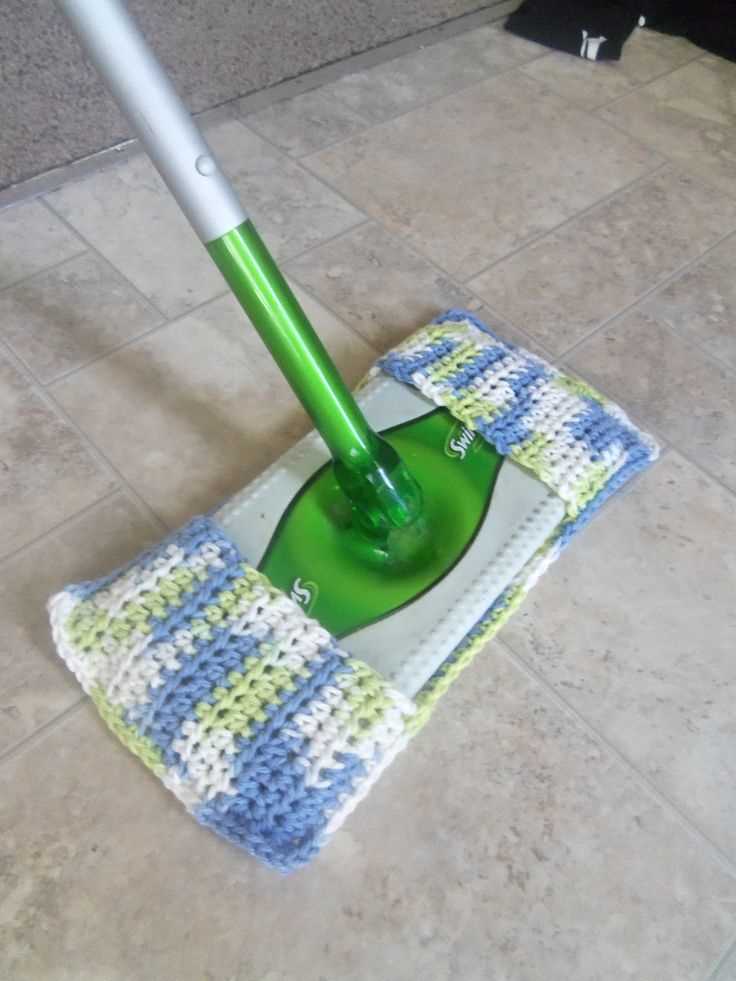
- Finishing: Weave in any loose ends using a yarn needle. Test your Swiffer cover by placing it on your Swiffer and gently securing it in place. Your knitted cover should fit snugly and be ready to use!
With these step-by-step knitting instructions, you’ll be able to create a beautiful and functional Swiffer cover that can be used time and time again. Not only will you save money and reduce waste, but you’ll also have the satisfaction of knowing you made something with your own hands. Happy knitting!
Troubleshooting Common Knitting Mistakes
Knitting is a relaxing and fulfilling hobby, but it can also be frustrating when mistakes happen. Whether you’re a beginner or an experienced knitter, it’s inevitable to encounter some common knitting mistakes along the way. Understanding these issues and learning how to troubleshoot them can help you avoid frustration and keep you motivated to continue your knitting projects.
Dropped Stitches
One of the most common mistakes knitters make is dropping a stitch. This happens when a stitch slips off the needle completely, creating a hole in your work. To fix this, use a crochet hook or a spare knitting needle to carefully pick up the dropped stitch from the row below. Insert the hook or needle into the stitch, and then slide it back onto the working needle. Be sure not to twist the stitch and maintain the correct tension.
Tension Problems
Another common knitting mistake is inconsistent tension. This occurs when your stitches are not uniform in size, resulting in a lumpy or uneven fabric. To fix tension problems, pay attention to your hand positioning and the way you hold the yarn. Experiment with different knitting styles and techniques to find the most comfortable and consistent method for you. Practice knitting with different yarn weights and needle sizes to develop a consistent tension throughout your work.
Uneven Gauge
Gauge is an important aspect of knitting because it determines the size of your finished project. An uneven gauge can result in a too tight or too loose fabric compared to the desired measurements. To troubleshoot this mistake, make sure you are using the recommended yarn weight and needle size stated in the pattern. Test your gauge by knitting a swatch and measuring it against the pattern’s gauge specifications. If your gauge is off, adjust your needle size accordingly until you achieve the correct tension.
Twisted Stitches
Twisted stitches occur when you accidentally knit or purl into the back loop instead of the front loop of a stitch. This can result in a twisted or distorted appearance in your knitting. To fix twisted stitches, identify the affected stitches and carefully unravel them back to the problem area. Then, reinsert the needle correctly and reknit the stitches in the correct orientation. Pay close attention to your stitching movements to prevent twisting in the future.
Miscounted Stitches
Counting stitches accurately is crucial for maintaining the pattern and shaping of your knitting project. Miscounting stitches can lead to irregularities in the pattern or incorrect shaping. To troubleshoot this mistake, use stitch markers to mark specific sections or pattern repeats. Double-check your stitch count after each row or round to ensure accuracy. If you notice a discrepancy, carefully unravel the necessary stitches and reknit them correctly.
By familiarizing yourself with these common knitting mistakes and learning how to troubleshoot them, you’ll be able to tackle any challenges that arise during your knitting projects. Remember that mistakes happen to everyone, and the most important thing is to stay patient, practice, and enjoy the process of knitting.
Adding Decorative Elements to Your Swiffer Cover
If you love knitting and want to add a personal touch to your Swiffer cover, you can easily incorporate decorative elements into your design. There are many ways to make your cover unique and eye-catching, whether you prefer simple patterns or intricate designs.
1. Colorful Stripes and Patterns: One way to add visual interest to your Swiffer cover is by incorporating colorful stripes or patterns. You can choose contrasting colors to create bold, vibrant stripes or select a variegated yarn for a more subtle effect. You can also experiment with different stitch patterns, such as chevron or ribbing, to create a textured look.
2. Embellishments: Adding embellishments to your Swiffer cover can make it truly stand out. You can sew on decorative buttons, beads, or sequins to add sparkle and personality. You can also stitch on small fabric flowers or appliques for an added touch of charm.
3. Fair Isle or Intarsia Designs: If you enjoy more complex knitting patterns, you can try incorporating Fair Isle or Intarsia designs into your Swiffer cover. These techniques involve creating intricate colorwork and can result in stunning patterns and motifs. Just be sure to pay attention to tension and yarn management if you decide to attempt these techniques.
4. Cable Knitting: Another way to add texture and interest to your Swiffer cover is by incorporating cable knitting. This technique involves crossing stitches to create intricate cable patterns. You can incorporate simple cables for a subtle effect or experiment with more complex designs for a dramatic look.
5. Lacey or Openwork Designs: If you prefer a more delicate and feminine look, you can try incorporating lacey or openwork designs into your Swiffer cover. These patterns create an airy and elegant effect, perfect for adding a touch of elegance to your cleaning routine.
By adding these decorative elements to your Swiffer cover, you can transform a functional cleaning tool into a beautiful and personalized accessory. Whether you’re looking for a colorful and playful design or an intricate and sophisticated look, there are countless possibilities to explore with your knitting skills.
- Colorful Stripes and Patterns
- Embellishments
- Fair Isle or Intarsia Designs
- Cable Knitting
- Lacey or Openwork Designs
Washing and Caring for Your Knitted Swiffer Cover

Keeping your knitted Swiffer cover clean is essential for maintaining its effectiveness and longevity. With proper care, you can ensure that your cover remains in great condition and continues to generate excellent results every time you use it.
Handwashing: The best way to wash your knitted Swiffer cover is by hand. Fill a basin or sink with lukewarm water and add a small amount of mild detergent. Gently agitate the cover in the soapy water, making sure to pay attention to any heavily soiled areas. Rinse well with clean water until all the soap is removed.
Drying:
Air drying: After washing, squeeze out any excess water from the cover without wringing or twisting it. Lay the cover flat on a clean towel or drying rack, allowing it to air dry completely. Avoid direct sunlight or high heat, as it can cause the cover to shrink or lose its shape.
Machine drying: If you prefer to use a machine, place the cover in a mesh laundry bag to protect it from tangling or snagging with other items. Select a delicate or low heat setting, and avoid using any fabric softeners or dryer sheets. Check the cover periodically during the drying process to ensure it is not experiencing any damage or shrinkage.
Storing:

When storing your knitted Swiffer cover, make sure it is completely dry to prevent the growth of bacteria or mold. Fold or roll the cover neatly and place it in a clean, dry location. If possible, store it in a sealed bag or container to keep it free from dust and debris.
NOTE: It’s a good idea to make multiple knitted Swiffer covers so that you can rotate them between uses and always have a clean one on hand. This way, you can wash and replace them regularly, ensuring they remain hygienic and effective.
Alternative Uses for Your Knitted Swiffer Cover
If you’re tired of using your knitted Swiffer cover only for dusting your floors, don’t fret! There are plenty of alternative uses for this versatile cleaning tool that you may not have considered. With just a few simple adjustments, you can repurpose your knitted Swiffer cover for a variety of household tasks.
1. Window and mirror cleaning: Attach your knitted Swiffer cover to the mop head of your Swiffer and use it to clean your windows and mirrors. The soft, textured fabric is perfect for removing fingerprints and smudges without leaving streaks behind.
2. Lampshade dusting: Dusting lampshades can be a tricky task, but your knitted Swiffer cover makes it a breeze. Simply slip it over your hand like a glove and gently wipe away the dust from your lampshades. The fabric’s texture helps to grab and hold onto dust particles, leaving your lampshades looking clean and refreshed.
3. Baseboard cleaning: Baseboards can quickly accumulate dust and dirt, but your knitted Swiffer cover can help keep them looking spotless. Attach the cover to your Swiffer and glide it along the baseboards to easily pick up dust and debris. The textured fabric helps to trap the dirt, ensuring that it doesn’t scatter around the room.
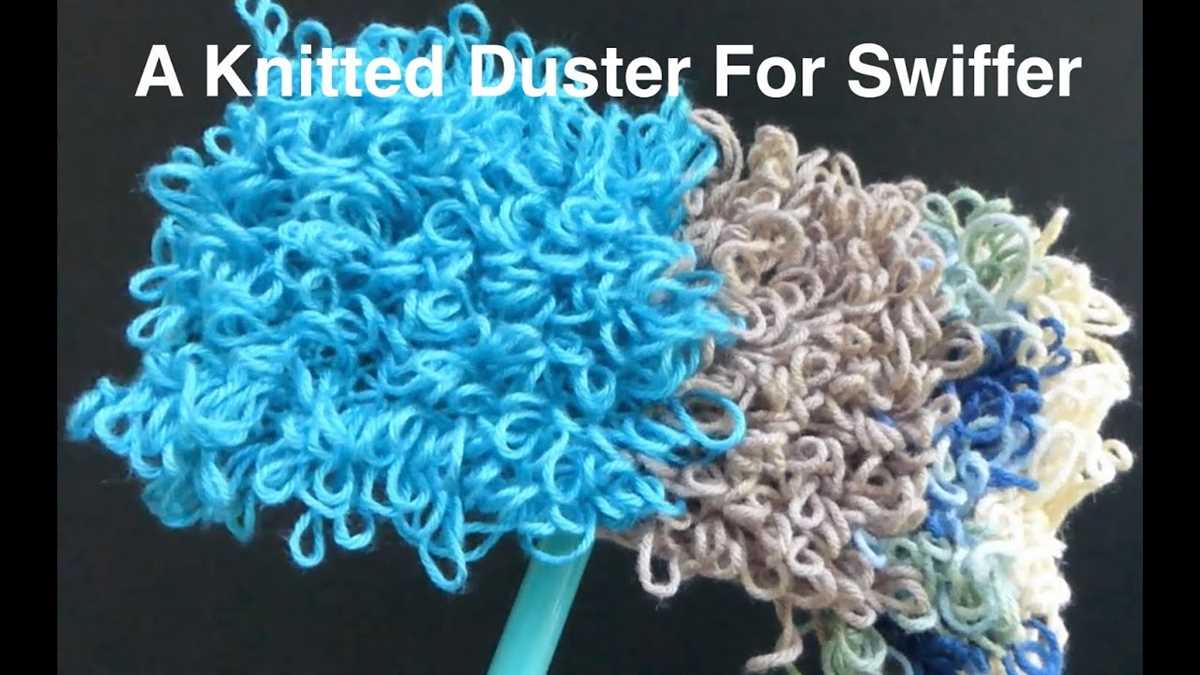
4. Car interior cleaning: Your knitted Swiffer cover can also be used to clean the interior of your car. Attach it to a long-handled duster and use it to dust the dashboard, console, and other surfaces. The soft fabric is gentle enough to use on different materials, including plastic, leather, and fabric.
5. Pet hair removal: If you have pets that shed, your knitted Swiffer cover can be a lifesaver. Use it to quickly and easily remove pet hair from upholstery, rugs, and bedding. The textured fabric helps to grab and hold onto the hair, minimizing the need for excessive vacuuming.
With these alternative uses for your knitted Swiffer cover, you can make the most out of this handy cleaning tool and keep your home clean and dust-free. Get creative and discover even more ways to repurpose this versatile accessory!
Share Your Swiffer Cover Knitting Experience
If you have knitted a Swiffer cover using the pattern provided above, we would love to hear about your experience! Knitting a Swiffer cover can be a fun and rewarding project, and sharing your insights and tips can help inspire others to give it a try.
Here are a few questions to consider when sharing your experience:
- How did you find the pattern? Did you stumble upon it online, or did a friend recommend it to you? Let us know how you discovered the Swiffer cover knitting pattern.
- What yarn did you use? The pattern suggests using cotton yarn, but there are many different types and brands available. Did you stick with cotton, or did you experiment with other fibers? How did your choice of yarn affect the final result?
- Did you make any modifications? Knitters often like to put their own spin on patterns by adding or changing certain elements. Did you make any alterations to the original pattern? How did these modifications enhance or affect the functionality of the Swiffer cover?
- How long did it take you to complete the project? Knitting can be a time-consuming activity, and everyone has their own pace. Share how long it took you to finish knitting the Swiffer cover, as it can give others an idea of the time commitment involved.
- How does the cover perform? After using your knitted Swiffer cover, how well does it work in comparison to disposable ones? Did you find any unexpected benefits or drawbacks? We would love to hear your thoughts on its performance.
By sharing your Swiffer cover knitting experience, you can contribute to the growing community of knitters who are embracing sustainable cleaning solutions. Whether you had a positive or negative experience, your insights can help others in their own knitting projects.