
Knitting is a versatile craft that allows you to create beautiful and intricate designs. One popular motif that many knitters love to incorporate into their projects is the leaf. Leaves can add a natural and organic touch to any knitted item, whether it’s a scarf, a blanket, or even a sweater. If you’re looking to add some leafy charm to your knitted creations, then you’re in luck! In this article, we’ll be sharing a free pattern for knitted leaves that you can use to spice up your knitting projects.
These knitted leaves are perfect for beginners and experienced knitters alike. The pattern is straightforward and easy to follow, making it a great project for those who are new to knitting or want to practice their skills. With just a few basic knitting techniques, you’ll be able to create beautiful leaves in no time.
What’s great about this pattern is that it can be easily customized to fit your needs. You can choose any color of yarn that you like and experiment with different sizes and textures to create a unique look. Whether you prefer traditional green leaves or want to go for a more whimsical color scheme, the possibilities are endless!
Why knit leaves?
Knitting leaves is not only a creative and enjoyable craft, but it also offers a variety of practical and decorative uses. Whether you are an experienced knitter or just starting out, incorporating knitted leaves into your projects can add a unique touch and bring nature-inspired beauty to your designs.
1. Versatility: Knitted leaves can be used in a wide range of projects, such as scarves, shawls, hats, sweaters, and home decor items. They can serve as embellishments, appliques, or even stand-alone decorative pieces. With different yarn weights and colors, you can create leaves of various sizes and shapes to suit your project’s needs.
- 2. Symbolism: Leaves symbolize growth, change, and resilience. By incorporating knitted leaves into your projects, you can infuse them with a deeper meaning or simply evoke an appreciation for nature’s beauty.
- 3. Customization: Knitting your own leaves gives you the freedom to customize them according to your preferences. You can experiment with different stitch patterns, colors, and sizes to create unique and personalized leaf designs.
- 4. Creativity and Challenge: Knitting leaves provides an opportunity to explore different knitting techniques and patterns. From basic garter stitch leaves to intricate lacework, there are endless possibilities to challenge yourself and showcase your creativity.
- 5. Relaxation and Mindfulness: Knitting leaves can be a calming and meditative activity. The repetitive motions of knitting can help relieve stress and promote mindfulness, allowing you to unwind while creating something beautiful.
Whether you’re looking to enhance your knitting skills, add a touch of nature to your projects, or simply enjoy the process of knitting, incorporating knitted leaves into your creations can be a rewarding and inspiring experience.
Choosing the right yarn and needles for your knitted leaves
When it comes to creating knitted leaves, choosing the right yarn and needles can make all the difference in achieving the desired outcome. The texture and weight of the yarn will affect the overall look and feel of the leaf, while the needles determine the size and tension of the stitches.
Yarn selection: It is important to choose a yarn that is suitable for the type of leaf you want to create. For more realistic-looking leaves, opt for a yarn with subtle color variations and a soft, natural texture. A lightweight, fingering or sport weight yarn would work well for delicate leaf designs. If you prefer bolder and more vibrant leaves, go for yarns with vibrant colors and textured fibers.
Needle selection: The size of the needles will determine the size of your knitted leaf. Smaller needles such as US size 2 or 3 can create intricate and detailed leaf patterns, while larger needles like US size 7 or 8 will result in bigger and more open leaves. Circular needles are also a good option as they allow for more flexibility in knitting and can accommodate larger leaf designs.
Tension: It is important to maintain a consistent tension throughout your knitting to ensure that all the leaves have a uniform size and shape. If your stitches are too loose, consider using smaller needles or adjusting your knitting technique to create tighter stitches. If your stitches are too tight, try using larger needles or loosening your tension to create more relaxed stitches.
Experimentation: Don’t be afraid to experiment with different yarns and needle sizes to achieve the desired effect. Knitted leaves can be a great opportunity to explore different textures and colors, and each combination of yarn and needles can create a unique and beautiful leaf design.
- Choose a yarn that suits your desired leaf design
- Select the appropriate needle size for your desired leaf size
- Pay attention to maintaining consistent tension
- Don’t be afraid to experiment with different yarns and needles
Basic Stitches for Knitting Leaves
In order to knit leaves, you need to be familiar with a few basic stitches. These stitches will help you create the shape and texture of the leaf. Here are some of the essential stitches for knitting leaves:
1. Knit Stitch: The knit stitch is the building block of knitting and is used in many patterns. To create a knit stitch, insert the right-hand needle into the front of the stitch on the left-hand needle, wrap the yarn around the right-hand needle from back to front, and pull the loop of yarn through the stitch.
2. Purl Stitch: The purl stitch is the reverse of the knit stitch and creates a bump on the right side of the fabric. To purl, insert the right-hand needle into the front of the stitch on the left-hand needle, wrap the yarn around the right-hand needle from front to back, and pull the loop of yarn through the stitch.
3. Increases: To give your leaf shape, you’ll need to use increases to add stitches. The most common increase stitch for leaves is the knit front and back (KFB) stitch. To perform this increase, knit into the front of the stitch as usual, but instead of sliding it off the left-hand needle, leave it on and knit into the back of the stitch. Then, slide both loops off the needle to complete the stitch.
4. Decreases: To shape the tip of the leaf, you’ll need to use decreases to remove stitches. The most common decrease stitch for leaves is the knit two stitches together (K2tog) stitch. To perform this decrease, insert the right-hand needle through the front loops of the next two stitches on the left-hand needle, wrap the yarn around the right-hand needle, and pull it through both stitches.
By mastering these basic stitches, you’ll have the foundation to create beautiful knitted leaves. Let your creativity flourish as you experiment with different stitch combinations and patterns to bring your leaves to life!
Leaf Pattern Options
When it comes to creating knitted leaves, there are a variety of pattern options to choose from. Whether you’re looking for a simple and straightforward design or want to challenge yourself with a more intricate pattern, there’s something for everyone.
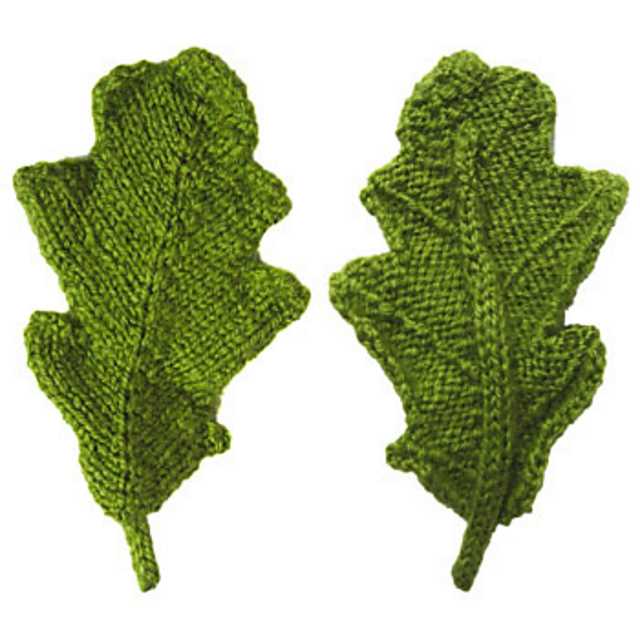
1. Basic Leaf Pattern: If you’re a beginner knitter or prefer a minimalist style, a basic leaf pattern is a great option. This pattern typically involves simple increases and decreases to create the shape of a leaf. It’s perfect for adding a subtle touch of nature to your knitting projects.
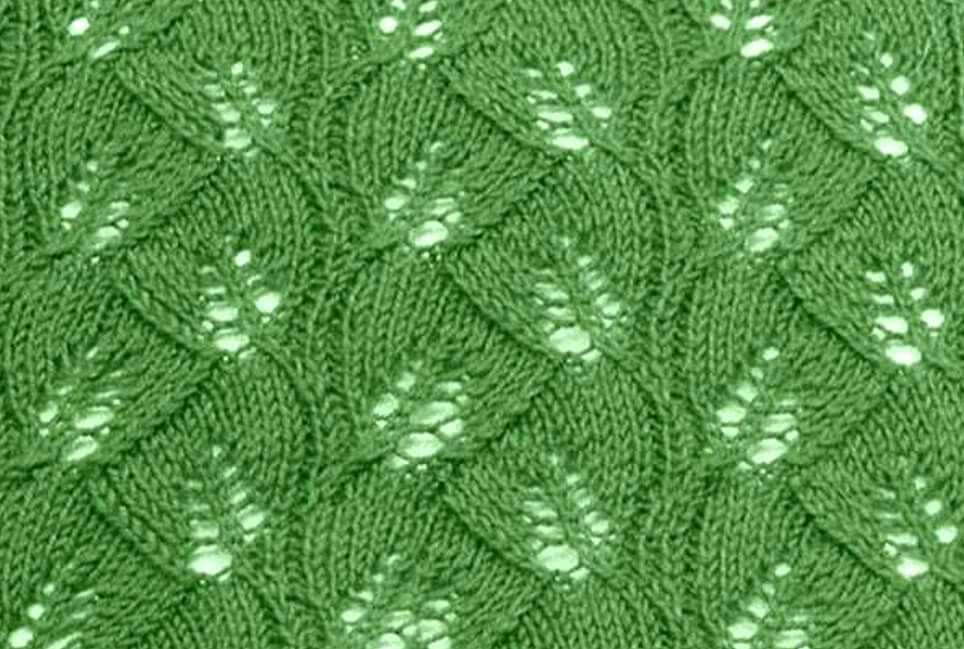
2. Lace Leaf Pattern: For those who want to add a touch of elegance to their knitted leaves, a lace leaf pattern is a beautiful choice. This pattern features intricate lacework that mimics the delicate veins of a real leaf. It can be a bit more challenging to knit, but the end result is worth the effort.
3. Cable Leaf Pattern: If you enjoy working with cables, a cable leaf pattern is a fantastic option. This pattern uses cable stitches to create the texture and shape of a leaf. It’s a great way to add depth and dimension to your knitting projects while showcasing your cable knitting skills.
Optional: You can include a table of these pattern options, with a column for each pattern and a row for each option. The table can list the features and difficulty level of each pattern.
- Pattern Options
- Basic Leaf Pattern
- Lace Leaf Pattern
- Cable Leaf Pattern
| Pattern | Features | Difficulty Level |
|---|---|---|
| Basic Leaf Pattern | Simple increases and decreases | Beginner |
| Lace Leaf Pattern | Intricate lacework, mimics veins of a leaf | Intermediate/Advanced |
| Cable Leaf Pattern | Cable stitches, adds depth and dimension | Intermediate |
Creating Texture with Different Stitch Patterns
When it comes to knitting, one of the most exciting ways to create texture in your projects is by using different stitch patterns. By combining different techniques, you can add depth and interest to your knitted fabric, making it stand out from the crowd.
The Seed Stitch
The seed stitch is a simple yet effective way to add texture to your knitting. By alternating between knit and purl stitches within the same row, you create a pattern that resembles a field of seeds. This stitch is great for adding subtle texture and is commonly used in scarves, blankets, and hats.
The Cable Stitch
Cables are an excellent way to create intricate and eye-catching texture in your knitting. By crossing stitches over each other, you can form beautiful braided or twisted patterns. Cables are often used in sweaters and blankets to add visual interest and dimension.
The Garter Stitch
The garter stitch is a basic stitch pattern that is created by knitting every row. It may be simple, but it creates a fabric with a unique texture. The garter stitch is often used for baby blankets and scarves and can be combined with other stitch patterns to create more complex designs.
- The Moss Stitch: The moss stitch is similar to the seed stitch but is worked over multiple rows. By alternating between knit and purl stitches, you can create a fabric that resembles a field of moss.
- The Basketweave Stitch: The basketweave stitch creates a pattern that resembles a woven basket. By combining blocks of knit and purl stitches, you can achieve this textured look.
These are just a few examples of the many stitch patterns you can use to create texture in your knitting. Each stitch pattern adds its own unique character to the fabric, allowing you to explore different textures and create one-of-a-kind projects.
Color options for knitted leaves
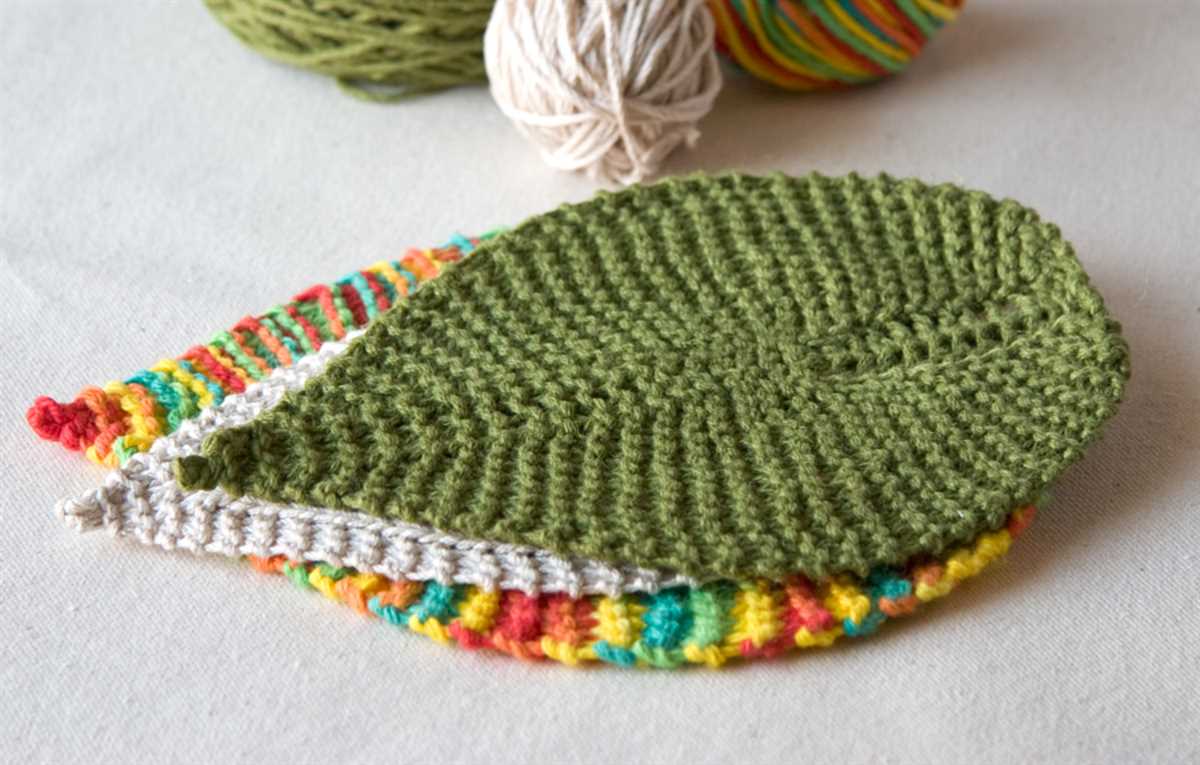
When it comes to knitting leaves, there are numerous color options that you can choose from to add variety and creativity to your projects. Whether you want a natural and earthy look or bright and vibrant colors, the choice is yours.
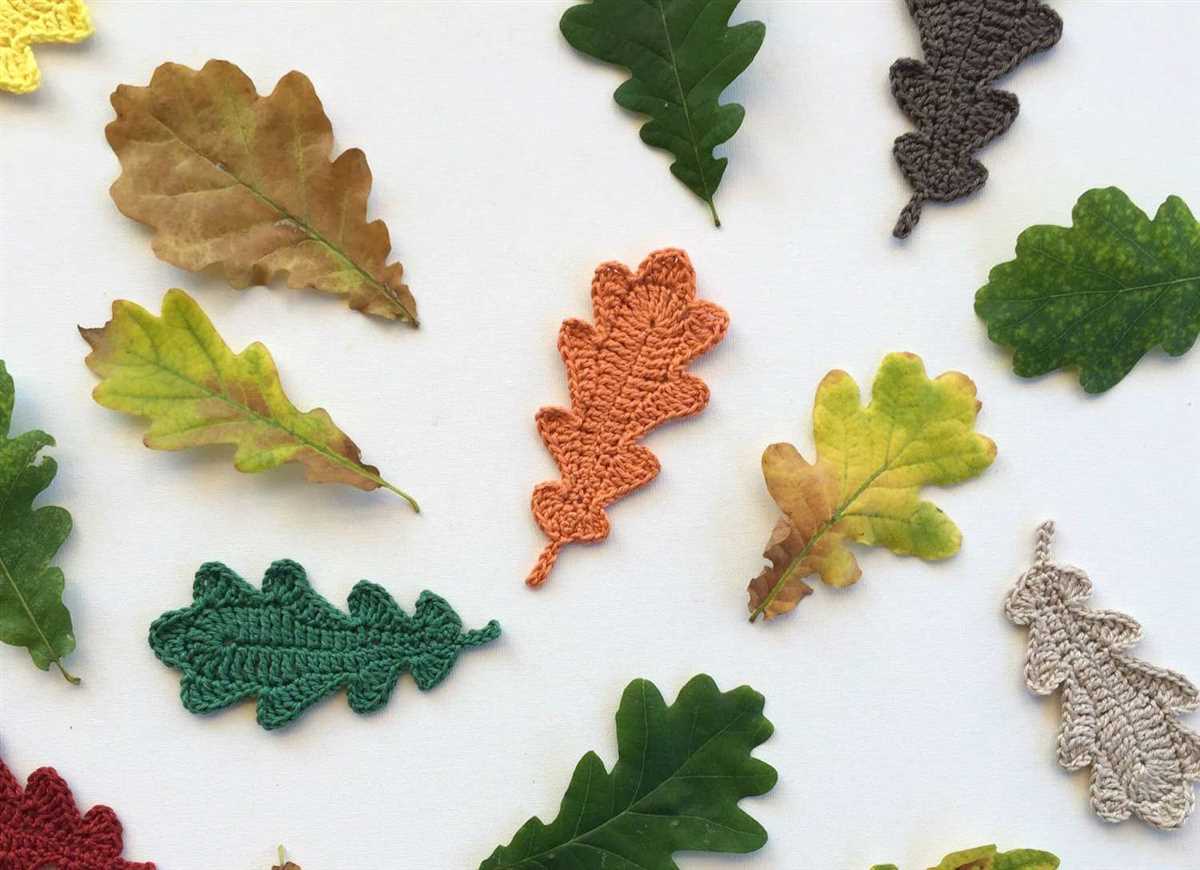
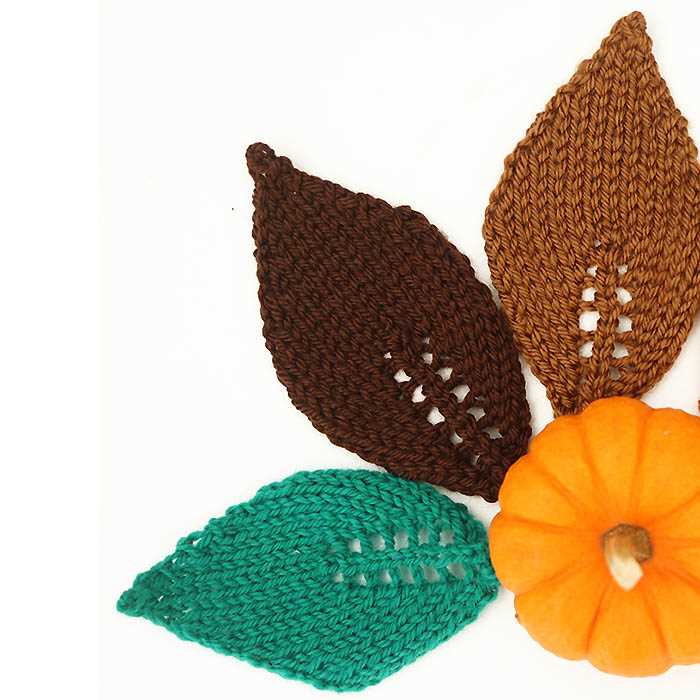
Natural shades: If you prefer a more realistic look, you can opt for natural shades of green, brown, and yellow. These colors will mimic the colors of real leaves and create a beautiful and serene project.
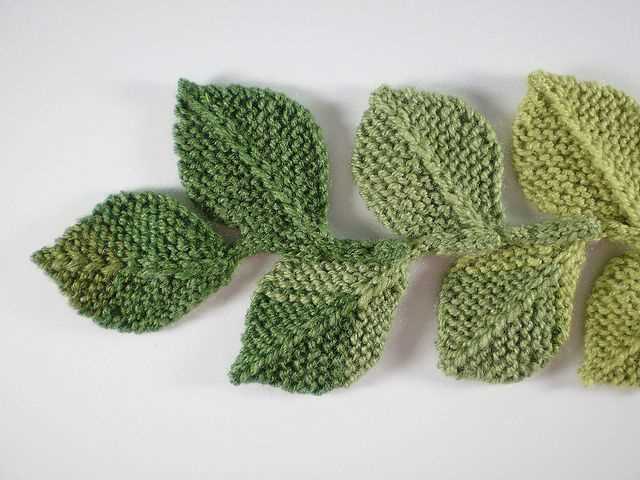
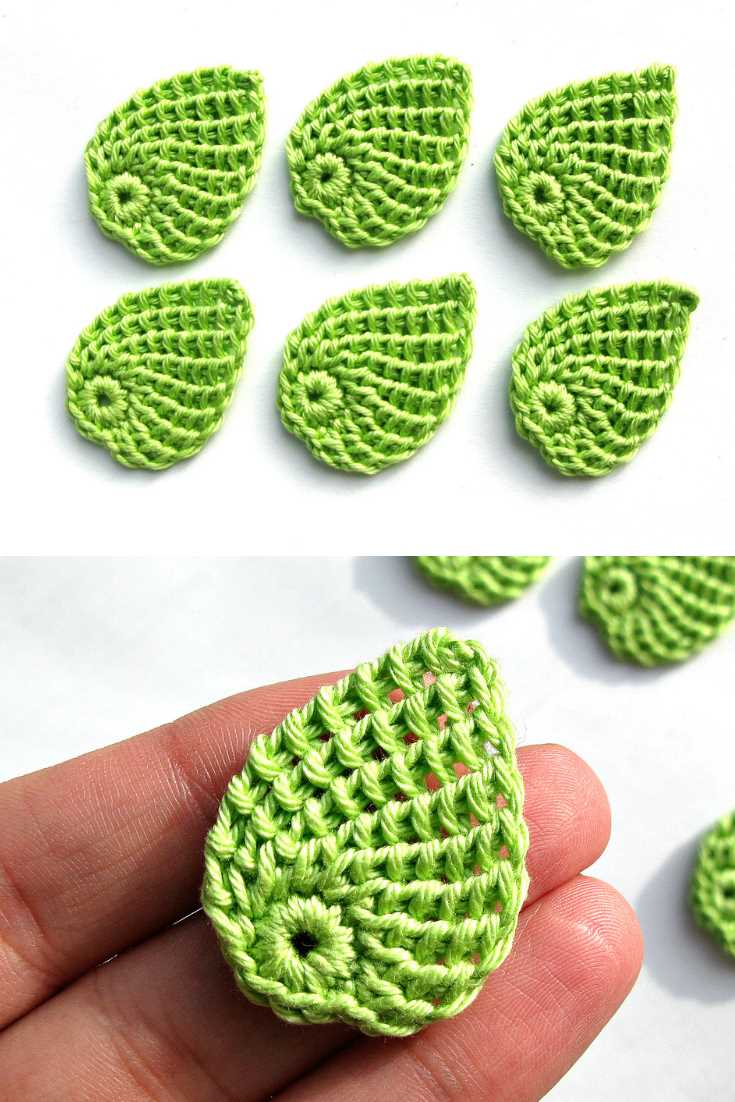
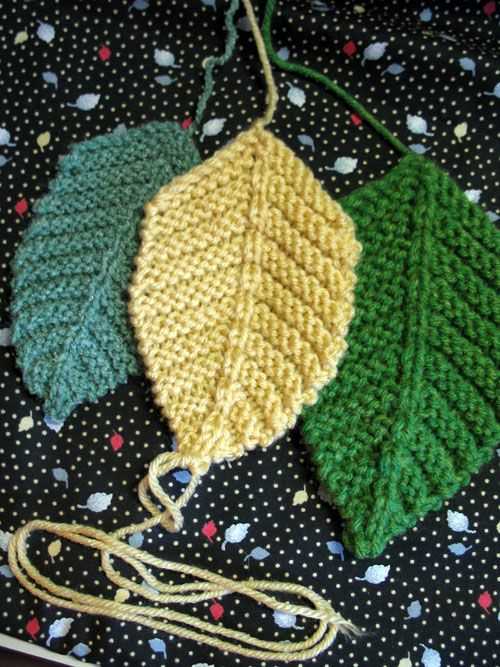
Shades of green: Green is the most common color for leaves and it comes in a variety of shades. From light lime green to dark forest green, you can play with different shades of green to create depth in your knitted leaves.
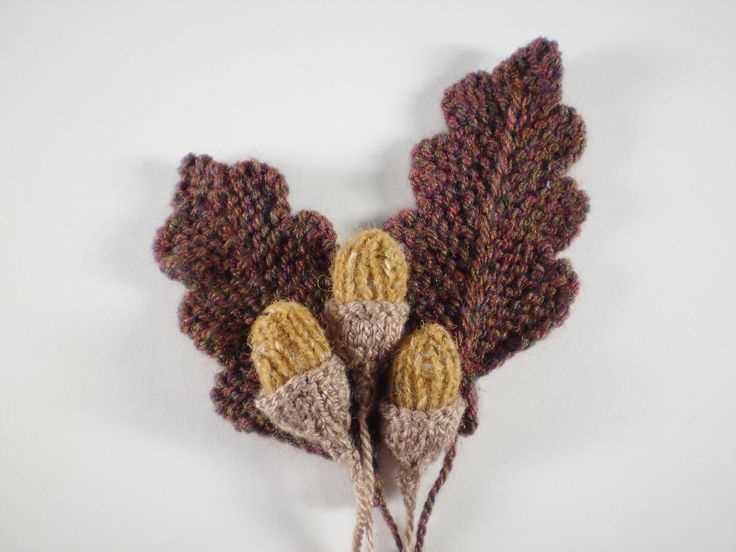
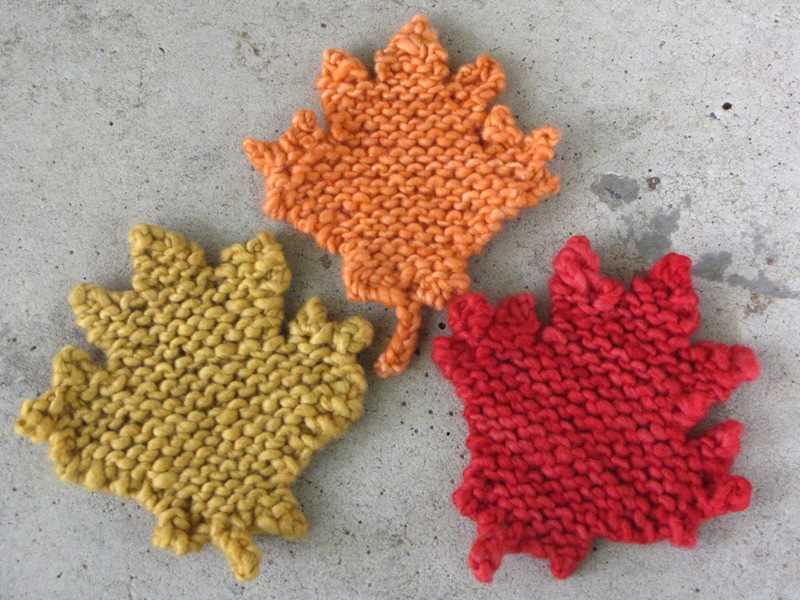
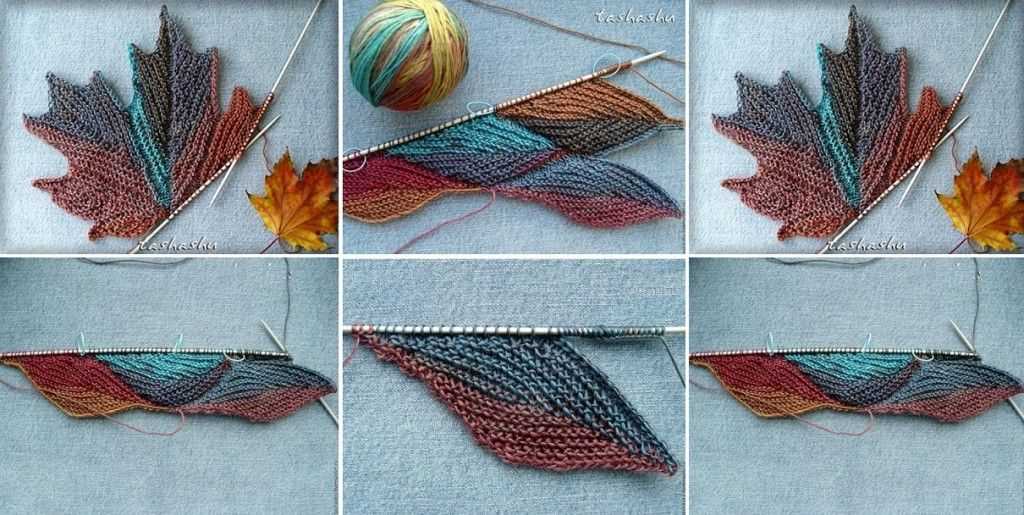
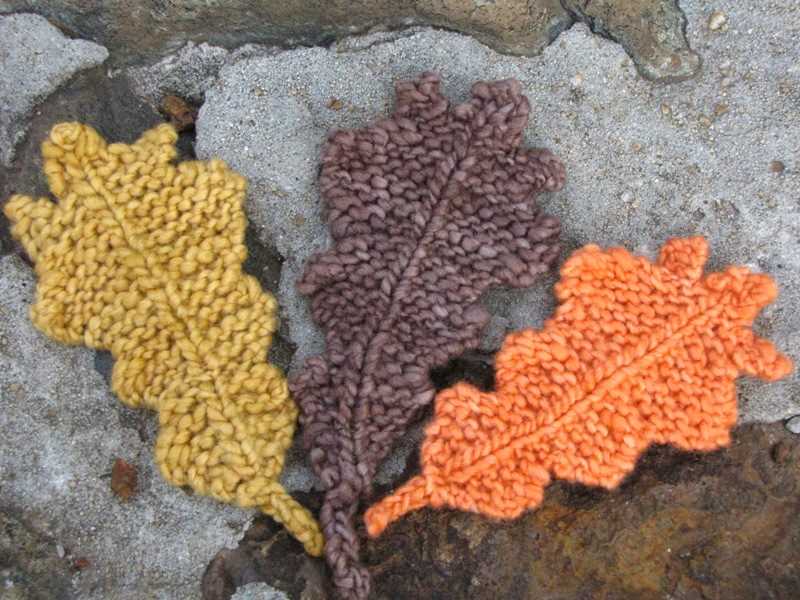
Autumnal colors: To capture the essence of autumn, you can choose colors like orange, red, and brown. These warm and cozy colors will bring a touch of fall to your knitted leaves and make them stand out in any project.
Contrasting colors: If you want to make a statement, you can use contrasting colors in your knitted leaves. For example, you can pair a vibrant green leaf with a bright yellow vein to create a bold and eye-catching effect.
Variegated yarn: Another option is to use variegated yarn that comes in different colors. This type of yarn will create a unique and random pattern on your knitted leaves, adding an extra touch of creativity to your projects.
Overall, the color options for knitted leaves are endless. Whether you prefer natural shades, autumnal colors, or contrasting combinations, you can create beautiful and unique knitted leaves that will add a special touch to any project.
Adding Details and Embellishments
When it comes to knitting leaves, adding details and embellishments can really bring them to life. One easy way to add details is by using different stitch patterns. For example, you can use a lace stitch to create a delicate and intricate pattern on your leaf. This adds texture and visual interest to the leaf, making it more realistic and appealing. Another option is to use different colors of yarn to create a variegated effect. This can mimic the natural color variations found in real leaves, making your knitted leaves look even more authentic.
Embroidery is another great way to add details to your knitted leaves. You can use embroidery floss or yarn to create veins and other fine details on the leaf. This can be done by following a pattern or by experimenting with different stitches and techniques. Embroidery can add depth and dimension to the leaf, making it look more three-dimensional and lifelike.
Accessories can also be added to your knitted leaves to give them a unique and personalized touch. You can attach small buttons or beads to the leaf to represent dewdrops or berries. This adds a little bit of sparkle and shine to the leaf, making it more eye-catching. Additionally, you can attach a small loop or ribbon to the top of the leaf to turn it into a hanging ornament or a decorative accessory for a hat or bag.
Table
| Decoration | Description |
|---|---|
| Embroidery | Adds fine details and texture to the leaf |
| Buttons or beads | Add sparkle and shine to the leaf |
| Loop or ribbon | Transform the leaf into a hanging ornament or accessory |
Lists
- Use different stitch patterns to add texture and visual interest
- Experiment with embroidery to create veins and other fine details
- Attach buttons or beads for sparkle and shine
- Add a loop or ribbon to turn the leaf into a hanging ornament or accessory
Finishing techniques for knitted leaves
In order to give your knitted leaves a polished and professional look, it is important to use proper finishing techniques. These techniques will help you achieve clean edges, neatly sewn seams, and smooth surfaces on your knitted leaves.
Blocking: Before starting the finishing process, it is recommended to block your knitted leaves. This involves gently wetting the leaves and then pinning them to a blocking board or mat to shape them. Blocking helps to even out the stitches and create a more cohesive appearance.
Seaming: Depending on the pattern, you may need to seam your knitted leaves together to create a larger piece, such as a garland or a decorative motif. To seam the leaves, you can use a tapestry needle and the mattress stitch technique. This will create an invisible seam that blends in seamlessly with the rest of the leaf.
Embroidery: Adding details and texture through embroidery can enhance the appearance of your knitted leaves. You can use a contrasting color of yarn or embroidery floss to stitch veins or other designs onto the surface of the leaves. This will give them an extra dimension and make them more visually interesting.
Edging: To give your knitted leaves a nice finished edge, you can use techniques such as single crochet or picot edging. This will help prevent the edges from curling and add a decorative touch. You can also experiment with different types of edging patterns to enhance the overall design of your leaves.
Finishing touches: Once you have completed the main finishing techniques, take the time to carefully inspect your knitted leaves for any loose ends or imperfections. Use a tapestry needle to weave in any loose yarn tails and make any necessary adjustments to ensure that your leaves look neat and tidy.
By following these finishing techniques, you can turn your knitted leaves into beautiful and professional-looking pieces that can be used in a variety of craft projects.
Using knitted leaves in your projects
Knitted leaves can add a unique and natural touch to your knitting projects. Whether you are making a scarf, a hat, or a blanket, incorporating knitted leaves can bring an element of nature that is both beautiful and functional.
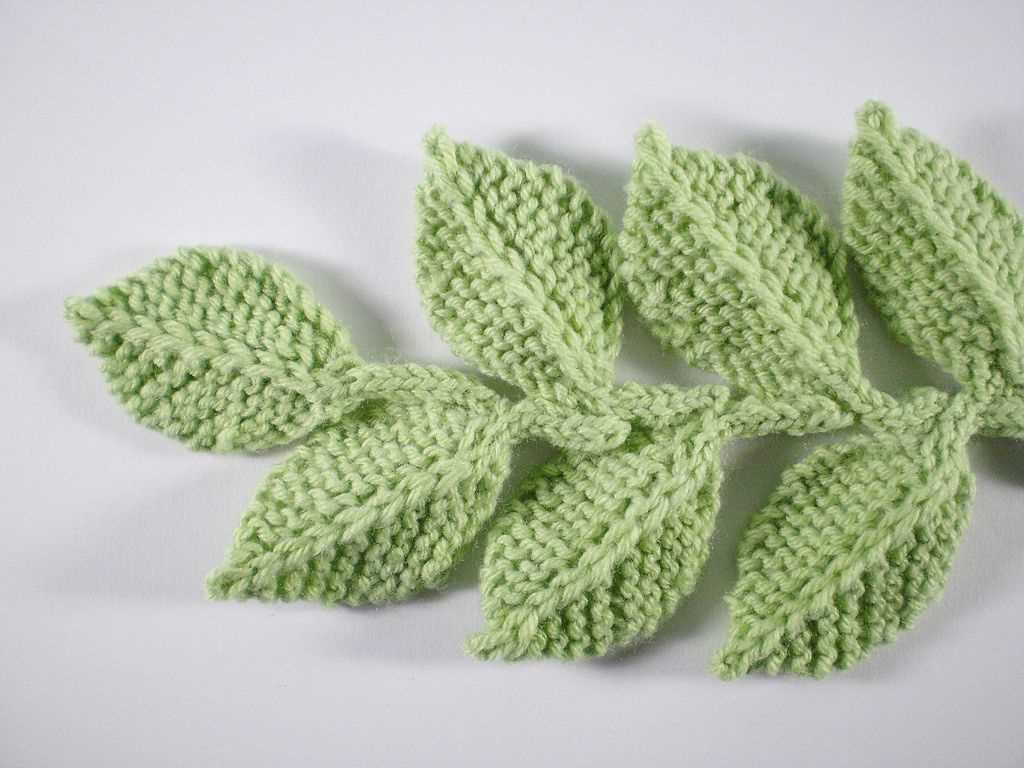
One way to use knitted leaves in your projects is to create a border or edging. You can knit several leaves of varying sizes and sew them onto the edge of your project for a whimsical and organic look. This can be especially effective on scarves or shawls, where the leaves can drape along the edge.
Knitted leaves can also be used as appliques
- For example, you could knit a leaf and attach it to a hat or a bag for a touch of nature-inspired style.
- You could also incorporate knitted leaves into a larger design or pattern, such as a floral motif or a nature-inspired scene. The leaves can add depth and dimension to the overall design, making it more visually interesting.
Additionally, knitted leaves can be a great way to practice new knitting techniques or stitch patterns. There are many different patterns available for knitted leaves, ranging from simple to complex. By knitting leaves, you can hone your skills and expand your repertoire of knitting techniques.
In conclusion, incorporating knitted leaves into your projects can add a unique and natural touch. Whether you use them as borders, appliques, or as part of a larger design, knitted leaves can bring a sense of beauty and nature to your knitting projects.
Knitting Leaves for Beginners
Knitting leaves can be a fun and rewarding project for beginners. Whether you are looking to make a decorative embellishment or a standalone piece, knitted leaves can add a touch of nature to your knitting projects.
Materials: To get started, you will need the following materials: yarn (in the color of your choice), knitting needles (appropriate size for your yarn), a tapestry needle, and scissors. Having these basic materials on hand will allow you to create beautiful knitted leaves.
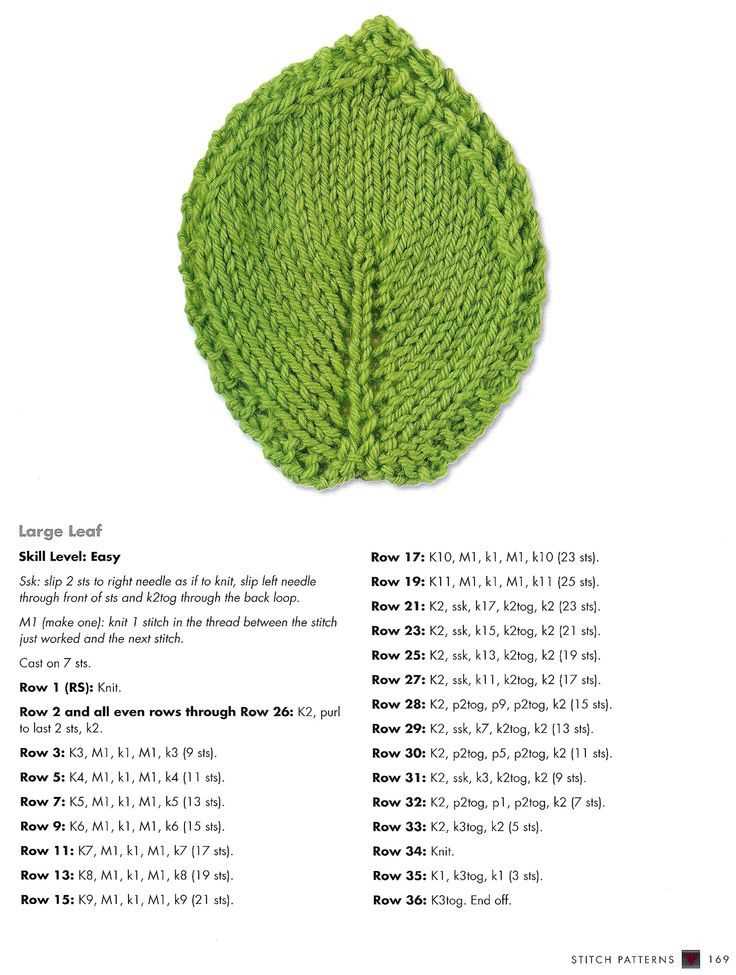
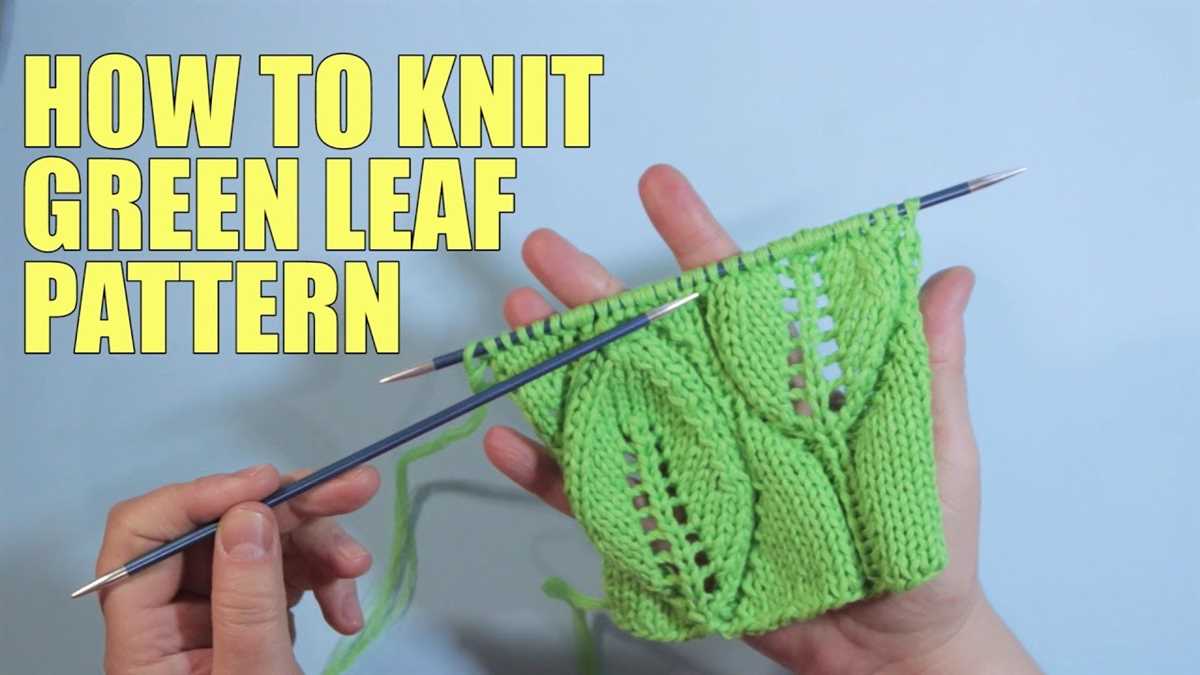
Basic Leaf Pattern:

1. Cast on: To begin, cast on a multiple of 7 stitches. For example, you can start with 14 stitches, 21 stitches, or any multiple of 7 that you prefer.
2. Row 1: Knit across all stitches.
3. Row 2: Purl across all stitches.
4. Row 3: Knit 1, *knit 2 together, yarn over, knit 5*. Repeat from * to * until the end of the row.
5. Row 4: Purl across all stitches.
6. Row 5: Knit across all stitches.
7. Row 6: Purl across all stitches.
8. Row 7: Knit 2, *knit 2 together, yarn over, knit 4*. Repeat from * to * until the last 2 stitches, knit 2.
Continue repeating rows 2-7 until your leaf reaches the desired length. Once you have completed the leaf, bind off all stitches and weave in any loose ends.
This basic leaf pattern is just one example of the many variations you can create. By experimenting with different stitch patterns, yarn weights, and needle sizes, you can customize your knitted leaves to suit your preferences and projects.
Remember, practice makes perfect! As a beginner, don’t be afraid to make mistakes and try different techniques. With time and patience, you will master the art of knitting leaves and be able to create beautiful and intricate designs.
Troubleshooting common issues
In this section, we will address some common issues that you may encounter while knitting leaves using this free pattern. Whether you are a beginner or an experienced knitter, it’s important to be aware of these potential pitfalls.
1. Incorrect stitch count

One common problem that knitters face is ending up with the wrong number of stitches. This can happen if you accidentally skip a stitch or make a mistake in increasing or decreasing stitches. To avoid this, make sure to carefully follow the pattern instructions and double-check your stitch count at the end of each row or round.
2. Uneven tension
Another issue that may arise is uneven tension in your knitting. This can result in leaves that are different sizes or have a distorted shape. To address this, try to maintain a consistent tension throughout your work by keeping your stitches neither too tight nor too loose. Practice and experience will help you improve your tension control.
3. Confusion with pattern instructions
Knitting patterns can sometimes be confusing, especially if you are a beginner or if the pattern is poorly written. If you find yourself struggling to understand the instructions, take a break and come back to it with a fresh mind. You can also try searching for tutorials or reaching out to fellow knitters for guidance.
4. Yarn choice
The type of yarn you choose can also impact the outcome of your knitted leaves. Some yarns may not hold their shape well or may not have the desired texture. When selecting yarn, consider its weight, fiber content, and recommended needle size. Experimenting with different yarns can help you achieve the desired result.
In conclusion, knitting leaves using a free pattern can be a rewarding and enjoyable project. However, it’s important to be aware of common issues such as incorrect stitch count, uneven tension, confusion with pattern instructions, and yarn choice. By being mindful of these potential problems and taking steps to address them, you can increase your chances of successfully knitting beautiful leaves.