
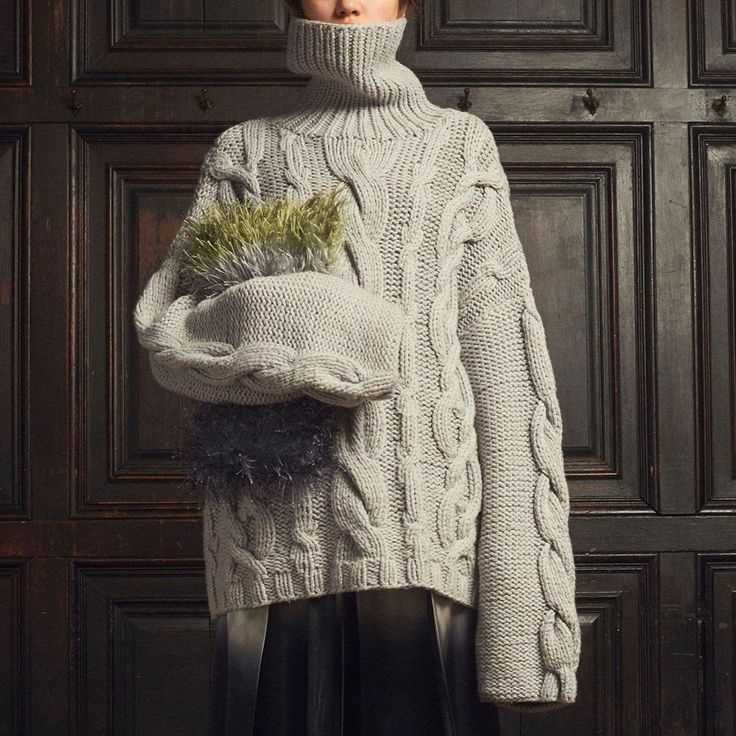
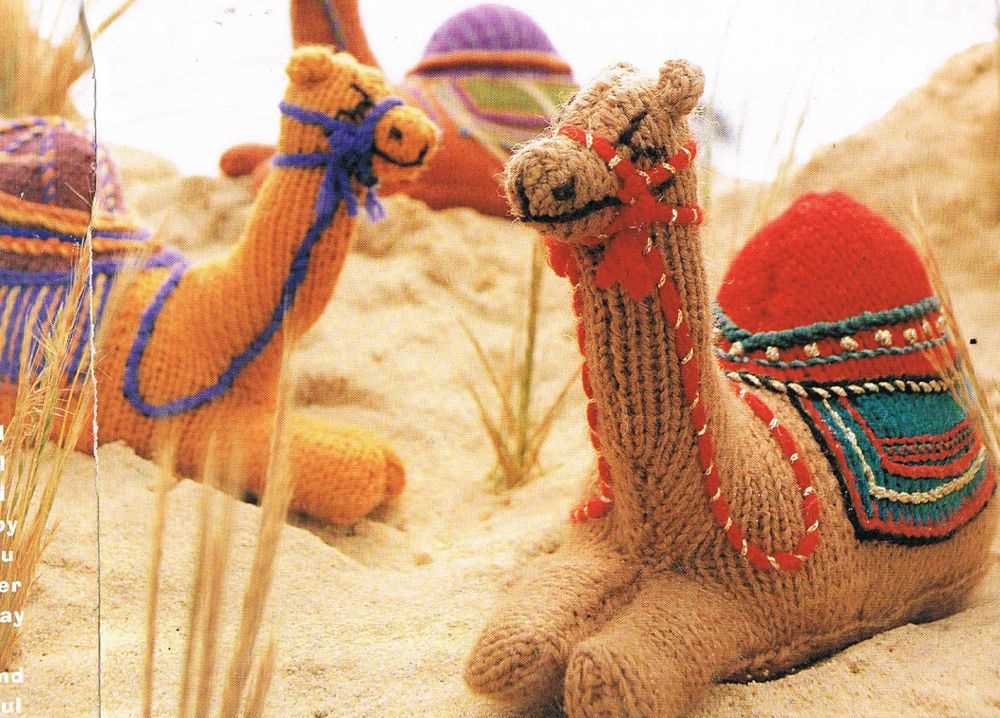
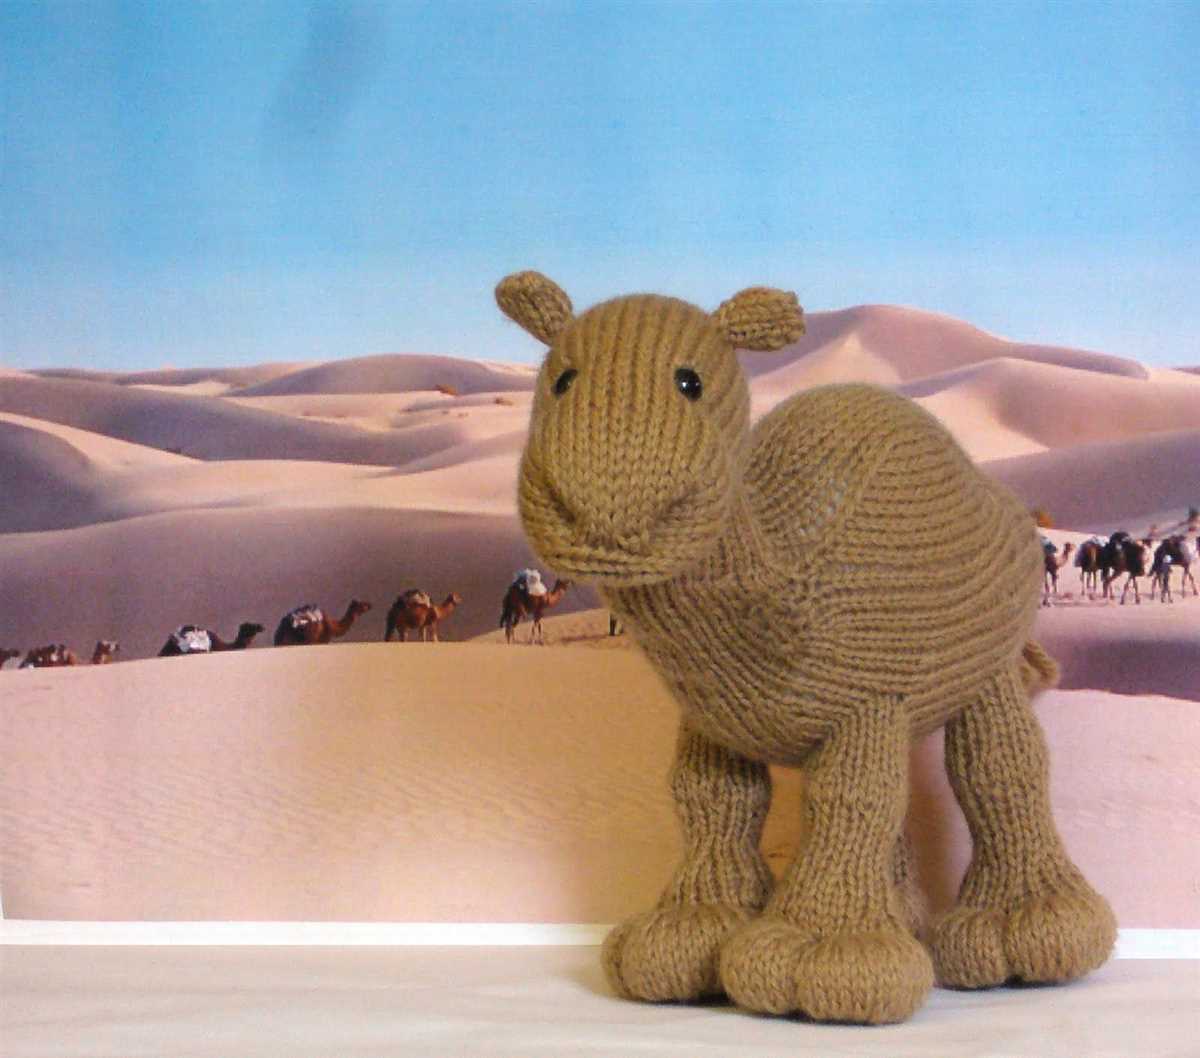
Knitting is a popular craft that allows people to create beautiful and unique pieces of clothing and accessories. One of the most adorable animals that can be knitted is the camel. The knitted camel pattern is a favorite among knitters, as it creates a cute and cuddly toy that can be enjoyed by people of all ages.
The knitted camel pattern usually consists of several basic knitting stitches, such as knit and purl. The toy can be knitted using various yarns, depending on the desired size and texture. Some knitters prefer using a soft and fuzzy yarn, while others opt for a more durable and textured one. The choice of colors is also up to the knitter, but traditional camel colors, such as brown and sandy hues, are often used to create a more realistic look.
Knitting a camel can be a fun and rewarding project for both beginner and experienced knitters. The pattern typically includes step-by-step instructions and a detailed list of materials needed. Knitters can experiment with different techniques, such as adding embroidery or using different types of stitches, to create a unique and personal touch to their camel. Once finished, the knitted camel can make a great gift or a cute addition to any room or nursery.
What is a Knitted Camel Pattern?
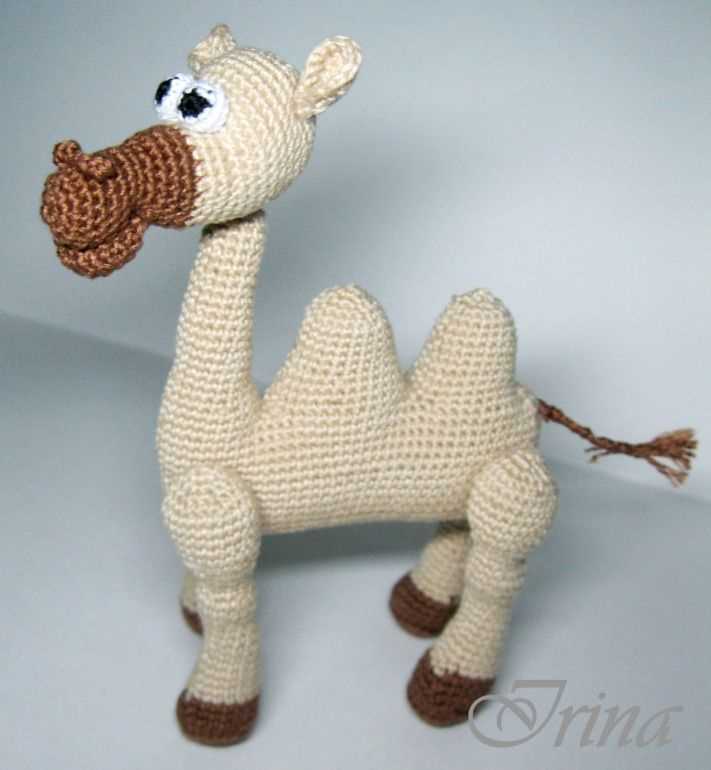
A knitted camel pattern is a set of instructions that guides you through the process of creating a knitted toy or decoration in the shape of a camel. It typically includes a list of materials needed, step-by-step instructions, and sometimes even charts or diagrams to help you visualize the construction process.
The pattern will usually specify the type of yarn and knitting needles to use, as well as any special techniques or stitches required. It may also provide suggestions for color choices and variations, allowing you to customize your camel to your liking.
Creating a knitted camel can be a fun and rewarding project for knitters of all skill levels. It allows you to practice various knitting techniques such as shaping, increasing, and decreasing, and can be a great way to experiment with different yarns and patterns.
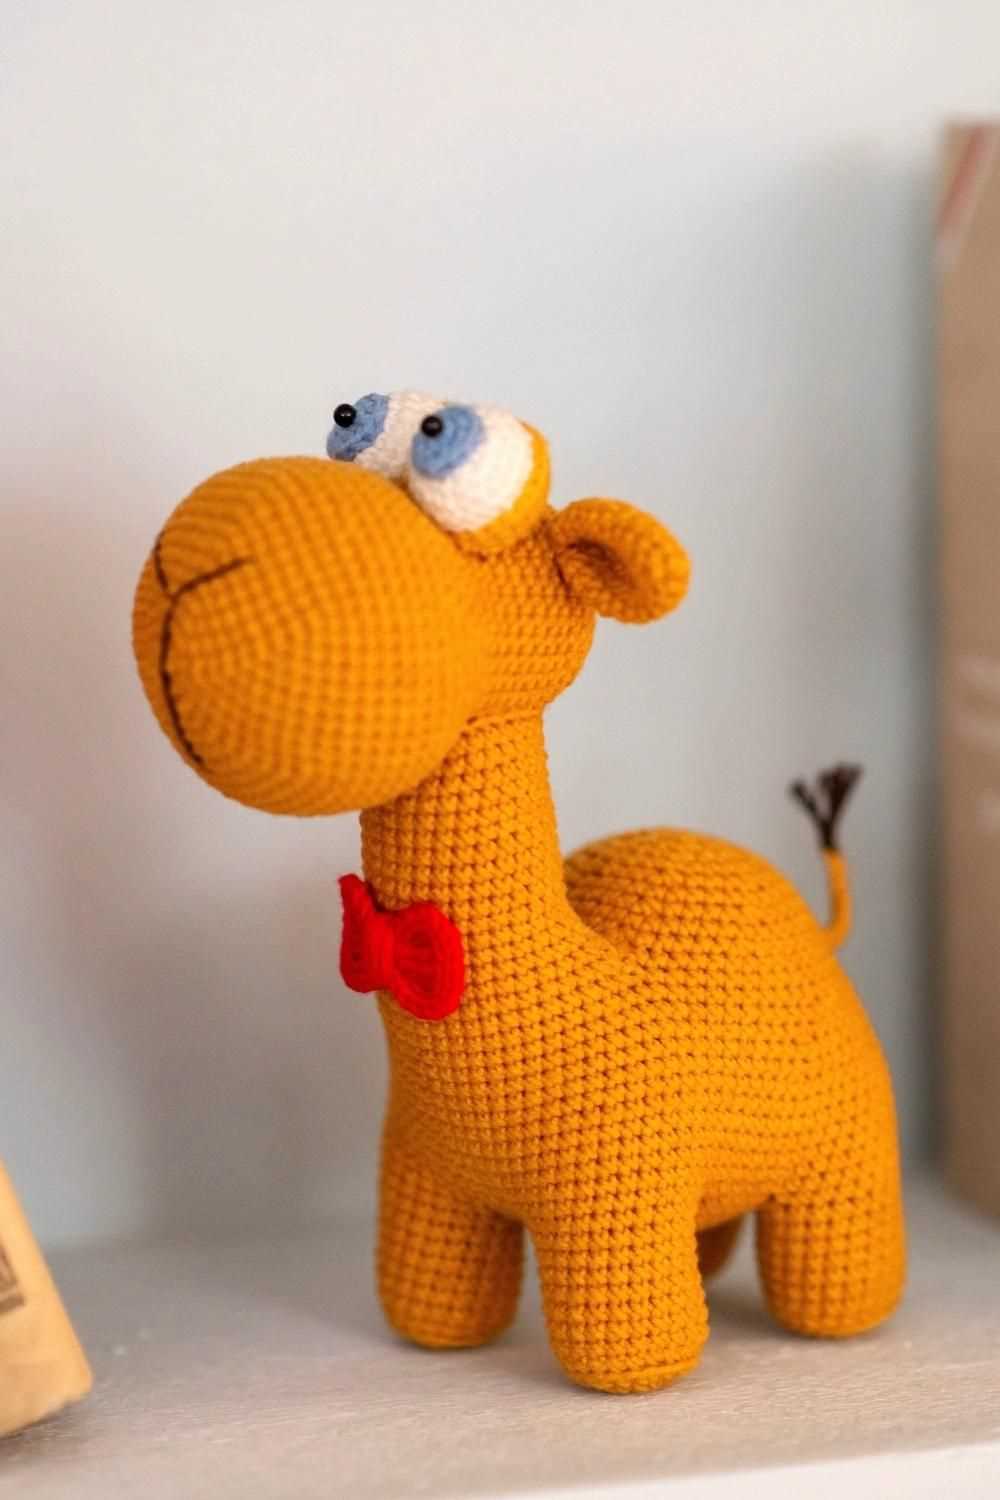
Knitted camels can make adorable gifts or decorations, adding a unique and whimsical touch to any space. They can be used as soft toys for children, or simply as decorative accents in a cozy corner of your home.
If you’re a beginner knitter, don’t be intimidated by the idea of following a pattern. Start with a simple pattern and take it one step at a time. As you gain confidence and experience, you can move on to more complex designs.
- Create your very own knitted camel with a charming pattern.
- Perfect for knitters of all skill levels.
- Use the specified yarn and needles for best results.
- Customize your camel with different colors and variations.
- Knitted camels make great gifts and decorations.
How to Start Knitting a Camel?
To start knitting a camel, you will need to gather the necessary materials and choose a suitable knitting pattern. The materials you will need include knitting needles, yarn, and a tapestry needle. It is recommended to use a thicker yarn and larger knitting needles to create a plush texture for the camel. You can choose any color of yarn you like, but shades of brown or tan are commonly used to mimic the color of a real camel.
Step 1: Cast On
Begin by casting on the required number of stitches according to your knitting pattern. This will determine the width of your camel. It is important to cast on loosely to allow for ease in knitting and to create a flexible fabric.
Step 2: Knit the Body
Once you have cast on the stitches, you can start knitting the body of the camel. Follow the instructions in your knitting pattern to create the desired shape and size. You will likely be knitting in stockinette stitch, which involves knitting one row and purling the next row.
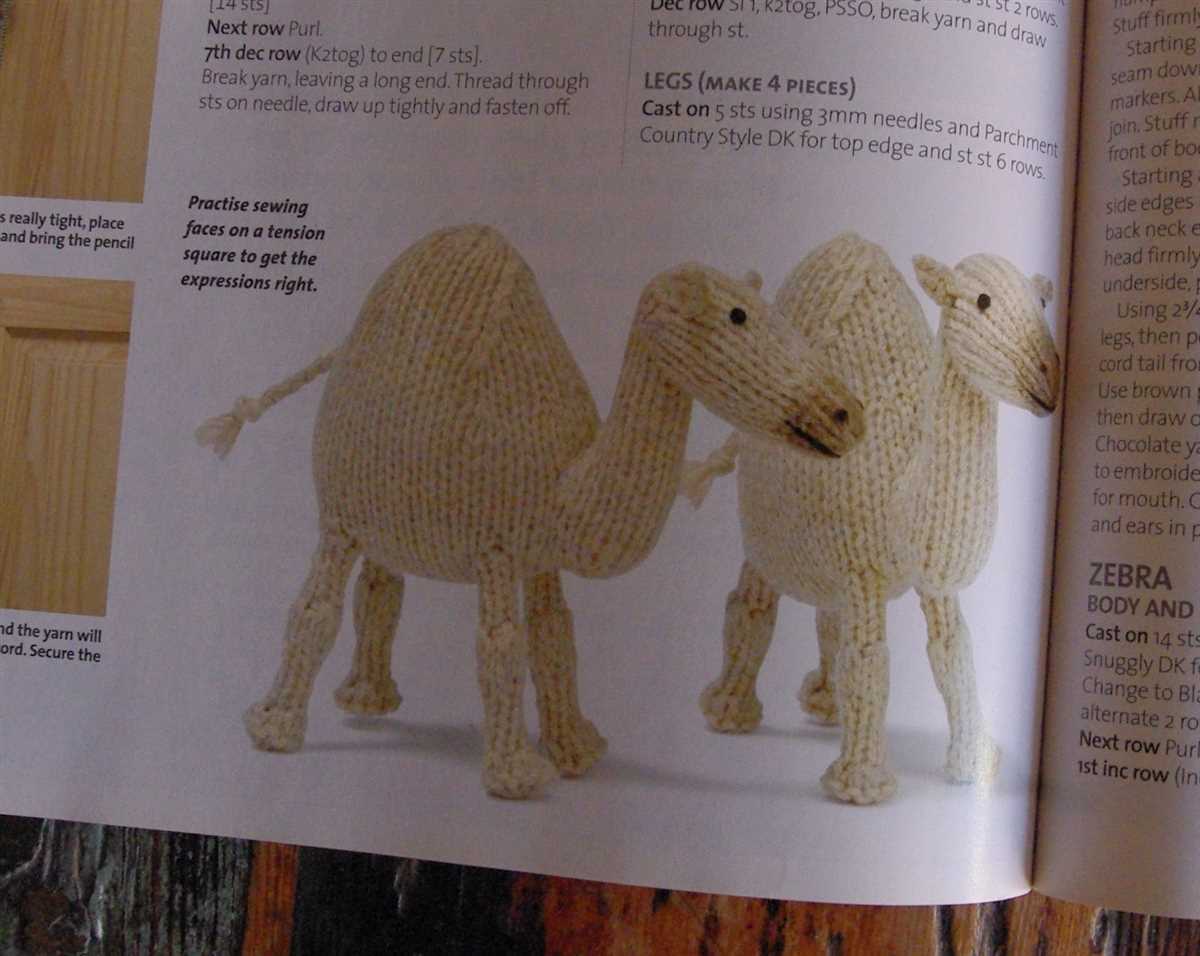
Step 3: Shape the Humps
A distinctive feature of a camel is its humps. To create the humps, you will need to shape the knitted fabric. This can be done by increasing and decreasing stitches in specific areas. Follow the instructions provided in your knitting pattern to shape the humps accurately.
Step 4: Knit the Legs
After completing the body and humps, it’s time to knit the legs of the camel. Each leg can be knitted separately and then sewn onto the body. Depending on your knitting pattern, you may need to knit the legs in a specific stitch pattern to create the desired texture.
Step 5: Finish the Details
Once all the pieces are knitted and assembled, you can add any additional details to the camel, such as facial features, ears, and tail. Use the tapestry needle and yarn to sew these details onto the body. Be sure to secure them tightly to prevent them from coming loose.
Following these steps and your knitting pattern, you will be able to create a charming knitted camel that can be a unique and whimsical addition to your collection of knitted animals.
Choosing the Right Materials for Knitting a Camel
When it comes to knitting an adorable camel, choosing the right materials is crucial to achieve the desired result. The choice of yarn and needles can greatly affect the texture, size, and overall appearance of the knitted camel, so it’s important to make informed decisions.
Yarn: One of the key considerations when selecting yarn for a knitted camel is its color. Camel’s fur comes in various shades of brown and beige, so opting for yarn in these hues would give the camel a realistic look. Additionally, choosing a yarn with a fluffy or textured finish can mimic the softness and texture of a camel’s coat. Mohair, alpaca, or a blend of different fibers can be excellent choices for this project.
Needles: The choice of needles depends on the desired size of the camel and the yarn thickness. If you want a smaller camel, using smaller-sized needles would be appropriate. However, if you prefer a larger and more cuddly camel, larger-sized needles should be considered. It’s essential to choose needles that are comfortable to work with, ensuring that the stitches are not too tight or too loose.
Other Materials: Apart from yarn and needles, other materials like stuffing, safety eyes, and embroidery thread may be required to complete the camel. For stuffing, it’s best to choose a soft and hypoallergenic material that will give the camel a plush feel. Safety eyes can enhance the camel’s expression and give it a more lifelike appearance. Embroidery thread can be used to add small details to the camel’s face, such as the nose and mouth.
By carefully considering the yarn, needles, and other materials for knitting a camel, you can create a charming and realistic toy that will be loved by both children and adults. Remember to experiment with different textures and colors to achieve the perfect camel-like look, and don’t forget to enjoy the process of creating a unique and special knitted camel.
Understanding Knitting Techniques for a Camel Pattern
Knitting a camel pattern requires an understanding of different knitting techniques to create the unique texture and design. By following these techniques, you can create a charming camel pattern that will impress both beginners and experienced knitters.
1. Basic Stitches: Before attempting a camel pattern, it’s essential to master basic knitting stitches such as the knit stitch and the purl stitch. These stitches form the foundation of the pattern and create the smooth and textured sections of the camel.
2. Cable Knitting: Cable knitting is a technique used to create the raised patterns that resemble the humps of a camel. By crossing a set of stitches over each other, the cables add depth and intricacy to the pattern. Understanding cable knitting charts and following the instructions carefully will help you create the camel’s humps with precision.
3. Colorwork: To bring the camel pattern to life, you can incorporate colorwork techniques such as stranded knitting or intarsia. Stranded knitting involves carrying multiple yarn colors across the row, creating a design that showcases different colors in the pattern. Intarsia, on the other hand, allows you to knit separate sections of color, resulting in more prominent color blocks.
4. Increasing and Decreasing: As you knit the camel pattern, you may need to shape the fabric by increasing or decreasing stitches. Properly executed increases and decreases will give your camel a realistic and proportionate appearance. Techniques like yarn overs and knit 2 together can be used for shaping the camel’s body, legs, and head.
5. Finishing Techniques: Once you have completed the knitting portion of the camel pattern, it’s important to finish it off with the correct techniques. Blocking the knitted pieces to ensure they maintain their shape, seaming the different sections together, and neatly weaving in loose ends all contribute to the final polished look of the camel.
By understanding and practicing these knitting techniques, you can confidently tackle a camel pattern and create a knitted masterpiece that showcases your skills and creativity.
Step-by-Step Guide to Knit a Camel

Knitting a camel can be a fun and challenging project for experienced knitters. This step-by-step guide will walk you through the process of creating your own adorable knitted camel.
Materials Needed:
- Knitting needles (size may vary depending on your desired finished size)
- Yarn in camel color
- Yarn needle
- Scissors
- Stitch markers
- Stuffing
Step 1: Cast On
Begin by casting on the desired number of stitches for the camel’s body. It’s recommended to use a long-tail cast-on method for a neat and sturdy edge.
Step 2: Knit the Body
Using the camel color yarn, start knitting the body of the camel in the desired stitch pattern. You can use simple stockinette stitch or try more intricate patterns for extra texture. Remember to place stitch markers to indicate important sections, such as where the head and humps will be positioned.
Step 3: Shape the Humps
Once you have reached the desired height for the body, start shaping the humps. This can be done by increasing stitches evenly across a row, following a specific pattern, or by using short rows. Be sure to follow the instructions for your chosen pattern to achieve the desired shape.
Step 4: Knit the Head
Next, it’s time to knit the camel’s head. Using a separate set of knitting needles, cast on the required number of stitches for the head. Knit in the desired stitch pattern until the head reaches the desired size. Remember to leave a long tail for sewing the head to the body later.
Step 5: Join the Head and Body
With the body and head both knitted, it’s time to join them together. Use the yarn needle and the long tail left from the head to sew the head onto the body. Make sure to securely attach the head to the body and weave in any loose ends.
Step 6: Finish and Stuff
With the camel’s body and head in place, it’s time to finish off any remaining details, such as embroidering facial features or adding embellishments like a saddle or bridle. Once all details are complete, stuff the camel firmly with stuffing material to give it a three-dimensional shape.
Congratulations! You have successfully knitted your very own camel. Whether it’s for a child’s toy or a decorative piece, your knitted camel is sure to bring joy and warmth to anyone who sees it.
Casting on Stitches
When starting a knitting project, the first step is to cast on stitches. Casting on is the process of creating loops on the needle that will eventually form the foundation for your knitting. There are different methods of casting on, each with its own unique characteristics and purposes. Whether you are a beginner or an experienced knitter, it is essential to understand the basics of casting on stitches.
One common method of casting on is the long-tail cast on. This method creates a clean and sturdy edge that is perfect for many projects. To do the long-tail cast on, you will need to estimate the length of yarn needed for the foundation rows. This method requires two strands of yarn: the working yarn and the tail. The working yarn is the yarn attached to the ball, while the tail is a separate strand that is about three times the length of the desired number of stitches. By using both strands of yarn, you can create a secure and flexible edge.
Another popular method is the knitted cast on. This technique is simple and versatile, making it a great choice for beginners. To do the knitted cast on, you will first make a slip knot and place it on the needle. Then, you will insert the other needle into the slip knot and knit a stitch, transferring it from the left needle to the right. This process is repeated until you have cast on the desired number of stitches. The knitted cast on creates a neat and elastic edge that blends well with the rest of the knitting.
It is important to choose the right casting on method based on your project and desired outcome. Some methods are more suited for specific types of projects, such as ribbing or lacework, while others are more general-purpose. It is also essential to cast on the correct number of stitches, as this will determine the width of your work. Taking the time to practice different casting on methods will expand your knitting skills and give you more options for your projects.
Key Points:
- Casting on is the process of creating loops on the needle to start a knitting project.
- There are different methods of casting on, each with its own characteristics and purposes.
- The long-tail cast on and the knitted cast on are two common methods.
- Choose the casting on method based on your project and desired outcome.
- Practice different casting on methods to expand your knitting skills.
Knitting the Body of the Camel
Materials needed: To knit the body of the camel, you will need your chosen yarn in the desired color, knitting needles of the appropriate size, stitch markers, scissors, and a tapestry needle.
Step 1: Cast on stitches
Begin by casting on the required number of stitches using the long-tail cast-on method. Make sure to leave a long tail, as this will be used for seaming later.
Step 2: Knit in stockinette stitch
Once the stitches are cast on, start knitting in stockinette stitch. This means that you will knit one row and purl one row, repeating this pattern until the desired length of the body is reached. Use stitch markers to mark the beginning and end of each row to keep track of your progress.
Step 3: Shape the body
To shape the body and give it a realistic appearance, you will need to decrease stitches gradually towards the end of the body. This can be achieved by knitting two stitches together at regular intervals. Refer to the knitting pattern for the specific instructions on where and when to make these decreases.
Step 4: Bind off
Once the body is the desired length and shape, it is time to bind off the stitches. Use a regular bind-off method to secure the stitches and create a nice edge.
Step 5: Finishing touches
After binding off, weave in any loose ends using a tapestry needle. If desired, you can also add any additional details such as embroidery or buttons to enhance the overall look of the camel’s body.
Follow these steps carefully, and soon you will have the knitted body of your camel ready to be assembled with the already knitted head and neck. Remember to take your time and enjoy the process of creating this unique and adorable knitted camel!
Shaping the Humps and Legs
When knitting a camel, shaping the humps and legs is a crucial step to achieve a realistic and three-dimensional appearance. The humps are the defining feature of a camel, and they consist of two large, curved sections of the body. To create the humps, start by increasing stitches evenly across the desired portion of the camel’s back. This can be done by making one stitch in the front and one stitch in the back of each existing stitch. Continue increasing every few rows until the humps are the desired size.
The legs of a camel are another important aspect to consider when creating a knitted camel. The camel has long, slender legs that are capable of carrying its weight as it traverses through various terrains. When shaping the legs, start with a narrow tube-like structure and gradually decrease stitches to create the tapered shape of the legs. This can be achieved by knitting two stitches together at regular intervals, or by using other decreasing techniques such as slip slip knit.
When knitting the humps and legs, it is important to pay attention to the proportions and dimensions to ensure they are in harmony with the rest of the camel’s body. The humps should be placed evenly along the camel’s back and have a smooth, curved appearance. The legs should be sturdy enough to support the weight of the camel and have a tapered shape that tapers towards the hooves.
In addition to shaping the humps and legs, it is also important to consider the overall structure and posture of the camel. Depending on the desired look, you may want to adjust the angle and position of the humps and legs to create a more dynamic and lifelike appearance. By paying attention to these details and using techniques such as increasing and decreasing stitches, you can create a knitted camel that captures the essence of this majestic creature.
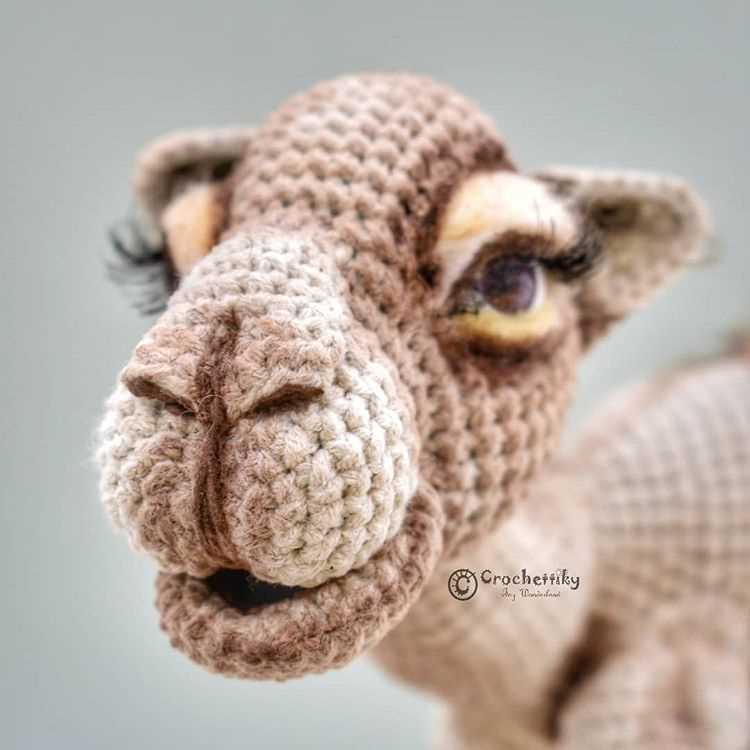
Adding Details like Eyes, Nose, and Tail
The beauty of knitting a camel pattern is that you have the opportunity to add all the charming details that make a camel unique. Once you have completed the basic body and legs, it’s time to work on the face and the tail. These elements will bring your knitted camel to life and give it its distinct character.
Start by creating the eyes using small buttons or beads. Position them on the face, taking care to ensure they are symmetrical. Sew them securely in place, making sure they are safely attached and won’t come off easily. Adding eyes will immediately give your camel a more expressive and lifelike appearance.
Next, work on the nose of your knitted camel. You can create a simple satin stitch or use a contrasting yarn color to crochet or embroider a nose onto the face. Be creative and experiment with different techniques to achieve the desired look. Adding a nose will give your camel a focal point and enhance its overall cuteness.
Finally, don’t forget about the tail. Knit or crochet a small tube-like shape using the same yarn as the body. Attach it to the back of the camel, making sure it is securely sewn in place. You can leave it as a straight tail or add some extra flair by creating a loop or a curl at the end. Adding a tail will give your knitted camel a sense of movement and make it even more adorable.
Tips and Tricks for Knitting a Perfect Camel
Knitting a camel pattern can be a fun and rewarding project, but it can also be challenging. To help you achieve the best results, here are some tips and tricks to keep in mind:
1. Choose the right yarn:
When knitting a camel, it’s important to select a yarn that matches the color and texture of a real camel. Look for a yarn that has a natural camel color, such as light brown or beige. Additionally, choose a yarn that has a soft and fluffy texture to mimic the look and feel of camel fur.
2. Use appropriate stitches:
There are various stitches that can be used to create different textures for your knitted camel. For the body, consider using a basic stockinette stitch or rib stitch to create a smooth and uniform appearance. However, for the camel’s hump and other textured areas, you may want to experiment with different stitches like popcorn stitches or bobbles to add dimension and detail.
3. Pay attention to shaping:
In order to accurately represent the shape of a camel, it’s important to pay attention to the shaping of your knitting. Start by creating a pattern that includes increases and decreases in the appropriate places to create the curves and contours of a camel’s body. Additionally, don’t forget to stuff your knitted camel properly to achieve the desired shape and fullness.
4. Add realistic details:
To make your knitted camel pattern look more realistic, consider adding some small details such as embroidered eyes and nose, or even a saddle made of a different colored yarn. You can also play around with different yarn colors to create patches or spots on the camel’s body, just like you would find on a real camel.
By following these tips and tricks, you’ll be well on your way to knitting a perfect camel that is both adorable and lifelike. Remember to take your time and enjoy the process, and soon you’ll have a unique and impressive knitted creation to show off to your friends and family.
Avoiding Common Mistakes
When knitting a camel pattern, it’s important to be aware of some common mistakes that beginners often make. By being mindful of these pitfalls, you can save yourself time and frustration in the long run.
1. Not Reading the Pattern Carefully
One of the biggest mistakes knitters make is not thoroughly reading the pattern before starting. It’s important to familiarize yourself with all the instructions and understand the techniques required. Skipping this step can lead to confusion and mistakes later on.
2. Ignoring Gauge Swatching
Another common error is neglecting to swatch for gauge. Each pattern will have a recommended gauge, which ensures that your finished project will have the correct measurements. By skipping this step, you run the risk of your camel pattern turning out too large or too small.
3. Lack of Tension Consistency
Tension consistency is crucial for achieving an even and professional-looking knit. If your tension varies throughout the project, it can result in uneven stitches and an overall unattractive finish. Take your time, relax your hands, and strive for consistent tension as you knit.
4. Forgetting to Count Stitches
Counting stitches is a critical aspect of knitting any pattern, including the camel pattern. Losing track of your stitch count can lead to mistakes in the overall design and make it difficult to correct the error later. Make it a habit to count your stitches regularly to ensure accuracy.
5. Not Checking Progress Regularly
Lastly, it’s important to check your progress regularly to catch any mistakes early on. By periodically reviewing your work, you can identify and correct any errors before they become more difficult to fix. This practice will help maintain the integrity of your camel pattern and ensure a smooth knitting process.
Adding Personal Touches to Your Camel Pattern
When it comes to knitting a camel pattern, there are endless possibilities for adding personal touches and making it your own. Whether you want to create a whimsical camel with bright colors and patterns, or a more realistic-looking camel with intricate details, the choice is yours.
Choose your colors: One way to add a personal touch to your camel pattern is by selecting unique colors. Try experimenting with different shades of brown for the body, or adding pops of color for the saddle and accessories. You can even create a multi-colored camel by using variegated yarn. Don’t be afraid to get creative and think outside the box!
Add decorative details: Another way to make your camel pattern unique is by adding decorative details. Consider adding a patterned design to the saddle, such as stripes or polka dots. You could also attach small beads or sequins to the camel’s harness for a touch of sparkle. Get inspired by traditional camel decorations or draw on your own imagination.
Personalize the facial features: The face of your camel can greatly contribute to its personality. Experiment with different eye shapes and sizes to give your camel a playful or serious expression. Consider embroidering a small smile or stitching on a tiny nose to add character. Personalizing the facial features is a great way to bring your camel to life.
Try different textures: If you want to add some extra texture and dimension to your camel pattern, consider using different knitting techniques. You could use a rib stitch for the saddle to create a textured effect, or use a fluffy yarn for the camel’s humps to add some softness. Mixing and matching different textures can create a visually interesting and tactile camel.
Accessorize: Finally, don’t forget to accessorize your camel! Add a decorative bridle and reins, or even knit a tiny saddle blanket for your camel to wear. You could also create additional accessories like a hat or a scarf to give your camel a unique style. The possibilities are endless, so have fun and let your creativity soar!
Where to Find Knitted Camel Patterns
If you’re interested in knitting a camel pattern, there are several resources available where you can find patterns to get started. Whether you’re a beginner or an experienced knitter, these sources offer a variety of options to suit your skill level and preferences.
1. Knitting Books and Magazines
Knitting books and magazines are a great place to find a wide range of knitting patterns, including camel patterns. Look for books that focus on animal-themed patterns or books specifically dedicated to camel patterns. Knitting magazines also often feature patterns for various animals, and you may find a camel pattern in one of the issues.
2. Online Knitting Communities and Forums
Many online knitting communities and forums exist where users share their knitting patterns and projects. These communities often have sections dedicated to animal patterns, where you can find camel patterns shared by other knitters. You can also participate in discussions and ask for recommendations on where to find specific camel patterns.
3. Knitting Pattern Websites
There are numerous websites that specialize in knitting patterns, and they offer a wide selection of pattern options. Some websites allow you to browse through categories or use search filters to find camel patterns specifically. These websites often have patterns for different skill levels, so you can choose one that matches your knitting abilities.
4. Knitting Workshops and Classes
If you prefer hands-on learning, consider attending knitting workshops or classes. These classes are often offered by local knitting stores or community centers. In a knitting workshop or class, you’ll have the opportunity to learn from an experienced instructor who can guide you through the process of knitting a camel pattern.
With these resources, you should be able to find a knitted camel pattern that suits your skill level and preferences. Whether you choose a pattern from a book, an online community, a knitting website, or attend a workshop, enjoy the process of knitting and creating your very own knitted camel masterpiece!