
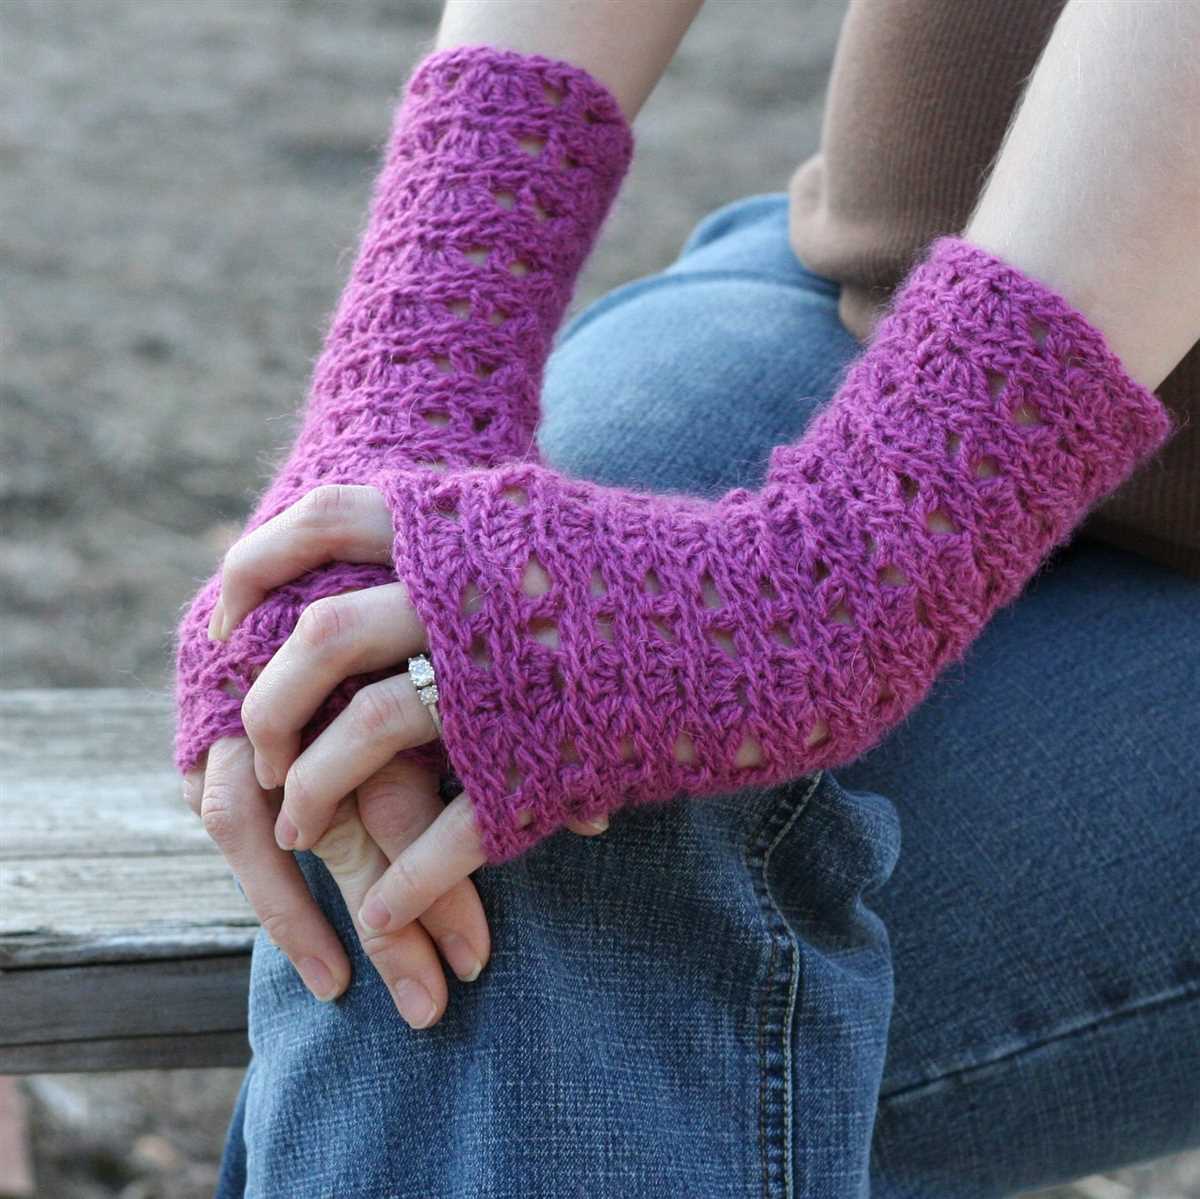
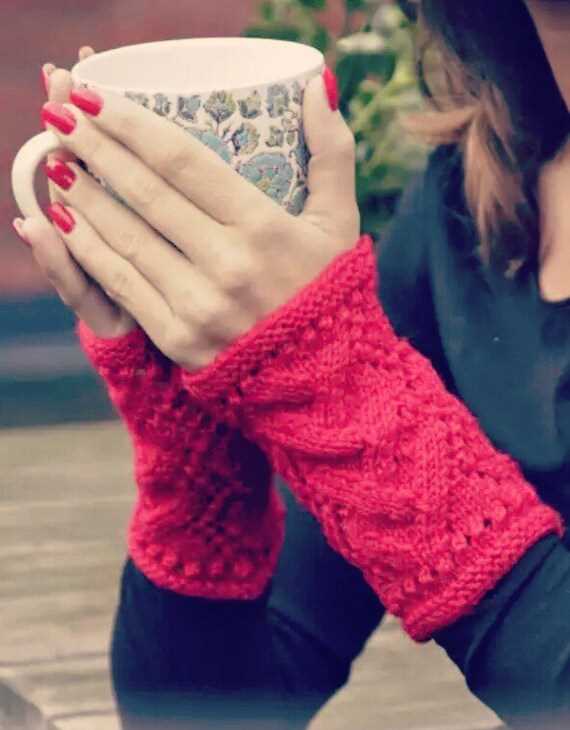
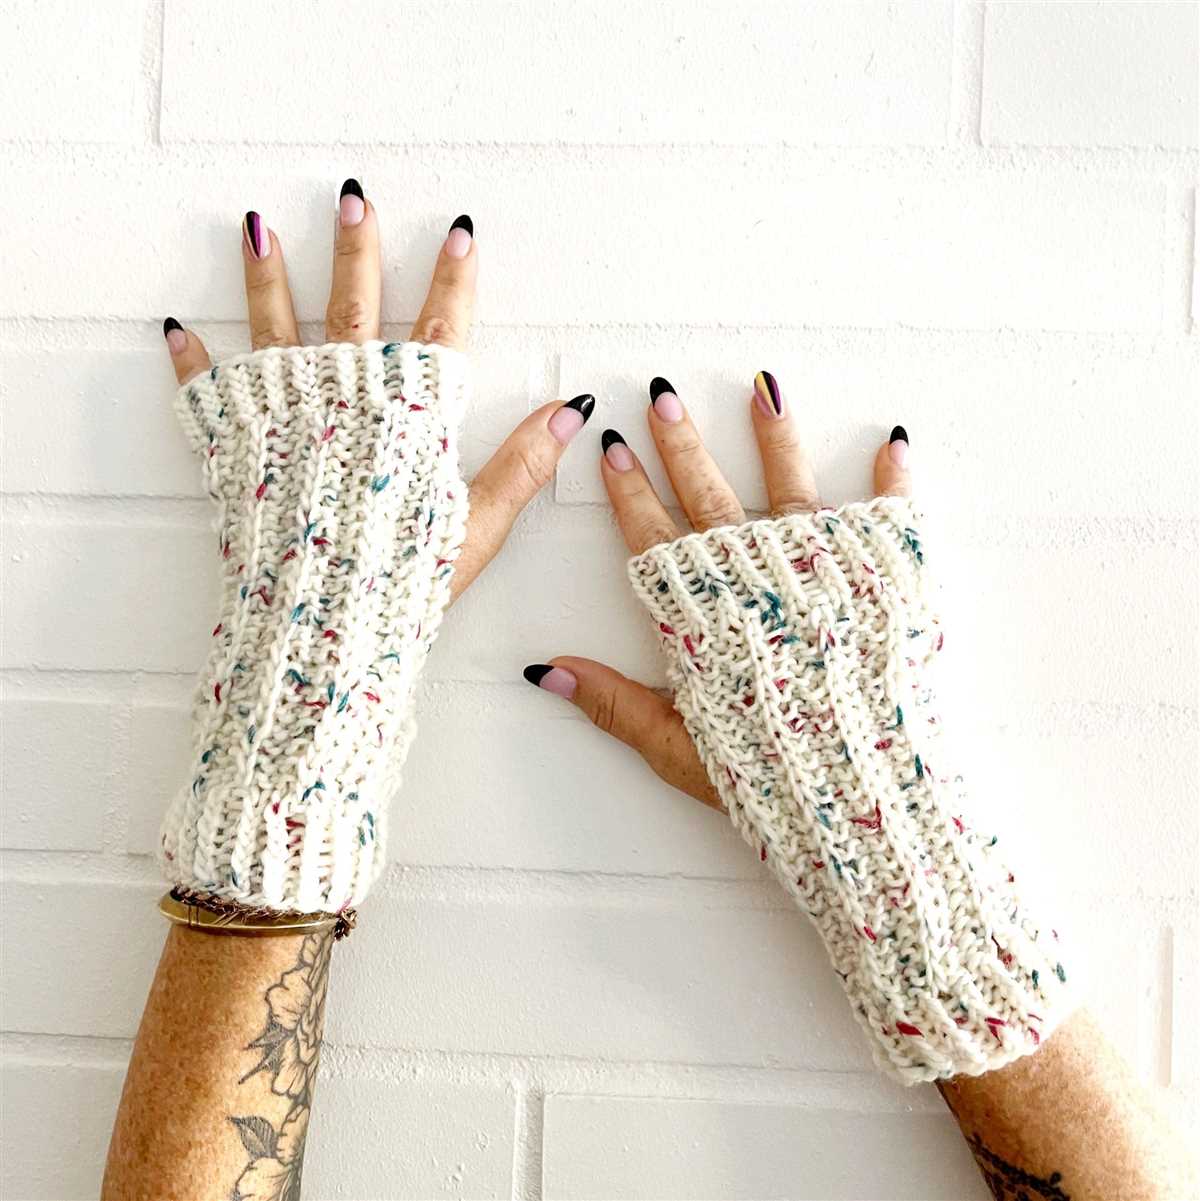
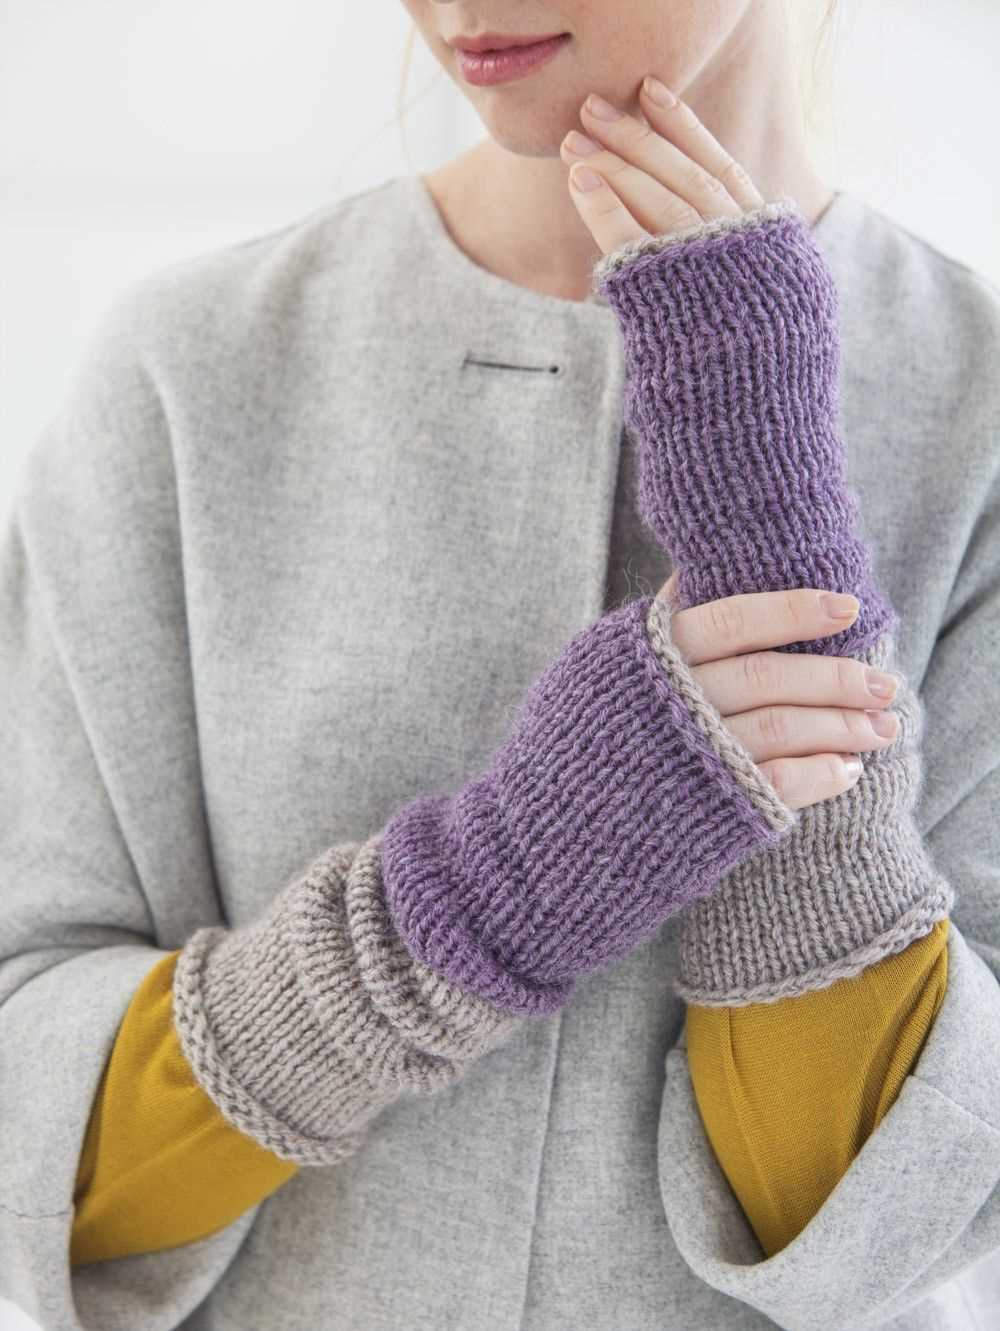
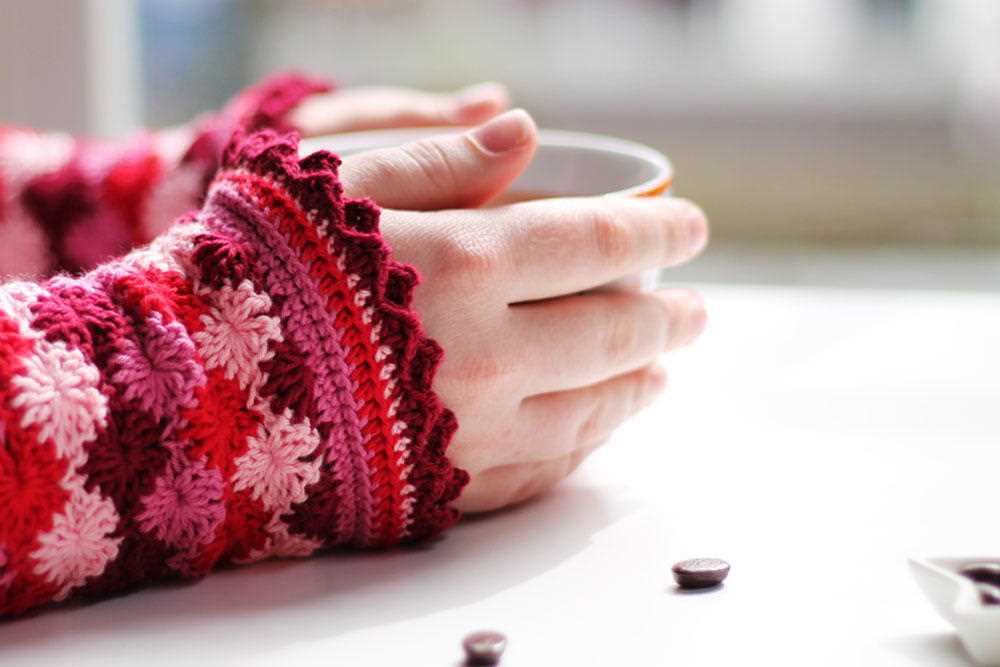
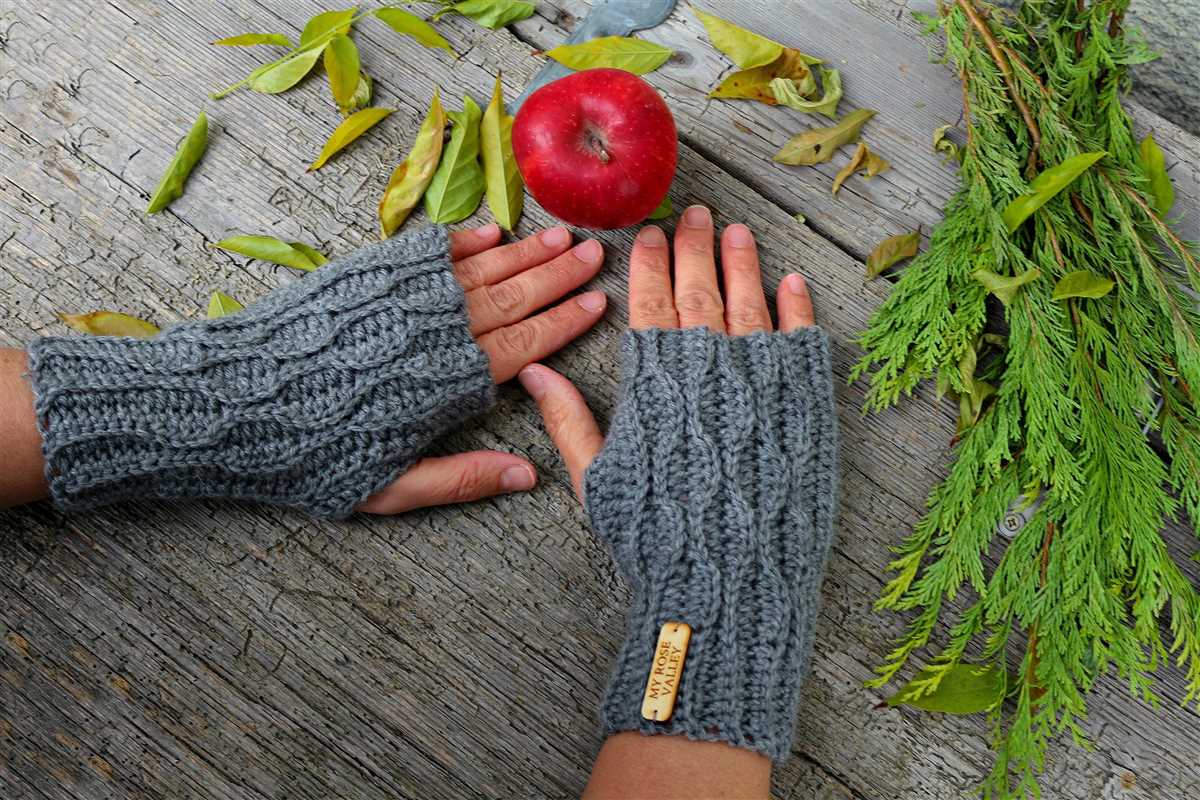
If you’re looking for a fun and fashionable knitting project, look no further than these knit wrist warmers! Wrist warmers are a great way to keep your hands warm and stylish during the colder months. Whether you’re a beginner knitter or an experienced pro, this free pattern is perfect for all skill levels.
With just a few basic knitting techniques, you’ll be able to create a cozy accessory that will keep your hands toasty all winter long. These wrist warmers are designed to fit snugly around your wrists, providing maximum warmth without sacrificing mobility. Plus, they’re the perfect canvas for adding your own personal touch with color and pattern choices.
This pattern is completely free, so you can knit as many pairs as you’d like for yourself or to give as gifts. And don’t worry if you’ve never knit wrist warmers before – this pattern includes step-by-step instructions and helpful tips to guide you through the process. So grab your knitting needles, choose your favorite yarn, and get ready to create a stylish and functional accessory that you’ll love to wear all winter long!
How to Make Stylish Knit Wrist Warmers: Free Pattern
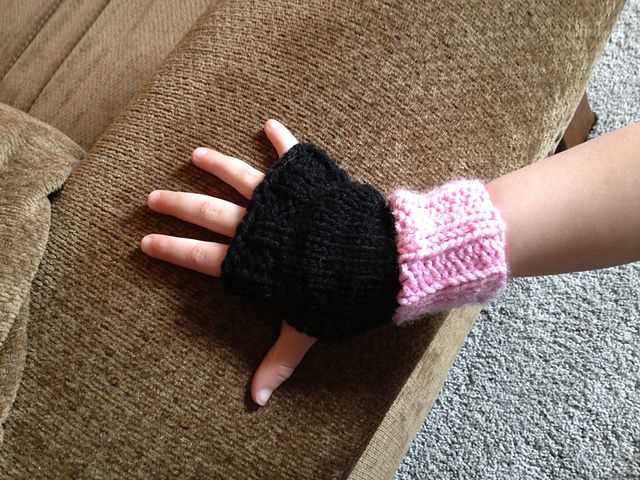
Knit wrist warmers are not only practical for keeping your hands warm during the colder months, but they can also add a touch of style to your outfit. With a free pattern and some basic knitting skills, you can easily create your own pair of stylish wrist warmers.
To start, you will need a set of knitting needles and a ball of yarn in your chosen color. You can use any type of yarn, but a soft and warm yarn like wool or alpaca is recommended for wrist warmers. You may also want to consider using a smaller needle size to create a snug fit.
Begin by casting on the desired number of stitches, typically around 30-40 stitches depending on the size of your wrist warmers. Using a basic knit stitch, work in rows back and forth until the wrist warmer reaches the desired length. You can add some variety by incorporating different knitting stitches, such as ribbing or cables, for a more intricate design.
Once the wrist warmer is long enough, bind off the stitches and cut the yarn, leaving a long tail for sewing. Fold the wrist warmer in half and use the long tail to sew up the side seam, leaving a hole for the thumb. You can also add any additional embellishments, such as buttons or decorative stitches, to personalize your wrist warmers.
Repeat the process to create a matching pair of wrist warmers. You can make multiple pairs in different colors or with different stitch patterns to suit your style. These knit wrist warmers make great gifts for friends and family, or you can just enjoy the cozy warmth for yourself.
Choosing the Right Yarn and Needles
When it comes to knitting wrist warmers, choosing the right yarn and needles is essential for a successful project.
Yarn: The type of yarn you choose will greatly affect the look, feel, and warmth of your wrist warmers. It’s important to consider the fiber content, thickness, and texture of the yarn. For a cozy and warm pair of wrist warmers, opt for a wool or alpaca blend. These natural fibers have excellent insulation properties and will keep your hands toasty during cold days. If you prefer a softer and lighter feel, you can choose a yarn blend that includes acrylic or bamboo. These fibers are known for their softness and drape.
Needles: The size and type of needles you use can also impact the outcome of your project. The needle size will determine the gauge of your knitting, so be sure to check the recommended gauge in the pattern. For the wrist warmers, you’ll generally need a set of double-pointed needles or a circular needle with a length suitable for knitting in the round. The material of the needles can also make a difference in your knitting experience. Metal needles are durable and smooth, making them great for faster knitting. Wooden or bamboo needles have a warmer feel and grip the yarn better, which can be helpful if you’re a beginner or working with slippery yarn.
Overall, the yarn and needles you choose should complement each other and the pattern you’re working with. Take your time to explore different options and experiment with different yarn and needle combinations to find the perfect match for your wrist warmers project.
Getting Started: Casting On
Before you begin knitting your wrist warmers, it’s important to start with the casting on process. Casting on is the initial step where you create the first row of stitches on your knitting needle. This sets the foundation for your project and determines the number of stitches you will work with.
There are several methods for casting on, but for this pattern, we will be using the long-tail cast-on method. This method creates a neat and elastic edge, which is perfect for wrist warmers. To begin, you will need a long tail of yarn, approximately three times the width of your finished wrist warmers.
Step 1: Start by making a slipknot at the end of your yarn. Insert your knitting needle into the slipknot and pull tight.
Step 2: Hold the needle with the slipknot in your right hand and the long tail of yarn in your left hand. Make an “L” shape with your thumb and index finger, and position them between the slipknot and the working yarn.
Step 3: Using your right hand, bring the needle down and behind your thumb. Then bring it back up and over your thumb, going under the working yarn.
Step 4: Bring your right hand between the yarn and the needle and grab the strand of yarn that is on top of your thumb. Pull it through the loop on your thumb, creating a new loop on the needle.
Step 5: Release your thumb and tighten the new loop by pulling the working yarn gently. Repeat steps 3-5 until you have the desired number of stitches on your needle.
Once you have successfully cast on all your stitches, you are ready to start knitting your wrist warmers. Follow the pattern instructions for the next steps, and enjoy the process of creating your cozy and stylish accessory.
Knitting the Rib Stitch
The rib stitch is a versatile knitting technique that creates a stretchy and textured fabric. It is commonly used for cuffs, collars, and other areas where elasticity is desired. The rib stitch is also commonly used in patterns for wrist warmers, as it provides a snug fit and allows for easy movement of the hands and fingers.
To knit the rib stitch, you will need a pair of knitting needles and a ball of yarn. The stitch pattern is created by alternating between knitting and purling stitches in a specific sequence. The most common rib stitch pattern is the 1×1 rib, which involves knitting one stitch and purling the next stitch, and repeating this sequence across the row.
To start, cast on an even number of stitches. Hold the knitting needles with the yarn in your right hand. Insert the right needle into the first stitch on the left needle, from left to right, as if to knit. Wrap the yarn around the right needle and pull it through the stitch, creating a new stitch on the right needle. This is a knit stitch. Now, insert the right needle into the next stitch on the left needle, from right to left, as if to purl. Wrap the yarn around the right needle and pull it through the stitch, creating a new stitch on the right needle. This is a purl stitch. Repeat the knit and purl stitches across the row until you reach the end.
- A common variation of the 1×1 rib is the 2×2 rib, which involves knitting two stitches and purling two stitches, and repeating this sequence across the row.
- The rib stitch can be used to create various patterns and textures by altering the sequence of knit and purl stitches. For example, a 3×1 rib consists of knitting three stitches and purling one stitch, and repeating this sequence across the row.
- The rib stitch can be used to create items such as scarves, hats, and sweaters. It is a versatile stitch pattern that adds both aesthetic appeal and functional stretchiness to knitted fabric.
In conclusion, the rib stitch is a fundamental knitting technique that can be easily mastered by beginners. It provides a stretchy and textured fabric that is perfect for cuffs, collars, and wrist warmers. With some practice and experimentation, you can create a variety of rib stitch patterns to add unique touches to your knitting projects.
Transitioning to the Main Pattern

Once you have completed the cuff of the wrist warmers, it’s time to transition to the main pattern. This is where the fun part begins! Follow these simple instructions to seamlessly move from the cuff to the body of the wrist warmers.
- Step 1: Begin by knitting a few rows in the rib stitch pattern to create a smooth transition from the cuff. This will help maintain the elasticity of the warmers and ensure a snug fit.
- Step 2: After the rib stitch section, switch to the main stitch pattern of your choice. You can opt for a simple stockinette stitch for a clean and sleek look or experiment with different stitch patterns like cables or lace for added texture and interest.
- Step 3: Continue knitting the main pattern rows until you reach your desired length for the wrist warmers. This will depend on your personal preference and the size of your wrists. You can try them on as you go to ensure the perfect fit.
- Step 4: Once you have reached the desired length, it’s time to start shaping the thumb opening. Follow the pattern instructions for your specific wrist warmers to create the opening using either a bind-off method or by placing stitches on hold.
Remember to keep track of your stitch count and pattern repeats to maintain consistency throughout the main pattern section. Don’t be afraid to get creative and make modifications to the pattern to suit your style and preferences. Happy knitting!
Creating the Thumb Hole
When knitting wrist warmers, one important detail to consider is the creation of the thumb hole. This opening allows for easy movement of the thumb while keeping the rest of the hand warm. There are several techniques that can be used to create a thumb hole, depending on the desired design and functionality.
1. Provisional Cast On Method
The provisional cast on method is a popular choice for creating a thumb hole. This technique involves casting on a certain number of stitches using a waste yarn, which will later be removed to create the opening. Once the desired length has been reached, the stitches are placed on hold, and the waste yarn is carefully unraveled, exposing the live stitches. These stitches can then be picked up and worked to create the thumb opening.
2. Afterthought Thumb Hole
Another approach to creating a thumb hole is the afterthought thumb hole method. With this technique, the thumb hole is added after the rest of the wrist warmer has been knit. Stitches are placed on hold in the desired location for the thumb, and a small opening is created by cutting a strand of yarn between the held stitches. The live stitches are then picked up and worked in the round to create the thumb.
3. Garter Stitch Tab Method
The garter stitch tab method is a simple yet effective way to create a thumb hole. This technique involves knitting a small rectangular tab in garter stitch, which will act as the base for the thumb. The tab is then joined to the rest of the work, and stitches are picked up along the edges of the tab to begin working the thumb in the round.
Overall, the choice of thumb hole technique depends on personal preference and the desired outcome for the wrist warmers. Whether opting for a provisional cast on, an afterthought thumb hole, or a garter stitch tab, careful planning and execution will ensure a comfortable and functional thumb opening for the knitted wrist warmers.
Knitting the Thumb
When knitting wrist warmers, the thumb is an important part of the design. It adds functionality and allows for comfortable movement of the hand. Knitting the thumb can be a bit tricky, but with the right techniques, it can be easily accomplished.
One common method for knitting the thumb is to place stitches on hold while working on the rest of the wrist warmer. These held stitches will later be used to create the thumb. To do this, simply slide the required number of stitches onto a stitch holder or a piece of scrap yarn. This will keep these stitches secure until they are needed.
Step 1: Start by knitting the desired length for the hand section of the wrist warmer, leaving a space for the thumb at the designated thumb placement area.
Step 2: Slide the required number of stitches onto a stitch holder or scrap yarn. This is usually around 10-15 stitches, but it can vary based on the size of the wrist warmer and the desired thumb size.
Step 3: Continue knitting the wrist warmer, working in the established pattern until you reach the desired length.
Step 4: When you have finished knitting the hand section, it’s time to go back to the thumb stitches. Transfer the held stitches back onto the knitting needle, making sure they are in the correct orientation.
Step 5: Knit the stitches from the stitch holder, following the established pattern. This may involve picking up a few extra stitches if necessary to close any gaps between the thumb and the hand section.
Step 6: Continue knitting the thumb section until it reaches the desired length. This can be shorter or longer depending on personal preference.
Step 7: Finally, bind off the thumb stitches, making sure to secure the last stitch. Weave in any loose ends, and your thumb is complete!
With these steps, you can successfully knit the thumb for your wrist warmers. Don’t be afraid to experiment with different patterns and techniques to create unique and personalized wrist warmers.
Finishing Touches: Cuff and Bind Off
As you near the end of your knitting project, it’s time to focus on the finishing touches to complete your wrist warmers. The cuff and bind off are the final steps in creating a polished and professional-looking pair of wrist warmers.
Cuff:
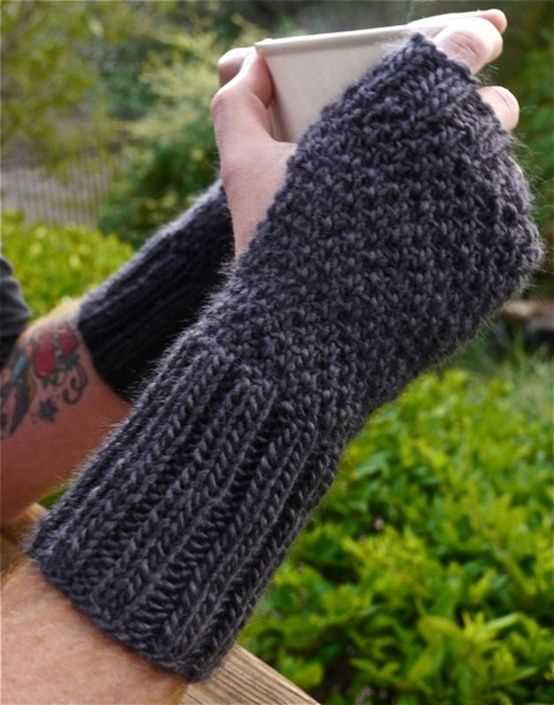
The cuff of your wrist warmers is the part that wraps around your wrist and provides a snug fit. To create the cuff, you will typically knit a few rows in a rib stitch pattern. This creates a stretchy and comfortable cuff that will stay in place while wearing the wrist warmers. You can choose to knit a simple 1×1 or 2×2 rib for a classic look, or experiment with other rib stitch patterns for added texture.
Remember to measure the circumference of your wrist before starting the cuff to ensure a proper fit. Adjust the number of stitches cast on accordingly.
Bind Off:
Once you are satisfied with the length of the cuff, it’s time to bind off your stitches. The bind off method you choose will depend on the desired finish and the elasticity of the stitch pattern used for the cuff. A standard bind off will work well for most rib stitch patterns.
To bind off, knit the first two stitches as usual, then insert the left needle into the first stitch on the right needle. Lift this stitch over the second stitch and off the needle. Continue this process, knitting one stitch and lifting the previous stitch over until you reach the last stitch. Cut the yarn, leaving a tail, and pull the tail through the last stitch to secure.
Optional: For a stretchier bind off, you can use a larger needle size or a different bind off method, such as a tubular bind off or a picot bind off.
With the cuff and bind off completed, you can now enjoy your cozy and stylish wrist warmers. Whether you wear them for warmth or as a fashion accessory, these finishing touches will ensure that your wrist warmers are both functional and fashionable.
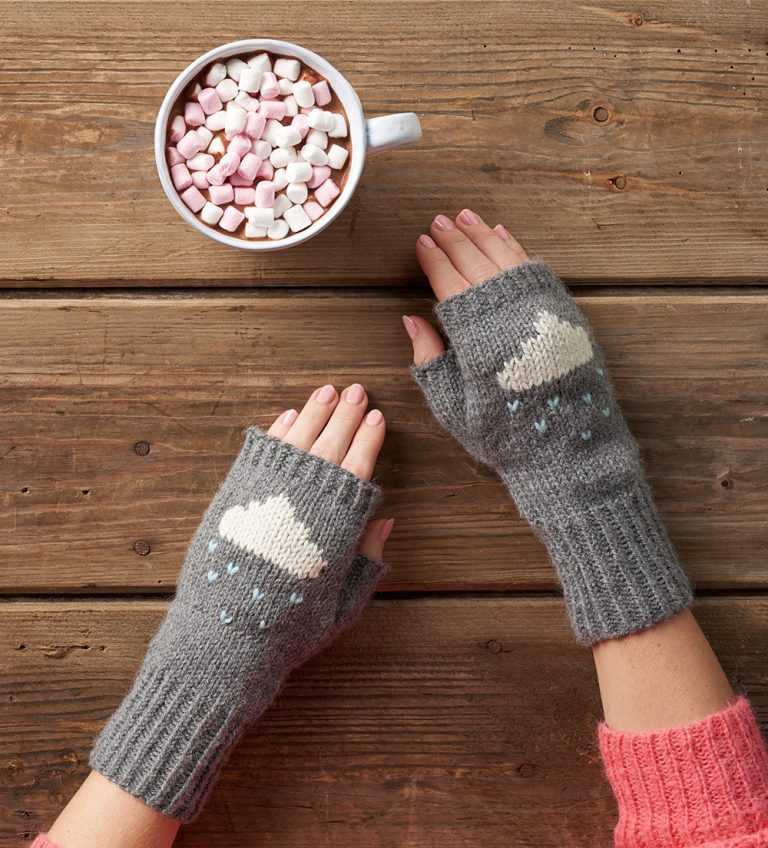
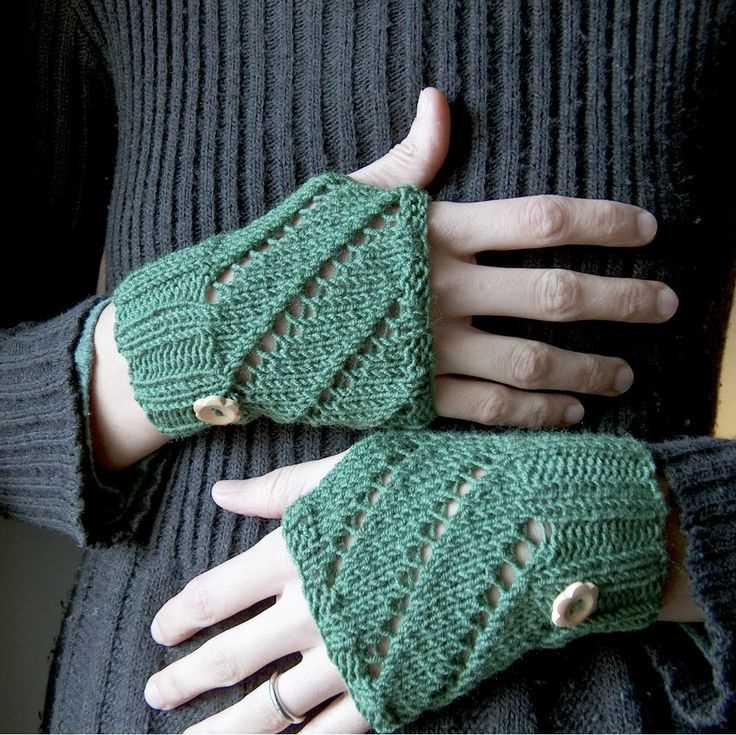
Customizing Your Wrist Warmers
Once you’ve mastered the basic pattern for wrist warmers, you can start customizing them to suit your personal style and preferences. Here are some ideas to get you started:
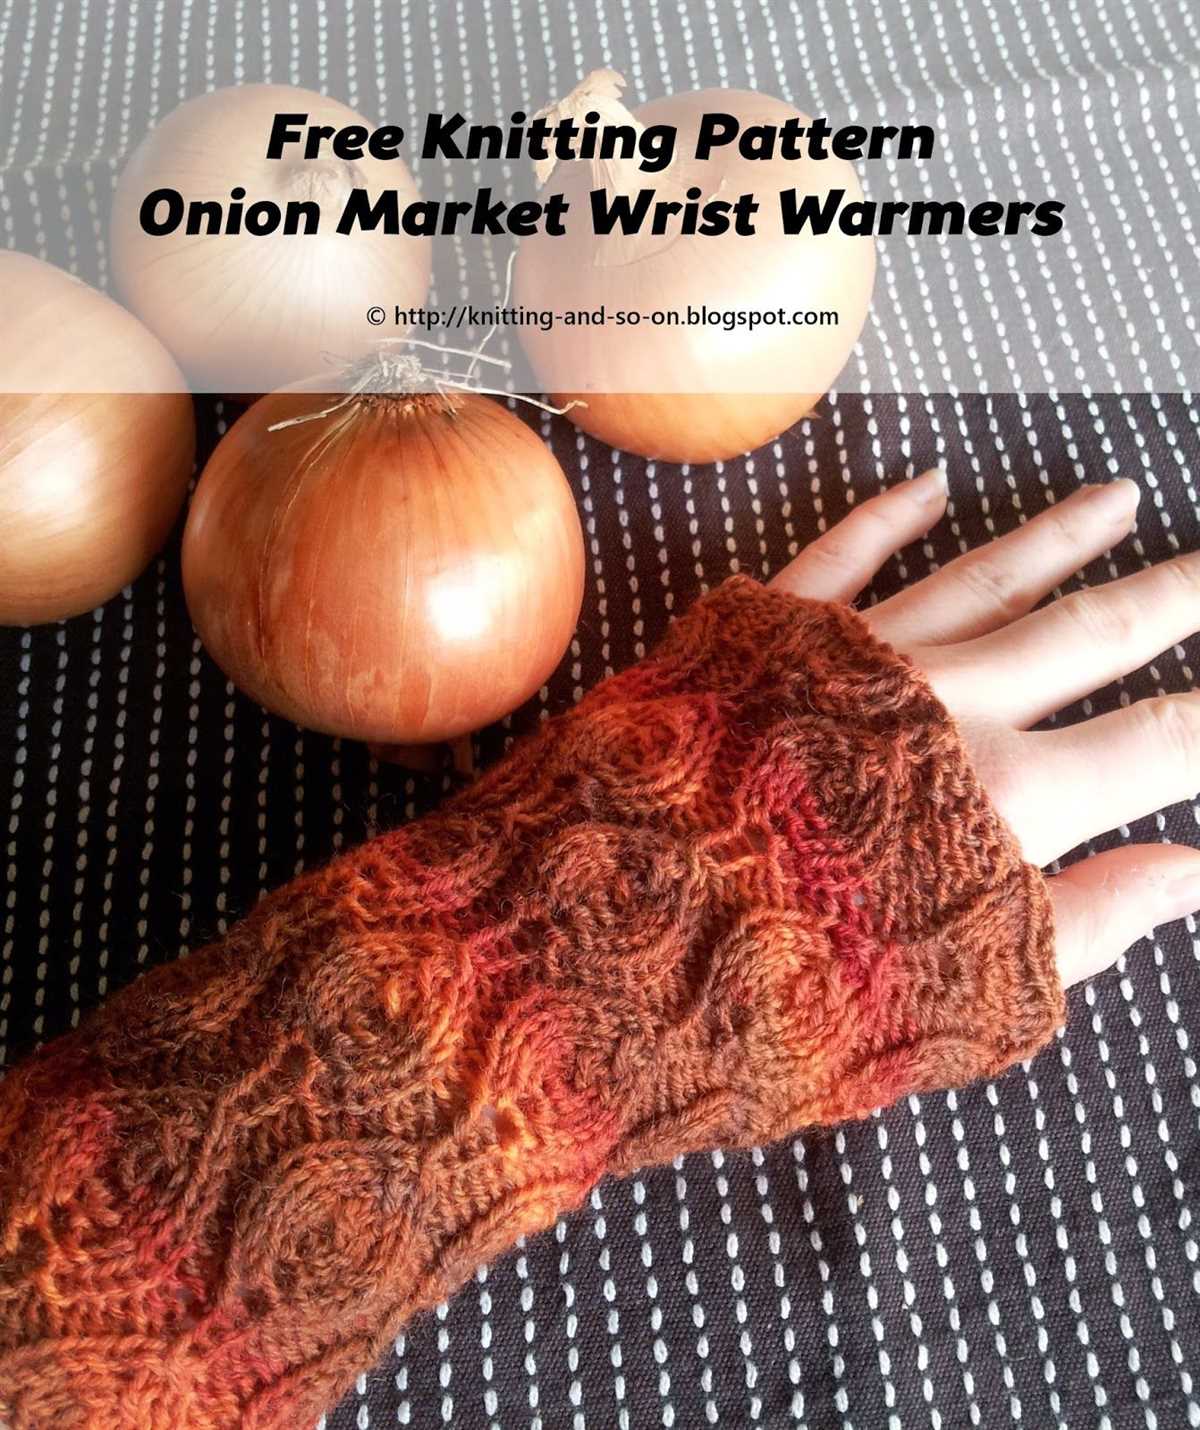
1. Color choices: Experiment with different yarn colors to create unique combinations. You can choose colors that complement or contrast with your outfits, or even use variegated yarn for a more eclectic look.
2. Length: Adjust the length of the wrist warmers to suit your needs. If you want more coverage, you can extend the pattern to cover more of your forearm. If you prefer a more minimalist style, you can make them shorter and closer to your wrists.
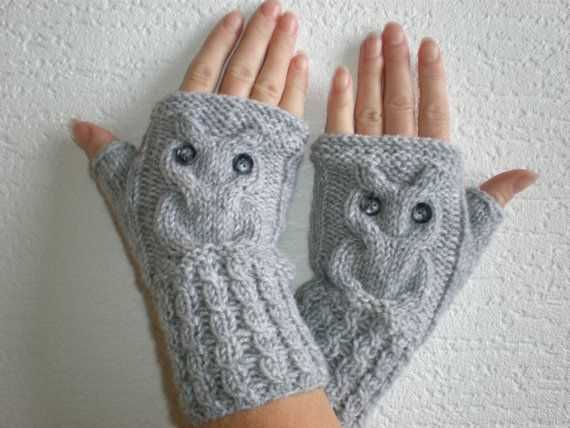
3. Pattern stitches: Try incorporating different stitch patterns to add texture and visual interest to your wrist warmers. You can experiment with cables, lace, or even colorwork to create a unique design.
4. Additions: Consider adding additional embellishments to your wrist warmers, such as buttons, ribbons, or embroidery. These little details can make your wrist warmers truly one-of-a-kind.
By customizing your wrist warmers, you can create a pair that reflects your personal style and suits your needs. Have fun experimenting with different colors, stitches, and embellishments to make them unique to you!