
If you’re looking for a fun and easy knitting project, look no further than a knit hat pattern! With just a few basic stitches and a pair of size 8 needles, you can create a cozy and stylish hat that will keep you warm all winter long. Whether you’re a beginner or an experienced knitter, this pattern is perfect for anyone.
Knitting hats is a great way to learn new techniques and practice your skills. With size 8 needles, you can create a hat that has a bit of stretch and give, making it comfortable to wear. Plus, with the versatility of a knit stitch, you can easily customize your hat with different colors and patterns to match your personal style.
One of the best things about knitting is the endless possibilities for creativity. With a knit hat pattern, you can experiment with different types of yarn, from soft merino wool to cozy acrylic blends. You can also add embellishments like pom-poms, buttons, or even a simple ribbed brim for a more polished look. The choice is yours!
So grab your size 8 needles and get ready to dive into the wonderful world of knitting. Whether you’re making a hat for yourself or as a gift for a loved one, this knit hat pattern is sure to be a hit. And with the satisfaction of creating something by hand, you’ll not only have a stylish accessory but also a sense of accomplishment. Happy knitting!
Choosing the Right Size Needles
When knitting a hat, choosing the right size needles is crucial to achieving the desired outcome. The size of the needles can affect the gauge, drape, and overall appearance of the finished hat. It is important to consider the yarn weight and personal knitting style when selecting the appropriate needle size.
Yarn weight: The weight of the yarn will influence the needle size needed to create a balanced and even fabric. Heavier yarns, such as bulky or chunky, will require larger needles to create a looser and more open fabric. On the other hand, thinner yarns, like lace or fingering, will necessitate smaller needles to create a tighter and denser fabric.
Knitting style: Another factor to consider is one’s personal knitting style. Some knitters may naturally have a looser or tighter tension, which can impact the size needles they should use. It is important for the knitter to be aware of their tension and choose needles accordingly. For example, if a knitter has a looser tension, they may need to use a smaller needle size to achieve the desired gauge.
When knitting a hat with size 8 needles, it is important to ensure that the yarn being used is compatible with this size. Size 8 needles are typically used with medium weight yarn, also known as worsted weight or aran weight. This weight of yarn is versatile and commonly used for a variety of knitting projects, including hats. By matching the appropriate needle size with the yarn weight, knitters can create a hat that has the desired drape, fit, and overall appearance.
Understanding Knitting Needle Sizes
When it comes to knitting, understanding the different needle sizes is essential. Knitting needle sizes determine the gauge and stitch size of your project, and it’s important to choose the right size for the desired outcome. In this article, we will explore the different knitting needle sizes and how they relate to your knitting projects.
Knitting needles are measured in both US sizes and metric sizes. The US sizes are typically represented by numbers, while the metric sizes are represented by millimeters. The sizes can vary depending on the country and the brand, so it’s important to check the size conversion chart if you’re using needles from a different country.
Understanding US Sizes
The US knitting needle sizes range from 0 to 50, with smaller numbers indicating smaller needles and larger numbers indicating larger needles. For example, a US size 0 needle is much smaller than a US size 50 needle. The smaller needle sizes are commonly used for delicate projects or fine yarns, while the larger needle sizes are used for bulkier projects or thicker yarns.
It’s important to note that the gauge of your knitting project will also depend on the yarn weight and your personal knitting tension. As a general guide, smaller needles create tighter stitches and a denser fabric, while larger needles create looser stitches and a more open fabric. Therefore, it’s important to swatch with different needle sizes to determine the best size for your project.
Understanding Metric Sizes
Metric knitting needle sizes are measured in millimeters and provide a more precise measurement compared to the US sizes. The metric sizes range from 2mm to 25mm, with smaller numbers indicating smaller needles and larger numbers indicating larger needles. To convert the metric size to the US size, you can use a size conversion chart or simply refer to the manufacturer’s recommendations.
When choosing the right knitting needle size for your project, it’s important to consider the yarn weight, the desired stitch size, and the pattern requirements. Some patterns may specify a specific needle size or provide a suggested range, while others may give you more flexibility to experiment with different sizes. Ultimately, the right needle size will depend on your personal knitting style and the desired outcome of your project.
Why Use Size 8 Needles?
When it comes to knitting hats, choosing the right needle size is crucial to achieving a desired outcome. Size 8 needles are a popular choice for knitting hats due to their versatility and the characteristics they bring to the finished product.
Consistency: Size 8 needles offer a consistent gauge that is suitable for a wide range of hat patterns. This means that you can expect a consistent stitch size and tension throughout your project, resulting in an even and professional-looking hat.
Speed: Knitting with size 8 needles allows for a good balance between speed and control. The slightly larger size makes it easier to work through stitches quickly, which is especially advantageous when knitting larger projects like hats. This means you can finish your hat in a shorter amount of time compared to using smaller needles.
Drape: Size 8 needles create a fabric that has a nice drape, meaning the finished hat will have a flattering shape and hang well when worn. This is particularly important for hats, as you want them to fit comfortably and look stylish on the head.
Availability: Size 8 needles are widely available and can be found in most knitting supplies stores. This makes them convenient to purchase, whether you prefer to buy in person or online. Additionally, size 8 needles are often included in beginner knitting kits, making them a great option for those new to knitting hats.
Overall, the use of size 8 needles for knitting hats offers consistency, speed, good drape, and availability. Whether you’re an experienced knitter or just starting out, considering these factors can help you choose the right needle size for your next hat project.
Basic Hat Pattern
Creating a knitted hat is a great project for beginners and experienced knitters alike. With a basic hat pattern, you can easily customize the size and style to fit your preferences. This pattern is designed for use with size 8 needles, which are widely available and create a comfortable and cozy hat.
To begin, gather your materials, including your size 8 knitting needles, a skein of yarn in the color of your choice, a pair of scissors, and a tape measure. You’ll also need a yarn needle to weave in any loose ends once you’ve finished knitting your hat.
- Cast on a number of stitches divisible by 8, such as 80 or 88, depending on the size of your head and how snug you want the hat to fit.
- Knit every row in a basic stockinette stitch until the hat reaches your desired length.
- Once the hat is the length you want, switch to a ribbing pattern, such as k2, p2, for the last few inches.
- When you’re ready to finish the hat, cut the yarn, leaving a long tail. Thread the tail onto your yarn needle and weave it through the remaining stitches, pulling them tight to close the top of the hat.
- Weave in any loose ends, trim the excess yarn, and your hat is complete!
Remember, this basic hat pattern is a starting point. Feel free to experiment with different stitch patterns, colors, and embellishments to make each hat unique. Happy knitting!
Gauge and Measurements
When knitting a hat pattern with size 8 needles, it is important to understand the concept of gauge and how it affects the final measurements of your hat. Gauge refers to the number of stitches and rows per inch that you achieve with a specific needle size and yarn. It determines the overall size and fit of your finished hat.
Before starting your project, it is recommended to make a gauge swatch. This involves knitting a small sample piece using the same needles and yarn that you plan to use for your hat. By measuring the stitches and rows in your swatch, you can determine if you are matching the gauge specified in the pattern. If your gauge is too tight, you may need to try larger needles or adjust your tension. If your gauge is too loose, you may need to use smaller needles or tighten your tension.
Measurements:
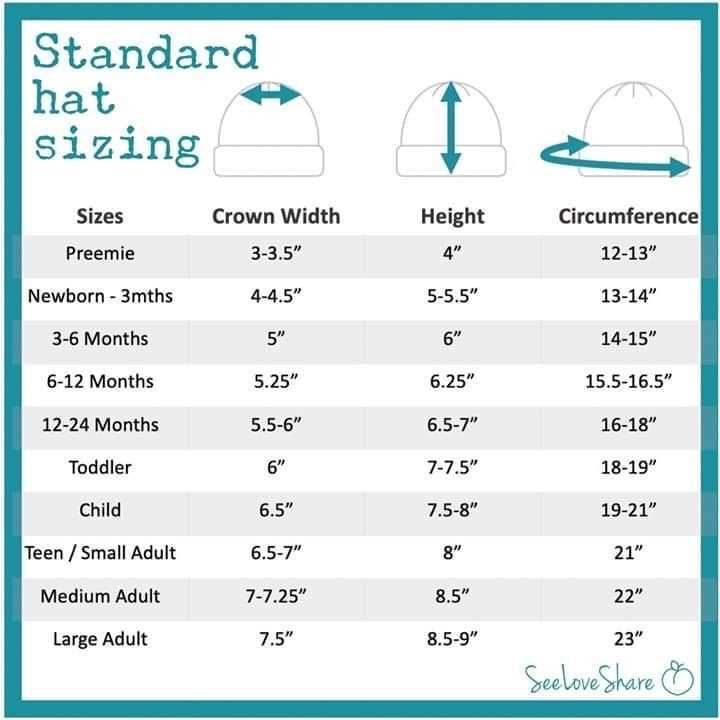
- Head circumference: To determine the size of your hat, measure around the widest part of your head, usually just above the ears and eyebrows. This measurement will help you choose the correct size for the pattern.
- Length: The length of the hat can vary depending on personal preference and style. Measure from the brim to the desired height of the hat. Keep in mind that the brim will fold up, so take that into consideration when measuring.
To achieve the correct measurements for your hat, it is important to follow the pattern’s instructions and adjust your gauge if necessary. Remember to periodically check your gauge as you knit to ensure that it remains consistent throughout the project. With the right measurements and gauge, you can create a perfectly fitting hat using size 8 needles.
Materials Needed
When knitting a hat using size 8 needles, there are several materials you will need to gather before you can begin. These materials include:
- Yarn: Choose a yarn that is suitable for a size 8 needle. Worsted weight or chunky yarns are commonly used for hats.
- Size 8 Knitting Needles: This pattern specifically calls for size 8 needles, so be sure to have a pair on hand. You can use straight, circular, or double-pointed needles, depending on your preference.
- Tapestry Needle: A tapestry needle is used for weaving in the ends of the yarn and any other finishing touches.
- Stitch Marker: A stitch marker is helpful for marking the beginning of a round when knitting in the round.
- Measuring Tape: A measuring tape is essential for checking the gauge of your knitting and ensuring the hat will fit properly.
- Scissors: Scissors are needed for cutting the yarn when switching colors or finishing the project.
- Pattern: Last but not least, you will need the knit hat pattern specifically designed for size 8 needles. This will guide you through the steps and stitches required to complete the hat.
With these materials assembled, you will be ready to start knitting your hat on size 8 needles.
Cast On and Ribbing
Before beginning your knit hat using size 8 needles, you will need to cast on the required number of stitches. The cast on is the foundation row of stitches that you will be working with throughout your project. To cast on, hold your knitting needle in your right hand and the working yarn in your left hand.
To create the ribbing pattern, you will be alternating knit and purl stitches. This creates a stretchy and decorative edge for your hat. The ribbing pattern is typically worked for a few inches before transitioning into the main stitch pattern of the hat.
Cast On Instructions:
- Hold the yarn in your left hand and make a slipknot by looping the yarn over itself.
- Slide the slipknot onto your right knitting needle, leaving a short tail of yarn.
- Insert the right knitting needle into the slipknot from front to back, catching the working yarn with the needle.
- With your right hand, pull the working yarn through the slipknot, making a new loop on the right needle.
- Continue this process until you have cast on the required number of stitches, as specified in your pattern.
Ribbing Instructions:
- Begin by knitting the first stitch. To knit, insert your right needle into the front of the first stitch on your left needle, from left to right.
- Wrap the working yarn around the right needle counterclockwise.
- With your right hand, pull the right needle with the new loop through the stitch on the left needle, sliding the old stitch off the left needle and onto the right needle.
- Now, purl the next stitch. To purl, insert your right needle into the front of the next stitch on your left needle, from right to left.
- Wrap the working yarn around the right needle clockwise.
- With your right hand, pull the right needle with the new loop through the stitch on the left needle, sliding the old stitch off the left needle and onto the right needle.
- Continue knitting and purling each stitch in the ribbing pattern until you have completed the required number of rows or inches, as specified in your pattern.
Body of the Hat
After completing the ribbing, you will now move on to the body of the hat using size 8 needles. The body will be worked in a simple stockinette stitch, creating a smooth and even fabric.
Start by knitting every stitch in the first row. In the next row, purl every stitch. Alternate between knitting and purling rows until the hat reaches the desired length. You can measure the length by trying the hat on occasionally or by referring to the pattern instructions.
- Continue to knit the body in stockinette stitch for the specified number of inches.
- Remember to keep track of your stitches and rows to ensure accuracy.
- You can also add any desired stitch patterns or color changes to personalize the hat.
As you work on the body, make sure to check your gauge periodically to ensure that your hat is turning out to the correct size. If necessary, you can adjust your needle size to achieve the desired gauge.
Once you have reached the desired length for the body of the hat, you can move on to the next step in the pattern, whether it’s shaping the crown, adding a brim, or finishing off the hat. Follow the instructions provided in the pattern to complete the project.
Remember to always have fun and be creative with your knitting projects. The body of the hat serves as a canvas for your imagination, so feel free to experiment with different stitch patterns, yarns, and colors to create a unique and stylish hat.
Shaping the Crown
When knitting a hat with size 8 needles, shaping the crown is an important step to create a snug and comfortable fit. The crown is the top part of the hat that covers the head, and it is important to shape it properly to ensure the hat sits nicely on the wearer’s head.
To shape the crown, you will need to decrease the number of stitches gradually. This is usually done by knitting two stitches together (k2tog) at regular intervals. The frequency of decreases will depend on the desired shape of the hat. For example, if you want a more rounded crown, you may decrease stitches every other row. If you want a more pointy or conical shape, you may decrease stitches every row.
Here is a simple pattern for shaping the crown using size 8 needles:
- Continue knitting in the established stitch pattern until the hat measures the desired length from the brim to the crown.
- Next, start decreasing by k2tog. For example, if you have 80 stitches, knit the first two stitches together, then knit the next two stitches together, and so on.
- Continue decreasing in this manner until you have reached your desired number of stitches for the crown.
- Once you have decreased to the desired number of stitches, cut the yarn, leaving a tail. Thread the tail through a yarn needle, and slip the needle through the remaining stitches on the knitting needle. Remove the knitting needle, and pull the yarn tight to close the top of the hat.
Shaping the crown is an essential step in knitting a hat with size 8 needles. It allows you to create a comfortable and well-fitting hat that will be enjoyed by the wearer. Remember to experiment with the frequency of decreases and the number of stitches to achieve the desired shape and style of your hat.
Pattern Modifications
When working with the knit hat pattern size 8 needles, there may be instances where you want to make modifications to the original pattern. Whether it’s adjusting the size, altering the stitch pattern, or adding embellishments, making modifications can help make the hat uniquely yours.
Changing the size: If you want to adjust the size of the hat, you can modify the number of stitches cast on or the number of rows worked. For a larger hat, you can increase the number of cast-on stitches, or for a smaller hat, decrease the number of cast-on stitches. Similarly, to lengthen or shorten the hat, you can add or subtract rows in the pattern.
Altering the stitch pattern:

Ribbing: If the original pattern uses a ribbing stitch pattern, you can experiment with different types of ribbing, such as a twisted rib or a seed stitch rib. This can add texture and visual interest to the hat.
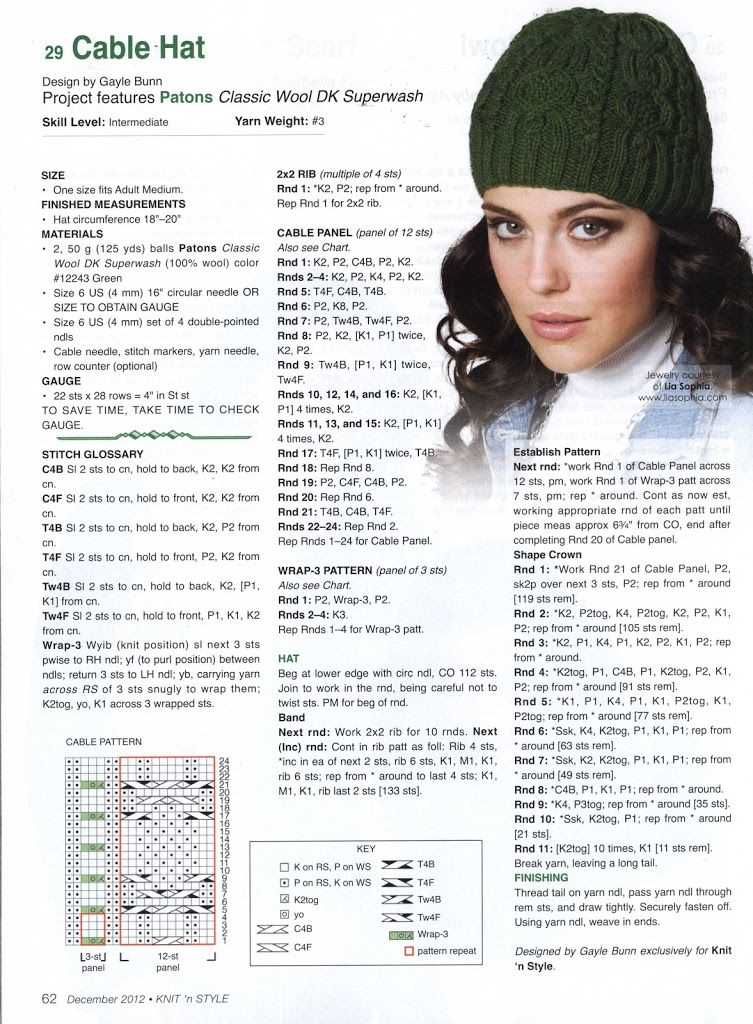
Cables: If you’re looking to add more complexity to the pattern, you can incorporate cable stitches. Cables can be worked over a set number of stitches to create twists and braids, adding a decorative element to the hat.
Adding embellishments:
Pom-pom: One popular way to add flair to a knit hat is by attaching a pom-pom on top. You can make a pom-pom using a pom-pom maker, or by hand using cardboard or a piece of sturdy material. The color of the pom-pom can be coordinated with the hat or contrasting for a fun pop of color.
Embroidery: Another way to personalize your hat is by adding embroidery. You can use different colors of yarn to create intricate patterns or designs on the hat. This can be a great opportunity to showcase your creativity and make the hat truly one-of-a-kind.
With these pattern modifications, you can customize your knit hat to perfectly suit your style and preferences. Don’t be afraid to experiment and make it your own!
Changing the Size
If you want to change the size of your knit hat, you can easily do so by adjusting the number of stitches and the size of your needles. By following a few simple steps, you can create a hat that fits perfectly.
To make a larger hat, you will need to increase the number of stitches. This can be done by adding multiples of a certain number to the original stitch count. For example, if the pattern calls for 60 stitches, you could increase it by adding multiples of 10, resulting in 70, 80, or any other number divisible by 10. Keep in mind that adding stitches will also increase the circumference of the hat, so make sure to calculate the desired size before making any adjustments.
On the other hand, if you want to make a smaller hat, you will need to decrease the number of stitches. This can be done by subtracting multiples of a certain number from the original stitch count. For example, if the pattern calls for 60 stitches, you could decrease it by subtracting multiples of 10, resulting in 50, 40, or any other number divisible by 10. Be mindful that decreasing stitches will also decrease the circumference of the hat, so be sure to calculate the desired size before making any adjustments.
Additionally, you can also adjust the size of your needles to change the overall size of your hat. Using larger needles will result in a looser and larger hat, whereas using smaller needles will create a tighter and smaller hat. Experimenting with different needle sizes can help you achieve the perfect fit for your knit hat.
Customizing the Pattern
Once you have the basic pattern down, you can start customizing it to make it your own. Here are a few ideas to get you started:
- Adjusting the Size: If you want a smaller or larger hat, you can modify the pattern by changing the number of stitches and rows. Experiment with different stitch counts until you achieve the desired size.
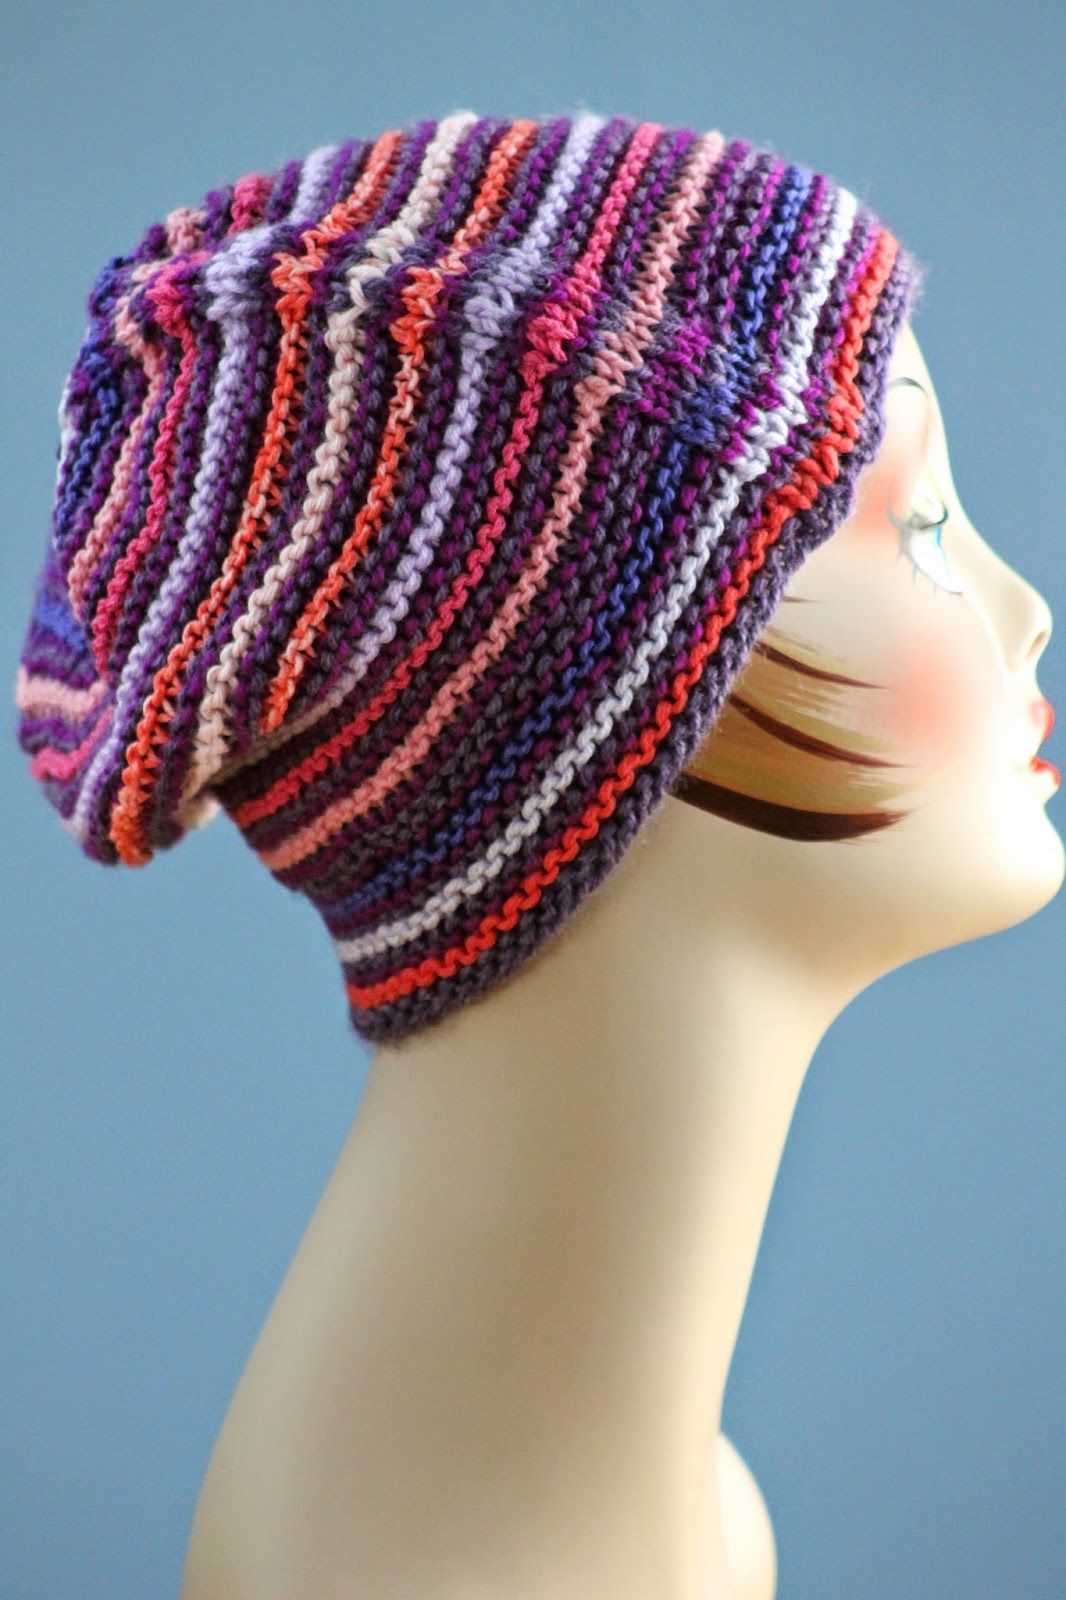
- Adding Colors: To make your hat more unique, consider adding a striped pattern using different colors of yarn. This can be done by alternating colors every few rows or by using a colorwork technique such as fair isle or intarsia.
- Adding Textures: You can also add texture to your hat by incorporating different stitch patterns. For example, you could try a ribbed or cable pattern for a more intricate design.
Remember, knitting is a versatile craft, and the possibilities for customizing your hat are endless. Don’t be afraid to experiment and make the pattern your own. Happy knitting!