
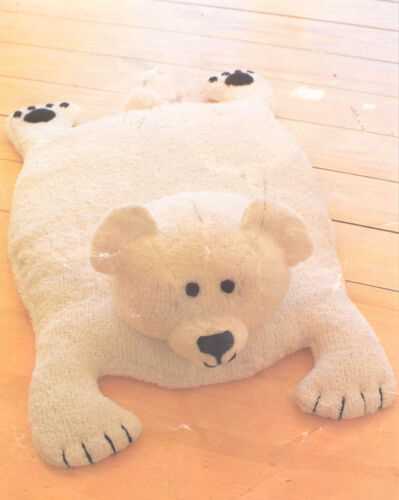
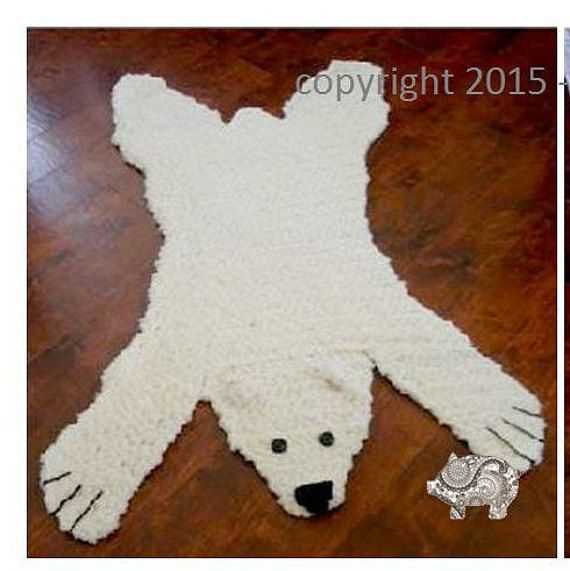
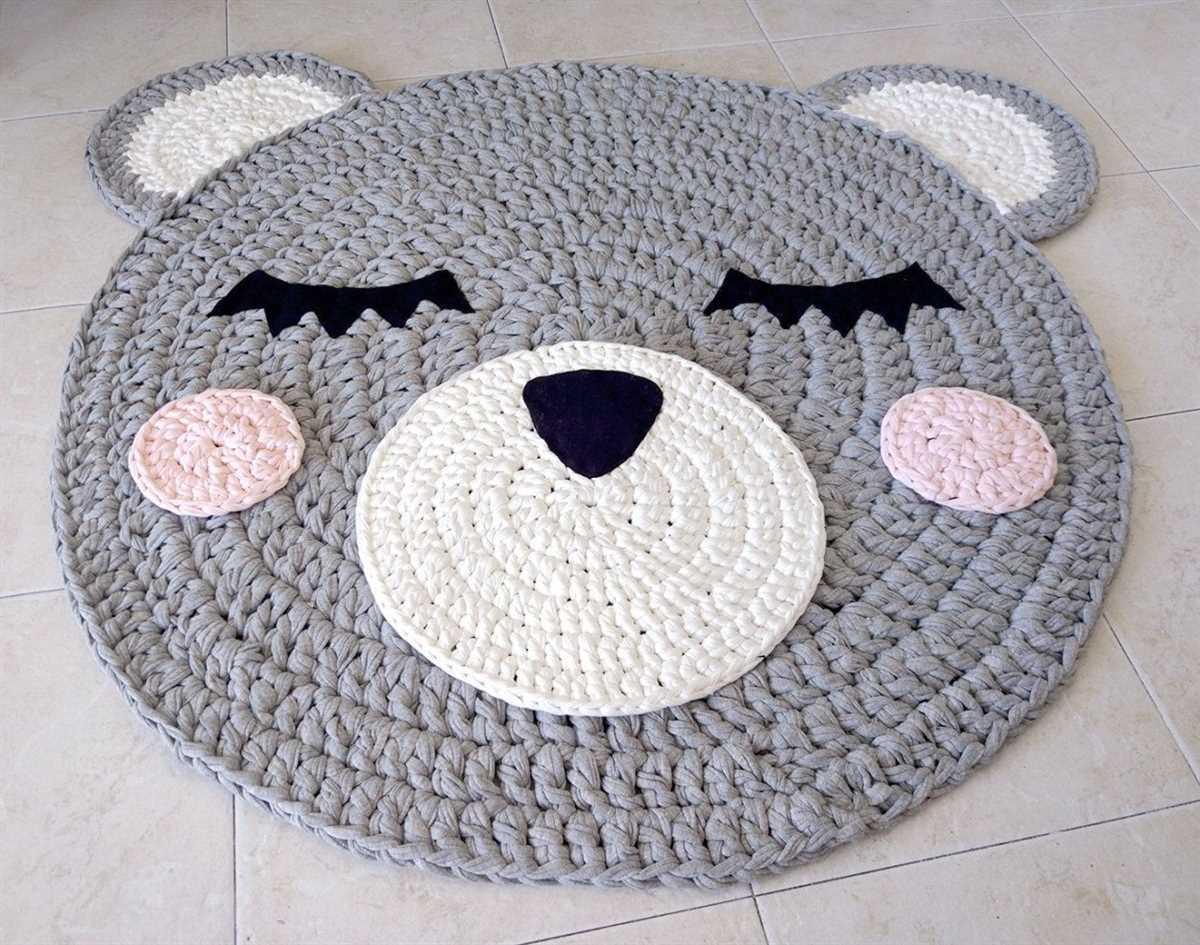
If you’re looking to add a touch of cozy rustic charm to your home decor, a knitted bear rug might be just what you need. This adorable pattern allows you to create a soft and cuddly bear rug that will be a charming addition to any room.
Knitting a bear rug may seem like a daunting task, but with the right pattern and some patience, you can create a beautiful and unique rug that you’ll be proud to display in your home. This pattern is designed for intermediate knitters, but even if you’re a beginner, you can give it a try and learn some new skills along the way.
The knit bear rug pattern includes detailed instructions and step-by-step photos to guide you through the process. You’ll need basic knitting skills, such as how to cast on, knit, purl, and bind off. The pattern also requires some special knitting techniques, such as increasing and decreasing stitches, so it’s a great project for expanding your knitting repertoire.
Knit Bear Rug Pattern
Turn your living room into a cozy retreat with this adorable knit bear rug. This pattern is perfect for those who enjoy knitting and want to add a touch of whimsy to their home decor. The finished rug measures approximately 36 inches in diameter, making it the ideal size to place by a fireplace or in a nursery.
The knit bear rug pattern requires intermediate knitting skills and knowledge of basic stitches such as knit, purl, and decrease. You will also need a set of size 10 (6 mm) knitting needles, bulky weight yarn in two colors (brown and white), and stuffing for the bear’s head and ears. The pattern includes detailed instructions and a color chart to help you create your own unique bear rug.
Materials:
- Size 10 (6 mm) knitting needles
- Bulky weight yarn in brown and white (approximately 500 yards each)
- Stuffing for bear’s head and ears
- Tapestry needle
- Scissors
- Stitch markers
Instructions:
- Using the brown yarn, cast on 120 stitches.
- Work in a circular pattern, knitting every row, until the rug measures 36 inches in diameter.
- Switch to the white yarn and knit one row.
- Decrease every 10 stitches by knitting two together.
- Continue decreasing until you have 12 stitches remaining.
- Bind off all stitches, leaving a long tail for sewing.
- For the bear’s head, knit a separate piece following the pattern provided.
- Stuff the head lightly and sew it onto the rug.
- Attach the bear’s ears to the head, using the color chart as a guide.
This knit bear rug pattern is sure to be a conversation starter and a unique addition to your home. Whether you choose to place it in the center of your living room or use it as a playful accent in a child’s bedroom, this rug is sure to bring warmth and charm to any space.
Necessary Supplies for the Knit Bear Rug
Before starting your knitting project, it is important to gather all the necessary supplies to ensure a smooth and enjoyable knitting experience. The knit bear rug pattern requires a few specific materials that are essential for creating a cozy and adorable rug for your space.
Yarn:
- A soft and chunky yarn is recommended for this project, as it will provide the rug with a plush and cuddly texture. Choose a yarn that is durable and easy to care for.
- Approximately 1000 yards of yarn will be needed to complete the bear rug. This may vary depending on the size of the rug and the thickness of the yarn.
Knitting Needles:
- A set of large knitting needles is required to accommodate the thickness of the yarn and create a loose and cozy fabric. It is recommended to use circular or straight needles in size US 10 or 11.
Stitch Markers:
- Stitch markers are helpful for keeping track of your progress and marking important points in the pattern. These can be simple plastic rings or decorative markers, whichever you prefer.
Tapestry Needle:
- A tapestry needle is necessary for weaving in loose ends and sewing any seams or embellishments on the rug. Choose a needle with a large eye that can easily accommodate the thickness of the yarn.
With these essential supplies at hand, you are ready to embark on your knitting journey and create a beautiful bear rug that will add warmth and charm to any room.
Choosing the Right Yarn for the Knit Bear Rug
When it comes to knitting a bear rug, selecting the right yarn is essential to achieving the desired texture and appearance. The choice of yarn will determine how soft or durable the rug will be, as well as how well it will hold up to wear and tear. Therefore, it is important to consider a few factors when choosing the yarn for your knit bear rug.
Fiber: One of the first things to consider is the type of fiber you want to use for your bear rug. Wool is a popular choice due to its warmth, durability, and natural elasticity. It is also a great option for providing the rug with a soft and cozy texture. Additionally, acrylic yarn can be a good alternative for those looking for a more affordable and low-maintenance option.
Weight: The weight of the yarn will determine the thickness and heaviness of the rug. For a thick and fluffy bear rug, you may want to opt for a bulky or super bulky weight yarn. This will not only provide the rug with extra softness and warmth but also make it a quick and enjoyable knitting project. However, if you prefer a thinner and lighter rug, you can choose a lighter weight yarn such as DK or worsted.
Color: Another important consideration is the color of the yarn. You may want to select a yarn color that resembles the natural fur colors of a bear, such as shades of brown, black, or beige. Alternatively, you can get creative and choose vibrant and unique colors to make a more whimsical and playful bear rug. This decision will ultimately depend on your personal preference and the overall aesthetic you want to achieve.
In conclusion, choosing the right yarn for your knit bear rug involves considering the fiber type, weight, and color. By taking these factors into account, you can ensure that your bear rug not only looks beautiful but also feels soft, cozy, and durable. Happy knitting!
Knitting Techniques Used in the Knit Bear Rug Pattern
The knit bear rug pattern is an adorable project that combines various knitting techniques to create a soft and comfortable rug in the shape of a bear. The pattern uses both basic and advanced knitting techniques, allowing knitters to improve their skills while creating a beautiful and functional piece of décor. Here are some of the main knitting techniques used in the pattern:
1. Knit and Purl Stitches
The knit and purl stitches are the foundation of the knit bear rug pattern. These basic stitches are used to create the textured fabric that forms the body of the bear rug. The pattern incorporates both knit and purl stitches in various combinations to achieve the desired texture and design. Knitters should be familiar with these stitches before attempting the pattern.
2. Decreases and Increases
The knit bear rug pattern includes decreases and increases to shape the bear’s head, ears, and limbs. Decreases are made by knitting or purling two stitches together, while increases are achieved by working multiple stitches into a single stitch. These techniques create the shaping and dimensionality of the bear’s features, giving it a more realistic appearance.
3. Intarsia and Stranded Colorwork
The pattern also utilizes intarsia and stranded colorwork techniques to add details and color to the bear rug. Intarsia involves using separate balls of yarn for each color section, while stranded colorwork carries multiple colors along the back of the work. These techniques allow knitters to create intricate designs and patterns, such as the bear’s facial features and stripes on the body.
4. Embroidery
In addition to knitting techniques, the bear rug pattern incorporates embroidery to add additional details and features. Embroidery is used to create the bear’s eyes, nose, and mouth, as well as any other desired embellishments. Knitters should have some basic embroidery skills to achieve the desired results.
Overall, the knit bear rug pattern is a great project for knitters looking to expand their skills and create a charming and functional piece of décor. The combination of knitting techniques used in the pattern adds depth and dimension to the finished product, resulting in a cozy and adorable bear rug.
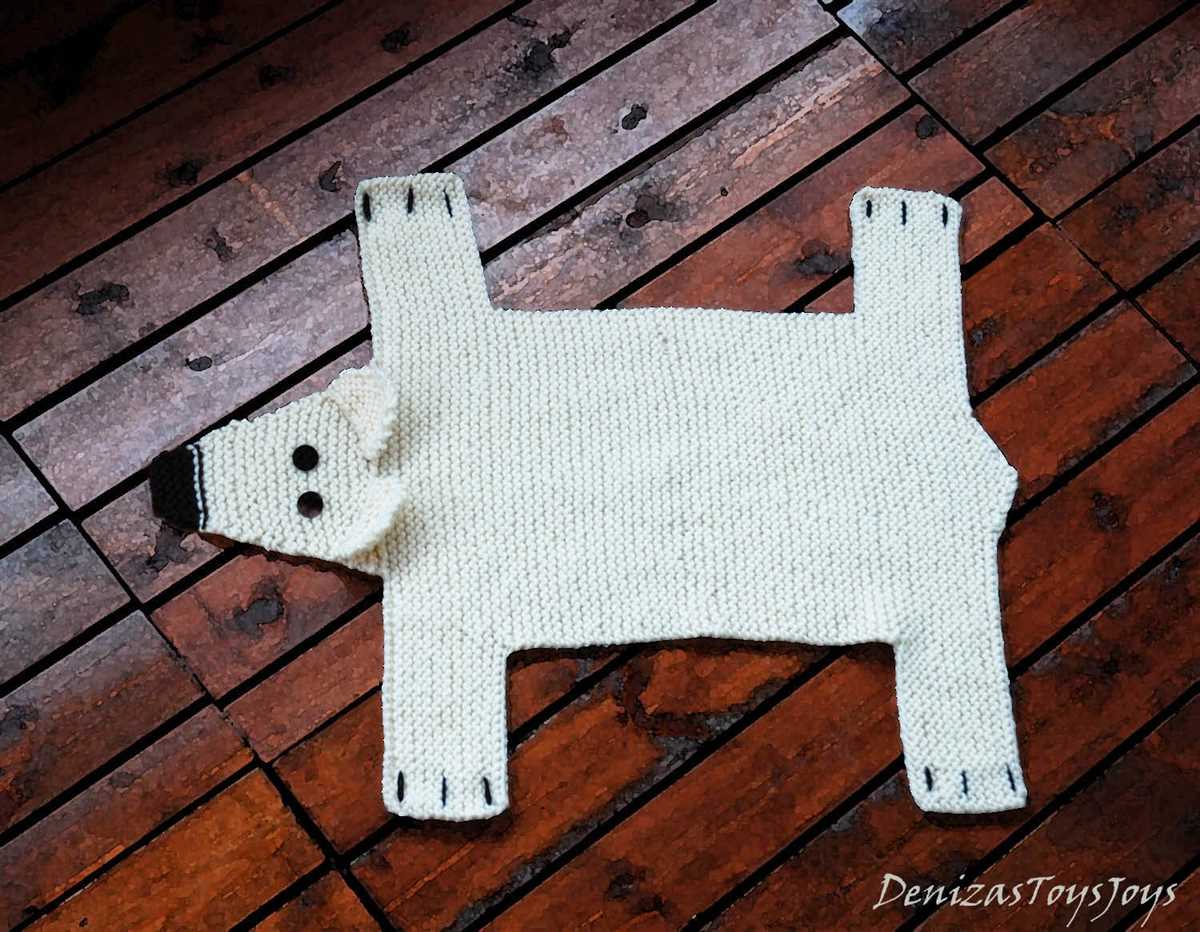
Step-by-Step Instructions for Knitting the Bear Rug
If you’re looking to create a cozy and adorable addition to your home decor, knitting a bear rug is the perfect project. This step-by-step guide will walk you through the process of creating your very own bear rug.
Gather Your Materials
Before you get started, make sure you have all the necessary materials on hand. You will need:
- Super bulky weight yarn in brown and cream
- Knitting needles in size 15
- Tapestry needle
- Scissors
Cast On and Create the Base
Begin by casting on 40 stitches using the cream yarn. This will serve as the base of your bear rug. Knit in garter stitch, knitting every row, for the first 10 rows. This will create a sturdy foundation for your rug.
Switch to Bear Color
After completing the base, switch to the brown yarn. Continue knitting in garter stitch for the next 15 rows. This will create the body of your bear rug.
Add the Bear Features
Once you have the body of the bear rug complete, it’s time to add the bear’s features. Using the cream yarn, knit the bear’s snout and ears separately. For the snout, cast on 10 stitches and knit every row for 5 rows. For the ears, cast on 8 stitches and knit every row for 5 rows.
Assemble the Rug
Now that you have all the pieces, it’s time to assemble the bear rug. Using a tapestry needle and the cream yarn, sew the snout and ears to the body of the rug. Position them as desired to give your bear rug a cute and lifelike appearance.
Once you have finished sewing, weave in any loose ends and trim the excess yarn. Your bear rug is now complete and ready to be displayed in your home!
Tips for Achieving Professional-Looking Results
When it comes to knitting a bear rug, it is important to pay attention to detail and follow a few tips to ensure your finished product looks professional and well-crafted. Here are some suggestions to help you achieve the best possible results.
1. Choose high-quality yarn: The type of yarn you use can greatly impact the overall appearance of your bear rug. Opt for a yarn that is soft, durable, and easy to work with. Consider using natural fibers, such as wool or alpaca, for a more luxurious and professional look.
2. Use the right knitting needles: The size and material of your knitting needles can also affect the outcome of your project. For a bear rug pattern, it is recommended to use larger-sized needles to create a loose and cozy texture. Circular or double-pointed needles may also be helpful, especially when you reach the smaller sections of the rug.
3. Pay attention to tension: Maintaining consistent tension throughout the project is crucial for achieving a professional finish. Make sure your stitches are not too tight or too loose, as it can affect the size and overall appearance of the bear rug.
4. Take your time with shaping: When knitting the various parts of the bear rug, take your time to shape them properly. Pay attention to the placement and spacing of decreases and increases to ensure the rug takes on a realistic bear shape.
5. Finish with care: The finishing touches can make a significant difference in the overall look of your bear rug. Weave in any loose ends neatly and securely, and block the rug to give it a smooth and polished appearance. Consider adding details, such as embroidered facial features or claws, to enhance the bear’s charm.
6. Follow the pattern instructions: Lastly, be sure to carefully read and follow the pattern instructions provided for the bear rug. This will help you avoid any unforeseen mistakes or inconsistencies and ensure that your finished project matches the intended design.
By applying these tips and techniques, you can create a knitted bear rug that looks professional, refined, and ready to be displayed and enjoyed in your home.
Customizing the Knit Bear Rug Pattern
Knitting a bear rug can be a fun and rewarding project, and customizing the pattern allows you to add your own personal touch to the final product. Whether you want to change the colors, alter the size, or add a unique design element, there are many ways to make the bear rug pattern your own.
1. Changing the Colors

One of the easiest ways to customize a knit bear rug pattern is by changing the colors. You can use a variety of yarn colors to create a rug that matches your personal style or complements your home decor. Consider using neutral tones for a more classic look, or experiment with bright and bold colors for a modern twist. Adding color changes can also create interesting patterns, such as stripes or gradients.
2. Altering the Size
If you want a larger or smaller bear rug, you can easily alter the pattern to fit your desired dimensions. This can be done by adjusting the number of stitches and rows in each section or by using a different weight of yarn and corresponding needle size. Keep in mind that changing the size of the rug may also affect the amount of yarn required for the project.
3. Adding a Unique Design Element
To make your bear rug truly one of a kind, consider adding a unique design element. This can be anything from a textured pattern stitch to an embroidered detail on the bear’s face. Get creative and let your imagination guide you. You could even incorporate other knitting techniques, such as cable or lace stitches, to add extra dimension and visual interest to the rug.
Customizing a knit bear rug pattern allows you to put your own personal stamp on the finished piece. Whether you choose to change the colors, alter the size, or add a unique design element, the possibilities are endless. Get inspired, experiment, and make a bear rug that is truly yours.
Creative Ways to Use the Knit Bear Rug
The knit bear rug is not just a decorative item for your living room floor, but it can also be used in various creative ways to add charm and coziness to your home. With its soft and fluffy texture, it can be used for both functional and decorative purposes. Here are some creative ideas on how you can use the knit bear rug:
1. Nursery Decoration:
The knit bear rug can be a perfect addition to your baby’s nursery. Place it in front of the crib to create a cozy and inviting space for your little one. It can also be used as a soft play mat for your baby to crawl and play on.
2. Wall Hanging:
Add a touch of rustic charm to your walls by using the knit bear rug as a wall hanging. Simply attach it securely to the wall using hooks or nails. It will instantly become a focal point in any room and add a unique and cozy vibe to your space.
3. Pet Bed:
Your furry friend deserves a cozy and comfortable place to sleep, and the knit bear rug can be a perfect option. Simply fold it up and place it in your pet’s bed or crate. The soft and plush texture will provide a warm and comfortable sleeping surface for your pet.
4. Photography Prop:

If you are a photographer or love capturing precious moments, the knit bear rug can be a great prop for newborn or children’s photography. Its soft and fluffy texture will add a whimsical and cozy element to your photos and help create beautiful and memorable images.
5. Christmas Decor:
During the holiday season, the knit bear rug can be used as a festive decoration. Place it near the Christmas tree or fireplace to create a cozy and inviting atmosphere. It can also be used as a backdrop for your holiday-themed photos or as a part of your Christmas table setting.
These are just a few creative ways to use the knit bear rug. With its versatility and charm, it can easily become a statement piece in your home and add warmth and coziness to any space.
Cleaning and Caring for the Knit Bear Rug
Keeping your knit bear rug clean and well-maintained is essential to ensure its longevity and preserve its appearance. Whether you have made the rug yourself or purchased it, following proper cleaning and care instructions is crucial. Here are some tips to help you keep your knit bear rug in great condition.
1. Regular vacuuming: It is important to vacuum your knit bear rug regularly to remove surface dirt, dust, and debris. Use a vacuum cleaner with a brush attachment and gently run it over the rug in the direction of the knit stitches. This will help remove any loose particles without damaging the delicate knit fabric.
2. Spot cleaning: Accidents happen, and if you notice a stain or spill on your knit bear rug, it is important to act quickly. Blot the affected area with a clean cloth or paper towel to absorb any liquid. Avoid rubbing or scrubbing, as this can push the stain deeper into the fibers. Use a mild detergent or carpet cleaner specifically designed for delicate fabrics and gently dab the stain, working from the outer edges towards the center. Rinse the area with clean water and blot dry.
3. Air drying: After cleaning, it is crucial to allow your knit bear rug to air dry completely. Avoid using heat sources such as radiators or hairdryers, as this can cause shrinkage or damage to the fibers. Lay the rug flat on a clean towel or hang it in a well-ventilated area until it is completely dry.
4. Storage: If you need to store your knit bear rug, make sure it is clean and completely dry before doing so. Fold the rug loosely to avoid creases, and store it in a breathable fabric bag or wrap it in acid-free tissue paper to prevent any dust or moisture from reaching it. Store the rug in a cool, dry place away from direct sunlight to avoid fading.
By following these cleaning and care instructions, you can enjoy your knit bear rug for many years to come. Remember, always check the care label or consult the manufacturer for specific cleaning recommendations, as different yarns and knit patterns may require slightly different care.
Frequently Asked Questions about the Knit Bear Rug Pattern
Here are some frequently asked questions about the Knit Bear Rug Pattern:
1. Can I use different yarn for this pattern?
Yes, you can use different yarn for this pattern, but keep in mind that it may affect the final size and texture of the bear rug. It is recommended to use a bulky weight yarn to achieve the desired thickness and softness. Also, make sure to check the gauge before starting the project to ensure that your yarn choice will result in the correct size.
2. How long does it take to complete the bear rug?
The time it takes to complete the bear rug will vary depending on your knitting speed and experience. On average, it may take a few days to a week to finish the project. However, this can vary greatly depending on the amount of time you have available to dedicate to knitting and your skill level. It is always a good idea to set aside enough time to thoroughly enjoy the process of knitting the bear rug.
3. Is this pattern suitable for beginners?
This pattern is not recommended for absolute beginners. It requires basic knitting skills, such as knitting and purling, as well as some knowledge of increasing and decreasing stitches. If you are new to knitting, it may be helpful to first practice on simpler patterns before attempting the bear rug pattern.
4. Can I wash the bear rug?
Yes, the bear rug can be washed, but it is important to follow the care instructions for the specific yarn you have used. Some yarns may require hand washing, while others may be machine washable. Make sure to check the yarn label for washing instructions and follow them accordingly to keep your bear rug in the best condition.
5. How do I assemble the bear rug?
Once you have finished knitting all the individual pieces of the bear rug, you will need to sew them together. Detailed assembly instructions are included in the pattern, but you will generally need to sew the head and body pieces, as well as the legs, to the main rug piece. Make sure to carefully align the pieces and securely sew them together using a tapestry needle and matching yarn.
6. Can I sell the bear rugs made from this pattern?
Yes, you can sell the bear rugs made from this pattern. However, it is important to give credit to the original pattern designer and not claim the pattern as your own. Additionally, it is a good idea to check the copyright information provided by the pattern designer, as some designers may have specific guidelines or restrictions regarding selling items made from their patterns.
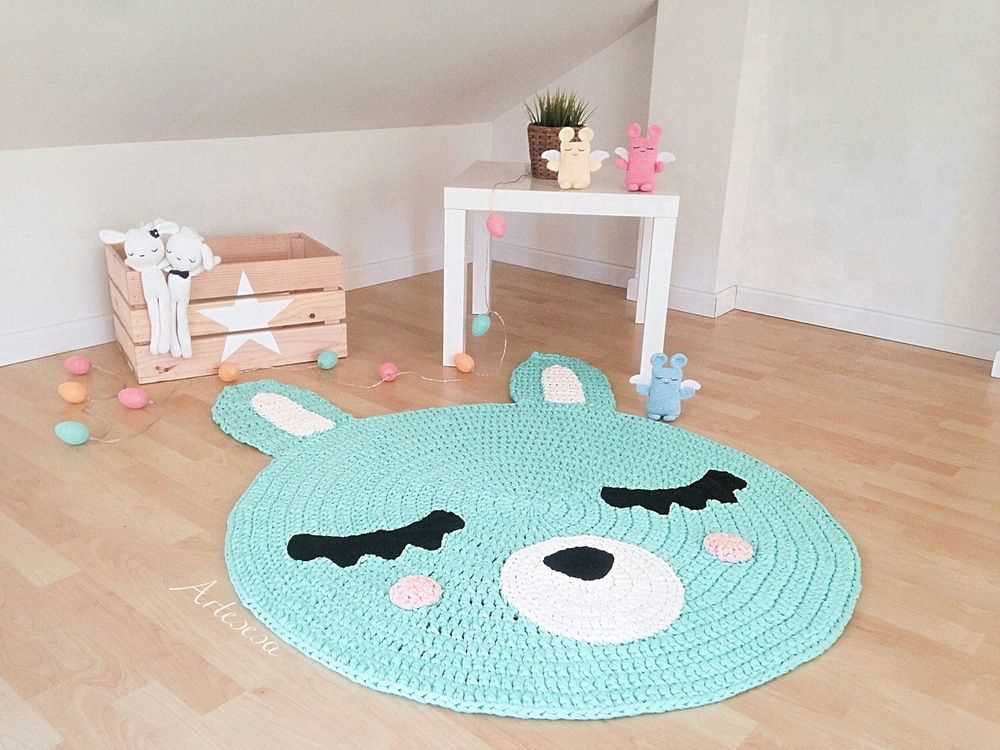
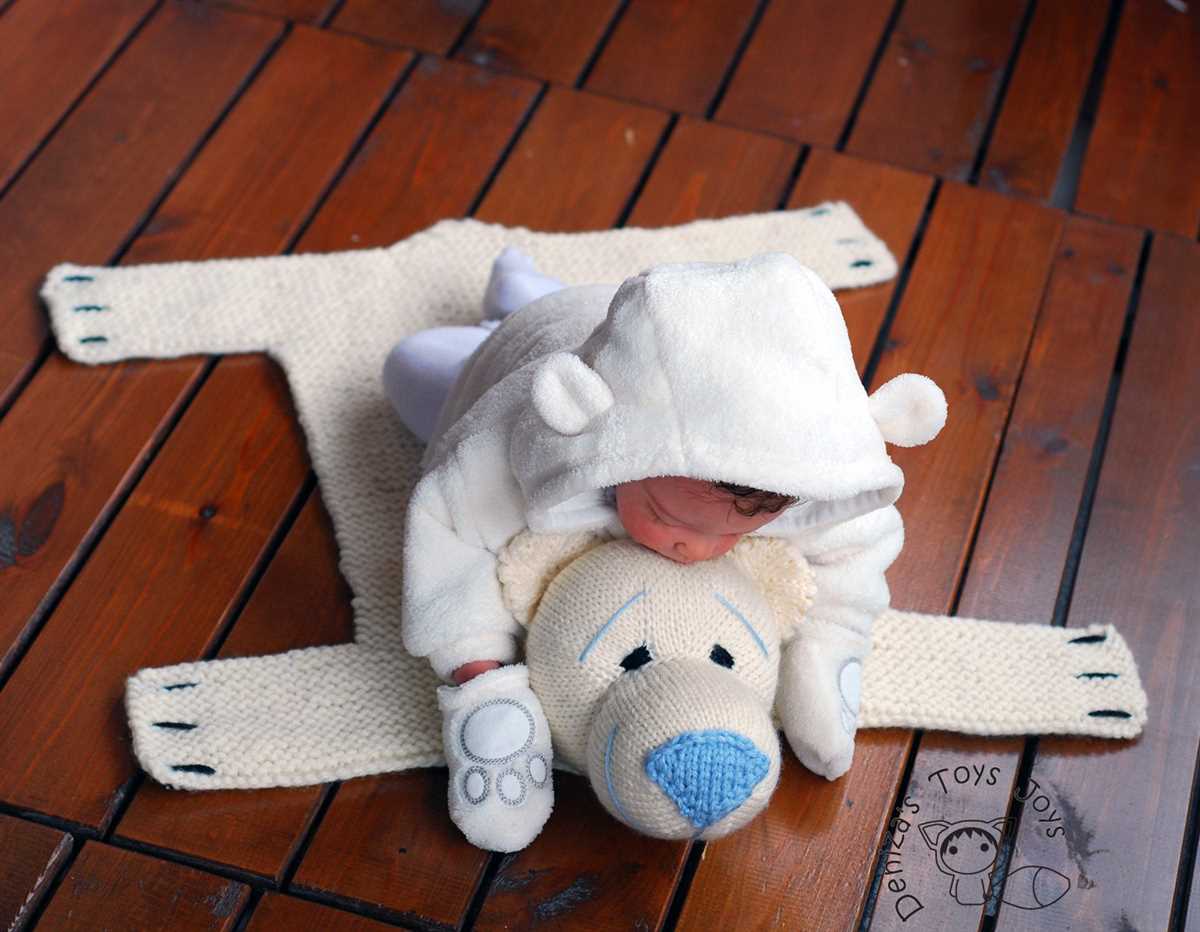
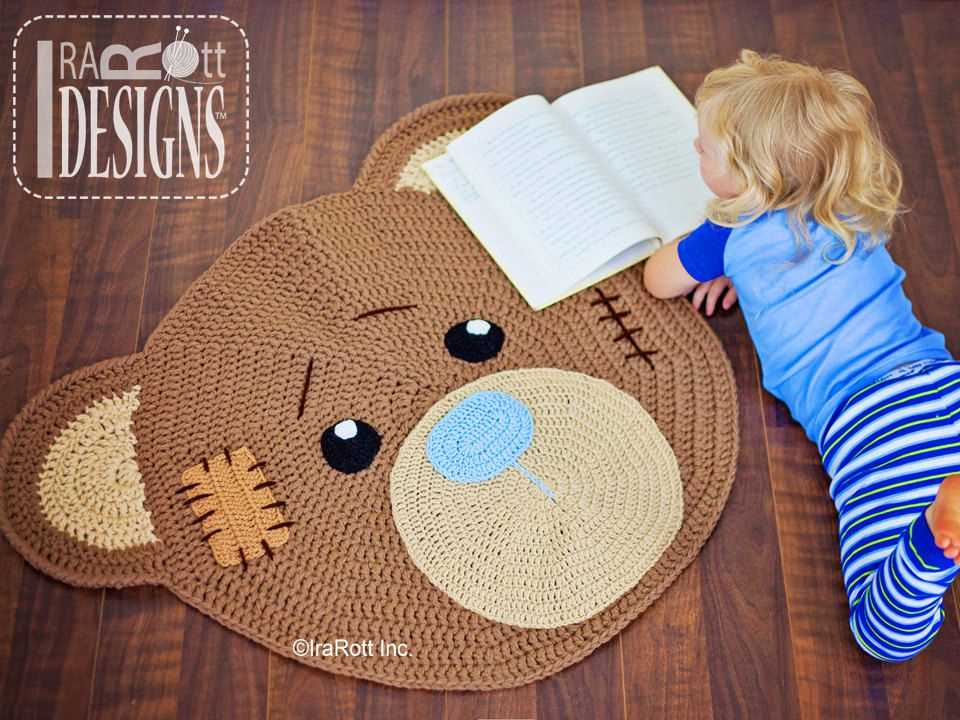
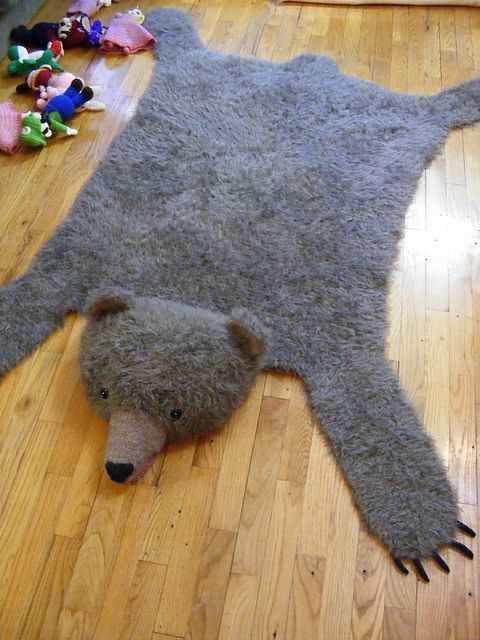
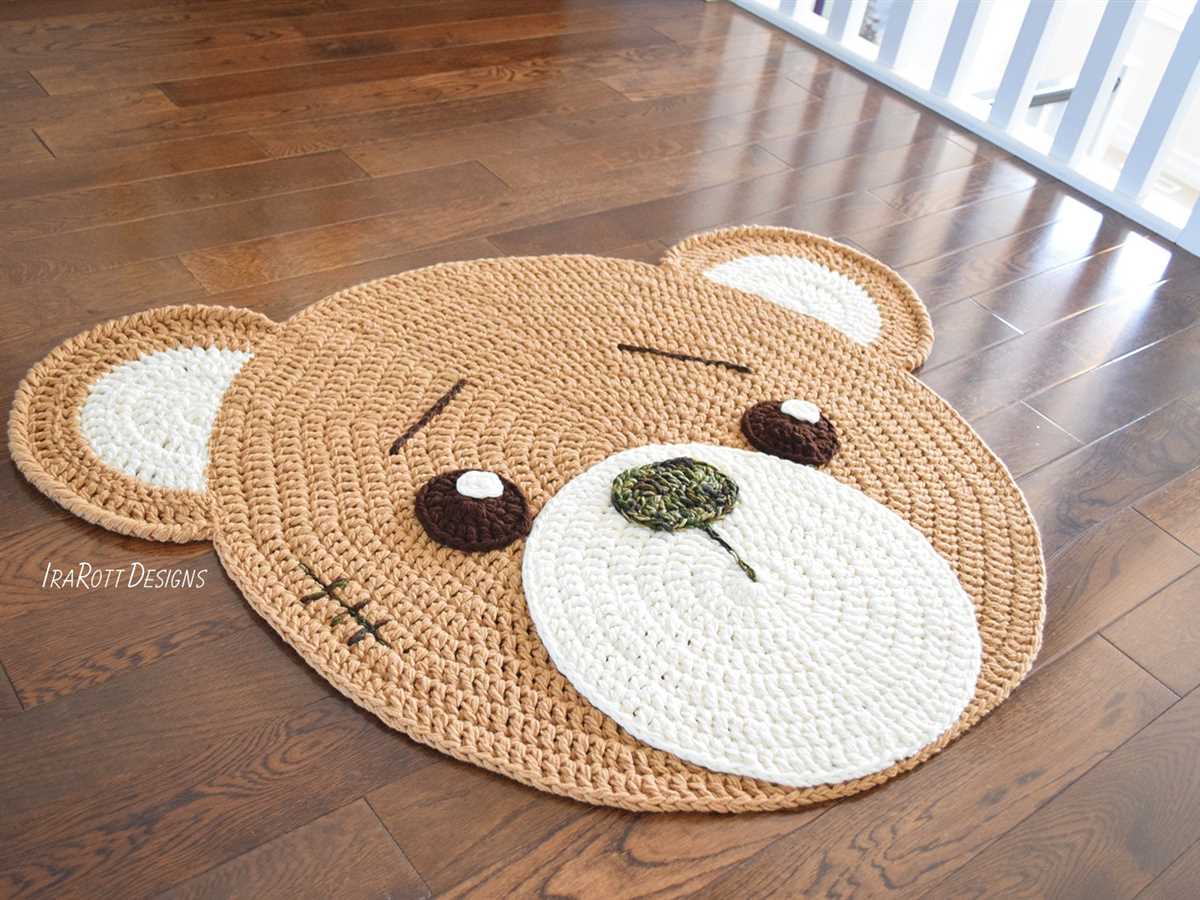
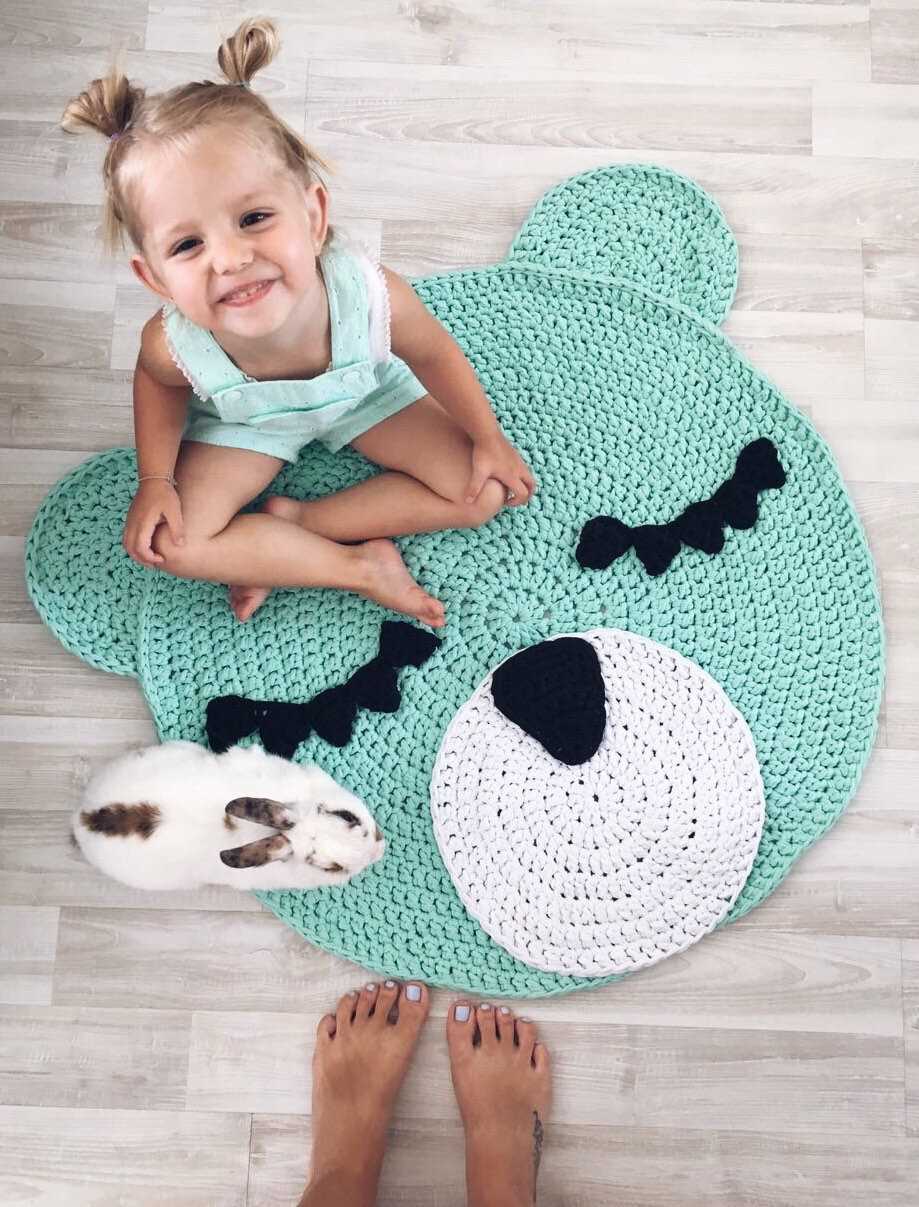
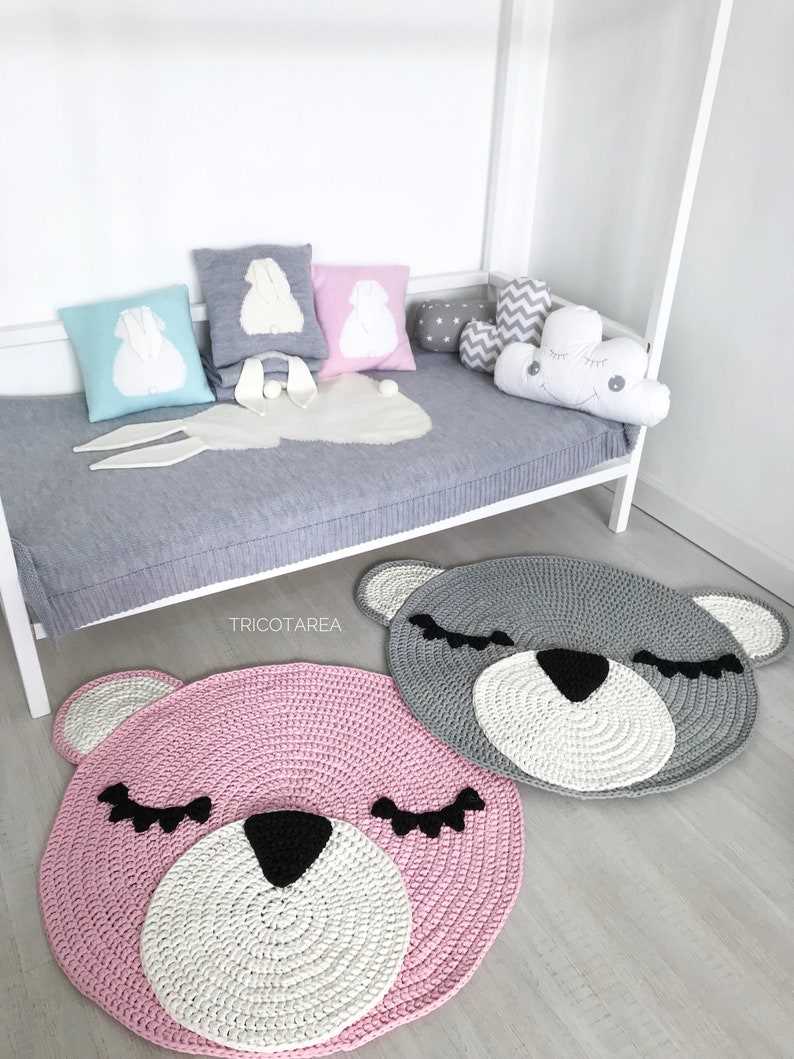
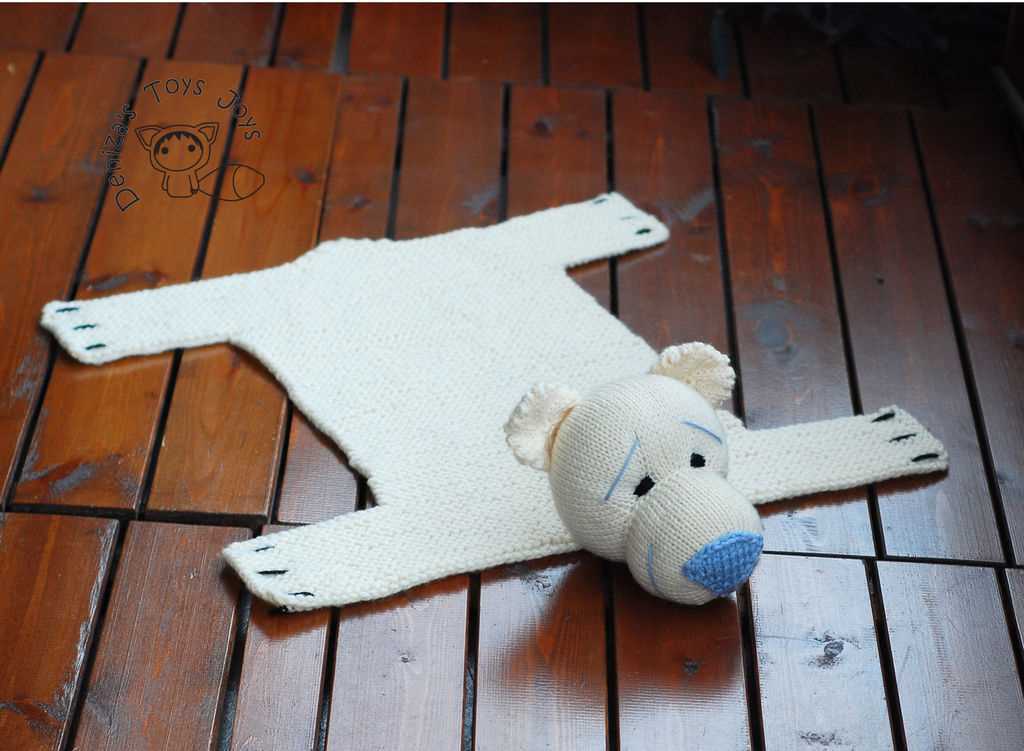
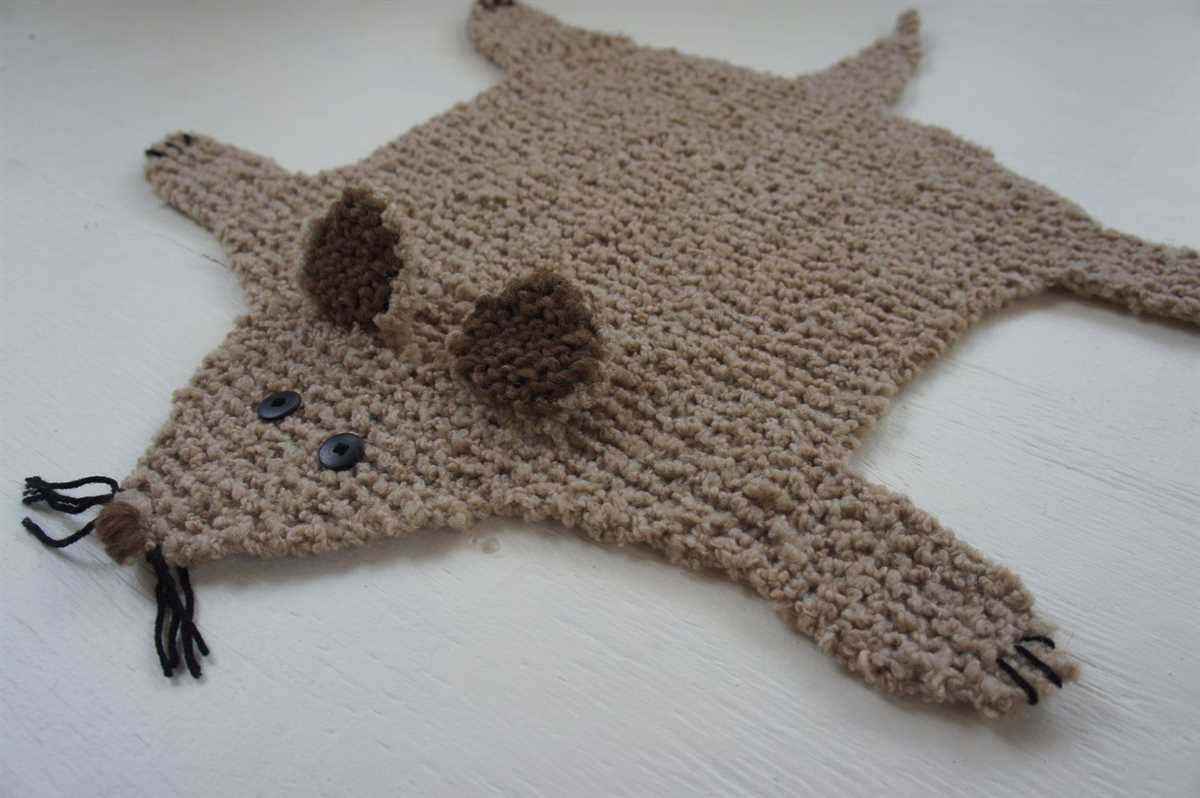
Inspirational Ideas and Examples of Finished Knit Bear Rugs

If you’re looking for some inspiration and examples of finished knit bear rugs, you’re in the right place! Knitting a bear rug can be a fun and rewarding project, and there are so many beautiful and creative designs to choose from. Whether you’re a beginner or an experienced knitter, you’ll find plenty of ideas to get you started on your own bear rug.
Below, we’ve compiled a list of some of our favorite knit bear rug patterns and examples of finished projects. From realistic bear rugs that look like they came straight from the woods to cute and whimsical bear rugs that would make a perfect addition to a child’s room, there’s something for everyone.
1. Realistic Bear Rugs
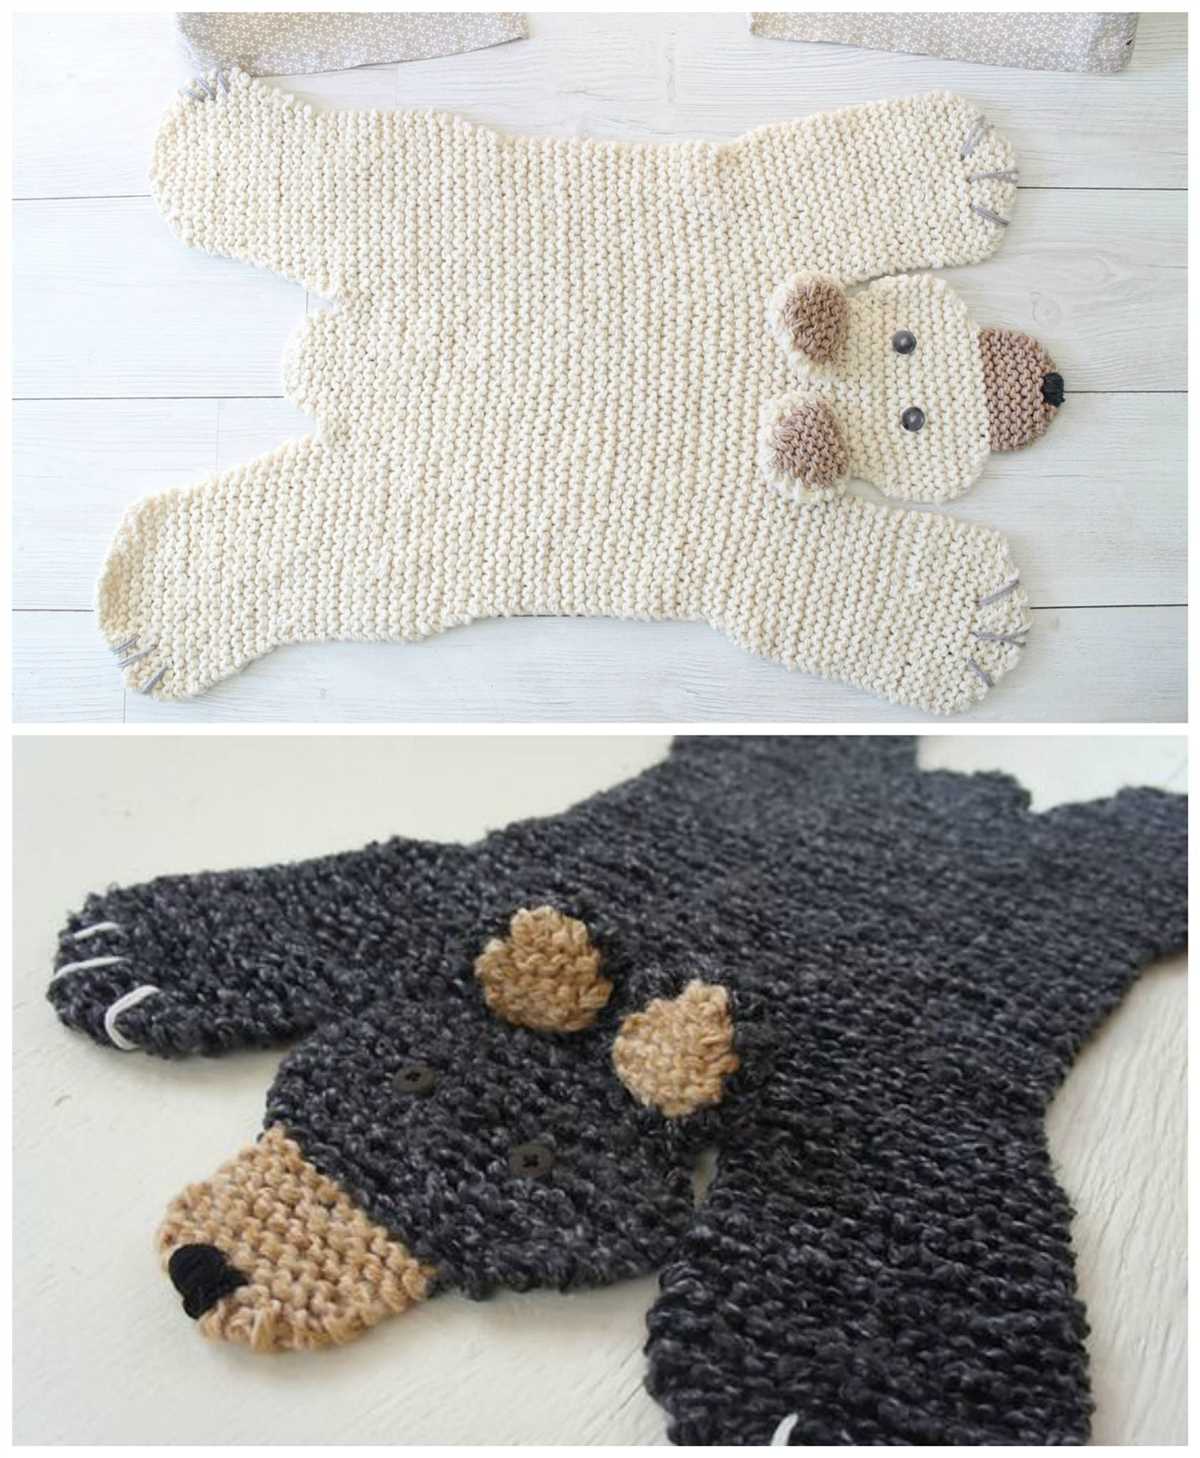
If you’re aiming for a realistic look, these bear rug patterns are perfect for you. With intricately designed textures and lifelike details, these rugs will impress anyone who sees them. From brown bears to polar bears, you can choose the type of bear that suits your style.
- Pattern: “Wilderness Bear Rug” by Mary Ann Colins
- Finished Project: A brown bear rug with a plush pile and lifelike features, creating a cozy and realistic addition to any room.
2. Whimsical Bear Rugs
If you’re looking for something a bit more playful and whimsical, these bear rug patterns are perfect for you. With colorful yarn and fun designs, these rugs will add a touch of charm to any space.
- Pattern: “Teddy Bear Picnic Rug” by Sarah Smith
- Finished Project: A cute and colorful bear rug featuring a picnic scene with teddy bears, perfect for a child’s bedroom or playroom.
3. Miniature Bear Rug Coasters
If you’re not ready for a full-sized bear rug, these miniature bear rug coaster patterns are a great option. These adorable coasters are quick to knit and make a charming addition to any table or desk.
- Pattern: “Tiny Bear Rug Coasters” by Jane Thompson
- Finished Project: Set of four miniature bear rug coasters in various colors, adding a touch of whimsy to any drinkware.
4. Bear Rug Blankets
If you’re looking for a larger project, these bear rug blanket patterns are a great choice. These blankets feature bear motifs and are perfect for snuggling up on a cold winter day.
- Pattern: “Cuddly Bear Blanket” by Emily Wilson
- Finished Project: A cozy and warm bear-themed blanket with a repeating bear pattern, making it the perfect addition to any couch or bed.
No matter which type of bear rug pattern you choose, knitting a bear rug is a fun and creative way to add a touch of warmth and whimsy to your space. We hope these inspirational ideas and examples have sparked your creativity and inspired you to start your very own bear rug project!