
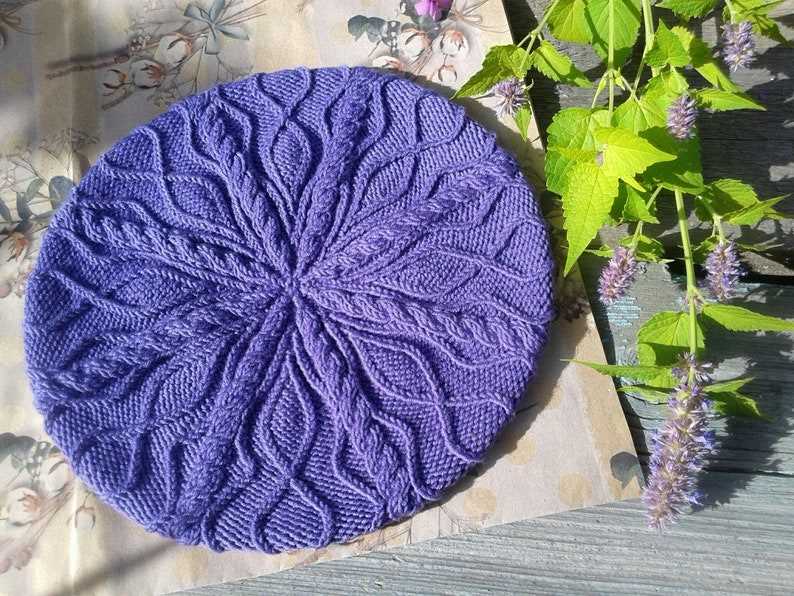
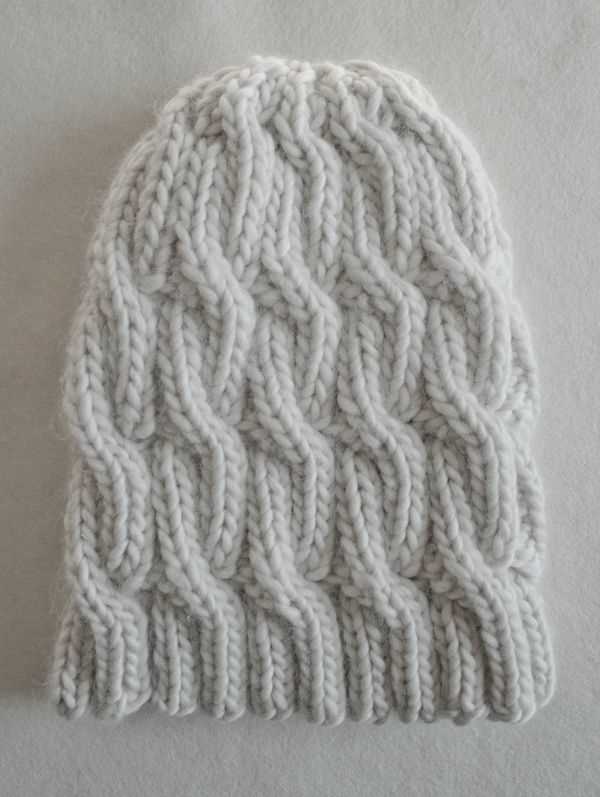
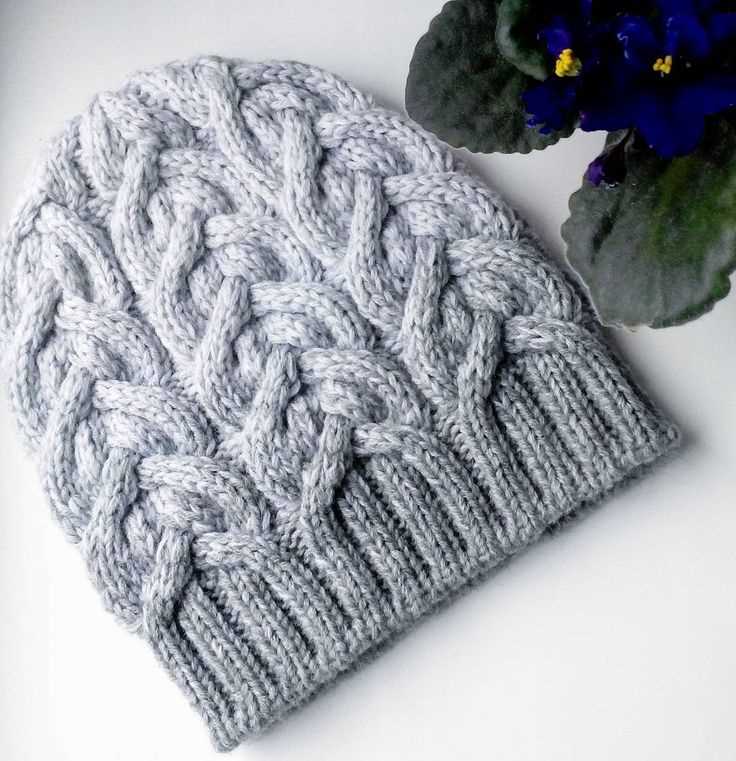
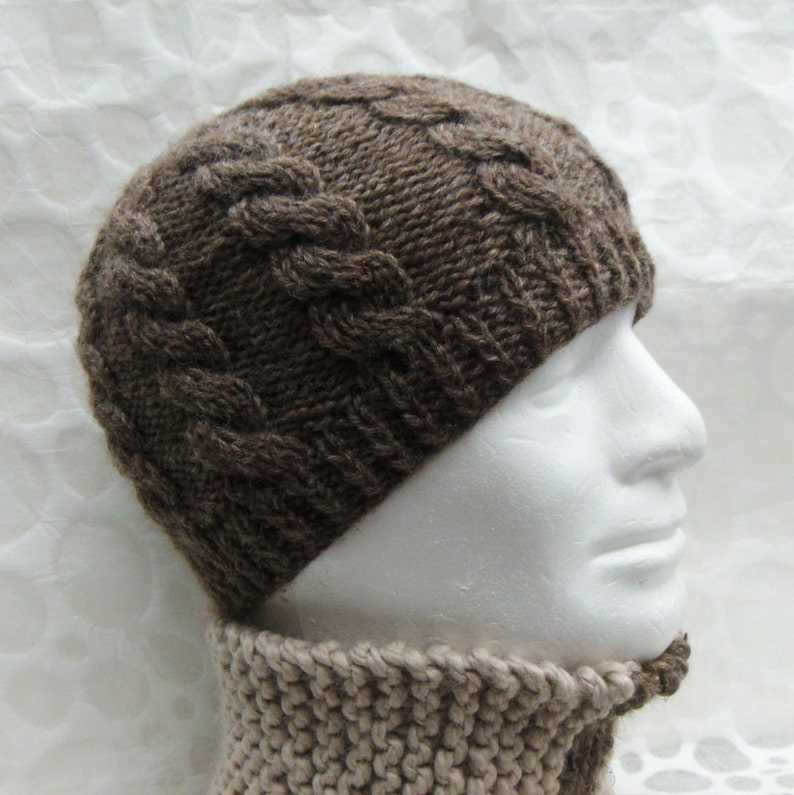
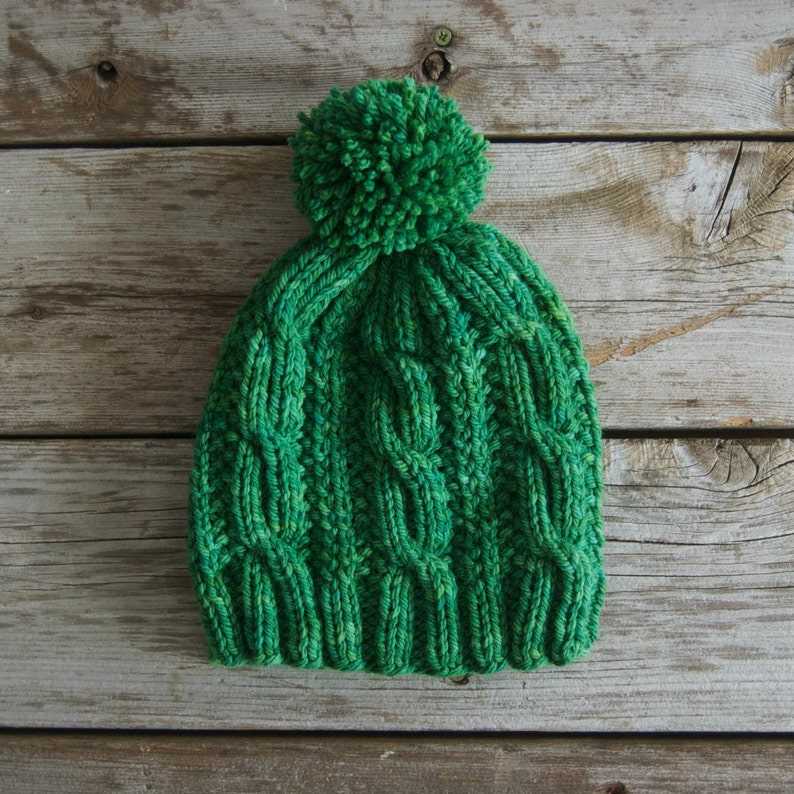
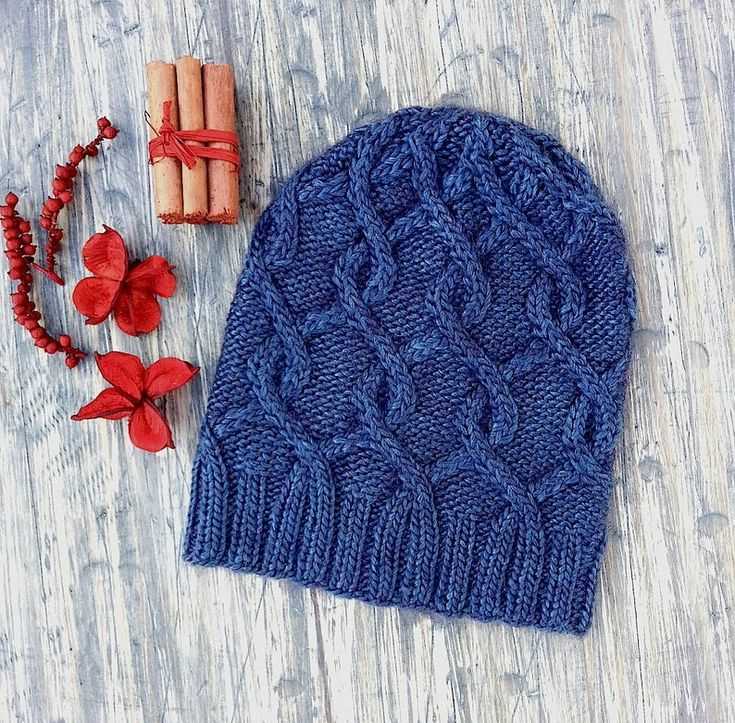
If you’re looking for a new knitting project to keep you warm and stylish all winter long, look no further than the Aran cable hat. This classic hat features intricate cable patterns that add a touch of sophistication to any outfit. Whether you’re a seasoned knitter or just starting out, this pattern is perfect for all skill levels.
The Aran cable hat is inspired by the traditional Aran sweaters of Ireland, which are known for their beautiful cable designs. The cables in this hat create a chunky texture and provide extra warmth, making it perfect for those chilly winter days. Plus, the hat is knit in the round, so there’s no need to sew any seams!
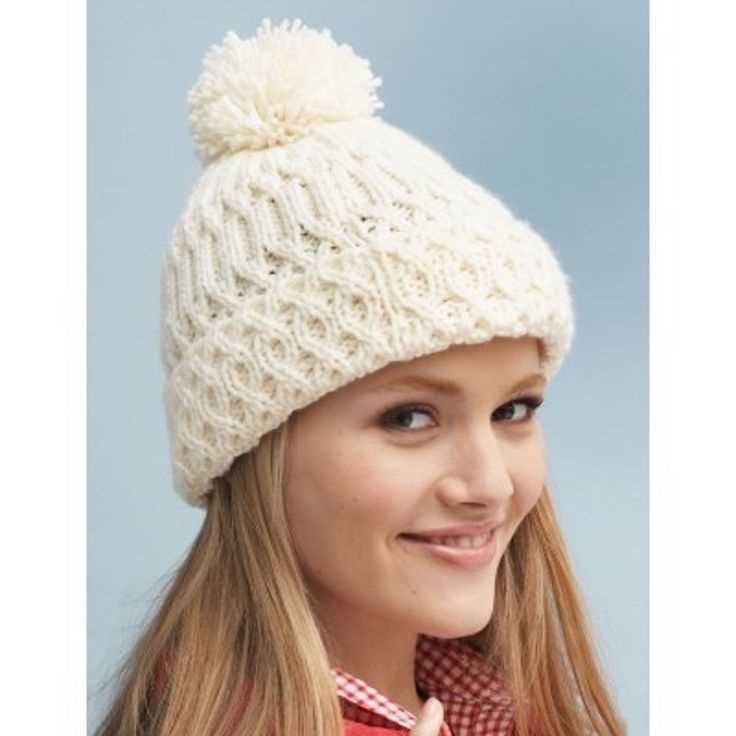
This knitting pattern includes detailed instructions and helpful tips to guide you through the process. From casting on to binding off, you’ll learn the techniques needed to create this stunning hat. Once you’ve finished knitting, you can add a pompom or leave it plain for a more minimalist look. Either way, you’ll have a cozy and stylish hat that you’ll love wearing all season long.
So gather your materials and get ready to create your own Aran cable hat. With just a little time and effort, you’ll have a beautiful accessory that will keep you warm and fashionable all winter long.
Aran Cable Hat Knitting Pattern
If you’re looking for a cozy and stylish hat to knit, an Aran cable hat is a great choice. Aran cables are a traditional Irish knitting technique that create beautiful, textured patterns. This hat pattern is perfect for intermediate knitters who are familiar with basic cable techniques.
To get started, you’ll need the following materials:
- Size 8 (5mm) knitting needles
- Aran weight yarn
- Cable needle
- Tapestry needle
Begin by casting on 80 stitches. Knit 3 rows in a rib stitch pattern (knit 2, purl 2) to create a stretchy brim for the hat. Next, switch to the main pattern. This pattern consists of a 12-row repeat, so be sure to keep track of your rows.
The main pattern for the Aran cable hat is a combination of cables and knit stitches. The cables create a beautiful, intertwined design that adds depth and interest to the hat. Follow the instructions for the cable pattern carefully, using a cable needle to hold stitches as needed.
- Row 1: Knit 6, *C8F (slip 4 stitches onto cable needle, hold in front, knit 4 stitches, knit 4 stitches from cable needle), K4; repeat from * to end of row.
- Row 2: Purl all stitches.
- Row 3: Knit 4, *K4, C8B (slip 4 stitches onto cable needle, hold in back, knit 4 stitches, knit 4 stitches from cable needle); repeat from * to last 6 stitches, knit 6.
- Row 4: Purl all stitches.
- Row 5: Knit 4, C8F, *K4, C8F; repeat from * to last 6 stitches, knit 6.
- Row 6: Purl all stitches.
- Row 7: Knit 4, C8B, *K4, C8B; repeat from * to last 6 stitches, knit 6.
- Row 8: Purl all stitches.
- Row 9: Knit all stitches.
- Row 10: Purl all stitches.
- Row 11: Repeat Row 1.
- Row 12: Repeat Row 2.
Continue repeating this 12-row pattern until the hat measures approximately 7 inches from the brim. Then, begin decreasing to shape the crown of the hat. Follow the instructions for decreasing carefully to create a neat and seamless finish. Finally, bind off and weave in any loose ends. Your Aran cable hat is now complete!
This hat pattern is a timeless classic that will keep you warm and stylish all winter long. Whether you’re an experienced cable knitter or looking to try a new technique, this Aran cable hat pattern is a great project to add to your knitting repertoire.
Materials Needed
To make the Aran cable hat, you will need the following materials:
Yarn:
- 4 balls of Aran weight yarn (200g each)
Needles:
- One set of 5mm circular needles (40cm in length)
- One set of 5mm double-pointed needles
Notions:
- Cable needle
- Stitch markers
- Tapestry needle
- Scissors
- Measuring tape
Make sure to choose a soft and warm yarn that is suitable for the cable pattern. The circular needles will be used for the brim of the hat, while the double-pointed needles are needed for the crown shaping. The cable needle is essential for creating the intricate cable design, and the stitch markers will help you keep track of your progress. The tapestry needle will be used for weaving in any loose ends, and the scissors and measuring tape are necessary for cutting yarn and taking measurements.
Gauge
Gauge is an important aspect of knitting patterns as it determines the size and fit of the finished project. It refers to the number of stitches and rows per inch that you achieve when knitting with a specific yarn and needle size. To ensure that your project turns out as expected, it is crucial to match the gauge specified in the pattern.
The gauge is typically measured using a swatch, which is a small sample of knitting worked in the chosen stitch pattern. The swatch is then washed and blocked to simulate the finished project. By measuring the number of stitches and rows per inch in the swatch, you can determine if your gauge matches the pattern’s gauge.
Why is gauge important?
Knitting to the correct gauge is important because it ensures that your finished project will have the correct measurements and fit. If your gauge is too loose, your project will turn out larger than expected. Conversely, if your gauge is too tight, your project will be smaller than intended.
Gauge also affects the amount of yarn required for a project. If your gauge is looser than the pattern’s gauge, you will use more yarn, potentially leading to running out before completing the project. On the other hand, if your gauge is tighter, you may have leftover yarn.
Ultimately, taking the time to achieve the correct gauge before beginning a knitting project will save you from potential disappointment and ensure that your finished item meets your expectations.
Abbreviations
In knitting patterns, abbreviations are commonly used to save space and make the instructions easier to read. These abbreviations represent specific knitting stitches or techniques and are usually accompanied by a brief explanation of their meaning. It is important to familiarize yourself with the commonly used abbreviations before starting a knitting project, as it will make following the pattern much easier.
Here are some common abbreviations you may come across in an Aran cable hat knitting pattern:
- K – knit
- P – purl
- YO – yarn over
- K2tog – knit two stitches together
- SSK – slip, slip, knit
- PM – place marker
- SM – slip marker
- C4F – cable four stitches to the front
- C4B – cable four stitches to the back
These abbreviations will be used throughout the pattern to give you step-by-step instructions on how to create the Aran cable hat. It is helpful to keep a list of the abbreviations handy for reference as you work through the pattern. With these abbreviations, you’ll be able to create a beautiful Aran cable hat in no time!
Instructions
In order to knit the Aran cable hat, you will need the following materials:
- 500 yards of worsted weight yarn
- Size US 7 (4.5mm) circular needles, 16″ (40cm) in length
- Size US 7 (4.5mm) set of double-pointed needles
- Cable needle
- Stitch markers
- Tapestry needle
Once you have gathered all of the necessary materials, you can start knitting the hat by following these steps:
- Cast on 96 stitches using the circular needles.
- Join the round, being careful not to twist the stitches.
- Place a stitch marker at the beginning of the round.
- Work 1×1 ribbing (alternating knit and purl stitches) for 1 inch.
- Switch to the cable pattern, which involves working various cable stitches.
- Repeat the cable pattern until the hat measures 7 inches from the cast on edge.
- Begin decreases by knitting 8 stitches, then knitting 2 stitches together. Repeat this sequence until the end of the round.
- Switch to the double-pointed needles when there are too few stitches to fit comfortably on the circular needles.
- Continue decreasing in this manner until there are only 8 stitches remaining.
- Break the yarn, leaving a long tail, and thread it through the remaining 8 stitches. Pull tight to close the top of the hat.
- Weave in any loose ends and block the hat to the desired shape and size.
Once you have completed these steps, you will have a beautiful Aran cable hat that is ready to be worn or gifted to someone special. Enjoy!
Casting On
Before you start knitting your Aran cable hat, you need to cast on your stitches. Casting on is the process of creating the foundation row of stitches on your knitting needle. It’s important to cast on with a method that will provide a stretchy and even edge for your hat.
One popular method for casting on is the long tail cast on. This method creates a neat and elastic edge that is perfect for hat brims. To start, measure a tail of yarn that is approximately three times the width of your finished hat. Make a slipknot by making a loop with the tail end of the yarn, inserting the working end of the yarn through the loop, and pulling tight.
Note: The long tail cast on is just one method of casting on. There are many other methods you can use depending on your personal preference and the effect you want to achieve. Feel free to explore different techniques and find the method that works best for you.
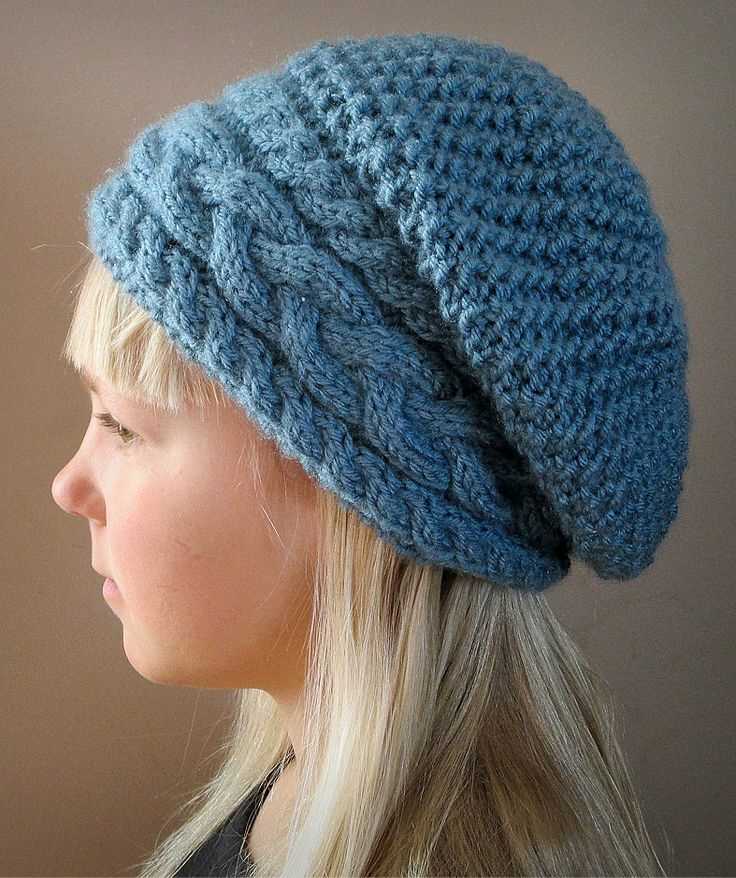
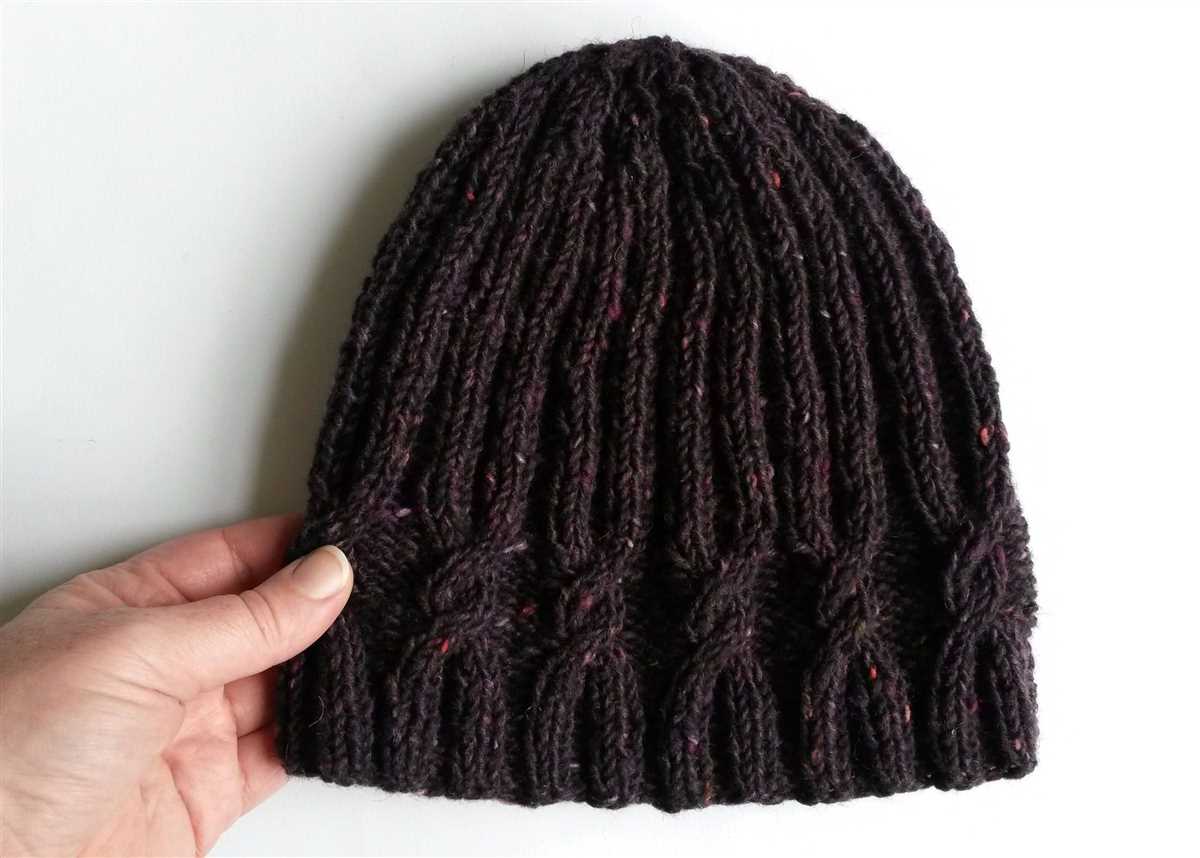
Body of the Hat
To begin the body of the hat, continue knitting in the Aran cable pattern as established in the previous section. The Aran cable pattern consists of a combination of cables and ribbing that create a beautiful texture. The cables create a twisted effect, while the ribbing adds elasticity to the hat.
To maintain the pattern, make sure to follow the chart or written instructions for the Aran cable pattern. Be sure to also continue knitting in the round, as this will create a seamless hat without any visible seams. It is important to keep track of your stitches and rows to ensure that you are following the pattern correctly.
As you knit the body of the hat, you will notice the pattern starting to take shape. The cables will become more pronounced, creating a visually appealing design. The ribbing will also help the hat to fit snugly on the head, providing extra warmth and comfort.
Continue knitting in the Aran cable pattern for the desired length of the hat’s body. The length will depend on personal preference and the size of the wearer’s head. It is recommended to try the hat on periodically to check the fit and make any necessary adjustments.
Once you have reached the desired length, you can move on to the next section of the pattern, which will explain how to shape the crown of the hat. The crown shaping will create a tapered effect, allowing the hat to fit more closely to the head. Stay tuned for the next section of the pattern to complete your Aran cable hat.
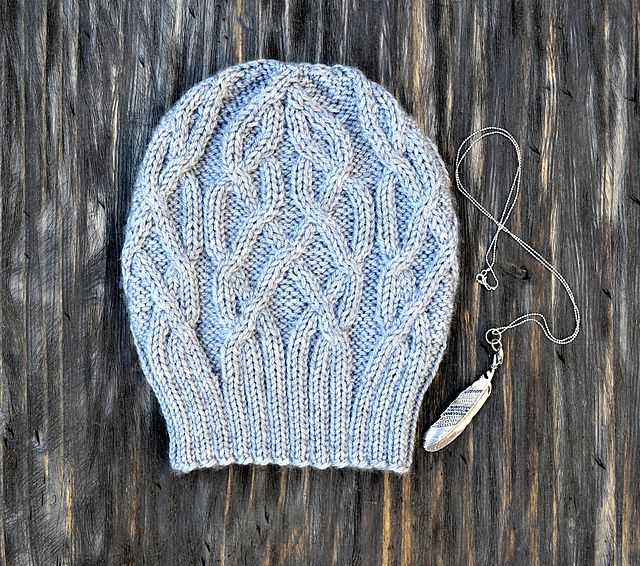
Shaping the Crown
The crown of the hat is the top part where all the cables and stitches come together to create a rounded shape. Shaping the crown is an important step in knitting the Aran cable hat. It determines the fit and the overall look of the hat. There are several ways to shape the crown, depending on the desired style and design.
One common method is to decrease stitches evenly across the rows to create gradual tapering towards the top. This can be done by knitting two stitches together, or by using other decrease stitches such as slip-slip-knit (ssk) or knit two together through the back loop (k2tog tbl). The number of stitches decreased in each row can be adjusted to achieve the desired shape.
Another method is to create a gathered or folded effect at the crown. This is often achieved by knitting a certain number of stitches together at regular intervals, creating a series of decrease points that pull the fabric together. This can create a textured and visually interesting effect on the top of the hat.
Some designs may also incorporate additional cable or stitch patterns in the crown, adding complexity and visual interest to the finished hat. This can be done by continuing the cable pattern from the main body of the hat, or by introducing a new cable pattern specifically for the crown. These additional elements can enhance the overall design and make the hat stand out.
Shaping the crown requires careful attention to detail and following the pattern instructions accurately. It is important to maintain proper tension and gauge throughout the knitting process to ensure the resulting crown fits snugly and comfortably on the head. With the right techniques and a little bit of patience, shaping the crown of an Aran cable hat can result in a beautifully finished accessory that is both stylish and warm.
Adding the Cable Pattern
To add the cable pattern to your Aran cable hat, you will need to follow a specific set of knitting instructions. The cable pattern will create a beautiful textured design on your hat, adding interest and visual appeal. Here is a step-by-step guide on how to add the cable pattern to your knitting project:
1. Prepare your stitches
Before beginning the cable pattern, make sure you have the correct number of stitches on your knitting needles. Count your stitches to ensure accuracy. It is also important to have a cable needle or double-pointed needle handy, as you will need it to perform the cable stitches.
2. Begin the cable pattern
To start the cable pattern, follow the specific instructions provided in your Aran cable hat knitting pattern. The cable pattern will typically involve a combination of knit stitches, purl stitches, and cable twists. Pay close attention to the pattern chart or written instructions, as they will guide you on which stitches to perform and in what order.
3. Perform the cable twist
When reaching the cable twist section of the pattern, you will need to use your cable needle or double-pointed needle to hold certain stitches in place. Slip the indicated number of stitches onto the cable needle and hold it at the front or back of your work, depending on the instructions. Knit the next set of stitches, then knit the stitches from the cable needle to complete the twist. The cable twist is what gives the cable pattern its distinctive appearance.
4. Repeat the cable pattern
Continue following the cable pattern instructions until you have completed the desired number of cable repeats. This will depend on the length and width of your hat. Keep track of your progress by using stitch markers or making notes on the pattern itself. Remember to take breaks and check your work regularly to ensure accuracy.
By adding the cable pattern to your Aran cable hat, you will create a beautiful and unique accessory. With a little patience and practice, you can master the cable knitting technique and create stunning designs that will impress everyone. Have fun and enjoy the process!
Finishing Touches
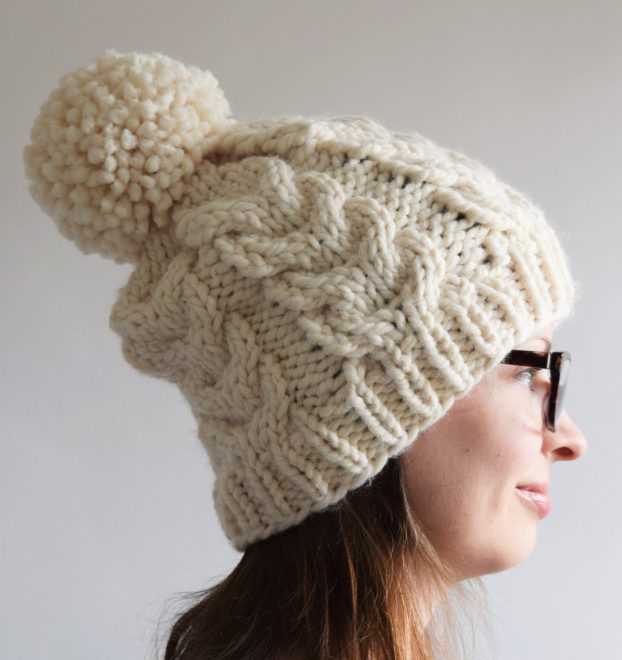
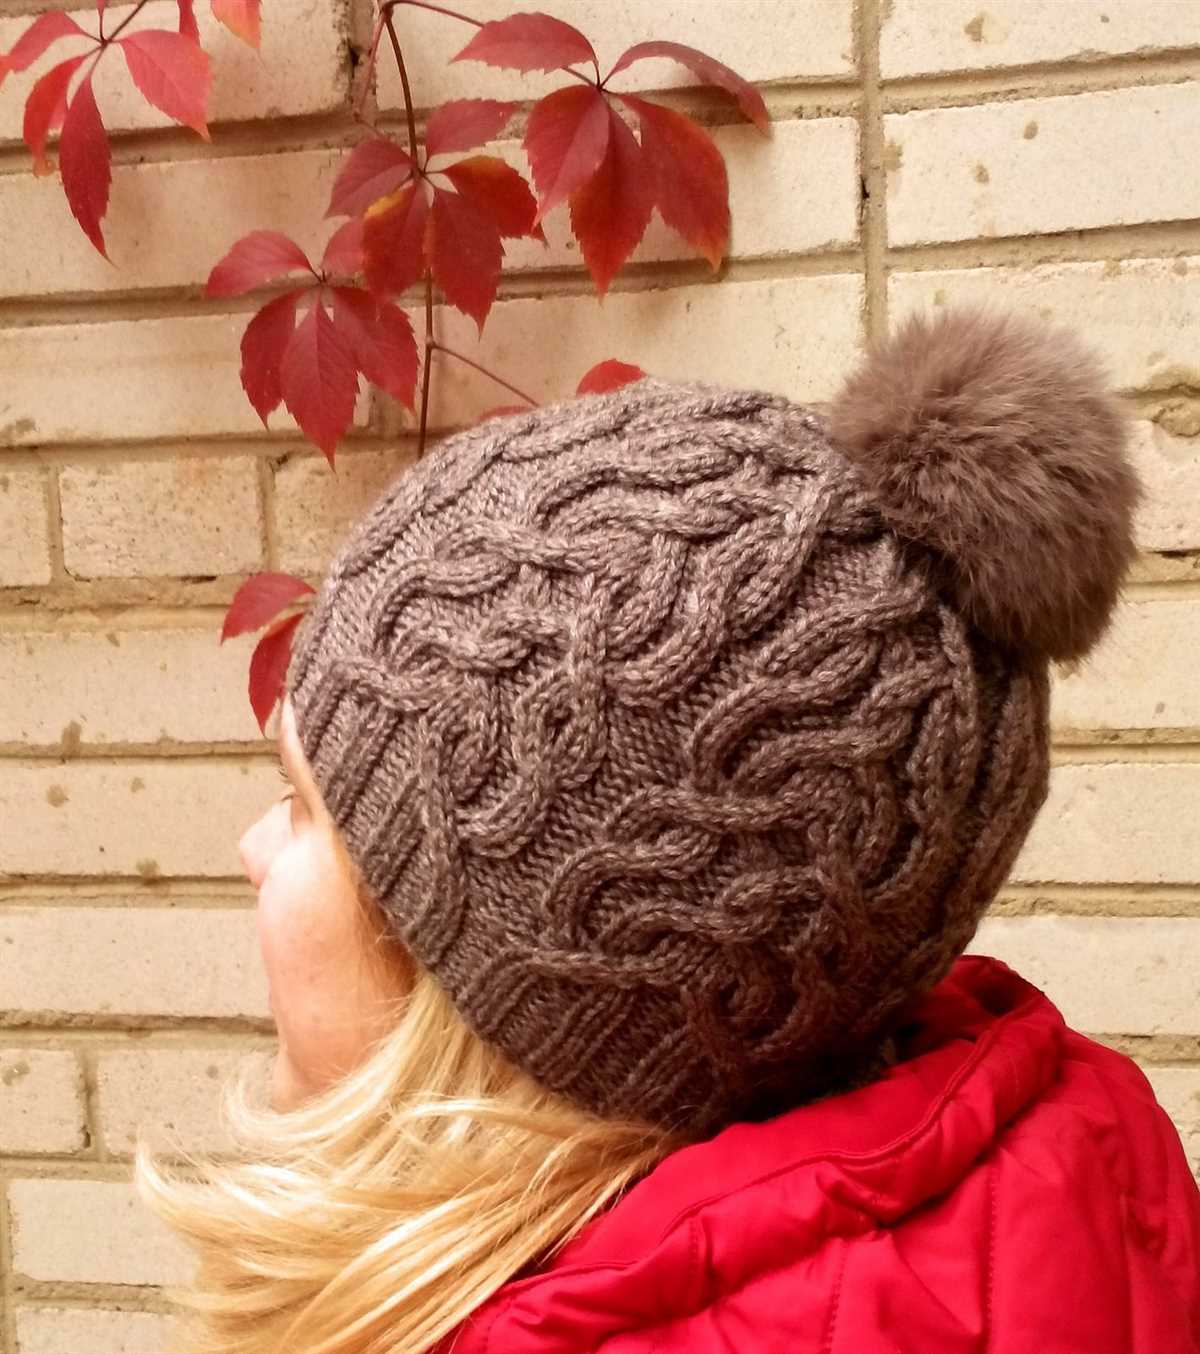
Once you have completed knitting your Aran cable hat, it’s time to add some finishing touches to make it truly unique. Here are some ideas to consider:
1. Pom pom: Add a fluffy pom pom on top of your hat for a playful touch. You can use a large pom pom maker or even make one by hand using yarn and cardboard.
2. Tassel: Instead of a pom pom, you can attach a tassel at the top of your hat. This can be made using contrasting yarn or the same yarn as your hat.
Now that you have added a touch of fun to your hat, it’s time to make it even more special:
- 3. Embroidery: You can use embroidery thread or yarn to add intricate designs or initials to your hat. This can be done on the brim or even around the cable pattern. Get creative!
- 4. Buttons: Sew on some cute buttons as a decorative element. You can choose buttons that match the color of your hat or opt for contrasting ones to add a pop of color.
- 5. Lining: To add extra warmth and a luxurious touch, consider adding a soft lining to the inside of your hat. This can be made from fleece or a soft fabric in a complementary color.
- 6. Ribbons: Attach a ribbon or a bow to the side or back of your hat for a feminine touch. This can be especially beautiful for a hat made as a gift.
Remember, the finishing touches are what make your Aran cable hat truly special and reflect your personal style. Get creative and have fun experimenting with different ideas!
Optional Embellishments

Once you have completed the basic cable hat pattern, you may want to add some optional embellishments to make your hat even more unique and personalized. Here are a few ideas to consider:
- Pom-pom: Attach a fluffy pom-pom to the top of the hat for a fun and playful touch. You can make a pom-pom using yarn in a matching or contrasting color.
- Button accents: Sew on some decorative buttons along the cable pattern to add some extra charm to your hat. Choose buttons that complement the colors and style of your hat.
- Beaded details: Incorporate some beads into the cable pattern to create a glamorous and eye-catching effect. You can thread the beads onto the yarn before knitting or use a crochet hook to add them afterward.
- Ribbed brim: Instead of a plain stockinette stitch brim, you can add a ribbed brim for some extra stretch and texture. This can be achieved by alternating knit and purl stitches in a rib pattern for a few inches.
- Embroidery: Use embroidery thread to add decorative stitches or motifs to the hat. This can be a great way to personalize the hat with initials, a favorite design, or a special message.
Remember, these embellishments are optional and can be customized to suit your own personal style and preferences. Get creative and have fun making your cable hat one-of-a-kind!
Tips and Tricks
When knitting an Aran cable hat, it can be helpful to keep a few tips and tricks in mind to ensure a successful project. Here are some key pointers:
1. Use a cable needle: Cable stitches are a defining feature of Aran knitting, and a cable needle is essential for achieving the intricate designs. Invest in a set of cable needles in various sizes to accommodate different cable patterns.
2. Take note of the chart: Most Aran cable hat patterns include a chart that depicts the cable designs row by row. It is crucial to carefully follow the chart while knitting, paying attention to symbols and instructions. This will help you create a hat with accurate and visually appealing cables.
- 3. Practice tension control: Tension is crucial in Aran knitting to ensure that the cables are tight and well-defined. Practice controlling your tension by knitting a swatch before starting the hat. Adjust your knitting style and needle size if needed to achieve the desired outcome.
- 4. Count your stitches: Aran cable patterns often involve intricate stitch patterns and increases or decreases. It is important to regularly count your stitches to ensure that you are on track and have not made any mistakes. This will save you time and frustration in the long run.
- 5. Block your finished hat: Blocking is a crucial step in knitting that helps to even out stitches, shape the hat, and showcase the cable patterns. Follow the blocking instructions provided in your pattern to achieve a professional and polished finish.
- 6. Experiment with yarn: While traditional Aran cable hats are typically knit with wool yarn, don’t be afraid to experiment with different yarn fibers and weights. This can create unique and interesting textures in your finished hat.
By keeping these tips and tricks in mind, you can confidently knit an Aran cable hat with beautiful and well-defined cables.
FAQ
Have a question about knitting an Aran cable hat? Check out our frequently asked questions below for answers:
1. How long does it take to knit an Aran cable hat?
The time it takes to knit an Aran cable hat can vary depending on your knitting speed and experience. On average, it can take anywhere from a few days to a couple of weeks to complete.
2. What materials do I need to knit an Aran cable hat?
To knit an Aran cable hat, you will need the following materials:
- Yarn (preferably a chunky or bulky weight yarn)
- Knitting needles (size will depend on the yarn weight and your tension)
- Cable needle (for twisting the stitches to create the cable pattern)
- Tapestry needle (for weaving in ends)
- Stitch markers (optional, but helpful for keeping track of your stitches)
3. Can I customize the size of the Aran cable hat?
Yes, you can customize the size of the Aran cable hat by adjusting the number of stitches and rows. You can also knit a gauge swatch before starting to ensure that your hat will be the right size.
4. Are there any tips for knitting cables?
Yes, here are some tips for knitting cables:
- Use a cable needle to hold the stitches as you twist them.
- Practice the cable pattern on a smaller swatch before starting the hat.
- Keep your tension consistent for even-looking cables.
- Use stitch markers to mark the beginning and end of each cable section.
- Follow the cable chart or written instructions carefully.
5. Can I sell hats that I knit using this pattern?
Yes, you can sell hats that you knit using this pattern. However, please do not sell or distribute the pattern itself without permission.
Knitting an Aran cable hat can be a fun and rewarding project. With the right materials and a little practice, you can create a cozy and stylish hat to keep you warm during the colder months. Happy knitting!
Q&A:
What is an Aran cable hat knitting pattern?
An Aran cable hat knitting pattern is a set of instructions on how to knit a hat using a specific cable stitch design. It typically includes information on the materials needed, the size of needles to use, and step-by-step instructions for creating the cables.
How do I knit an Aran cable hat?
To knit an Aran cable hat, you will need a set of double-pointed knitting needles, cable needles, and yarn. Follow the instructions in the knitting pattern, which will guide you through creating the cable stitch pattern. This typically involves crossing stitches over each other to form the cables. Once you have completed the cable section, you will continue knitting in the round until the hat is the desired length. Finally, you will bind off your stitches and weave in any loose ends.
What materials do I need to knit an Aran cable hat?
To knit an Aran cable hat, you will need a set of double-pointed knitting needles or circular needles, cable needles, and yarn. The specific size of needles and weight of yarn will depend on the knitting pattern you are using and your desired finished hat size. It is always recommended to check the knitting pattern for the recommended needle size and yarn weight.
Can I modify an Aran cable hat knitting pattern?
Yes, you can modify an Aran cable hat knitting pattern to suit your preferences. For example, you can change the size of the hat by adjusting the number of stitches cast on or by using smaller or larger needles. You can also change the cable stitch design by swapping out one cable pattern for another. However, it is important to note that any modifications may affect the overall look and fit of the hat, so it is recommended to make a gauge swatch and test your modifications before starting the project.
Where can I find an Aran cable hat knitting pattern?
There are many sources where you can find Aran cable hat knitting patterns. You can search online on websites and forums dedicated to knitting patterns, or you can check knitting pattern books and magazines at your local library or bookstore. Additionally, many knitting designers and bloggers offer free Aran cable hat knitting patterns on their websites. You can also consider joining a knitting community or forum where members often share and exchange knitting patterns.
What is an Aran cable hat?
An Aran cable hat is a type of knitted hat that features intricate cable patterns. It is typically made using Aran weight yarn, which is a medium weight yarn, and is known for its warmth and durability.