
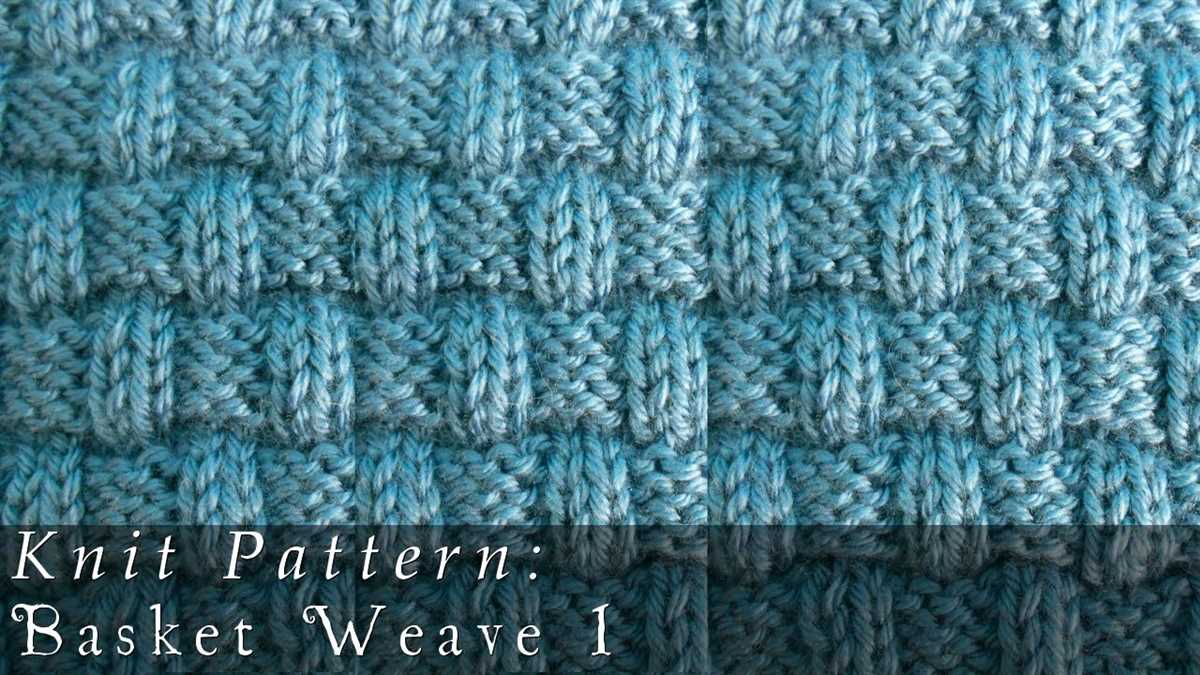
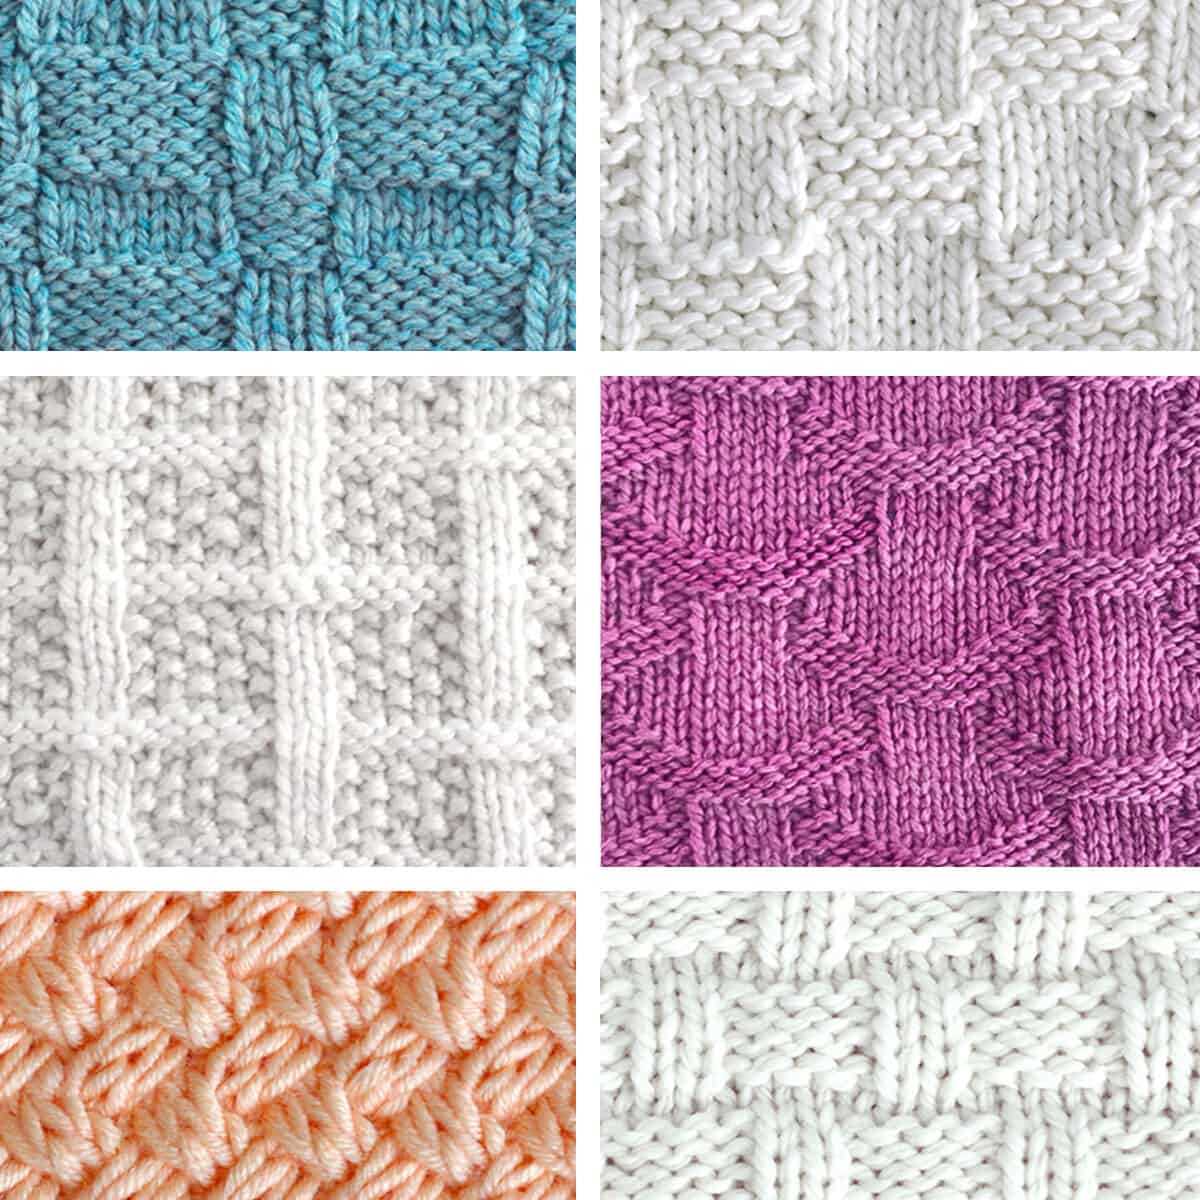
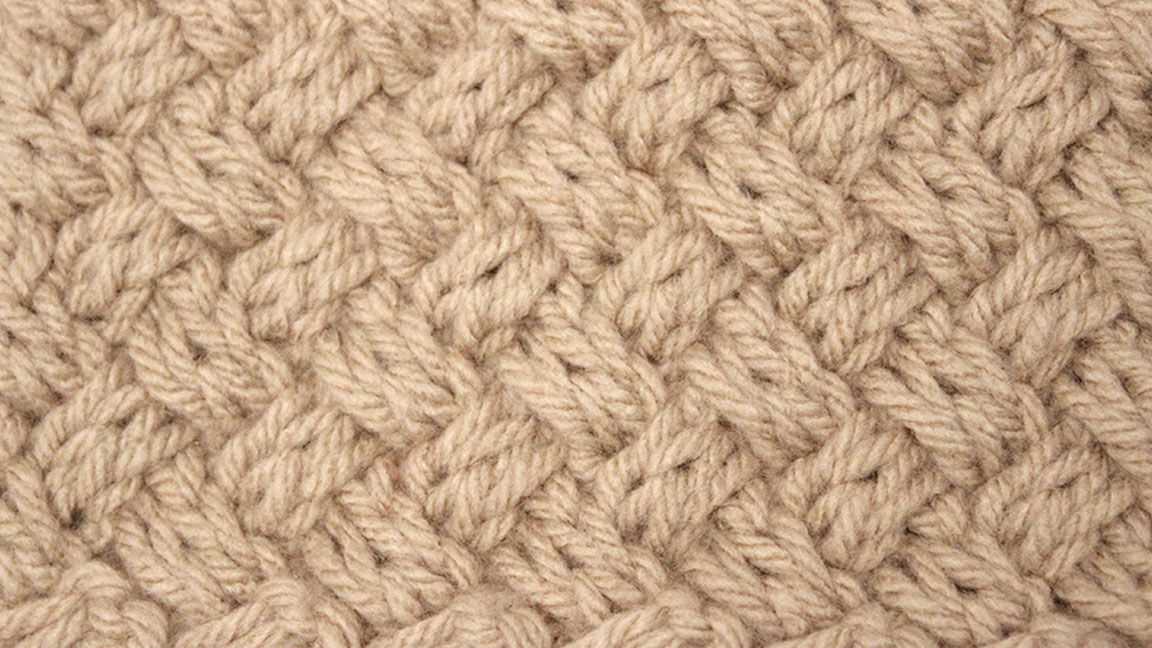
Knitting is a versatile and creative craft that allows you to create beautiful and functional items using just a pair of needles and some yarn. One popular and classic knitting pattern is the basket weave pattern, which creates a textured and woven look that resembles a basket.
The basket weave pattern consists of blocks of knits and purls, which are arranged in a grid-like pattern. It is a relatively easy stitch pattern to learn, making it suitable for both beginners and more experienced knitters who are looking for a project with an interesting and engaging texture.
To knit the basket weave pattern, you will need a multiple of 8 stitches. The basic repeat of the pattern is usually 8 stitches wide and 8 rows tall, although you can adjust the size of the pattern to suit your needs. Once you have cast on the required number of stitches, you can begin working the pattern by following a simple set of instructions.
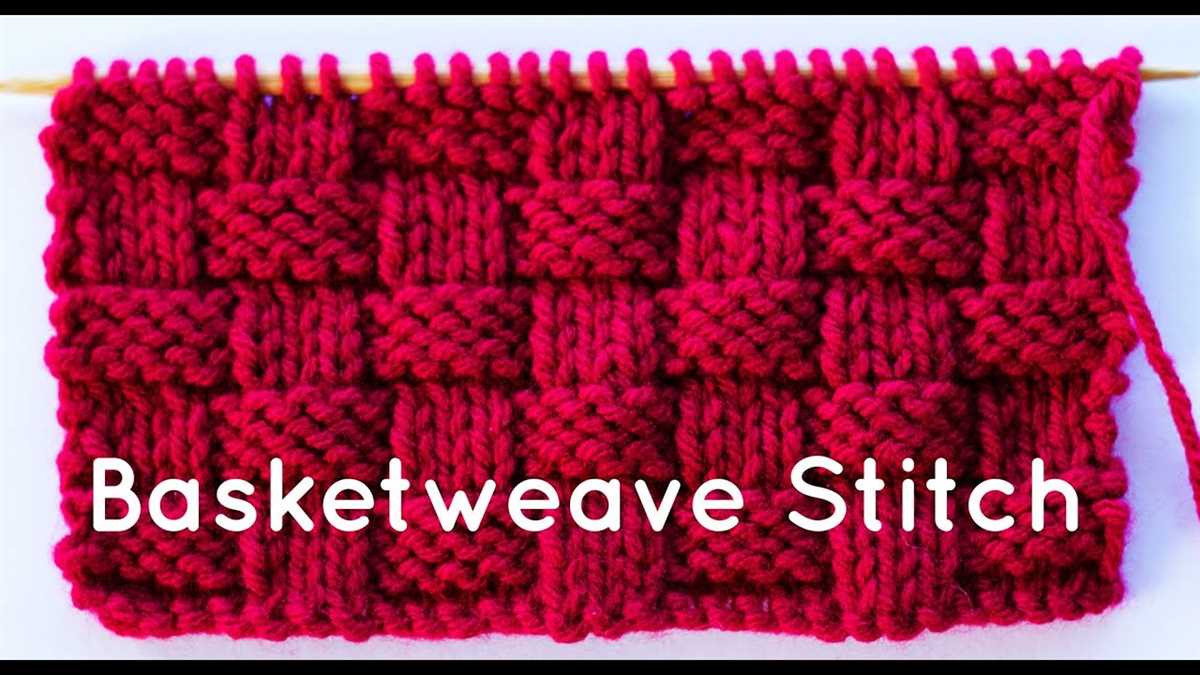
How to Knit Basket Weave Pattern
A basket weave pattern is a popular knitting pattern that creates a textured fabric that resembles the woven pattern of a basket. It is a great pattern to use for a variety of projects such as blankets, scarves, and even sweaters.
To knit the basket weave pattern, you’ll need a pair of knitting needles and yarn in your desired color. Here’s a step-by-step guide on how to knit the basket weave pattern:
- Cast on: Start by casting on an even number of stitches. The number of stitches you cast on will depend on the width of the project you want to knit. For example, if you’re knitting a scarf, you can cast on anywhere between 20-30 stitches.
- Row 1 and 2: Start by knitting the first two rows in a basic knit stitch. This will create a foundation for the basket weave pattern.
- Row 3 and 4: On the third row, knit the first four stitches. Then, switch to the purl stitch for the next four stitches. Repeat this pattern till the end of the row. On the fourth row, purl the first four stitches and then knit the next four stitches. Repeat this pattern till the end of the row.
- Repeat Rows 3 and 4: Continue repeating rows 3 and 4 until you’ve reached the desired length of your project.
- Row 5 and 6: To create the intricate woven pattern, reverse the pattern from rows 3 and 4. Knit the first four stitches on row 5, and then purl the next four stitches. On row 6, purl the first four stitches and then knit the next four stitches.
- Repeat Rows 5 and 6: Continue repeating rows 5 and 6 until you’ve reached the desired length of your project.
- Bind off: To finish off your project, bind off by knitting two stitches, and then passing the first stitch over the second stitch. Continue this until all stitches are bound off. Cut the yarn, leaving a tail, and weave in any loose ends.
Once you’ve mastered the basket weave pattern, you can experiment with different variations, such as different stitch counts or adding in additional rows of the basket weave pattern. Have fun exploring the endless possibilities of this versatile knitting pattern!
Choosing the Right Yarn and Needles
When knitting a basket weave pattern, it’s important to choose the right yarn and needles to ensure a successful outcome. The yarn you select should be durable and strong, as the basket weave stitch can create a dense fabric. A yarn made from natural fibers like wool or cotton is a good choice, as these fibers tend to have good stitch definition and will hold up well over time.
Next, consider the needle size for your project. The size of needle you choose will depend on the weight of your yarn and the desired finished fabric. For a chunky yarn, you may want to use larger needles to create a more open and drapey fabric. Alternatively, if you’re using a finer yarn, you may want to use smaller needles to create a tighter and more compact fabric.
It’s always a good idea to do a swatch before starting your project to ensure that you have the right gauge. This will help you determine the needle size that will give you the desired finished size of your project. To knit a swatch, cast on a few stitches and work a few rows in the basket weave pattern. Measure the gauge by counting how many stitches and rows fit within a 4×4 inch square.
Once you have determined the right yarn and needle size, you can start knitting your basket weave pattern with confidence, knowing that you have chosen the materials that will give you the best results. Just remember to enjoy the process and have fun with your knitting!
Casting On and Setting up the Pattern
Casting on is the first step in starting any knitting project, and it is no different for the basket weave pattern. To begin, you will need to decide how wide you want your basket weave pattern to be and calculate the number of stitches needed. This will depend on your chosen yarn and needle size, as well as the size of the finished project you desire.
Once you have determined the number of stitches needed, you can begin casting on. You can use any casting on method you prefer, such as the long-tail cast on or the knitted cast on. Make sure to cast on an even number of stitches to create the basket weave pattern.
Setting up the pattern: After casting on, the setup row for the basket weave pattern involves repeating a specific sequence of knit and purl stitches. The sequence is usually a multiple of four stitches. For example, you could set up the pattern by knitting two stitches and then purling two stitches, repeating this sequence across the entire row.
Note: The setup row may vary depending on the specific instructions for the basket weave pattern you are following. Always refer to the pattern instructions for the exact setup row sequence.
Once you have completed the setup row, you are ready to continue knitting the basket weave pattern. The pattern typically consists of alternating knit and purl stitches, creating the signature woven look. It is important to pay attention to the pattern instructions to ensure you are following the correct stitch sequence.
Knitting the First Row

Before you can start knitting the basket weave pattern, you need to cast on the required number of stitches. The number of stitches will depend on the width of the item you’re knitting and the size of your knitting needles. Once you have cast on the desired number of stitches, you are ready to begin knitting the first row.
For the first row of the basket weave pattern, you will start by working a series of knit and purl stitches. The pattern will typically begin with a series of knit stitches, followed by a series of purl stitches. The specific pattern will depend on the number of stitches you have cast on and the desired width of the item you’re knitting.
If your pattern calls for a specific number of knit stitches followed by a specific number of purl stitches, you will repeat this pattern across the entire row. For example, if your pattern calls for 4 knit stitches followed by 4 purl stitches, you will work repeats of this sequence until you reach the end of the row.
Alternatively, some patterns may require a different combination of knit and purl stitches. For example, you may need to alternate between knitting 2 stitches and purling 2 stitches. Again, you will repeat this pattern across the entire row until you reach the end.
As you work the first row of the basket weave pattern, be sure to keep an eye on your tension. It’s important to maintain an even tension to ensure that your basket weave pattern looks uniform. If your tension is too tight, your stitches may appear bunched up. If your tension is too loose, your stitches may appear stretched out.
Continue knitting the first row of the basket weave pattern according to your specific pattern instructions. Once you have completed the first row, you will be ready to begin the second row of the pattern.
Knitting the Second Row
Once you have completed the first row of the basket weave pattern, you are ready to move on to the second row. This row will alternate the stitches and create the woven effect.
To begin, start by knitting the first two stitches in the row. This will create the base for the weave. Next, you will purl the following two stitches. This creates the alternating pattern.
- Knit 2 stitches
- Purl 2 stitches
Continue this pattern of knitting two stitches and then purling two stitches until you reach the end of the row. Make sure to maintain the correct tension and keep your stitches neat and even.
Once you have completed the second row, you can continue in the same manner for the following rows, always alternating between knitting and purling the stitches. This will create the beautiful woven texture of the basket weave pattern.
Repeating the Rows
Once you have completed the first set of rows in the basket weave pattern, you will need to repeat those rows until your desired length is reached. The repetition of the rows is what creates the basket weave pattern and gives it its unique texture.
To begin repeating the rows, you will start by working Row 1 again. This row consists of knitting the first 5 stitches, followed by purling the next 5 stitches. You will continue this pattern of knitting and purling until you reach the end of the row.
After completing Row 1, you will move on to Row 2. This row is essentially the reverse of Row 1. You will begin by purling the first 5 stitches, followed by knitting the next 5 stitches. Again, you will continue this pattern of purling and knitting until you reach the end of the row.
Once Row 2 is finished, you will go back to Row 1 and repeat it once more. You will continue to alternate between Row 1 and Row 2, following the same pattern of knitting and purling, until your project reaches the desired length.
Remember to always consult the pattern instructions for the specific number of rows you need to repeat, as well as any variations or modifications that may be required. Happy knitting!
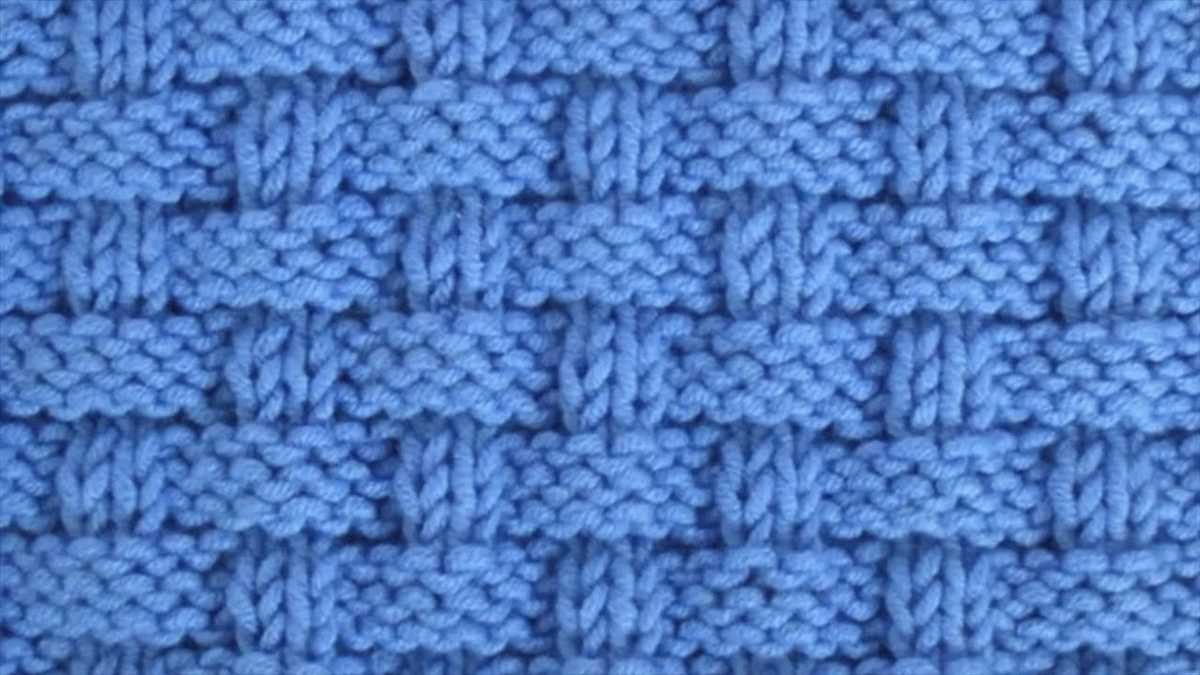
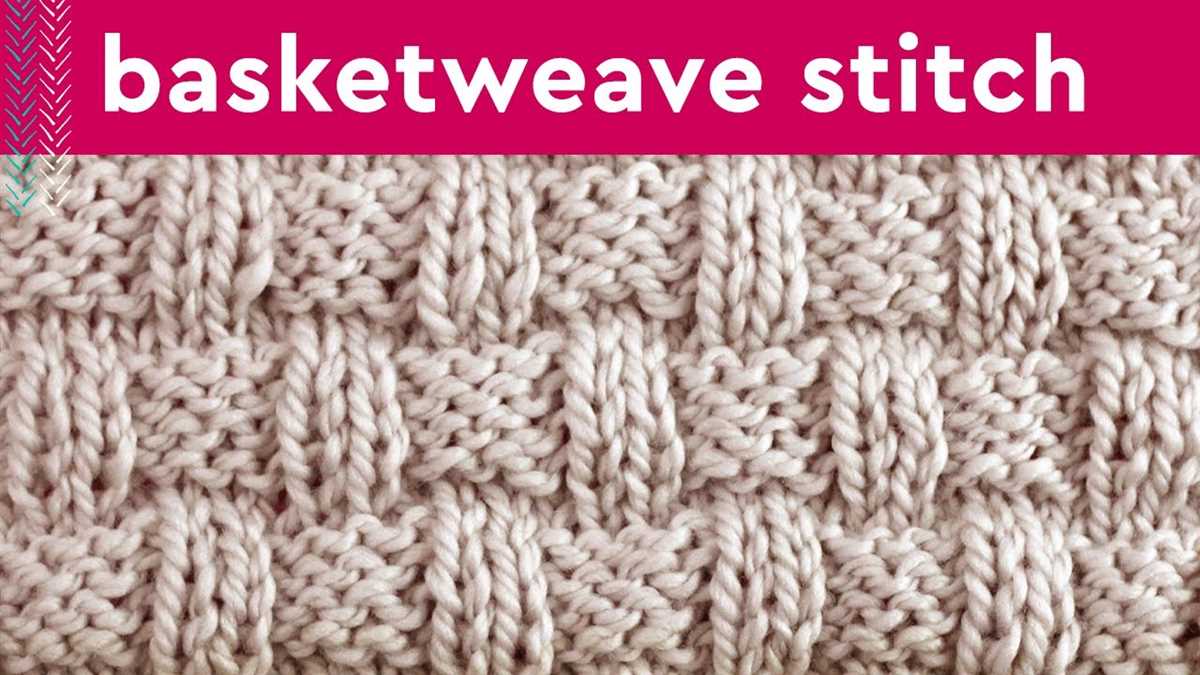
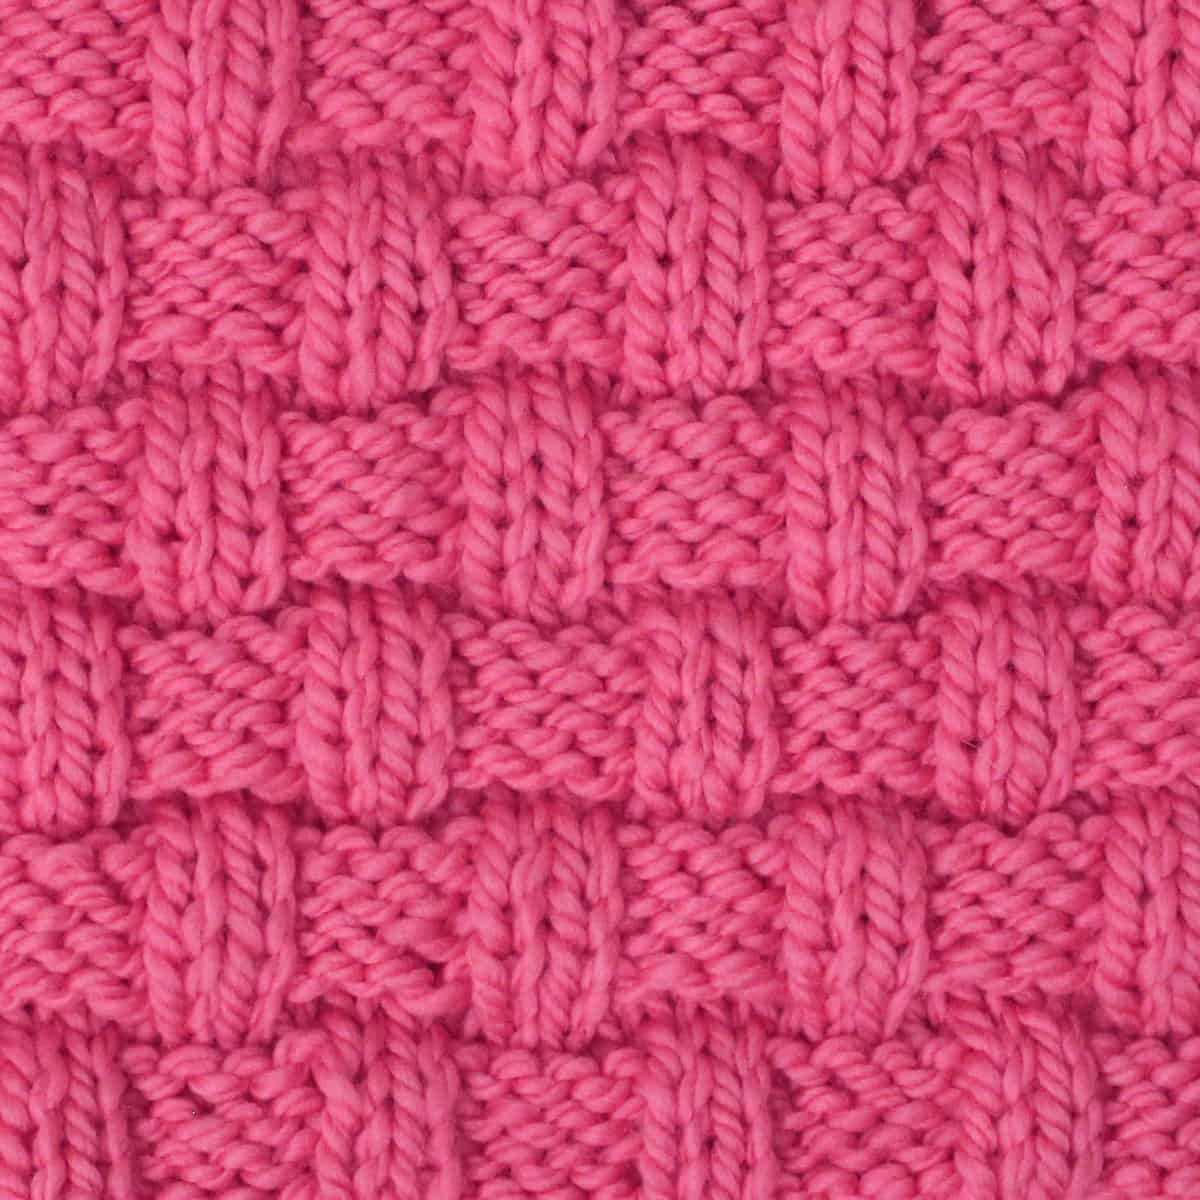
Understanding the Basket Weave Pattern
The basket weave pattern is a popular knitting technique that creates a beautiful textured fabric resembling woven baskets. It is a simple yet effective pattern that can add depth and interest to various knitting projects like scarves, blankets, and accessories.
To create the basket weave pattern, you need to have a basic understanding of knitting terms and techniques such as knit and purl stitches. The pattern works by alternating between a set number of knit and purl stitches across multiple rows, creating a pattern that resembles woven strands.
Key Steps:
- Cast on: Start by casting on an even number of stitches, depending on the desired width of your project.
- Rows 1-4: Begin the pattern by knitting the first row. The next three rows will be worked in a basic knit stitch.
- Rows 5-8: In these rows, you will start creating the basket weave texture. The pattern alternates between a set number of knit and purl stitches. For example, you can knit 4 stitches, then purl 4 stitches, and repeat this pattern until the end of the row. Repeat this pattern for the next 3 rows.
- Rows 9-12: Return to knitting all stitches for these four rows. This helps create the defined basket weave effect, as the knit stitches stand out against the purl stitches from the previous rows.
- Repeat: Continue alternating between the knit and purl rows, followed by the all-knit rows, until you reach the desired length of your project.
- Bind off: Finally, bind off your stitches to finish your basket weave pattern.
The basket weave pattern is a versatile technique that can be adapted to different knitting projects. You can experiment with different yarn weights, needle sizes, and stitch counts to create variations in the texture and density of the pattern. Whether you are a beginner or an experienced knitter, the basket weave pattern is an enjoyable and rewarding technique to add to your repertoire.
Fixing Mistakes and Common Issues
While knitting the basket weave pattern, it is common to encounter mistakes or run into issues that need to be fixed. Here are some tips on how to address these problems:
1. Dropped or Missed Stitches
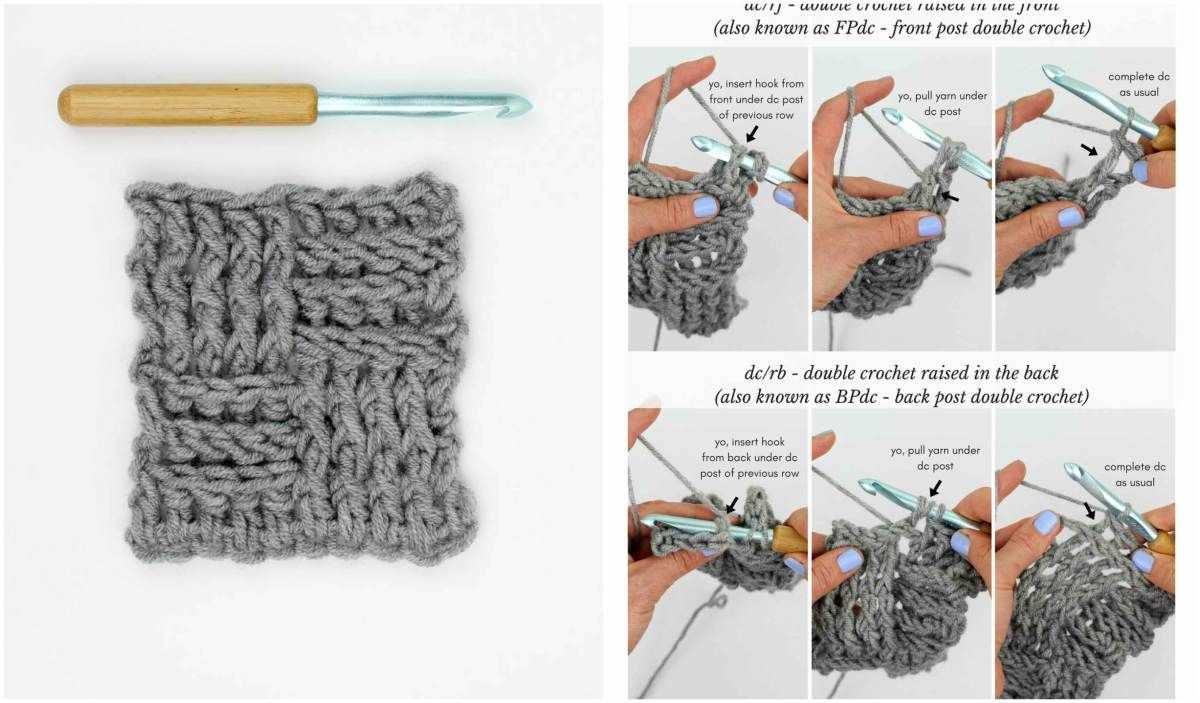
If you notice that you have dropped or missed a stitch while knitting the basket weave pattern, you can use a crochet hook or a spare knitting needle to pick up the dropped stitch. Carefully insert the crochet hook or needle from the front or back of the stitch, depending on which way the stitch is oriented, and gently pull the stitch back up onto the needle.
2. Uneven or Loose Tension
If you find that your basket weave pattern has uneven or loose tension, you can try using a smaller needle size or adjusting your knitting technique. Knitting tighter stitches can help improve tension, while using a smaller needle can result in a tighter fabric. Remember to practice consistent tension throughout your knitting.
3. Wrong Placement of Cables
Misplacing cables in a basket weave pattern can lead to a visually unappealing design. To fix this issue, carefully unravel the rows or rounds where the mistake occurred and re-knit them correctly. Use stitch markers or cable needles to help keep track of the correct placement of the cables.
4. Twisted or Crossed Stitches
If you accidentally twist or cross your stitches in the basket weave pattern, it can affect the overall look of the design. To fix this, identify the twisted or crossed stitch and carefully unravel the rows or rounds to the mistake. Then, re-knit the stitches correctly, making sure to pay attention to the pattern instructions.
5. Miscounted Rows or Rounds
If you lose track of the number of rows or rounds you have completed in the basket weave pattern, it can throw off the symmetry of the design. To fix this issue, use a stitch counter or a pen and paper to keep track of your progress. Double-check your count periodically to ensure you are following the pattern correctly.
Remember, mistakes are a part of the knitting process, and they can often be fixed with a bit of patience and care. Don’t be discouraged if you encounter an issue while knitting the basket weave pattern – take your time to correct it and continue with your project.
Adding Variations and Embellishments

Once you have mastered the basic basket weave pattern, you can start experimenting with variations and embellishments to add interest and personal flair to your knitted projects. Here are a few ideas to get you started:
1. Changing the stitch size
You can vary the size of the basket weave pattern by using different stitch sizes. For a chunkier and more textured look, try using larger needles and thicker yarn. Alternatively, for a more delicate and intricate pattern, use smaller needles and thinner yarn. Play around with different stitch sizes to achieve different effects.
2. Mixing colors
Another way to add visual interest to your basket weave pattern is by incorporating different colors. You can choose contrasting colors for a bold and eye-catching pattern, or use shades of the same color for a subtle and sophisticated look. Experiment with different color combinations to find the one that suits your style and project.
3. Adding cables or lacework
If you want to take your basket weave pattern to the next level, consider adding cables or lacework. Cables can create beautiful texture and depth, while lacework can add a delicate and feminine touch. These techniques require more advanced knitting skills, but they can elevate your knitted projects to a whole new level of complexity and beauty.
By incorporating these variations and embellishments into your basket weave pattern, you can create unique and personalized knitted items that showcase your creativity and skill. Remember to have fun and experiment with different techniques to find the ones that resonate with you.
Blocking and Finishing the Project
Once you have finished knitting the basket weave pattern, the next step is to block and finish the project. Blocking is an important process that helps to shape and give a finished look to your knitted piece. It involves gently stretching and shaping the piece to the desired dimensions and allowing it to dry in that shape. Here are the steps to properly block your basket weave knitted project:
- Soak the project: Fill a basin or sink with lukewarm water and add a little bit of wool wash or gentle detergent. Immerse the knitted piece in the water, making sure it is completely submerged. Let it soak for about 15-20 minutes to relax the fibers.
- Remove excess water: Gently squeeze out the water from the knitted piece, being careful not to wring or twist it. You can place the piece between two towels and press down to remove more water.
- Prepare blocking materials: Lay out a clean, flat surface such as a foam blocking mat or towels. Place rustproof T-pins or blocking wires along the edges of the knitted piece to keep it in place during blocking.
- Shape the project: Lay the knitted piece onto the blocking surface and use your hands to gently stretch and shape it to the desired dimensions. Pay attention to the edges and corners to ensure they are straight and even.
- Pin the piece in place: Starting from one corner, use the T-pins or blocking wires to secure the edges of the knitted piece to the blocking surface. Place pins or wires approximately every 1-2 inches to ensure even tension and straight edges.
- Allow to dry: Once the knitted piece is securely pinned in place, leave it to dry completely. This can take anywhere from a few hours to overnight, depending on the thickness of the yarn and the humidity in the room.
After the project is fully dry, carefully remove the T-pins or blocking wires. You will notice that the basket weave pattern is now more defined and the piece looks neater and more polished. You can then sew in any loose ends or trim any excess yarn. Your knitted basket weave project is now ready to be used or displayed!
Project Ideas and Inspiration
Now that you have learned how to knit the basket weave pattern, you can start thinking about all the wonderful projects you can create. The basket weave pattern adds texture and depth to any knitting project, making it perfect for a variety of items.
Here are some project ideas to inspire you:
- Blankets: Knit a cozy and warm blanket using the basket weave pattern. The texture of the pattern will make the blanket extra snuggly.
- Scarves: Create a stylish and textured scarf using the basket weave pattern. This pattern is perfect for showcasing different yarn colors and textures.
- Hats: Knit a trendy hat with the basket weave pattern. The textured stitches will add an interesting element to your hat.
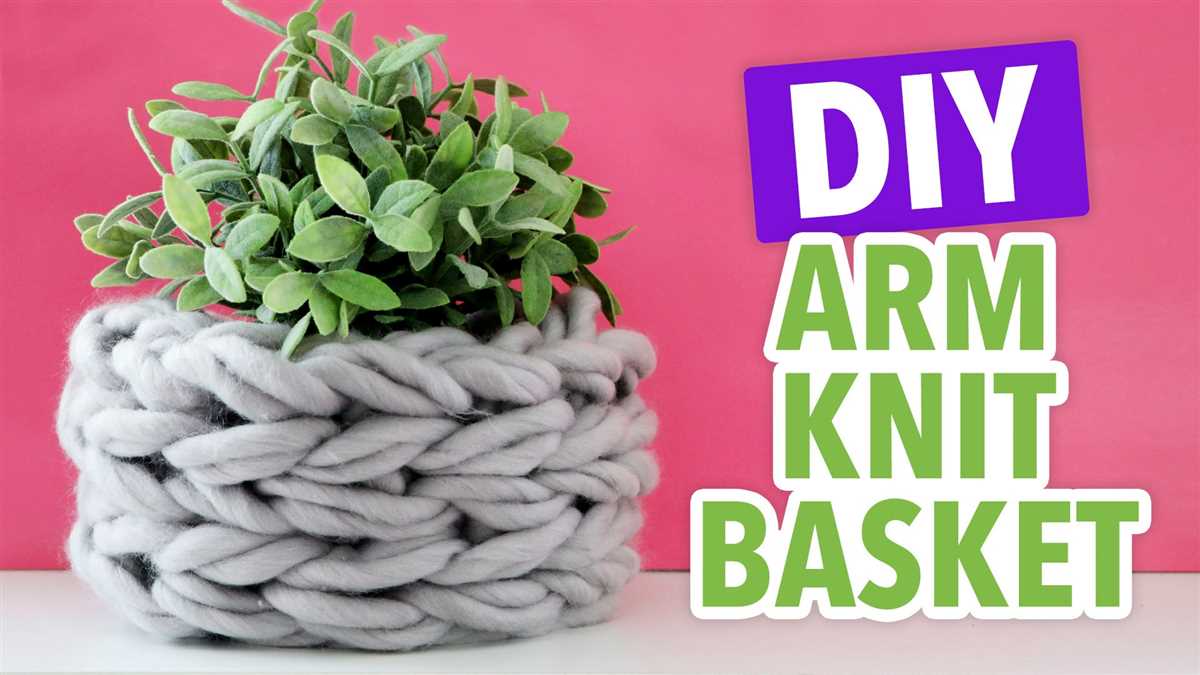
- Bags: Make a unique and sturdy bag using the basket weave pattern. The texture of the pattern will make your bag stand out.
- Pillows: Add a touch of elegance to your home decor by knitting patterned pillows using the basket weave pattern. The texture will make the pillows look luxurious.
Remember, these are just a few ideas to get you started. The basket weave pattern can be used in a wide range of knitting projects. Use your creativity and experiment with different yarns, colors, and stitch variations to create your own unique pieces.
Happy knitting!