
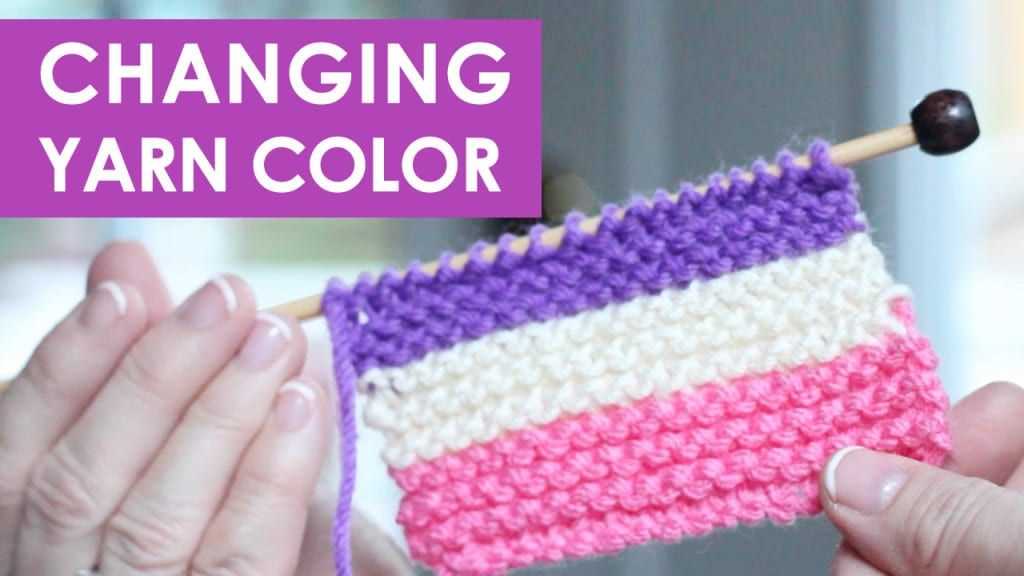
Adding different colors to your knitting project can transform it from a simple design to a work of art. Whether you want to create stripes, color blocks, or intricate patterns, learning how to change colors in knitting is an essential skill. With a few simple techniques, you can incorporate a variety of colors into your knitting projects and create stunning finished pieces.
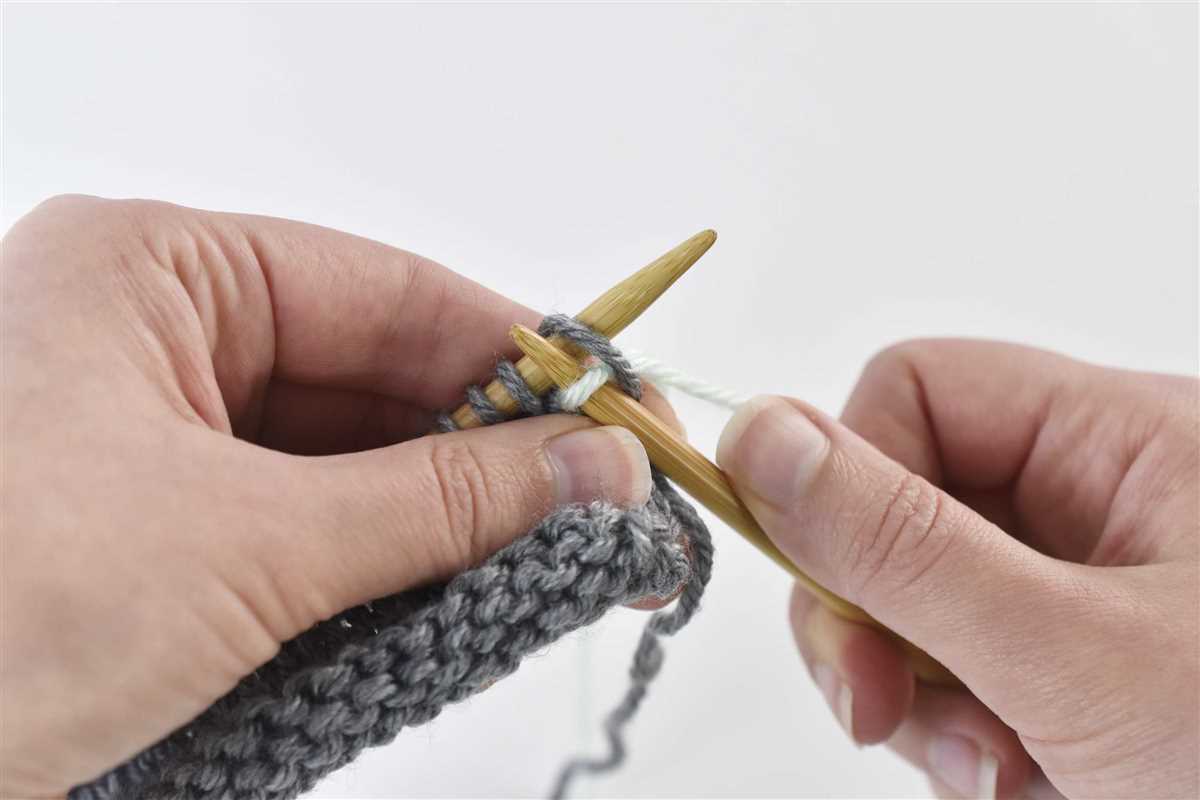
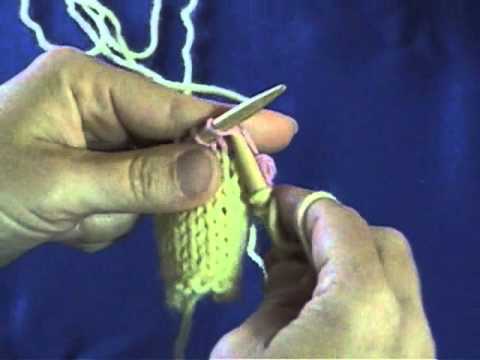
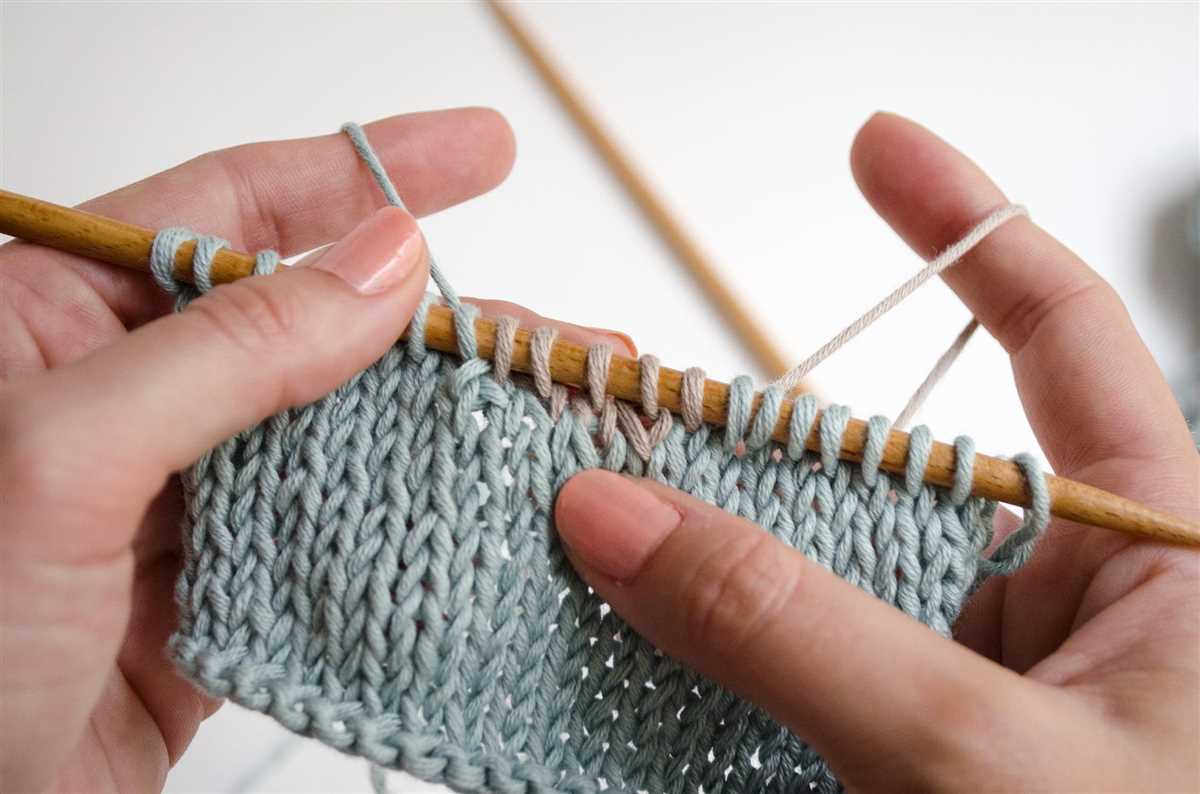
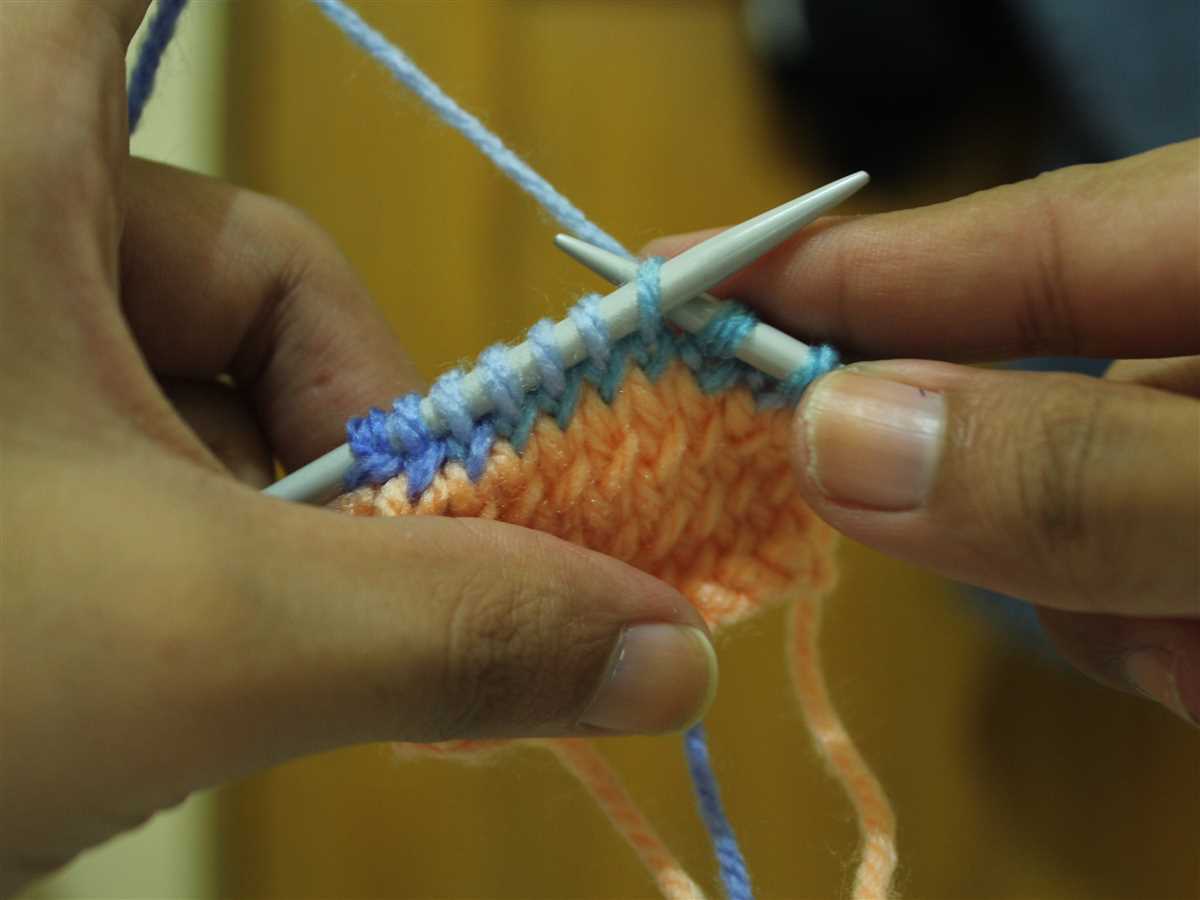
First, it’s important to understand how to join a new color of yarn when knitting. When you reach the point in your pattern where you want to change colors, start by knitting the last stitch of the old color. Then, insert the needle into the next stitch as if to knit, but instead of using the old color, drop it and pick up the new color. Use the new color yarn to complete the stitch, pulling it through the old color to create a smooth transition.
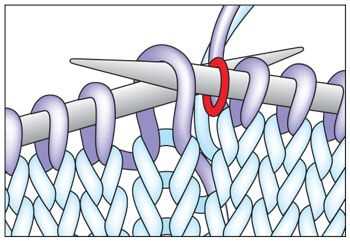
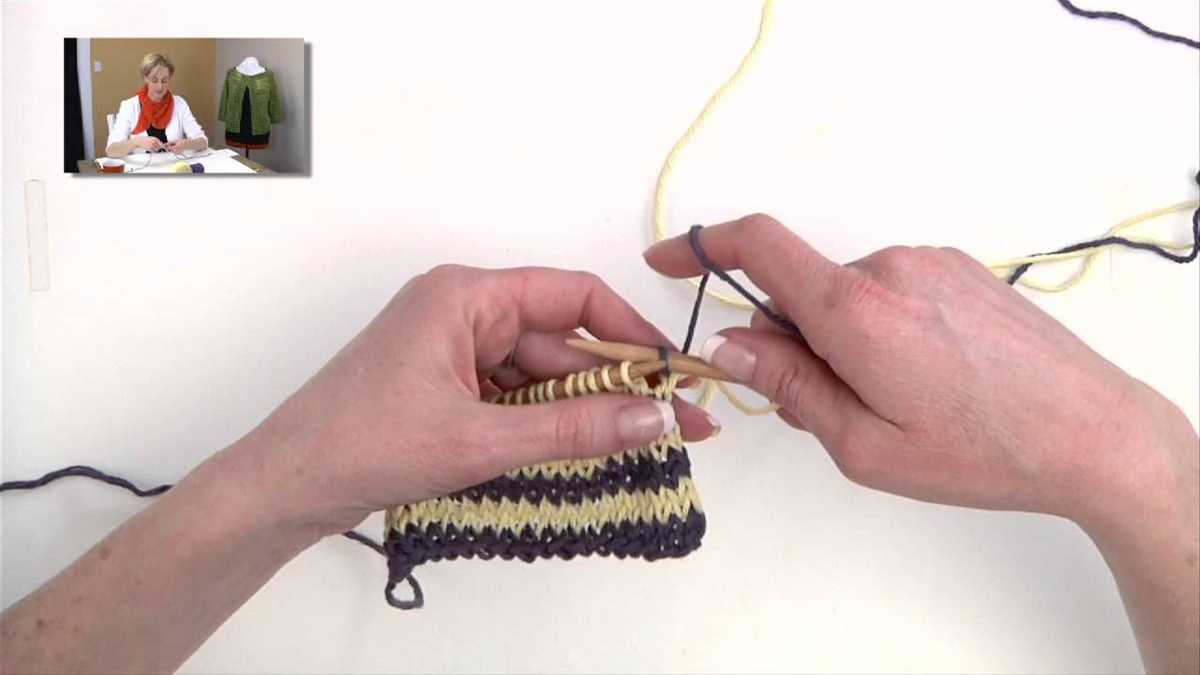
Once you’ve joined the new color, continue knitting with the new yarn. You may need to carry the unused color along the back of your work if you plan on using it again in a few rows. To do this, twist the two colors of yarn together every few stitches to prevent gaps or loose strands. This technique is especially useful for creating stripes or color blocks in your knitting.
How to Change Colors in Knitting Pattern
Changing colors in a knitting pattern can add depth and visual interest to your project. Whether you want to create stripes, a color gradient, or incorporate different hues for a specific design, knowing how to change colors correctly is essential. Here are some steps to help you navigate this technique.
Step 1: Choose your colors
Before you start knitting, decide on the colors you want to use for your project. Consider how they will harmonize or contrast with each other and ensure they will complement the overall aesthetic you are aiming for.
Step 2: Prepare your yarn
If you are switching from one color to another, ensure that you have enough of each color to complete your desired pattern. This may involve winding separate balls or preparing skeins, so you have easy access to each color when you need it.
Step 3: Start knitting with a new color
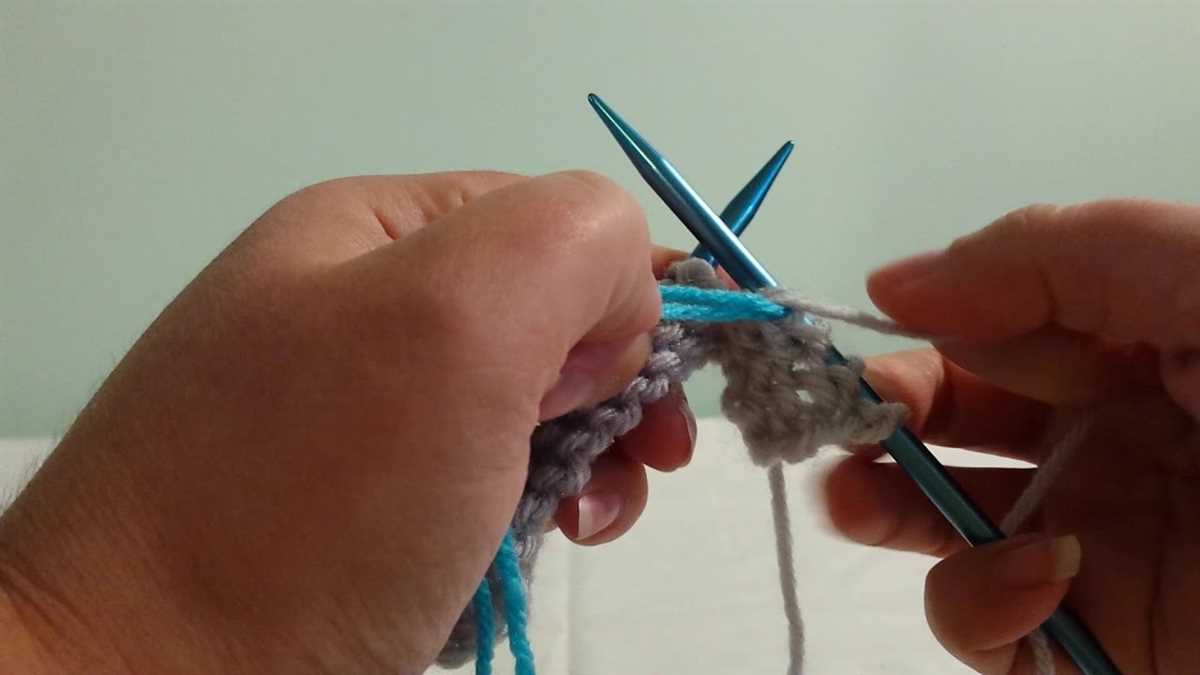
When you are ready to change colors in your knitting pattern, begin by knitting to the point where you want the color change to occur. Then, simply drop the current color’s yarn and pick up the new color. Leave a long enough tail of the new color yarn so you can weave it in later.
Step 4: Secure the yarn ends
To ensure your color change is secure, you can twist the two strands of yarn together for a few stitches. This will prevent any gaps from forming between the color changes. Alternatively, you can simply start knitting with the new color, securing the ends later.
Step 5: Repeat as necessary
If your knitting pattern requires multiple color changes, continue following the same steps for each transition. Make sure to keep track of the color changes in your pattern or notes, so you don’t forget where and when to switch colors.
Step 6: Weaving in the ends
Once you have completed your project, weave in any loose ends from the color changes. To do this, use a tapestry needle to thread the yarn tails through the stitches on the wrong side of the fabric. This will ensure your color changes are secure and concealed.
By following these steps, you can confidently change colors in your knitting pattern and create beautiful, colorful designs. Don’t be afraid to experiment with different colors and techniques to achieve the desired effect in your projects.
Choosing the Right Yarn Colors
When it comes to knitting, selecting the right yarn colors can make a significant difference in the overall look and feel of your project. The colors you choose can help enhance the design, highlight specific details, or create a particular mood. Here are some factors to consider when choosing yarn colors for your knitting pattern:
1. Project type and purpose
Consider the type of project you are working on and its purpose. If you are knitting a baby blanket, you might opt for soft pastel colors or vibrant shades to create a playful and cheerful atmosphere. For a more sophisticated project like a sweater or a shawl, you may want to choose neutral or subdued colors for an elegant and timeless look.
2. Personal preference

Trust your instincts and go with colors that you love. Knitting is a creative endeavor, and your color choices should reflect your personal style and taste. If you are drawn to bold and vibrant colors, don’t be afraid to incorporate them into your knitting pattern. Similarly, if you prefer muted or monochromatic hues, embrace those choices and create a soothing and harmonious color palette.
3. Color theory and combination
Understanding the basics of color theory can help you create visually appealing combinations. Colors can be classified into primary (red, yellow, blue), secondary (orange, green, purple), and tertiary (the hues in between). You can use complementary colors (opposites on the color wheel) to create contrast or analogous colors (neighboring on the color wheel) to achieve harmony. Experimenting with different color combinations can result in stunning and unique knitting patterns.
4. Pattern and stitch details
Consider the pattern and stitch details in your knitting project. If your pattern has intricate stitch work or textured sections, it may be best to choose solid or subtle colors that won’t distract from the design. On the other hand, if the pattern is simple, you could opt for variegated or self-striping yarn to add visual interest to the finished piece.
5. Accessibility and availability
Lastly, consider the accessibility and availability of yarn colors. Some unique or hand-dyed yarns may not be readily available, especially if you are on a budget or have limited access to certain yarn brands. It’s always a good idea to check the color options and availability before starting your project to ensure you can easily find the yarn colors you desire.
Choosing the right yarn colors for your knitting project is an exciting part of the creative process. By considering the project type, personal preference, color theory, pattern details, and accessibility, you can create beautiful and harmonious knitting patterns that reflect your unique style and vision.
Understanding Color Charts
Color charts are an essential tool for knitters who want to incorporate different colors into their patterns. These charts provide a visual representation of how each color should be used and where it should be placed within the pattern. By understanding how to read and interpret color charts, knitters can create stunning and intricate designs.
One of the key elements of a color chart is the color key, which provides a list of the different colors used in the pattern. Each color is typically assigned a symbol or abbreviation, making it easy to follow the chart and know which color to use for each stitch. It’s important to refer to the color key and the symbols throughout the pattern to ensure that the correct colors are being used.
Color charts are often presented in a grid format, with each square representing one stitch. The squares are filled with the corresponding symbol or abbreviation for the color to be used in that stitch. By following the chart row by row, knitters can create intricate color patterns and motifs within their knitting projects.
When using a color chart, it’s important to keep track of your progress by marking off each row as you complete it. This helps to avoid mistakes and ensure that you stay on track with the pattern. It can also be helpful to use a highlighter or pen to mark the specific squares that need to be worked in each color.
Overall, understanding color charts is essential for knitters who want to incorporate multiple colors into their projects. By following the color key and the chart itself, knitters can create beautiful and intricate designs that make their knitting projects truly unique.
Preparing Your Yarn for Color Changes
When knitting a pattern that requires color changes, it is important to prepare your yarn beforehand to ensure smooth transitions and neat results. Here are some tips to help you get your yarn ready:
1. Identify the color change points
Read through your knitting pattern and identify the points where color changes are indicated. This will give you an idea of how many color changes you will be making and where they will occur in your project.
2. Wind separate balls or bobbins of yarn
If your pattern requires multiple colors, wind separate balls or bobbins of each color before starting your project. This will make it easier to switch between colors and minimize tangling or twisting of the yarn.
3. Secure yarn ends
Before making a color change, secure the loose ends of the yarn from the previous color. This can be done by tying a simple knot or using a small safety pin to hold the yarn in place. This will prevent the yarn from unraveling and ensure a clean color transition.
4. Plan for yarn carryovers
If you are carrying a color across a few stitches or rows, plan ahead to make sure the yarn is carried neatly on the wrong side of your work. You can twist the two yarn colors together at the back of your knitting to prevent long floats and tangles.
5. Practice the color change technique
Before starting your actual project, it can be helpful to practice the color change technique on a small swatch. This will allow you to become familiar with the pattern’s color changes and ensure you are comfortable executing them in your main project.
By following these preparatory steps, you can ensure that your color changes in knitting patterns are executed smoothly and with professional-looking results.
Knitting Techniques for Changing Colors
When knitting a pattern that requires color changes, there are several techniques you can use to achieve clean and seamless transitions between colors. Here are some commonly used methods:
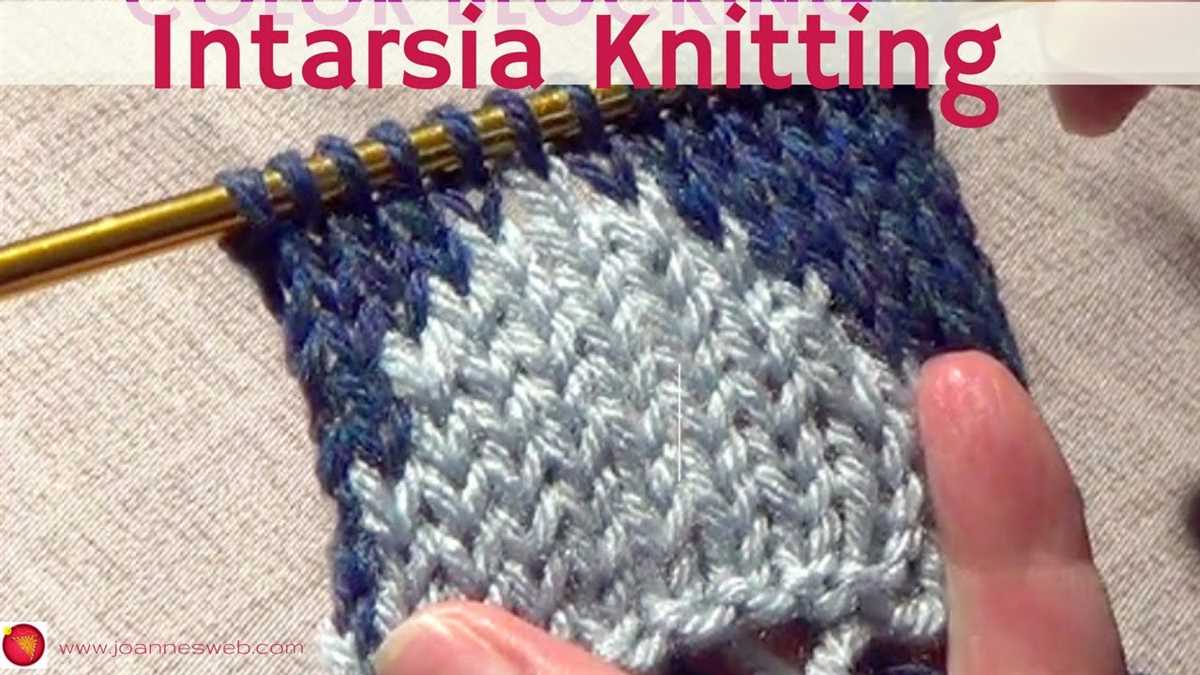
1. Intarsia Technique

The Intarsia technique is ideal for creating large blocks of color in your knitting. To use this technique, you need to have separate balls or bobbins of each color you want to use. When changing colors, simply drop the old color and start knitting with the new one, making sure to twist the old and new yarns around each other to avoid gaps or holes. This technique is often used in projects like blankets or sweaters with large color sections.
2. Fair Isle Technique
The Fair Isle technique, also known as stranded knitting, involves carrying both colors of yarn across the back of the work. When changing colors, you pick up the new color from under the old one, creating floats across the back of the work. Make sure not to carry the floats too tightly, as it can cause puckering in your fabric. This technique is often used in projects with smaller color motifs, like hats or mittens.
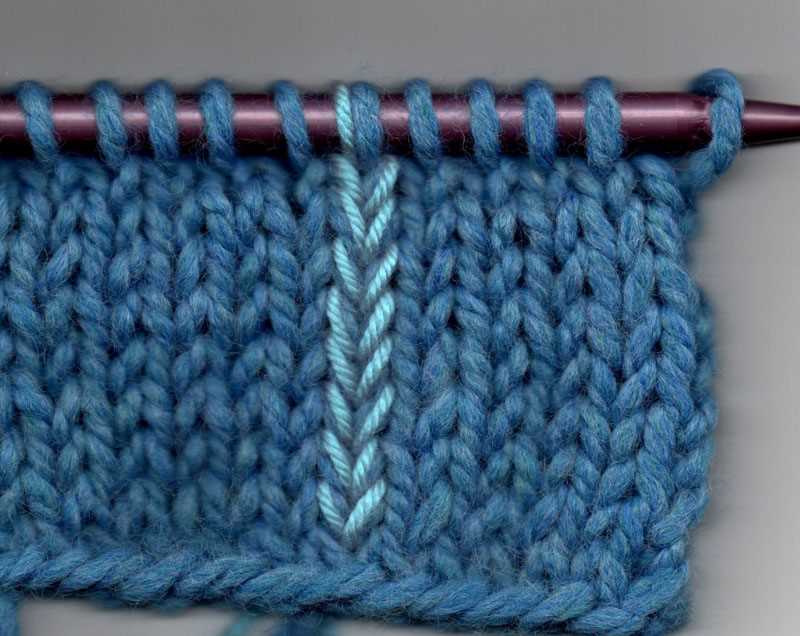
3. Duplicate Stitch
If you want to add small color details or designs to your knitting, the duplicate stitch technique is a great option. With this technique, you use a contrasting yarn to embroider over the existing stitches to create the desired color pattern. This allows you to add color to your knitting without having to change yarns. It’s a great technique to use for adding initials, hearts, or other small motifs to your projects.
4. Slip Stitch Technique
The slip stitch technique is a simple yet effective way to add colorful texture to your knitting. With this technique, you slip stitches from the previous row without knitting them and then knit the next row with the new color. This creates a nice contrast and adds depth to your fabric. It’s often used in projects like scarves or blankets to create interesting color patterns.
5. Gradient Technique
If you want to create a gradual color transition in your knitting, the gradient technique is a great choice. This technique involves using yarns in varying shades of the same color and gradually changing from one shade to the next. You can achieve this by creating a separate ball or bobbin for each shade and switching to the next shade at regular intervals. This technique is often used in projects like shawls or sweaters to create a beautiful ombre effect.
By using these techniques, you can easily change colors in your knitting patterns and create stunning projects with vibrant colors and seamless transitions. Experiment with different techniques to find the one that works best for your project and enjoy the creative process of color knitting!
Intarsia: Creating Color Blocks
Intarsia is a technique in knitting that involves using multiple colors to create blocks of color in a design. Unlike stranded knitting, where all the colors are carried along the back of the work, intarsia requires individual bobbins or balls of yarn for each color block.
To create color blocks in intarsia, you will need to follow a few steps. First, you will need to determine where in your knitting pattern you want to create the color blocks. This can be a specific design element or a section of the pattern where you want to add some visual interest.
Next, you will need to separate the sections of the pattern that will be different colors. This can be done by placing stitch markers or by simply keeping track of where the color changes will occur.
Once you have identified the sections, you will need to create separate bobbins or balls of yarn for each color block. To do this, you will need to wind small amounts of each color onto separate bobbins or balls, ensuring that each color block has enough yarn to complete the desired number of rows.
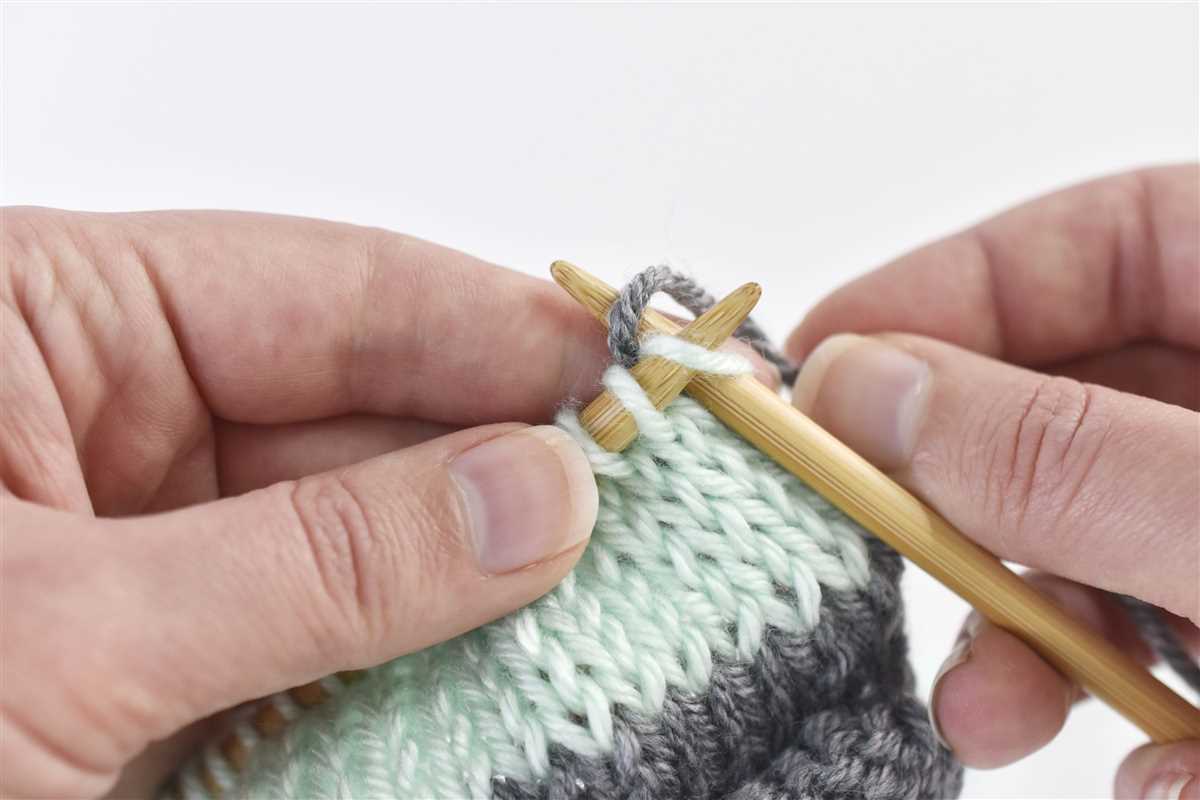
When knitting with intarsia, you will use one color at a time, knitting across the row until you reach the end of the color block. At this point, you will drop the current color and pick up the next color, making sure to twist the two colors together to prevent any holes or gaps in your work.
To keep your color blocks neat and tidy, it is important to twist the yarns together at the back of the work when changing colors. This will create a seamless transition between the different color blocks.
By using the intarsia technique, you can create vibrant and intricate color patterns in your knitting. Whether you want to create a bold geometric design or add a pop of color to a plain garment, intarsia is a versatile technique that allows you to explore your creativity.
Fair Isle: Adding Colorwork Designs
Knitting with colorwork designs can add a beautiful and vibrant touch to any project. Fair Isle, a traditional knitting technique originating from the Fair Isle region in Scotland, is one popular method of adding colorwork designs. In Fair Isle knitting, multiple colors are used in a single row or round to create intricate patterns.
Choosing Colors: When adding colorwork designs in Fair Isle knitting, it is important to choose colors that work well together. Typically, one color is used as the main color or background, while several other colors are used for the design. Contrasting colors help the design stand out, while complementary colors create a harmonious effect. Experimenting with different color combinations can yield unique and stunning results.
Stranding and Tension: In Fair Isle knitting, two or more colors are carried along the row with strands or floats of yarn on the wrong side of the work. These strands should be kept at an even tension to prevent puckering or distortion of the fabric. It’s important to avoid pulling the yarn too tight or leaving it too loose. Practice and experience will help you find the right balance.
Reading Colorwork Charts: Fair Isle patterns are typically charted, with each square representing a stitch and a different color indicating which yarn to use. By following the chart, you can create intricate and detailed designs. It’s important to read the chart from right to left for right-handed knitters and from left to right for left-handed knitters to maintain the correct pattern. Pay attention to any repeats or motifs in the chart to ensure an accurate and consistent design.
Techniques for Changing Colors: When changing colors in Fair Isle knitting, there are different techniques you can use. Some knitters prefer to drop one color and pick up the next, while others prefer to carry both colors along the row. Experiment with different methods to find what works best for you. It’s important to twist the yarns together at the color change to avoid creating gaps or holes in the fabric.
Practice Makes Perfect: Adding colorwork designs in Fair Isle knitting may require practice to master the tension, reading charts, and changing colors seamlessly. Start with simple patterns and gradually progress to more complex designs. With time and practice, you’ll be able to create beautiful colorwork projects that showcase your knitting skills.
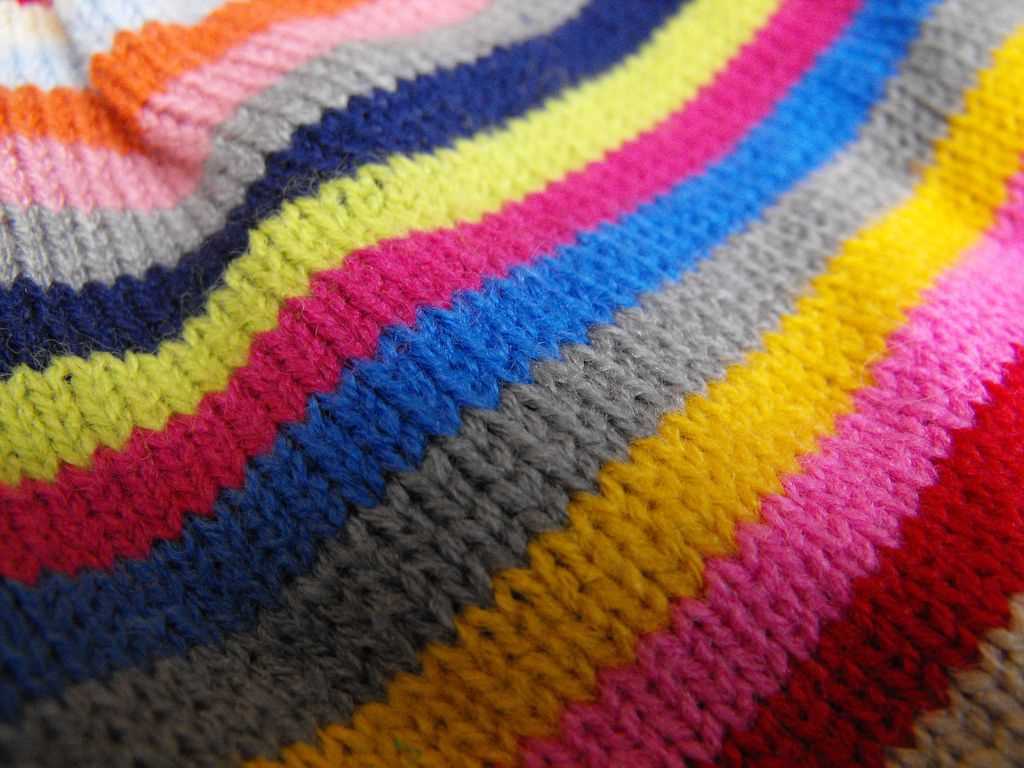
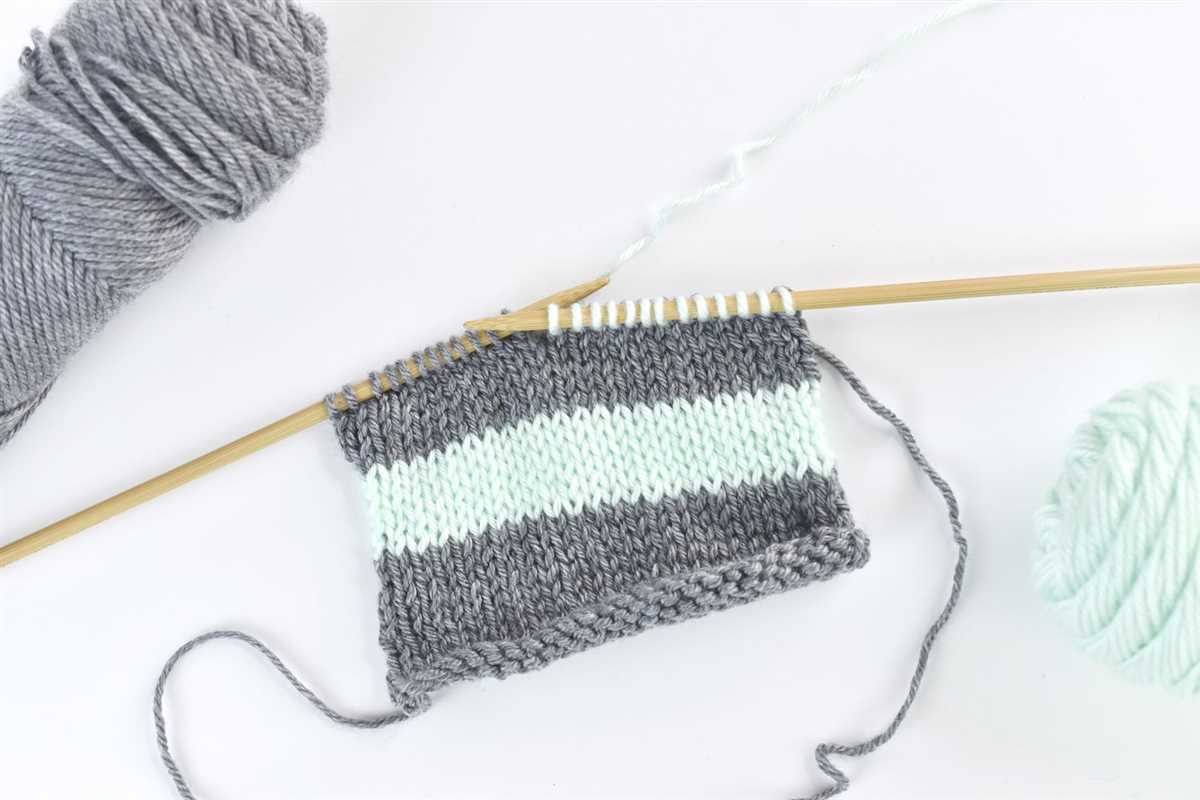
Slipped Stitch: Creating Color Stripes
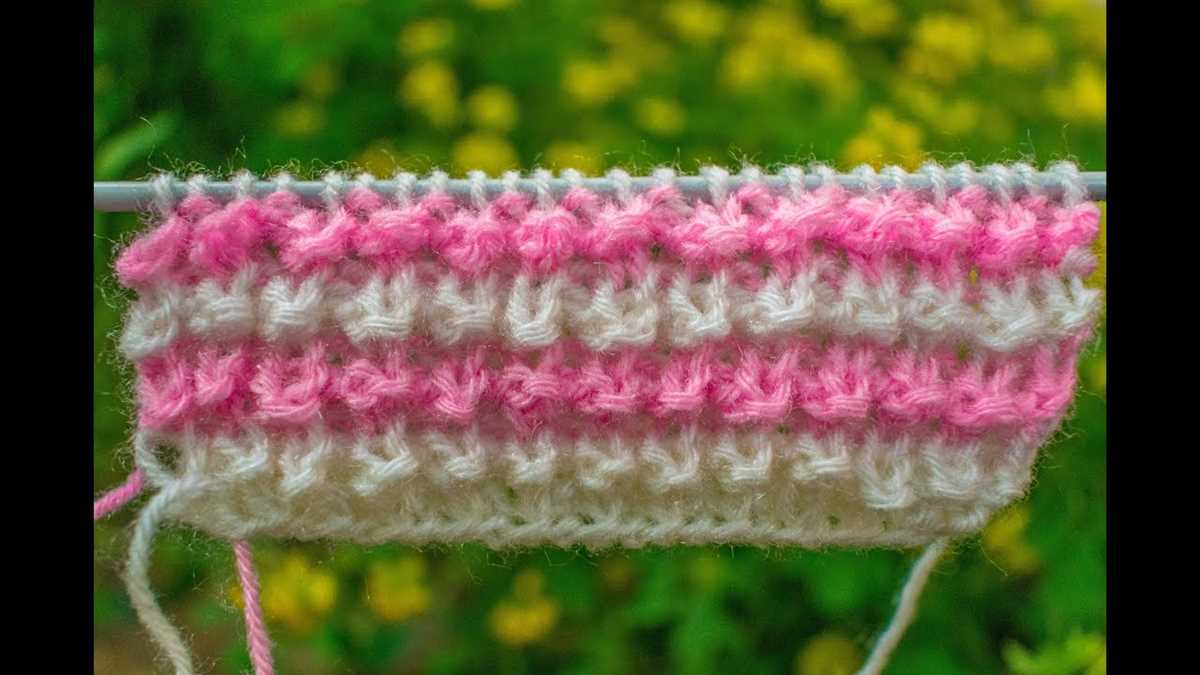
One popular technique for creating color stripes in knitting is the slipped stitch method. Slipped stitches are a simple and effective way to introduce different colors into your knitting pattern, creating clean and distinct stripes.
To use the slipped stitch method, start by knitting a few rows of your main color. When you’re ready to introduce a new color, simply slip the first stitch of the new row onto the right needle without knitting it. Then, knit the rest of the row as usual with the new color. When you come back to that slipped stitch on the next row, purl it with the new color. This will create a neat and visually appealing edge for your color stripes.
Here’s an example of using the slipped stitch method to create color stripes:
- Knit 4 rows with Color A.
- On the 5th row, slip the first stitch onto the right needle without knitting it.
- Knit the rest of the row with Color B.
- On the 6th row, purl the slipped stitch with Color B.
- Continue knitting in this manner, alternating colors every row.
The slipped stitch method can be used with any type of knitting pattern, whether you’re working on a simple garter stitch scarf or a complex fair isle sweater. It’s a versatile technique that allows you to easily incorporate multiple colors into your project without the need for complicated colorwork techniques.
Experiment with different color combinations and stripe widths to create a unique and personalized look. You can also combine the slipped stitch method with other colorwork techniques, such as stranded knitting or intarsia, to create even more intricate designs. With a little practice, you’ll be able to confidently create beautiful and eye-catching color stripes in your knitting projects.
Using Duplicate Stitch for Color Accents
The duplicate stitch is a great technique to add color accents to your knitting projects. Whether you want to create a bold design or simply add a pop of color, the duplicate stitch allows you to easily incorporate new shades into your pattern.
To use the duplicate stitch, you will need a tapestry needle and a length of yarn in the color you want to add. Start by identifying the stitches where you want to add the new color. Thread your needle with the yarn, bringing it up through the bottom of the first stitch.
Next, insert the needle into the first stitch above, bringing it out through the top of the stitch. Make sure to keep the tension of the stitches consistent with the rest of your knitting. Repeat this process for each stitch you want to change color, following the pattern or design you have in mind.
The duplicate stitch allows you to experiment with different hues and shades without the need for complicated colorwork techniques. It is a versatile method that can be used to add small details or completely transform the look of your project. With a little practice, you can create stunning color accents and make your knitting truly unique.
Joining Yarn for Color Changes
When working on a knitting project that involves color changes, it’s important to know how to join yarn in order to seamlessly transition between colors. Here are some techniques to help you achieve clean and neat color changes:
1. Spit Splicing: This method is ideal for joining yarn of the same color or similar shades. Start by unraveling the old yarn and the new yarn for about 6 inches. Overlap the two strands, wet your fingers, and rub them together to create friction. The heat and moisture will cause the fibers to fuse together, creating a secure join. Trim any excess yarn, and continue knitting with the new color.
2. Russian Join: This technique is perfect for joining yarn of different colors or materials. Thread the new yarn through a tapestry needle and weave it through the plies of the old yarn for a few inches. Repeat this process with the old yarn through the plies of the new yarn. Pull tight to secure the join and trim any excess yarn. This method creates a smooth transition between colors.
3. Overlapping: If you’re working with thicker yarn or a pattern that calls for a more noticeable color change, overlapping the yarns can create an intentional visible seam. To do this, knit the last stitch with both colors of yarn held together. In the next row, drop the old yarn and continue knitting with the new color. This method provides a clear distinction between colors.
4. Weaving in Ends: Regardless of the joining technique you choose, it’s crucial to properly weave in the yarn ends to secure the color change. Use a tapestry needle to weave the ends into the stitches of your work. This will ensure that the color change remains secure and doesn’t unravel over time.
By using these techniques to join yarn for color changes, you can achieve professional-looking knitting projects with smooth and seamless transitions between colors.
Securing Yarn Ends for Color Changes
When working with different colors in a knitting pattern, it’s important to secure the ends of your yarn to prevent them from unraveling or peeping through the stitches. By properly securing yarn ends, you can create a neat and professional finish to your color changes.
Weaving in the ends: One common method to secure yarn ends is by weaving them into the back of the work. After completing a color change, leave a long tail of yarn and use a tapestry needle to weave the end through the stitches on the wrong side of the fabric. Make sure to weave the yarn in a zigzag pattern to prevent it from coming loose. Once the end is woven in, trim any excess yarn.
Double-knotting: Another technique to secure yarn ends is by double-knotting them. This method is particularly useful when working with thick or textured yarns. After completing a color change, leave a short tail of yarn and tie a tight double knot close to the base of the last stitch. Trim any excess yarn, leaving a small tail. The double-knot will prevent the yarn from unraveling and ensure that it stays securely in place.
Using a Russian join: The Russian join is a unique method that allows you to seamlessly join yarns together, eliminating the need for weaving in ends. To use this technique for color changes, untwist a small section of each yarn color and overlap them. Twist the strands together tightly, creating a smooth join. Continue knitting with the newly joined yarn, ensuring that the join is securely in place. This method is especially useful when working with fine or delicate yarns.
By using these techniques to secure yarn ends for color changes, you can create clean and polished knitting projects. Whether you choose to weave in the ends, double-knot, or use a Russian join, the goal is to ensure that your color changes are secure and that the yarn ends do not unravel over time.
Blocking and Finishing with Color Changes
Once you have completed your knitting project with color changes, it is important to properly block and finish it to give it a polished and professional look. Blocking helps to even out the stitches and shape the garment, while finishing adds those final touches that really make your project shine. Here are some steps to follow:
1. Blocking
Blocking can be done in a few different ways, depending on the fiber content of your yarn and your personal preferences. Here are two common methods:
- Wet blocking: Fill a sink or basin with cool water and a small amount of gentle detergent. Immerse your knitting project in the water, gently squeezing it to ensure that all the fibers are thoroughly saturated. Let it soak for about 20 minutes, then carefully remove it from the water and squeeze out the excess moisture. Lay the project flat on a clean towel, gently shaping it to the desired size and dimensions. Allow it to air dry completely before moving on to finishing.
- Steam blocking: Set up a steam iron or garment steamer according to the manufacturer’s instructions. Hover the iron or steamer about an inch above the surface of your knitting project, allowing the steam to penetrate the fibers. Gently reshape the project as needed while applying the steam. Be careful not to press the iron or steamer directly onto the knitting, as it can flatten the stitches. Once the project is evenly steamed, allow it to dry completely before proceeding with finishing.
2. Finishing
Finishing touches can really elevate your knitting project. Here are a few ideas for incorporating color changes into your finishing:
- Seaming: Use a contrasting color of yarn to sew the seams of your project together. This can create a striking visual effect and add dimension to the finished piece.
- Embroidery: Enhance the color changes in your knitting by adding embroidered details in coordinating or contrasting colors. This can be done using simple stitches like straight stitches, French knots, or satin stitches.
- Trimming: Add a border or edging in a different color to frame your project and give it a finished look. This can be done using a different yarn or by picking up stitches along the edges and knitting a few rows in a contrasting color.
Remember to block and finish your knitting project with color changes carefully, as these final steps can make a big difference in the overall appearance and durability of your finished piece. Take your time, follow the instructions for your specific yarn and pattern, and enjoy the process of creating something unique!