
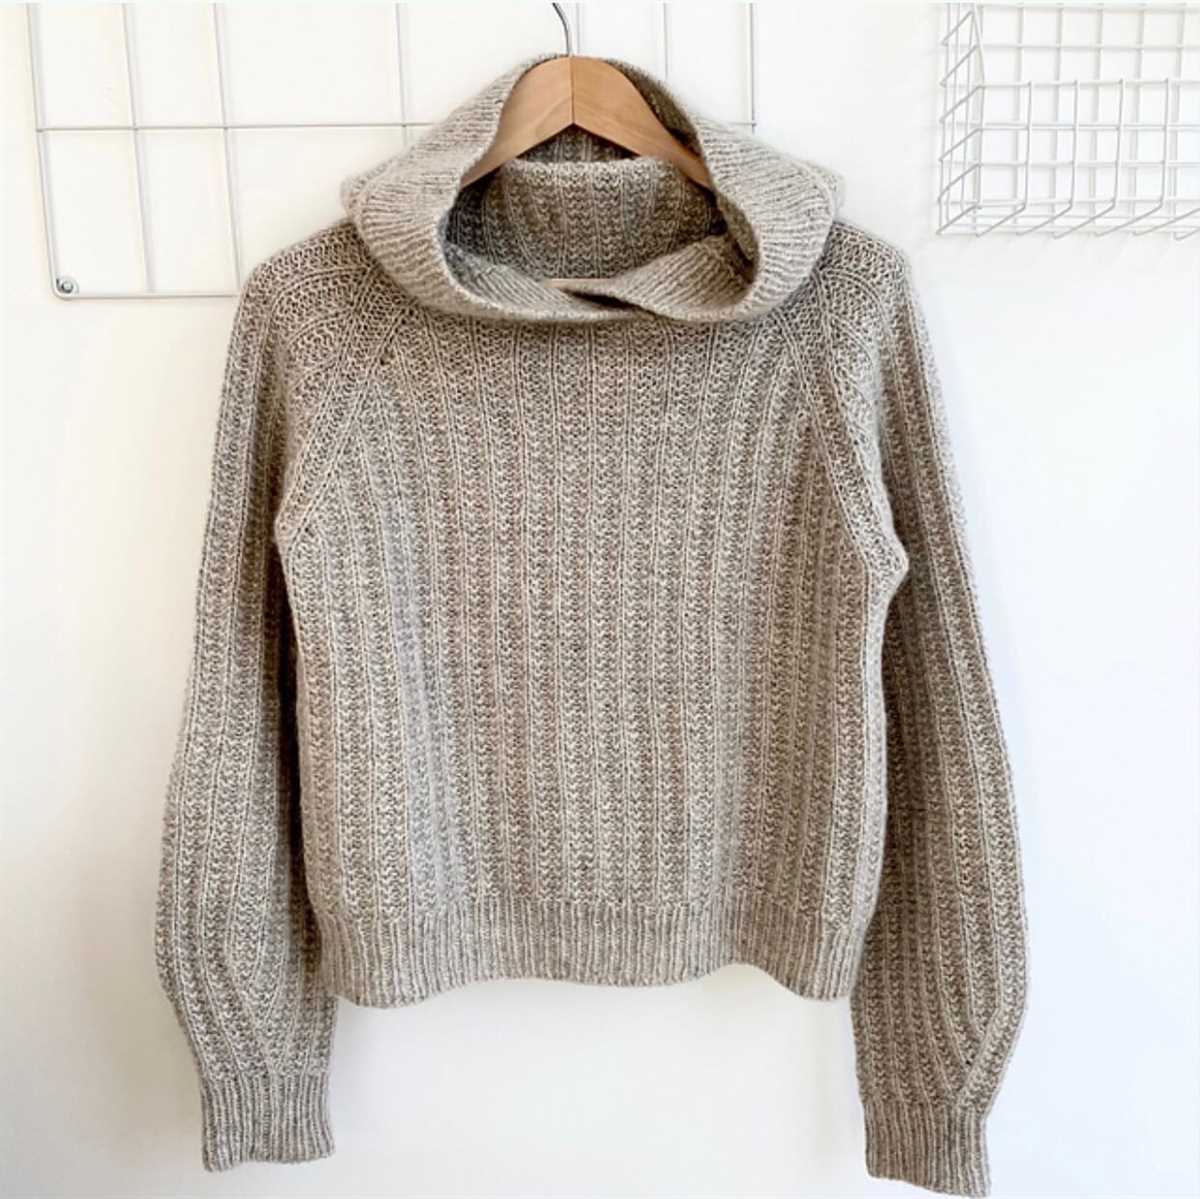
If you’re a fan of cozy and comfortable clothing, then a hoodie sweater is the perfect addition to your wardrobe. Whether you’re lounging at home or heading out for a casual day, a hoodie sweater will keep you warm and stylish. Plus, with its knit design, you can customize the sweater to fit your style and preferences.
Knitting your own hoodie sweater may seem like a daunting task, but with the right pattern and some basic knitting skills, you’ll be able to create a one-of-a-kind piece that you can be proud of. In this article, we’ll provide you with a step-by-step knitting pattern for a hoodie sweater, so you can get started on your knitting project.
First, you’ll need to gather your materials. You’ll need a pair of knitting needles, preferably in a size that matches the gauge of the pattern. You’ll also need some yarn in your desired color and weight, as well as a few stitch markers and a tapestry needle. Once you have your materials ready, you can begin knitting your hoodie sweater.
Hoodie Sweater Knitting Pattern
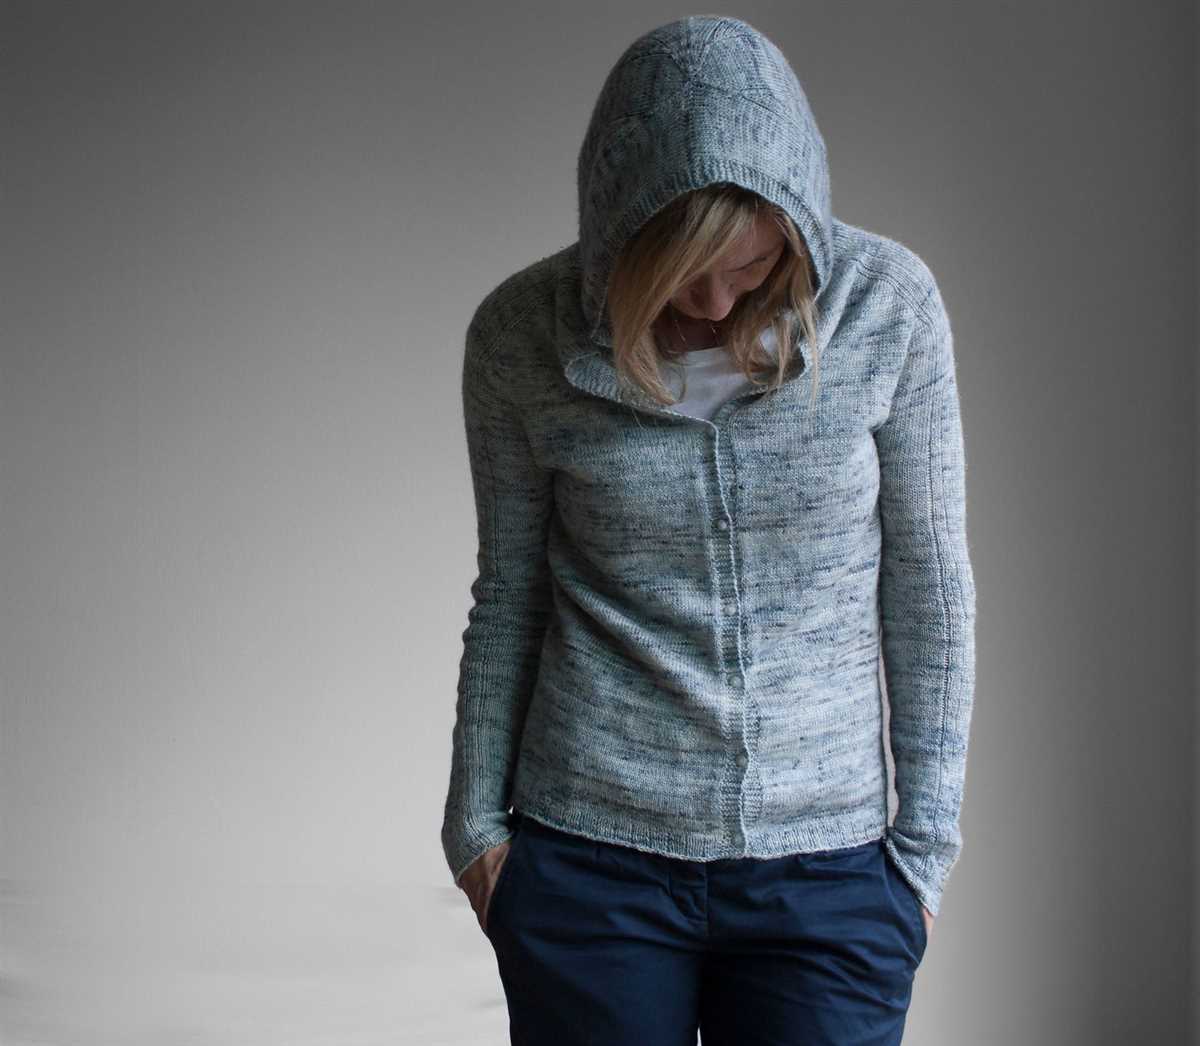
If you are looking for a cozy and stylish addition to your winter wardrobe, a hoodie sweater is a perfect choice. Knitting your own hoodie sweater allows you to customize the fit and design, making it a truly one-of-a-kind piece. Whether you are a beginner or an experienced knitter, there are many patterns available that cater to all skill levels.
Materials:
- Yarn of your choice (preferably bulky weight or a yarn suitable for sweaters)
- Knitting needles (size will vary depending on the pattern)
- Circular needles (optional, but helpful for knitting in the round)
- Stitch markers
- Tapestry needle
- Scissors
Pattern:
- Start by selecting a knitting pattern that suits your style and skill level. There are various websites and books available that offer hoodie sweater patterns.
- Once you have chosen your pattern, gather all the necessary materials.
- Read through the pattern carefully and make sure you understand all the instructions before you begin.
- Cast on the required number of stitches using your chosen yarn and needles. Make sure to follow the pattern’s gauge instructions to achieve the correct size.
- Begin knitting according to the pattern’s instructions. This may include working in different stitch patterns, shaping the sleeves, and creating the hood.
- Continue following the pattern until you have completed all the required sections. Remember to count your stitches regularly to ensure accuracy.
- Once you have finished knitting, weave in any loose ends and block your sweater to give it a professional finish.
- Try on your hoodie sweater and make any necessary adjustments to the fit.
- Enjoy your new cozy and fashionable hoodie sweater!
Knitting a hoodie sweater is a rewarding project that allows you to showcase your creativity and personal style. With the right pattern and materials, you can create a garment that is not only warm and comfortable but also a true reflection of your knitting skills. So grab your needles and start knitting your very own hoodie sweater today!
History of Hoodie Sweaters
Hoodie sweaters have become a staple in modern fashion, but their origins can be traced back to the early 20th century. The term “hoodie” refers to a type of sweater or sweatshirt that includes a hood attached to the garment. This practical design feature has roots in the working class and athletic communities, where hoodies were originally worn for protection and warmth.
The hoodie sweater as we know it today first gained popularity in the 1930s, when Champion Products introduced the first mass-produced hooded sweatshirt. The garment was initially marketed to laborers working in cold environments, such as dockworkers and loggers. The hood provided an extra layer of insulation for the head and neck, making it ideal for outdoor work.
Evolution of the Hoodie
As the 20th century progressed, the hoodie sweater evolved from a practical workwear item to a symbol of rebellion and counterculture. In the 1970s and 1980s, hoodies became associated with streetwear and urban fashion, often donned by skateboarders, graffiti artists, and hip-hop musicians. The hoodie’s anonymity and casual style made it a preferred choice for those who wanted to express their individuality and nonconformity.
By the turn of the millennium, the hoodie had cemented its place in mainstream fashion. High-end designers began incorporating hoodies into their collections, elevating the garment to a luxury status symbol. Today, hoodies are worn by people of all ages and backgrounds, serving as a versatile and comfortable piece of clothing for both casual and athletic wear.
Conclusion
The history of hoodie sweaters is one of functional beginnings that transformed into a cultural icon. From its origins in the working-class and athletic communities to its association with rebellion and fashion, the hoodie has proven its lasting appeal. Whether worn for practical purposes or as a fashion statement, the hoodie continues to be a beloved wardrobe staple for many.
Importance of Choosing the Right Yarn
The choice of yarn is a crucial aspect when it comes to knitting a hoodie sweater. The yarn selected not only affects the final look and feel of the garment, but also its durability and comfort. Therefore, it is important to carefully consider the characteristics of different yarns before starting the knitting project.
1. Fiber Content: Different fibers have distinct properties that can greatly impact the overall performance of the sweater. For instance, natural fibers like wool provide excellent insulation and warmth, while cotton yarns offer breathability and softness. Synthetic fibers, such as acrylic or nylon, are often chosen for their durability and easy care. Make sure to choose a yarn that suits the desired functionality and aesthetic of the hoodie sweater.
- Wool: Provides warmth and insulation. Perfect for cold climates.
- Cotton: Breathable and soft. Suitable for warmer seasons or people with sensitive skin.
- Acrylic: Durable and easy to care for. Ideal for everyday wear and machine washability.
- Nylon: Adds strength and elasticity to the yarn. Good for reinforcing areas that need extra support.
2. Weight and Thickness: The weight of the yarn determines the thickness of the knitted fabric, which affects both the look and feel of the sweater. Bulkier yarns create a chunky and cozy texture, while lighter yarns result in a more delicate and lightweight fabric. Consider the desired drape and warmth of the hoodie sweater to determine the appropriate weight of the yarn.
3. Color and Texture: The color and texture of the yarn can greatly influence the overall appearance of the hoodie sweater. Variegated or self-striping yarns can add visual interest and complexity to the design, while solid colors create a classic and timeless look. Similarly, yarns with different textures, such as bouclé or mohair, can enhance the tactile experience of wearing the sweater. Choose a yarn that complements the desired style and aesthetic of the garment.
4. Budget: Lastly, the budget plays a role in selecting the right yarn. High-quality natural fibers are often more expensive than synthetic or blended yarns. Consider the budget constraints and prioritize the desired characteristics and qualities of the yarn to find a suitable option.
Overall, choosing the right yarn for a hoodie sweater is essential for achieving the desired look, comfort, and durability of the garment. By carefully considering factors such as fiber content, weight, color, texture, and budget, knitters can ensure a successful and enjoyable knitting experience.
Essential Knitting Tools for a Hoodie Sweater
When embarking on a knitting project, having the right tools is essential to ensure successful and enjoyable knitting experience. This is especially true when knitting a hoodie sweater, as it requires precision and attention to detail. Here are some of the essential knitting tools you will need to knit a hoodie sweater:
1. Knitting Needles
Knitting needles are the most important tool for any knitting project, including a hoodie sweater. Depending on the pattern and yarn thickness, you will need a specific size of knitting needles. It is recommended to have a set of interchangeable knitting needles, which allow you to easily change the needle size as needed. Additionally, circular needles are essential for knitting the body and sleeves of the hoodie sweater.
2. Stitch Markers
Stitch markers are crucial for keeping track of your stitches, especially when working on complex stitch patterns or shaping the hoodie sweater. They help you identify where a specific stitch or pattern repeat begins and ends, making it easier to follow the knitting instructions without losing your place. It is recommended to have both removable and fixed stitch markers in various sizes to accommodate different stitch counts and patterns.
3. Tapestry Needles
Tapestry needles, also known as yarn needles or darning needles, are used for seaming and weaving in loose ends. When knitting a hoodie sweater, you will need to sew together the various pieces, such as the front and back panels, sleeves, and hood. A tapestry needle with a large eye and blunt tip is ideal for this purpose. Additionally, tapestry needles are used for weaving in loose ends to ensure a neat and professional finish.
4. Row Counter
A row counter is a handy tool for keeping track of the number of rows or repeats in your knitting project. This is especially important when knitting the body and sleeves of the hoodie sweater, as you need to ensure that both sides match in terms of length and stitch count. There are various types of row counters available, including manual click counters, digital counters, and knitting apps that can be installed on your smartphone.
5. Measuring Tape
A measuring tape is essential for checking your gauge and measuring your progress as you knit the hoodie sweater. It helps ensure that your sweater will fit properly, as specified in the pattern. You can use a flexible measuring tape to measure your body or a ruler to measure your knitted swatch. Make sure to follow the gauge instructions provided in the pattern and adjust your knitting accordingly to achieve the desired size and fit.
By having these essential knitting tools on hand, you will be well-equipped to knit a beautiful and cozy hoodie sweater. Remember to always follow the pattern instructions and take your time to achieve the best results.
Understanding the Basics of Knitting
Knitting is a popular craft that involves creating fabric by interlocking loops of yarn with specialized needles. It is a skill that has been passed down through generations and is enjoyed by people of all ages and skill levels. Whether you are a beginner just starting out or an experienced knitter looking for new patterns and techniques, understanding the basics of knitting is essential.
Knitting Needles: One of the first things to familiarize yourself with in knitting is the different types of knitting needles. They come in a variety of materials such as wood, metal, and plastic, and in various sizes. The size of the needles is determined by the diameter, which affects the size and tension of the stitches. Different projects may require different sizes of needles, so it’s important to choose the appropriate ones for your desired outcome.
Casting On
Before you can start knitting, you need to cast on your stitches onto the needle. This is the process of creating the foundation row. There are various methods for casting on, such as the long-tail cast on, the knitted cast on, or the cable cast on. Each method creates a different type of edge, so it’s good to experiment and find the one that works best for your project.
Knit and Purl Stitches
Once your stitches are cast on, you are ready to start knitting. There are two basic stitches in knitting: the knit stitch and the purl stitch. The knit stitch creates a smooth, V-shaped stitch on the right side of the fabric, while the purl stitch creates a raised, horizontal stitch on the right side. By combining these two stitches in different patterns, you can create a wide variety of textures and designs in your knitting.
Increasing and Decreasing Stitches
To shape your knitted fabric, you may need to increase or decrease the number of stitches. Increasing stitches is done by adding new stitches, while decreasing stitches is done by eliminating stitches. There are several methods for increasing and decreasing, such as yarn overs, knit two together (k2tog), and slip slip knit (ssk). These techniques allow you to create shaping in your knitting, such as shaping the neckline of a sweater or creating decorative patterns.
Binding Off

After you have completed your knitting project, you will need to bind off your stitches to create a finished edge. The binding off process involves knitting two stitches, then passing the first stitch over the second stitch and off the needle. This is repeated until only one stitch remains, which is then cut and the yarn is pulled through the final loop to secure it. Binding off ensures that your stitches do not unravel and gives your project a neat and professional finish.
These are just some of the basic techniques to get you started on your knitting journey. With practice and patience, you can expand your skills and take on more complex projects. Knitting can be a relaxing and rewarding hobby, and with each completed project, you will gain a sense of accomplishment and satisfaction.
Step-by-Step Guide to Knitting the Body of the Sweater
Knitting the body of the hoodie sweater is an exciting and rewarding part of the knitting process. It is where you begin to see your project take shape and transform into a cozy garment. Whether you are a beginner or an experienced knitter, this step-by-step guide will help you through the process.
1. Cast on: Before you start knitting the body of the sweater, you will need to cast on the required number of stitches. This will determine the width of the sweater. Make sure to use the appropriate cast-on method for your chosen pattern.
2. Work the ribbing:
Start by working the ribbing for the hem of the sweater. This is typically done in a knit-one, purl-one rib stitch, but your pattern may specify otherwise. The ribbing provides a stretchy edge and adds a nice finish to the bottom of the sweater.
3. Continue in the main stitch pattern: Once you have completed the ribbing, switch to the main stitch pattern indicated in your pattern. This could be a simple stockinette stitch, a cable pattern, or any other stitch pattern that you have chosen for your sweater body.
Note: It is important to carefully follow the pattern instructions for any stitch pattern changes, shaping, or increases/decreases required for the body of the sweater.
4. Knit to the desired length: Continue knitting in the main stitch pattern until the body of the sweater reaches the desired length. This will vary depending on your own preferences and the style of the sweater.
5. Shape the armholes and neckline: As you approach the armhole area, you will need to shape the armholes and neckline according to your pattern. This may involve binding off stitches, working short-rows, or using other shaping techniques.
6. Complete the body: Once you have shaped the armholes and neckline, continue knitting the body of the sweater until it reaches the desired length. Make sure to follow any remaining instructions in your pattern, such as adding additional ribbing or other finishing details.
Tip: It is helpful to regularly try on the sweater as you knit the body to ensure the fit is as desired and make any necessary adjustments along the way.
By following these step-by-step instructions, you will be able to successfully knit the body of your hoodie sweater. Remember to take your time, enjoy the knitting process, and create a comfortable and stylish garment that you will be proud to wear.
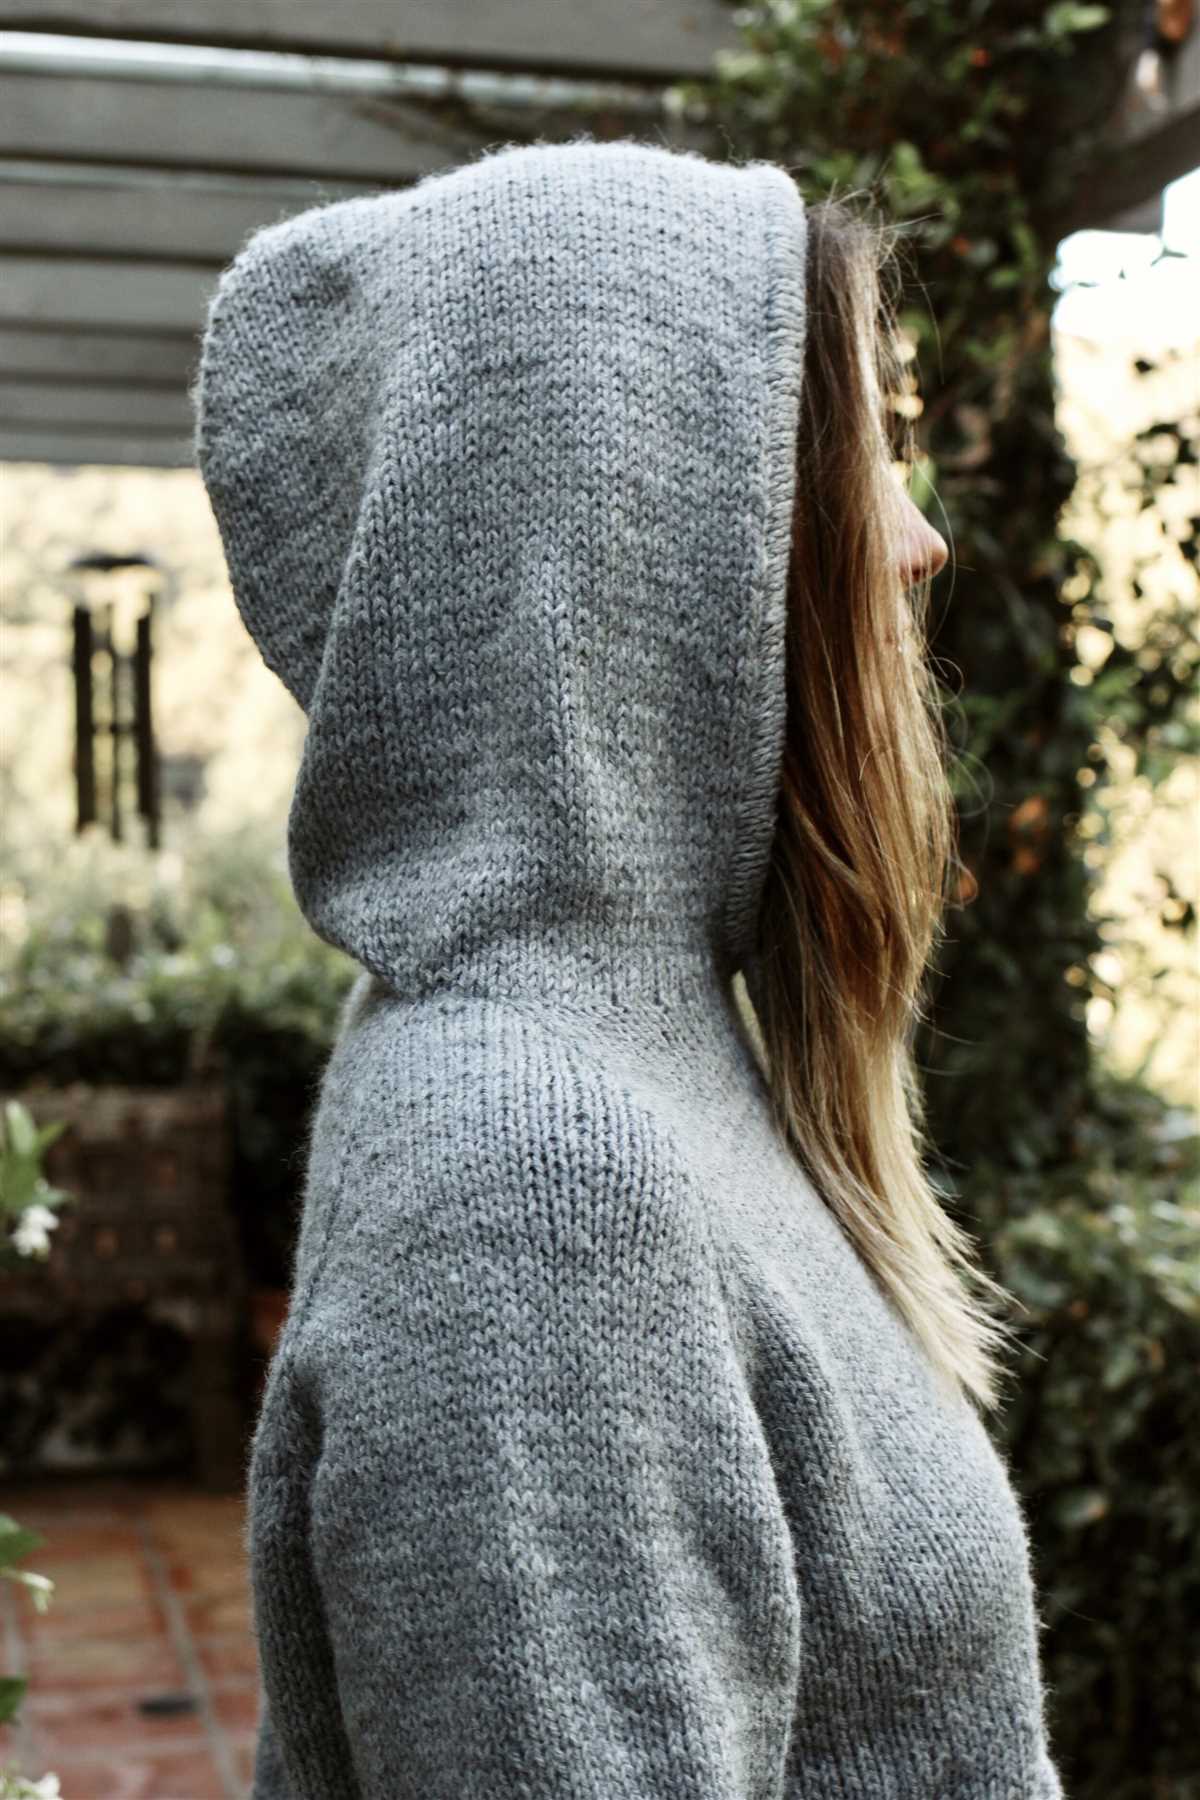
Creating the Hood and Neckline
The hoodie sweater is known for its cozy hood that provides extra warmth and comfort. In order to create the hood, start by knitting the back section of the sweater as per the pattern instructions. Once the back is complete, you can move on to shaping the hood.
Shaping the Hood
1. Begin by marking the center back stitch on the top edge of the back piece. This will be your starting point for the hood shaping.
2. Follow the pattern instructions to determine the number of stitches that need to be picked up along the sides of the back piece. Use a separate ball of yarn or stitch markers to hold these stitches in place, as they will be used to create the hood.
3. Work the indicated number of stitches in the specified stitch pattern until you reach the desired length for the hood. This could involve knitting straight or incorporating increases or decreases to shape the hood as desired.
4. Once the hood is the desired length, you can finish the shaping and create the neckline. Follow the pattern instructions to bind off the required number of stitches along the center front of the hood to create the neckline opening.
5. Continue knitting the remaining stitches on either side of the neckline, following the pattern instructions for any shaping or stitch patterns. This will create the front section of the hood.
By following these steps, you can successfully create the hood and neckline of your hoodie sweater, adding an extra element of style and functionality to your knitting project.
Knitting the Sleeves
Once you have completed the body of your hoodie sweater, it’s time to move on to knitting the sleeves. The sleeves are an important part of the sweater, as they provide warmth and comfort to the wearer. It’s essential to ensure that the sleeves are knit to the correct length and width, so they fit well and are not too tight or too loose.
To begin knitting the sleeves, you will first need to transfer the stitches from the stitch holder onto your double-pointed needles or circular needles, depending on your knitting preference. Make sure to divide the stitches evenly onto each needle to avoid any gaps or uneven tension.
Next, you’ll need to follow the sleeve pattern or instructions provided in your hoodie sweater knitting pattern. This will typically involve knitting in the round and following a specific stitch pattern or decreasing technique to shape the sleeve. Pay close attention to the instructions to ensure that you are knitting the correct number of rows and stitches to achieve the desired length and width.
As you knit the sleeves, it’s important to try them on periodically to check for fit. This will allow you to make any necessary adjustments as you go along. If the sleeves are too long, you can simply knit fewer rows before shaping the cuff. If they are too short, you can add a few extra rows before starting the cuff. Don’t forget to take into account the additional length that will be added by the ribbed cuff at the end of the sleeve.
Once you have completed knitting the sleeves to the desired length, you can finish them off by knitting a ribbed cuff. This will provide a snug and comfortable fit around the wrist. Follow the pattern instructions for the cuff, which will typically involve knitting in a ribbed stitch pattern such as k1, p1 or k2, p2. Repeat this pattern for a few rows before binding off to create the cuff.
After completing both sleeves, you can then proceed to join them to the body of the sweater. This is typically done by knitting the sleeves onto the body using a technique called “grafting” or “seaming.” Follow the pattern instructions or consult a knitting tutorial for guidance on how to properly join the sleeves to the body to create a seamless and professional finish.
Adding Ribbing and Cuffs
When knitting a hoodie sweater, adding ribbing and cuffs can give the garment a more finished and polished look. Ribbing is a stretchy pattern that is commonly used for the bottom hem, cuffs, and neckline of a sweater. It helps to create a snug fit and adds structure to the garment.
To add ribbing to the bottom hem of the hoodie, you will need to switch to a smaller needle size. This will create a tighter stitch pattern that will help the hem retain its shape. You can use a ribbing pattern such as the classic k1, p1 rib or a k2, p2 rib for a different look. Work the ribbing pattern for a few inches, or the desired length, before continuing with the main sweater body.
Adding Cuffs
Adding cuffs to the sleeves of a hoodie sweater is a great way to give the garment a professional finish. Cuffs can be added using the same ribbing pattern used for the hem. To create the cuffs, you will need to pick up stitches along the edge of the sleeve. This is done by inserting the needle into the edge of the fabric and pulling up a loop of yarn. Once you have picked up the required number of stitches, you can work the ribbing pattern for the desired length.
When knitting the cuffs, it is important to make sure they are the right length to fit comfortably around the wrist but not be too tight. You can try on the sweater and adjust the length of the cuffs if needed. Once the cuffs are complete, you can continue knitting the sleeves in the main stitch pattern until they reach the desired length.
Assembly and Finishing Touches
Once all the pieces of your hoodie sweater are knitted up, it’s time to assemble them together to create the final project. Start by laying out all the pieces on a flat surface and make sure they are in the right order. This will help you visualize how the sweater will look once it’s complete.
Next, use a tapestry needle and the yarn that you used to knit the pieces to sew them together. Begin by attaching the front and back pieces at the shoulders, using a simple whip stitch. Then, sew the sleeves onto the body, making sure to match up the armhole and sleeve seams. Finally, sew up the side seams, leaving a space for the neck opening.
Once the pieces are all sewn together, it’s time to add the finishing touches. You can choose to add a ribbed collar or a hood to your sweater. To add a ribbed collar, pick up stitches evenly around the neck opening and knit in rib stitch for a few inches. To add a hood, you’ll need to pick up stitches along the neckline and then work the hood in the desired pattern, following the instructions provided in the knitting pattern.
To neaten up the edges and give your hoodie sweater a polished look, you can also add ribbed cuffs and a ribbed hem. Simply pick up stitches around the sleeve openings and bottom edge of the sweater and knit in rib stitch for a few inches. This will help the sweater to fit snugly around the wrists and waist, and give it a professional finish.
Lastly, weave in all the loose ends of yarn from sewing and changing colors throughout the project. This will ensure that your hoodie sweater is neat and tidy, and all the ends are securely fastened. Once you’ve completed these finishing touches, your hoodie sweater will be ready to wear and enjoy!
Tips and Tricks for Customizing Your Hoodie Sweater
Now that you have your knitting pattern for the hoodie sweater, it’s time to add your own personal touch. Customizing your sweater allows you to create a unique and one-of-a-kind garment that reflects your style and personality. Here are some tips and tricks to help you get started:
1. Choose the Right Yarn: The yarn you choose can greatly impact the look and feel of your sweater. Consider the fiber content, weight, and color of the yarn to achieve the desired effect. Experimenting with different yarns can create interesting textures and patterns.
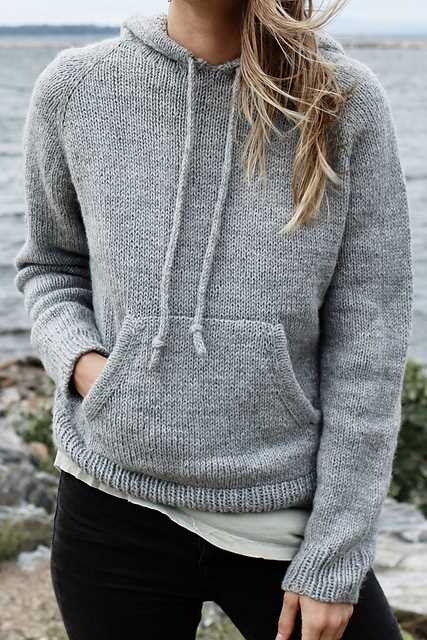
2. Modify the Hood: If you’re not a fan of the traditional hood design, you can customize it to suit your preferences. You can make the hood smaller or larger, add a drawstring, or even omit the hood altogether. Get creative and make it your own.
3. Add Pockets: Pockets can be a functional and stylish addition to your hoodie sweater. You can choose to add kangaroo-style pockets to the front or side pockets for a more subtle look. Experiment with different pocket sizes and placements to find the perfect design.
4. Embellish with Embroidery or Patches: Personalize your hoodie sweater by adding embroidery or patches. You can stitch your initials, a favorite design, or even a meaningful quote. This not only adds visual interest but also makes the sweater more unique and personal.
5. Experiment with Colorwork: Colorwork allows you to create patterns and designs using multiple colors of yarn. You can incorporate stripes, Fair Isle patterns, or other intricate designs. This technique can elevate your hoodie sweater and make it a true work of art.
6. Consider the Fit: Customizing the fit of your hoodie sweater is essential for achieving a flattering and comfortable silhouette. Take accurate measurements and adjust the pattern accordingly. You can make it more fitted or loose, depending on your preference.
By following these tips and tricks, you can transform a basic knitting pattern into a personalized masterpiece. Let your creativity shine through and create a hoodie sweater that is uniquely yours.
Q&A:
What materials do I need to knit a hoodie sweater?
To knit a hoodie sweater, you will need yarn (usually worsted weight or bulky), knitting needles (circular and double-pointed), stitch markers, a tapestry needle, and a knitting pattern.
Where can I find a knitting pattern for a hoodie sweater?
You can find knitting patterns for hoodie sweaters in various places such as knitting books, online knitting communities, and websites that offer knitting patterns for purchase or free downloads.
What are the different types of hoodie sweater knitting patterns available?
There are various types of hoodie sweater knitting patterns available, such as pullover hoodies, zip-up hoodies, oversized hoodies, cropped hoodies, and hoodies with different stitch patterns or colorwork.
Is knitting a hoodie sweater difficult?
Knitting a hoodie sweater can be a bit challenging for beginners, especially if you are new to knitting in the round or following complex patterns. However, with practice and patience, you can learn and successfully knit a hoodie sweater.
Can I customize a hoodie sweater knitting pattern?
Yes, you can customize a hoodie sweater knitting pattern by adjusting the length, adding or removing details like pockets or cables, choosing different yarn colors or stitch patterns, or making alterations to the hood or sleeves as per your preference.