
Knitting is a popular craft that allows people to create their own unique pieces of clothing and accessories. One of the more challenging items to knit is a helmet, which not only provides warmth but also protection. Whether you’re a knitting enthusiast looking for a new project or someone in need of a cozy helmet for outdoor activities, this helmet knitting pattern is for you.
Knitting a helmet requires some intermediate-level knitting skills, including basic stitch knowledge and an understanding of shaping techniques. The pattern combines different knitting stitches to create a textured and visually appealing design. It also includes instructions for adding a chin strap and ear flaps to ensure a secure fit and extra warmth.
This helmet knitting pattern is versatile and can be customized to fit any head size. By adjusting the number of stitches and rows, you can create a helmet that fits snugly and comfortably. It’s also a great opportunity to experiment with different yarn colors and textures to create a truly unique helmet.
Helmet Knitting Pattern
A helmet knitting pattern is a great project for knitters of all skill levels. Whether you are a beginner or an experienced knitter, you can create a stylish and functional helmet for yourself or a loved one. Knitting a helmet allows you to customize the fit, style, and color to match your personal preferences.
When choosing a helmet knitting pattern, it is important to consider the intended purpose of the helmet. Are you knitting for a cyclist, skier, or motorcyclist? Each activity may require a slightly different style and level of protection. Look for patterns that provide guidance on yarn choice and gauge to ensure the helmet is properly sized and will provide the desired level of warmth and protection.
Materials:
- Worsted weight yarn
- Size 8 circular knitting needles
- Set of size 8 double-pointed knitting needles
- Tapestry needle
- Stitch markers
Instructions:
- Cast on 80 stitches using the circular knitting needles.
- Join in the round, being careful not to twist the stitches.
- Knit every round until the helmet measures 4 inches from the cast-on edge.
- Begin decreasing: *Knit 8, knit 2 together* Repeat from * to * around.
- Knit 1 round.
- Decrease again: *Knit 7, knit 2 together* Repeat from * to * around.
- Knit 1 round.
- Continue in this manner, decreasing 1 stitch before the knit 2 together stitch every round, until there are 16 stitches remaining.
- Switch to double-pointed needles when necessary.
- Break yarn, leaving a long tail. Thread tail through remaining stitches and pull tight to close the top of the helmet.
- Weave in any loose ends using the tapestry needle.
- Add any desired embellishments, such as a pompom or buttons, to personalize your helmet.
A helmet knitting pattern is a fun and practical project that allows you to create a unique and customized accessory. Whether you need a helmet for safety or simply want to add a stylish touch to your outfit, knitting your own helmet is a rewarding endeavor. With the right materials and instructions, you can knit a helmet that is both functional and fashionable.
Benefits of knitting your own helmet

Knitting your own helmet can offer several benefits, both practical and personal. Whether you are looking for a unique helmet design, a custom fit, or the satisfaction of creating something with your own hands, knitting your own helmet can be a rewarding experience.
1. Customization: When you knit your own helmet, you have complete control over every aspect of its design. You can choose the colors, patterns, and textures that reflect your personal style and preferences. This allows you to create a helmet that is truly one-of-a-kind and stands out from mass-produced options.
2. Perfect fit: One of the biggest advantages of knitting your own helmet is being able to customize the size to fit your head perfectly. By carefully measuring your head and adjusting the pattern accordingly, you can ensure that the helmet fits comfortably and securely. This can help prevent any discomfort or slipping that may occur with standard-sized helmets.
3. Creative outlet: Knitting is not only a practical skill but also a creative one. Knitting your own helmet allows you to express your creativity and make something that reflects your unique style and personality. You can experiment with different stitches, patterns, and embellishments to create a helmet that is truly one-of-a-kind.
4. Mindful and relaxing activity: Knitting can be a meditative and relaxing activity that helps relieve stress and promote mindfulness. The repetitive motions of knitting can have a calming effect on the mind and help you focus on the present moment. Knitting your own helmet can provide a creative outlet while also providing a sense of peace and relaxation.
5. Sustainable choice: By knitting your own helmet, you have the opportunity to make a sustainable choice. Instead of purchasing a new helmet made from synthetic materials, you can opt for natural and eco-friendly yarns. Additionally, knitting your own helmet reduces the demand for mass-produced products, helping to minimize waste and promote a more sustainable lifestyle.
In conclusion, knitting your own helmet offers a range of benefits, from customization and a perfect fit to a creative outlet and sustainable choice. Whether you are an experienced knitter or a beginner, knitting your own helmet can be a fulfilling and enjoyable project that results in a unique and practical piece of headgear.
Choosing the right yarn for your helmet
When it comes to knitting a helmet, choosing the right yarn is crucial for the overall comfort, durability, and functionality of the finished product. Whether you are knitting a helmet for yourself or as a gift, considering the type of yarn you use is an important decision.
1. Consider the fiber content: The fiber content of the yarn will greatly affect the functionality of the helmet. It is recommended to choose a yarn that is soft, lightweight, and has some elasticity to ensure a comfortable fit. Wool and acrylic blends are popular choices for helmet knitting as they offer warmth, durability, and ease of care.
2. Pay attention to gauge: Before selecting a yarn, it’s important to know the gauge required for the helmet pattern you are using. The gauge determines the size of the stitches and the overall fit of the helmet. Be sure to check the recommended gauge on the yarn label and compare it to the gauge specified in the pattern. Using the recommended needle size and achieving the correct gauge will ensure the helmet fits properly.
3. Consider the season: If you plan to wear the helmet in cold weather, choosing a yarn with thermal properties is important to keep your head warm. Wool yarns are great for insulation and moisture-wicking, making them ideal for colder seasons. For helmets intended for warmer weather, cotton or bamboo yarns are breathable options that will help keep you cool.
4. Opt for machine washable yarns: Helmets can get sweaty and dirty, especially if they are worn during physical activities. Choosing a yarn that is machine washable will make cleaning and maintaining the helmet much easier. Look for yarns labeled as machine washable or that can be washed on a gentle cycle to ensure longevity.
5. Consider the color and texture: While the color and texture of the yarn may not directly affect the functionality of the helmet, they do play a role in the overall appearance. Consider choosing a yarn color that matches your personal style or the recipient’s preferences. Additionally, textured yarns can add interest and dimension to the knitted helmet, making it stand out.
In conclusion, when choosing yarn for your helmet, it is important to consider the fiber content, gauge, season, washability, and appearance. By selecting the right yarn, you can ensure a comfortable, functional, and stylish helmet that will be enjoyed for years to come.
Needles and other materials for helmet knitting
When it comes to knitting a helmet, having the right materials is crucial to achieving a well-fitted and sturdy result. The choice of needles, yarn, and other accessories will greatly impact the final product.
Needles: A set of double-pointed needles (DPNs) is usually recommended for helmet knitting, as they allow you to work in the round and shape the crown seamlessly. Many patterns suggest using size US 7 (4.5 mm) or US 8 (5 mm) DPNs, but this can vary depending on the pattern and desired gauge. Make sure to check the pattern instructions for the recommended needle size.
Yarn: The type of yarn used for knitting a helmet will depend on the desired warmth, durability, and aesthetic. Worsted weight yarn is a popular choice as it provides good insulation and is readily available. Consider using a wool or wool-blend yarn for added warmth and resilience. It is also important to check the pattern for the suggested yarn weight and yardage to ensure you have enough for the project.
Other materials: In addition to needles and yarn, you may need some other materials to complete your helmet knitting project. These can include stitch markers to help keep track of your rounds, a tapestry needle for weaving in ends, and a pom-pom maker if you want to add a fun and whimsical touch to your helmet. It is always a good idea to gather all necessary materials before starting your project to ensure a smooth and enjoyable knitting experience.
Basic Stitches For Helmet Knitting

When knitting a helmet, it is crucial to get the basic stitches right. The success of the project depends on your ability to master these stitches and create a sturdy and comfortable helmet.
Here are some of the basic stitches that you need to know:
1. Knit Stitch (K)
The knit stitch is the most fundamental stitch in knitting. It creates a “V” shape on the right side of the fabric and is often used to create the body of the helmet. To knit a stitch, insert the right-hand needle through the first stitch on the left-hand needle, wrap the yarn around the right-hand needle, pull the loop through, and slide the stitch off the left-hand needle.
2. Purl Stitch (P)
The purl stitch creates a raised horizontal line on the right side of the fabric and is commonly used for ribbing or adding texture to the helmet. To purl a stitch, insert the right-hand needle into the front of the stitch on the left-hand needle, wrap the yarn around the right-hand needle counterclockwise, pull the loop backwards through the stitch, and slide the stitch off the left-hand needle.
3. Ribbing
Ribbing is a combination of knit and purl stitches arranged in a particular pattern. It is often used at the brim of the helmet to add elasticity and ensure a snug fit. The most common ribbing pattern is K1, P1 (knit one stitch, purl one stitch) repeated across the row.
4. Decreases
Decreases are essential for shaping the helmet and creating a seamless fit. Two common decrease stitches are the knit two together (K2tog) and the purl two together (P2tog). For K2tog, insert the right-hand needle through the next two stitches on the left-hand needle as if to knit, wrap the yarn around the right-hand needle, pull the loop through, and slide the stitches off the left-hand needle. For P2tog, the process is similar, but you purl instead of knitting the two stitches together.
By mastering these basic stitches, you will be well on your way to knitting a functional and stylish helmet. Practice them, and don’t be afraid to experiment with different patterns and techniques to create the perfect helmet for your needs.
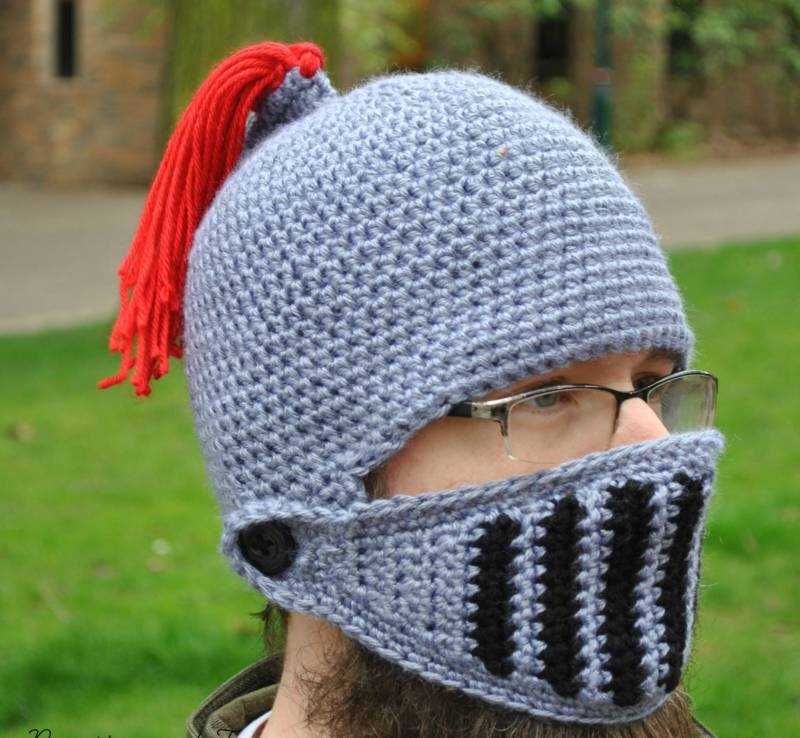
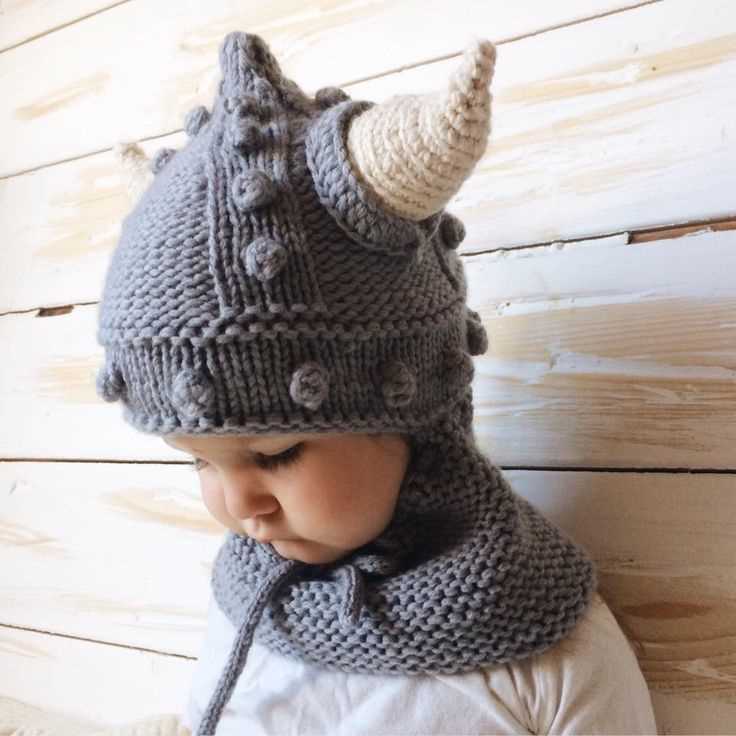
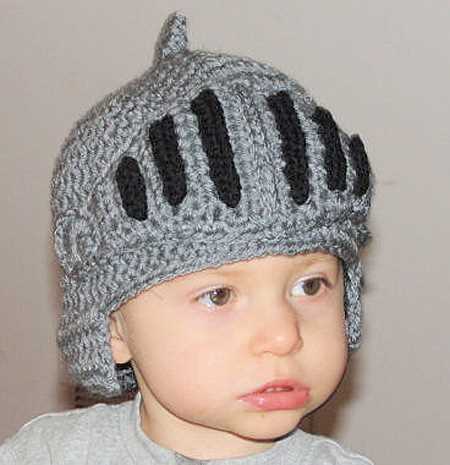
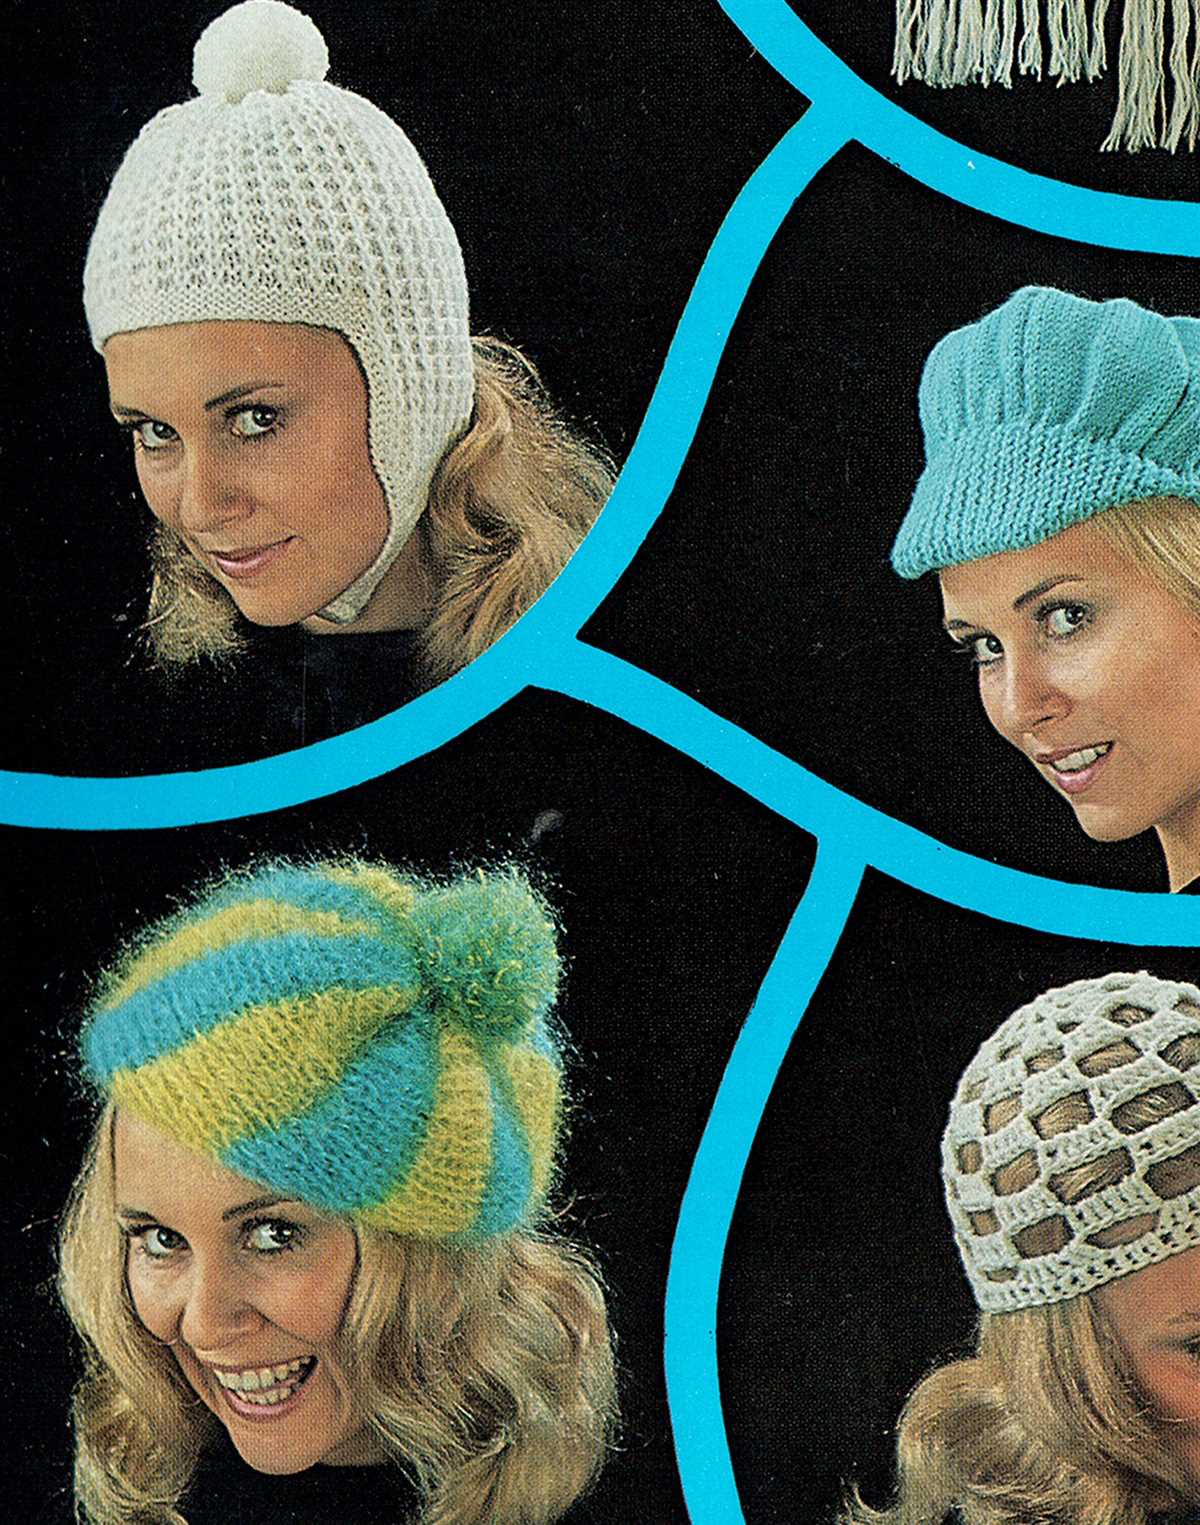
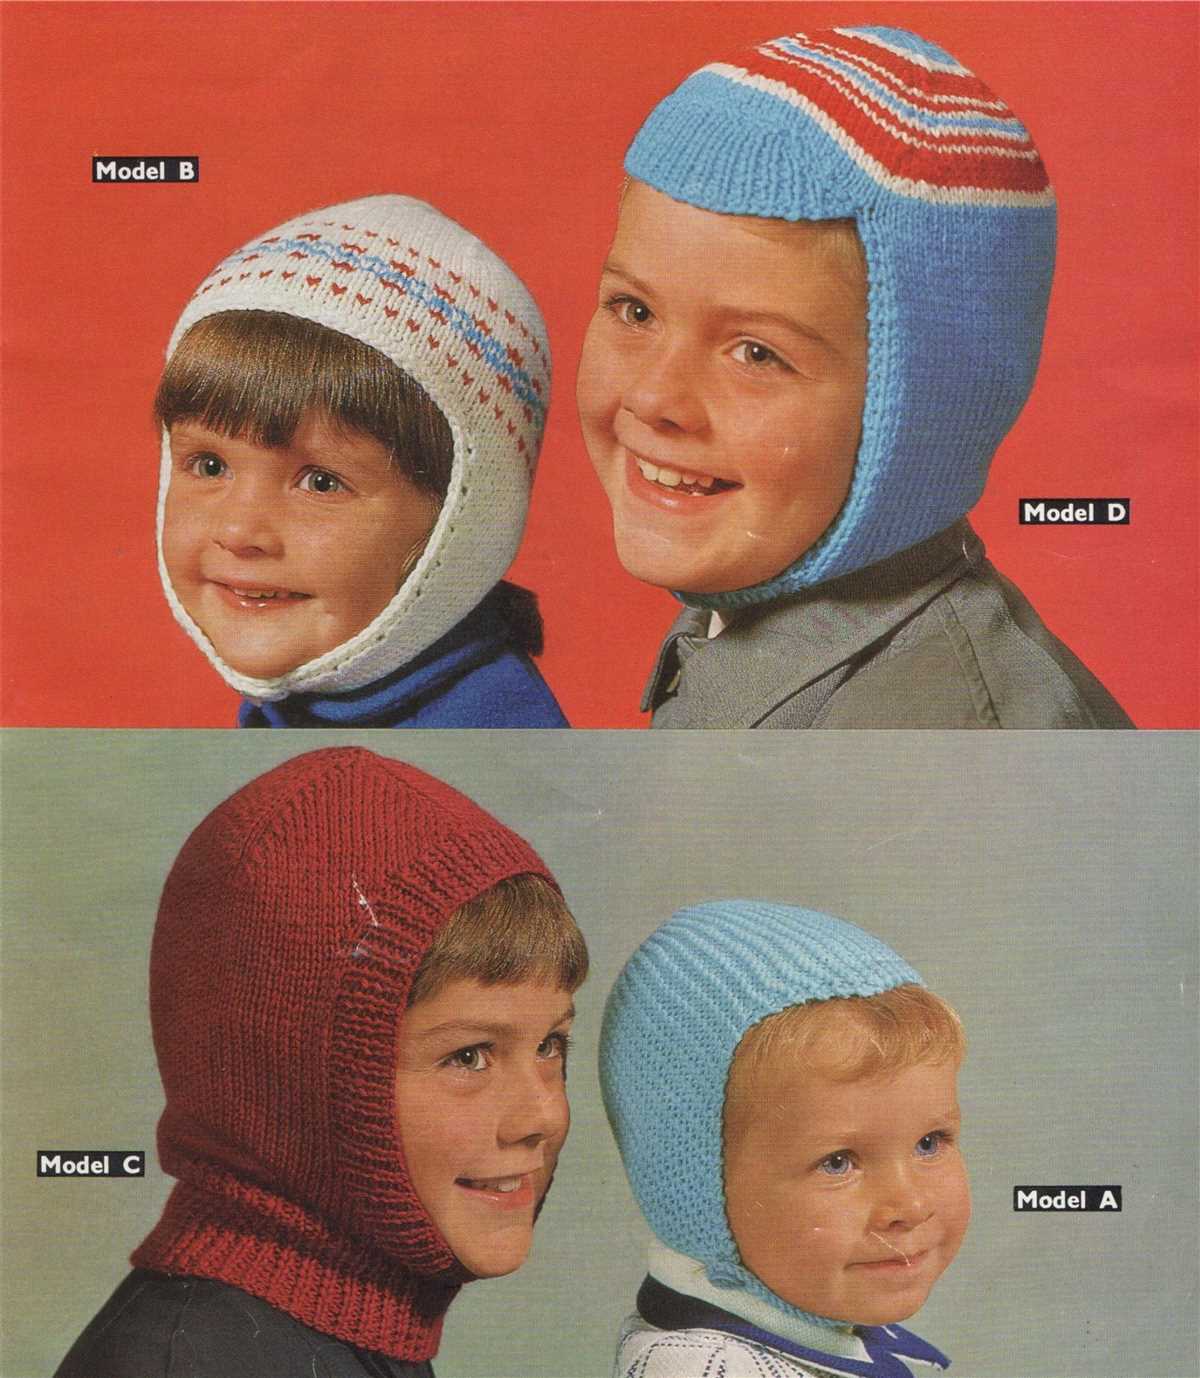
Different helmet styles to consider
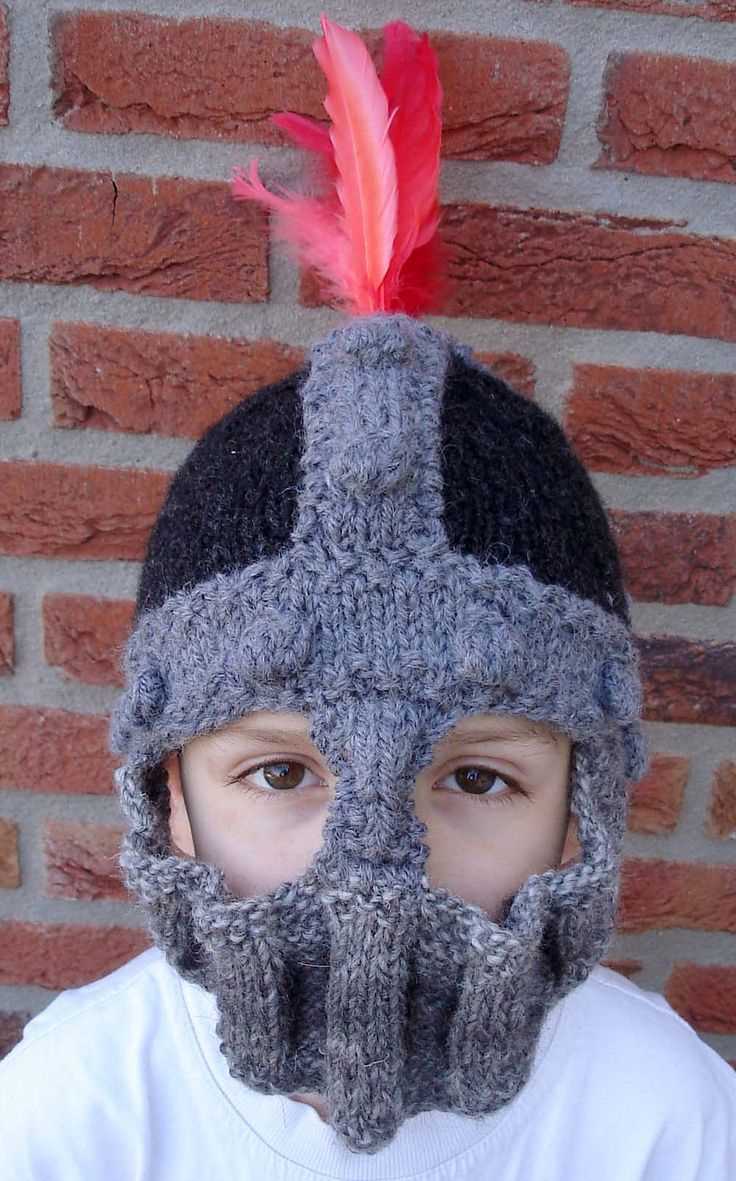
When it comes to knitting a helmet, there are several different styles to consider. Each style offers its own unique features and benefits. Whether you are knitting a helmet for yourself or as a gift, it is important to choose a style that suits your needs and preferences.
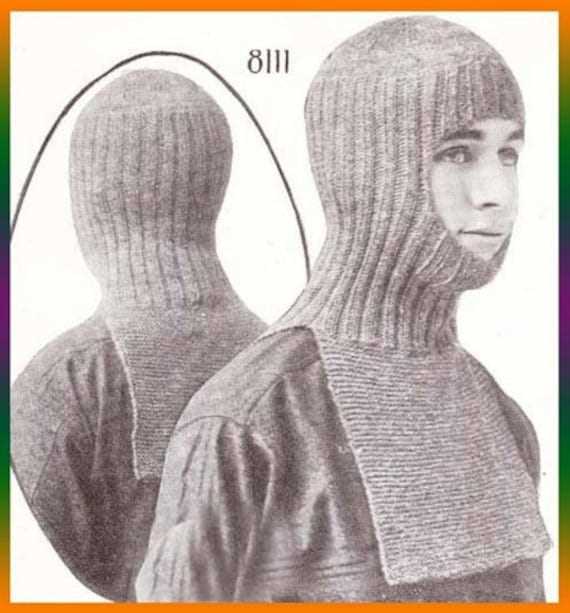
1. Basic helmet:
A basic helmet style is a popular choice for beginners and those looking for a simple and straightforward design. This style typically features a snug fit and covers the entire head, providing maximum protection. It can be easily customized with different color patterns or stitch designs to add a personal touch.
2. Cable knit helmet:
For those who prefer a more textured and intricate design, a cable knit helmet is a great option. The raised cable stitch pattern adds depth and visual interest to the helmet, making it both functional and fashionable. This style is perfect for colder climates as the cables provide extra insulation.
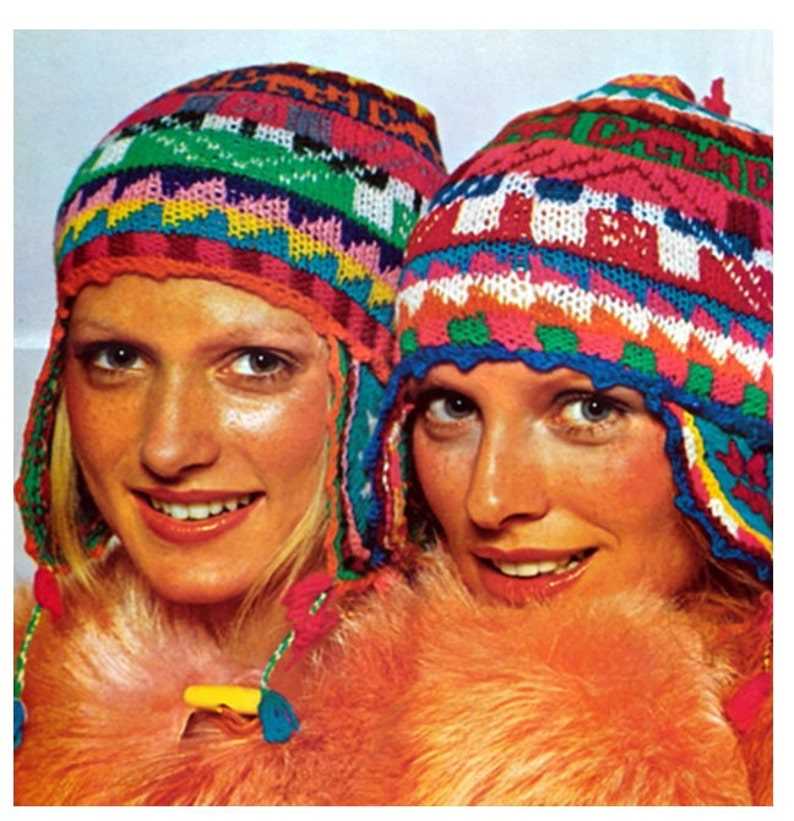
3. Fair Isle helmet:
The Fair Isle technique involves using multiple colors in a pattern to create intricate designs. A Fair Isle helmet is an excellent choice for those looking to showcase their knitting skills and create a beautifully detailed piece. This style can be adapted to suit any color combination, allowing for endless possibilities.
4. Visor helmet:
If you prefer a helmet with added sun protection, a visor helmet is an ideal choice. This style features a brim or visor that extends from the front of the helmet, shielding the face and eyes from the sun. It is perfect for outdoor activities such as cycling or hiking.
5. Slouchy helmet:
For those who want a more relaxed and casual look, a slouchy helmet is a great option. This style is characterized by a looser fit and a slouchy or slouched crown. It offers a comfortable and laid-back vibe, perfect for everyday wear or for those who prefer a more relaxed style.
Whichever helmet style you choose, make sure to select a knitting pattern that includes clear instructions and measurements to ensure a proper fit. Additionally, don’t be afraid to experiment with different yarn types and colors to add your own personal touch to the design.
Tips for adjusting the helmet size
When knitting a helmet, it is important to ensure that it fits the intended wearer properly. Here are some tips for adjusting the helmet size:
1. Measure the head size
Before starting the knitting project, measure the head size of the person who will be wearing the helmet. This will help determine the appropriate size and ensure a proper fit. Use a flexible measuring tape and wrap it around the widest part of the head, just above the ears. Take note of the measurement and refer to the sizing chart provided in the knitting pattern.
2. Adjust the number of stitches
If the helmet is too small or too large based on the measurement taken, you may need to adjust the number of stitches. To make the helmet larger, you can add more stitches to the cast-on or increase stitches evenly across the rows. To make the helmet smaller, you can decrease stitches evenly or use a smaller needle size.
3. Modify the length
If the helmet is the correct size but too short or too long in length, you can easily adjust this as well. To make the helmet longer, continue knitting more rows before shaping the crown. To make the helmet shorter, knit fewer rows before shaping the crown. Be sure to refer to the knitting pattern for guidance on shaping the crown.
4. Consider the yarn weight
The weight of the yarn used can also affect the size of the helmet. If the pattern calls for a specific yarn weight and you choose to use a different weight, it may result in a different size. Take this into consideration and make adjustments accordingly. You may need to modify the number of stitches or needle size to accommodate the difference in yarn weight.
5. Test the fit
After completing the helmet, it is important to test the fit by trying it on the intended wearer. This will help ensure that the adjustments made have resulted in the desired fit. Make any necessary tweaks before finishing off the helmet to ensure a comfortable and secure fit.
By following these tips and making the necessary adjustments, you can knit a helmet that fits perfectly and provides the intended wearer with both comfort and protection.
Adding earflaps to your helmet
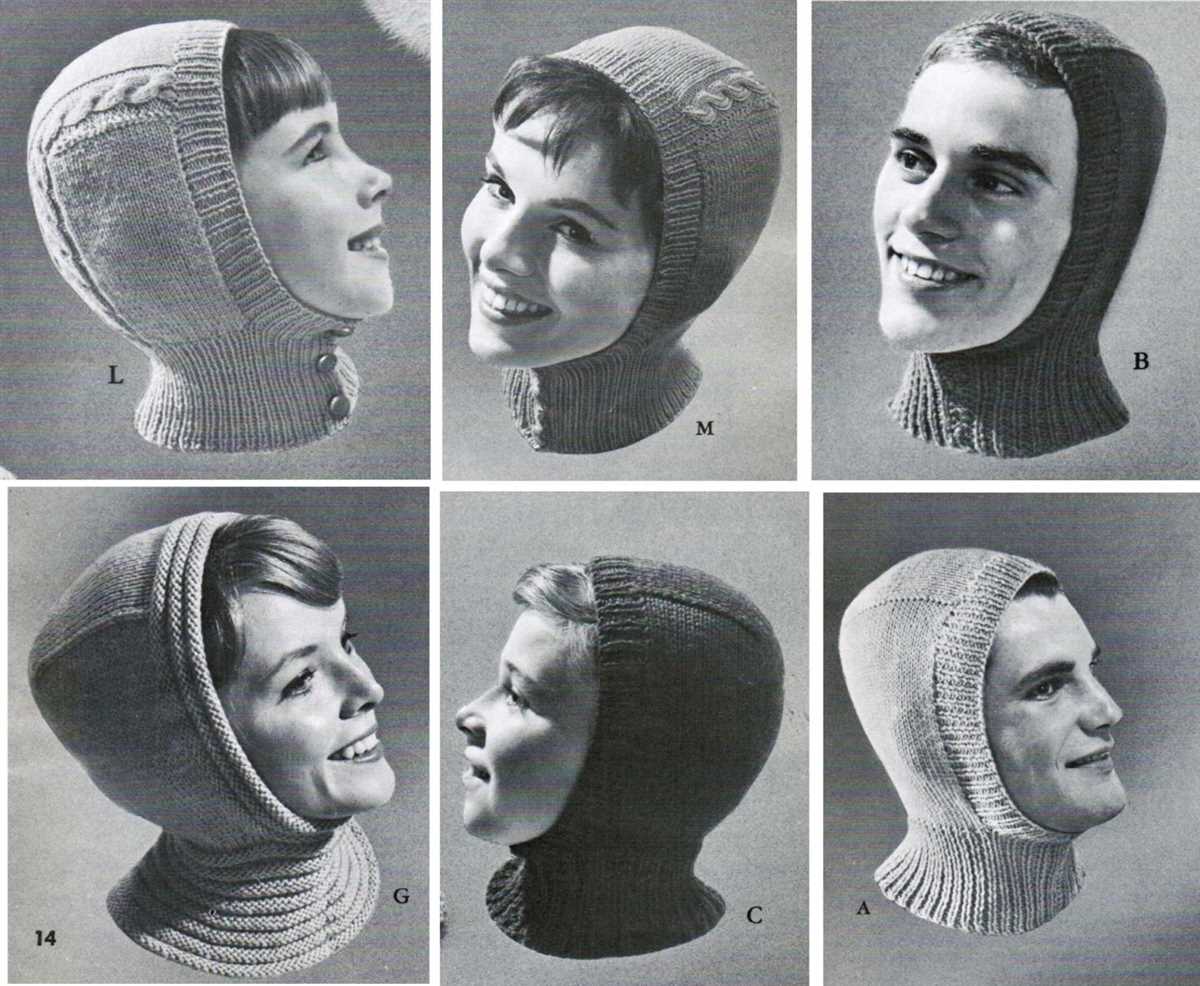
If you want to add some extra warmth and protection to your helmet, you can easily do so by adding earflaps. Earflaps are a great addition to any knitted helmet and can provide extra insulation against cold temperatures and wind. They are also a stylish and practical way to keep your ears warm during winter activities like skiing, snowboarding, or hiking.
To add earflaps to your helmet, you will need to follow a simple knitting pattern. Start by measuring the distance from one side of your helmet to the other, passing over the top of your head. This will help you determine the length of your earflaps. Once you have your measurement, you can begin knitting the earflaps.
Here is a step-by-step guide on how to add earflaps to your helmet:
- Using your helmet measurement, cast on the desired number of stitches for each earflap. Make sure to use a yarn that matches the weight and color of your helmet.
- Knit each row in garter stitch until the earflap reaches your desired length. You can adjust the length based on how much coverage you want for your ears.
- Once the earflap is the desired length, you can either bind off the stitches or continue knitting to create a braided or tassel-like finish. This will add a decorative touch to your earflaps.
- Repeat the process for the other earflap, making sure to match the length and style of the first one.
- To attach the earflaps to your helmet, use a tapestry needle and yarn to sew them onto the sides of the helmet. Make sure to securely attach them so that they won’t come loose while wearing the helmet.
By following these simple steps, you can easily add earflaps to your helmet and enhance its functionality and style. Whether you’re hitting the slopes or simply braving the cold weather, your earflap helmet will keep you warm and fashionable.
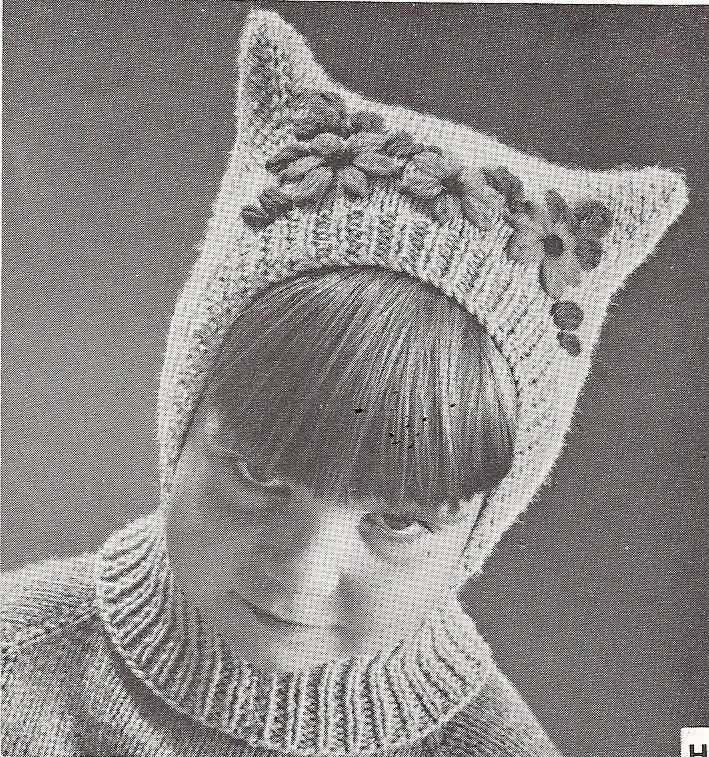
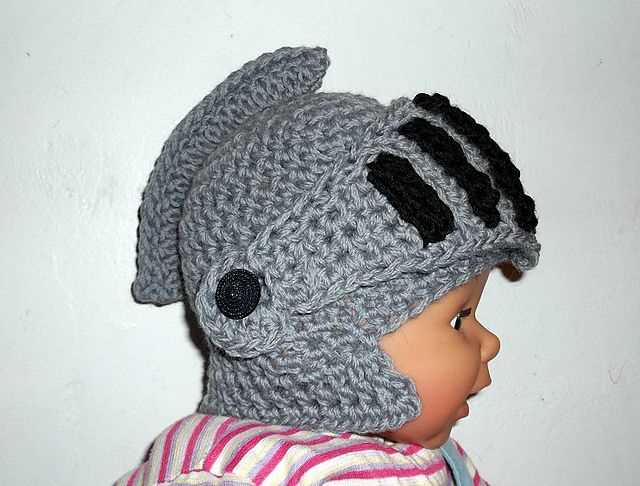
Embellishing your helmet with pom-poms or tassels
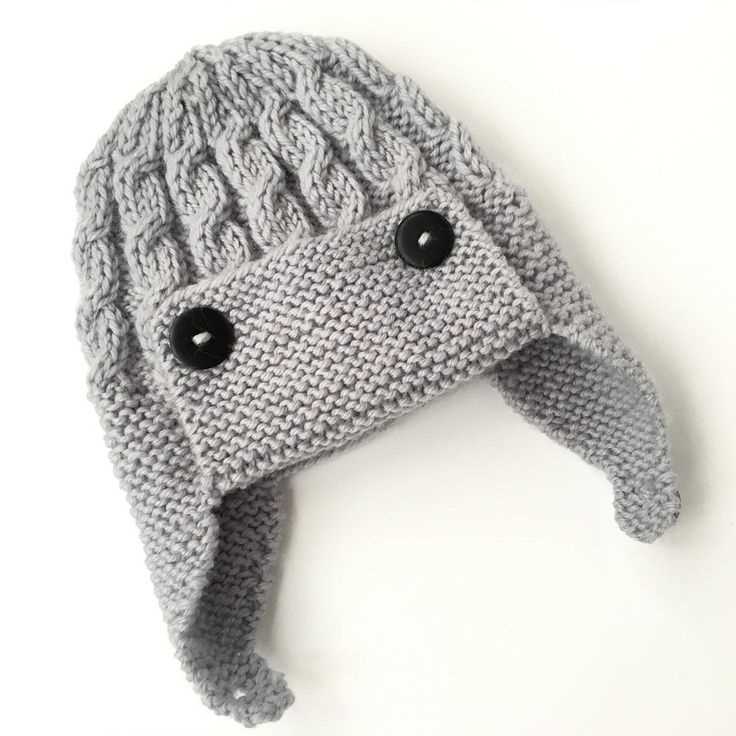
Adding pom-poms or tassels to your helmet is a fun and stylish way to personalize your gear and stand out on the slopes or in the skate park. These decorative accessories not only add a touch of flair to your helmet, but they can also serve as a functional element, making you more visible to others. Whether you prefer the playful look of pom-poms or the elegant sway of tassels, there are many creative options to choose from.
Pom-poms: Pom-poms are a great way to add a pop of color and texture to your helmet. They can be made from various materials such as yarn, faux fur, or even fabric. You can choose to make small pom-poms or larger ones depending on your preference. Attach them to the top or sides of your helmet using a strong adhesive or sew them on for added durability. Pom-poms are a versatile accessory that can be easily removed or swapped out to match different outfits or moods.
Tassels: Tassels add a touch of elegance and movement to your helmet. They can be made from various materials such as yarn, embroidery floss, or even ribbon. Tassels can be attached to the back or sides of your helmet using hooks, adhesive, or by sewing them on. The length and thickness of the tassels can be customized to suit your style. Experiment with different colors and textures to create a unique look that reflects your personality.
By embellishing your helmet with pom-poms or tassels, you can make a fashion statement while staying safe in style. These accessories not only add a touch of fun and personality to your gear, but they can also serve as a way to enhance your visibility and make you more noticeable on the slopes or in the skate park. So, get creative and have fun adding some flair to your helmet!
Essential tips for beginners in helmet knitting
If you are a beginner in helmet knitting, there are a few essential tips that can help you get started and improve your skills. First and foremost, it’s important to choose the right yarn and needle size for the project. This will ensure that the helmet fits properly and has the desired texture and warmth.
Measurements and gauge – Before starting your knitting project, it’s crucial to take accurate measurements of the recipient’s head circumference. This will help you determine the size of the helmet and ensure a proper fit. Additionally, paying attention to gauge is essential, as it determines how many stitches and rows are needed to achieve the desired size and texture.
Choosing the right pattern – There are numerous helmet knitting patterns available online and in knitting books. As a beginner, it’s recommended to start with a simple pattern that includes clear instructions and basic techniques. This will allow you to practice and build confidence in your knitting skills before moving on to more complex designs.
Mastering basic techniques – Helmet knitting involves several basic techniques, such as casting on, knitting, purling, decreasing, and binding off. It’s important to thoroughly understand and practice these techniques before attempting more advanced patterns. There are many online tutorials and videos available that can guide you through each step.
Joining a knitting community – Joining a knitting community or attending knitting classes can be a great way to learn from experienced knitters and get valuable tips and advice. These communities often have forums and social media groups where you can ask questions, share your progress, and get feedback on your projects.
Take it slow and practice – Knitting can be a relaxing and enjoyable hobby, but it also requires patience and practice. Don’t be discouraged if your first few attempts don’t turn out perfectly. Take it slow, be patient with yourself, and keep practicing. With time and practice, you’ll improve your skills and create beautiful helmets that you can be proud of.
- Choose the right yarn and needle size
- Measurements and gauge are crucial
- Start with a simple pattern
- Master basic techniques before attempting complex patterns
- Join a knitting community or attend knitting classes for guidance
- Be patient and practice regularly
Troubleshooting common issues in helmet knitting
Knitting a helmet can be a challenging project, but with some troubleshooting, you can overcome common issues that may arise during the process. Here are some tips to help you troubleshoot and fix these issues:
1. Gauge problems
One of the most common issues in helmet knitting is having incorrect gauge. If your gauge is too loose, your finished helmet may be too big and lack structure. If your gauge is too tight, the helmet may be too small and uncomfortable to wear. To fix this issue, change your needle size to achieve the correct gauge. Test your gauge swatch with the new needle size and adjust as needed.
2. Twisted stitches
Twisted stitches can result in a distorted shape and texture in your helmet. This issue often occurs if you twist the stitches inadvertently while knitting. To correct twisted stitches, carefully unravel the affected rows and re-knit them with the correct stitch orientation. Pay close attention to your knitting and make sure each stitch is properly seated on the needle.
3. Uneven tension
Inconsistent tension can lead to a helmet with sections that are noticeably tighter or looser than others. This can affect the fit and appearance of the finished project. To fix uneven tension, make a conscious effort to maintain a consistent tension throughout your knitting. Practice knitting with relaxed hands and avoid pulling the yarn too tightly or loosely. If necessary, take breaks during your knitting and relax your hands to prevent tension buildup.
4. Sizing issues
Another common issue in helmet knitting is incorrect sizing. If your helmet turns out too small or too big, it may not provide proper protection or fit comfortably. To resolve sizing issues, carefully follow the pattern instructions and check your gauge before starting the project. If needed, adjust the number of stitches or rows to ensure the desired size. Additionally, consider measuring the intended recipient’s head circumference to ensure an accurate fit.
By troubleshooting these common issues in helmet knitting, you can enhance the overall quality and fit of your finished project. Remember to take your time, practice, and don’t be afraid to unravel and start again if needed. Happy knitting!
Inspiration for your next helmet knitting project
Now that you have learned how to knit a helmet and have some ideas for patterns, it’s time to get inspired for your next project. Whether you’re knitting for yourself, a friend, or a loved one, there are endless possibilities for creating unique and stylish helmets.
Here are a few suggestions to help you find inspiration:
1. Explore different stitch patterns:
Knitting doesn’t have to be limited to basic stitches. Experiment with new stitch patterns like cables, lace, or colorwork to create interesting textures and designs.
2. Look for inspiration in nature:
Nature is full of beautiful patterns and colors. Take a walk in the park or go hiking and observe the shapes, colors, and textures around you. Use these elements as inspiration for your helmet design.
3. Consider the recipient’s interests:
If you’re knitting a helmet for someone else, think about their hobbies and interests. If they love sports, you can incorporate sporty colors or team logos into the design. If they are a fan of a particular TV show or movie, you can create a helmet inspired by that theme.
4. Browse knitting pattern books and websites:
There are countless knitting pattern books and websites available that can provide you with inspiration. Look for books specifically focused on helmet knitting or explore knitting pattern websites for ideas.
Remember, knitting is a creative and personal craft, so don’t be afraid to experiment, mix and match different patterns, and add your personal touch. The most important thing is to enjoy the process and have fun creating something unique!