
Knitting is a popular hobby that challenges the mind and allows for the creation of beautiful and functional items. However, for those seeking a truly difficult project to test their skill and perseverance, the hardest knitting pattern ever is a must-try. This pattern is known for its intricate design, complex stitch combinations, and challenging techniques, making it a true feat for advanced knitters.
The hardest knitting pattern ever is not for the faint of heart. With its abundance of cables, lacework, colorwork, and advanced stitch patterns, it pushes the boundaries of what is possible with knitting needles and yarn. It requires extreme focus and attention to detail, as even the smallest mistake can throw off the entire design.
The difficulty of this pattern is not only in its complexity, but also in its length. It often consists of hundreds of rows and requires hours, if not days, of dedicated work. The knitter must have a strong sense of patience and determination, as progress may be slow and mistakes may need to be undone and corrected.
While the hardest knitting pattern ever may seem intimidating, it is also incredibly rewarding. The challenge of completing such a difficult project can bring immense satisfaction and a sense of accomplishment. Knitters who successfully complete the pattern often find themselves with a unique and cherished item that showcases their skills and dedication.
Knitting is a popular hobby that allows you to create beautiful and unique clothing and accessories. While there are many knitting patterns available for beginners and intermediate knitters, there are also some patterns that are notoriously difficult and challenging to complete. These patterns require advanced skills, intricate stitches, and a lot of patience. If you’re up for a challenge and want to test your knitting abilities, here are some of the hardest knitting patterns ever.
1. Lace Knitting

Lace knitting is known for its delicate and intricate patterns that often include complex stitch combinations, increases, and decreases. Knitting lace requires precision and attention to detail, as any mistakes can be difficult to fix. The combination of lace stitches and fine yarn can make this type of knitting extremely challenging and time-consuming. However, the end result is always stunning and worth the effort.
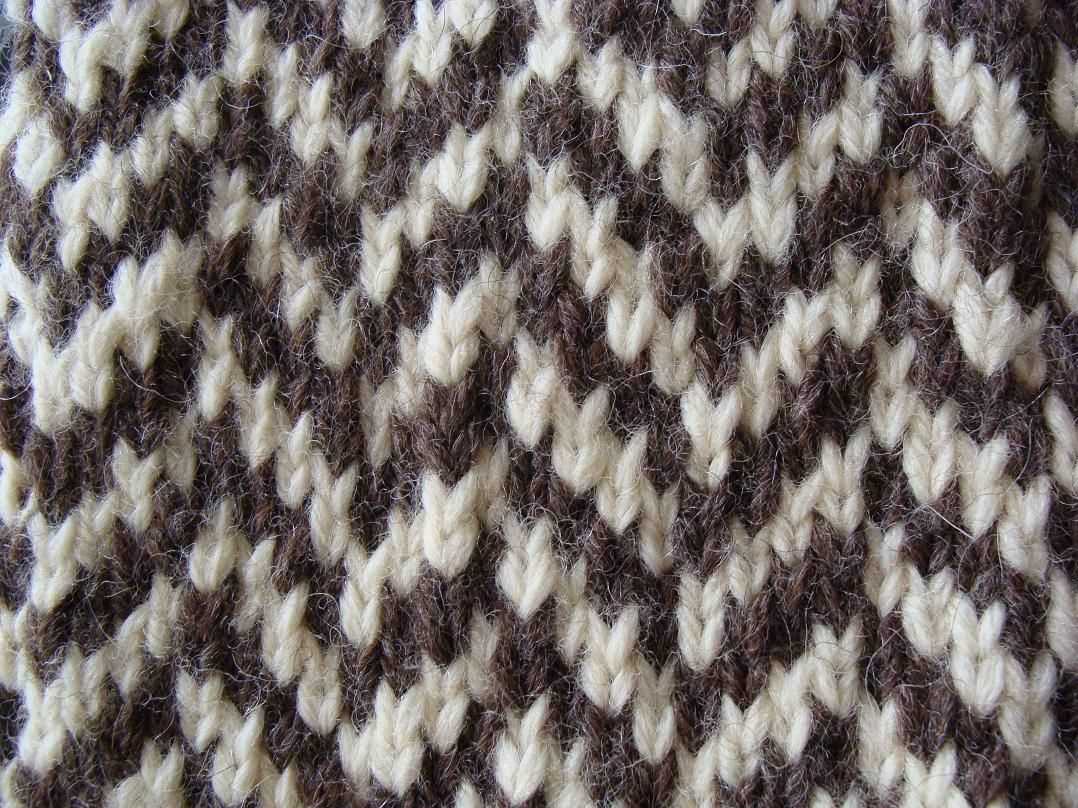
2. Fair Isle Knitting
Fair Isle knitting, also known as stranded knitting, involves working with multiple colors in the same row to create intricate patterns. This technique requires carrying the unused yarn along the back of the work, which can be tricky and result in tangled threads if not done properly. Fair Isle patterns often feature small, detailed motifs, requiring accuracy and patience to get the desired outcome.
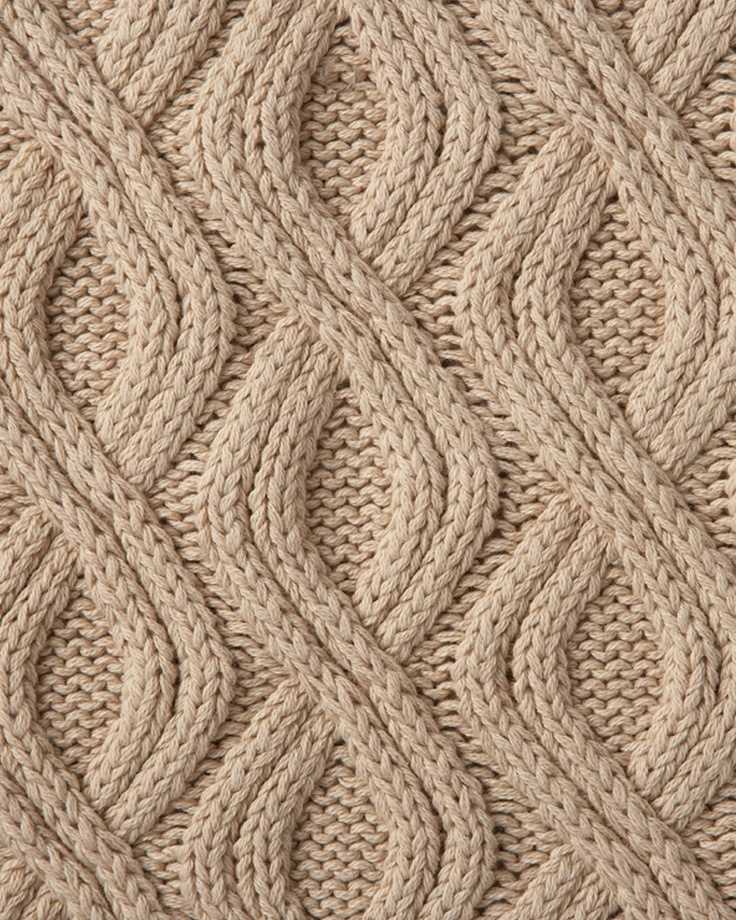
3. Aran Knitting
Aran knitting is characterized by its intricate cable patterns that often resemble ropes or braids. These patterns are created by crossing the stitches over one another, creating a textured and visually appealing design. Aran knitting can be challenging due to the complexity of the cable patterns, especially if you’re new to this type of knitting. It requires careful attention to stitch counts and cable charts to ensure the cables are correctly aligned.
4. Intarsia Knitting
Intarsia knitting involves working with multiple colors to create pictures or patterns in your knitting. Unlike Fair Isle knitting, where the unused yarn is carried across the back, intarsia requires separate balls or bobbins of yarn for each section of color. This technique can be challenging to master, as it requires precise tension control and careful attention to color changes. Creating smooth and seamless transitions between colors is the key to achieving a professional-looking result.
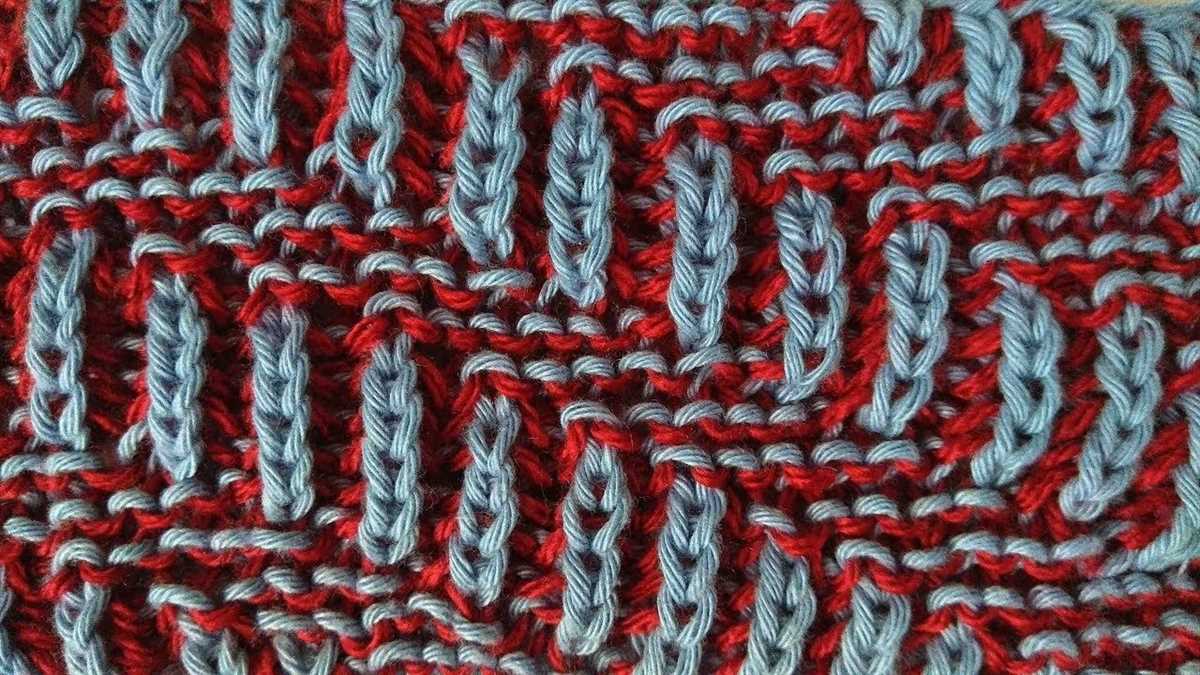
5. Double-Knitting
Double-knitting is a technique that produces a reversible fabric with two right sides. It involves knitting two layers simultaneously, with each layer having its own set of stitches. Double-knitting can be quite challenging, as it requires keeping track of both layers of stitches and working with two different yarns at the same time. This technique can create intricate colorwork designs and has the benefit of creating a fabric that is warm and fully reversible.
These are just a few examples of some of the hardest knitting patterns ever. These patterns require advanced skills, patience, and a dedication to detail. However, completing a challenging knitting project can be incredibly rewarding, as it allows you to create unique and beautiful pieces that showcase your knitting talents.
Lacework Masterpiece: A Challenge for Experienced Knitters
If you’re an experienced knitter looking for a new challenge, then look no further than the Lacework Masterpiece pattern. This intricate design is considered one of the hardest knitting patterns ever created, testing the skills and patience of even the most seasoned knitters. With its delicate lace motifs and complex stitch patterns, the Lacework Masterpiece is a true work of art.
Expert level techniques:
The Lacework Masterpiece pattern incorporates a variety of advanced knitting techniques that push the boundaries of traditional knitting. From intricate lace knitting stitches to complex chart reading, this pattern requires a high level of skill and precision. The use of multiple stitch markers and the ability to read and follow detailed instructions are also essential for successfully completing this challenging project.
Attention to details:
Every detail matters when working on the Lacework Masterpiece pattern. The pattern requires careful attention to stitch counts, yarn overs, and decreases to maintain the delicate lacework motifs. Patience and precision are key, as even a small mistake can disrupt the overall design. This pattern will put your knitting skills to the test and push you to strive for perfection in every stitch.
A labor of love:
The Lacework Masterpiece pattern is not for the faint of heart. It requires hours of dedicated work and a true love for the art of knitting. The intricate stitch patterns and delicate lace motifs demand patience and perseverance. However, the end result is truly rewarding, as you will have created a stunning lacework masterpiece that showcases your knitting expertise.
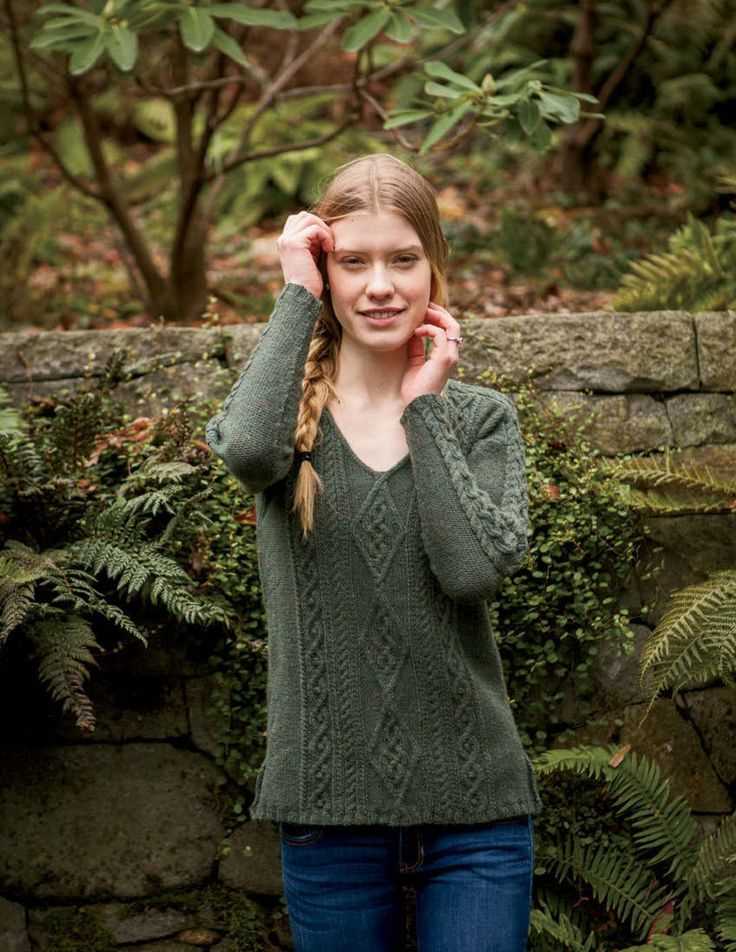
Cable-Knit Sweater: Complex Designs for Advanced Crafters
Knitting a cable-knit sweater can be a challenging and rewarding project for advanced crafters. With their intricate designs and complex stitch patterns, cable-knit sweaters are highly regarded in the knitting community for their beauty and craftsmanship. These sweaters feature intertwining cables that create a textured and dimensional look, making them stand out from ordinary sweaters.
One of the key elements that makes cable-knit sweaters complex is the intricate stitch patterns involved. Crafters need to follow detailed instructions and charts to create the desired cable designs. The patterns often include various types of cables, such as rope cables, honeycomb cables, and diamond cables, each requiring different techniques and stitches. This level of complexity requires a solid understanding of knitting techniques and the ability to read and interpret knitting patterns accurately.
Advanced crafters who take on the challenge of knitting a cable-knit sweater will be rewarded with a garment that showcases their skill and dedication. These sweaters are not only fashionable, but they also provide warmth and comfort. The textured cables give the sweater extra insulation, making it perfect for colder climates. Additionally, the intricate designs become a conversation starter, as people admire the craftsmanship and artistry involved in the creation of the sweater.
When choosing a cable-knit sweater pattern, it is important to consider your skill level and experience. If you are an advanced crafter looking for a challenge, opt for a pattern that features complex cable designs and intricate stitch patterns. However, if you are still developing your knitting skills, start with simpler cable patterns and gradually work your way up to more complex designs. Remember, practice makes perfect, and with patience and dedication, you can master the art of cable knitting and create stunning sweaters that will be cherished for years to come.
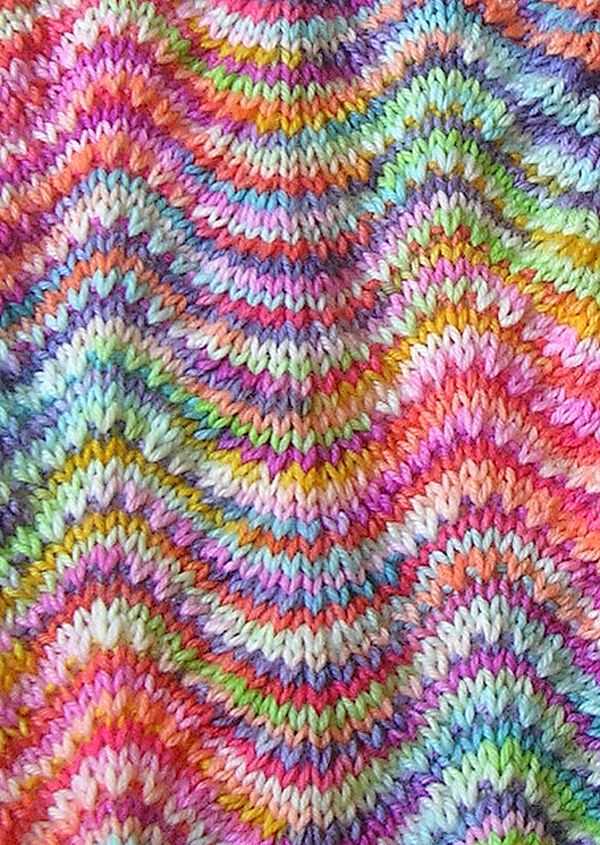
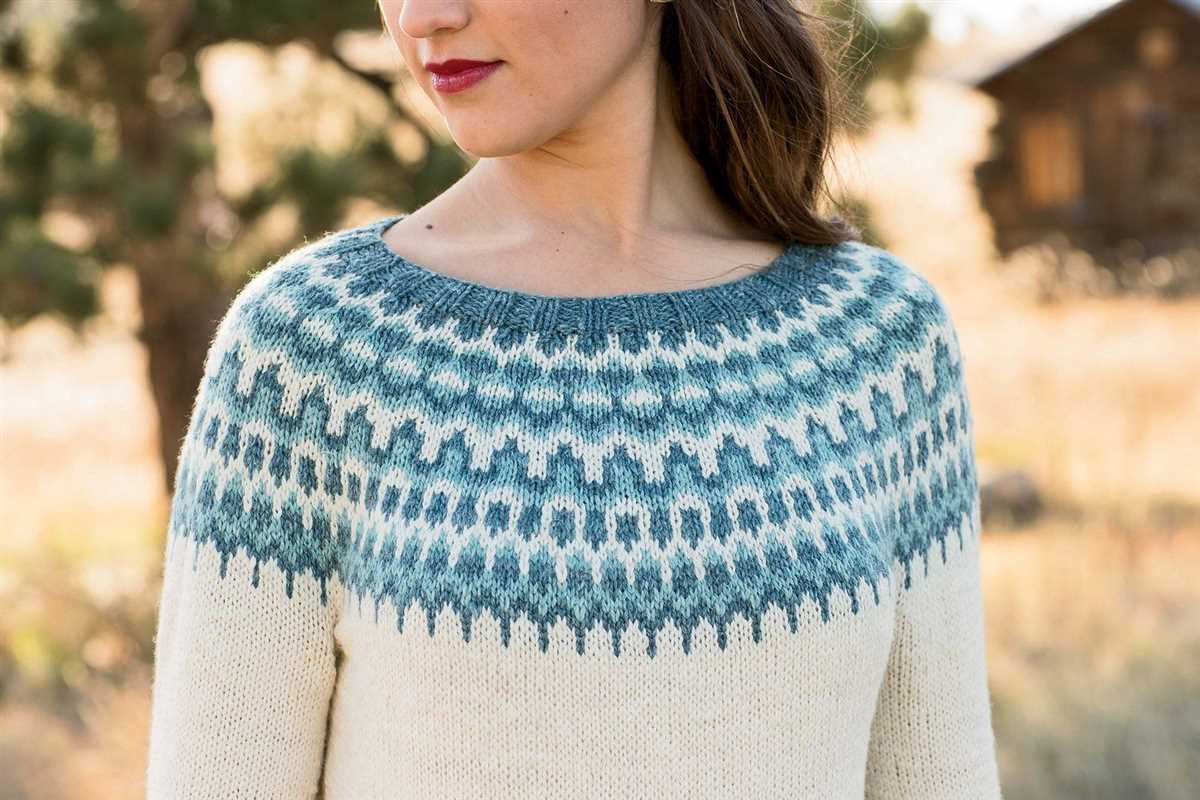
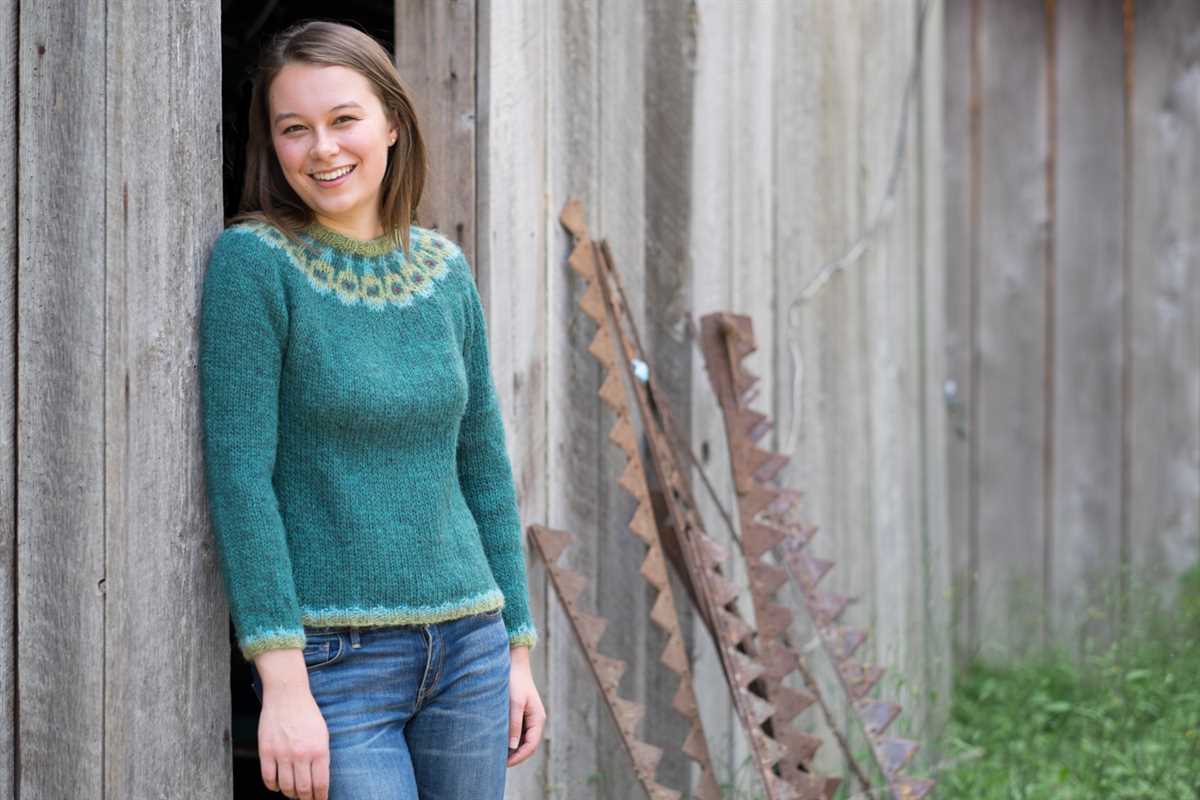
Fair Isle Cardigan: Juggling Multiple Colors and Patterns
Knitting a Fair Isle cardigan is no easy task. This style of knitting is known for its intricate colorwork and pattern combinations, requiring the knitter to juggle multiple colors and stitch patterns throughout the project.
A Fair Isle cardigan typically features a main color, which forms the majority of the garment, and several contrasting colors that are used for the intricate pattern details. The knitter must carefully plan the placement of these colors to create a balanced and visually appealing design. This involves choosing colors that complement each other and strategically placing them within the garment. The process requires a keen eye for color theory and design.
Once the colors are chosen, the knitter must then learn to juggle multiple strands of yarn at once. This can be quite challenging, as it requires keeping track of each color and untangling any potential knots or tangles that may occur. Knitters often use techniques such as stranding or intarsia to manage the multiple colors. These techniques require a high level of concentration and precision to ensure that the colorwork comes out crisp and clean.
In addition to the colorwork, Fair Isle cardigans often feature complex stitch patterns. Knitters must follow charts or written instructions to execute these patterns accurately. This requires careful attention to detail and the ability to read and interpret knitting patterns. Mistakes can easily be made, so knitters must stay focused and vigilant throughout the project.
Despite the challenges, knitting a Fair Isle cardigan can be a rewarding experience. Seeing the intricate patterns come together and the beautiful colors blend harmoniously is a testament to the knitter’s skill and dedication. It may be one of the hardest knitting patterns ever, but the end result is a unique and stunning garment that showcases the knitter’s talent and creativity.
Aran Shawl: Intricate Cable and Lace Combinations
The Aran shawl is a knitting pattern that showcases intricate cable and lace combinations. It is a challenging project that requires advanced knitting skills and attention to detail. This pattern is not for the faint of heart, but for experienced knitters looking to push their abilities to the next level.
The Aran shawl features a variety of cable and lace patterns that create a beautiful, textured fabric. The cables add depth and richness to the shawl, while the lace creates delicate and airy sections. These two elements work together to create a stunning and unique piece that is sure to impress.
To knit the Aran shawl, you will need to be familiar with a variety of cable and lace stitches. The pattern may include stitches such as twisted cables, braided cables, honeycomb cables, and various lace motifs. Each stitch will require careful attention to detail and concentration to ensure that the pattern is executed correctly.
The Aran shawl is typically knit using a fine yarn and smaller needles to achieve a tight and dense fabric. This adds to the challenge of the project, as working with smaller needles can be more difficult and time-consuming. However, the end result is a beautifully intricate shawl that is worth the effort.
If you are an experienced knitter looking for a challenging project that will push your skills to the limit, the Aran shawl is the perfect choice. With its intricate cable and lace combinations, this pattern will not only test your knitting abilities, but also result in a stunning and unique piece of wearable art.
Intarsia Blanket: Mastering Colorwork and Chart Reading
Knitting an intarsia blanket is a great way to challenge your skills in colorwork and chart reading. Intarsia is a technique that allows you to create intricate designs using multiple colors of yarn. It involves knitting with different colors in different sections of the fabric, and using bobbins or bobbins to manage the yarns.
To begin knitting an intarsia blanket, you will need to choose a design or pattern that you would like to create. This could be anything from simple geometric shapes to more complex images or motifs. Once you have chosen your design, you will need to acquire the necessary yarns in the colors specified in the pattern.
The next step is to create a chart for your design. This chart will serve as a visual guide for where to change colors and how many stitches to knit with each color. It will also help you keep track of which yarns are on which bobbins or bobbins. To create the chart, you can either use a knitting software, or draw it by hand on graph paper.
Once you have your chart and yarns ready, you can start knitting your intarsia blanket. Follow the chart carefully, making sure to change colors at the correct stitches. To join a new color, simply drop the old yarn and start knitting with the new color, leaving a tail to weave in later. When you come to the end of a section with a color, carry the yarn behind the work and pick it up again when you need it.
Knitting an intarsia blanket can be a complex and time-consuming project, but with patience and practice, you can create a beautiful and unique piece. It’s important to take your time with the colorwork and chart reading, as accuracy is key to achieving a clean and professional-looking result. As you progress with your intarsia knitting skills, you can experiment with more intricate designs and color combinations to create truly stunning blankets.
Entrelac Socks: Building a Unique Geometric Design
When it comes to knitting, there are endless possibilities for creating intricate and beautiful patterns. One such pattern that challenges even the most experienced knitters is the Entrelac socks. This design is known for its unique geometric construction, which creates an eye-catching woven effect.
The Entrelac socks pattern is not for the faint of heart. It requires a solid understanding of knitting techniques, as well as the ability to follow complex instructions. The design is built by knitting individual squares or diamonds in a diagonal formation, which are then joined together to create the distinctive woven look. This technique requires careful attention to detail and precision, as any mistakes can disrupt the overall pattern.
To begin the Entrelac sock pattern, you will need to:
- Select a high-quality yarn in a color or colors of your choice.
- Choose appropriate knitting needles, typically in a size suitable for the yarn you have chosen.
- Have a good understanding of basic knitting techniques, such as knit, purl, and decrease stitches.
The Entrelac sock pattern is broken down into the following steps:
- Cast on the desired number of stitches for the sock cuff.
- Create the base triangles by picking up stitches along the edge of the cuff.
- Knit the base triangles in a diagonal formation, gradually increasing the number of stitches as you go.
- Work the square or diamond motifs by picking up stitches along the edges of the base triangles.
- Continue building the sock by alternating between base triangles and square/diamond motifs.
- Shape the heel and toe of the sock as necessary.
- Finish the sock by binding off and weaving in any loose ends.
The Entrelac sock pattern allows for endless variations in color and design. Knitters can choose to use one solid color, experiment with gradient yarns, or mix and match multiple colors for a bold and vibrant look. The design also lends itself well to showcasing intricate stitch patterns, such as cables or lace.
In conclusion, the Entrelac sock pattern presents a unique and challenging knitting project for those looking to push their skills to the next level. With its geometric design and intricate construction, these socks are sure to turn heads and become a coveted addition to any knitter’s collection.
Double-Knit Scarf: Creating Reversible Patterns with Two Colors
Creating a double-knit scarf allows knitters to showcase their skills and create beautiful reversible patterns using two colors. Double knitting is a technique that involves knitting with two strands of yarn at the same time, creating a fabric that is reversible and has two right sides. This technique is perfect for scarves as it creates a thick and warm fabric that works well for cold weather.
To start knitting a double-knit scarf, you will need two contrasting colors of yarn and a pair of knitting needles. It is important to choose colors that complement each other and create a pleasing contrast. Once you have your materials ready, you can begin by casting on an even number of stitches.
The key to creating reversible patterns in double knitting is the use of different colors on each side of the fabric. As you knit each row, you will alternate between the two colors, creating a pattern that is visible on both sides. This allows you to experiment with different motifs, such as stripes, checks, or even more intricate designs like cables or lace.
One popular technique in double knitting is the “slip-stitch” pattern, where one color is worked as knit stitches on one side and slipped stitches on the other. This creates a contrasting pattern that adds depth and texture to the scarf. Another technique is the “intarsia” method, where different colored blocks or shapes are created on each side of the fabric.
Double knitting can be a challenging technique for beginners, but with practice, it can be mastered. It requires concentration and attention to detail to ensure that the pattern is executed correctly on both sides of the fabric. However, the results are truly rewarding, as you will have a beautiful, reversible scarf that is sure to impress.
Steeked Hat: Conquering the Fear of Cutting Your Work
One of the scariest techniques in knitting is steeking, the process of cutting your knitting to create openings for sleeves or other design elements. The idea of taking scissors to your carefully crafted work can be nerve-wracking, but mastering this technique opens up a whole new world of possibilities. One project that is perfect for conquering your fear of steeking is a steeked hat.
A steeked hat is a great introduction to this technique because it is a small and relatively quick project. It allows you to practice the steeking process on a smaller scale before attempting it on a larger garment. The basic idea of a steeked hat is to knit a tube in the round, leaving a small opening or “steek” that will later be cut to create the brim of the hat. This technique is commonly used in traditional Fair Isle knitting, where intricate colorwork patterns create stunning designs.
To knit a steeked hat, you will need to choose a suitable yarn and design your colorwork pattern. It is important to select a yarn that can be easily steeked, such as wool or wool blends with high felting properties. The colorwork pattern should be symmetrical and have clear points for cutting. You will also need to have a good understanding of knitting in the round, as well as basic techniques such as knitting, purling, and decreasing.
Once you have chosen your yarn and designed your pattern, you can start knitting your steeked hat. Create a seamless tube by knitting in the round, making sure to leave a small opening for the steek. Use stitch markers to help keep track of your colorwork pattern and make any necessary adjustments as you go. Once you have completed the tube, it is time to prepare for the steeking process.
Before cutting your work, reinforce the steek by sewing a line of secure stitches on either side of the opening. This can be done using a sewing machine or by hand with a strong sewing thread. Once the steek is secured, carefully cut through the center of the stitches using sharp scissors. This can be a nerve-wracking moment, but remember that you have reinforced the steek and it will hold together. Once the hat is cut, you can fold back the steek and either secure it with a crochet edge or sew it down with a sewing machine or by hand. Finish off your hat by adding a brim or other design elements, and you will have successfully conquered your fear of steeking!
By starting with a smaller project like a steeked hat, you can gradually build up your confidence and skills in steeking. As you become more comfortable with the process, you can move on to larger garments such as cardigans or sweaters. Steeking opens up a whole new world of design possibilities in knitting, allowing you to create intricate and beautiful garments with ease.
Chunky Cable Mittens: Working with Thick Yarn and Intricate Cables
Knitting with thick yarn can be a rewarding and challenging experience. Chunky cable mittens are a perfect project for those who enjoy working with thick yarn and intricate cable designs. These mittens are not only cozy but also stylish, making them a great accessory for the colder months.
One of the main benefits of working with thick yarn is that it knits up quickly, allowing you to see the progress of your project in no time. The substantial weight of the yarn also creates a warm and durable finished product. Chunky yarn is perfect for winter items like mittens, as it provides extra insulation against the cold.
Intricate cables add an extra level of complexity and visual interest to your mitten project. Cables are created by crossing stitches over each other, forming lovely braided patterns. While they may look intimidating, with some patience and practice, you can master cable knitting techniques.
When working with cables, it is important to use the correct needle size to ensure the stitches can easily slide onto and off the needle. It is also crucial to have a cable needle or stitch holder to hold the stitches while you create the cables. Following a cable chart or written instructions will help you keep track of the cable pattern and create a cohesive design.
Overall, knitting chunky cable mittens can be a challenging but rewarding project. The combination of working with thick yarn and intricate cable designs creates a cozy and stylish accessory that you can be proud of. So grab your chunky yarn and cable needles, and get ready to create a pair of mittens that will keep your hands warm and your style on point.
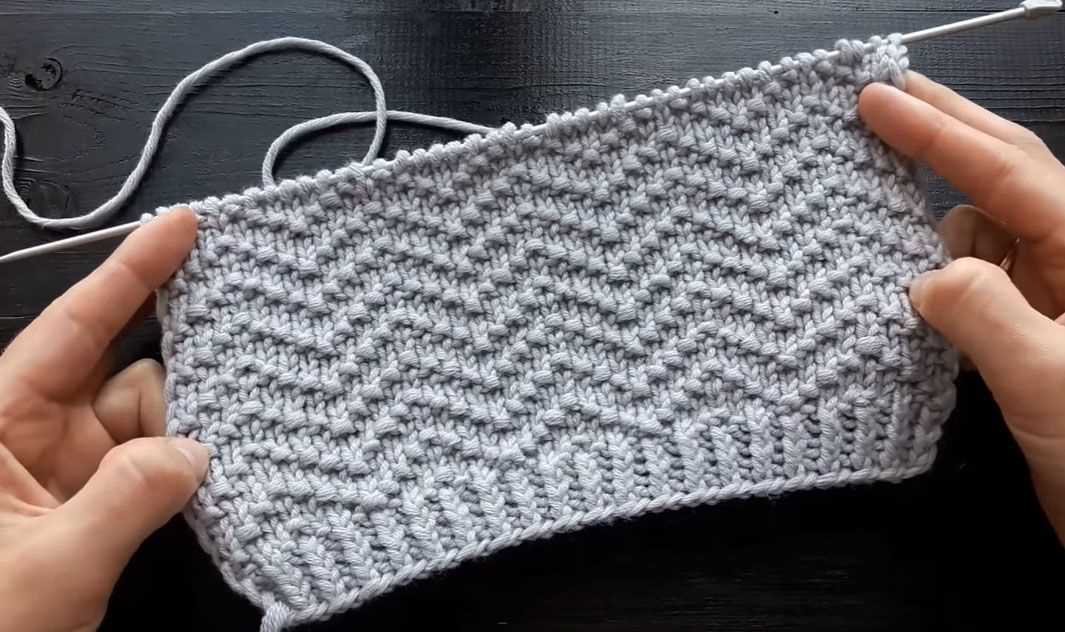
Sweater with Twisted Stitches: Challenging Techniques and Patterns
In the world of knitting, there are endless possibilities when it comes to creating intricate designs and patterns. One such technique that can challenge even the most experienced knitters is working with twisted stitches. Sweaters with twisted stitch patterns are a true test of skill and patience, but the end result is a beautifully textured garment that is sure to impress.
Twisted stitches are created by working the stitch through the back loop instead of the front. This simple variation in knitting technique creates a twisted effect, resulting in a unique pattern that adds depth and visual interest to any garment. While it may take some time to get used to working with twisted stitches, the effort is well worth it.
There are countless twisted stitch patterns that can be used to create stunning sweaters. From intricate cables to delicate lace designs, the possibilities are endless. Some knitters prefer to work with charts, while others rely on written instructions. Whichever method you choose, be prepared for a challenge as you navigate the twists and turns of the pattern.
To successfully complete a sweater with twisted stitches, it is important to pay close attention to the pattern and take your time. Mistakes can be difficult to correct in twisted stitch patterns, so it is essential to focus and work accurately. Additionally, using a smooth and solid-colored yarn will help showcase the stitch pattern and make it easier to read your knitting.
While working on a sweater with twisted stitches may be daunting, the sense of accomplishment and the stunning finished product make it all worthwhile. This challenging technique allows knitters to push their skills to the limit and create truly unique and eye-catching garments. So if you’re up for a challenge, grab your knitting needles and dive into the world of twisted stitches. You may just discover a new favorite technique!