
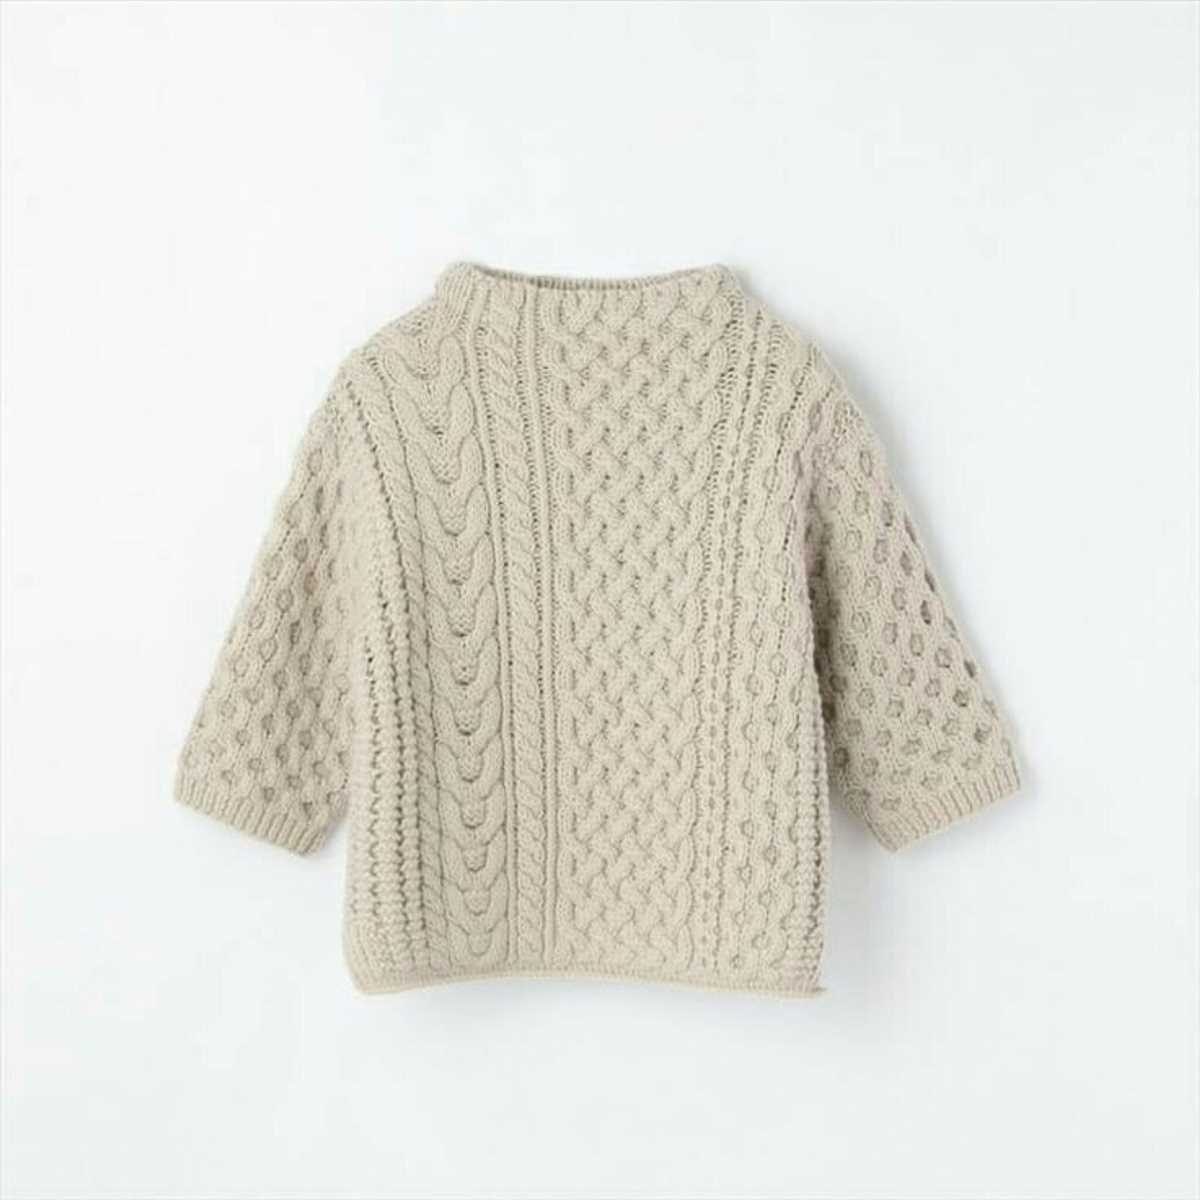
Knitting is a wonderful way to relax and create beautiful, unique garments. If you’re looking for a new project to tackle, why not try knitting a funnel neck sweater? Funnel neck sweaters are cozy, stylish, and perfect for keeping warm during the colder months.
This knitting pattern is suitable for intermediate knitters and requires knowledge of basic knitting stitches such as knit, purl, and ribbing. The funnel neck adds a touch of elegance to the sweater and can be adjusted to your desired height.
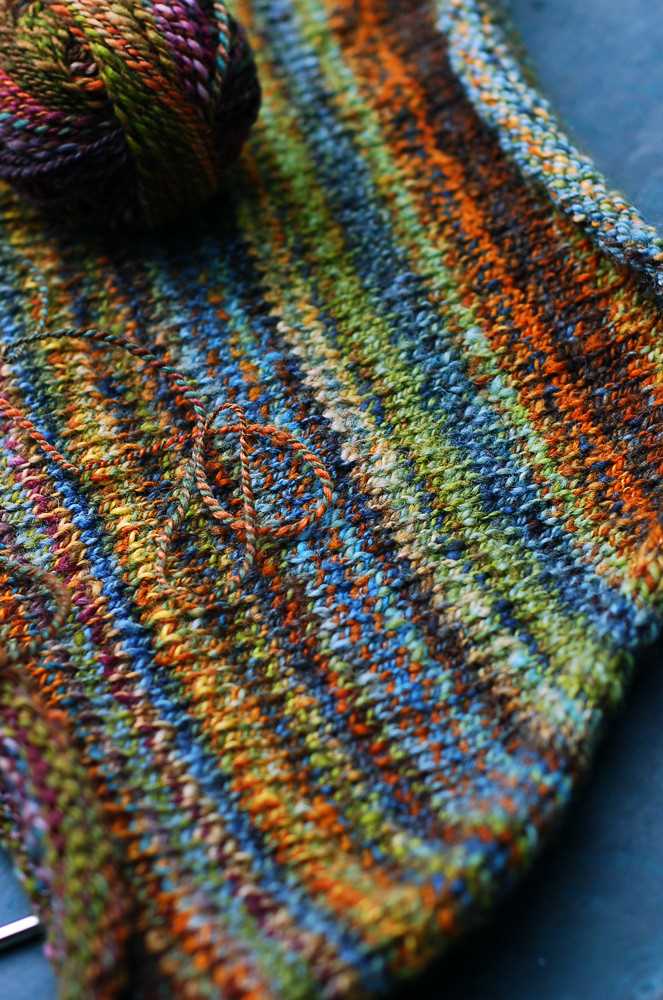
To begin, you will need to gather your materials. You’ll need yarn in your chosen color, knitting needles in the appropriate size for your yarn, and a tapestry needle for finishing. Make sure to choose a soft, durable yarn that will keep you warm and hold its shape.
Funnel Neck Sweater Knitting Pattern
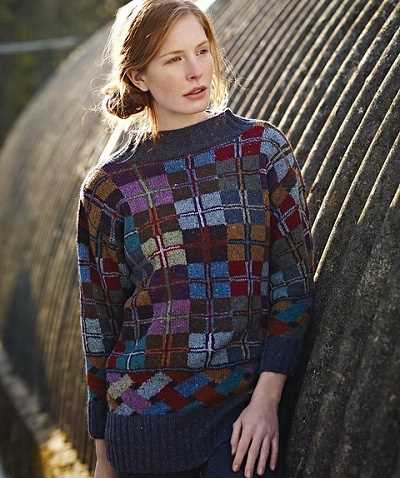
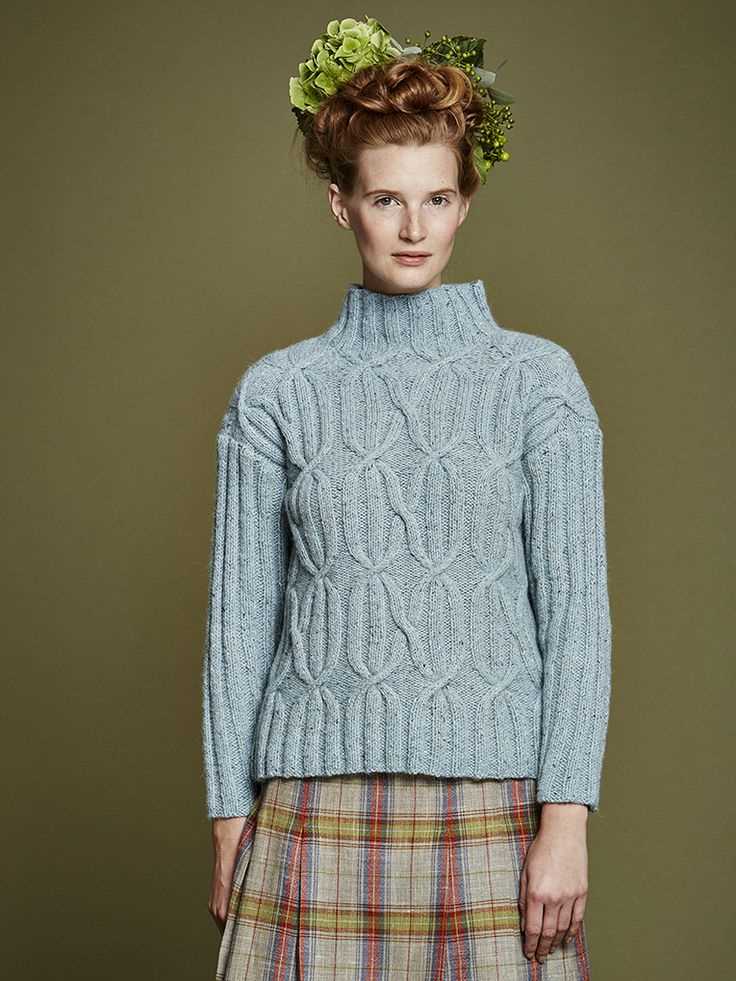
The funnel neck sweater is a stylish and cozy garment that is perfect for the colder months. Knitting your own sweater allows you to customize the fit and choose your favorite colors and patterns. With this knitting pattern, you can create a beautiful funnel neck sweater that will become a staple in your wardrobe.
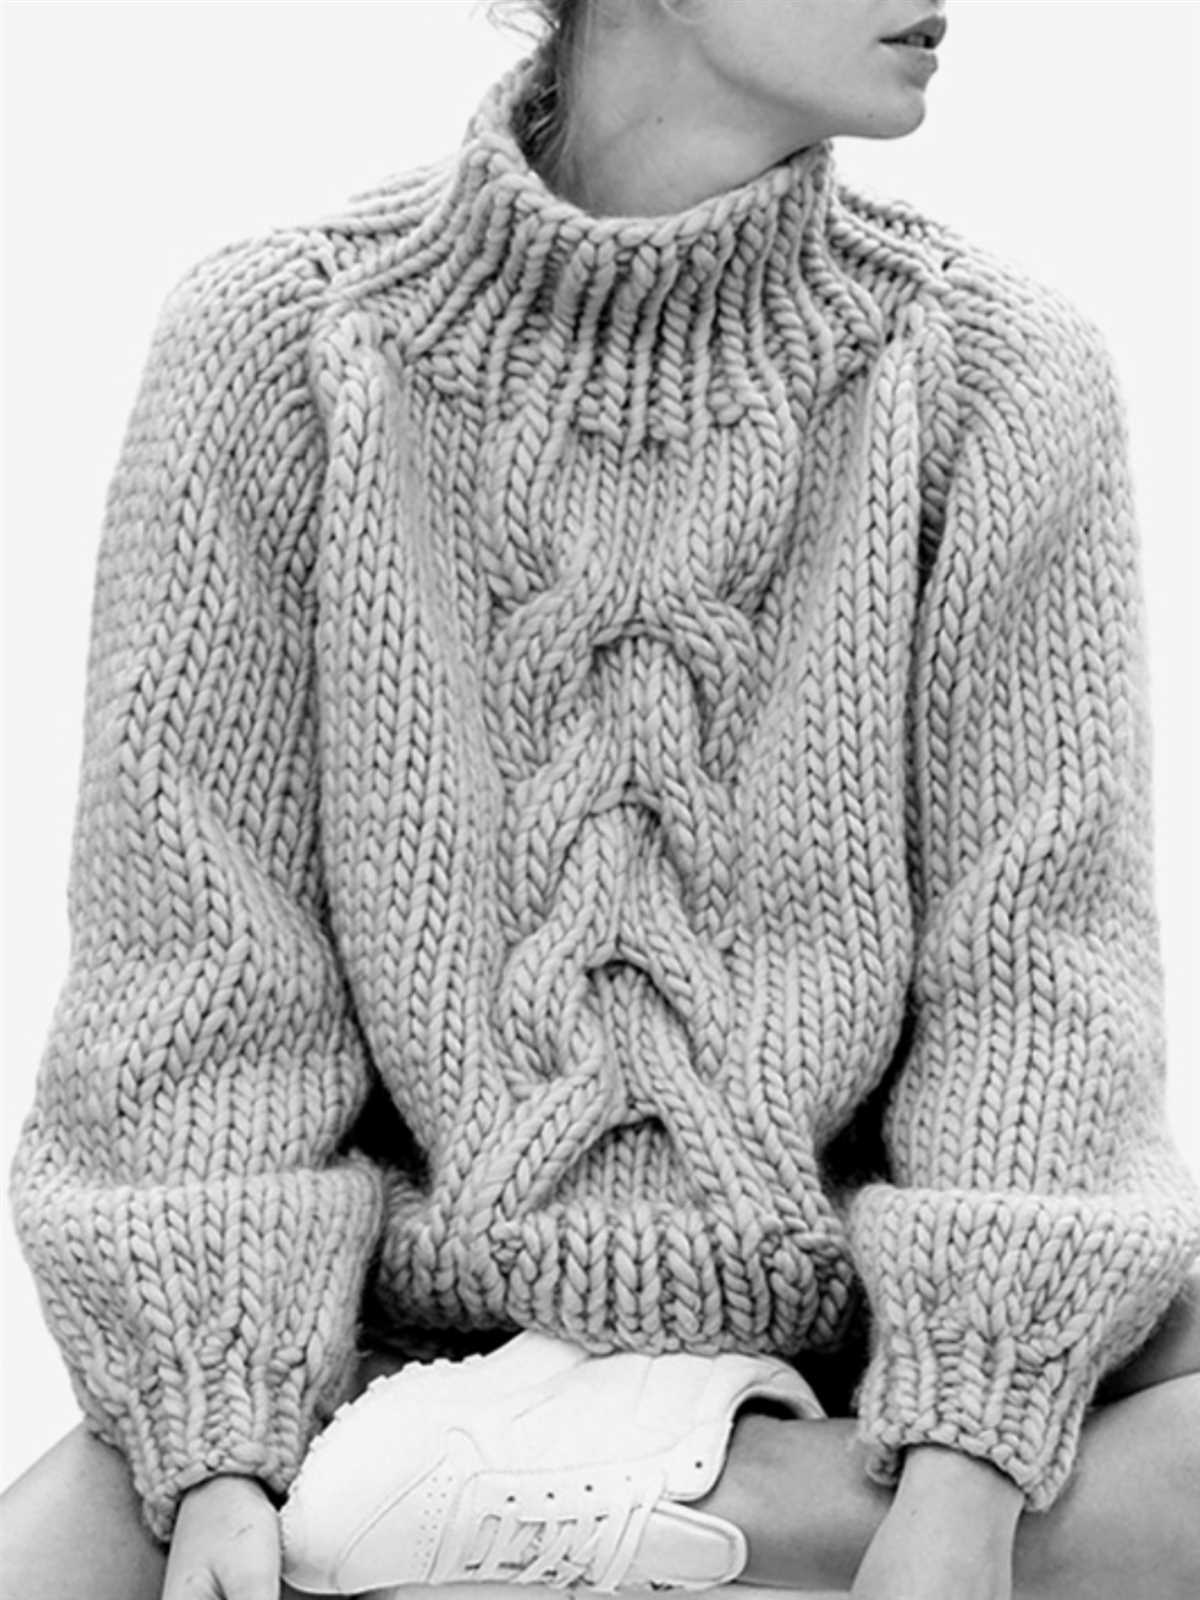
To begin knitting the sweater, you will need chunky yarn and knitting needles in the appropriate size. You will also need a cable needle and stitch markers. The pattern is suitable for intermediate knitters who are comfortable with basic knitting techniques such as knit, purl, and decreasing stitches.
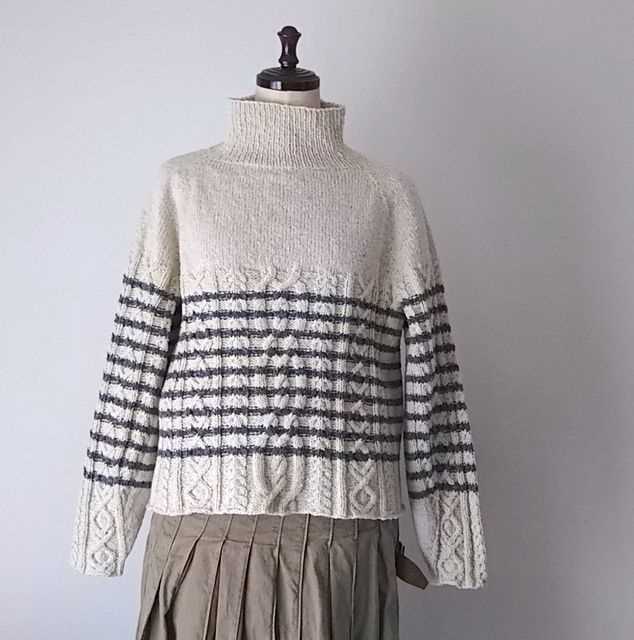
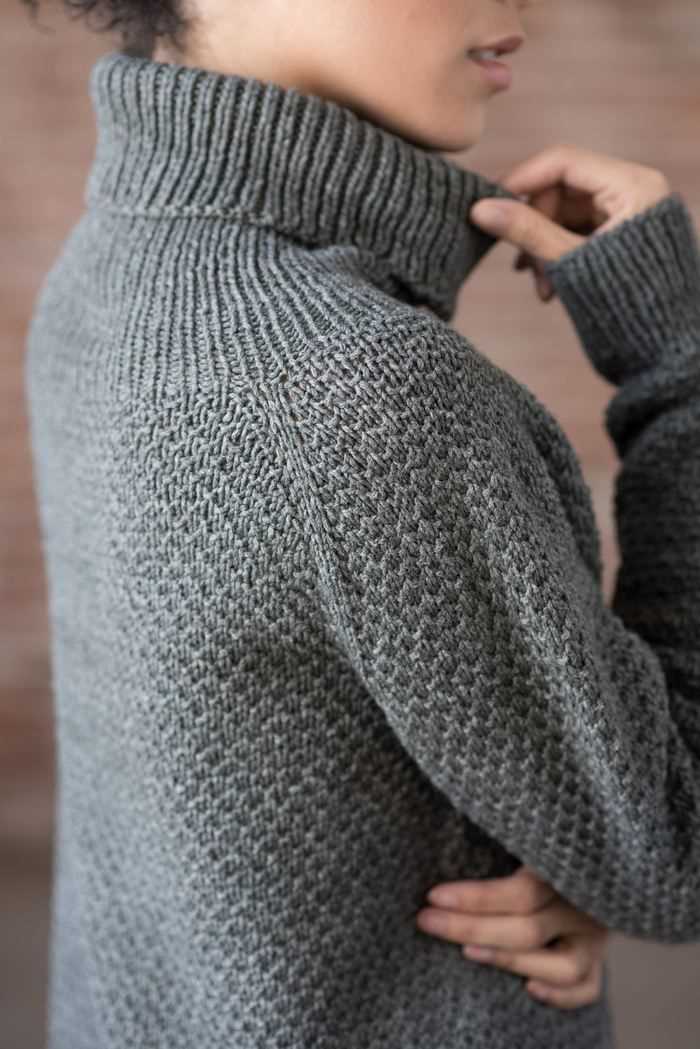
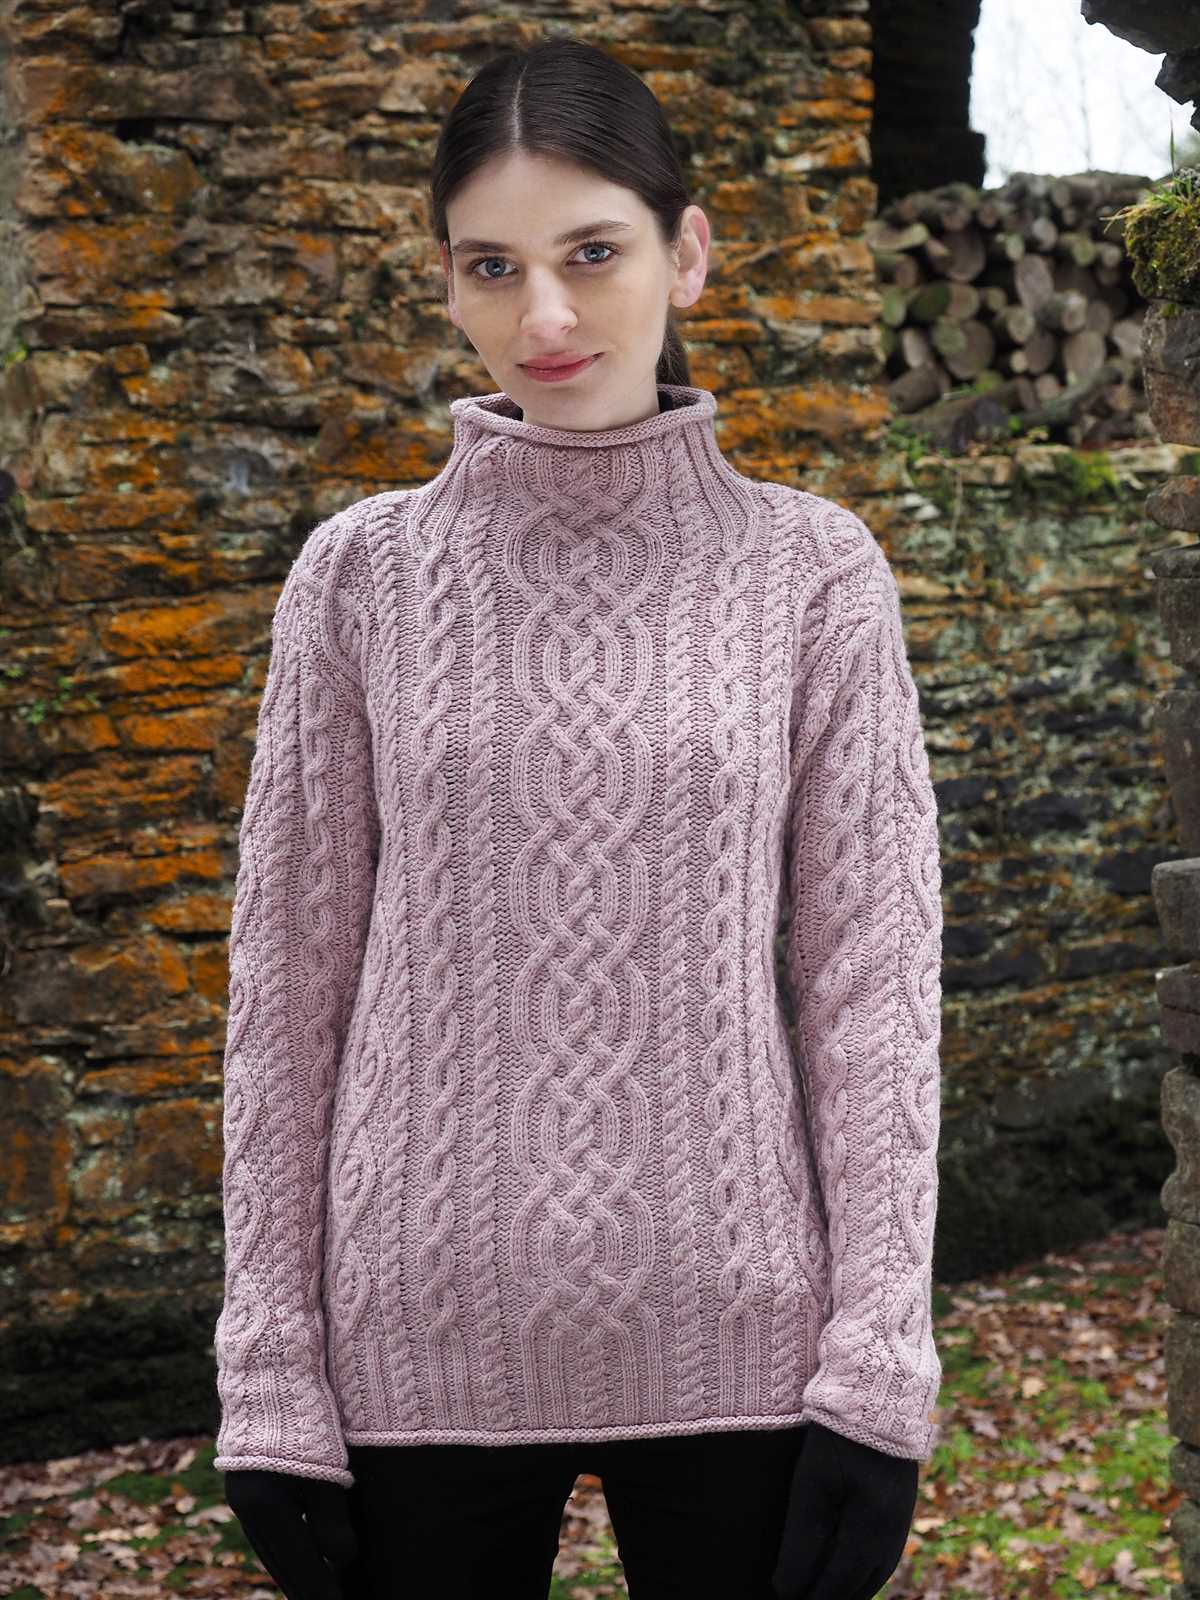
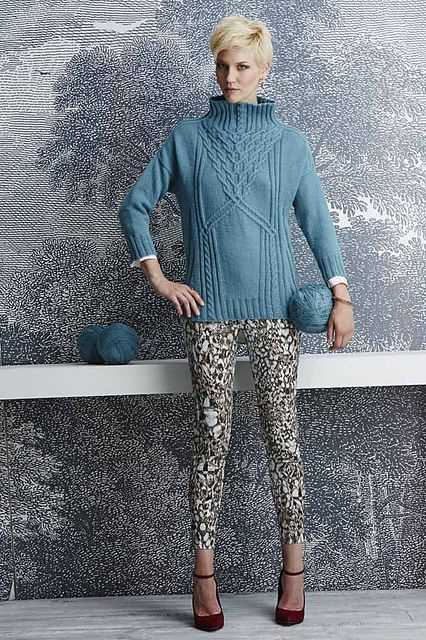
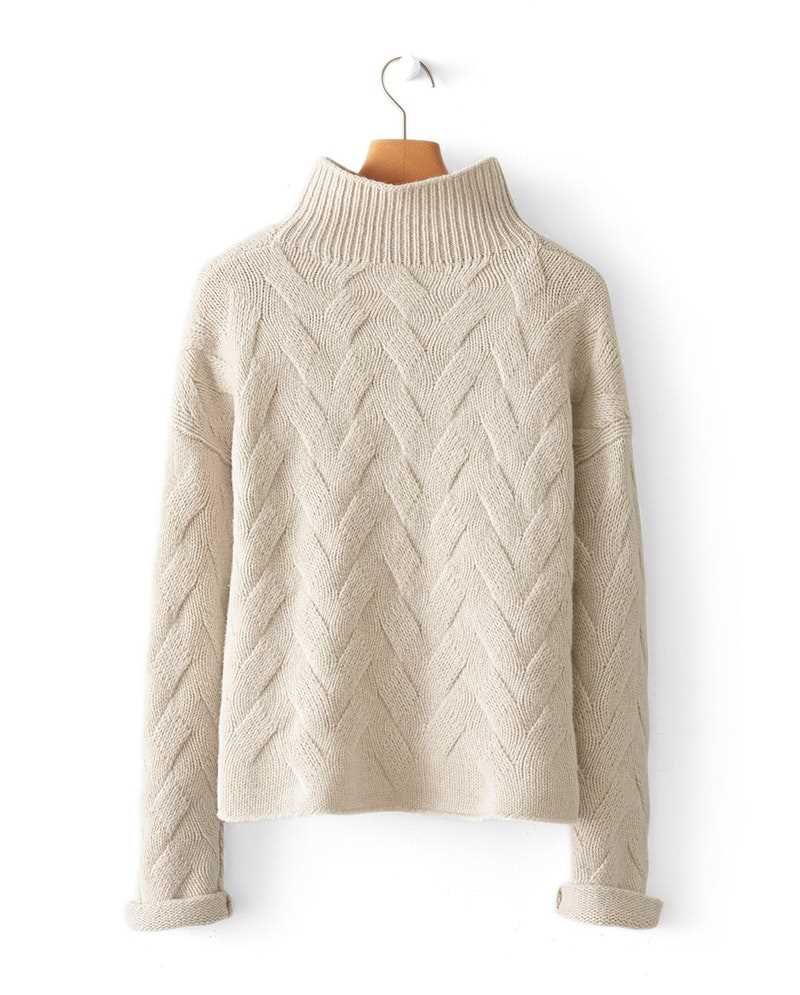
The funnel neck sweater starts with a ribbed collar that provides a snug fit around the neck. From there, the sweater features a textured body pattern that adds interest and depth to the design. The sleeves are knit separately and then attached to the body. The pattern includes instructions for both a cropped and a longer version of the sweater, allowing you to create the perfect length for your preferences.
The finished funnel neck sweater will be a cozy and versatile addition to your wardrobe. It can be dressed up or down, worn with jeans for a casual look or paired with a skirt for a more polished outfit. The chunky yarn used in the pattern ensures that the sweater will keep you warm and comfortable during the cold winter days. Whether you are an experienced knitter or just starting out, this pattern will guide you through the process of creating a beautiful and stylish funnel neck sweater.
Choosing Yarn and Needles
When knitting a funnel neck sweater, the choice of yarn and needles is crucial to achieve the desired outcome. The yarn selection depends on the desired texture, warmth, and drape of the finished sweater. Opting for a soft and warm yarn like merino wool or alpaca can create a cozy sweater. For a more lightweight and breathable option, cotton or linen yarn can be used. It’s important to consider the season and climate to ensure the sweater is comfortable to wear.
The needle size also plays a role in the overall look and feel of the sweater. Thicker needles create a looser and more open stitch, resulting in a more relaxed and casual sweater. On the other hand, smaller needles create a tighter stitch, giving the sweater a more structured and polished appearance. The choice of needle material, such as metal, bamboo, or plastic, can also affect the overall knitting experience and the final outcome.
Before starting the project, it is advisable to make a swatch using the chosen yarn and needles to determine the gauge. This will ensure that the sweater turns out to be the correct size and fit. Following the pattern’s recommendations for gauge is important to achieve the intended measurements and ensure the sweater fits well.
Overall, the choice of yarn and needles in knitting a funnel neck sweater is a personal preference based on the desired texture, warmth, and style. Swatching and checking gauge are crucial steps to ensure a successful knitting project and a satisfying end result.
Getting Started
If you’re looking to create a cozy and fashionable funnel neck sweater, this knitting pattern is the perfect project for you. With its relaxed fit and stylish neckline, this sweater is a must-have addition to your wardrobe.
To get started on this knitting pattern, you’ll need the following materials:
- 9 balls of chunky yarn (color of your choice)
- A pair of 5mm knitting needles
- A pair of 6mm knitting needles
- A yarn needle for finishing
- A set of stitch markers
Once you have gathered all the necessary materials, it’s time to dive into the pattern. The first step is to cast on the required number of stitches, which can be found in the instructions. Make sure to use the larger knitting needles for this step to achieve the correct gauge.
As you progress through the pattern, you’ll encounter different stitches and techniques, such as ribbing, increasing, and decreasing. Don’t worry if you’re not familiar with these techniques – the pattern includes detailed instructions and explanations to help you along the way. You can also refer to online knitting resources or tutorials if you need additional guidance.
One important tip to keep in mind is to regularly check your gauge as you knit. This will ensure that your sweater turns out the correct size and fit. If your gauge is too loose, try using smaller needles, and if it’s too tight, switch to larger needles.
Once you’ve completed all the required sections of the pattern, it’s time to finish off your sweater by sewing up any seams and weaving in any loose ends. Take your time with this step to ensure a neat and professional-looking finish.
Now that you have all the information you need, it’s time to grab your knitting needles and get started on your very own funnel neck sweater. Happy knitting!
Knitting the Ribbing

The ribbing is an important component of a funnel neck sweater as it provides structure and elasticity to the collar. It is typically knitted using a smaller needle size than the main body of the sweater to create a tighter fabric.
To start knitting the ribbing, cast on the required number of stitches using the smaller needle size. It is common to use a smaller needle size than the rest of the sweater, such as a size US 4 (3.5mm), to ensure the ribbing is snug and doesn’t sag.
The most common ribbing pattern used for a funnel neck sweater is the 1×1 ribbing. This means that each knit stitch is followed by a purl stitch, creating a textured pattern. The 1×1 ribbing provides flexibility and stretch to the collar, allowing it to comfortably fit over the head.
Continue knitting the ribbing until you reach the desired length. Typically, the ribbing is around 1-2 inches (2.5-5cm) long, but you can adjust this based on your preference. For a more fitted collar, you can opt for a shorter ribbing, while a longer ribbing will create a looser look.
Once the ribbing is complete, you can switch to the main needle size and continue knitting the body of the sweater according to the pattern instructions. The ribbing will provide a clean and polished edge to the collar, giving the sweater a professional finish.
Knitting the Body
Once you have completed the ribbing for the funnel neck, it’s time to start knitting the body of the sweater. The body section will determine the length and fit of the sweater, so it’s important to follow the pattern instructions carefully.
Begin by casting on the required number of stitches for your desired size. You can use a stitch marker to mark the beginning of the round, especially if you are knitting in the round. If the pattern calls for any shaping, such as increases or decreases, make sure to do them at the designated points.
Continue knitting in the designated stitch pattern until you reach the desired length for the body. You may need to measure your work periodically to ensure that you are on track. It’s also a good idea to try on the sweater as you go to check the fit and make any necessary adjustments.
If the pattern includes any additional details, such as pockets or colorwork, follow the instructions to incorporate these into the body of your sweater. Be sure to read through the pattern and understand any special techniques or stitches that may be required.
Once you have completed the body section, you can move on to knitting the sleeves and finishing the sweater. The body is a significant part of the overall sweater and it’s important to take your time and make sure it is knit with care and attention to detail.
Shaping the Shoulders
Shaping the shoulders of a funnel neck sweater is an important step to ensure a comfortable and flattering fit. This is done by decreasing stitches on each side of the shoulder area to create a sloping line that follows the natural shape of the shoulders.
Decreasing Stitches:
To start shaping the shoulders, you will need to decrease stitches on both sides of the shoulder area. This can be done using various decrease techniques, such as knitting two stitches together (k2tog) or slipping a stitch then knitting the next stitch and passing the slipped stitch over (ssk). The specific decrease method you choose will depend on the overall design and stitch pattern of your funnel neck sweater.
Placement of Decreases:
The decreases should be evenly spaced across the shoulder area to create a smooth and balanced slope. You can calculate the number and interval of decreases based on your desired shoulder width and stitch gauge. It’s important to make sure that the decreases do not interfere with any stitch patterns or cables that may be present in the sweater.
Gradual Slope:
The decreases should be worked gradually to create a natural slope without any abrupt changes in the shape of the shoulder. This can be achieved by decreasing stitches on every other row or by spacing out the decreases over a certain number of rows, depending on the stitch pattern and desired slope.
By carefully shaping the shoulders of your funnel neck sweater, you can ensure a comfortable and flattering fit that enhances the overall appearance of the garment.
Knitting the Sleeves
Once you have finished knitting the body of the funnel neck sweater, it’s time to move on to the sleeves. The sleeves are knitted separately and then attached to the body of the sweater.
Casting on and knitting the sleeves
To start knitting the sleeves, you will first need to cast on the required number of stitches onto your knitting needle. The pattern should specify the number of stitches to cast on based on the size you are making.
Once you have cast on the stitches, you will then begin knitting in the desired stitch pattern for the sleeves. This could be a simple stockinette stitch or a more intricate pattern, depending on the design of the sweater. Follow the instructions provided in the pattern to ensure you are knitting the correct stitch pattern for the sleeves.
Continue knitting the sleeves until you reach the desired length. The pattern should specify the exact length you need to achieve. Make sure to check your gauge as you knit to ensure that you are knitting to the correct measurements.
Shaping the sleeves
Once you have reached the desired length, you may need to shape the sleeves. This could involve decreasing stitches to create a tapered sleeve or adding increases for a more relaxed fit. The pattern will provide instructions on how to shape the sleeves and may include specific rows or stitch patterns to follow.
Follow the shaping instructions carefully, making sure to keep track of any stitch markers or pattern repeats that may be involved. It’s important to maintain the correct stitch count as you shape the sleeves to ensure an even and symmetrical fit.
After shaping the sleeves, continue knitting until you reach the end of the pattern or until the required number of rows are completed. Then, bind off the stitches and cut the yarn, leaving a tail to weave in later. Repeat the same process for the second sleeve.
Once both sleeves are completed, you can then attach them to the body of the sweater using mattress stitch or another suitable method. Follow the instructions in the pattern to correctly position and attach the sleeves to the sweater.
With the sleeves attached, your funnel neck sweater is now complete and ready to be worn!
Adding the Funnel Neck
One of the defining features of a funnel neck sweater is, well, the funnel neck! The funnel neck adds an extra layer of warmth and coziness to the sweater, making it perfect for colder weather. Adding this feature to your knitting project is not as difficult as it may seem, and with a little bit of patience and practice, you can achieve a professional-looking result.
To add the funnel neck, you will first need to determine the desired height and width of the neck opening. This will depend on your personal preference and the overall design of the sweater. Once you have these measurements, you can calculate the number of stitches you will need to cast on and the number of rows you will need to knit to achieve the desired size.
Step 1: Provisional Cast On
To begin, you will need to create a provisional cast on. This technique allows you to easily remove the cast on stitches later and create a seamless look for the funnel neck. There are several ways to do a provisional cast on, but one common method is using a waste yarn. Simply cast on the desired number of stitches using the waste yarn, and then knit one row with the main yarn. This will create a temporary base for your funnel neck.
Step 2: Knitting the Funnel Neck
Now that you have your provisional cast on in place, you can start knitting the funnel neck. Using the main yarn, continue knitting in the stitch pattern you have been using for the rest of the sweater until you reach the desired height for the neck. This could be several inches or a specific number of rows, depending on your preference.
Once you have reached the desired height, you can begin shaping the funnel neck. This is typically done by decreasing stitches gradually on either side of the neck opening. You can use techniques such as k2tog (knit two stitches together) or ssk (slip, slip, knit) to create a neat and symmetrical decrease. Keep knitting in this pattern until you have decreased enough stitches to achieve the desired width for the neck opening.
Finishing Touches
Once you have completed knitting your funnel neck sweater, it’s time to add some finishing touches to make it perfect. Here are a few suggestions to consider:
Blocking
Blocking is an essential step in finishing any knitted garment. It involves gently dampening the sweater and then reshaping it to its desired measurements. This process helps to even out the stitches, improve the drape, and ensure that the sweater fits well. Place the sweater on a clean towel and pin it into shape. Allow it to dry completely before removing the pins.
Seaming
If your sweater was knit in separate pieces, you will need to seam them together. Use a yarn needle and the same yarn you used for knitting to sew the seams. Take care to match the stitch count and pattern repeat at the seams for a seamless look.
Edging
To give your sweater a polished look, consider adding edging to the cuffs, hem, and neckline. This can be done using a knitting technique such as ribbing, garter stitch, or a decorative stitch pattern. Experiment with different options to find the one that complements your funnel neck sweater the best.
Buttons or Zippers
If your sweater has a front opening, you may want to add buttons or a zipper. This not only adds functionality but also allows you to personalize your sweater. Choose buttons or a zipper that match the style and color of your sweater for a cohesive look.
By following these finishing touches, you can take your funnel neck sweater from being a simple knitted garment to a stylish and professional-looking piece. Enjoy the process of adding these final details and show off your beautiful creation!
Q&A:
What is a funnel neck sweater?
A funnel neck sweater is a type of sweater with a tall, folded collar that covers the neck and can be adjusted to fit snugly around it.
Is it difficult to knit a funnel neck sweater?
It depends on your knitting skills and experience. Knitting a funnel neck sweater may require some intermediate-level techniques, such as increasing and decreasing stitches, but with the right pattern and instructions, it is achievable for most knitters.
What materials do I need to knit a funnel neck sweater?
To knit a funnel neck sweater, you will need yarn in your desired color and weight, knitting needles in the appropriate size for your chosen yarn, stitch markers, a tapestry needle for weaving in ends, and a pair of scissors.
Where can I find a funnel neck sweater knitting pattern?
You can find funnel neck sweater knitting patterns online on websites dedicated to knitting patterns, on knitting blogs, or in knitting books and magazines. You can also search for specific knitting patterns on platforms like Ravelry.
Can I customize the funnel neck sweater knitting pattern?
Yes, you can customize the funnel neck sweater knitting pattern to fit your preferences. You can adjust the length of the sweater, modify the collar height, or add different stitch patterns or colorwork designs. However, it’s important to note that making significant modifications may require some knitting experience and knowledge.
What is a funnel neck sweater knitting pattern?
A funnel neck sweater knitting pattern is a set of instructions and guidelines for knitting a sweater with a high, folded collar that covers the neck. The pattern typically includes details on the type and weight of yarn to use, needle size, gauge, and step-by-step instructions for casting on, knitting, shaping, and finishing the sweater.