
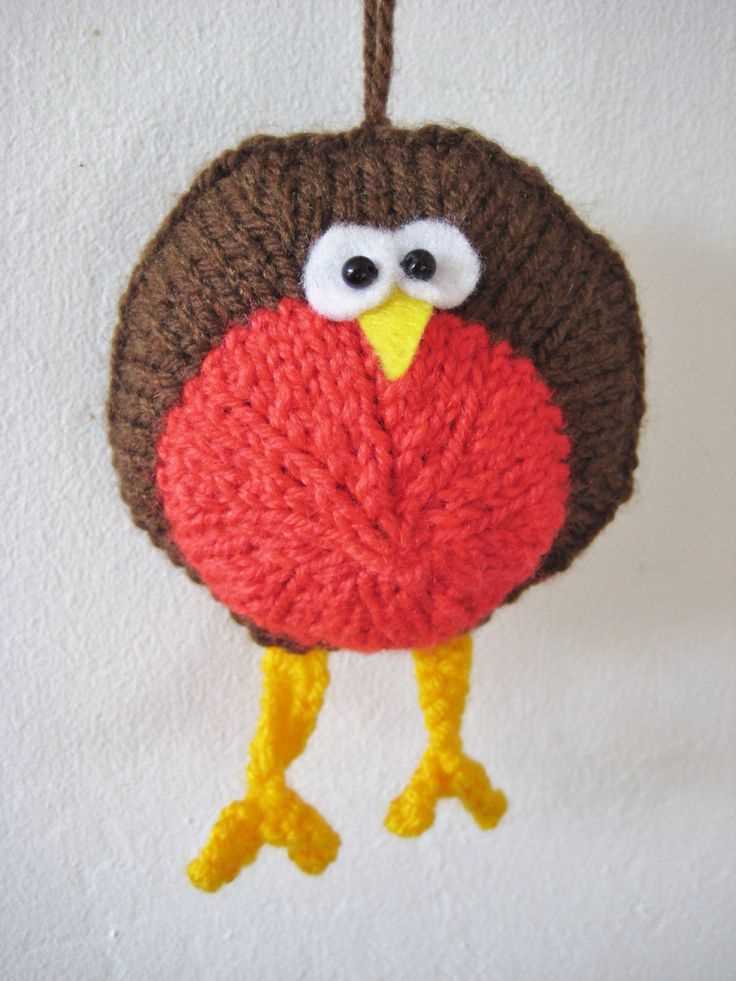
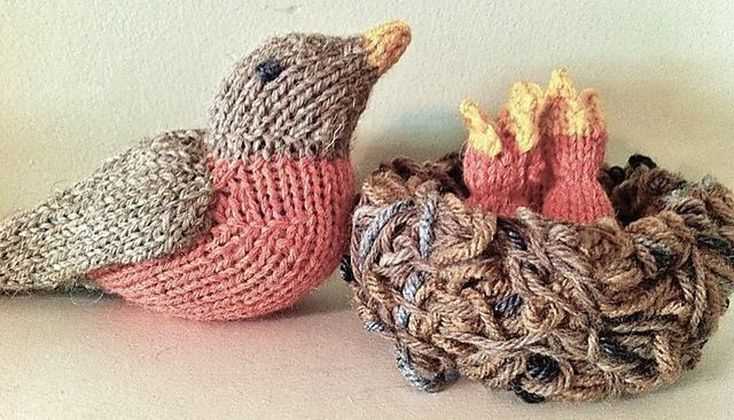
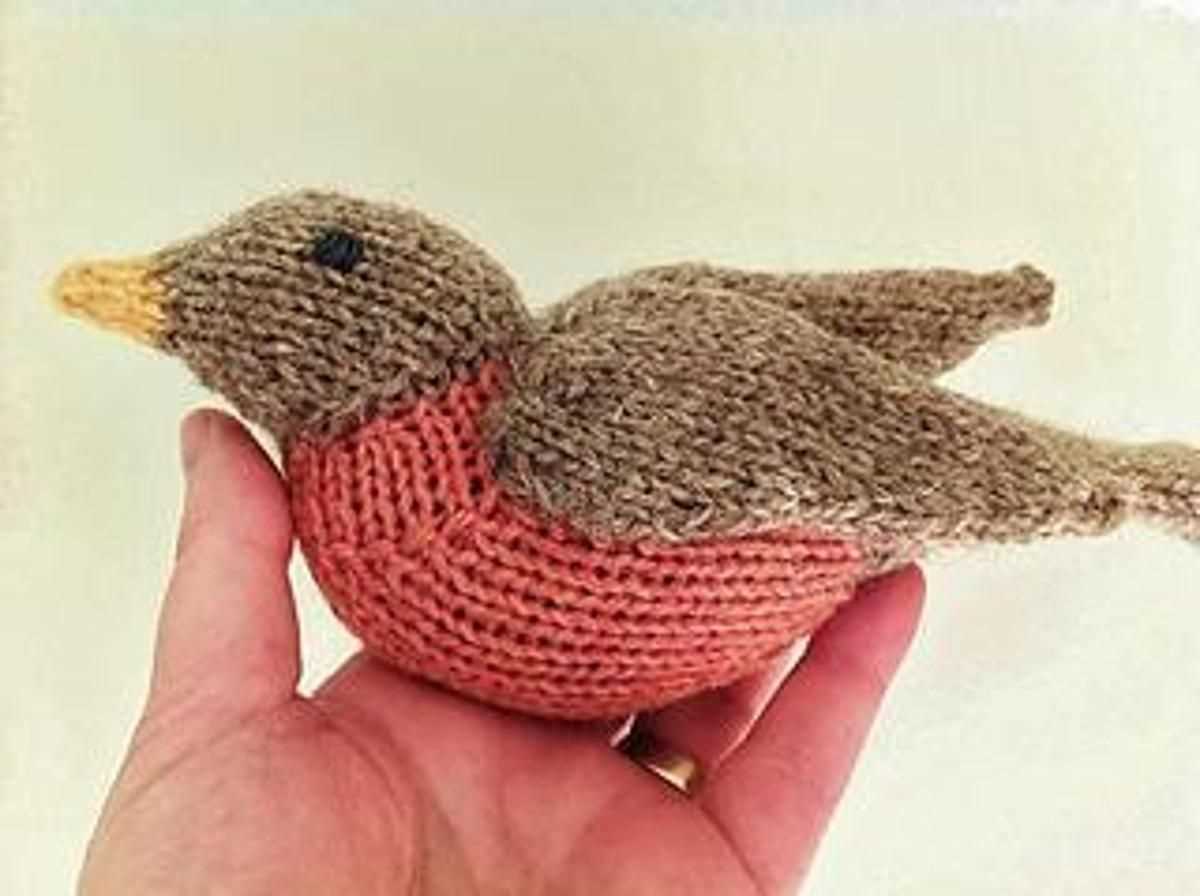
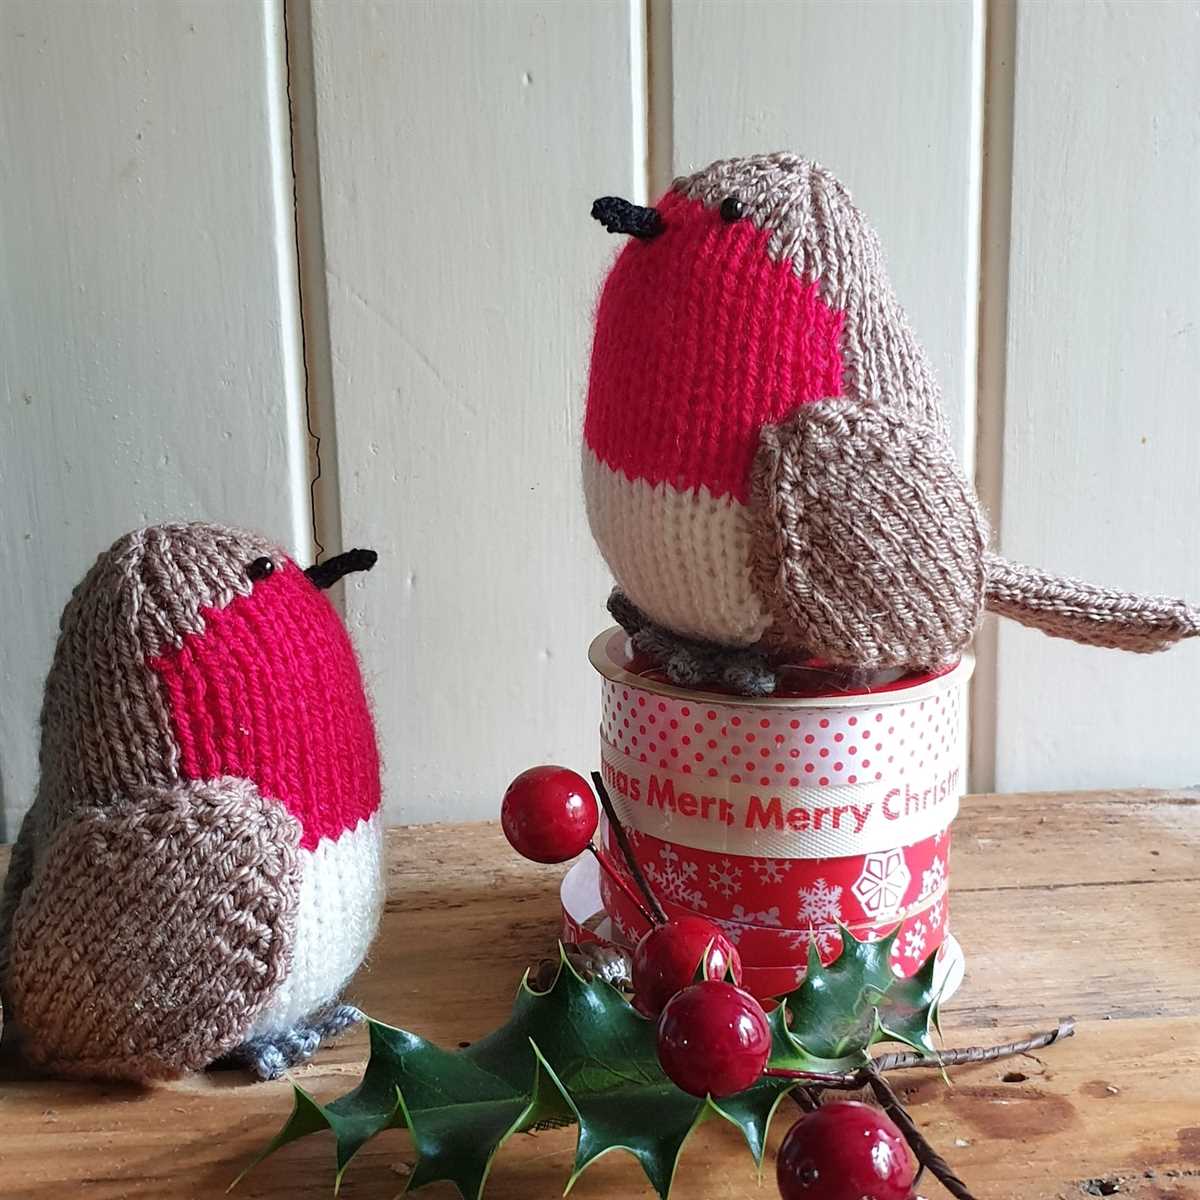
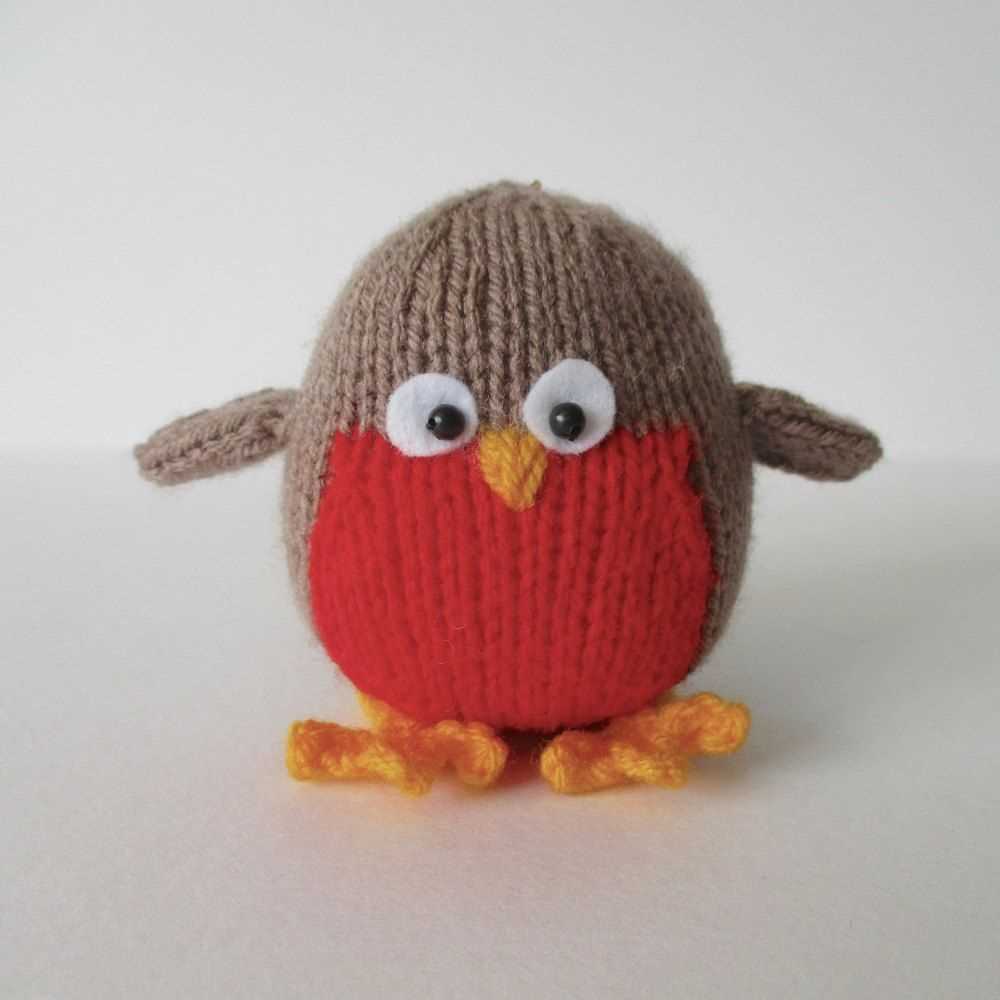
Knitting is a wonderful and relaxing hobby, and what better way to show off your skills than by making adorable knitted animals? One popular animal to knit is the robin, with its vibrant red breast and chirpy personality. In this article, we will share a free robin knitting pattern that you can use to create your own cute little bird.
This free knitting pattern is perfect for both beginners and experienced knitters alike. It provides clear and detailed instructions on how to create a robin from start to finish, including information on the materials and techniques needed. Whether you’re new to knitting or have been knitting for years, this pattern is sure to bring you joy as you create your very own robin.
Not only is knitting a fun and relaxing activity, but it also allows you to create unique and personalized gifts for your loved ones. Imagine the delight on a child’s face as they receive a handmade knitted robin as a gift! By following this free knitting pattern, you can create thoughtful and heartfelt presents that will be cherished for years to come.
How to Knit a Free Robin Pattern
Knitting a free robin pattern is a fun and rewarding project that allows you to create a cute and colorful robin bird using your knitting skills. Whether you are experienced or a beginner, this pattern is suitable for all skill levels and will provide you with a charming addition to your knitting collection.
To start knitting the free robin pattern, gather all the necessary materials, including knitting needles, yarn in various colors, and a tapestry needle. It’s important to choose yarn colors that closely resemble a real robin bird, such as brown, white, and red. Once you have all the materials ready, you can begin knitting.
Step 1: Begin by knitting the body of the robin. Start with the brown yarn and cast on the desired number of stitches, usually around 20-25 stitches, depending on your preference. Knit the body using the stockinette stitch, alternating between knitting and purling rows, until the desired length is reached.
Step 2: Once the body is complete, it’s time to knit the wings. Using the brown yarn, cast on a smaller number of stitches, around 10-15 stitches. Knit the wing using the garter stitch, knitting every row, until the desired size is achieved. Repeat this step to create a second wing for the robin.
Step 3: Next, it’s time to knit the robin’s head and beak. Using the white yarn, cast on a small number of stitches, usually around 5-10 stitches. Knit a few rows in the garter stitch to create the head. To make the beak, switch to the red yarn and knit a few additional stitches in the shape of a triangle.
Step 4: Now that all the individual components of the robin are complete, it’s time to assemble them. Use the tapestry needle to sew the wings onto the sides of the body, making sure they are evenly positioned. Then, attach the head and beak to the front of the body, aligning them properly.
Step 5: Finally, add any additional details or embellishments to your robin. You can use black yarn or thread to create the eyes, or even sew on some small beads for a realistic effect. Get creative and personalize your robin to make it unique.
By following these steps, you can easily knit a free robin pattern and create an adorable bird that will be a delightful addition to your knitted collection or a thoughtful gift for bird lovers. Enjoy the process and have fun creating your own knitted robin!
Choosing the Right Yarn and Needles
When knitting a free robin pattern, it is important to choose the right yarn and needles to ensure a successful and enjoyable knitting experience. The type of yarn you select will have a significant impact on the final look and feel of your knitted robin. Additionally, the size of the needles will determine the overall size and stitch definition of your project.
Selecting the Yarn
When choosing yarn for your free robin knitting project, consider the desired characteristics of the final product. For a robin with a soft and fluffy appearance, opt for yarns that are labeled as “chunky,” “bulky,” or “super bulky.” These yarns typically have a higher thickness and produce a plush texture. Alternatively, if you prefer a more sleek and defined robin, look for yarns labeled as “sportweight” or “worsted weight.” These yarns are thinner and will create more defined stitches.
Pro tip: When selecting yarn, keep in mind the robin’s intended purpose. For example, if you plan to use the knitted robin as a toy, consider using a sturdy and washable yarn that can withstand playtime and regular cleaning.
Choosing the Needles
The size and material of your knitting needles can also influence the outcome of your free robin project. The thickness of the needles should correspond to the weight of the yarn you are using. Thicker yarns require larger needles, while thinner yarns need smaller needles to create the desired tension and stitch definition.
It is also important to consider the material of the needles. Metal or plastic needles are typically slick and smooth, allowing for faster knitting. Wood or bamboo needles, on the other hand, provide a bit more grip, which can be helpful when working with slippery yarns. Ultimately, the choice of needle material is a personal preference, but it is worth experimenting with different types to find what works best for you.
Pro tip: If you are new to knitting or struggle with tension, consider using circular needles instead of straight needles. Circular needles distribute the weight of your project more evenly and can help prevent hand and wrist fatigue.
By carefully selecting the right yarn and needles, you can ensure that your free robin knitting project turns out just the way you envision it. Experiment with different yarn weights and needle sizes to create a robin that is uniquely yours.
Gathering the Necessary Materials
Before you start knitting your free robin pattern, you will need to gather the necessary materials. Here is a list of what you will need:
- Yarn: You will need a small amount of red, black, and white yarn. Make sure to choose yarn that is suitable for knitting small projects.
- Knitting Needles: You will need a pair of knitting needles in a size suitable for the yarn you have chosen. This will typically be a US size 4 or 5 (3.5mm or 3.75mm).
- Tapestry Needle: A tapestry needle will be needed for weaving in ends and sewing any parts of the robin together.
- Scissors: A pair of scissors will be needed for cutting yarn.
- Stuffing: You will need some stuffing material to fill the robin and give it shape. You can use polyester fiberfill or any other stuffing material of your choice.
- Black Beads: Two small black beads will be needed for the eyes of the robin.
Once you have gathered all of these materials, you will be ready to begin knitting your adorable robin. Make sure you have everything you need before you start, as it can be frustrating to realize you are missing something in the middle of your project. Happy knitting!
Understanding the Basic Knitting Stitches
When it comes to knitting, it is important to have a solid understanding of the basic stitches. These stitches form the foundation of all knitting projects and knowing how to execute them correctly can make a world of difference in the outcome of your work. Whether you are a beginner or an experienced knitter, mastering these stitches will help you create beautiful and professional-looking pieces.
Knit stitch: The knit stitch is the most fundamental stitch in knitting. It is created by inserting the right needle into the front of the stitch on the left needle and pulling the yarn through to form a new stitch. This stitch creates a smooth and flat texture on the right side of the fabric.
Purl stitch: The purl stitch is essentially the reverse of the knit stitch. It is created by inserting the right needle into the front of the stitch on the left needle, but this time, instead of pulling the yarn through, you bring the yarn to the front of the work and wrap it around the right needle before pulling it through. This stitch creates a bumpy texture on the right side of the fabric, often used for ribbing or creating more intricate patterns.
Stockinette stitch: Stockinette stitch is created by alternating rows of knit and purl stitches. When knitted in the round, you knit every stitch on one round and purl every stitch on the next, creating a smooth and even fabric. When knitted flat, you knit one row and purl the next, creating a fabric with a smooth right side and a bumpy wrong side.
Garter stitch: Garter stitch is created by knitting every row, resulting in a fabric that has ridges on both sides. This stitch is often used for scarves or as a border for other stitch patterns. It is also a great stitch for beginner knitters as it is simple to execute and doesn’t require switching between knit and purl stitches.
These are just a few of the basic knitting stitches that every knitter should know. Once you have mastered these stitches, you can start experimenting with more advanced techniques and patterns. Knitting is a versatile craft, and by understanding the basics, you can create a wide variety of beautiful and unique projects.
Casting On and Knitting the Body
When starting the robin knitting pattern, the first step is to cast on the required number of stitches using the long-tail cast-on method. This method creates a neat and flexible edge for your project. The pattern will specify the number of stitches to cast on, which is usually around 40-50 stitches for the body of the robin.
Once the stitches are cast on, it’s time to start knitting the body of the robin. The pattern may instruct you to start with a specific type of knit stitch, such as a plain knit stitch or a seed stitch. Follow the pattern instructions carefully to ensure you are using the correct stitch and creating the desired texture for the body. It’s important to pay attention to the tension of your knitting, making sure it is not too loose or too tight.
To keep track of your progress and ensure an even shape for the body, it can be helpful to use stitch markers. These small plastic or metal rings can be placed on the knitting needle between specific stitches to mark their positions. This can be particularly useful if the pattern includes shaping techniques, such as increases or decreases, which will be used to create the rounded shape of the robin’s body.
As you continue to knit the body, you may need to switch between different types of stitches or follow a specific pattern for the robin’s colorwork. Take your time and carefully read the pattern instructions to ensure you are following the correct sequence of stitches. Knitting the body of the robin can be a relaxing and enjoyable process, allowing you to see your creation take shape stitch by stitch.
Creating the Wings and Tail Feathers
When making a knitted robin, one of the most distinctive features is its wings and tail feathers. These elements add character and charm to the final design. Here is a step-by-step guide on how to create the wings and tail feathers for your knitted robin.
1. Wings
Begin by casting on the required number of stitches for the wings, as specified in the free robin knitting pattern. Knit the wings using a combination of knit and purl stitches to create the desired texture. You can use different colors of yarn for the wingtips to add contrast. Once the wings are the desired length, bind off the stitches and weave in any loose ends.
2. Tail Feathers
The tail feathers of the knitted robin are another charming detail that adds to its lifelike appearance. To create the tail feathers, start by casting on the designated number of stitches as mentioned in the pattern. Knit rows of garter stitch or any desired stitch pattern to form the feathers. You can vary the length and width of each feather to add variety. Once the tail feathers are the desired length, bind off the stitches and secure any loose ends.
Tip: You can embellish the wings and tail feathers further by adding small details such as embroidered stitches or using different yarn textures for a more realistic look. Be creative and experiment with different techniques to make your knitted robin unique.
Shaping the Head and Beak
In order to create a lifelike and adorable robin, it is important to pay special attention to shaping the head and beak. These details will give your knitted robin a realistic and characterful appearance.
To shape the head, begin by increasing the number of stitches on the needles. This can be done by working a series of increases evenly spaced across the row. This will give the head a rounded shape and allow for the beak to be attached seamlessly.
The beak can be created separately and then sewn onto the head. To make the beak, cast on a small number of stitches and work in the desired length. Then, shape the beak by decreasing the stitches gradually to create the pointed tip.
Once the head and beak are completed, you can attach the beak to the head using a yarn needle. Position the beak in the center of the head and use small, discreet stitches to secure it in place. Be sure to leave enough space for the eyes, which will be added later.
By taking the time to shape the head and beak with care and precision, you can create a charming and realistic robin that will delight both children and adults alike.
Adding the Eyes and Facial Details
Once you have finished knitting your robin, it’s time to add the eyes and facial details to bring your bird to life. The eyes are an important feature that adds character to the robin’s face.
To create the eyes, you can use two small buttons or beads. Choose buttons or beads that are the appropriate size for your knitted robin. Sew them securely in place using a needle and thread. Make sure to position the eyes evenly on either side of the robin’s face.
In addition to the eyes, you can add other facial details to enhance the robin’s appearance. You can create a beak using orange or yellow yarn. Cut a small piece of yarn and sew it onto the robin’s face to form a triangle shape. Alternatively, you can use felt or fabric to create a beak and sew it onto the face.
To give the robin a more realistic look, you can also embroider eyebrows and eyelashes using black or brown yarn. Use a small needle and carefully stitch these details onto the face. Take your time and ensure that the stitches are neat and even.
Adding these small details will bring your knitted robin to life and make it a delightful addition to any home or as a gift for bird lovers. Don’t be afraid to get creative and experiment with different materials and techniques to personalize your robin and make it truly unique. Enjoy the process of adding the eyes and facial details, and have fun showcasing your knitting skills!
Assembling the Pieces
Once you have completed all the necessary knitting pieces for your robin, it’s time to assemble them together. Follow these steps to bring your adorable robin to life:
1. Prepare the Body Pieces

Start by placing the front and back body pieces with the right sides facing each other. Use a yarn needle and the same yarn color to stitch the pieces together. Make sure to leave an opening at the bottom for stuffing.
2. Attach the Wings
Take the wings and position them on the sides of the body, aligning them with the top of the body piece. Use a yarn needle and the same yarn color to sew the wings in place securely. Make sure to stitch them only to the back body piece, allowing them to hang freely.
3. Add the Beak
Next, take the beak piece and position it on the front of the robin’s head. Use a yarn needle and the same yarn color to carefully sew the beak in place. Make sure it is centered and securely attached.
4. Attach the Eyes

Take the eye pieces and position them on either side of the robin’s head, above the beak. Use a yarn needle and the same yarn color to stitch the eyes in place securely. You can add a small stitch or a French knot in the center of each eye to create a more realistic look.
5. Stuff and Close
Finally, stuff the robin with fiberfill or your preferred stuffing material through the opening at the bottom. Make sure to fill it evenly, giving the robin a plump and cuddly appearance. Once fully stuffed, use your yarn needle to close the opening by weaving the yarn through the edges and pulling it tight. Knot the yarn securely and weave in any loose ends.
Once the pieces are assembled and the robin is stuffed and closed, your adorable knitted robin is ready to be displayed or given as a gift. Enjoy the process and the satisfaction of bringing this cute bird to life with your own knitting skills!
Finishing Touches: Embroidery and Appliques
When it comes to adding those final touches to your knitted robin, embroidery and appliques can truly bring your project to life. Whether you’re looking to add intricate details or just some extra flair, these techniques can help you achieve the perfect finishing touches.
Embroidery:
Embroidery is a wonderful way to add intricate designs and textures to your robin. You can use different colors of yarn to create patterns and motifs, such as the robin’s trademark red breast or subtle details like feathers and beak. With a needle and some patience, you can easily bring your knitted robin to life.
Start by planning out your embroidery design on a piece of paper, considering where you want to add the details on your knitted robin. Then, using a needle and contrasting yarn color, carefully stitch the design onto the knitted fabric. You can use different embroidery stitches such as satin stitch, backstitch, or French knots to create different textures and effects. Remember to secure the ends of the yarn neatly on the back of your work.
Appliques:
For a fun and dimensional look, you can also add appliques to your knitted robin. Appliques are small pieces of fabric or yarn that are attached to the surface of the knitted fabric. They can be used to create features like eyes, wings, or even accessories like scarves or hats.
To create an applique, first cut out the desired shape from fabric or yarn. You can use the same yarn you used for knitting the robin or choose complementary colors for added contrast. Then, using a needle and thread, sew the applique onto the knitted fabric, making sure to secure it firmly in place.
These finishing touches of embroidery and appliques can take your knitted robin from basic to extraordinary. Get creative and have fun experimenting with different designs and techniques to make your robin truly unique.
Blocking and Finishing the Knitted Robin
Once you have completed knitting your robin, it is important to block and finish it properly to give it a polished look. Blocking helps to even out any inconsistencies in the stitches and bring out the beauty of the pattern. Here are the steps you can follow to block and finish your knitted robin:
1. Soaking
Fill a basin or sink with lukewarm water and add a few drops of mild detergent. Gently place your knitted robin in the water and let it soak for about 10-15 minutes. Make sure the water completely covers the entire robin.
Note: Do not agitate or rub the fabric vigorously as it may cause felting or damage to the knitting.
2. Blocking
- Remove the robin from the water and gently squeeze out the excess water without wringing or twisting it.
- Spread out a clean towel and place the robin on it. Roll up the towel with the robin inside and gently press to remove more water.
- Lay a blocking mat or a clean, dry towel on a flat surface and pin the robin in place according to the desired shape and measurements. Use rust-proof pins to avoid any marks on the fabric.
- Allow the robin to air dry completely. This may take a few days depending on the thickness of the yarn and the ambient humidity.
3. Finishing touches
After the robin has dried, it’s time to add the finishing touches:
- Secure any loose ends by weaving them into the fabric using a tapestry needle.
- Embroider the eyes and beak using black and orange yarn or embroidery floss. You can refer to the pattern for the specific instructions.
- If desired, attach a small loop of yarn or ribbon to the top of the robin’s head to create a hanging loop.
- Give the robin’s wings a gentle curve by lightly steam blocking them with a steam iron. Be careful not to press too firmly or directly onto the knitting to avoid flattening the stitches.
Once you have completed these steps, your knitted robin will be ready to be displayed or gifted to bring a touch of joy to any home.
Tips and Tricks for a Perfect Result
Knitting a robin using a free knitting pattern can be a fun and rewarding project. However, to achieve a perfect result, it’s important to keep in mind a few tips and tricks. Whether you’re a beginner or an experienced knitter, these tips can help you create a beautiful and realistic robin.
Choose the Right Yarn
When knitting a robin, it’s important to choose the right yarn for the job. Opt for a yarn that is soft and has good stitch definition. A yarn with some wool content can give your robin a fluffier and more realistic look. Consider using different shades of brown for the body, and red and yellow for the breast. Mixing different yarns in various colors can also add depth to your project.
Pay Attention to Gauge
Gauge is important in knitting, as it determines the size and proportions of your project. Follow the gauge specified in the pattern to ensure that your robin turns out the correct size. Use the recommended needle size and swatch to check your gauge before starting. Adjust your needle size if needed to match the gauge specified in the pattern.
Practice Different Stitch Techniques
Knitting a robin involves using a variety of techniques, such as increasing, decreasing, and working colorwork. Practice these techniques before starting on your robin to ensure that you’re comfortable with them. This will help you achieve neat and even stitches throughout your project. Consider swatching different stitch patterns to add texture and detail to your robin.
Embellish with Embroidery
Once you’ve finished knitting the body of your robin, you can add extra details and embellishments using embroidery. Embroider the eyes, beak, and legs using small stitches with black, yellow, and orange embroidery floss. This will bring your robin to life and give it a more realistic appearance. Use reference photos or illustrations to guide you in placing the embroidery stitches accurately.
Assemble with Care
When it’s time to assemble your robin, take your time and be precise. Pay attention to the placement of each body part to ensure that your robin looks balanced and natural. Use a tapestry needle and the same yarn you used for knitting to sew the parts together. Make sure to secure the stitches well to prevent any parts from coming loose over time.
By following these tips and tricks, you can create a beautiful and lifelike robin using a free knitting pattern. Enjoy the process and don’t be afraid to add your own personal touch to make your robin unique.
Show off Your Knitted Robin
Now that you have successfully completed knitting your robin using the free pattern provided, it’s time to show off your creation! Whether you plan to display it in your home or gift it to someone special, here are a few ideas to showcase your knitted robin:
- Decorative Display: Place your knitted robin on a shelf, mantelpiece, or side table. Its vibrant colors and adorable design will add a touch of charm to any room.
- Christmas Tree Ornament: Attach a small loop of yarn to the top of your knitted robin to transform it into a charming Christmas decoration. Hang it on your tree or give it as a thoughtful holiday gift.
- Gift Topper: Add an extra special touch to a wrapped gift by attaching your knitted robin to the ribbon or twine. It will make the present even more memorable and unique.
- Pin or Brooch: Sew a pin or brooch back to the back of your knitted robin to create a cute accessory. Wear it on your coat, bag, or hat to show off your knitting skills and love for robins.
- Children’s Toy: If you’re making the knitted robin for a child, it can become their new favorite toy. Make sure to stitch the eyes securely and consider using washable yarn for easy maintenance.
However you choose to display or use your knitted robin, it’s sure to bring joy and admiration to those who see it. Happy knitting and enjoy showcasing your handiwork!