
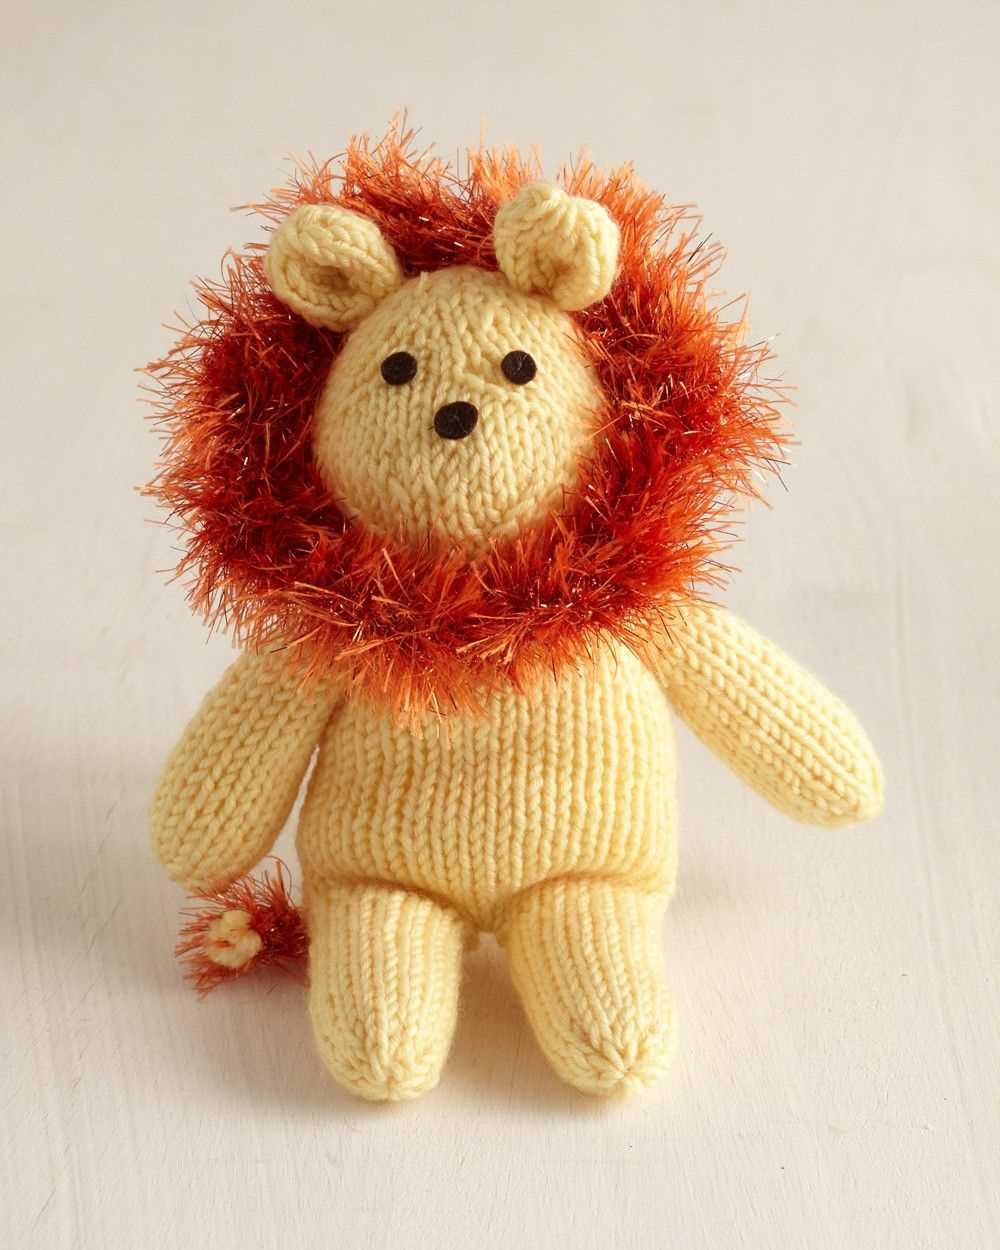
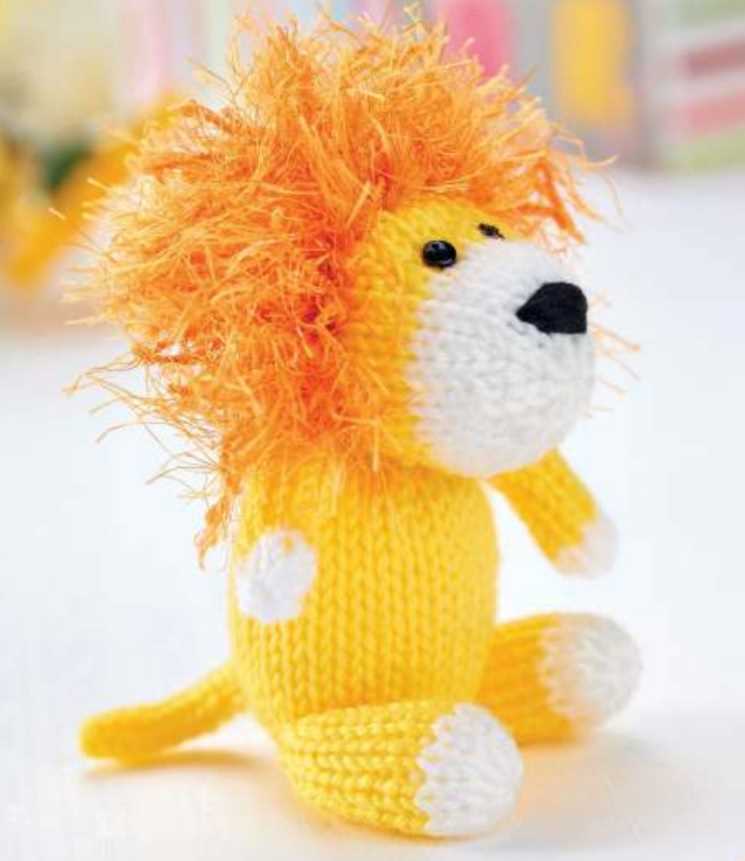
Are you looking for a fun and unique knitting project? Look no further than this free lion knitting pattern! Whether you are a beginner or an experienced knitter, this pattern is perfect for you.
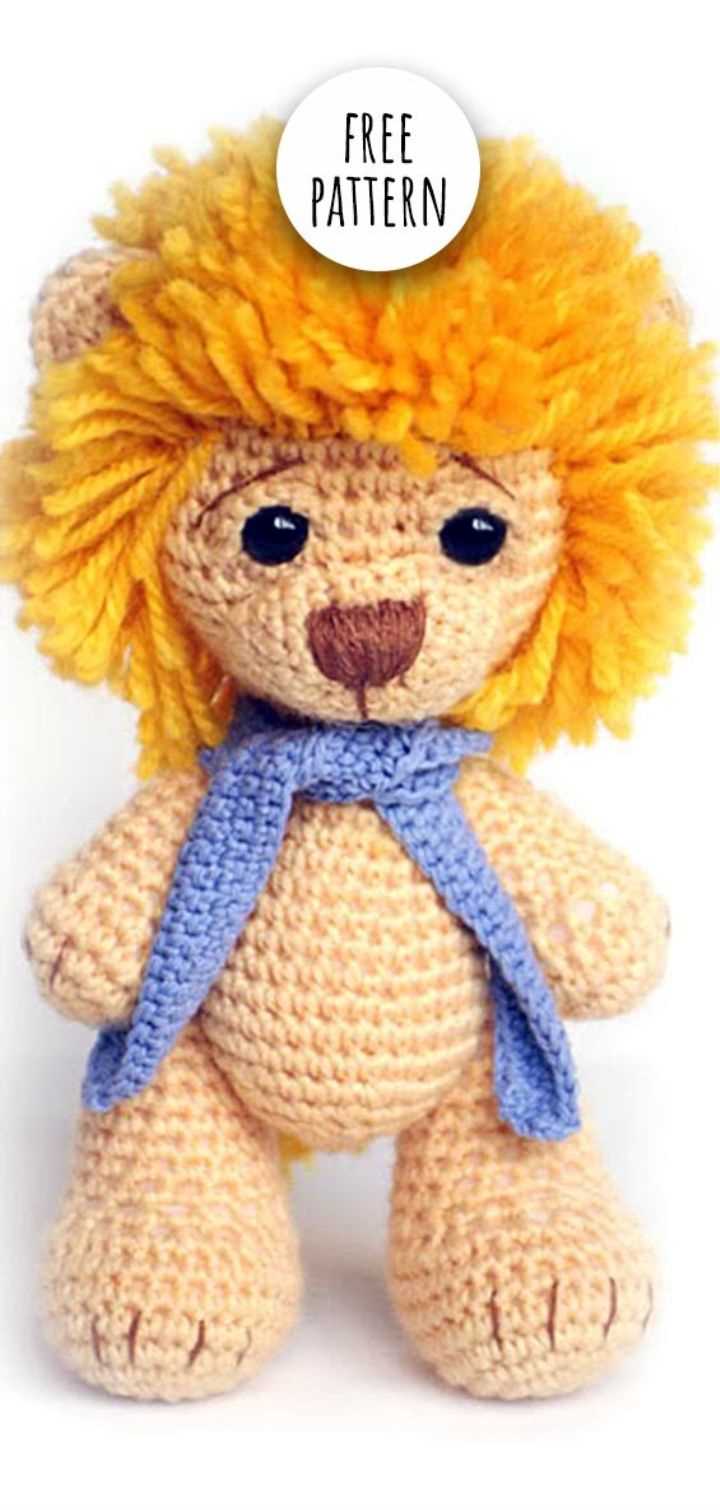
This adorable lion pattern is a great way to add some charm to your home or to make a special gift for a loved one. The finished lion measures approximately 10 inches tall and is sure to bring a smile to anyone’s face.
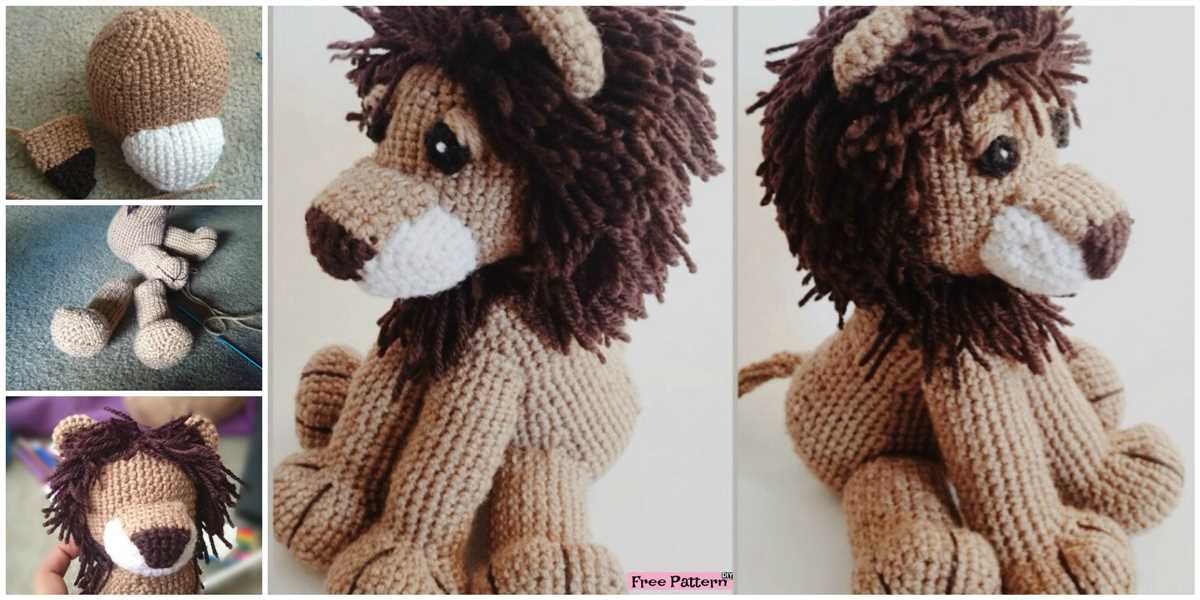
With this free lion knitting pattern, you will be able to create your very own cuddly lion friend. The pattern includes detailed instructions and step-by-step photos to guide you through the knitting process. Plus, it’s completely free to download and use.
So, grab your knitting needles and get started on this whimsical lion pattern today! You’ll have a blast creating this cute and cuddly creature that will bring joy to your home or make a heartfelt gift for someone special.
Free Lion Knitting Pattern
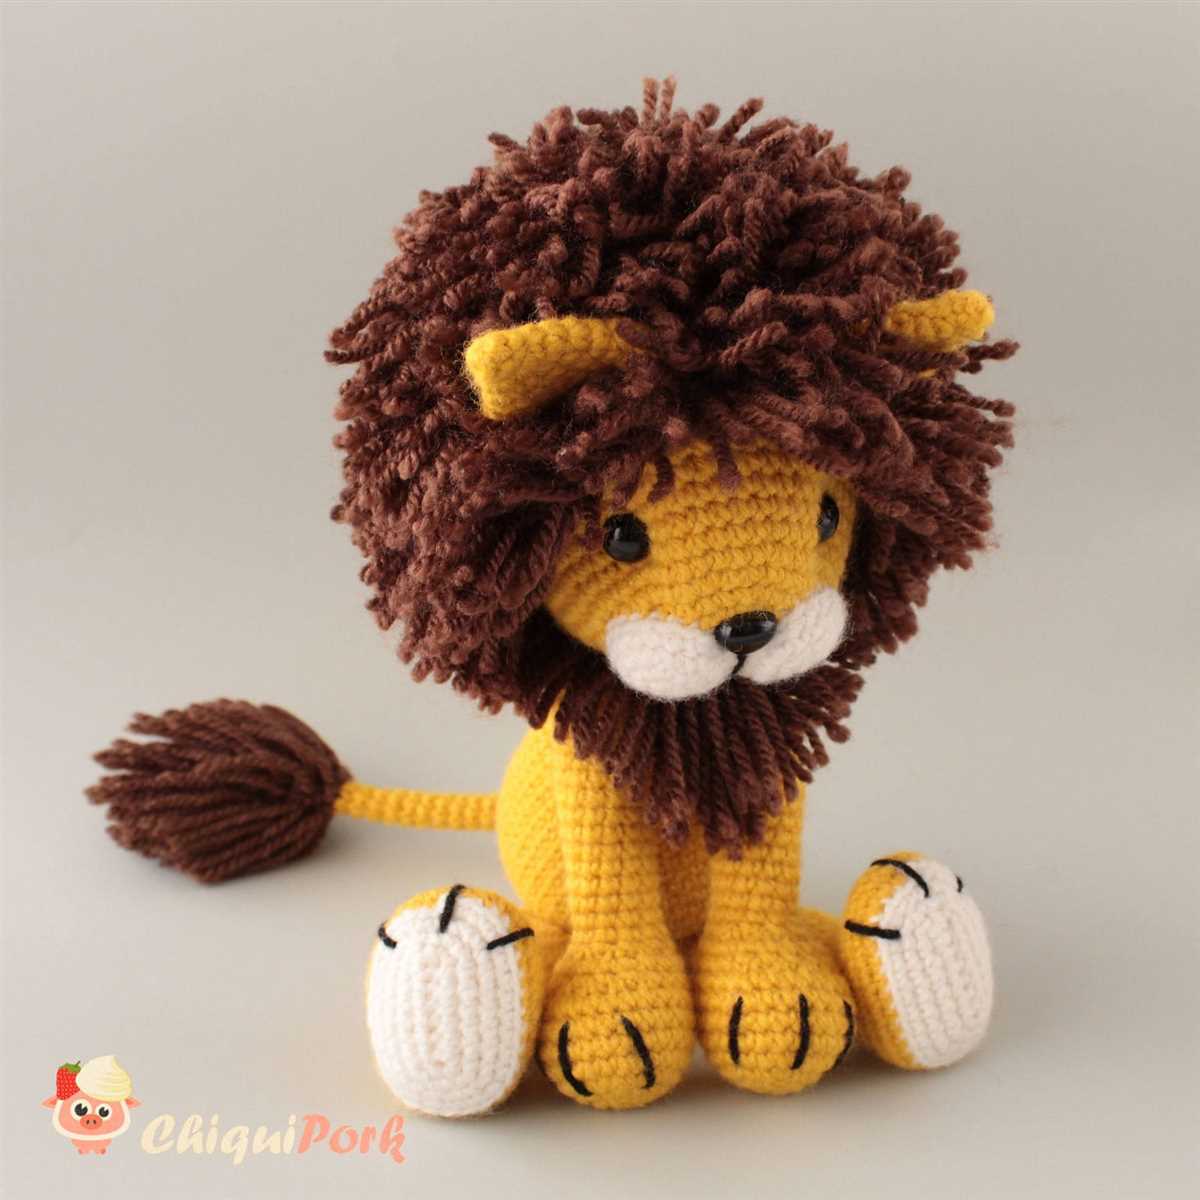
Knitting is a popular craft that allows people to create unique and personalized items for themselves or their loved ones. For those who are passionate about knitting and adore lions, a free lion knitting pattern is the perfect project to try. With this pattern, you can create an adorable lion toy or even a lion-inspired accessory.
If you are new to knitting, don’t worry! This lion knitting pattern is suitable for knitters of all skill levels. The pattern will include detailed instructions and step-by-step photos to guide you through the process. Whether you are a beginner or an experienced knitter, you can easily follow along and create your own lion masterpiece.
Materials Needed
- Yarn in lion-inspired colors such as shades of brown, tan, and yellow
- Knitting needles appropriate for your chosen yarn weight
- Fiberfill stuffing
- Yarn needle
- Scissors
- Black embroidery floss for details like the lion’s eyes and nose
Once you gather all the necessary materials, you can start knitting your lion. The pattern will guide you through casting on, knitting, purling, increasing, and decreasing stitches to shape the lion’s body, legs, and head. You will also learn how to embroider facial features to give your lion a cute and friendly expression.
Not only is knitting a lion a fun and creative project, but the end result can also make a wonderful gift for children or lion enthusiasts. Knitted lions can be used as toys, decorative items, or even as a cozy pillow. No matter how you choose to use your knitted lion, it will surely bring joy and warmth to the recipient.
Why Knit a Lion
Knitting a lion can be a fun and rewarding project for craft enthusiasts. Lions are majestic creatures that symbolize strength and courage, and knitting a lion can be a creative way to pay homage to these qualities. Whether you are a beginner or an experienced knitter, creating a lion knitting pattern can offer a sense of accomplishment and provide a unique addition to your collection of handmade crafts.
One of the reasons why you might choose to knit a lion is the versatility it offers. Lions can be made in various sizes and styles, allowing you to customize your creation based on your personal preferences. You can knit a small lion as a cute toy for children or create a larger lion as a statement piece for your home decor. The flexibility of the pattern allows you to experiment with different colors and textures of yarn, adding your own creative touch to the project.
Another benefit of knitting a lion is the therapeutic nature of the craft. Knitting has been shown to reduce stress and anxiety, as the rhythmic motion of the needles can promote relaxation and mindfulness. By focusing on the repetitive actions of knitting, you can find solace and a sense of calm amidst the busyness of everyday life. The process of completing a lion knitting pattern can be a form of self-care, allowing you to unwind and express your creativity.
Furthermore, knitting a lion can be a meaningful gift for loved ones. Handmade crafts often carry a sentimental value that store-bought items lack. By knitting a lion for someone special, you are investing your time and effort into creating a unique and thoughtful present. The lion can symbolize various positive qualities such as protection, strength, or loyalty, making it a meaningful and cherished gift for birthdays, anniversaries, or other special occasions.
In conclusion, knitting a lion can offer many benefits, from the sense of accomplishment and creativity it brings, to the therapeutic and meaningful nature of the craft. Whether you choose to keep the lion for yourself or gift it to someone special, creating a lion knitting pattern is a fulfilling and enjoyable project that allows you to explore your artistic skills and express your love for these majestic creatures.
Choosing the Right Yarn
When it comes to knitting, one of the most important decisions you’ll make is choosing the right yarn for your project. The type of yarn you choose can greatly affect the appearance, texture, and overall quality of your finished piece. With so many choices available, it can be overwhelming to know which yarn is best.
Fiber Content: One of the first things to consider when selecting yarn is the fiber content. Different fibers have different properties, so it’s important to choose one that is suitable for your project. For example, wool is a popular choice for its warmth and elasticity, while cotton is known for its softness and breathability. Acrylic yarn is a synthetic option that is often chosen for its affordability and durability. Take the time to research different fiber options and consider how they will affect the final product.
Weight: Yarn comes in a variety of weights, from lace weight to super bulky. The weight of the yarn will determine how thick or thin your finished project will be. It’s important to choose a weight that is appropriate for your pattern and the desired outcome. For intricate lacework, a lightweight yarn may be best, while a heavier yarn would be better suited for a cozy sweater or blanket. Consider the type of project you are working on and choose a weight that will give you the desired result.
Color and Texture: The color and texture of the yarn can have a big impact on the appearance of your finished piece. Consider the effect you want to achieve and choose a yarn that will help you achieve that. Variegated yarns can create an interesting pattern or gradient effect, while solid colors are versatile and can showcase intricate stitches or patterns. Additionally, the texture of the yarn can add depth and interest to your project. Experiment with different textures to find one that enhances the style and design of your knitting.
Price and Availability: Finally, it’s important to consider your budget and the availability of the yarn. Some yarns can be quite expensive, especially if they are made from luxury fibers or are hand-dyed. Others may be difficult to find, especially if you live in a remote area. Take these factors into account when choosing your yarn, and be prepared to shop around or make substitutions if necessary.
By carefully considering the fiber content, weight, color and texture, and price and availability of different yarn options, you can choose the right yarn for your project and ensure that your finished piece turns out exactly as you envisioned.
Knitting Tools and Supplies
Knitting is a popular craft that requires a few essential tools and supplies. Whether you’re a beginner or an experienced knitter, having the right equipment is crucial for achieving great results. Here are some of the basic knitting tools you’ll need:
1. Knitting Needles
The most important tool in knitting is the knitting needles. They come in different sizes and materials, such as metal, plastic, bamboo, and wood. The size of the needles will depend on the thickness of the yarn you’re using and the desired tension of your project. It’s always good to have a set of both straight and circular needles in various sizes to accommodate different knitting projects.
2. Yarn
Yarn is the main material used in knitting, and there are countless options to choose from. Yarns come in different weights, colors, and fibers, such as wool, cotton, acrylic, and blends. The type of yarn you use will depend on the project you’re working on and your personal preferences. It’s important to choose a yarn that is suitable for your project to ensure the best outcome.
3. Stitch Markers
Stitch markers are small plastic or metal rings that are used to mark specific stitches in your knitting. They come in handy when working on complex patterns or shaping your project. Stitch markers can be easily inserted into the stitches and moved along as you progress. They are available in various sizes and shapes, and having a few different types in your knitting kit can be helpful.
4. Scissors

A good pair of scissors is essential for cutting yarn and weaving in loose ends. Choose a pair of scissors that is sharp and comfortable to hold. It’s a good idea to have a dedicated pair of scissors for your knitting projects to avoid using them for other purposes and potentially damaging them.
5. Tape Measure
A tape measure is necessary for checking gauge and measuring your knitting projects. It helps ensure that your knitted item will fit properly and has the correct dimensions. Look for a flexible tape measure that is long enough to measure larger items like garments or blankets.
6. Tapestry Needles
Tapestry needles, also known as darning needles, are used for weaving in ends and sewing pieces together. They have a blunt tip and a large eye, making it easy to thread yarn through. Having a few different sizes of tapestry needles in your knitting supplies will allow you to tackle different types of projects with ease.
These are just some of the essential tools and supplies you’ll need for knitting. As you gain experience and explore different knitting techniques, you may find yourself adding more specialized tools to your collection. Enjoy your knitting journey and have fun creating beautiful knitted items!
Getting Started with the Mane
If you’re looking to knit a lion toy and want to add some extra flair, then knitting a mane is the perfect way to do it. The mane adds character and charm to your lion, making it more lifelike and playful. With a few simple steps, you’ll be able to create a beautiful and fluffy mane that will make your lion truly stand out.
First, you’ll need to gather the necessary materials. You’ll need a lion knitting pattern, yarn in your chosen color for the mane, knitting needles, scissors, and a tapestry needle. Once you have everything ready, you can begin working on the mane.
Step 1: Start by casting on the required number of stitches for the mane. This will depend on the size of your lion and the desired length of the mane. You can refer to your lion knitting pattern for specific instructions on the number of stitches to cast on.
Step 2: Once you have cast on the stitches, you can start knitting the mane. In most cases, you’ll be working in garter stitch or stockinette stitch to create a smooth and even texture for the mane. You can follow the pattern instructions for the mane, or you can get creative and experiment with different stitch patterns to achieve the desired effect.
Step 3: As you’re knitting the mane, make sure to leave a long tail of yarn at the beginning and end. This will be used later to attach the mane to the lion’s head. It’s also a good idea to periodically check the length and fullness of the mane to ensure it’s as fluffy and voluminous as you’d like it to be.
Step 4: Once you’ve finished knitting the mane, you can carefully bind off the stitches and cut the yarn, leaving a long tail. Thread the tapestry needle with the tail of yarn and use it to sew the ends of the mane together, creating a loop. This loop will make it easier to attach the mane to the lion’s head.
Step 5: Finally, it’s time to attach the mane to the lion’s head. Using the long tails of yarn left at the beginning and end of the mane, sew the mane onto the lion’s head, following the instructions in the knitting pattern. Make sure to securely attach the mane, as it will be handled and played with.
With these steps, you’ll be able to create a beautiful and unique mane for your lion toy. The mane will add an extra touch of creativity and fun to your knitting project, making it truly one-of-a-kind. Have fun knitting and enjoy the process of bringing your lion to life!
Knitting the Lion’s Body
When it comes to knitting the lion’s body, there are a few key steps to keep in mind. First, gather all the necessary materials, including knitting needles, yarn in the desired color, and the lion knitting pattern. Using the lion knitting pattern as a guide, start by casting on the required number of stitches. This will typically be specified in the pattern and may vary depending on the desired size of the lion.
Once the stitches are cast on, begin working in the round, using either circular needles or double-pointed needles, depending on your preference and the pattern instructions. Follow the lion knitting pattern to create the lion’s body, which may involve various knitting stitches such as knit, purl, and increases or decreases to shape the body. It is important to carefully read and follow the pattern instructions to ensure accuracy.
In addition to the basic knitting stitches, you may also encounter specific techniques or stitches unique to the lion pattern. These could include colorwork for creating stripes or pattern details, as well as different types of stitch patterns such as ribbing or lacework. Take your time and practice these techniques as needed to ensure a successful lion knitting project.
As you progress through knitting the lion’s body, periodically check your work to ensure it matches the pattern and adjust as necessary. This may involve counting stitches, measuring the length or width of the work, or comparing it to the pattern’s gauge. Making small adjustments along the way will help ensure that the final product turns out as desired.
Once the lion’s body is complete, finish off any remaining stitches according to the pattern instructions. This may involve binding off, seaming, or adding any necessary finishing touches such as embroidery details for the lion’s face. With the body complete, you can then move on to knitting the lion’s other components, such as the head, mane, and tail, using the same techniques and attention to detail.
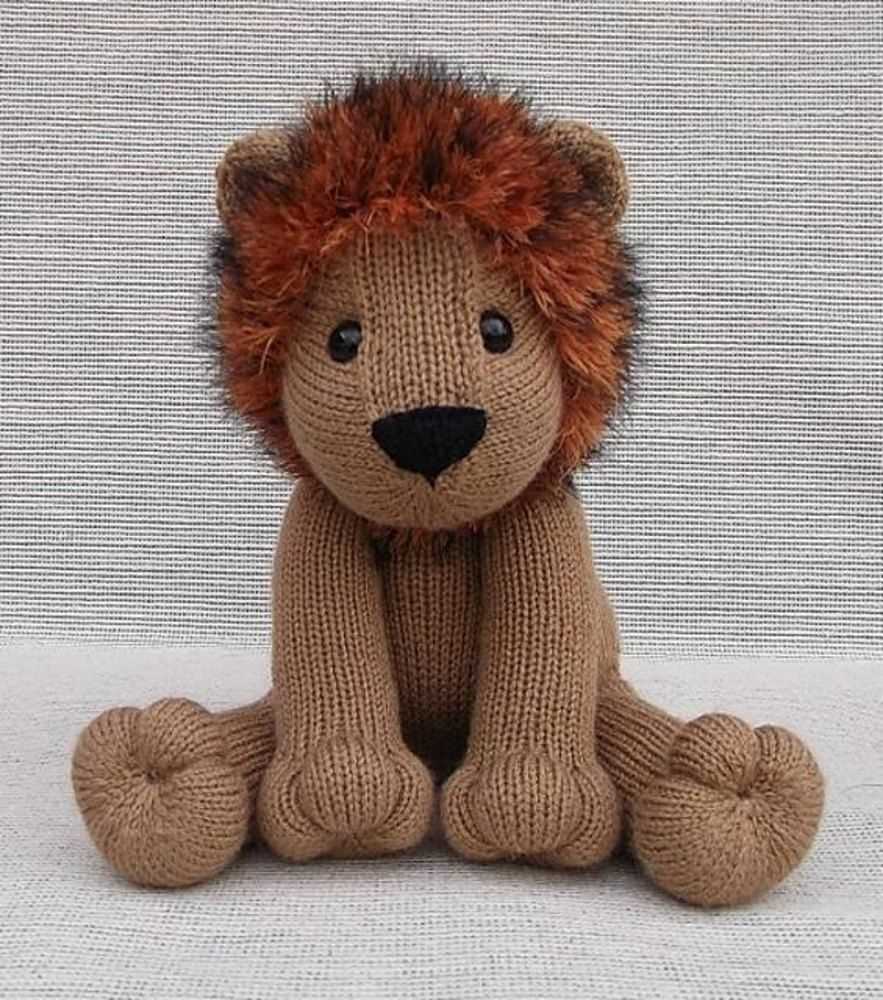
Adding Details: Face and Features
After completing the basic body of your knitted lion, it’s time to add the details that will give it a unique and charming look. One of the most important details is the face and features of the lion, which will bring it to life.
Eyes: Start by knitting or embroidering the lion’s eyes. You can choose to use safety eyes if you prefer a more realistic look, or you can simply sew or embroider the eyes using yarn. Position them on the face, slightly below the center, and make sure they are evenly spaced.
Nose: The lion’s nose can be knitted separately and then sewn onto the face. You can use a small round shape or create a triangular-shaped nose to add character. Place the nose in the center, just below the eyes.
Mouth: Knit or embroider the lion’s mouth using a contrasting color yarn. You can create a simple smile or experiment with different shapes to give your lion a playful expression. Position the mouth just below the nose, leaving a small gap between the two.
Whiskers: To add a touch of realism to your lion’s face, you can create whiskers using thin strands of yarn. Carefully sew them onto the sides of the lion’s face, just below the eyes. Make sure they are evenly spaced and secure them tightly so that they don’t come loose easily.
Ears: Finally, don’t forget to attach the lion’s ears. Knit or crochet two triangular-shaped pieces or use pre-made felt or fabric ears. Position them on the sides of the lion’s head, slightly above the eyes. Make sure they are symmetrical and securely sew them in place.
By adding these details to your knitted lion, you will transform it into a cute and lovable toy. Get creative with the colors and shapes, and don’t be afraid to experiment to make your lion truly unique!
Assembling the Lion
Once you have completed knitting all the necessary pieces for your lion, it’s time to assemble them and bring your cute lion to life!
Step 1: Attach the limbs
To begin, take your lion’s body and place it in front of you. Take one of the front legs and position it where you want it to be on the body. Using a yarn needle, carefully sew the leg onto the body, making sure it is securely attached. Repeat this step with the other front leg and both hind legs.
Step 2: Add the tail
Next, it’s time to attach the lion’s tail. Position the tail where you want it to be on the lion’s body and sew it into place using a yarn needle. Make sure to secure the tail tightly so it doesn’t come loose.
Step 3: Sew on the head
Now it’s time to attach the head to the lion’s body. Position the head where you want it to be and sew it onto the body, taking care to ensure it is securely attached. Use small stitches and make sure to sew all the way around the head to prevent it from coming loose.
Step 4: Add the mane
The final step in assembling your lion is to add the mane. Take your mane pieces and position them around the lion’s head, sewing them in place using a yarn needle. Make sure to evenly distribute the mane pieces and sew them securely so they don’t come loose.
Once you have completed these steps, your lion is all assembled and ready to be displayed or played with! Take pride in your knitting skills and enjoy your adorable lion creation!
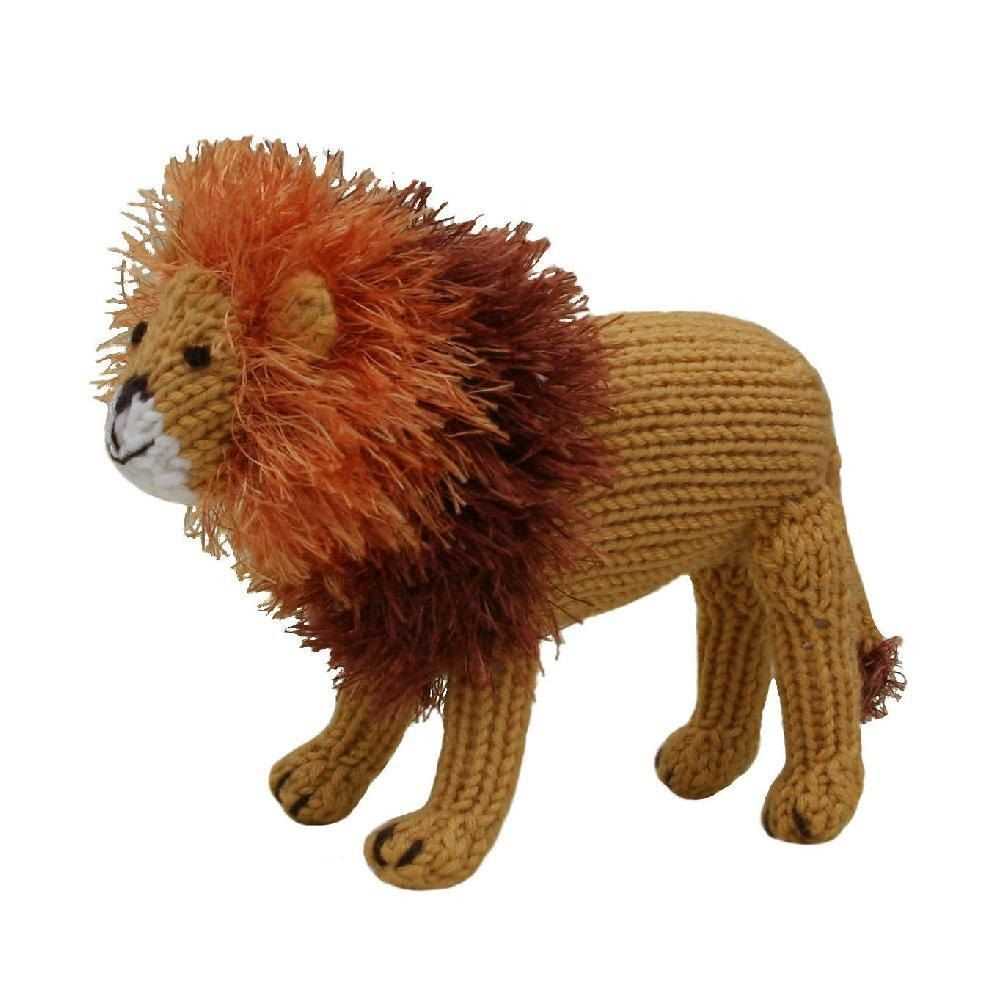
Finishing Touches: Mane and Tail
Now that you have completed knitting your lion toy, it’s time to add the finishing touches that will give it character and personality. The mane and tail are essential elements to make your lion look majestic and realistic. Follow these steps to create a beautiful and fluffy mane and a cute tail for your knitted lion.
Mane
To make the mane, you will need a chunky or bulky weight yarn in a color of your choice. Cut strands of yarn to the desired length for the lion’s mane, making sure they are longer than you want the final result to be, as you will be trimming them later. You can use a single color or multiple colors to create a colorful and vibrant mane.
Take one strand of yarn and fold it in half. Use the loop formed at the folded end to attach it to the top of the lion’s head. Repeat this step, attaching strands all around the head until you are satisfied with the density of the mane. Trim the strands to your desired length, shaping the mane as you go.
Tail

The tail is a simple yet essential part of your lion’s appearance. Choose a matching yarn color for the tail. Take a long strand of yarn and fold it in half. Use the loop formed at the folded end to attach it to the back of the lion’s body, just above the hind legs.
Next, take another long strand of yarn and fold it in half. Use the loop formed at the folded end to attach it to the first strand. This will create a thicker and fuller tail. Repeat this step, adding more strands until you are satisfied with the tail’s thickness. Trim the strands to your desired length, giving the tail a nice shape.
Once you have completed the mane and tail, your knitted lion will come to life! These finishing touches will elevate your lion toy and make it truly unique. Have fun experimenting with different colors and textures to create a lion that suits your style.
Enjoy the process of adding the mane and tail to your lion, and don’t forget to share your creations with others who love knitting and crafting!