
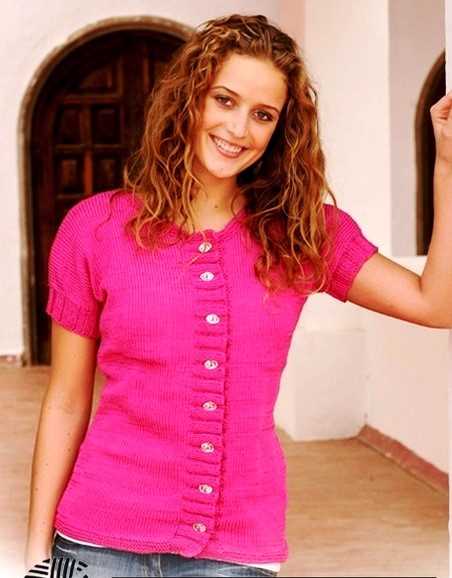
If you love knitting and are looking for a stylish and versatile project, a short sleeve cardigan might be just the thing. Perfect for spring and summer, a short sleeve cardigan can be worn over dresses, tanks, or tees for an added layer of warmth and style. With its open front and short sleeves, it’s the perfect lightweight piece for those slightly cooler days.
In this article, we’ll share a free knitting pattern for a women’s short sleeve cardigan that is beginner-friendly and customizable to your preferred fit and style. This pattern is perfect for knitters of all skill levels – whether you’re a beginner looking for a simple project or an experienced knitter in search of a quick and satisfying knit.
This versatile cardigan can be dressed up or down, making it a stylish addition to any wardrobe. With its simple and timeless design, it’s a classic piece that you’ll find yourself reaching for again and again. So grab your knitting needles, your favorite yarn, and let’s get started on this fun and rewarding project!
Free Knitting Pattern for Women’s Short Sleeve Cardigan
Looking for a stylish and versatile addition to your wardrobe? With this free knitting pattern, you can create a beautiful women’s short sleeve cardigan that is perfect for any season. Whether you’re dressing up for a night out or keeping it casual, this cardigan will be a go-to piece in your closet.
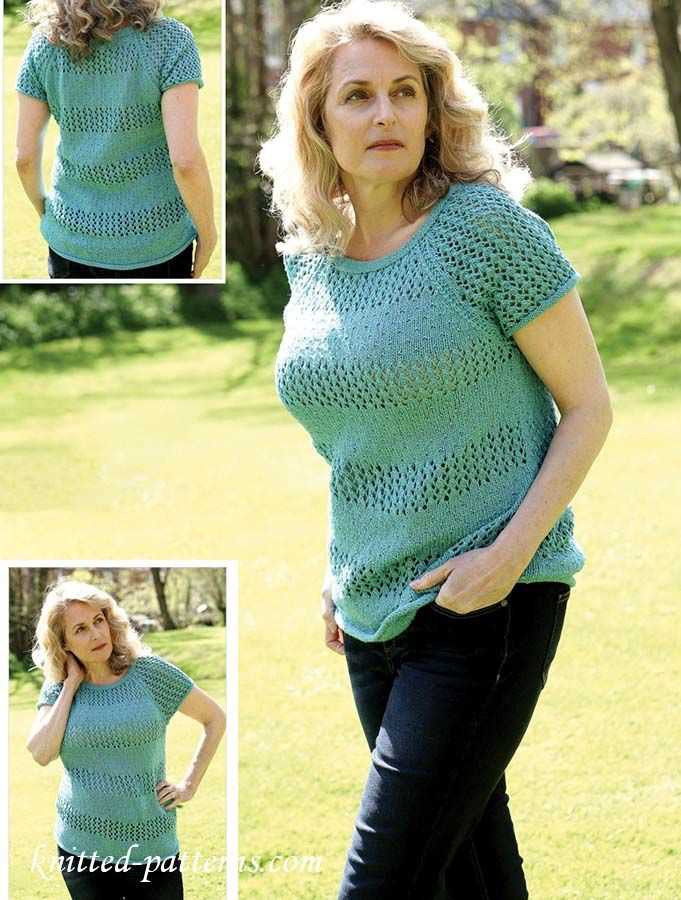
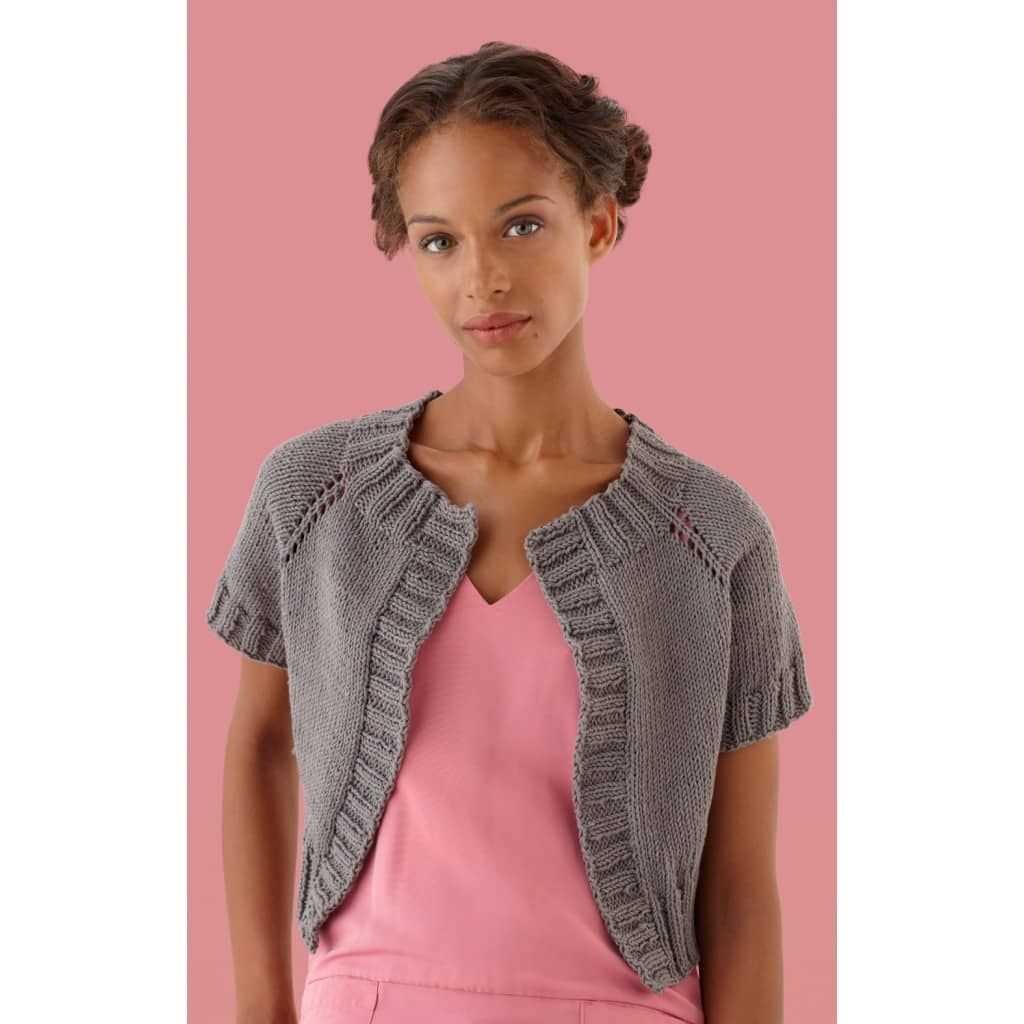
The pattern features a flattering V-neckline and short sleeves, making it ideal for layering over dresses, blouses, or even a simple t-shirt. The simplicity of the design allows for endless customization options, so you can choose your favorite colors and yarns to truly make it your own.
Materials:
- Yarn: Choose a medium weight yarn in your desired color(s). Approximately 800-1000 yards.
- Knitting Needles: US size 8 (5mm) circular needles, or size needed to obtain gauge.
- Stitch markers
- Tapestry needle
- Buttons (optional)
Size:
This pattern is written for sizes small (medium, large, X-large, XX-large). Adjustments can be made for a custom fit.
Gauge:
18 stitches and 24 rows = 4 inch (10 cm) in stockinette stitch
Instructions:
- Using the long-tail cast on method, cast on 120 (140, 160, 180, 200) stitches.
- Knit in stockinette stitch until the piece measures approximately 18 inches (46 cm) from the cast on edge.
- Shape the V-neck by binding off the center 10 (12, 14, 16, 18) stitches and continue working each side separately.
- For the sleeves, bind off 6 (8, 10, 12, 14) stitches at the beginning of the next 2 rows, then decrease 1 stitch at each edge every other row until you have 30 (34, 40, 44, 50) stitches remaining.
- Continue knitting in stockinette stitch until the sleeves measure approximately 7 inches (18 cm) from the shoulder seam.
- Bind off all stitches and weave in any loose ends.
- If desired, attach buttons along the front opening of the cardigan.
This free knitting pattern for a women’s short sleeve cardigan is a great way to showcase your knitting skills and create a versatile piece for your wardrobe. Give it a try and enjoy the satisfaction of wearing something you made with your own hands.
Overview of the Pattern
When it comes to knitting a short sleeve cardigan, this free knitting pattern for women’s short sleeve cardigan is a must-have. It provides a detailed guide on how to create a stylish and comfortable cardigan that is perfect for warmer weather. The pattern features a classic design with short sleeves, making it a versatile addition to any woman’s wardrobe.
The pattern begins with a list of materials needed for the project. This includes the specific yarn type and weight, as well as the recommended needle size. Having all the necessary materials on hand ensures a smooth and enjoyable knitting experience.
Next, the pattern provides step-by-step instructions on how to cast on and begin knitting the cardigan. It includes detailed explanations of common knitting techniques, such as the knit and purl stitches, as well as any additional stitches or techniques required for the pattern.
The pattern is divided into sections, making it easy to follow along and keep track of progress. Each section includes clear instructions and stitch counts, ensuring that knitters of all skill levels can successfully complete the cardigan.
To add a touch of customization, the pattern also includes suggestions for modifying the cardigan’s length, neckline, or sleeve length. This allows knitters to create a cardigan that suits their personal style and preferences.
In addition to the written instructions, the pattern includes a helpful chart that visually represents the various sections and stitches. This chart can be referenced alongside the written instructions to provide a clear visual guide.
Overall, this free knitting pattern for women’s short sleeve cardigan is an excellent resource for knitters looking to create a versatile and stylish garment. With its detailed instructions and customization options, it is suitable for knitters of all skill levels. Whether you’re an experienced knitter or just starting out, this pattern is sure to result in a beautiful and comfortable cardigan that you’ll love to wear.
Required Materials
Before starting this knitting project, make sure you have all the necessary materials on hand. Here is a list of what you will need to complete the women’s short sleeve cardigan:
- Yarn: Choose a soft and lightweight yarn in your preferred color. The pattern recommends using a DK weight yarn.
- Knitting Needles: You will need a set of US size 7 (4.5 mm) knitting needles, or the size needed to obtain gauge.
- Stitch Markers: These will help you keep track of your stitches and pattern repeats.
- Tapestry Needle: This will be used for weaving in loose ends and sewing up any seams.
- Buttons: Depending on the style you prefer, choose buttons that complement the yarn color and size. You will need around 5-6 buttons.
- Scissors: A pair of sharp scissors will be useful for cutting yarn and trimming any excess.
- Measuring Tape: This will allow you to check your gauge and measure your progress as you knit.
Once you have gathered all the necessary materials, you’ll be ready to start knitting your women’s short sleeve cardigan. Make sure to check the gauge before beginning to ensure your cardigan will fit properly. Happy knitting!
Knitting Gauge
Knitting gauge refers to the number of stitches and rows per inch that you achieve when you knit with a specific yarn and set of needles. It is an important measurement that helps ensure that your finished project will turn out the correct size and fit.
To obtain an accurate knitting gauge, it is important to follow the pattern’s instructions for both the type of yarn and the recommended needle size. Using a different yarn weight or needle size will result in a different gauge, and therefore, a different finished size.
Measuring your knitting gauge
- Start by casting on the number of stitches indicated in the pattern.
- Knit a swatch of 4×4 inches (10×10 cm) in the specified stitch pattern.
- Measure the number of stitches and rows within the 4×4 inch (10×10 cm) swatch using a measuring tape or ruler.
- If the number of stitches and rows match the pattern’s gauge, then your knitting gauge is correct. If not, you may need to adjust your needle size.
Importance of knitting gauge
Knitting gauge is crucial because it determines the size and fit of the finished garment or accessory. If your gauge is too tight, meaning you have more stitches and rows per inch than the pattern calls for, your item will turn out smaller than intended. On the other hand, if your gauge is too loose, with fewer stitches and rows per inch, your item will turn out larger than intended.
Following the pattern’s gauge will ensure that your finished project matches the dimensions provided in the pattern and fits properly. It can be frustrating to spend time and effort knitting a garment only to have it turn out too small or too large due to an incorrect knitting gauge.
Sizing Information
When it comes to knitting a cardigan, getting the right fit is essential. With this free knitting pattern for women’s short sleeve cardigan, you can easily customize the size to fit your body perfectly. The pattern provides instructions for sizes ranging from small to extra-large, ensuring that there is a size for everyone.
To determine the correct size for your cardigan, it is important to take accurate measurements of your body. The key measurements you will need are your bust, waist, and hip measurements. These measurements will help you choose the size that will fit you best.
Size Chart
Use the size chart below as a guide to find the right size for your cardigan:
| Size | Bust Measurement (inches) | Waist Measurement (inches) | Hip Measurement (inches) |
|---|---|---|---|
| Small | 32-34 | 24-26 | 34-36 |
| Medium | 36-38 | 28-30 | 38-40 |
| Large | 40-42 | 32-34 | 42-44 |
| Extra-Large | 44-46 | 36-38 | 46-48 |
Once you have determined your size, you can follow the pattern instructions for that specific size. Make sure to make any necessary adjustments to the length of the cardigan or the sleeves to achieve the desired fit.
Remember, knitting is a flexible craft, so don’t be afraid to customize the pattern to suit your personal preferences. Whether you prefer a more fitted or relaxed look, this free knitting pattern allows you to create a cardigan that is tailored to your individual style.
Starting the Cardigan
Before beginning the knitting process, it is important to gather all the necessary materials. For this women’s short sleeve cardigan pattern, you will need a set of knitting needles in the appropriate size, yarn in your desired color, a tapestry needle for finishing, and any additional embellishments or buttons you may want to add. Once you have everything you need, it’s time to get started on your cardigan!
The first step is to cast on the required number of stitches. This pattern may specify a certain number of stitches or provide a gauge that you can use to determine the appropriate number of stitches for your size. Make sure to follow the instructions closely to achieve the correct fit. You can use any casting on method that you prefer, such as the long-tail cast on or the cable cast on.
Next, you will begin working the ribbing for the bottom of the cardigan. Typically, this involves knitting several rows of rib stitches, such as K1, P1, to create a stretchy and decorative edge. The pattern may provide specific instructions for the ribbing, so be sure to follow them carefully.
Once the ribbing is completed, it’s time to move on to the main body of the cardigan. This usually involves working in a certain stitch pattern or combination of knit and purl stitches to create the desired texture or design. Again, make sure to follow the pattern instructions closely to achieve the intended result.
As you continue knitting, you may need to make increases or decreases to shape the cardigan. These can be achieved by working specific increases or decreases, such as knit or purl two stitches together or make one. The pattern will guide you on where and how to make these adjustments.
Continue knitting according to the pattern instructions until you reach the desired length for the body of the cardigan. Remember to try on the garment as you go to ensure a proper fit. Once the body is complete, you will move on to knitting the sleeves and finishing the cardigan with any necessary details, such as buttonholes or decorative edging.
Knitting the Body
The body of the women’s short sleeve cardigan is knitted in one piece from the bottom up. It starts with the ribbing for the hem, which is worked in a k1, p1 rib pattern. This ribbing creates a nice, elastic edge that lays flat and helps to give the cardigan a polished look. The ribbing is worked for a few inches before transitioning to the main body stitch pattern.
Once the ribbing is complete, the main body stitch pattern is worked. This stitch pattern is a combination of knit and purl stitches that creates a textured fabric. The pattern is simple and easy to memorize, making it ideal for both beginner and experienced knitters. The body is worked in stockinette stitch, with the textured pattern continuing up the front and back of the cardigan.
The body is knit in one piece until the armholes are reached. At this point, the stitches are divided for the front and back, and the two sections are worked separately. The back is worked first, with the front stitches placed on hold. The back is worked until the desired length is reached, and then the front section is worked in the same manner.
After the front and back sections are complete, they are joined together at the shoulders using a three-needle bind off. This technique creates a neat and sturdy seam and eliminates the need for sewing. Once the shoulders are joined, the sleeves are picked up along the armhole edges and knitted in the round using double-pointed needles or a circular needle with the magic loop method.
With the body and sleeves complete, the final step is to add the button bands and collar. This is done by picking up stitches along the front edges of the cardigan and working ribbing in the same k1, p1 pattern used for the hem. The button bands are worked to the desired length, and then the stitches are bound off. Finally, the collar is picked up along the neckline and worked using the same ribbing pattern as the button bands.
Shaping the Neckline

When knitting a short sleeve cardigan, shaping the neckline can be an important step to ensure a proper fit and a flattering look. There are several ways to shape the neckline, depending on the desired style and the specific pattern instructions.
One common method is to use decreases to create a V-neck shape. This can be achieved by working certain stitches together, such as knitting two stitches together (k2tog), or slipping a stitch and knitting the next stitch (skp). These decreases are usually done at the beginning or end of a row, gradually reducing the number of stitches and creating the desired V shape.
Another option is to utilize short rows to shape the neckline. Short rows involve knitting or purling a certain number of stitches and then turning the work before reaching the end of the row. This creates a curve in the fabric, allowing for a more rounded or scooped neckline. Short rows can be used in combination with decreases to create unique neckline designs.
In some patterns, the neckline may be finished with ribbing or a decorative trim. This can be achieved by switching to a smaller needle size and working a few rows of ribbing, or by adding a separate edging once the main body of the cardigan is complete. These details can add a polished touch and help to frame the neckline.
When shaping the neckline, it is important to follow the pattern instructions carefully and make any necessary adjustments for your own personal fit. Pay attention to any stitch counts or marker placements specified in the pattern, as these will guide you in shaping the neckline correctly. Remember to also consider the type of yarn and needle size being used, as this can affect the drape and overall look of the finished cardigan.
Adding the Sleeves
Once you have completed the body of the cardigan, it is time to add the sleeves. Start by picking up stitches along the armhole edge. Use a circular needle that is the same size as your main needle, and begin by picking up a stitch at the underarm seam. Work your way around the armhole, picking up approximately 3 stitches for every 4 rows.
Setting up the Sleeve
When you have picked up all the required stitches, distribute them evenly onto four double-pointed needles or use the magic loop method with a circular needle. Join into a round by knitting the first stitch of your picked-up stitches along with the first stitch on the needle that held the underarm stitches. This will create a seamless join.
Next, it is time to work the sleeve in your chosen stitch pattern. Follow the instructions provided in the pattern, keeping in mind any adjustments that need to be made for the sleeve length and shaping. Knit the sleeve until it reaches the desired length, and then bind off in your preferred method.
Finishing Touches
After completing both sleeves, it is important to block them before sewing them in. Lay the sleeves flat on a towel or blocking mat, and gently shape them to the correct size and dimensions. Use pins to hold the shape in place, and allow the sleeves to dry completely before sewing them in. This will help ensure that your cardigan has a professional and polished finish.
Finishing Touches
After completing the main body and sleeves of your women’s short sleeve cardigan, it’s time to add the finishing touches to give your garment a polished appearance. Here are some key steps to consider:
1. Buttonholes and Buttons
Make sure to add buttonholes along one edge of the cardigan’s front opening, evenly spaced and aligned with the corresponding buttons. You can sew the buttonholes by hand or use a sewing machine. Once the buttonholes are in place, sew the buttons securely on the opposite edge of the opening.
2. Seam Finishing
Ensure that all seams are neatly finished to prevent fraying and give your cardigan a professional look. Options for seam finishing include using a zigzag stitch on a sewing machine, serging the edges, or hand-sewing a whip stitch or flat fell seam.
3. Blocking
Blocking is an essential step that helps to shape and even out your knitted garment. To block your cardigan, gently soak it in lukewarm water with a mild detergent, then lay it flat on a clean towel, carefully shaping it to the desired dimensions. Allow it to dry completely before wearing or storing.
4. Weaving in Ends
Don’t forget to weave in all loose ends of yarn throughout your project for a clean and seamless finish. Use a yarn needle to carefully thread the ends through the stitches, then trim any excess yarn close to the fabric.
5. Adding Embellishments (optional)
If you’d like to personalize your cardigan, consider adding embellishments such as embroidery, appliqué, or decorative buttons. Be creative and let your personal style shine through!
By following these finishing touches, your women’s short sleeve cardigan will be ready to wear and showcase your knitting skills. Enjoy the satisfaction of completing a beautiful handmade garment!
Optional Modifications
If you’re looking to customize your women’s short sleeve cardigan, there are several optional modifications you can make to the pattern. These modifications will allow you to add your own personal touch to the design and make it unique to your style.
1. Different yarn weight
While this pattern calls for a specific yarn weight, you can experiment with different yarn weights to achieve a different look and feel. A lighter weight yarn will create a more delicate and airy cardigan, while a heavier weight yarn will result in a warmer and cozier cardigan.
2. Lengthen or shorten the sleeves
If you prefer long sleeves or sleeveless, you can easily modify the length of the sleeves. Simply adjust the number of rows you knit for the sleeves to achieve your desired length. Keep in mind that you may need to modify the armhole shaping as well.
3. Add embellishments
If you want to add some extra flair to your cardigan, consider adding embellishments such as buttons, sequins, or embroidery. These small details can make a big impact and elevate the overall look of your cardigan. Be sure to choose embellishments that complement the color and style of your cardigan.
4. Change the neckline
If you prefer a different neckline style, you can modify the pattern to achieve your desired shape. For example, you can create a v-neck or a boat neck by adjusting the number of stitches you pick up for the neckline. You can also experiment with different ribbing patterns or add a decorative edging.
By making these optional modifications, you can create a women’s short sleeve cardigan that is truly unique to you. Don’t be afraid to get creative and make it your own!
Tips and Tricks
When knitting a short sleeve cardigan, there are a few tips and tricks that can help ensure your project turns out beautifully. Here are some suggestions to consider:
- Choose the Right Yarn: Select a yarn that is suitable for the design and desired fit of your cardigan. Make sure to check the gauge and recommended needle size mentioned in the pattern.
- Swatch for Accuracy: Always knit a gauge swatch before starting your project. This will help you determine whether you need to adjust your needle size to achieve the correct gauge. It’s important to note that even small variations in gauge can significantly affect the final size and fit of the garment.
- Read the Pattern Carefully: Review the entire knitting pattern before beginning. Pay attention to any special instructions or techniques that may be required. This will help you understand the construction of the cardigan and ensure success throughout the project.
- Take Accurate Measurements: Before you start knitting, take accurate measurements of the intended wearer. This will help you choose the correct size and make any necessary adjustments to ensure a proper fit.
- Use Stitch Markers: Stitch markers can be incredibly helpful in keeping track of pattern repeats or specific sections of your work. They can help you avoid mistakes and make it easier to follow the instructions.
- Knit with Confidence: While knitting can be challenging at times, remember to have fun and enjoy the process. Trust your skills and take your time. If you encounter any difficulties, don’t hesitate to reach out to fellow knitters or online knitting communities for guidance and support.
By following these tips and tricks, you’ll be well-prepared to tackle your next short sleeve cardigan knitting project. Remember, practice makes perfect, so don’t be discouraged if it takes a few tries to achieve the desired result. Happy knitting!