
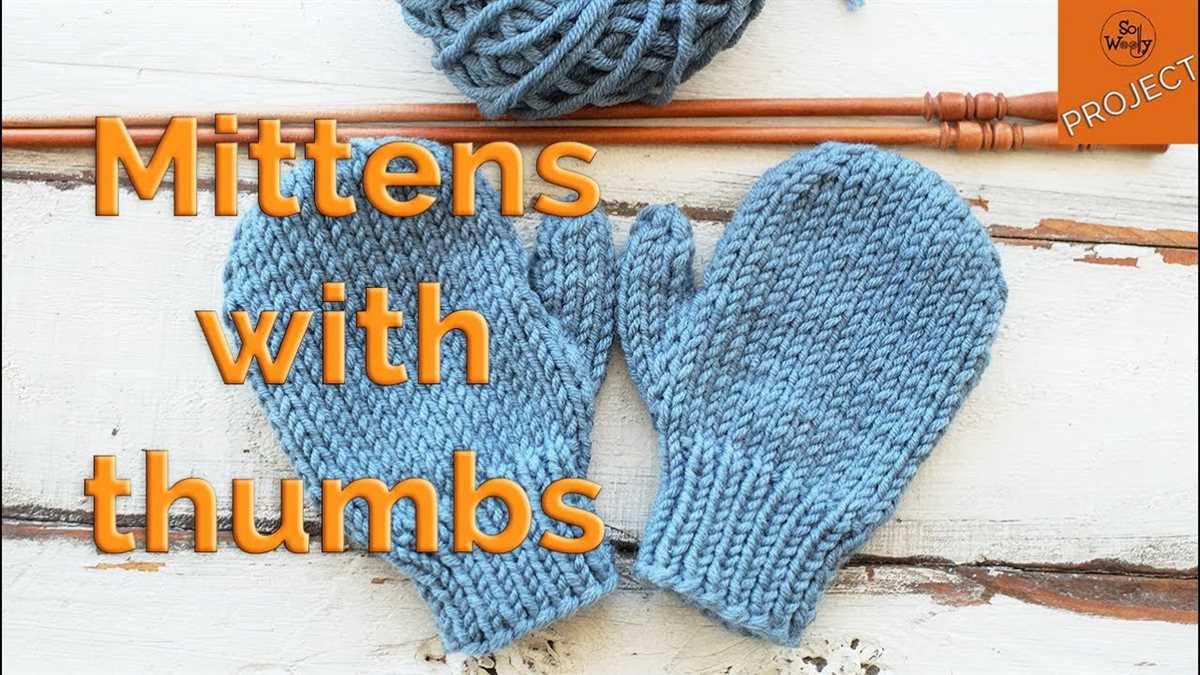
If you love knitting and want to make something special for the little ones in your life, why not try making children’s mittens? Mittens are not only practical for keeping little hands warm, but they also make for a fun and cute accessory. Plus, they are relatively quick and easy to knit, making them a perfect project for beginners or those looking for a quick knitting fix.
In this article, we will provide you with a free knitting pattern for children’s mittens that you can use to create adorable and cozy mittens for your kids or as gifts. Whether you’re knitting for a baby, toddler, or older child, this pattern can be easily adjusted to fit any size. The pattern includes step-by-step instructions and helpful tips to guide you through the knitting process.
With just a few basic knitting supplies and some soft and warm yarn, you can create a pair of mittens that your child will love wearing. Not only will they appreciate the warmth and comfort, but they will also enjoy the vibrant colors and unique designs that you can create with the knitting pattern.
Free Knitting Pattern for Children’s Mittens
Are you looking for a simple and free knitting pattern for children’s mittens? Look no further! We have a great pattern that will keep your little ones’ hands warm and toasty during the cold winter months.
This pattern is perfect for beginners as it only requires basic knitting skills. The mittens are knit in the round, using double-pointed needles, and can be easily customized to fit the size of your child’s hands.
To get started, you will need:
- Double-pointed knitting needles
- Worsted weight yarn
- Tapestry needle
- Stitch markers
Begin by casting on the desired number of stitches, then join in the round and place a stitch marker to mark the beginning of the round. Knit in a rib stitch for a few rows to create a snug cuff.
Next, switch to stockinette stitch and continue knitting until the mitten measures the desired length. Remember to place a stitch marker to mark the thumb gusset, which will be worked later.
Once the mitten is the desired length, it’s time to shape the top. Decrease stitches evenly around the mitten until you have a small opening for the fingers. Then, cut the yarn and thread it through the remaining stitches, pulling tight to close the top.
For the thumb, pick up stitches around the thumb gusset and knit in the round until the thumb reaches the desired length. Decrease stitches at the top of the thumb and bind off.
Finally, weave in any loose ends and your mittens are ready to be worn! Feel free to add any embellishments or decorations to make them truly unique.
With this free knitting pattern, you’ll be able to create cozy and stylish mittens for your little ones in no time. Happy knitting!
About Children’s Mittens
Children’s mittens are an essential accessory for colder weather. They are designed to keep little hands warm and protected from the elements, while also allowing for easy movement and flexibility. Whether your child is playing outside, helping with chores, or just walking to school, a good pair of mittens can make a big difference in their comfort and well-being.
Mittens for children come in various sizes, colors, and designs to suit different tastes and preferences. You can find mittens with animal prints, favorite cartoon characters, or simple solid colors. Some mittens even have fun features like built-in touchscreen compatibility, making it easier for kids to use their electronic devices without having to remove their mittens.
When choosing children’s mittens, it is important to consider the material and construction to ensure durability and warmth. Look for mittens made from high-quality materials such as wool or fleece, as these fabrics are known for their excellent insulation properties.
It is also essential to find mittens that fit properly to provide optimal warmth and comfort. Be sure to measure your child’s hands to determine the correct size and consider adjustable features like elastic cuffs or Velcro straps for a snug fit.
Additionally, many knitting enthusiasts enjoy creating their own children’s mittens using free knitting patterns. These patterns provide step-by-step instructions on creating mittens of various sizes, styles, and designs. Knitting mittens for children can be a rewarding and fun project that allows for personalization and customization.
Overall, children’s mittens are an important part of a child’s winter wardrobe. They provide warmth, protection, and style, making them a must-have accessory for any little one.
Suggested Knitting Patterns:
Why Choose Knitted Mittens?

When it comes to keeping your child’s hands warm during the colder months, knitted mittens are a great option. Not only do they provide an extra layer of insulation, but they also offer a stylish and unique look that is sure to make your child stand out.
One of the main reasons why you should choose knitted mittens is their inherent warmth. Unlike other types of mittens or gloves, knitted mittens are made from wool or other warm materials that are designed to trap heat and keep your child’s hands toasty. They are also often lined with a soft fabric like fleece for added comfort.
Another reason to choose knitted mittens is their versatility. They can be easily customized to fit any size or style preference. You can choose from a wide range of colors, patterns, and designs to match your child’s personality and outfit. Additionally, knitted mittens can be made to be fingerless or with flaps that can be pulled back to allow for more dexterity.
Furthermore, knitting your own mittens allows you to create a truly personalized and one-of-a-kind item for your child. Not only will they appreciate the effort and love that went into making them, but they will also have a unique accessory that they can proudly show off to their friends.
In conclusion, knitted mittens are not only practical and warm, but they also offer a level of customization and uniqueness that other types of mittens do not. So, why settle for boring store-bought mittens when you can create your own beautiful and functional pair?
Materials Needed
Before you get started on knitting children’s mittens, you will need to gather the necessary materials. Here is a list of what you will need:
1. Yarn:
- Choose a yarn that is suitable for children’s mittens, such as a soft and warm wool or acrylic blend.
- Consider using a yarn in a fun and colorful shade to make the mittens more appealing to children.
- Make sure to have enough yarn to complete the pair of mittens, as well as extra for any potential mistakes or adjustments.
2. Knitting Needles:

- Use a pair of knitting needles that are appropriate for the yarn you have chosen.
- Consider using circular or double-pointed needles, depending on your knitting preference and the pattern you will be using.
- Check the gauge of your needles to ensure that it matches the recommended gauge for the pattern.
3. Stitch Markers:
- Stitch markers are useful for keeping track of specific stitches or sections of the mitten pattern.
- Use small, removable stitch markers that will not snag on the yarn as you knit.
4. Tapestry Needle:
- A tapestry needle is necessary for weaving in loose ends and neatly finishing the mittens.
- Choose a needle with a blunt tip, as this will make it easier to work with the yarn.
5. Scissors:
- Have a pair of sharp scissors on hand for cutting the yarn as needed.
- Make sure the scissors are suitable for cutting yarn without causing fraying or damage.
- Keep the scissors within reach to easily trim any excess yarn during the knitting process.
By gathering these materials before you begin, you will be fully prepared to start knitting children’s mittens and create a cozy accessory for little ones to wear during the colder months.
Size and Gauge
Before you start knitting the children’s mittens, it’s important to determine the size and gauge to ensure that they will fit properly. The size of the mittens can vary depending on the age of the child and their hand measurements. It’s a good idea to measure the child’s hand before starting the project to determine the appropriate size.
To find the gauge for the pattern, you will need to knit a swatch using the recommended yarn and needle size. The gauge is the number of stitches and rows per inch that you achieve with your knitting. It’s important to match the gauge given in the pattern to ensure that your mittens will turn out the correct size.
When knitting the swatch, cast on enough stitches to create a square that is at least four inches wide and four inches tall. Knit in the specified stitch pattern for a few rows, then measure how many stitches and rows are in one inch. If your gauge is larger than the pattern gauge, try using a smaller needle size. If your gauge is smaller, try using a larger needle size.
Keep in mind that achieving the correct gauge is essential for the fit and size of the mittens. If your gauge is significantly different from the pattern gauge, your mittens may turn out either too big or too small. Take the time to check your gauge before starting the project to ensure the best results.
Instructions
In order to create these adorable mittens for children, you will need the following materials:
- Size 5 (3.75mm) knitting needles
- DK weight yarn (about 100 yards)
- Stitch markers
- Yarn needle
Once you have gathered all the necessary materials, you can begin knitting the mittens following these instructions:
- Cast on 28 stitches using the long-tail cast on method.
- Divide the stitches evenly between three double-pointed needles (9 stitches on each needle) or use magic loop technique.
- Join in the round, being careful not to twist the stitches.
- Place a stitch marker to indicate the beginning of the round.
- Knit in a 1×1 rib stitch (alternating knit and purl stitches) for 2 inches.
- Switch to stockinette stitch and knit every round until the mitten measures 4 inches from the cast-on edge.
- To shape the thumb gusset, increase 1 stitch at the beginning and end of the 1st needle every other round, until there are 10 stitches on the needle.
- Place these thumb stitches on a holder or waste yarn until later.
- Continue knitting the hand portion in stockinette stitch until it measures 5 inches from the cast-on edge.
- For the top shaping, decrease 1 stitch at the beginning and end of each needle every other round, until there are 6 stitches left on each needle.
- Break the yarn leaving a long tail, thread the tail through the remaining stitches and pull tight to close the mitten top.
- Use the yarn needle to weave in any loose ends.
- Repeat steps 1-12 to make the second mitten.
With these instructions, you will be able to create snug and warm mittens for the little ones in your life. Enjoy knitting!
Cuff
The cuff is an important element of any mitten, as it provides a snug and secure fit around the wrist. It also helps to keep cold air from entering and warm air from escaping. When designing a pattern for children’s mittens, it is crucial to create a cuff that is both practical and comfortable.
In this pattern, the cuff is worked in a rib stitch, which adds stretch and flexibility. This is especially important for children, as it allows the mittens to fit snugly without feeling too tight or constricting. The rib stitch also creates a textured pattern that adds interest to the design.
To create the rib stitch, you will alternate between knitting and purling stitches. This creates a stretchy fabric that is perfect for the cuff. Additionally, by using a smaller needle size for the cuff, you can ensure that it fits snugly without being too tight.
To make the cuff even more comfortable, you can add a fold-over ribbed edge. This not only adds an extra layer of warmth, but it also adds a decorative touch to the mittens. To achieve this, simply knit the rib stitch for a few rows, then fold the cuff over and continue knitting in the round.
Hand
The hand is one of the most important parts of the human body. It consists of the wrist, palm, fingers, and thumb, all of which work together to perform various tasks and functions. The hand is essential for everyday activities such as grasping, holding, manipulating objects, and performing intricate tasks like writing, typing, and playing musical instruments.
One unique feature of the hand is its opposable thumb, which sets humans apart from many other animals. The thumb allows us to perform precise movements and grip objects with precision and strength. It can be bent, flexed, and rotated, enabling us to perform tasks that require dexterity and fine motor skills.
The hand is also home to a complex network of muscles, tendons, ligaments, and nerves. These structures work together to enable the hand to move, flex, and extend. The muscles in the hand are responsible for generating the force required for gripping and manipulating objects, while the tendons connect the muscles to the bones, allowing for movement. The ligaments provide stability and support, preventing excessive movement and maintaining the hand’s structure.
Furthermore, the hand has a rich sensory network, allowing us to perceive touch, temperature, pain, and pressure. This sensory information is transmitted to the brain through the nerves in the hand, allowing us to navigate and interact with our environment effectively. The hand also plays a crucial role in communication, as gestures and hand movements can convey various meanings and emotions.
In conclusion, the hand is a remarkable and versatile part of the human body. Its intricate structure and functionality enable us to perform a wide range of tasks and activities. Whether it’s knitting, playing an instrument, or simply holding hands with loved ones, the hand plays an essential role in our daily lives.
Thumb
The thumb is an essential part of a mitten as it allows for better movement and dexterity. It is important to knit the thumb in such a way that it fits comfortably and allows for easy hand movement.
To knit the thumb, you can either pick up stitches from the thumb hole and knit a separate section, or you can place the thumb stitches on a stitch holder and knit them later. Both methods have their advantages, so it’s up to you to choose which one you prefer.
- Picking up stitches: This method involves picking up stitches from the thumb hole and knitting them in the round. It allows for a seamless finish and a snug fit.
- Using a stitch holder: This method involves placing the thumb stitches on a stitch holder and knitting them separately. It allows for more flexibility in terms of thumb placement and size adjustment.
Whichever method you choose, make sure to follow the pattern instructions carefully and maintain the correct gauge. The thumb should be wide enough to allow for easy movement, but not so loose that it slips off easily. You can also add ribbing or a different stitch pattern to the thumb for added texture and style.
Remember to try on the mitten as you go to ensure the thumb fits properly. This may require making adjustments and knitting a few extra rows if necessary. Don’t be afraid to experiment and customize the thumb to your liking, as long as it remains functional and comfortable for the wearer.
Finishing
After completing the knitting portion of your childrens mittens, it’s time to give them a finished look. There are several steps you can take to achieve a polished and professional result.
1. Block the mittens
First, you should block the mittens to shape them and even out the stitches. Wet blocking is the most common method for blocking knitting. Gently soak the mittens in cool water with a bit of wool wash and then press out the excess water. Lay the mittens flat on a towel, gently patting them into shape and smoothing out any wrinkles. Allow them to dry completely before moving on to the next step.
2. Sew the sides
Next, fold the mittens in half with wrong sides together. Use a tapestry needle and the same color yarn to sew the sides together. Start at the cuff and work your way up, making sure to line up the edges and maintain an even tension. Secure the yarn on the inside of the mittens and weave in any loose ends.
3. Add the thumb
The next step is to add the thumb. Using the same color yarn and tapestry needle, sew the gap at the top of the thumb closed. Start at one side and weave through the stitches until the gap is closed. Again, secure the yarn on the inside of the mittens and weave in any loose ends.
4. Attach any additional embellishments
If desired, you can add any additional embellishments to the mittens at this stage. This could include pom poms, buttons, or embroidery. Be creative and personalize the mittens to your liking.
Once you have finished all of these steps, your childrens mittens will be ready to wear or gift to someone special. Enjoy the satisfaction of completing a handmade project and the warmth and comfort that these cozy mittens will provide.
Tips and Tricks for knitting children’s mittens
Knitting mittens for children can be a fun and rewarding project. Here are some tips and tricks to help you create the perfect pair:
1. Choose the right yarn
When selecting yarn for children’s mittens, it is important to choose a soft and durable yarn. Avoid scratchy or itchy yarns that may irritate sensitive skin. Look for yarns specifically designed for children or baby projects, as they often come in a variety of vibrant colors.
2. Use the right needle size
The needle size you choose can have a significant impact on the size and fit of the mittens. If you want a snug fit, use smaller needles. If you prefer a looser fit, opt for larger needles. Be sure to check the gauge before starting your project, as this will help ensure the mittens are the correct size.
3. Pay attention to the thumb placement
The placement of the thumb is crucial for comfortable and functional mittens. Make sure to carefully follow the pattern instructions for thumb placement, as it can vary depending on the age of the child. Taking the time to properly position the thumb will result in mittens that fit well and allow for easy movement.
4. Add an extra layer of warmth
To provide extra warmth, consider lining the mittens. You can use fleece or another soft and warm fabric to create a cozy lining. This will help keep little hands warm during colder weather and make the mittens even more comfortable to wear.
5. Don’t forget about decorative details
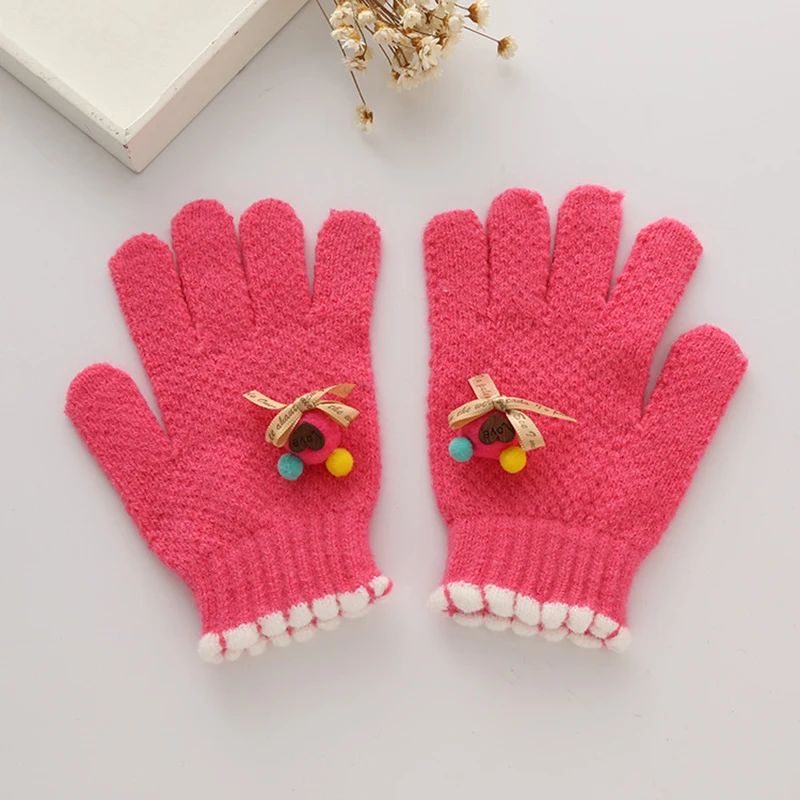
While the main focus is on function, don’t be afraid to add some decorative details to make the mittens more appealing to children. You can incorporate colorful stripes, embroidery, or buttons to make the mittens unique and fun. Just make sure the decorations are securely attached to avoid any potential choking hazards.
With these tips and tricks in mind, you’ll be well-equipped to knit a pair of children’s mittens that are both functional and stylish. Happy knitting!
Variations
There are countless ways to customize these children’s mittens to create unique and personalized designs. Here are some ideas to get you started:
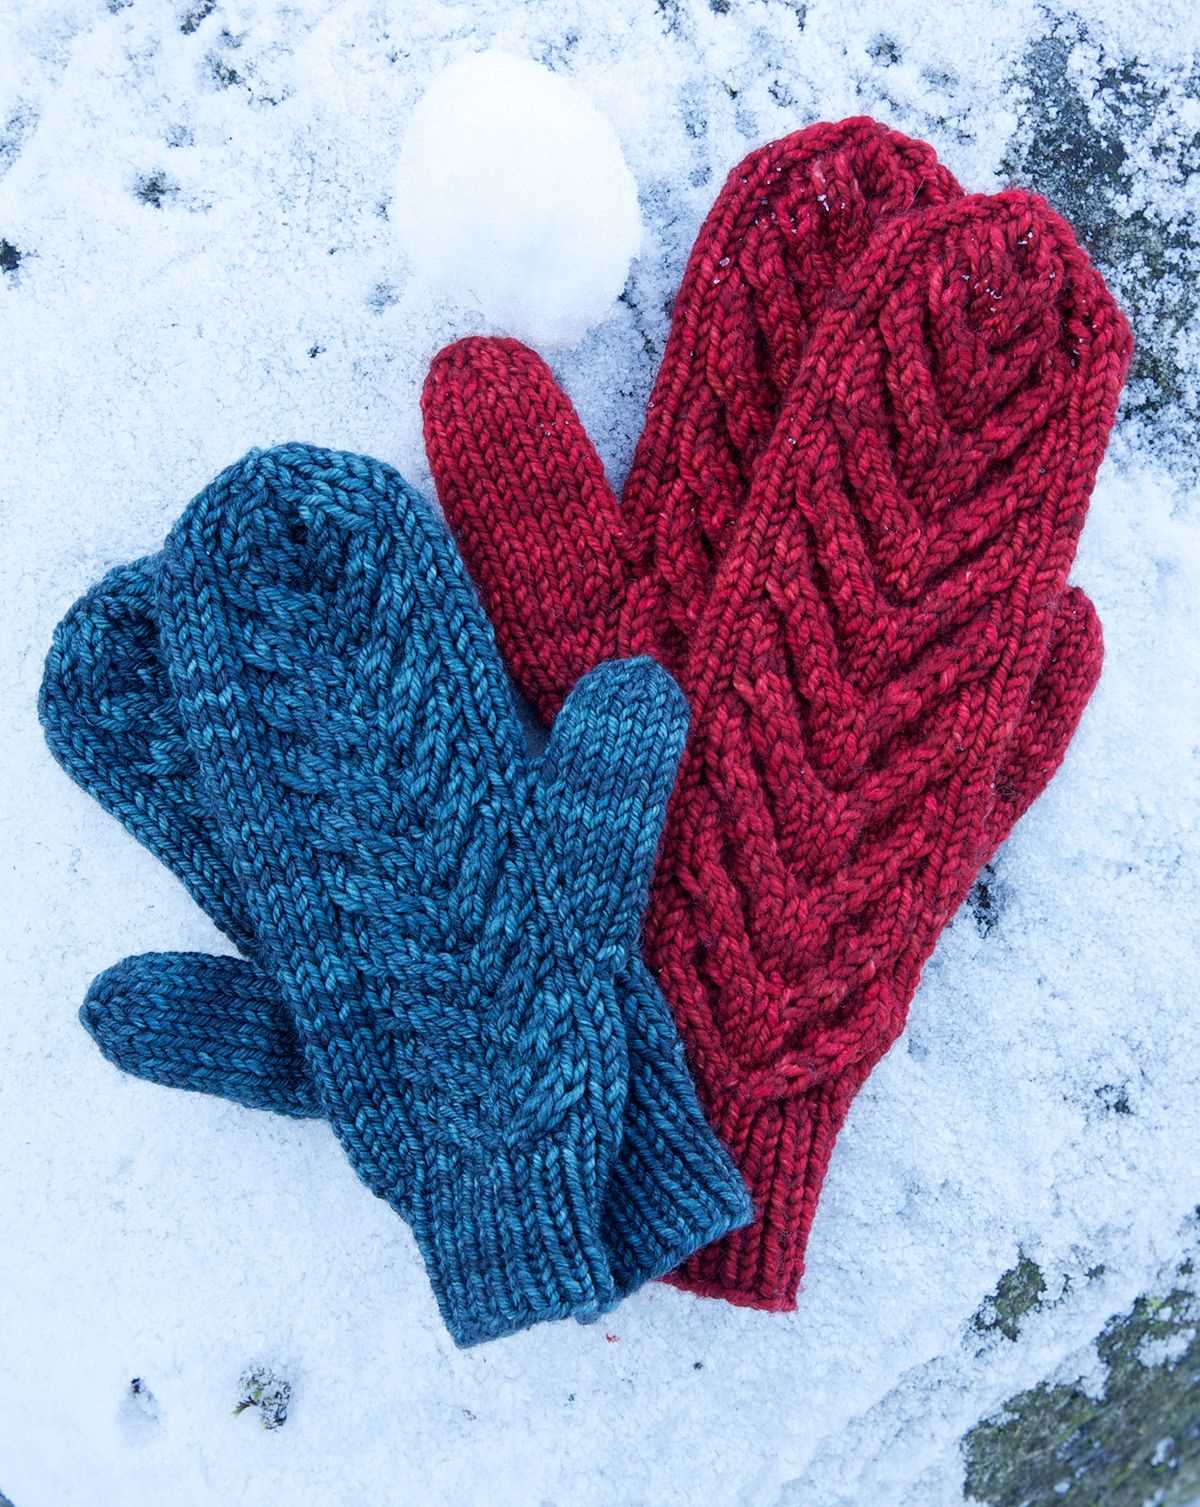
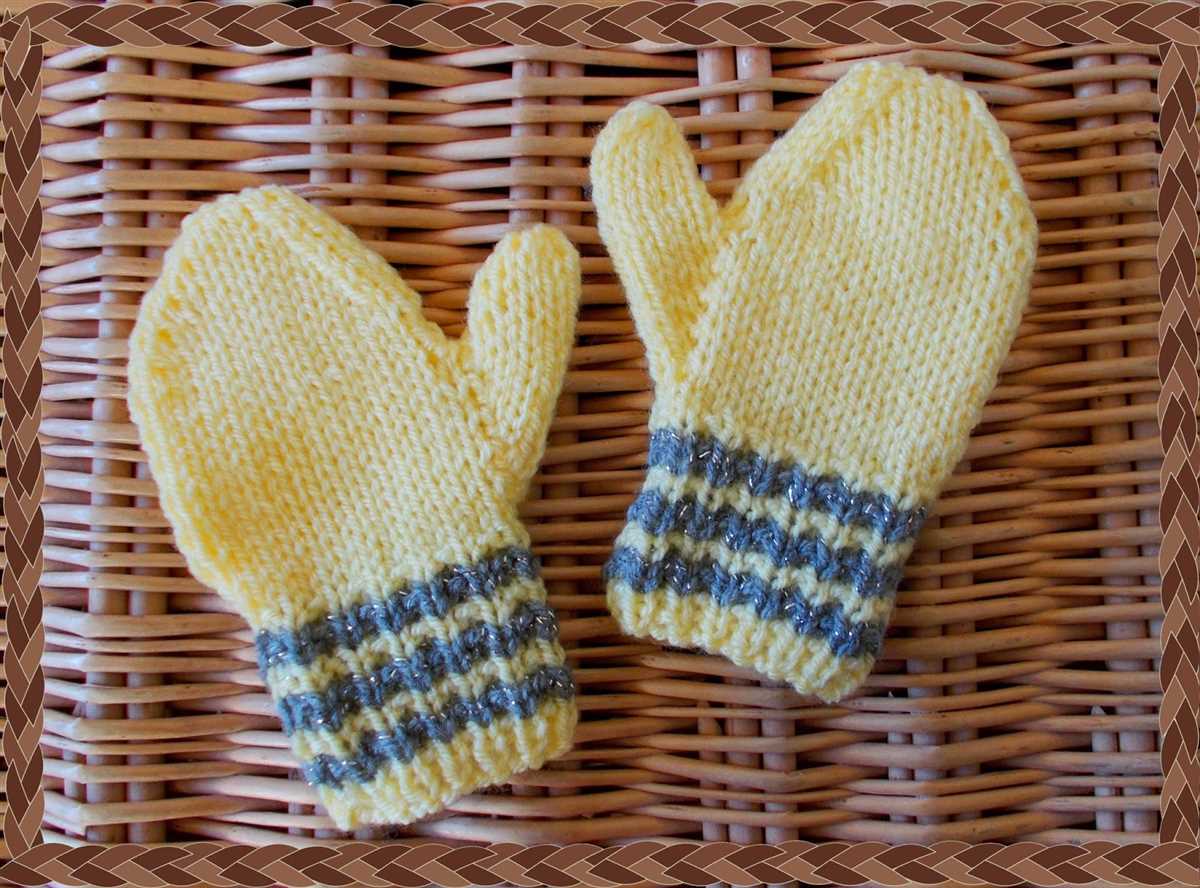
- Color variations: Experiment with different color combinations to create fun and vibrant mittens. You can use different colors for the main body, cuffs, and thumbs.
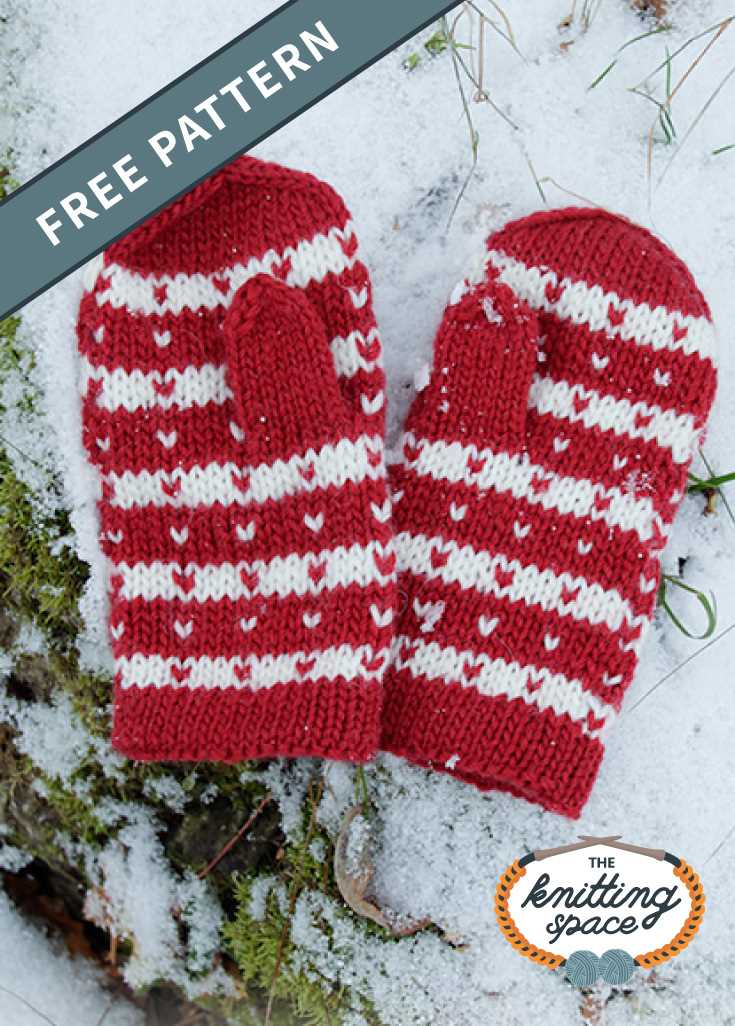
- Stripes: Add stripes to the mittens by alternating colors every few rows. This can create a playful and eye-catching design.
- Embroidery: Add embroidered designs, such as flowers or animals, to make the mittens even more special. You can use contrasting or complementary colored yarn for the embroidery.
- Button accents: Sew buttons onto the cuffs or thumbs as decorative accents. Choose buttons that complement the color scheme of the mittens.
- Lace panels: Incorporate lace patterns into the mittens for a delicate and feminine touch. This could be done on the cuffs or the back of the hand.
Remember, these variations are just starting points. Feel free to mix and match different ideas, or come up with your own creative twists!
Happy knitting!