
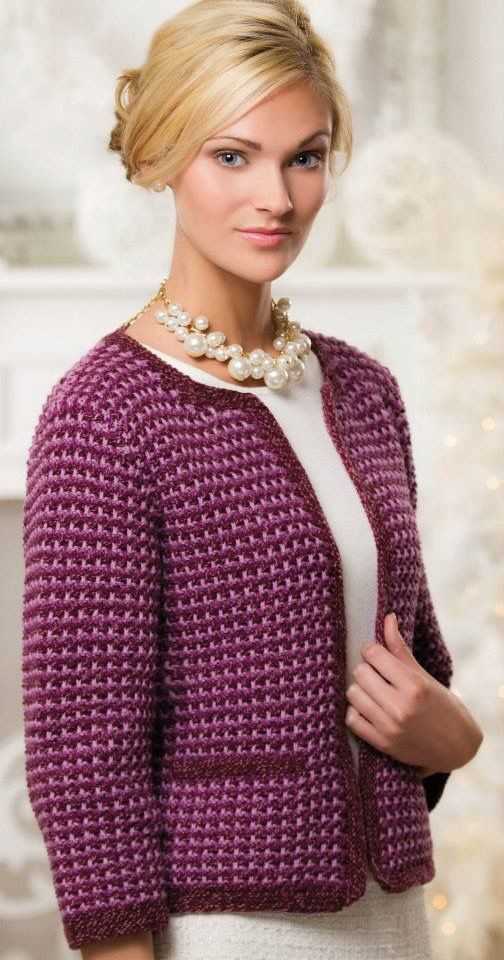
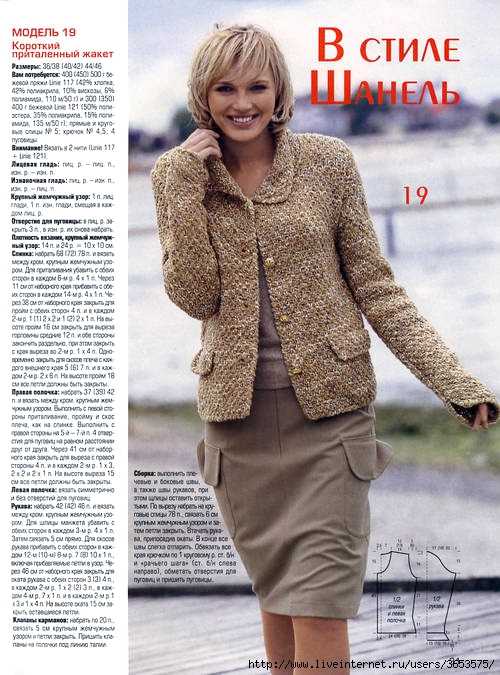
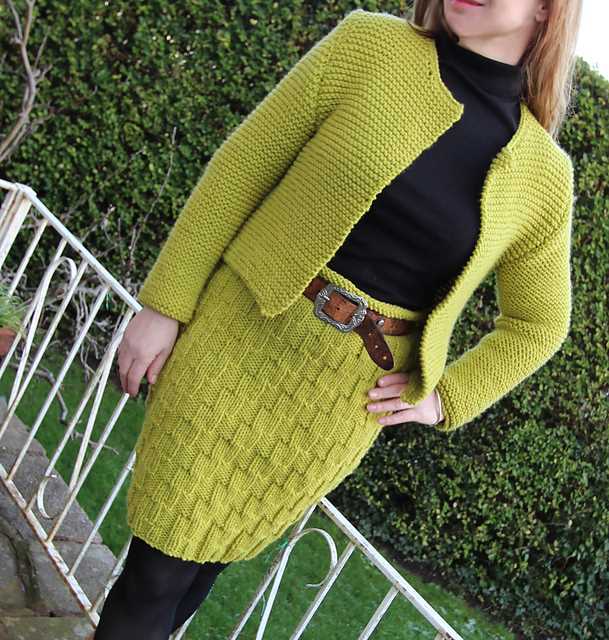
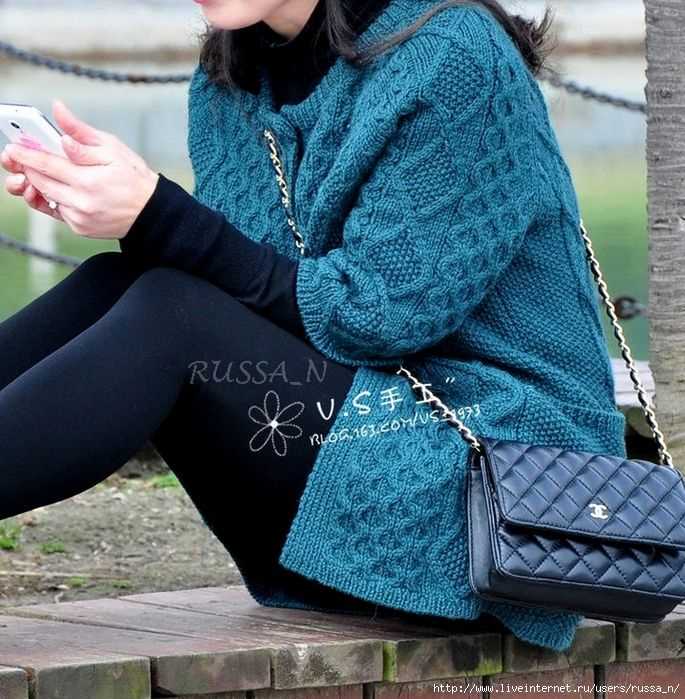
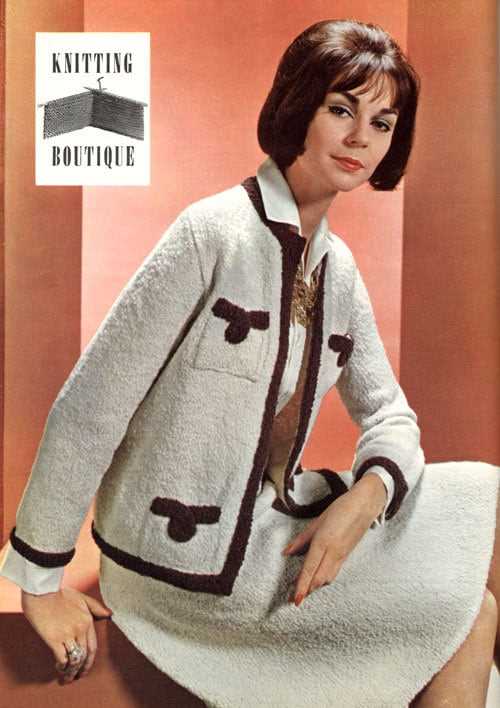
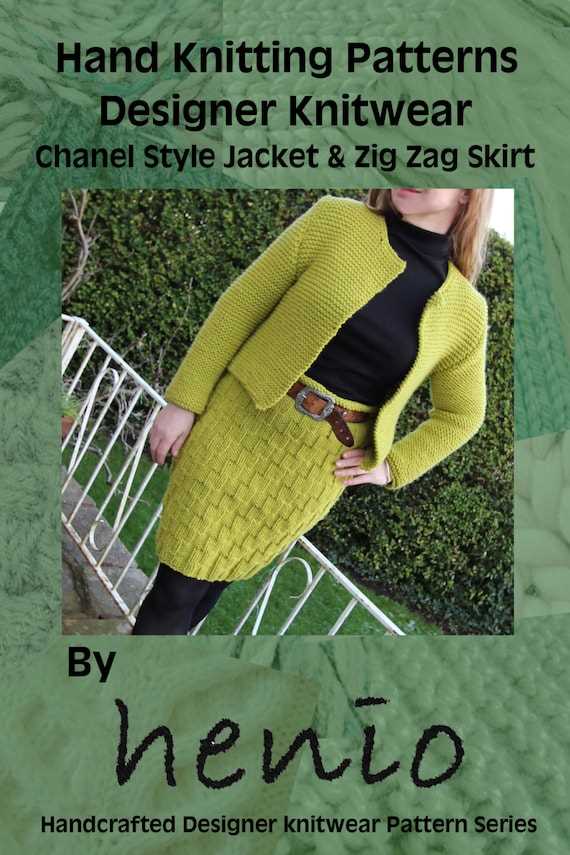
Are you tired of searching for the perfect jacket to add to your fall wardrobe? Look no further! We have a free knitting pattern for a chic Chanel-style jacket that is sure to be a showstopper. Inspired by the classic designs of Coco Chanel, this jacket features a timeless silhouette and sophisticated details that will elevate any outfit.
Knitting your own jacket allows you to create a unique and personalized piece that fits you perfectly. With this free pattern, even beginner knitters can achieve professional-looking results. The pattern includes detailed instructions and helpful tips to guide you through each step of the project.
Get ready to channel your inner fashionista and bring a touch of Parisian chic to your wardrobe. Whether you’re dressing up for a special occasion or adding a touch of elegance to your everyday look, this Chanel-style jacket is the perfect addition to your collection. Don’t miss out on this free knitting pattern – start knitting today!
How to Knit a Chanel Style Jacket: Free Pattern and Instructions
Looking to add a touch of timeless elegance to your wardrobe? Why not try knitting a Chanel style jacket? This classic and sophisticated garment is a staple in every fashion lover’s closet, and with our free pattern and instructions, you can create your very own.
To get started, gather the materials you’ll need: yarn in your desired color, knitting needles, a tape measure, and a pair of scissors. Once you have everything you need, it’s time to cast on and begin knitting.
Step 1: Cast On
To begin your Chanel style jacket, cast on the desired number of stitches using your knitting needles. Make sure to leave a long tail of yarn for seaming later.
Step 2: Ribbing
Once you’ve cast on, it’s time to create the ribbing for your jacket. Knit the first row, then switch to a purl stitch for the second row. Continue alternating between knit and purl stitches until you’ve reached the desired length for the ribbing.
Step 3: Body
After completing the ribbing, it’s time to move on to the body of the jacket. This is where you can get creative with different stitch patterns or stick to a simple stockinette stitch. Knit rows until you’ve reached your desired length for the body.
Step 4: Sleeves
Next, it’s time to knit the sleeves for your Chanel style jacket. Using the same stitch pattern as the body, knit rows until you’ve reached the desired length for the sleeves.
Step 5: Finishing
Once you’ve completed the body and sleeves, it’s time to seam the jacket together. Use the long tail of yarn from the cast on to sew the sides and shoulders together. Make sure to leave openings for the arms and neckline.
Finally, add any finishing touches such as buttons or a trim to complete your Chanel style jacket.
With our free pattern and instructions, you’ll be able to create a beautiful Chanel style jacket that will never go out of style. Whether you’re a seasoned knitter or just starting out, this project is a great way to showcase your skills and add a touch of luxury to your wardrobe.
Choosing the Right Yarn and Needles
When knitting a Chanel style jacket, it is important to choose the right yarn and needles to achieve the desired look and fit. The yarn and needle choices can greatly impact the overall appearance and texture of the finished garment.
Yarn:
For a Chanel style jacket, it is best to choose a high-quality yarn that has a good drape and provides enough structure for the jacket to hold its shape. Look for yarns that have a combination of natural fibers, such as wool and silk, as they will provide warmth and a luxurious feel. It is also important to consider the weight of the yarn – a medium to bulky weight yarn is typically used for this type of jacket to create the classic textured look.
Needles:
The choice of needles is equally important when knitting a Chanel style jacket. Depending on the yarn you have chosen, you will need to select the appropriate needle size to achieve the correct gauge. It is recommended to use circular needles with a length that is comfortable for you and can accommodate the number of stitches required for the width of the jacket. The circular needle allows for the weight of the jacket to be distributed evenly, reducing strain on your hands and wrists. Additionally, using a needle with a smooth surface will help prevent the yarn from snagging and ensure that the stitches slide easily.
Whether you are an experienced knitter or a beginner, taking the time to choose the right yarn and needles for your Chanel style jacket project will make a significant difference in the outcome. Remember to consider the qualities of the yarn and the size and material of the needles to ensure that they complement each other and help you create a beautiful and well-fitting jacket.
Getting Started: Casting On
Before you begin knitting your Chanel style jacket, you will need to cast on your stitches. Casting on is the process of creating the foundation row of stitches that your jacket will be built upon. There are several methods for casting on, but for this pattern, we recommend using the long tail cast on method.
To start, you will need your knitting needles and your yarn. Measure out a length of yarn for your tail, leaving enough for the number of stitches you need to cast on, plus a little extra. Hold the yarn in your left hand, with the tail end in your palm and the working end (attached to the ball of yarn) over your index finger.
Step 1: Make a slipknot by crossing the working yarn over the tail, creating a loop. Insert your needle through the loop and pull it snug.
Step 2: Hold the needle with the slipknot in your right hand. With your left hand, take the working yarn and loop it under the left-hand needle from front to back.
Step 3: Insert the right-hand needle into the loop on your left-hand needle from front to back. Use the right-hand needle to pick up the working yarn and pull it through the loop, creating a new loop on your right-hand needle. Drop the loop from your left-hand needle.
Step 4: Repeat steps 2 and 3 until you have cast on the desired number of stitches for your jacket. Make sure to keep your stitches loose, as a tight cast on can make it difficult to knit your first row.
Casting on can take a bit of practice, so don’t be discouraged if it doesn’t come easily at first. Once you have cast on all of your stitches, you are ready to start knitting the body of your Chanel style jacket!
Knitting the Main Body

Once you have completed the ribbing for your Chanel style jacket, it’s time to move on to knitting the main body. For this part, you will continue using the same size needles and yarn as before.
To start, you will need to cast on the required number of stitches for your size. The pattern should specify how many stitches to cast on and will usually provide different measurements for each size. Make sure to follow the instructions carefully to ensure the correct fit.
From there, you will begin knitting the main body in the desired stitch pattern. This could be a simple stockinette stitch, a textured pattern, or even a cable pattern. The pattern will indicate which stitches to use and how many rows to knit in each stitch pattern.
As you knit the main body, make sure to periodically check your gauge to ensure you are achieving the correct tension. Gauge is important for getting the right fit and drape of the finished jacket. If your tension is too loose, you may need to switch to smaller needles. If it’s too tight, you may need to switch to larger needles.
Keep knitting the main body until you reach the desired length or until the pattern instructs you to switch to the next section. Make sure to read the pattern carefully for any shaping or decreases that may be required as you progress.
Once you have finished knitting the main body, you can move on to the next step in the pattern, whether it’s knitting the sleeves, adding pockets, or attaching any embellishments. Continue following the pattern instructions until you have completed your Chanel style jacket.
Creating the Sleeves
When it comes to knitting the sleeves for your Chanel-style jacket, there are a few key steps to follow. First, you will need to pick up stitches along the armhole edge. This is typically done using a smaller needle size, such as a US size 4 or 5. Using this smaller needle size will help ensure a snug fit and prevent any gaps or loose stitches along the armhole edge.
Once you have picked up the stitches, you can begin knitting the sleeves in your desired pattern. You may choose to continue the main stitch pattern used on the body of the jacket, or you can switch to a different stitch pattern for added interest. It’s important to pay attention to the pattern instructions and the stitch counts to ensure your sleeves match the overall design of the jacket.
Decreasing
As you knit the sleeves, you will need to incorporate decreases to shape the sleeve and create a tapered fit. Decreases are typically done on either side of the sleeve to create a symmetrical look. There are various decrease methods you can use, such as knit two together (k2tog) or slip, slip, knit (ssk). The pattern you are following should specify which decrease method to use and when to decrease.
It’s important to keep track of your decreases and ensure they are evenly spaced along the sleeve. This will help create a polished and professional finished look. You can use stitch markers or count your stitches to ensure your decreases are consistent.
Finishing

Once you have completed the sleeve section, it’s time to finish off your knitting. This typically involves binding off your stitches with a stretchy bind off method, such as the tubular bind off or the suspended bind off. The stretchy bind off will allow the sleeve to retain its shape and provide a comfortable fit.
After binding off, you may need to weave in any loose ends or sew any seams to complete the sleeve. This will depend on the specific pattern instructions and the design of your jacket. Remember to block your finished sleeves to relax the stitches and ensure a professional finish.
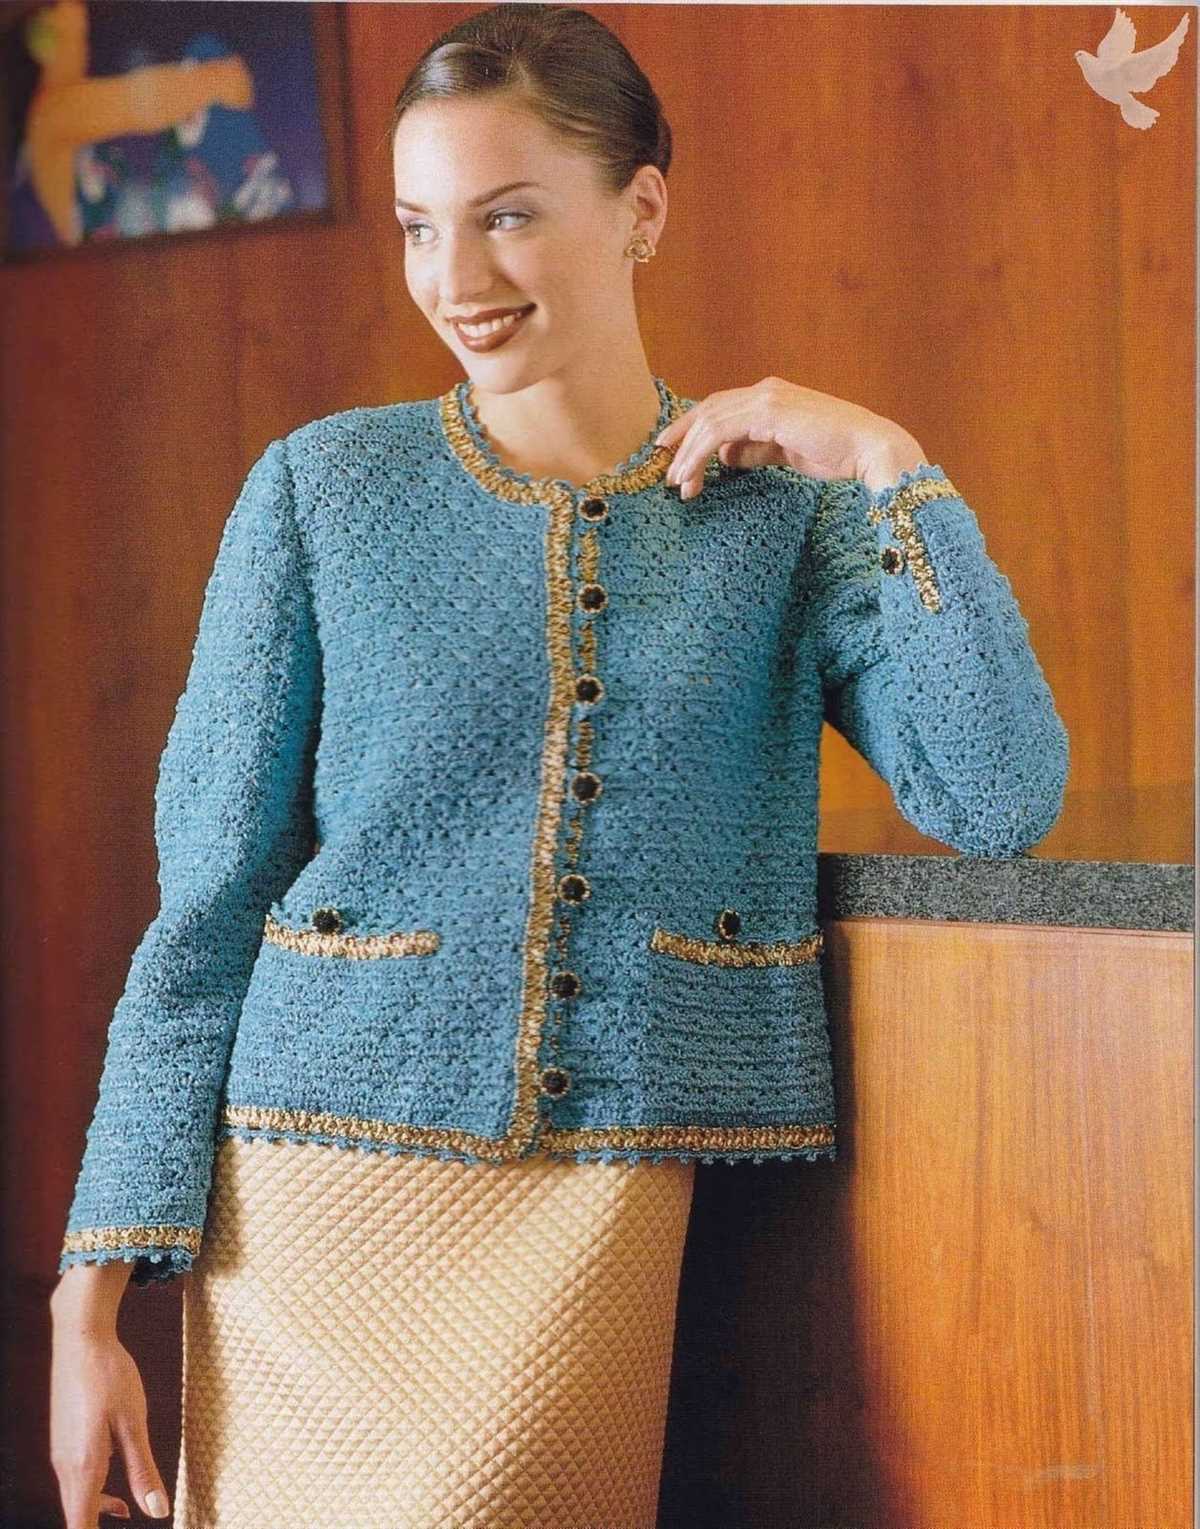
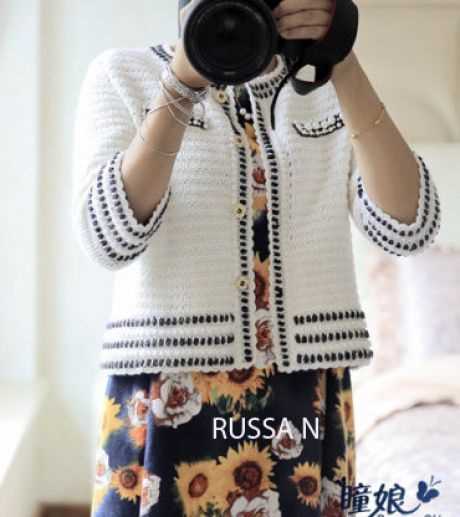
Adding the Chanel-inspired Details
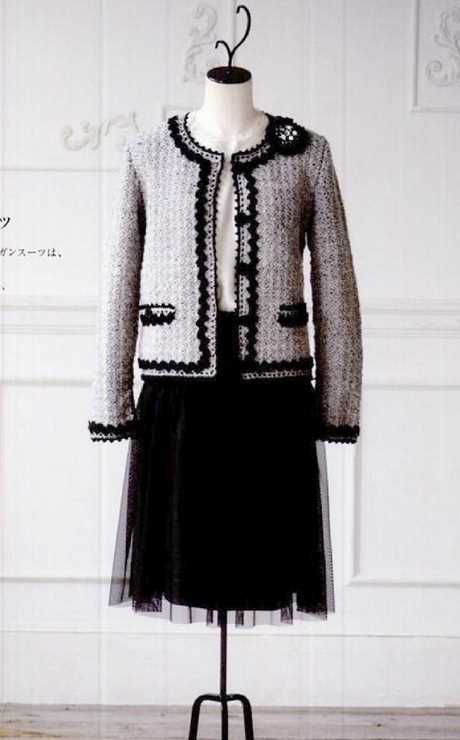
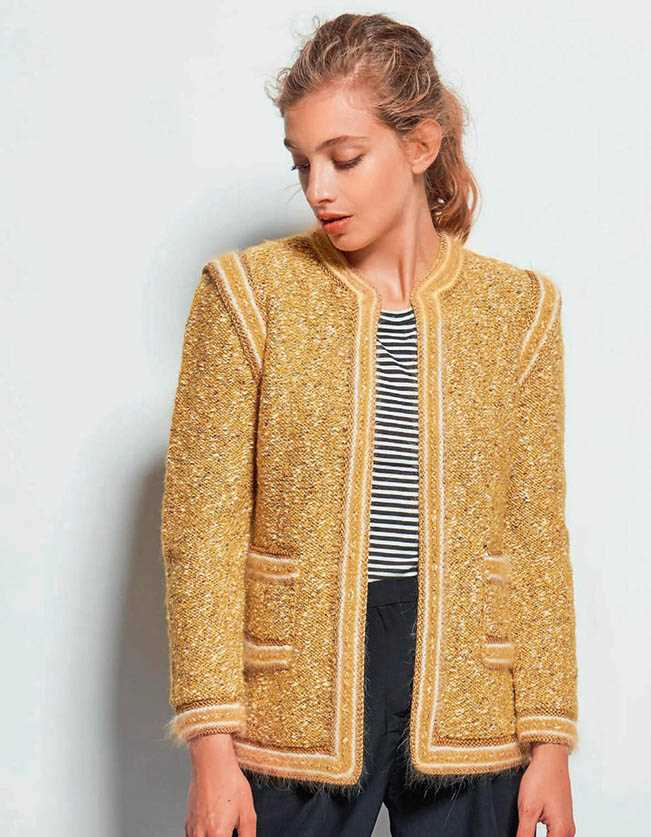
Once you have finished knitting the main body of your Chanel-style jacket, it’s time to add the details that will give it that iconic Chanel look. These details include the signature trim, pockets, and buttons.
Trim: To create the signature trim, you can either use a pre-made trim in a contrasting color or make your own by knitting a narrow strip of fabric. The trim is typically sewn around the edges of the jacket, including the collar, cuffs, and hem. This adds an elegant and polished touch to the garment.
Pockets: The Chanel jacket is known for its functional yet stylish pockets. To add pockets to your jacket, you can either knit them separately and sew them onto the jacket or create them as part of the knitting process. The pockets are usually positioned on the front of the jacket, near the waistline. They can be square or slightly rounded in shape, depending on your preference.
Buttons: The buttons are another important detail in a Chanel-style jacket. Traditionally, Chanel jackets feature gold or pearl buttons with the iconic double C logo. You can either purchase buttons with a similar design or use plain buttons and add the logo yourself using embroidery or appliqué techniques.
Other Considerations
- When adding the trim, pockets, and buttons, make sure to carefully measure and mark the placement before sewing them onto the jacket. This will help ensure that the details are evenly spaced and aligned.
- Consider using a matching or contrasting thread color when sewing on the details. This can add an additional element of style to your jacket.
- If you prefer a more modern twist on the Chanel-style jacket, you can experiment with different colors, textures, and embellishments. Don’t be afraid to customize the design to make it your own.
With the addition of these Chanel-inspired details, your knitted jacket will truly resemble the timeless elegance of a classic Chanel piece. Once complete, you can proudly wear your creation and enjoy the compliments that will undoubtedly come your way.
Shaping the Waist and Neckline
When knitting a Chanel style jacket, one important aspect to consider is the shaping of the waist and neckline. These details play a crucial role in achieving the classic and flattering fit that Chanel designs are known for. Here are a few key techniques to help you shape the waist and neckline of your jacket.
1. Decreasing
Decreasing is an essential technique in shaping the waist of a Chanel style jacket. By strategically decreasing stitches, you can create a fitted silhouette that accentuates the waistline. This can be achieved by working decreases evenly distributed across the rows or by creating vertical darts along the sides of the jacket.
2. Darting
Another way to shape the waist is by incorporating darts. Darting involves creating diagonal lines that taper in towards the waist, helping to create a more tailored look. These darts can be positioned on the front, back, or both sides of the jacket, depending on the desired fit and design.
3. Neckline Shaping
To shape the neckline of a Chanel style jacket, careful attention must be given to the placement of decreases or increases. The goal is to create a neckline that sits properly and enhances the overall look of the garment. Common techniques include working short rows, which allow for shaping without affecting the rest of the fabric, or incorporating decreases gradually along the neckline.
By understanding and implementing these shaping techniques, you can ensure that your Chanel style jacket fits and flatters your body shape. Experiment with different combinations of darts, decreases, and neckline shaping to achieve the desired result and create a stunning garment that reflects the timeless elegance of Chanel.
Working on the Buttonholes
Creating buttonholes is an essential part of finishing your Chanel-style jacket. It is important to carefully plan and mark the placement of the buttonholes before you begin. Buttonholes are typically placed along the center front edge of the jacket, and the number of buttonholes needed will depend on the size and design of your jacket.
Step 1: Marking the buttonhole placement
Using a ruler and tailor’s chalk, carefully measure and mark the desired placement for each buttonhole along the center front edge of your jacket. Make sure to consider the size and spacing of the buttons you will be using. For a polished and professional look, it is recommended to space the buttonholes evenly and align them with the corresponding buttons.
Step 2: Creating the buttonholes
There are several methods you can use to create buttonholes, including hand-sewing, machine-sewing, or using a buttonhole attachment on your sewing machine. For a Chanel-style jacket, a hand-sewn buttonhole is often preferred for its delicate and couture-like finish.
Hand-sewn buttonhole method:
- Thread a hand-sewing needle with a matching thread color.
- Starting from the bottom of the buttonhole marking, make a small backstitch to secure the thread.
- Using a buttonhole stitch, sew along the marked line, making sure to catch both sides of the fabric. Repeat this stitch several times to reinforce the buttonhole.
- Finish the buttonhole by making another small backstitch at the top of the marking.
- Repeat this process for each buttonhole on your jacket.
Step 3: Finishing touches
Once all the buttonholes are created, carefully trim any excess thread and use a small pair of sharp scissors to carefully cut open the buttonhole. Take extra caution to avoid cutting through the stitches. Finally, give each buttonhole a gentle press with a pressing cloth and steam to ensure a crisp and professional finish.
Finishing the Jacket
After completing all the knitting sections of your Chanel style jacket, it’s time to move on to the finishing touches. These steps will bring your project together and give it a polished look.
1. Sewing the pieces together: Use a tapestry needle and matching yarn to sew the front and back pieces together at the shoulders. Then, attach the sleeves to the armholes, making sure to match the stitch counts and pattern. Finally, sew the side and sleeve seams, using an invisible or mattress stitch to create smooth, seamless edges.
2. Adding the collar: The collar of a Chanel style jacket is a signature feature. Using your tapestry needle, sew the collar to the neckline, making sure it aligns with the front edges of the jacket. You can choose to sew it flat or create a rolled collar effect by folding it slightly forward.
3. Applying the trim: Chanel jackets are known for their decorative trim, often made from contrasting fabric or ribbon. Measure and cut your chosen trim to fit along the front edges, neckline, and cuffs of the jacket. Use either fabric glue or hand stitch it in place for a secure attachment.
4. Blocking the finished jacket: To ensure the jacket retains its shape and drapes beautifully, block it by wetting it slightly and shaping it on a blocking board or towel. Use pins to hold the pieces in place and allow it to dry completely before removing the pins.
5. Adding closures: Chanel jackets typically have subtle closures, such as hooks and eyes or snaps. Sew these closures onto the front edges of the jacket, ensuring they are evenly spaced and secure. This step will provide a neat and finished look to the garment.
By following these steps, you’ll be able to complete your Chanel style jacket and enjoy the stylish and timeless piece you’ve created. It’s a project that requires patience and attention to detail, but the end result will be well worth the effort.
Blocking and Seaming the Pieces
Before assembling the jacket, it is important to block each knitted piece to ensure that they are the correct size and shape. Blocking involves wetting the pieces and gently stretching and pinning them into the desired dimensions. This step not only helps to even out any uneven tension in the knitting but also gives the finished garment a more professional look.
After blocking, it’s time to seam the pieces together. The Chanel style jacket typically consists of a back piece, two front pieces, two sleeves, and any additional details such as pockets or collar. The seams can be sewn using a tapestry needle and matching yarn or a sewing machine. It is important to follow the pattern instructions for seam placement and stitching techniques to ensure a neat and secure finish.
The first step in seaming is usually to sew the shoulder seams, attaching the back piece to the front pieces. This creates the main body of the jacket. Next, the sleeves can be attached to the armholes, either by sewing them in flat or by setting them in using a circular method. Once the basic structure of the jacket is complete, any additional details or finishing touches can be added, such as picking up stitches around the neckline for a collar or attaching pockets to the front pieces.
When seaming, it is important to match the stitch pattern and tension of the knitting as closely as possible to maintain the overall appearance of the jacket. This may mean adjusting the tension of the sewing stitches or using additional techniques, such as mattress stitch or slip stitch crochet, to ensure smooth and invisible seams. Once all the pieces are seamed, the jacket is ready for any final touches, such as adding buttons and buttonholes or blocking the finished garment one last time to help it retain its shape.
Styling and Wearing Your Chanel Style Jacket
Now that you’ve completed your beautiful Chanel style jacket, it’s time to style it and wear it with confidence. Follow these tips to showcase your craftsmanship and create a fashionable outfit:
- Go Classic: Channel Coco Chanel’s iconic style by pairing your jacket with a simple white blouse and a pair of tailored pants. This timeless combination will never go out of style.
- Mix and Match: Experiment with different textures and patterns to create unique looks. Try pairing your jacket with a floral dress or a pair of printed trousers to add some visual interest.
- Accessorize: Add some accessories to elevate your outfit. A pearl necklace, a statement belt, or a silk scarf can all enhance the sophistication of your look.
- Dress It Up or Down: Your Chanel style jacket is versatile enough to be worn for both formal and casual occasions. Dress it up with a tailored skirt and heels for a fancy event, or dress it down with jeans and sneakers for a more relaxed vibe.
- Layer it: Make your jacket work for different seasons by layering it with other pieces. Add a turtleneck sweater underneath for chilly days, or drape a lightweight cardigan over it for a stylish layered look.
Remember, the most important thing is to wear your Chanel style jacket with confidence and pride. This timeless piece will surely become a staple in your wardrobe for years to come.