
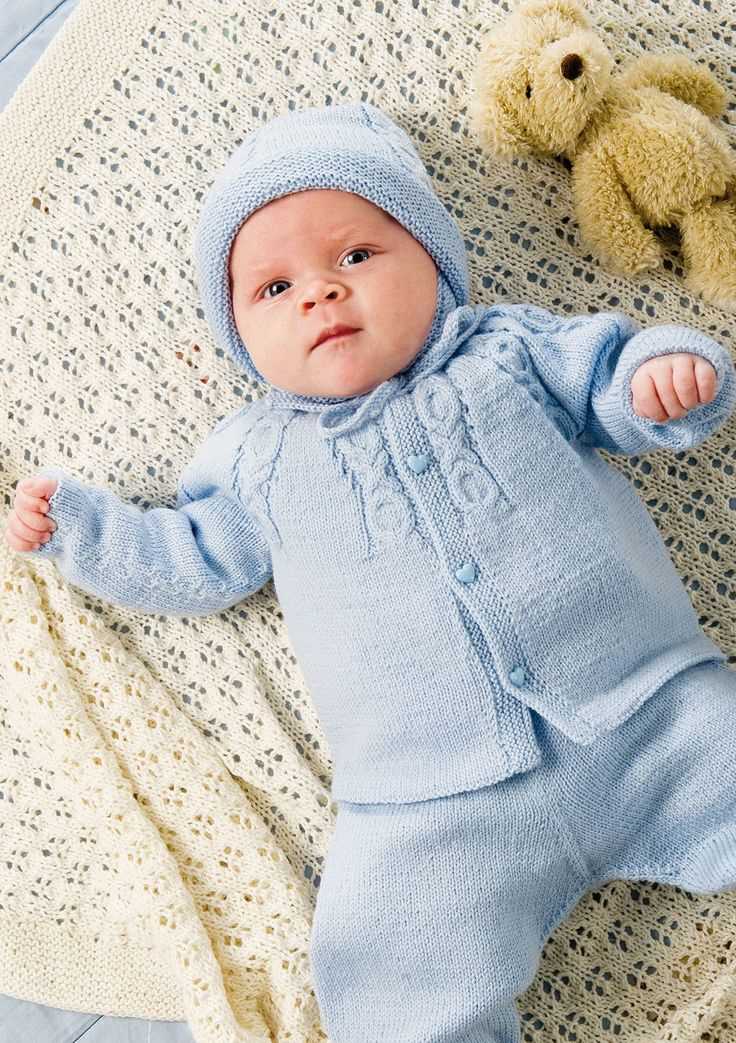
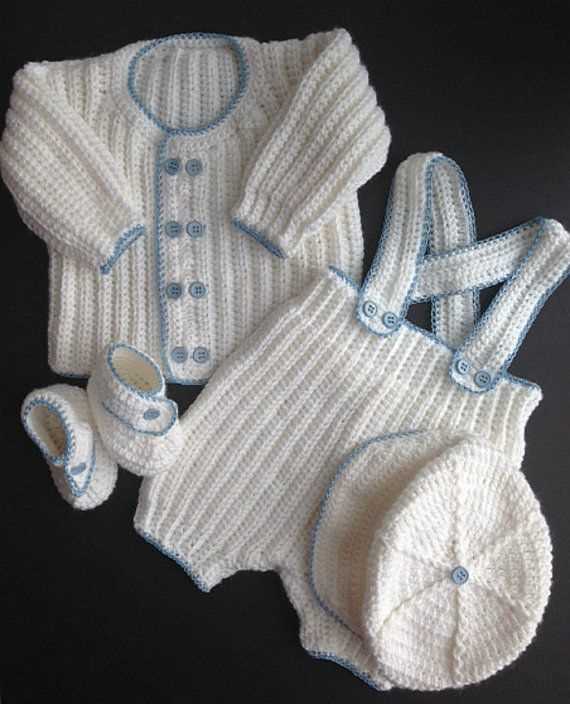
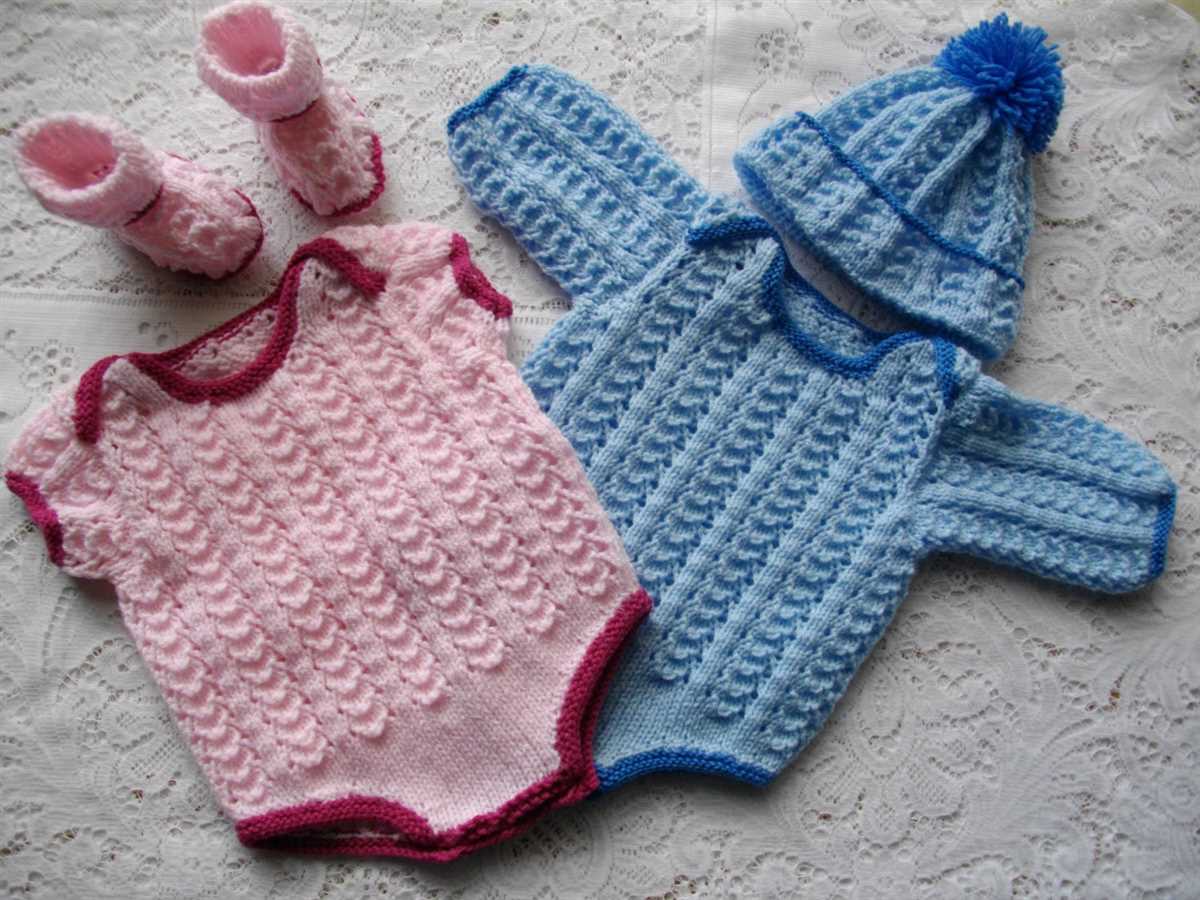
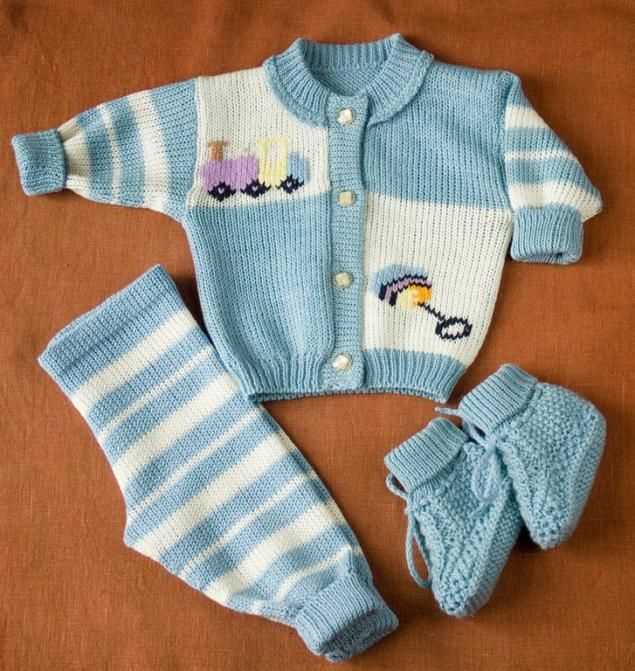
Knitting is a wonderful craft that allows you to create beautiful and practical items with just a few simple stitches. One popular item to knit for babies is an all in one suit, also known as a onesie or babygro. This versatile and cozy garment is perfect for keeping little ones warm and comfortable, and it also makes for a fantastic gift for expectant parents.
If you’re looking for a free knitting pattern to make a baby all in one suit, you’re in luck! We have a fantastic pattern that is suitable for both beginners and experienced knitters. The pattern includes step-by-step instructions and helpful tips to ensure that your finished garment looks and feels amazing.
With this free knitting pattern, you’ll be able to create a baby all in one suit that is not only adorable but also practical. The pattern includes options for different sizes, so you can make one to fit a newborn or a larger size for a growing baby. Whether you choose to knit it in a cozy wool blend for the winter or a lightweight cotton for the summer, this all in one suit is sure to be a favorite in any baby’s wardrobe.
Free Knitting Pattern Baby All in One Suit
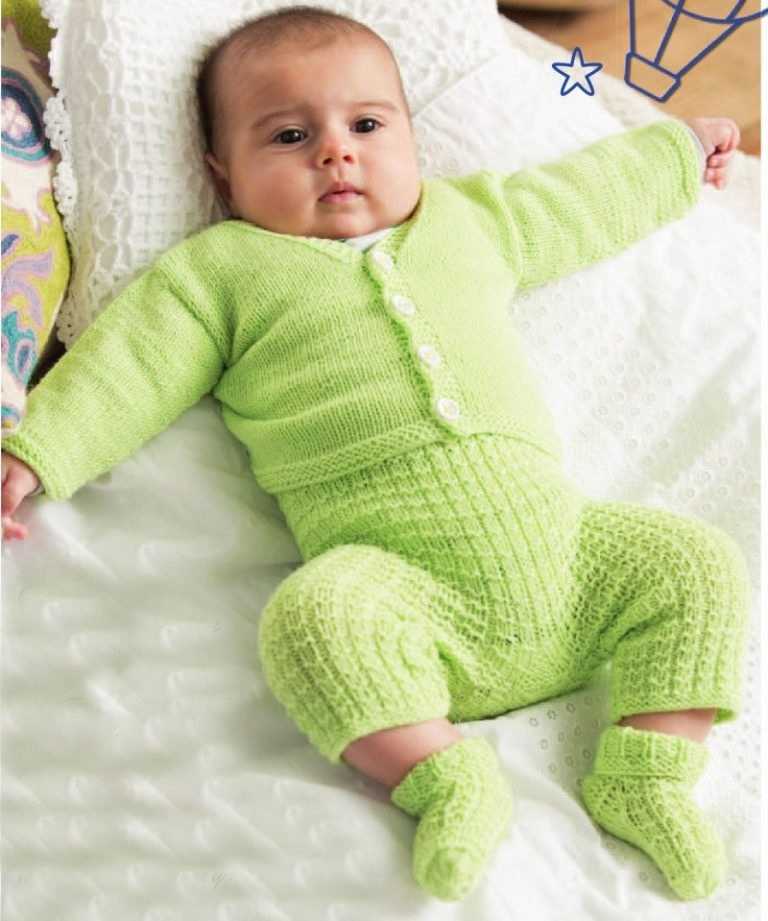
If you’re looking for a cute and cozy outfit for your little one, this free knitting pattern for a baby all in one suit is perfect. Made with soft and warm yarn, this suit will keep your baby comfortable and stylish. Whether you’re a beginner or an experienced knitter, you’ll enjoy working on this project and seeing the adorable end result.
Gauge and Materials
Before you start knitting, make sure to check your gauge to ensure the correct size of the suit. This pattern calls for size 4mm knitting needles and DK weight yarn. You’ll also need a set of stitch markers, a tapestry needle for weaving in ends, and buttons for the front closure.
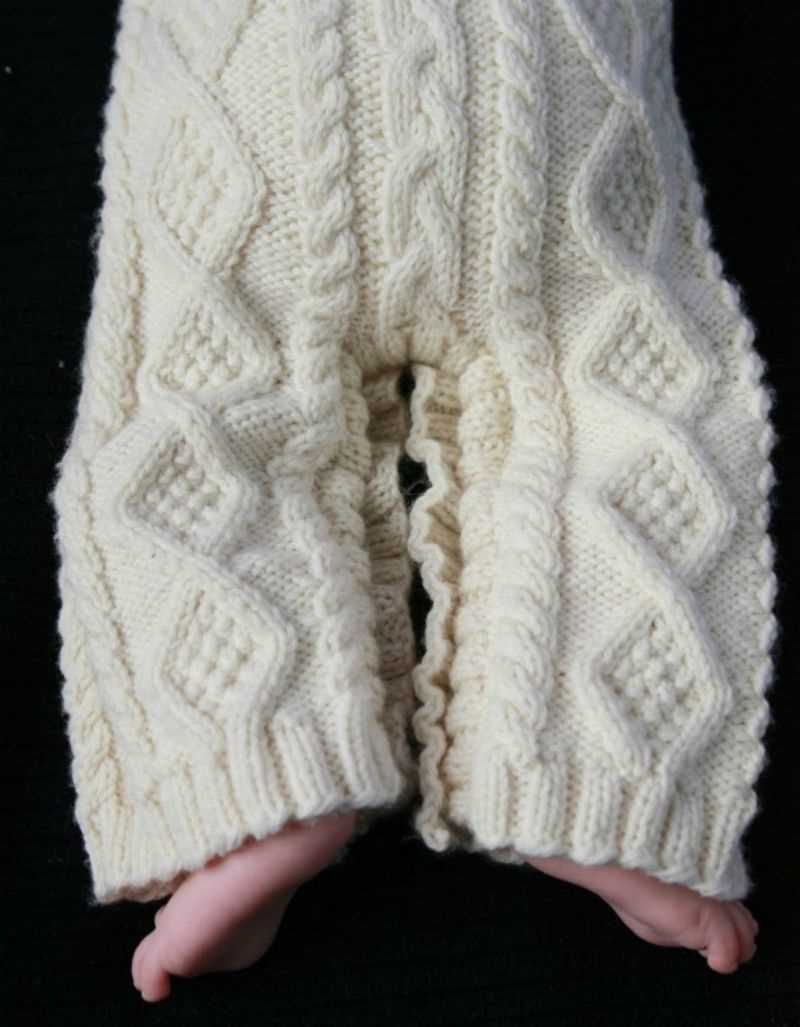
For the body of the suit, you’ll be working in a combination of garter stitch and stockinette stitch. The garter stitch sections provide texture and warmth, while the stockinette stitch sections give the suit a smooth and polished look. The sleeves are worked in ribbing for a snug fit, and the hood adds an extra layer of coziness.
Pattern Instructions
1. Cast on the required number of stitches for the size you’re making.
2. Work the body of the suit in a combination of garter stitch and stockinette stitch, following the pattern instructions for your chosen size.
3. Shape the sleeves by increasing and decreasing stitches as indicated in the pattern.
4. Work the hood by picking up stitches along the neckline and continuing in the specified pattern until the hood reaches the desired length.
5. Finish the suit by sewing on the buttons for the front closure and weaving in any loose ends.
With this free knitting pattern for a baby all in one suit, you’ll be able to create a precious and practical garment for your little one. The versatility of this suit makes it perfect for both indoor and outdoor wear, and the classic design ensures that it will never go out of style. Start knitting today and give your baby the gift of warmth and comfort.
Materials Needed
In order to make the baby all in one suit, you will need the following materials:
- Yarn: Choose a soft and comfortable yarn that is suitable for babies. It is recommended to use a yarn that is machine washable for easy care. Approximate amount needed: [insert amount] grams.
- Knitting Needles: Use a pair of knitting needles in the appropriate size for the yarn you have chosen. The recommended size is [insert needle size].
- Stitch markers: These can be helpful for marking important points in the pattern, such as the beginning and end of rounds or specific stitch counts.
- Tapestry needle: This is used for weaving in loose ends and sewing seams.
- Buttons or snaps: Choose buttons or snaps that are appropriate for a baby’s garment. Make sure they are secure and not a choking hazard. The number of buttons or snaps needed will depend on the pattern.
- Scissors: These are essential for cutting yarn and trimming any excess.
It is recommended to gather all the necessary materials before starting the project to ensure a smooth knitting experience. Once you have everything you need, you can proceed to follow the knitting pattern and create a beautiful and cozy all in one suit for your baby.
Step-by-Step Instructions
Knitting a baby all-in-one suit may seem like a daunting task, but with the right instructions and a little patience, you can create a beautiful garment for your little one. Here is a step-by-step guide to help you through the process:
Gather Your Materials
Before you begin, make sure you have all the necessary materials on hand. This includes knitting needles, yarn, stitch markers, and any additional accessories you may need. It’s always best to read through the entire pattern before you start, so you know what to expect.
Cast On
To begin, cast on the required number of stitches according to the size you are knitting. You can use a long-tail cast-on or any other method you prefer. Remember to leave a long tail for seaming later on.
Knit the Body
Next, you will work on the body of the all-in-one suit. Follow the pattern instructions, which will typically involve knitting in the round and creating patterns or textures as desired. Keep track of your stitch count and use stitch markers to mark any pattern repeats or increases/decreases.
Add Sleeves

Once the body is complete, you will move on to adding the sleeves. This may involve picking up stitches along the armholes or knitting the sleeves separately and then attaching them to the body. Again, refer to the pattern for specific instructions and measurements.
Finish the Neckline and Legs
After the sleeves have been added, you will finish the neckline and legs of the all-in-one suit. This may include ribbing, hemming, or creating buttonholes or snaps for closure. Take your time to make sure everything is neat and secure.
Seaming and Finishing
Once all the knitting is done, it’s time to seam any remaining openings and weave in any loose ends. Use a tapestry needle to sew the seams together, making sure the garment is lined up correctly. Give it a final gentle blocking to even out any stitches or tensions before washing and letting it dry.
Following these step-by-step instructions, you’ll be able to create a beautiful and cozy all-in-one suit for your baby. Remember to take your time, read the pattern carefully, and enjoy the process of knitting for your little one!
Choosing the Right Yarn
When it comes to knitting baby all-in-one suits, choosing the right yarn is crucial to ensure both the comfort and durability of the final product. The yarn you choose should be soft, gentle on the baby’s skin, and easy to care for. There are several factors to consider when selecting the perfect yarn for your project.
Fiber Type: One of the most important factors to consider is the fiber type of the yarn. Natural fibers such as cotton, bamboo, and merino wool are popular choices for baby garments. These fibers are breathable, hypoallergenic, and gentle on sensitive skin. Acrylic yarn is another option, as it is machine washable and resistant to fading and shrinking. It’s important to consider the season and climate when selecting the fiber type, as different fibers provide different levels of warmth.
Weight: The weight of the yarn will determine the thickness and drape of the finished all-in-one suit. For a baby suit, a DK (Double Knitting) or worsted weight yarn is typically recommended. These weights are versatile and suitable for a range of climates. However, if you prefer a lighter or heavier garment, you can adjust the weight accordingly. Keep in mind that a heavier yarn may make the suit too warm, while a lighter yarn may not provide enough insulation.
Color: The color of the yarn is also an important consideration when knitting a baby all-in-one suit. Neutral and pastel shades are popular choices for baby garments as they are versatile and easy to coordinate with other clothing. It’s also worth noting that lighter colors tend to show stains more easily, so if you’re concerned about maintenance, a darker color may be a better option. Ultimately, the choice of color is a matter of personal preference.
Quality: Lastly, it’s important to choose a yarn of good quality to ensure the longevity of the garment. High-quality yarns are less likely to pill, lose their shape, or fade over time. Reading reviews and checking the yarn’s composition can help you determine its quality. Investing in a good-quality yarn will not only make the knitting process more enjoyable but also result in a beautiful and durable baby all-in-one suit.
Creating a Gauge Swatch
Before starting any knitting project, it is important to create a gauge swatch. A gauge swatch is a small square piece of knitting that is used to determine the number of stitches and rows per inch in a particular yarn and needle size combination. This information is crucial for ensuring that the finished project will be the correct size and fit.
To create a gauge swatch, begin by selecting the yarn and needle size specified in the knitting pattern. Cast on a sufficient number of stitches to create a small square, typically around 4 inches by 4 inches. It is important to cast on with the same tension and method that you would use for the actual project.
The next step is to work the swatch in the specified stitch pattern, following the knitting pattern instructions. Be sure to knit with the same tension and technique that you plan to use for the rest of the project. Once the swatch is complete, use a ruler or tape measure to count the number of stitches and rows within a 1 inch area. This will give you your gauge measurement.
Compare your gauge measurement with the gauge specified in the pattern. If your gauge is too loose and you have more stitches and rows per inch, you will need to switch to a smaller needle size. Conversely, if your gauge is too tight and you have fewer stitches and rows per inch, you will need to switch to a larger needle size. Making adjustments to your needle size will ensure that your finished project matches the size specified in the pattern.
Once you have determined your gauge, you are ready to start your project with confidence. Remember to periodically check your gauge throughout the project to ensure that you are maintaining the correct tension. Happy knitting!
Knitting the Body of the Suit

Once you have completed the ribbing for the neckline and the armholes, it’s time to start knitting the body of the suit. Using the main color yarn, begin by knitting in stockinette stitch for the required length. This will create a smooth and even fabric for the baby’s comfort.
Continue knitting in stockinette stitch until you reach the specified length for the body. Make sure to periodically check your gauge to ensure that you are knitting to the correct measurements. You can do this by counting the number of stitches and rows per inch using a ruler or a gauge swatch.
When you reach the desired length, it’s time to shape the leg and crotch area. Follow the pattern instructions to decrease stitches evenly across the row to create the crotch shaping. This will ensure a comfortable fit for the baby and allow for easy diaper changes.
After shaping the crotch, continue knitting in stockinette stitch for the specified number of rows to complete the body of the suit. Make sure to check your gauge and measurements regularly to ensure accuracy.
Once the body is complete, you can move on to knitting the sleeves and finishing the suit. The body of the suit serves as the foundation for the rest of the pattern and creates a cozy and comfortable garment for the baby.
Shaping the Sleeves and Legs
Once you have finished knitting the body of the all-in-one suit, it’s time to start shaping the sleeves and legs.
Sleeves: To shape the sleeves, you will need to decrease stitches gradually to create a tapered shape. This can be done by knitting two stitches together at the beginning and end of every alternate row until you have reached your desired sleeve length. Make sure to keep track of the number of decreases you make to ensure symmetry in both sleeves.
Legs: Shaping the legs can be done using a similar method as the sleeves. However, instead of decreasing stitches, you will need to increase stitches gradually to create a flared shape. This can be achieved by knitting into the front and back of a stitch at the beginning and end of every alternate row until you have reached your desired leg width. Again, it’s important to keep track of the number of increases you make to ensure symmetry in both legs.
Using these shaping techniques, you can create sleeves and legs that fit comfortably and look stylish on your baby. Don’t forget to try the all-in-one suit on your baby as you go to ensure the perfect fit. Happy knitting!
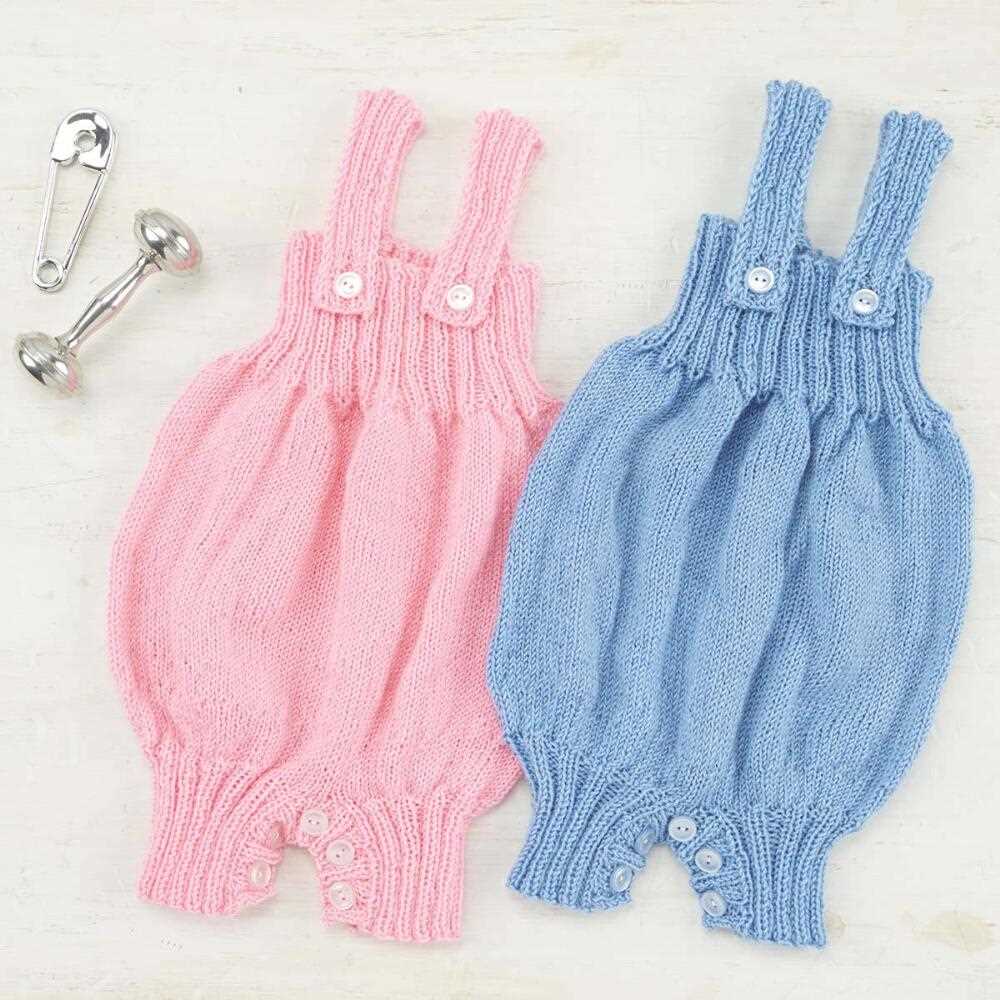
Adding Buttonholes and Buttons
In order to make the all-in-one suit functional and easy to put on and take off, you will need to add buttonholes and buttons to the design. This will allow you to secure the suit in place and ensure that it stays on the baby comfortably.
Start by determining how many buttonholes you want to add to the suit. Typically, three or four buttonholes are sufficient for a baby all-in-one suit. You can place them evenly along the front or back of the suit, depending on your preference.
To create buttonholes:
- Decide on the size of your buttonholes. Measure the diameter of your buttons and add a little extra space for ease of use. Mark the length of each buttonhole on the fabric.
- Using a sharp pair of scissors or a craft knife, carefully cut along the marked lines to create the buttonholes. Make sure to leave enough space between each buttonhole to avoid any tearing or fraying of the fabric.
- To reinforce the buttonholes, you can stitch around the edges using a sewing machine or by hand. This will help prevent any stretching or unraveling over time.
To attach buttons:
- Choose buttons that match your fabric and buttonholes in terms of size and style.
- Thread a needle with a strong thread that matches the color of your buttons and knot the end.
- Starting from the back of the fabric, push the needle through one of the buttonholes and then through the corresponding button. Repeat this process a few times to ensure a secure attachment.
- To secure the button in place, bring the needle back through the fabric and create a few stitches at the back. Make sure to knot the thread tightly to prevent any buttons from coming loose.
- Repeat the process to attach all the buttons to the suit.
Remember to double-check the positioning of the buttonholes and buttons before making any cuts or stitches, as adjustments may be needed. Once you have completed these steps, your all-in-one suit will be ready to wear and can be easily fastened and unfastened as needed.
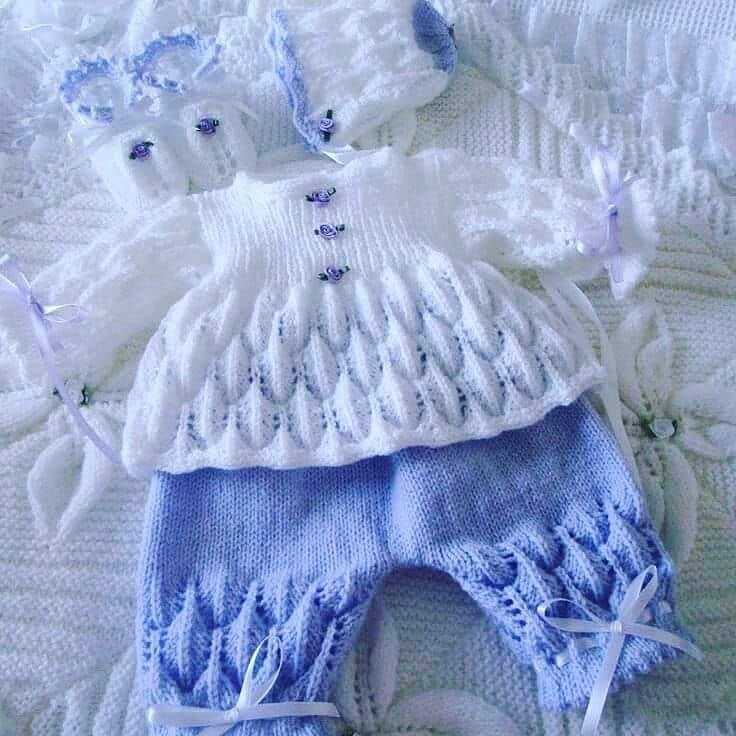
Working the Collar
Once you have finished knitting the body and sleeves of the baby all-in-one suit, it’s time to work on the collar. The collar adds an extra touch of style and warmth to the suit, and it’s a relatively simple and quick step to complete.
To start working the collar, pick up stitches along the neckline. You can use a smaller needle size than what you used for the rest of the suit, as this will help to create a snug and neat collar. Begin by picking up stitches along the right side of the neckline, starting from the right front of the suit.
Next, switch to the smaller needle size and work a few rows of ribbing to create the collar. You can use a simple knit 1, purl 1 ribbing pattern for a classic look. Make sure to measure the collar as you go to ensure a good fit around the baby’s neck. You can adjust the number of stitches picked up or the number of rows worked to achieve the desired size and shape.
Once the collar is the desired length, you can bind off the stitches and weave in any loose ends. Take your time and make sure to work the collar evenly to ensure a professional-looking finish. Once completed, the collar will provide a cozy and stylish addition to the baby all-in-one suit.
Adding Finishing Touches
Once you have completed knitting the baby all-in-one suit, it’s time to add the finishing touches to give it a polished look. These finishing touches include weaving in loose ends, sewing on buttons, and adding any desired embellishments.
Weaving in Loose Ends: Start by threading a tapestry needle with the yarn tail from the loose end. Insert the needle into the back of the knitted fabric, following the path of the yarn, and bring it out a few stitches away. Repeat this process to secure the loose end, ensuring that it is hidden within the fabric. Trim any excess yarn.
Sewing on Buttons: Place the baby all-in-one suit flat on a surface and position the buttons where you want them to be. Thread a needle with a matching yarn or thread and sew the buttons securely onto the fabric, making sure to go through both layers. Double stitch for extra strength. Repeat this process for all the buttons.
Adding Embellishments: If you want to add some decorative elements to the baby all-in-one suit, you can consider attaching ribbons, bows, or crochet flowers. Sew these embellishments onto the fabric using a needle and matching thread or yarn. Make sure they are securely fastened and evenly spaced.
Final Touches: Once all the finishing touches have been added, inspect the baby all-in-one suit for any loose threads or uneven stitches. Trim any excess yarn and use a tapestry needle to maneuver any loose stitches back into place. Give the suit a gentle steam or hand wash as per the yarn instructions to block and shape it nicely. Your baby all-in-one suit is now ready to be worn or gifted!
Blocking and Seaming
Blocking and seaming are two important steps in the process of knitting a baby all-in-one suit. Blocking refers to the process of washing and shaping the finished knit piece to achieve smoothness and evenness in the stitches. Seaming, on the other hand, involves joining the different parts of the suit together to create a seamless and polished final product.
Before blocking, it is important to check the care instructions for the yarn used in the project. Some yarns require hand-washing and gentle handling, while others can withstand machine washing. Once the blocking method is determined, the knit piece can be submerged in water and gently pressed to remove any excess moisture. Next, the piece is carefully stretched and pinned into shape on a blocking mat, allowing it to dry completely.
After blocking, it is time to seam the different parts of the suit together. This may involve sewing the sleeves onto the body, attaching the hood, and joining the legs. It is important to ensure that the seams are neat and secure, as they will contribute to the overall durability and appearance of the finished garment. Some knitters prefer to use a tapestry needle and matching yarn to invisibly sew the seams, while others may opt to use a crochet hook and slip stitch method. Either way, taking the time to carefully seam the suit will result in a professional-looking and comfortable garment for the baby.
By following the blocking and seaming techniques specific to the free knitting pattern for a baby all-in-one suit, knitters can achieve a beautifully finished garment that is both cozy and stylish. With careful attention to detail in these final steps, the suit will be ready for the little one to enjoy, keeping them warm and comfortable in handmade love and care.
Tips and Tricks
In order to successfully knit a baby all in one suit, here are some helpful tips and tricks:
- Choose the right yarn: Select a soft and durable yarn that is suitable for a baby’s sensitive skin. Ensure that the yarn is also easy to wash, as baby items require frequent cleaning.
- Read and understand the pattern: Carefully read through the knitting pattern before you start. Make sure you understand each step and are familiar with any special techniques or stitches required.
- Check your tension: Always make a tension swatch before starting the actual project. This will help you determine if you need to adjust your needle size to achieve the correct gauge.
- Keep track of your progress: Use stitch markers or a row counter to keep track of your rows and increase and decrease points. This will help you stay organized and prevent mistakes.
- Use lifelines: For more complex or intricate sections of the pattern, consider using lifelines. Lifelines are threads that are threaded through a row of stitches, acting as a safety net in case you need to rip back or fix a mistake.
- Block your finished project: After completing the knitting, block your all in one suit to give it a polished look. This process involves wetting or steaming the garment to set the stitches and ensure it holds its shape.
By following these tips and tricks, you will be well-prepared to knit a beautiful and comfortable all in one suit for a baby. Have fun with your knitting project and enjoy the satisfaction of creating something special!
Q&A:
Where can I find a free knitting pattern for a baby all-in-one suit?
You can find free knitting patterns for baby all-in-one suits on various websites such as Ravelry, LoveCrafts, and AllFreeKnitting. These websites offer a wide range of patterns for all skill levels.
What materials do I need to knit a baby all-in-one suit?
To knit a baby all-in-one suit, you will need a suitable yarn for baby clothing, such as a soft and washable yarn in the desired color. You will also need knitting needles in the recommended size for the pattern, stitch markers, a tapestry needle for seaming, and any additional embellishments or buttons if desired.
Is it difficult to knit a baby all-in-one suit?
The difficulty level of knitting a baby all-in-one suit can vary depending on the pattern and your knitting skills. Some patterns may be more advanced and require knowledge of more complex techniques, while others may be suitable for beginners. It’s always a good idea to choose a pattern that matches your skill level and to take your time with the project.
How long does it take to knit a baby all-in-one suit?
The time it takes to knit a baby all-in-one suit can vary depending on factors such as the complexity of the pattern, your knitting speed, and the amount of time you can dedicate to the project. It is best to check the estimated knitting time provided in the pattern or consult with other knitters who have completed the project to get an idea of the time commitment involved.
Can I modify a baby all-in-one suit knitting pattern to fit a different size?
Yes, it is possible to modify a baby all-in-one suit knitting pattern to fit a different size. This may involve adjusting the stitch and row counts, as well as making alterations to the shaping of the garment. It is important to carefully read the pattern and make calculations based on your gauge and desired measurements to ensure a proper fit. Some patterns may also include instructions for different sizes.