
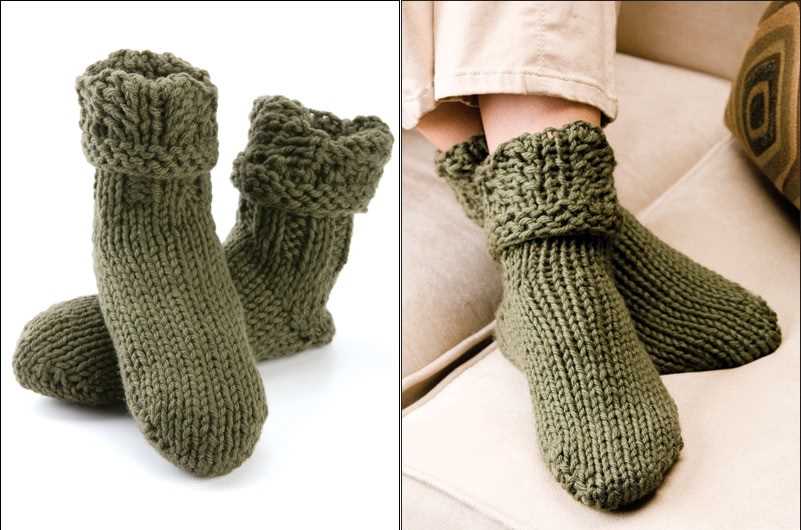
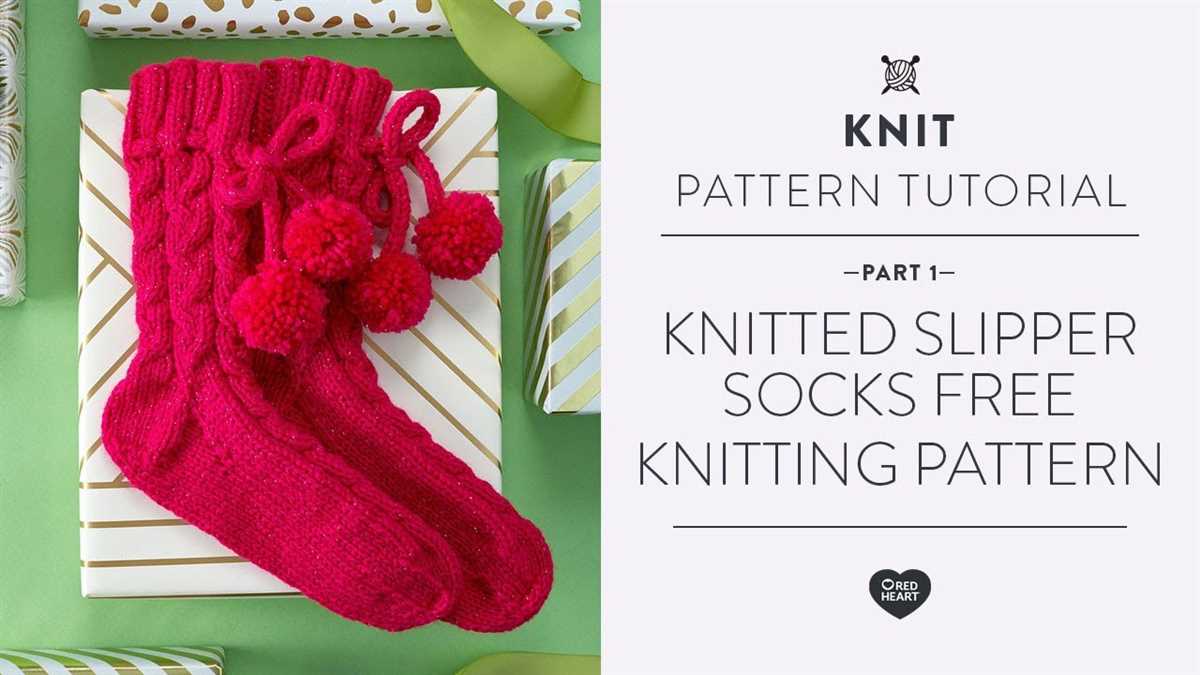
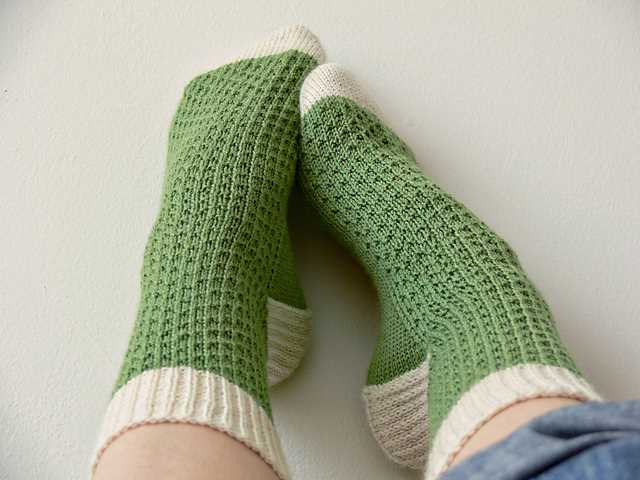
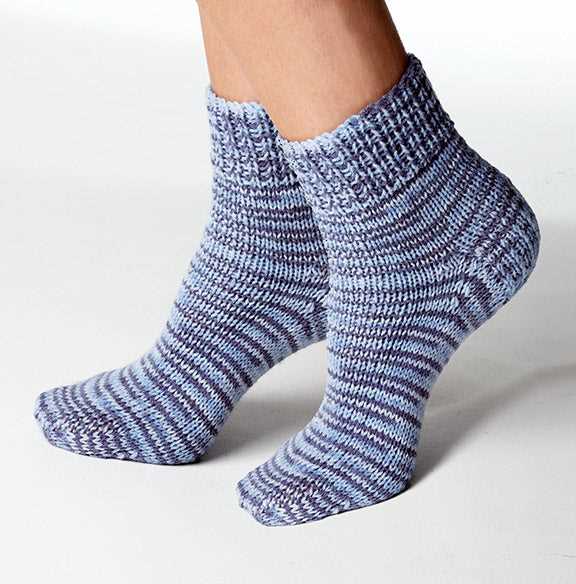
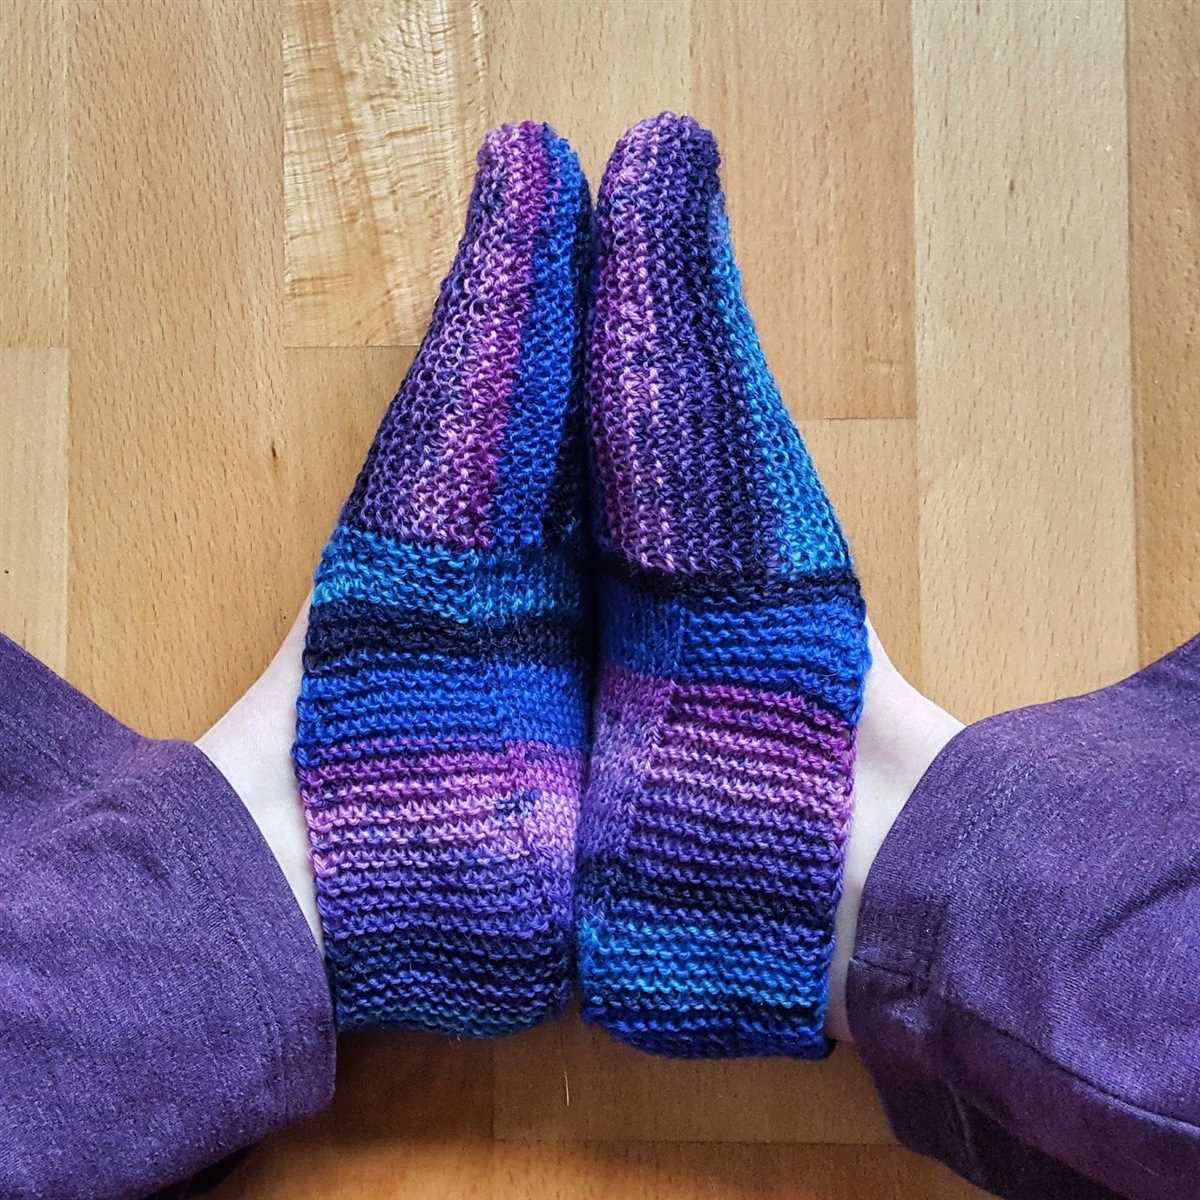
Looking for a cozy and comfortable project to knit? Look no further than this free knit slipper sock pattern! Whether you’re a beginner knitter or an experienced crafter, these slipper socks are a great project to work on. They’re perfect for keeping your feet warm and toasty during those chilly winter months.
This pattern features a simple yet stunning design that will have you reaching for your knitting needles in no time. The slipper socks are knit using a soft and squishy yarn, ensuring maximum comfort and warmth. The pattern also includes detailed instructions and helpful tips, making it easy for even the most novice knitters to create a beautiful pair of slipper socks.
With this free pattern, you can create a pair of slipper socks for yourself or make them as a thoughtful gift for a loved one. The possibilities are endless! So grab your knitting needles and get started on this fun and rewarding project today.
Free Knit Slipper Sock Pattern

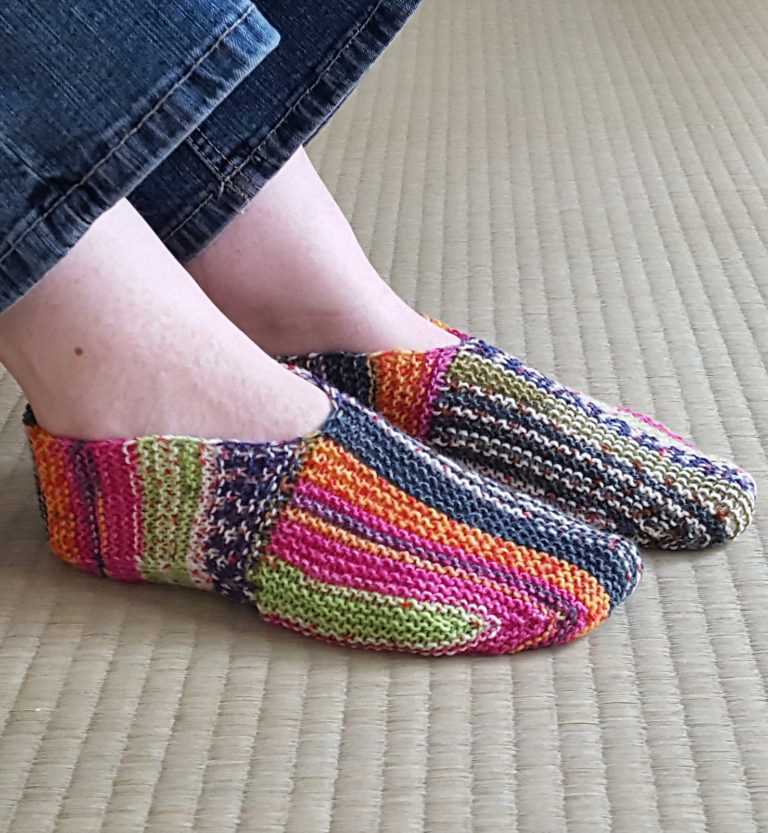
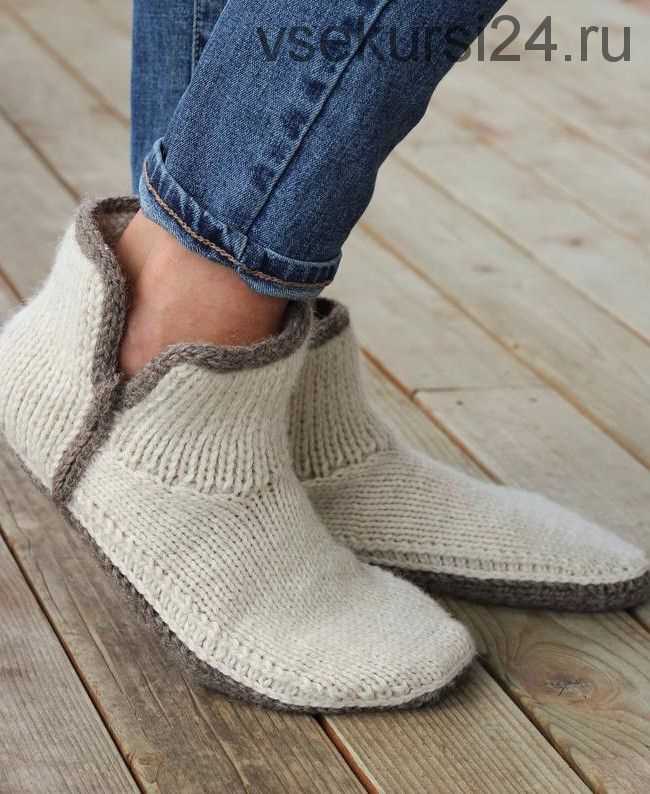
Keep your feet cozy and warm with these free knit slipper sock patterns! Whether you’re knitting for yourself or as a gift, these patterns are sure to impress. With their combination of comfort and style, these slipper socks are perfect for lounging around the house or for an extra layer of warmth during the colder months.
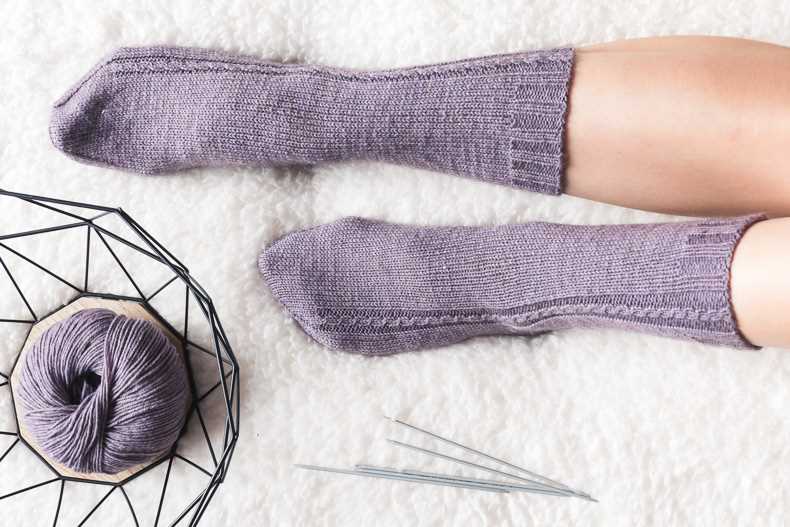
One popular slipper sock pattern is the Ribbed Slipper Socks. This pattern features a simple ribbing design that not only adds texture but also ensures a snug fit. Knit with worsted weight yarn, these slipper socks are quick to make and are suitable for knitters of all skill levels.
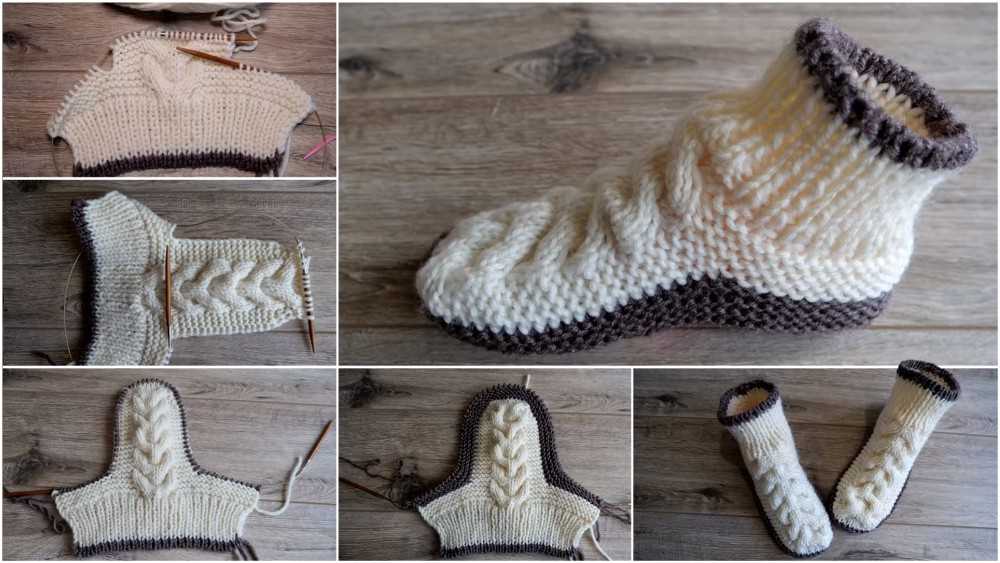
If you’re looking for something a bit more challenging, consider trying the Cable Knit Slipper Socks pattern. This pattern incorporates intricate cable stitches for a more sophisticated look. Knit with bulky weight yarn, these slipper socks are extra warm and perfect for those chilly winter nights.
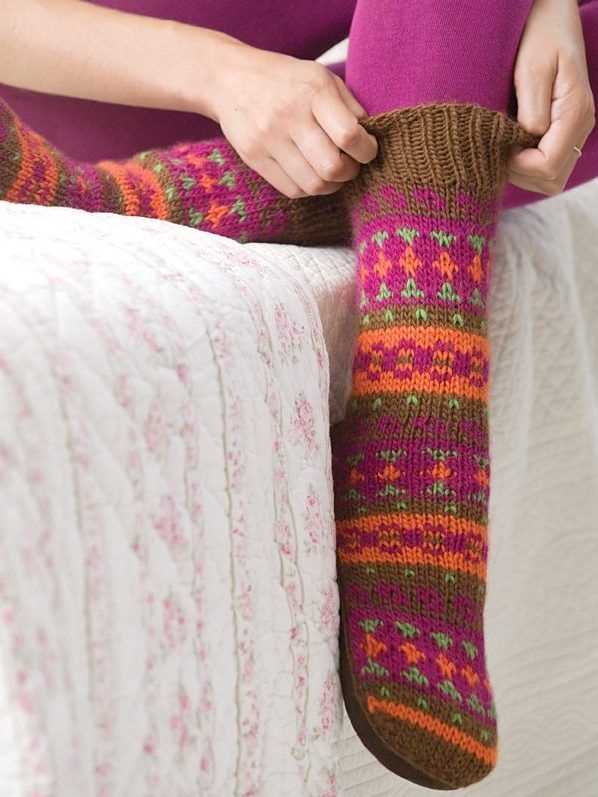
For those who prefer a more traditional style, the Fair Isle Slipper Socks pattern is a great option. This pattern features a classic Fair Isle colorwork design, adding a pop of color and pattern to your slipper socks. Knit with fingering weight yarn, these slipper socks are lightweight and perfect for year-round wear.
With so many free knit slipper sock patterns available, you’re sure to find one that suits your style and skill level. Gather your favorite yarn and knitting needles, and get ready to create cozy and stylish slipper socks that you’ll love to wear!
Supplies
Before you get started on knitting your slipper socks, make sure you have all the necessary supplies on hand. Here is a list of what you will need:
- Yarn: Choose a soft and warm yarn that is suitable for socks. Look for a yarn that is labeled as “worsted weight” or “sock weight”. You will need approximately one skein of yarn for a pair of slipper socks.
- Knitting Needles: You will need a set of double-pointed needles or a circular needle in the appropriate size for your yarn. Check the label on your yarn for the recommended needle size. If you are using double-pointed needles, you will need a set of four or five.
- Tapestry Needle: This needle will be used for weaving in ends and seaming the toe of your slipper socks.
- Stitch Markers: These small plastic or metal rings are used to mark your stitches. You will need at least two stitch markers for this pattern.
- Scissors: You will need a pair of small scissors for cutting the yarn.
- Tape Measure: This will be useful for measuring your foot and checking your progress as you knit.
Once you have gathered all the supplies, you will be ready to start knitting your slipper socks. Make sure to choose a quiet and comfortable spot where you can work on your project without any distractions. Now, let’s get started!
Getting Started
Welcome to the world of knitting slipper socks! Whether you’re a beginner or an experienced knitter, this free knit slipper sock pattern is a great project to take on. Before you begin, gather all the necessary materials:
- Knitting needles (size will depend on the yarn weight you choose)
- Yarn (choose a soft and cozy yarn that will keep your feet warm)
- Tapestry needle (for weaving in ends)
- Scissors (for trimming yarn)
- Stitch markers (optional, but helpful for keeping track of your progress)
Once you have your materials ready, it’s time to choose the right size for your slipper socks. The pattern provides instructions for various sizes, so make sure to measure your feet before starting. You’ll need to measure the length of your foot from heel to toe, as well as the circumference of your foot around the widest part.
Now that you have everything you need and know the correct size, it’s time to cast on and begin knitting! Follow the pattern instructions step by step, taking your time to ensure each stitch is made correctly. Don’t hesitate to refer to knitting resources or tutorial videos if you encounter any unfamiliar techniques.
Choosing the Right Yarn
When it comes to knitting slipper socks, choosing the right yarn is crucial for the success of your project. The yarn you select will not only determine the final appearance, but also how comfortable and warm the socks will be. Here are some factors to consider when choosing yarn for your slipper socks:
1. Weight
Consider the weight of the yarn you want to use for your slipper socks. The weight of the yarn will affect the thickness and warmth of the socks. If you want lightweight and breathable socks, go for a sock weight or fingering weight yarn. For thicker and warmer socks, choose a worsted weight or bulky yarn.
2. Fiber Content
The fiber content of the yarn is another important consideration. Different fibers have different characteristics, so choose a yarn that suits your preferences and needs. Wool is a popular choice for slipper socks because it is warm, breathable, and has good moisture-wicking properties. Acrylic yarn is an affordable and low-maintenance option, while alpaca and mohair yarns add extra softness and warmth.
3. Durability
Since slipper socks are meant to be worn around the house, they should be made with a yarn that is durable and can withstand frequent use. Look for yarns that have a high twist or contain nylon to improve their strength and durability. These yarns are less likely to pill or wear out quickly, ensuring that your socks last longer.
4. Color and Design
Finally, consider the color and design of the yarn. Slipper socks are a great opportunity to play with different colors and patterns. Choose a yarn that complements your personal style and matches your wardrobe. Variegated yarns can create interesting color patterns, while solid colors allow for more versatility. Consider using self-striping or speckled yarns for a unique and playful look.
By considering the weight, fiber content, durability, and color of the yarn, you can choose the perfect yarn for your slipper socks. Taking the time to select the right yarn will ensure that your socks turn out exactly as you envisioned and provide you with warmth and comfort.
Selecting the Appropriate Needle Size
When it comes to knitting slipper socks, selecting the appropriate needle size is crucial. The needle size you choose will determine the size and tension of the stitches, as well as the overall fit and comfort of the finished socks.
Before starting your project, it’s important to consider the type of yarn you’ll be using and the pattern you’ll be following. Different yarns have different recommended needle sizes, so make sure to check the yarn label to ensure you’re using the correct size. If you’re working from a pattern, the designer will typically include a suggested needle size to achieve the desired gauge and fit.
Keep in mind that the needle size may need to be adjusted depending on your personal tension and knitting style. If your stitches are too loose, try using a smaller needle size to create tighter stitches. On the other hand, if your stitches are too tight, switch to a larger needle size to achieve a looser tension.
Additionally, the needle size can affect the overall thickness and warmth of the slipper socks. Smaller needles will create a denser fabric, while larger needles will result in a more open and airy texture. Consider the desired level of warmth and insulation when choosing your needle size.
Remember, selecting the appropriate needle size may involve some trial and error. It’s important to knit a swatch before beginning your project to ensure the desired gauge and fit. By experimenting with different needle sizes and adjusting your tension, you’ll be able to create slipper socks that are not only stylish but also comfortable to wear.
Casting On
When beginning a knitting project, one of the first steps is casting on. This is the process of creating the loops that will form the first row of stitches on the needle. There are several different methods of casting on, each with its own advantages and purposes.
Long-tail cast on: This is a versatile and commonly used method of casting on. It creates a sturdy and elastic edge, making it suitable for a wide range of projects. To perform the long-tail cast on, you will need to estimate the length of yarn needed for the cast on, as it requires a tail of yarn to be left before the slip knot is made.
Knitted cast on: Also known as the single cast on, this method is simple and easy to learn. It creates a neat edge, but is not as stretchy as the long-tail cast on. The knitted cast on is ideal for projects that require a firmer or less flexible edge.
Cable cast on: The cable cast on method is often used when you need to add stitches to your knitting in the middle of a project. It creates a tidy edge that is similar to the long-tail cast on, but is slightly less stretchy. It is commonly used for buttonholes or when joining two separate pieces of knitting together.
There are many other methods of casting on, such as the backward loop cast on, the tubular cast on, and the provisional cast on, each with their own specific uses. It is important to choose the right cast on method for your project to ensure that it meets your desired outcome. Practice and experimentation will help you become more comfortable with different casting on techniques and allow you to create a variety of beautiful and functional knitting projects.
Knitting the Cuff
The cuff is the part of the slipper sock that goes around the ankle. It is usually the first part of the slipper sock that you knit. To start knitting the cuff, you will need to cast on stitches. The number of stitches you cast on will depend on the size of the slipper sock and the desired width of the cuff. The cuff can be knit in a ribbing pattern, such as K1, P1 ribbing, or in a simple stockinette stitch.
Once you have cast on the desired number of stitches, you will need to knit several rows to create the cuff. If you are knitting in a ribbing pattern, you will need to continue knitting in the ribbing pattern for the desired length of the cuff. If you are knitting in stockinette stitch, you will need to knit every row for the desired length of the cuff.
When knitting the cuff, it is important to keep an eye on your tension to ensure that it is consistent throughout. If your tension is too tight, the cuff may be too small and tight around the ankle. If your tension is too loose, the cuff may be too loose and slide down the ankle. It is recommended to use a smaller needle size for the cuff compared to the rest of the slipper sock to achieve a tighter tension.
Some slipper sock patterns may include additional details or features on the cuff, such as a decorative pattern or a folded or rolled edge. These details can add extra visual interest to the cuff and make it unique. When following a slipper sock pattern, make sure to carefully read and follow the instructions for the cuff to ensure that you achieve the desired result.
Creating the Heel

The heel is an important part of any slipper sock, as it provides structure and support for the wearer’s foot. In this free knit slipper sock pattern, the heel is created using a combination of short rows and decreases.
Step 1: Begin by knitting across the first half of the stitches on the needle. Then, turn the work and purl back across these same stitches. This creates a short row, which will form the first part of the heel.
Step 2: Continue working short rows, knitting across fewer stitches each time, until you have reached the desired width for the heel. Be sure to wrap the last stitch of each short row to prevent any holes from forming.
Step 3: Once the desired width for the heel is reached, begin decreasing stitches to shape the heel. This is typically done by working two stitches together, either knitwise or purlwise, at the beginning and end of each row.
Step 4: Continue decreasing stitches until the desired length for the heel is reached. Be sure to alternate between knitting and purling rows to maintain the established pattern for the slipper sock.
Step 5: Once the heel is complete, continue knitting in the established pattern for the rest of the slipper sock. This may involve picking up stitches along the sides of the heel and joining them with the live stitches on the needle.
By following these steps, you can create a well-fitting and comfortable heel for your knit slipper socks. Remember to adjust the pattern as necessary to fit your foot size and desired style.
Shaping the Foot
When it comes to knitting slipper socks, shaping the foot is an important step to ensure a snug fit and comfortable wear. There are a few techniques you can use to achieve the desired shape.
Decreases: One common method is to use decreases to shape the toe area. This can be done by knitting two stitches together, either knitwise or purlwise, at regular intervals. This helps to taper the toe and create a more rounded shape.
Short rows: Another technique is to use short rows to shape the heel. Short rows involve knitting only a portion of the stitches in a row, then turning the work and working back in the opposite direction. This creates a curved shape, mimicking the natural contours of the heel.
Gussets: Some slipper sock patterns also incorporate gussets, which are added stitches on the sides of the foot. These gussets provide extra room and allow for a better fit, especially for those with wider feet. They can be achieved by increasing stitches evenly on both sides of the foot.
By combining these shaping techniques, you can achieve a slipper sock that hugs the foot and provides maximum comfort. It’s important to follow the pattern instructions carefully, as different patterns may use different shaping methods and stitch counts.
Finishing the Toe
Completing the toe of your knit slipper sock is the final step in the pattern. After you have finished knitting the foot of your sock, it’s time to shape the toe to give it a comfortable fit.
Start by decreasing the stitches gradually at the front of the sock. You can use different decrease methods such as k2tog (knit two stitches together) or ssk (slip, slip, knit) to create a smooth and rounded shape. Follow the pattern instructions for the specific decrease method and rate to use.
As you continue decreasing, you may need to switch to double-pointed needles or use the magic loop method if your circular needle becomes too crowded. This will allow you to comfortably work on a smaller number of stitches.
Continue decreasing until you have reached the desired number of stitches for the toe. This will usually be about 16 stitches, but it may vary depending on your foot size and the gauge of your knitting.
Once you have finished the toe decreases, you can then use a darning needle to weave in any loose ends and seam the toe closed. This will create a seamless finish and prevent any uncomfortable seams or bumps inside the slipper sock.
Finally, try on the slipper sock to check for fit and make any adjustments if necessary. If the sock feels too loose or too tight, you can carefully unravel a few rows and make the necessary modifications. Once you are satisfied with the fit, your slipper sock is ready to be worn and enjoyed!
Adding Optional Embellishments
Once you have completed knitting your slipper socks, you can add optional embellishments to give them a personalized touch. These embellishments can be added to the cuffs, heels, or toes of the socks, and can range from simple to elaborate.
Buttons: One easy way to add embellishments is by sewing buttons onto the cuffs of the slipper socks. You can choose buttons that match the color and style of your socks, or opt for contrasting buttons to create a unique look. Sew them on securely with a needle and thread.
Ribbon: Another option is to attach ribbon to the cuffs or heels of the socks. You can choose a ribbon that complements the color of the socks, or go for a bold contrasting color to make a statement. Simply tie the ribbon into a bow or use a small amount of fabric glue to secure it in place.
Embroidery: If you’re skilled with a needle and thread, you can add intricate embroidery designs to your slipper socks. This can be done on the cuffs, heels, or toes of the socks, and can range from simple patterns to more detailed motifs. Use embroidery thread in contrasting colors to make your designs stand out.
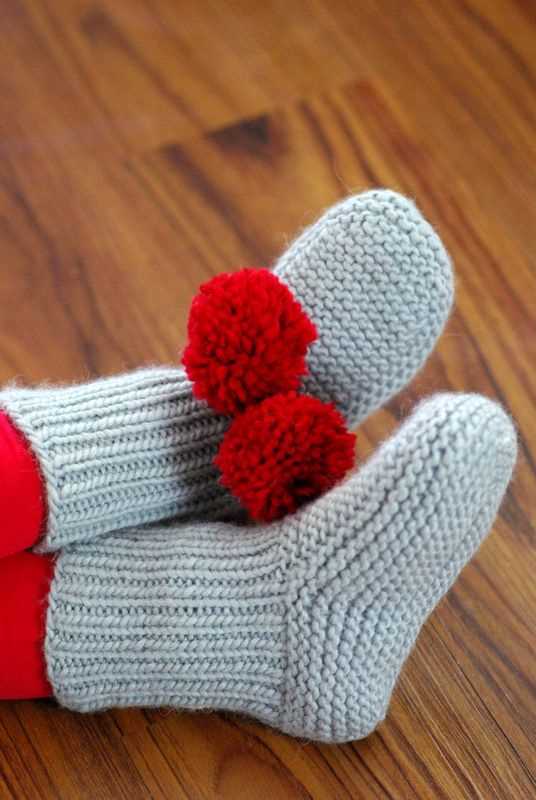
Pom-poms: Adding fluffy pom-poms to the cuffs or toes of your slipper socks can give them a playful and whimsical look. You can make pom-poms using yarn in the same color as your socks, or mix it up with different colors for a more vibrant effect. Attach the pom-poms securely by sewing them on with a needle and thread.
Beading: For a touch of glamour, you can add beads to your slipper socks. Sew them onto the cuffs or sprinkle them across the heels or toes to create a shimmering effect. Choose beads that match the color and style of your socks, or use contrasting beads to create an eye-catching contrast.
These are just a few ideas for adding optional embellishments to your knit slipper socks. Get creative and experiment with different materials, colors, and techniques to make your socks truly one-of-a-kind.
Final Thoughts
In conclusion, this free knit slipper sock pattern is a great option for those looking to make cozy and comfortable slippers for themselves or as gifts. With its easy-to-follow instructions and customizable design, it is suitable for knitters of all skill levels. Whether you prefer a classic or more modern look, you can easily modify the pattern to suit your personal style.
Not only are these slipper socks practical, but they also provide a creative outlet for knitters to showcase their skills and experiment with different yarns and stitches. The pattern allows for endless possibilities in terms of color combinations and embellishments, making each pair of slipper socks unique.
If you have been searching for a fun and rewarding knitting project, look no further than this free knit slipper sock pattern. It offers everything you need to create cozy and stylish slippers that will keep your feet warm all winter long. So grab your knitting needles and yarn, and get started on your own pair of slipper socks today!
Q&A:
Where can I find a free knit slipper sock pattern?
You can find free knit slipper sock patterns on various knitting websites and blogs. Some popular websites that offer free patterns include Ravelry, KnittingPatternCentral, and LoveKnitting. Additionally, many yarn companies also offer free patterns on their websites.
What materials do I need to knit slipper socks?
The materials you will need to knit slipper socks include knitting needles (typically size 6 or 7), yarn (worsted weight or chunky yarn is commonly used), a darning needle or tapestry needle for sewing up seams, and scissors. Some patterns may also call for additional materials such as stitch markers or cable needles, depending on the design.
Are slipper socks suitable for beginners to knit?
Slipper socks can be suitable for beginners to knit, especially if you choose a simple pattern that uses basic stitches such as knit and purl. Look for patterns that are labeled as easy or beginner-friendly. Additionally, there are many tutorials and online resources available to help beginner knitters learn the necessary techniques.
Can I modify a slipper sock pattern to fit my foot size?
Yes, slipper sock patterns can often be modified to fit your foot size. Many patterns will provide instructions on how to adjust the size by adding or subtracting stitches or rows. Additionally, you can try using a different yarn weight or knitting needle size to achieve the desired fit. It may also be helpful to measure your foot and compare it to the pattern’s finished measurements to ensure a proper fit.