
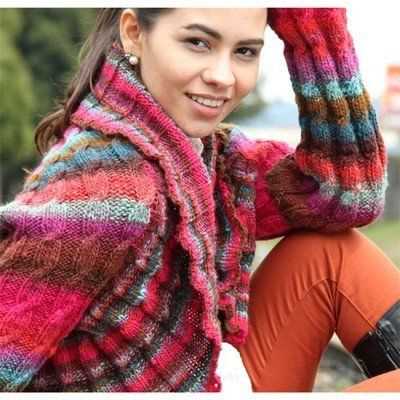
Are you looking for a cozy and stylish addition to your wardrobe? Look no further than a knit shrug! Shrugs are the perfect clothing item to throw on when there’s a slight chill in the air or when you want to add a layer of warmth to your outfit without sacrificing style. Plus, they’re a great project for beginner knitters looking to expand their skills.
In this article, we will provide you with a free knit shrug pattern that is perfect for all skill levels. Whether you’re a seasoned knitter or just starting out, this pattern will guide you through the process of creating a stunning shrug that you will be proud to wear.
This free knit shrug pattern features a simple yet elegant design that will complement any outfit. The pattern uses basic knitting stitches and techniques, making it a great project for beginners. And the best part is, you can customize the size and length of the shrug to fit your personal style and body shape. So grab your knitting needles and let’s get started on creating your new favorite wardrobe staple!
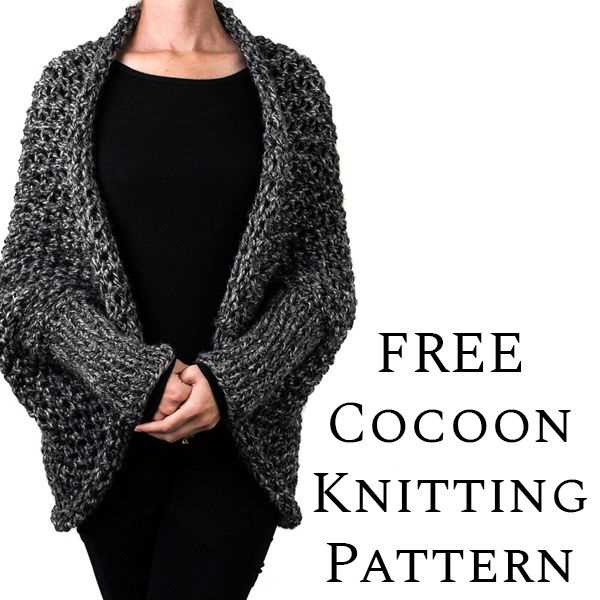
Free Knit Shrug Pattern

A knit shrug is a versatile wardrobe staple that can be dressed up or down to suit any occasion. Whether you’re looking for a cozy layering piece or a stylish accessory, a free knit shrug pattern is a great way to showcase your knitting skills and create a unique garment.
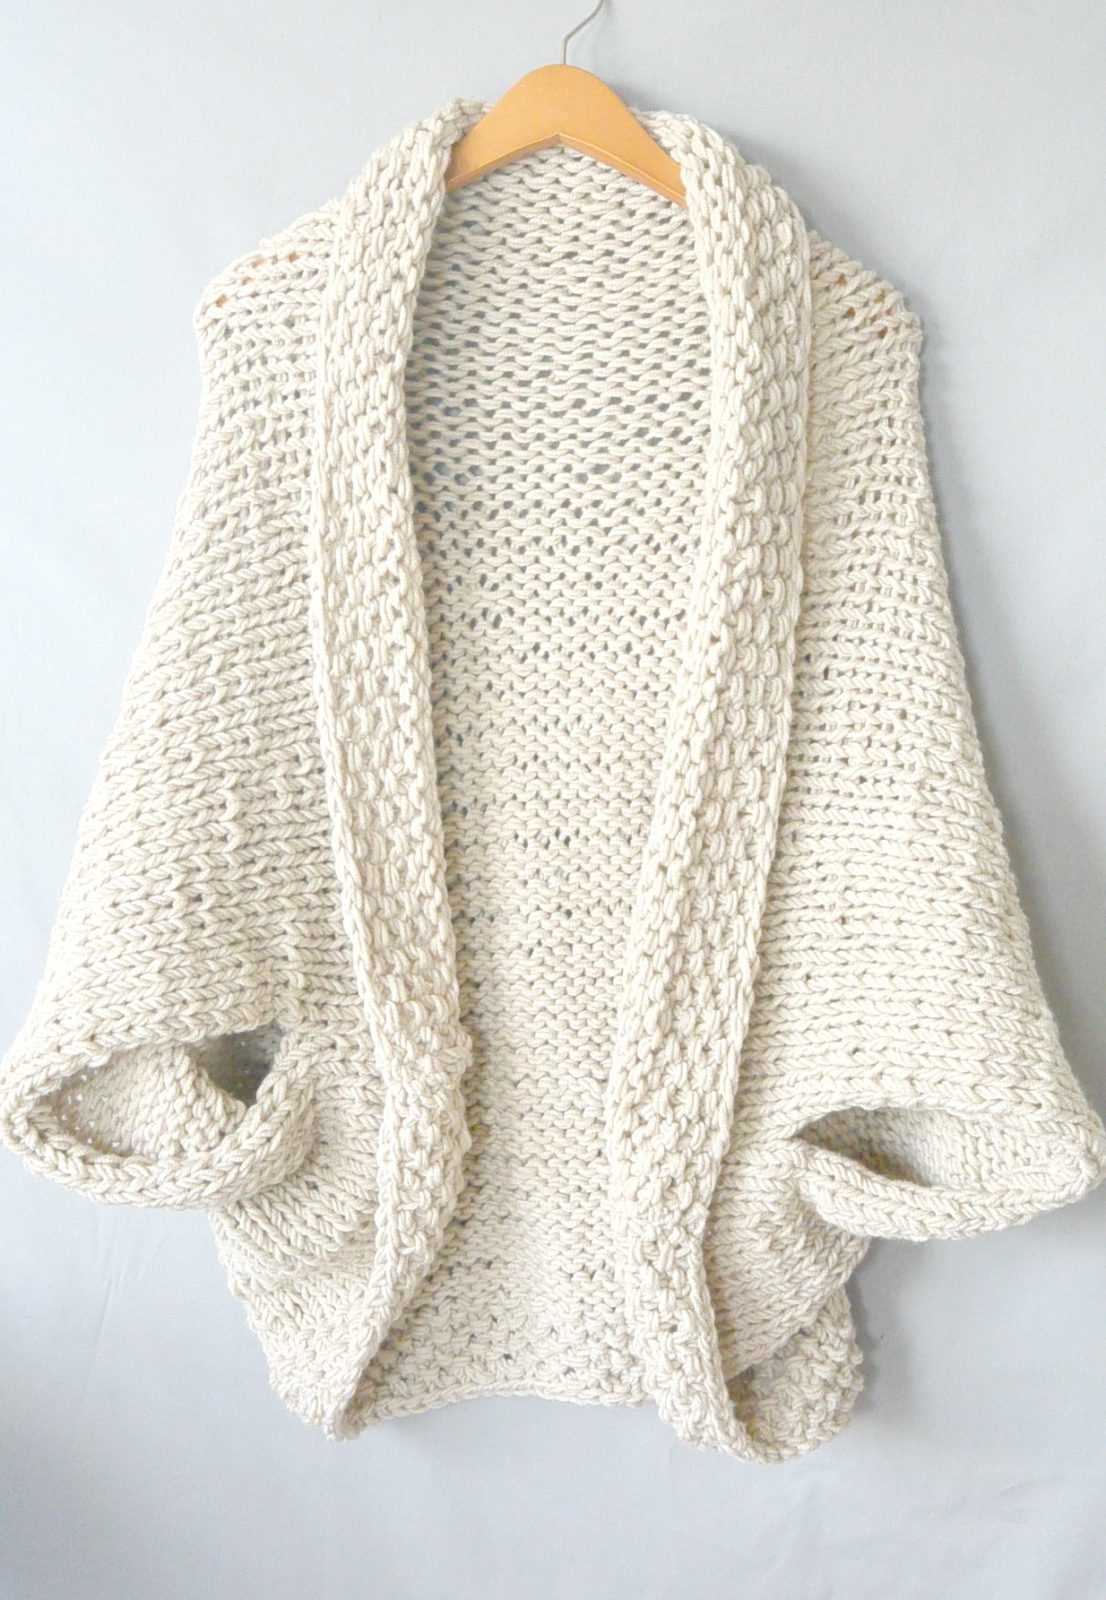
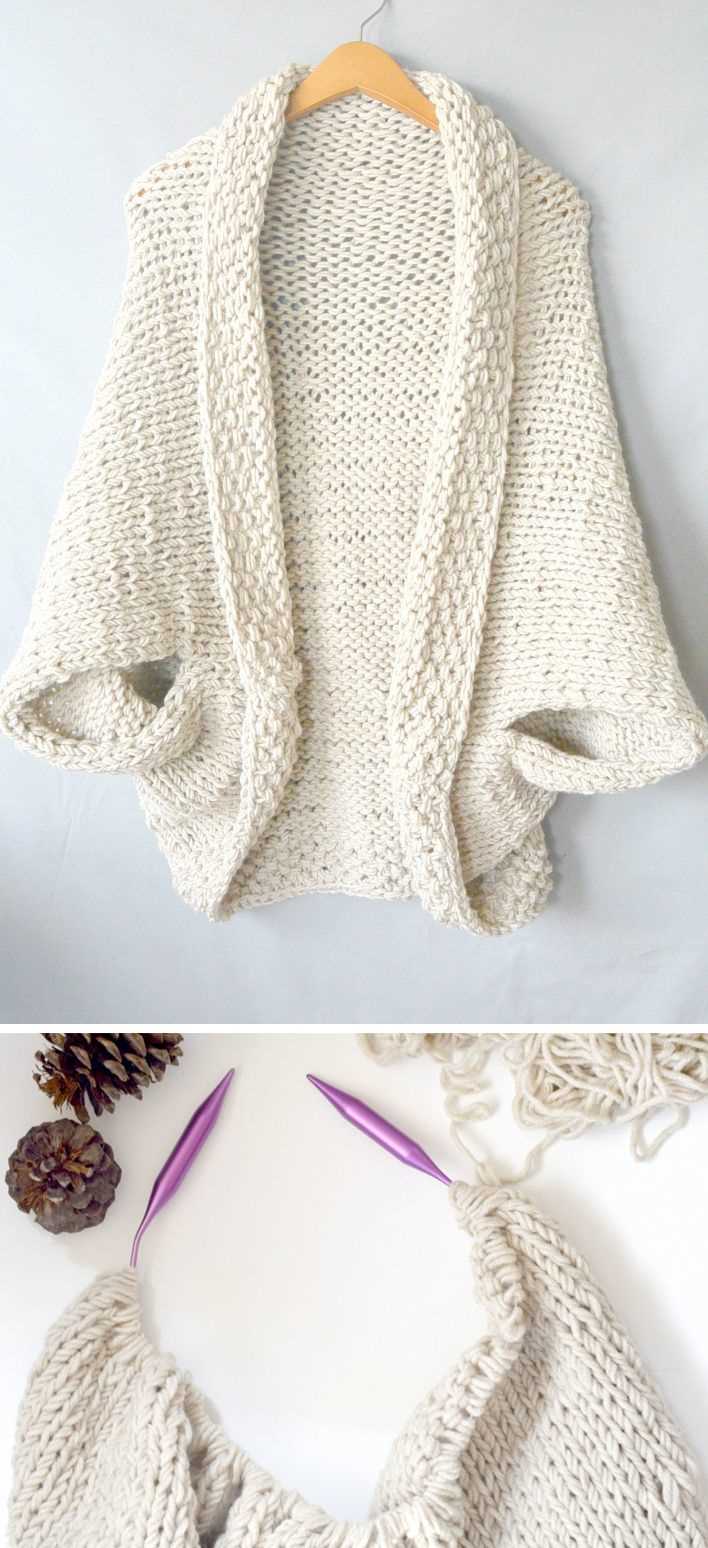
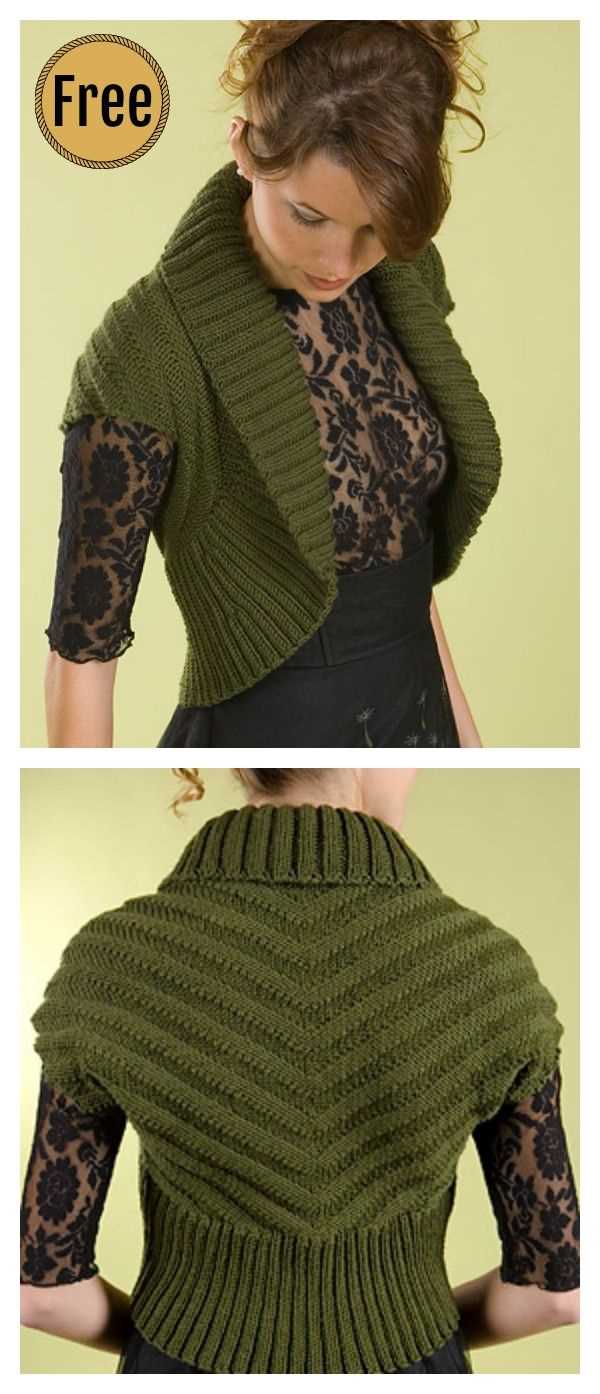
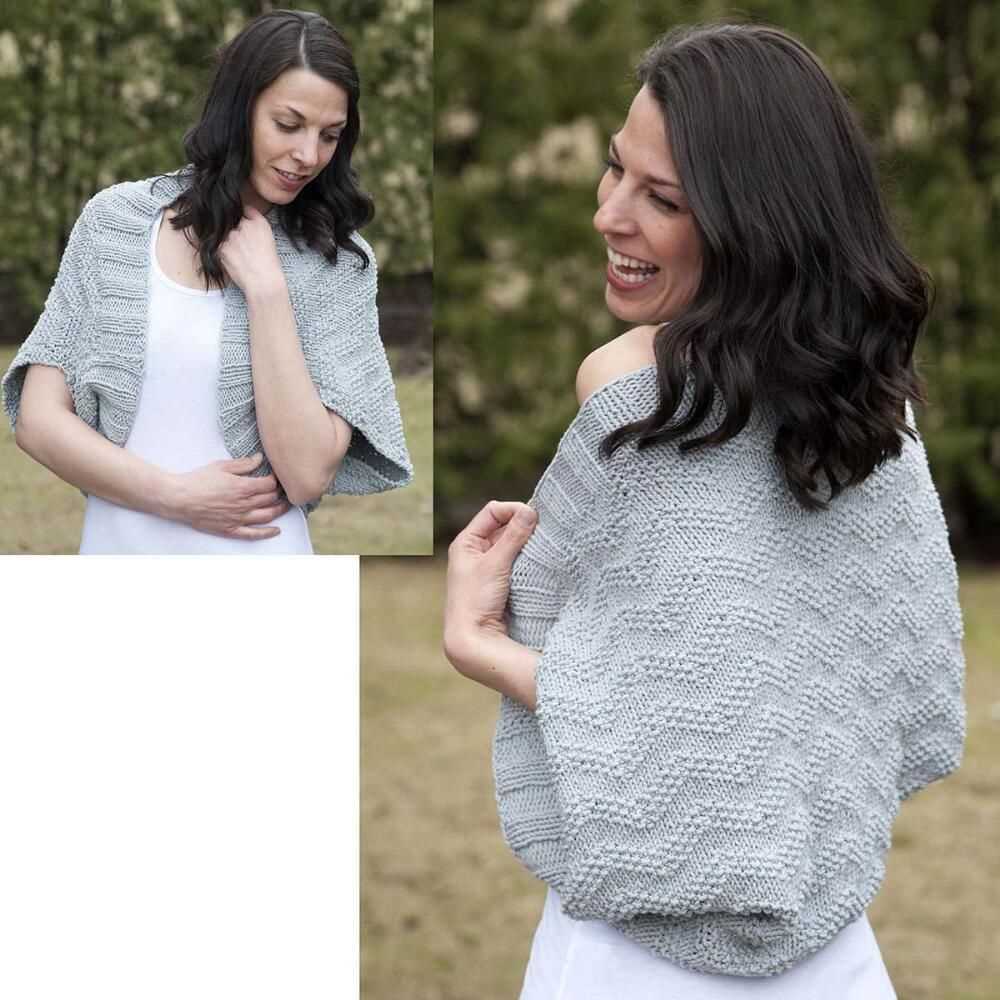
One popular free knit shrug pattern is the “Classic Shrug,” which features a simple yet elegant design. This pattern is suitable for knitters of all skill levels and only requires basic knitting techniques such as knit, purl, and decreasing stitches. The Classic Shrug can be customized with different yarn weights and colors to create a personalized look.
To knit the Classic Shrug, you will need approximately 600-800 yards of worsted weight yarn and US size 8 (5mm) circular needles. The pattern begins by casting on stitches for the back panel, then continues by working in ribbing for the collar and front panels. The sleeves are created separately and then joined to the body. The shrug is finished off with a few rows of ribbing along the edges.
The Classic Shrug pattern provides a great foundation for experimenting with different stitch patterns and embellishments. You can add lace or cable details, experiment with color-blocking, or even incorporate a unique stitch pattern to make your shrug truly one-of-a-kind. The possibilities are endless!
- Materials needed:
- 600-800 yards of worsted weight yarn
- US size 8 (5mm) circular needles
- Basic knitting techniques:
- Cast on
- Knit stitch
- Purl stitch
- Decrease stitches
With a free knit shrug pattern, you can create a stylish and cozy accessory that will enhance any outfit. Whether you’re a beginner knitter looking for a simple project or an experienced knitter looking to experiment with different styles and techniques, the Classic Shrug pattern is a great choice. So grab your needles and start knitting a beautiful shrug today!
Materials Needed
Before starting your knitting project, it’s important to gather all the necessary materials. Here is a list of items you will need:
- Knitting Needles: You will need a pair of knitting needles in the size recommended in the pattern. It’s always a good idea to have a few different sizes on hand in case you need to adjust your tension.
- Yarn: Choose a yarn that is suitable for the pattern you are working on. The pattern will specify the weight of the yarn and the yardage required. Make sure to purchase enough yarn to complete your project.
- Tape Measure: A tape measure is essential for checking your gauge and measuring your progress as you knit.
- Stitch Markers: Stitch markers are useful for marking specific stitches or sections in your pattern.
- Tapestry Needle: A tapestry needle or yarn needle is needed for weaving in ends and seaming your project.
- Scissors: A pair of sharp scissors is necessary for cutting yarn and trimming any loose ends.
Once you have gathered all the necessary materials, you can begin your knitting project with confidence and enjoy the process of creating a beautiful shrug.
Gauge and Size
When knitting a shrug, it is important to achieve the correct gauge in order to ensure that the finished garment will fit properly. Gauge refers to the number of stitches and rows of knitting that are needed to create a certain measurement. To determine your gauge, it is recommended to knit a swatch using the recommended yarn and needles.
The gauge for this free knit shrug pattern is 18 stitches and 24 rows = 4 inches in stockinette stitch. However, it is important to note that everyone knits with different tension, so it is highly recommended to check your gauge before starting the project. If your gauge doesn’t match the pattern, you may need to adjust your needle size to obtain the correct gauge.
Size
This free knit shrug pattern is available in multiple sizes: small, medium, large, and extra-large. The finished measurements of the shrug will vary depending on the size you choose to knit. The pattern provides instructions for each size separately, so you can easily follow along to create the size that best fits you or the intended recipient.
It is important to refer to the sizing chart provided in the pattern to determine which size to knit. The measurements are usually given in inches or centimeters for the bust circumference. Keep in mind that the shrug is designed to have a slightly oversized fit, so it is recommended to choose a size that is closest to your actual bust measurement for the desired fit.
Abbreviations
When knitting, it is common to come across abbreviations in knitting patterns. These abbreviations are used to make the patterns more concise and easier to read. Here are some common abbreviations you may come across:
- K – Knit
- P – Purl
- yo – Yarn Over
- ssk – Slip, Slip, Knit
- k2tog – Knit Two Together
- pm – Place Marker
- sl – Slip Stitch
These are just a few examples of the many abbreviations you may come across in knitting patterns. It is important to familiarize yourself with these abbreviations before starting a project to ensure you understand the instructions clearly. Most knitting patterns will include a key or glossary that explains any abbreviations used, so make sure to reference that if you come across an abbreviation you are unfamiliar with.
Back Panel
The back panel is the central piece of the knit shrug that covers the back of the wearer. It is an essential component of the overall design and provides structure and support to the garment. The back panel is typically knit separately and then attached to the side panels and sleeves to create the finished shrug.
To create the back panel, you will need to follow the pattern instructions for your chosen free knit shrug pattern. This may involve knitting a certain number of stitches in a specific stitch pattern, working increases or decreases to shape the garment, and knitting to a specific length or measurement.
Depending on the pattern, the back panel may be worked in a simple stockinette or garter stitch, or it may feature a more intricate stitch pattern or design element. The pattern instructions will provide guidance on the exact stitches and techniques to use.
It is important to carefully follow the pattern instructions and check your gauge to ensure that your back panel matches the correct measurements and achieves the desired fit. Once the back panel is complete, it can be sewn or otherwise attached to the other pieces of the shrug to create a cohesive and finished garment.
Left Front Panel
The left front panel of the knit shrug is an important component of the overall design. It is knitted separately and then attached to the body of the shrug. The pattern for the left front panel is fairly simple, making it a great project for knitters of all skill levels.
To knit the left front panel, you will need to cast on a specified number of stitches using your chosen yarn and needle size. The pattern will then guide you through the various rows and stitches needed to create the desired design. You may need to increase or decrease stitches at certain points to achieve the correct shape and fit.
One popular pattern for the left front panel is the garter stitch pattern, which creates a subtle texture and adds a touch of elegance to the shrug. To achieve this pattern, you will need to knit every row on the right side and purl every row on the wrong side. This creates a consistent pattern that is both visually appealing and easy to follow.
Another option for the left front panel is a ribbed pattern, which adds stretch and flexibility to the shrug. This pattern involves alternating knit and purl stitches in a specific sequence. The ribbed pattern not only adds texture but also helps the shrug to fit snugly around the body.
Regardless of the chosen pattern, it is important to follow the instructions carefully to ensure that the left front panel is knitted correctly. Once the panel is complete, it can be attached to the rest of the shrug using a sewing needle and thread or by using a technique called mattress stitch.
Overall, the left front panel is a crucial element in the construction of a knit shrug. It adds style, shape, and functionality to the garment and can be customized based on personal preference. With the right pattern and attention to detail, the left front panel can be knitted with ease and become a beautiful addition to any wardrobe.
Right Front Panel
The right front panel of the knit shrug pattern is an important component that adds structure and shape to the garment. It is knitted separately from the back and left front panel, and is later joined together to create the final piece.
To start knitting the right front panel, cast on the required number of stitches using the suggested yarn and needle size. It is important to gauge your knitting to ensure the correct fit. A swatch can be helpful in determining the appropriate needle size and stitch count.
Working the pattern:
- Row 1: Begin by knitting the first stitch, and continue with the stitch pattern as specified in the instructions. This may involve a combination of knit and purl stitches, as well as increases or decreases to create shaping.
- Row 2: Follow the stitch pattern for the second row. Pay attention to any instructions for stitch changes or shaping, as this will help create the desired result.
- Continue knitting according to the pattern instructions, making any necessary stitch changes or shaping as indicated. Remember to always keep track of your stitch count and pattern repeats.
Finishing:
- Once the desired length of the right front panel has been reached, bind off all stitches. Cut the yarn, leaving a long tail for seaming.
- Use a tapestry needle to seam the right front panel to the back panel, following the instructions provided in the pattern. This may involve joining the pieces at the shoulders and sides.
- After seaming, block the completed shrug to ensure the stitches settle and the garment takes its final shape. This step is important for achieving a professional finish.
The right front panel of the knit shrug pattern is a key element in creating a stylish and versatile garment. Follow the pattern instructions carefully to achieve the desired result, and enjoy the process of creating a beautiful handmade shrug.
Sleeve
The sleeve is an essential part of any garment, serving as a covering for the arm. It can come in various lengths and styles, depending on the design and purpose of the garment. In the context of a knit shrug pattern, the sleeve is typically short and adds a stylish touch to the overall look.
When knitting a free knit shrug pattern, it is important to pay attention to the sleeve construction. The sleeves can be knit separately and then sewn onto the body of the shrug, or they can be worked in the round, starting from the cuff and gradually increasing stitches to create the desired shape and size.
Short sleeves: Short sleeves are a popular choice for shrug patterns as they provide enough coverage to keep the shoulders warm while still allowing freedom of movement for the arms. They can be worked in a ribbed pattern or in a simple stockinette stitch, depending on the desired effect.
Three-quarter sleeves: Three-quarter sleeves are slightly longer than short sleeves, typically ending just below the elbow. They can add a touch of elegance to the shrug and are great for transitional seasons when the weather is not too hot or too cold.
Flared sleeves: Flared sleeves are a fun and trendy option for a knit shrug pattern. They start narrow at the cuff and gradually widen towards the upper arm, creating a bell-like shape. This style can add a vintage or boho vibe to the garment, depending on the yarn and color chosen.
Bishop sleeves: Bishop sleeves are characterized by their fullness and gathering at the cuff. They can create a dramatic and feminine look, perfect for special occasions or evening wear. Knitting bishop sleeves may require additional techniques, such as short rows or lace patterns, to achieve the desired effect.
Each style of sleeve can add a unique touch to a knit shrug pattern, allowing for personalization and creativity in the design. Whether you prefer short, three-quarter, flared, or bishop sleeves, there are endless possibilities to explore when knitting a shrug. Experiment with different stitch patterns, colors, and lengths to create the perfect sleeve for your free knit shrug pattern.
Assembly
After completing all the necessary knitted pieces, it’s time to assemble your shrug. Follow the steps below to put everything together:
Step 1: Blocking
Before assembling, it’s essential to block your knitted pieces to ensure that they have the correct dimensions and shape. Lay each piece flat on a blocking mat and pin it down to the desired measurements. Leave them to dry completely before moving on to the next step.
Step 2: Seaming the Shoulders
Begin by seaming the shoulders of your shrug. Place the front and back pieces together with the right sides facing each other. Use a tapestry needle and matching yarn to sew the shoulder seams together, joining the front and back pieces.
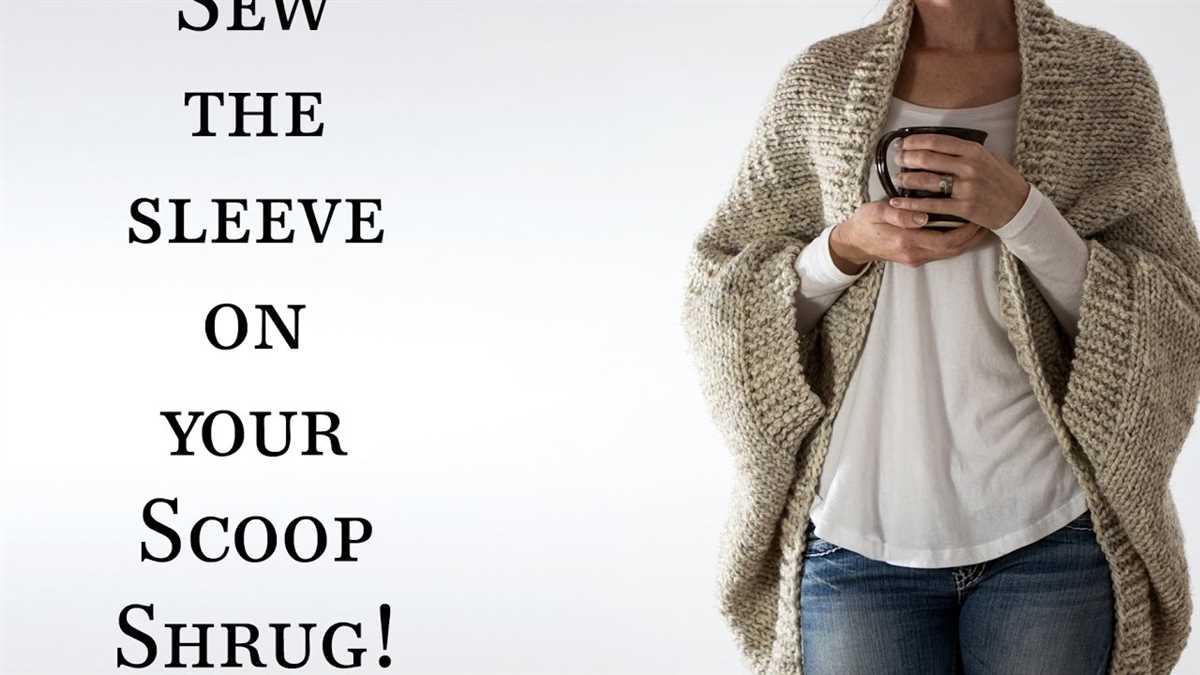
Step 3: Attaching the Sleeves
Next, you’ll attach the sleeves to the body of the shrug. Align the sleeve openings with the armholes on the sides of the shrug. Use the same seaming technique as before to sew the sleeves in place, making sure to match the stitches and align the patterns if necessary.
Step 4: Finishing Touches
Finally, it’s time to add the finishing touches. Weave in any loose ends using a tapestry needle, making sure to secure them properly. Take a moment to try on the shrug and make any final adjustments before considering it complete.
Congratulations! You have successfully assembled your knitted shrug. Now you can enjoy wearing your cozy and stylish accessory. Remember to take care of it by handwashing or following the specific care instructions for the yarn you used. Happy knitting!
Finishing Touches
Once you have completed knitting the shrug, it’s time to add the finishing touches to make it truly special. Here are a few steps you can follow to achieve a polished look:
- Blocking: After weaving in all the loose ends, gently wet the shrug and lay it flat on a clean towel. Use pins to shape it to the desired size and let it dry completely. This will help even out the stitches and give the shrug a smooth finish.
- Seaming: If your shrug consists of multiple pieces, such as front and back panels, you may need to seam them together using a tapestry needle and yarn. Take your time to match the stitches and create a seamless join.
- Edging: Adding an edging along the cuffs and the bottom hem can provide a nice finished look. You can experiment with different stitch patterns or simply add a few rows of ribbing or garter stitch to create a clean edge.
- Buttons or closures: Depending on the design of your shrug, you can add buttons, hooks, or other closures to secure it in place. Consider the size and weight of the shrug when selecting closures and make sure they complement the overall aesthetic.
- Embellishments: If you want to jazz up your shrug even further, consider adding embellishments such as embroidery, beads, or appliques. But remember, less is often more, so be mindful of the overall balance and keep it tasteful.
By following these finishing touches, your knit shrug will be transformed into a beautiful and fashionable accessory that you can proudly wear or gift to a loved one. Enjoy the process of adding those final details and admire your handiwork!