
Are you tired of knitting with double-pointed needles? Looking for a new project to keep your hands warm during the chilly months? Look no further! We have a free knit pattern for two needle mittens that is perfect for all skill levels!
With this pattern, you can enjoy the simplicity of knitting with just two needles while creating a cozy and stylish pair of mittens. Whether you’re a beginner or an experienced knitter, these mittens are a great way to practice your skills and create a practical accessory at the same time.
Our free knit pattern includes detailed instructions and a clear chart to guide you through the process. You can choose from a variety of yarns and colors to customize your mittens to match your style and preference. No matter what your knitting experience is, you can easily follow along and create a beautiful pair of mittens in no time!
Free Knit Pattern for Two Needle Mittens
If you are a beginner knitter or prefer using two needles instead of circular or double-pointed needles, this free knit pattern for two needle mittens is perfect for you! With just two needles and some worsted weight yarn, you can create cozy and stylish mittens to keep your hands warm during the cold winter months.
To make these mittens, you will need the following materials:
- Worsted weight yarn in your preferred color
- Size 8 (5mm) knitting needles
- Tapestry needle
- Scissors
Once you have gathered your materials, you can begin knitting your mittens.
- Start by casting on 32 stitches.
- Work in a rib pattern for the cuff of the mitten, knitting 2 stitches and purling 2 stitches, for approximately 2 inches.
- Continue with stockinette stitch (knit one row, purl one row) until the mitten measures approximately 5 inches from the cast on edge.
- Next, begin shaping the thumb gusset. Knit 9 stitches, place a marker, knit 1 stitch, place another marker, and knit to the end of the row.
- On the next row, knit to the first marker, make 1 stitch, knit the 1 stitch between the markers, make 1 stitch, and knit to the end of the row. Repeat this increase row every 4th row until you have 12 stitches between the markers.
- Continue knitting in stockinette stitch until the mitten measures approximately 7 inches from the cast on edge.
- Next, begin shaping the top of the mitten. Knit 1, knit 2 together, knit to the last 3 stitches, knit 2 together, knit 1.
- Knit the next row.
- Repeat these two rows until you have 8 stitches remaining.
- Break the yarn, leaving a long tail. Thread the tail through the tapestry needle and slide it through the remaining stitches. Pull tight to close the top of the mitten.
- Finally, sew up the side seam of the mitten using the tapestry needle and the mattress stitch.
Voila! You have just completed your two needle mittens. Repeat these steps to make a second mitten for a matching pair.
These mittens are great for keeping your hands warm while allowing you to freely use your fingers. Feel free to get creative with different colors and patterns, or add embellishments like buttons or pom poms. Enjoy knitting your own cozy mittens and stay warm all winter long!
Benefits of Using a Free Knit Pattern
When it comes to knitting, having a pattern to follow can be incredibly helpful. It provides you with a guide to follow, ensuring that your project turns out just how you envisioned it. While there are many knitting patterns available for purchase, using a free knit pattern can have its own unique benefits.
1. Cost-effective
One of the biggest advantages of using a free knit pattern is that it is cost-effective. Knitting supplies can be quite expensive, so being able to access a pattern for free can help save money. This is especially beneficial if you are an avid knitter and enjoy trying out different patterns frequently without breaking the bank.
2. Wide variety
There is a wide variety of free knit patterns available online. Whether you are a beginner or an experienced knitter, you are sure to find a pattern that suits your skill level and interest. From simple scarves and hats to intricate sweaters and blankets, the options are endless. You can also find patterns for specific items, such as two-ne
Materials Needed for the Project
In order to complete the two needle mittens project, you will need the following materials:
- Yarn: Choose a soft and warm yarn in the desired color for your mittens. You will need approximately 200 yards for an average-sized pair of adult mittens.
- Knitting Needles: You will need a pair of straight knitting needles, preferably in the appropriate size for your chosen yarn. Check the yarn label for the recommended needle size.
- Stitch markers: These will help you keep track of your stitches and make it easier to follow the pattern.
- Tapestry needle: This needle is used for finishing and weaving in the ends of your yarn.
- Scissors: A pair of sharp scissors will be needed to cut the yarn.
- Measuring tape: You will need a measuring tape or ruler to check your gauge and measure your mittens.
- Optional: If you want to add any decorative elements to your mittens, such as buttons or embroidery, you will also need the corresponding materials.
Make sure you gather all these materials before starting the project to ensure a smooth and enjoyable knitting experience. Once you have everything ready, you can begin knitting your two needle mittens!
Step-by-Step Instructions for Knitting the Two Needle Mittens
In this knitting pattern, you will learn how to create a pair of cozy mittens using just two knitting needles. Follow these step-by-step instructions for a fun and easy project.
Materials needed:
- Worsted weight yarn in your desired color
- Size 8 (5mm) knitting needles
- Tapestry needle
- Scissors
Step 1: Cast on stitches
Begin by casting on 32 stitches onto one of your knitting needles. This will be the starting point for your mitten.
Step 2: Knit the ribbing
Next, knit the ribbing for the cuff of the mitten. To do this, alternate between knitting one stitch and purling one stitch for the entire row. Repeat this ribbing pattern for about 2 inches.
Step 3: Knit the hand section
Once you have completed the ribbing, continue knitting in the stitch pattern of your choice for the hand section of the mitten. You can use a simple stockinette stitch or experiment with other stitch patterns to add more texture.
Step 4: Shape the thumb gusset
To shape the thumb gusset, you will gradually increase stitches on one side of the mitten. Follow the pattern instructions for the specific number of stitches to increase and the row intervals.
Step 5: Knit the thumb
Once the thumb gusset is complete, you will place the thumb stitches onto a stitch holder or scrap yarn. Continue knitting the hand section until it reaches the desired length, typically around 6 inches from the cuff.
Step 6: Shape the top of the mitten
To shape the top of the mitten, you will gradually decrease stitches. Follow the pattern instructions for the specific number of stitches to decrease and the row intervals.
Step 7: Finish the mitten
Finally, bind off all the stitches to secure the top of the mitten. Use a tapestry needle to weave in any loose ends and trim off excess yarn. Repeat the entire process for the second mitten.
With these step-by-step instructions, you will be able to create a cozy pair of mittens using just two knitting needles. Enjoy the process and stay warm this winter!
Tips and Tricks for Knitting Mittens
When it comes to knitting mittens, there are a few tips and tricks that can help make the process easier and more enjoyable. Whether you’re a beginner or an experienced knitter, these tips will ensure that your mittens turn out beautifully.
1. Choose the Right Yarn
When selecting yarn for your mittens, it’s important to choose one that will provide warmth and durability. Look for yarn that is soft, yet sturdy, and consider the fiber content. Natural fibers like wool or alpaca are great choices for mittens as they provide excellent insulation and are moisture-wicking.
2. Swatch and Measure
Before diving into your mitten project, take the time to swatch and measure your gauge. This will ensure that your mittens fit properly. Use the recommended needle size and stitch pattern to create a swatch, then measure the number of stitches and rows per inch. Adjust your needle size as needed to match the pattern gauge.
3. Use the Right Needles
When knitting mittens, it’s important to use the right needles for the job. Most mitten patterns call for double-pointed needles, but you can also use circular needles or magic loop method if you’re more comfortable with those techniques. Make sure you have the correct size needles for your yarn and gauge.
4. Add Ribbing for a Snug Fit
To ensure that your mittens have a snug and comfortable fit, consider adding ribbing to the cuff. Ribbing creates elasticity and helps the mittens stay in place on your hands. A commonly used ribbing pattern is k1, p1 or k2, p2, but feel free to experiment with different ribbing patterns to customize your mittens.
5. Pay Attention to Thumb Placement
One of the trickiest parts of knitting mittens is placing the thumb correctly. Follow your pattern’s instructions carefully and mark the placement of the thumb. Take the time to try on your mittens as you go to ensure that the thumb is in the right position and fits comfortably.
- In summary, choosing the right yarn, swatching and measuring, using the right needles, adding ribbing, and paying attention to thumb placement are all important tips to keep in mind when knitting mittens. With these tips, you’ll be able to create cozy and stylish mittens that you’ll love to wear.
Common Mistakes to Avoid

When knitting two needle mittens, there are several common mistakes that knitters should be aware of and try to avoid. By being mindful of these mistakes, you can ensure that your mittens turn out well and fit properly.
1. Incorrect gauge
One of the most common mistakes in knitting is not checking your gauge before starting a project. It is important to make a gauge swatch and measure it accurately to ensure that you are using the correct needle size and achieving the proper tension. If your gauge is off, your mittens may turn out too small or too big.
2. Miscounting stitches
Another mistake that can easily happen is miscounting stitches. Whether you are casting on, increasing, decreasing, or working a specific stitch pattern, it is important to pay attention to your stitch count. Even a small mistake can throw off the entire mitten and lead to an ill-fitting finished product.
3. Uneven tension
Tension plays a crucial role in knitting, and an uneven tension can affect the appearance and fit of your mittens. Make sure to maintain a consistent tension throughout your knitting, especially when switching between knit and purl stitches. This will help ensure that your mittens have a smooth and professional-looking finish.
4. Not using stitch markers
Stitch markers are a handy tool that can help you keep track of specific pattern sections or increases/decreases. Without them, it is easy to lose count or miss a crucial stitch, leading to errors in your mittens. Always use stitch markers when required by the pattern to help you stay organized and avoid mistakes.
5. Neglecting blocking and finishing
After completing your mittens, it is important to block them to achieve the desired shape and size. Blocking can smooth out any unevenness and enhance the stitch definition. Additionally, take the time to properly finish your mittens by weaving in all loose ends and ensuring that the seams are secure. Neglecting these finishing touches can detract from the overall quality of your mittens.
Conclusion
Avoiding these common mistakes in knitting two needle mittens can help ensure that your finished product is beautiful, well-fitted, and of high quality. By paying attention to gauge, stitch count, tension, using stitch markers, and properly finishing your mittens, you can create a pair of mittens that you will be proud of.
Variations and Customizations for the Pattern
If you’re looking to add a personal touch to your two needle mittens, there are several variations and customizations you can make to the pattern. These modifications will not only allow you to tailor the mittens to your preferences but also make them unique and one-of-a-kind.
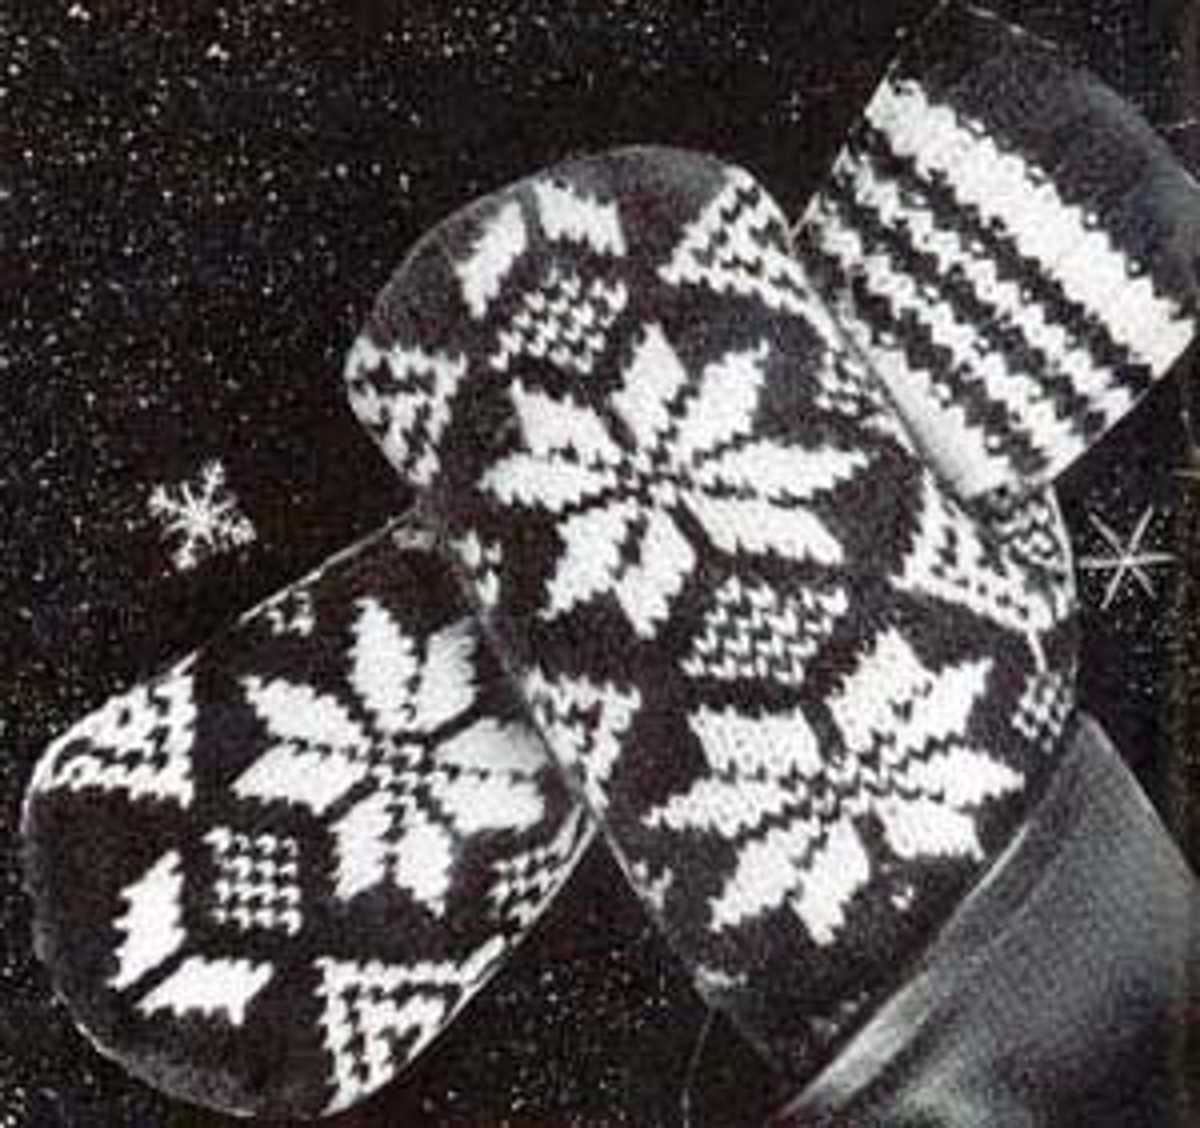
1. Color Choices
One way to customize the pattern is to play with different color combinations. Instead of using a single color for the entire mitten, you can incorporate multiple colors for the cuff, palm, and back of the hand sections. Consider using contrasting colors or even variegated yarns for a more eye-catching look.
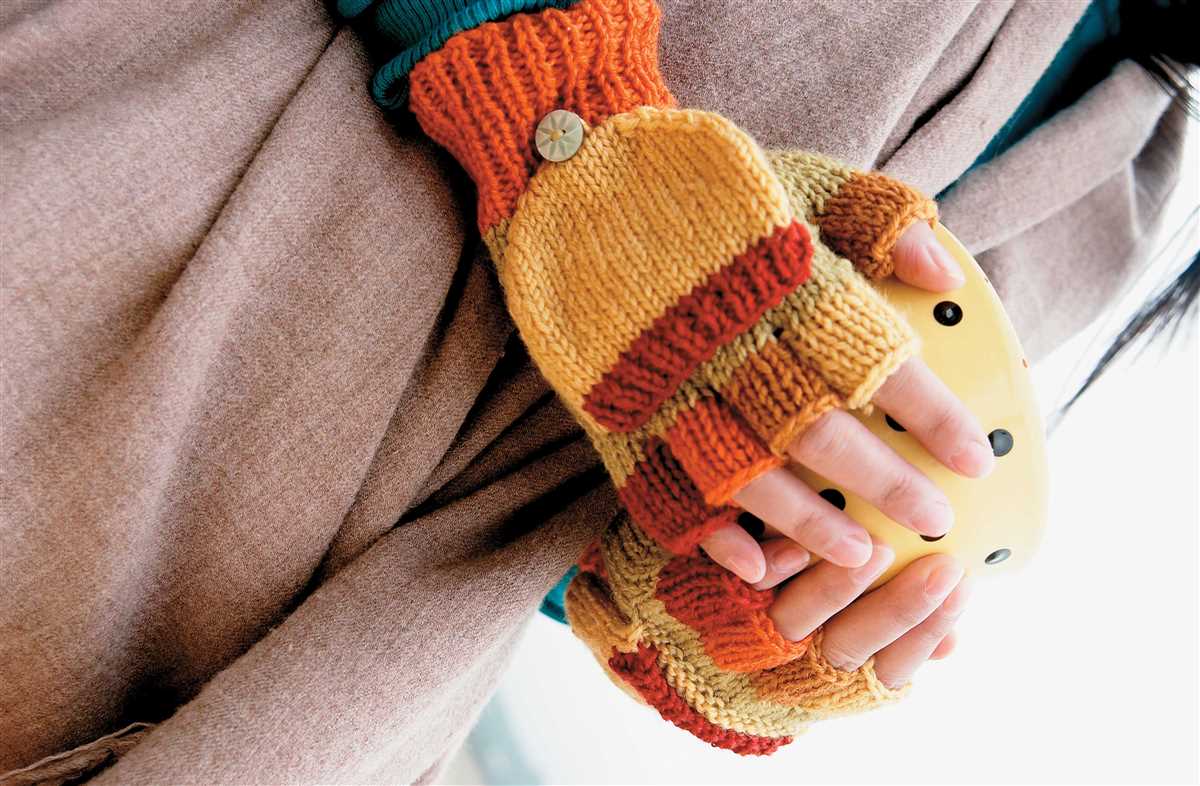
2. Embellishments
If you want to add some extra flair to your mittens, consider incorporating embellishments such as buttons, ribbons, or embroidery. You can sew on buttons at the cuff or add a decorative ribbon bow. Embroidery can be used to create intricate patterns or even personalize the mittens with initials or symbols.
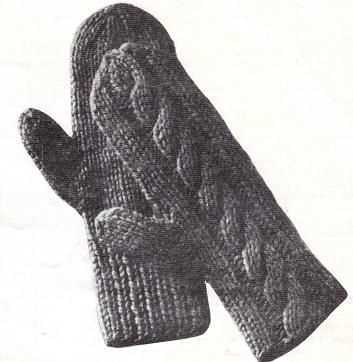
3. Texture and Stitch Patterns
Another way to customize the mittens is to experiment with different stitch patterns and textures. Instead of using a basic stockinette stitch throughout, you can try incorporating cables, lace, or even bobbles to add interest and dimension to your mittens. You can also experiment with different types of yarn to achieve different textures and densities.
4. Sizing
If the pattern doesn’t fit your hand size perfectly, you can easily customize it by adjusting the number of stitches and rows. By measuring your hand and working gauge swatches, you can determine the optimal stitch count and adjust accordingly to achieve a better fit. Remember to consider ease and comfort when making sizing modifications.
5. Fingerless Mittens
If you prefer fingerless mittens, you can easily modify the pattern by omitting the finger section. Instead of working the fingers, simply leave an opening for each finger and continue knitting in the round to create a cozy and stylish pair of fingerless mittens.
With these variations and customizations, you have the flexibility to create mittens that are truly unique and reflect your personal style. Whether you choose to play with colors, add embellishments, experiment with stitch patterns, adjust the sizing, or opt for fingerless mittens, the possibilities are endless. Get creative and enjoy the process of making these two needle mittens your own!
Frequently Asked Questions about Two Needle Mittens
Knitting mittens with two needles is a popular technique among knitters, but it can also raise questions for beginners or those looking for specific information. Here are some frequently asked questions about knitting two needle mittens:
1. Can I use any yarn for knitting mittens?
Yes, you can use any yarn for knitting mittens. However, it is important to choose a yarn that is suitable for the desired warmth and durability of the mittens. Thicker yarns will provide more warmth, while thinner yarns may result in more delicate mittens.
2. How can I adjust the size of the mittens?

To adjust the size of the mittens, you can either use a different size of needles or adjust your stitch count. If you want to make the mittens larger, you can use larger needles or add more stitches to the pattern. For a smaller size, you can use smaller needles or decrease the number of stitches.
3. Can I add a thumb to the mittens?
Yes, it is possible to add a thumb to the mittens. There are various techniques to do this, such as picking up stitches and knitting a thumb gusset, or knitting a separate thumb and attaching it to the mitten afterwards. You can find specific instructions for adding a thumb in many mitten patterns.
4. How do I finish the top of the mittens?
The finishing of the top of the mittens can vary depending on the pattern. Some patterns may instruct you to gather the stitches and close the top with a yarn tail, while others may involve binding off stitches. It is important to carefully follow the pattern instructions to achieve the desired finish.
5. Can I knit mittens without a pattern?
Yes, it is possible to knit mittens without a pattern. However, it is recommended for beginners to start with a pattern that provides detailed instructions for shaping and sizing. Once you have more experience, you can experiment with creating your own mitten designs.
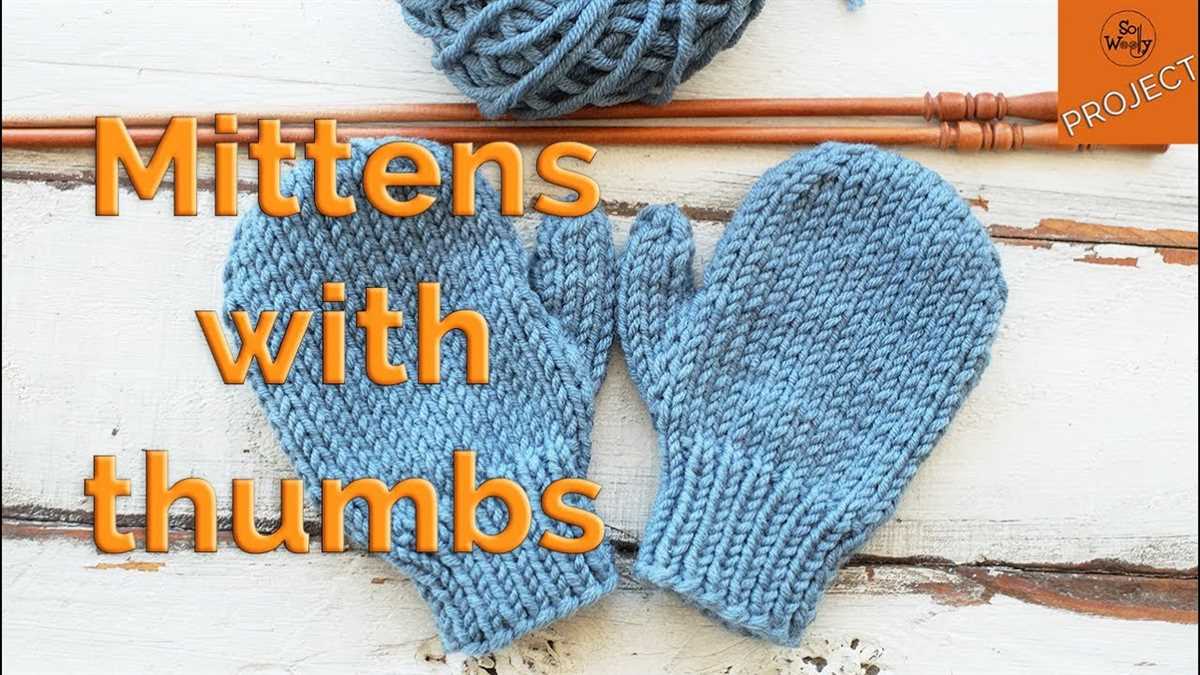
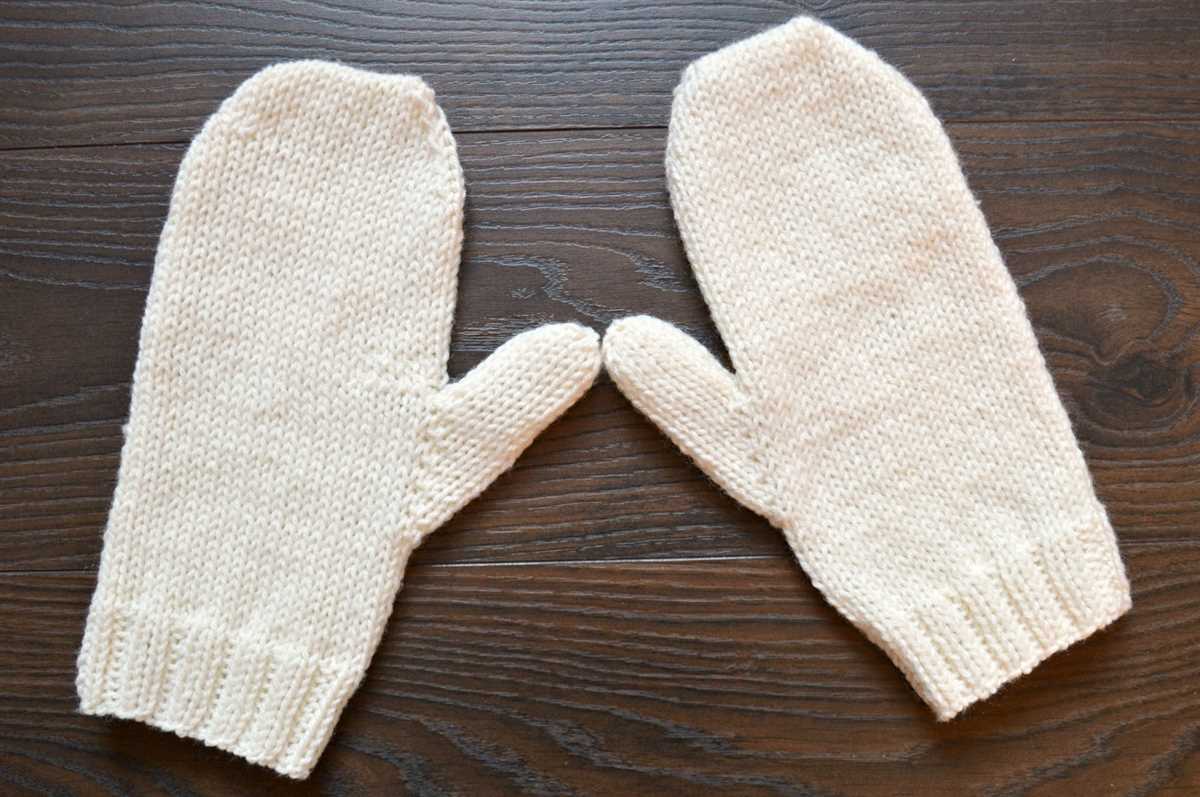
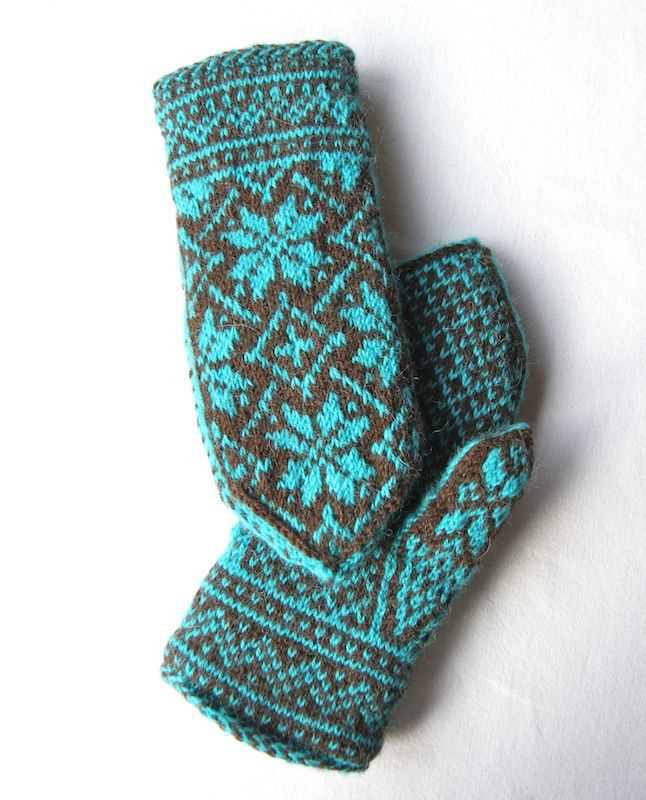
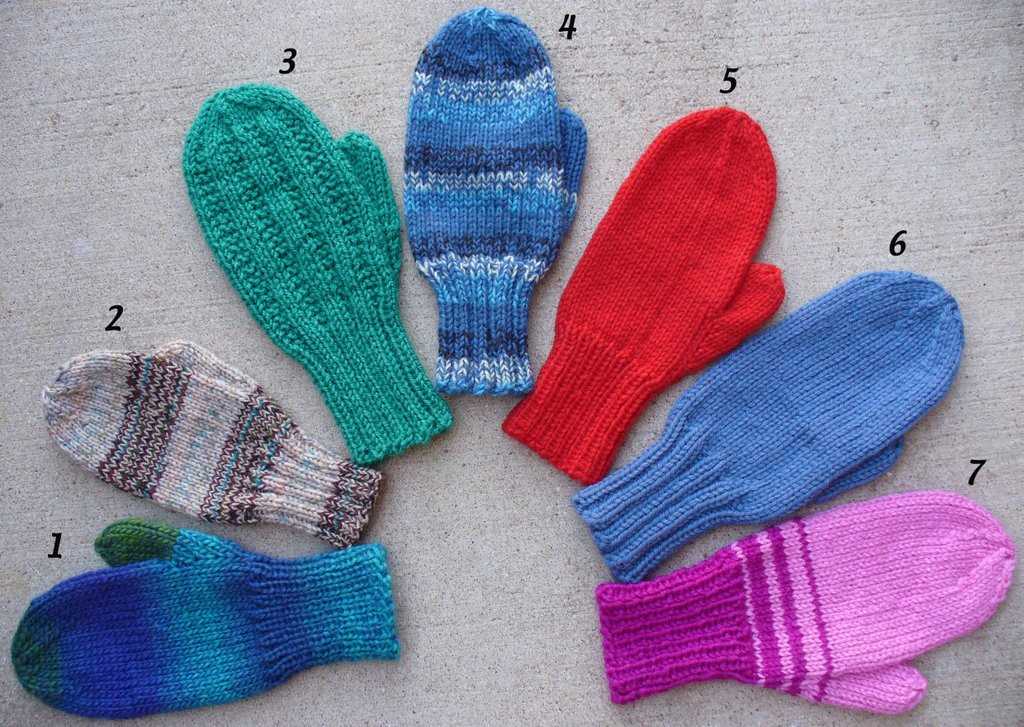
Inspirational Photos of Finished Mittens
After putting in the time and effort to knit your mittens, it’s always satisfying to see the final results. Here are some inspirational photos of finished mittens made using the free knit pattern for two needle mittens:
-

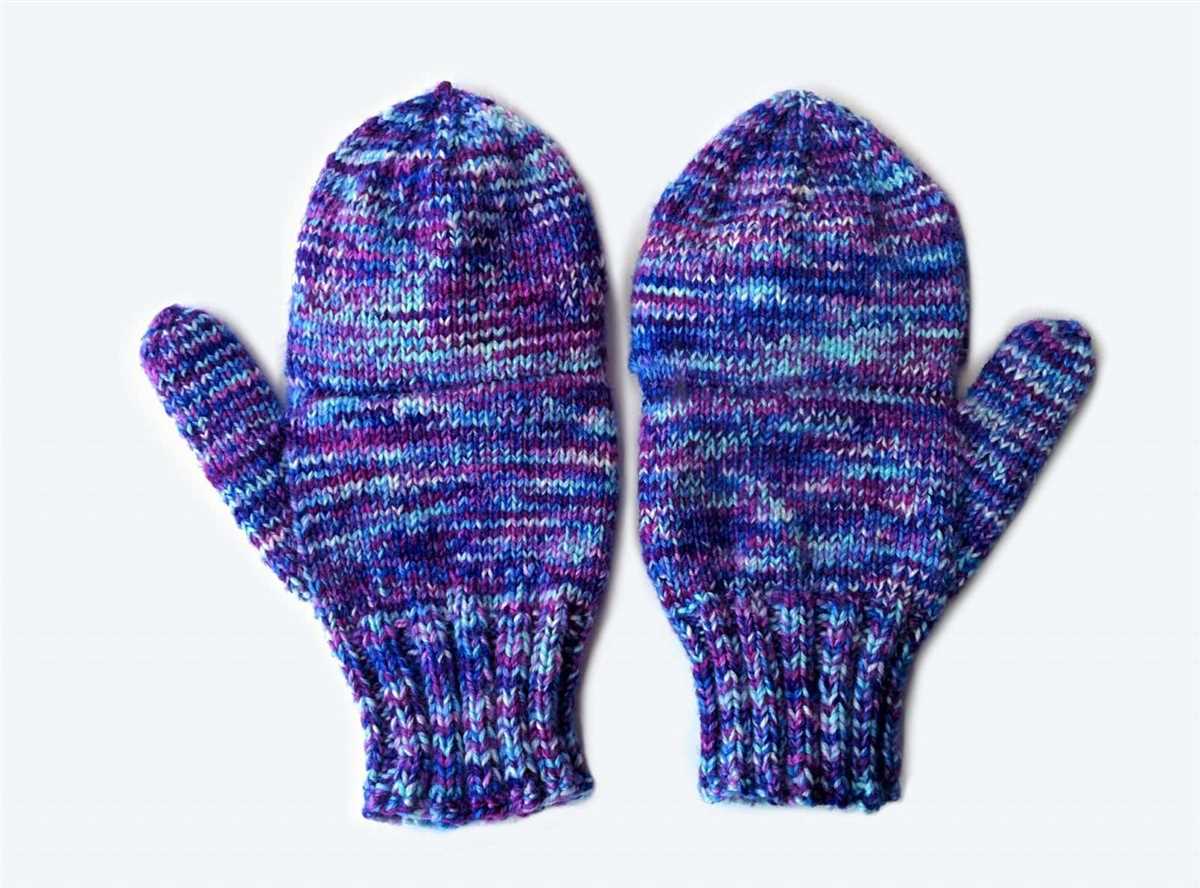
Cozy and Colorful: These mittens were knit using a variety of vibrant yarns. The combinations of different colors create a playful and eye-catching design.
-

Classic and Timeless: These mittens showcase the beauty of simplicity. Knit in a neutral color, they can easily complement any winter outfit.
-

Warm and Cozy: These mittens were knit using a chunky yarn, making them perfect for keeping your hands warm during cold winter days.
These photos can serve as inspiration for your own knitting projects. Feel free to experiment with different colors, yarn weights, and patterns to create your own unique pair of mittens.
So grab your knitting needles and get started on your own pair of cozy mittens using the free knit pattern for two needle mittens. Happy knitting!