
If you’re looking for a versatile accessory that is both stylish and cozy, look no further than the knit hitchhiker scarf. This free pattern is perfect for knitters of all skill levels and can be customized to suit your own personal style. Whether you’re a beginner looking to try your hand at a new knitting project or an experienced knitter in need of a quick and satisfying knit, this pattern is sure to be a hit.
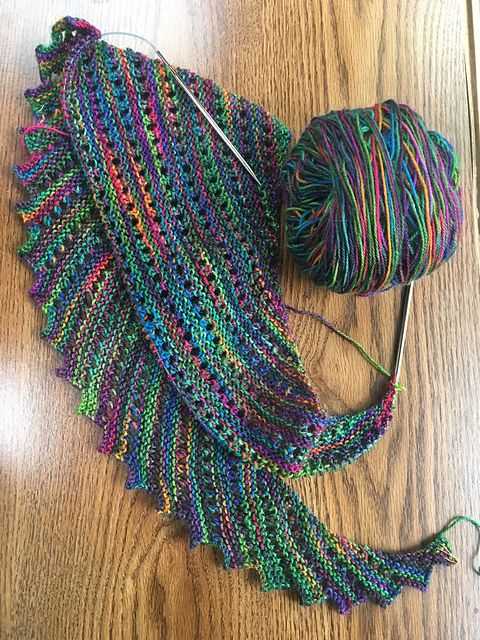
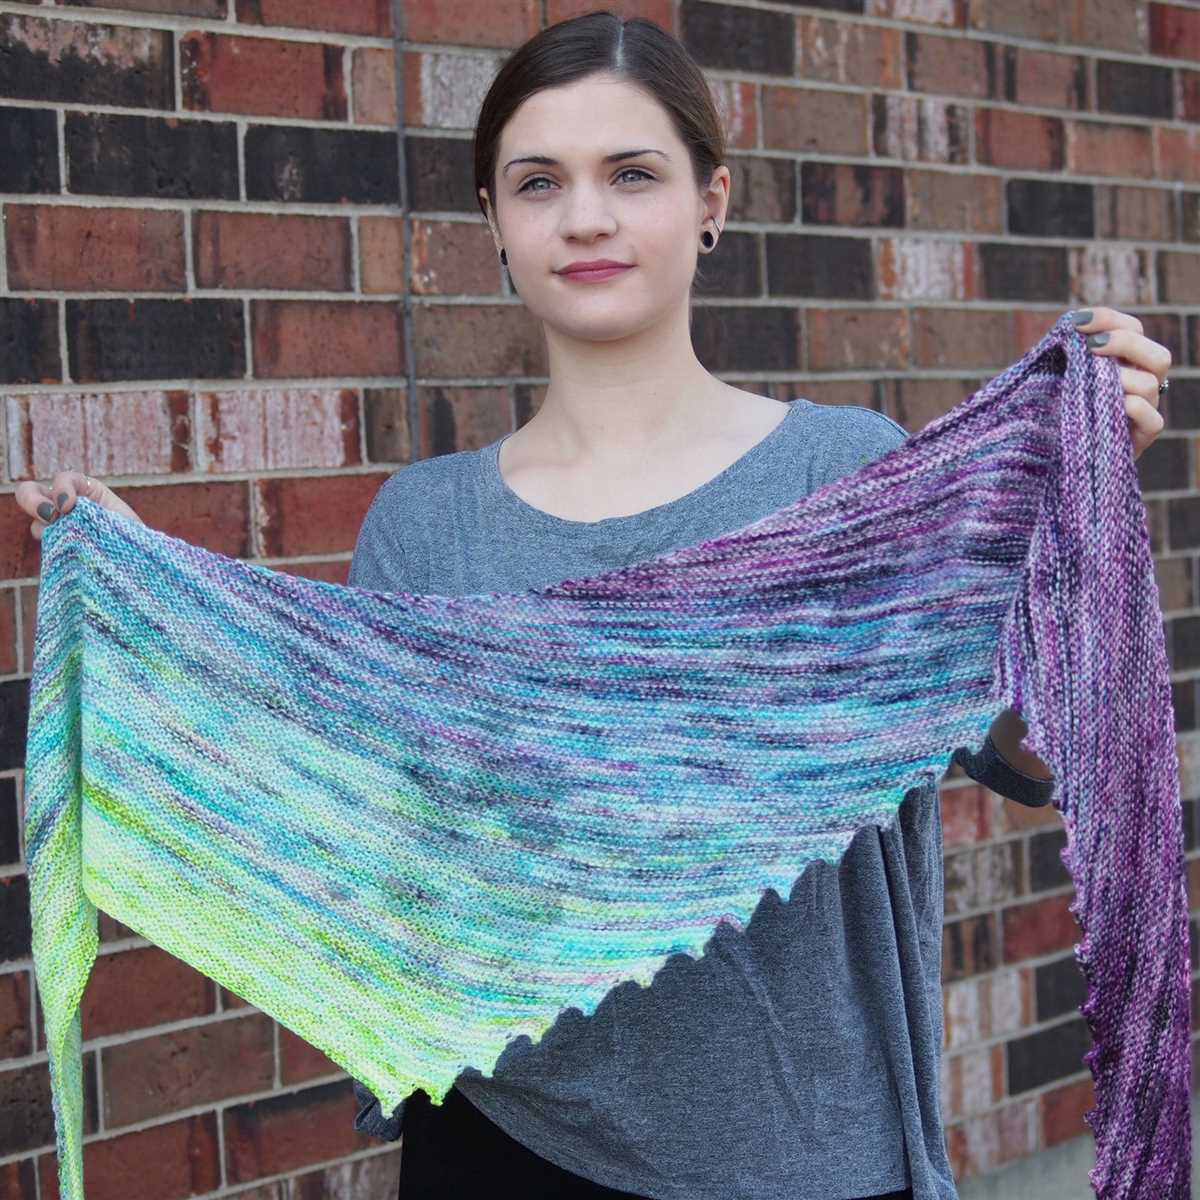
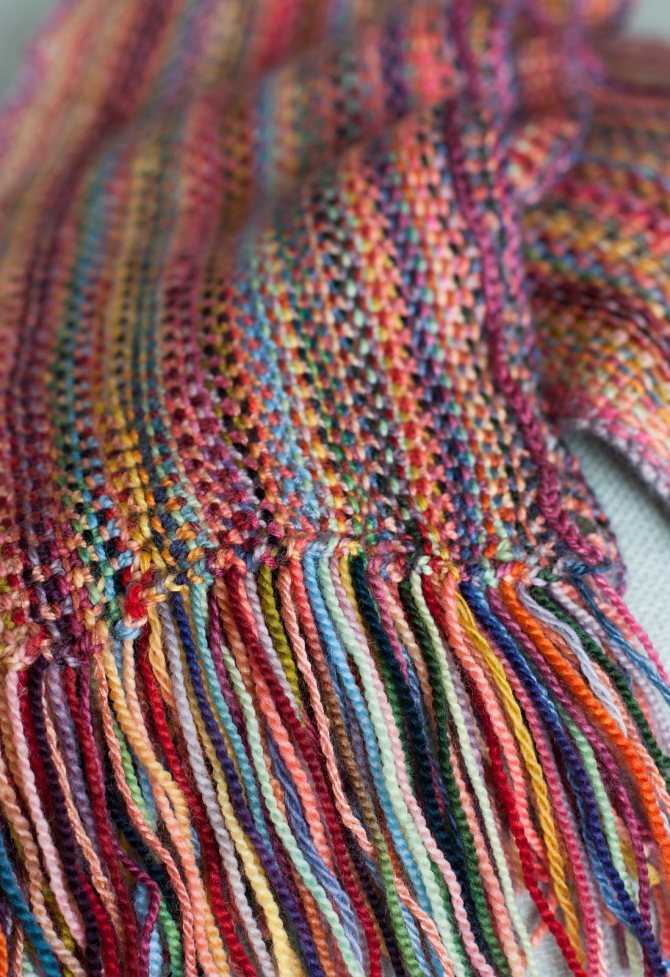
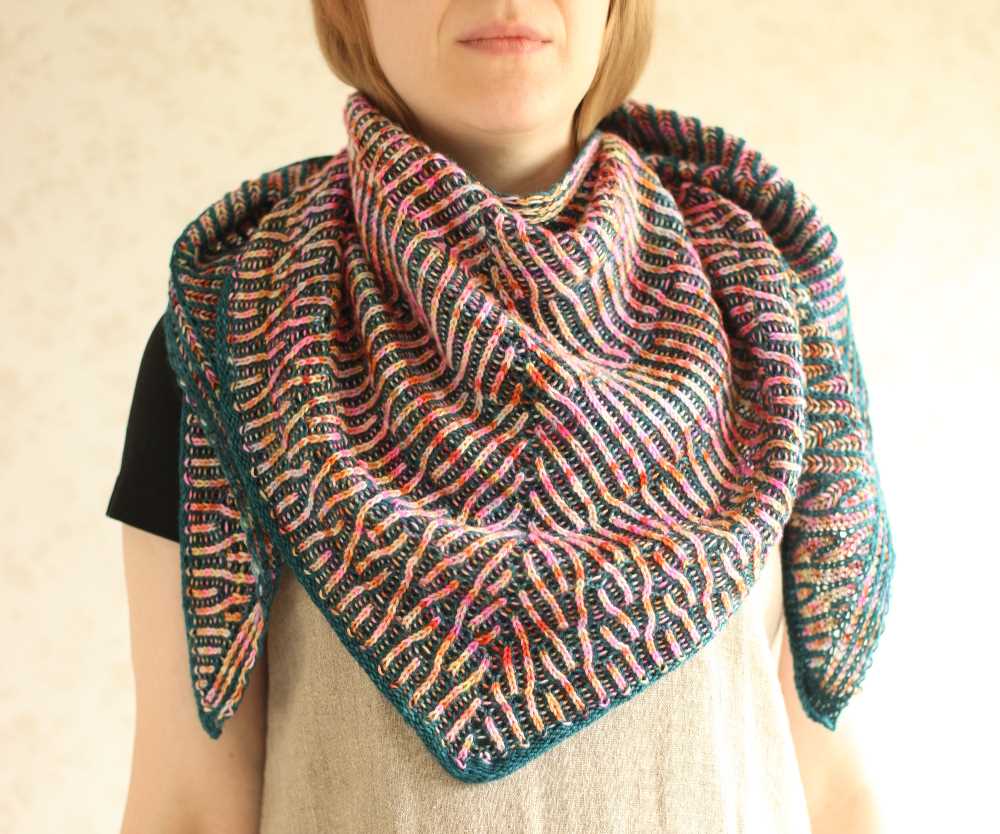
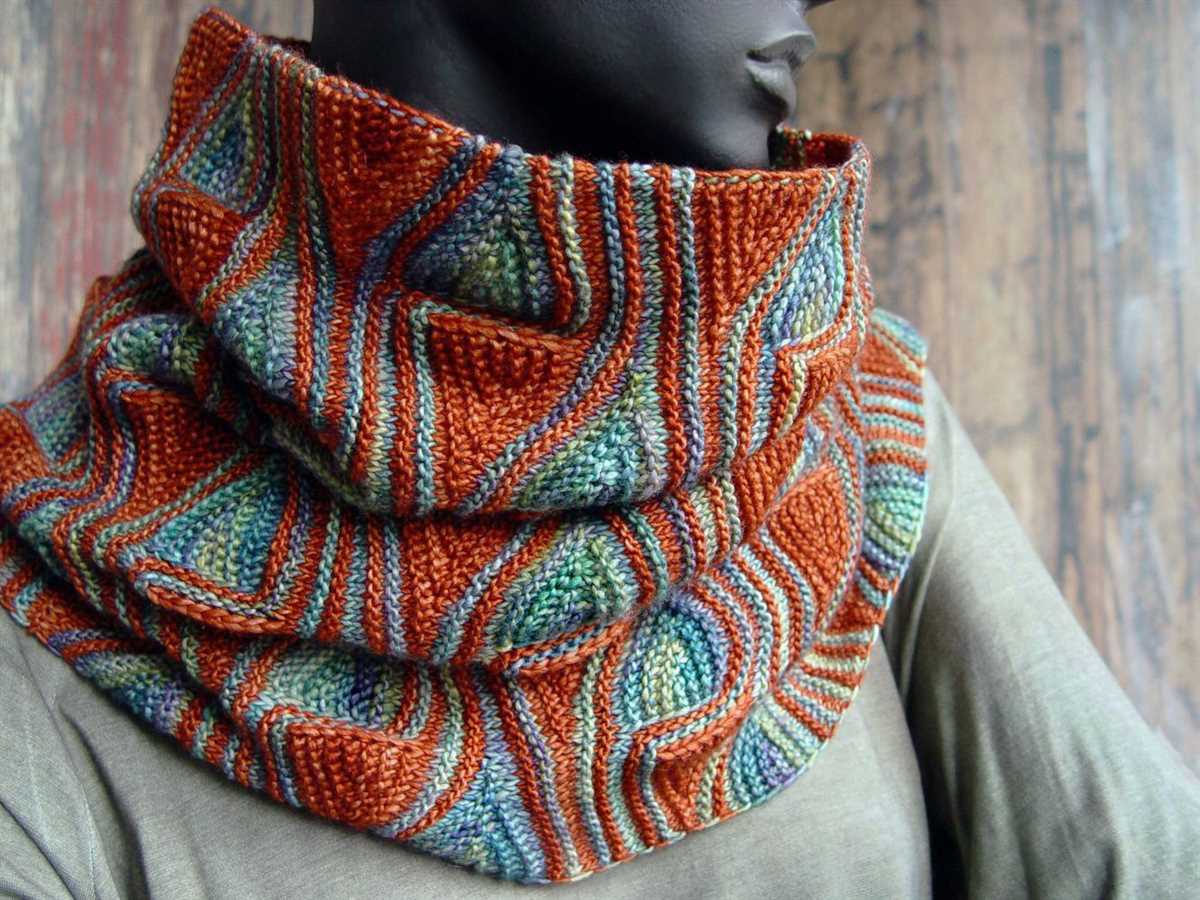
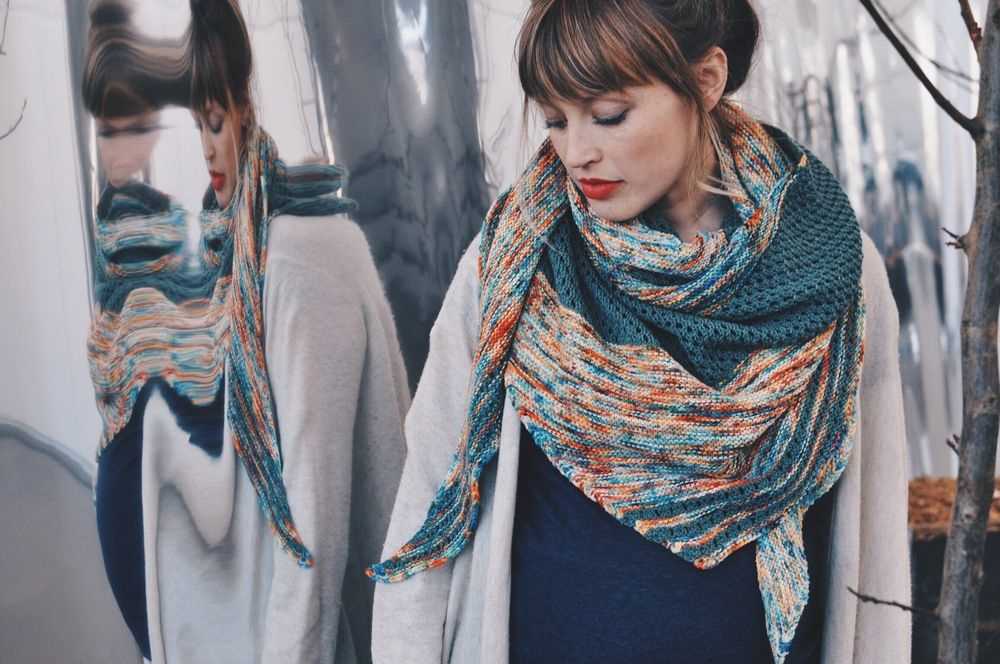
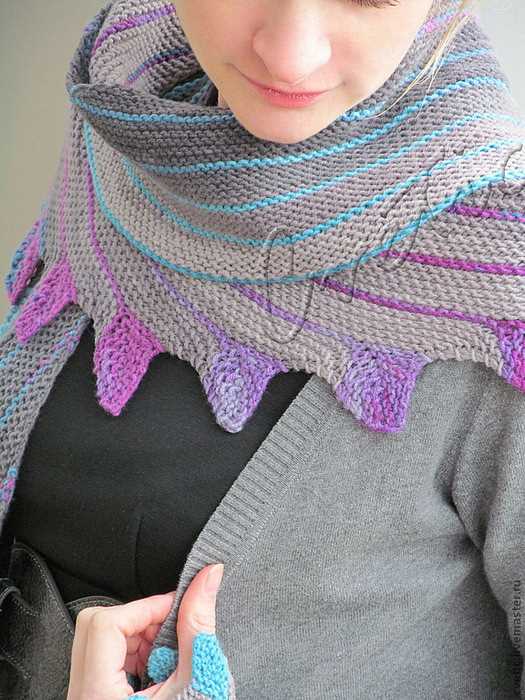
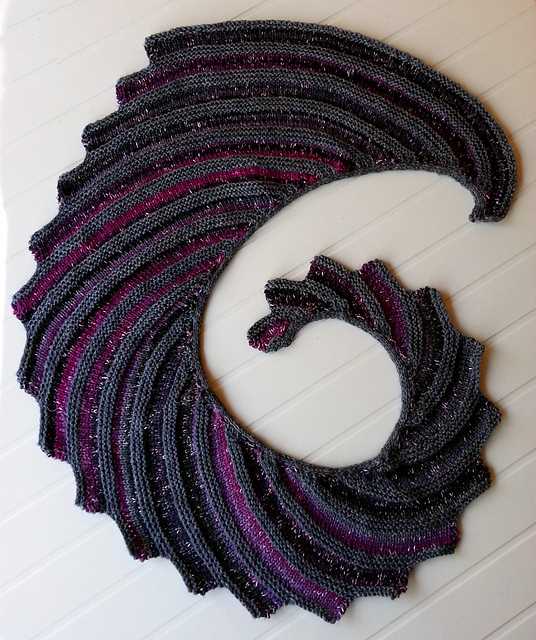
The hitchhiker scarf gets its name from the distinctive shape it creates. The scarf is knit with short rows, resulting in a long, skinny scarf with a zigzag edge. This unique shape allows the scarf to be worn in a variety of ways, from wrapped around the neck multiple times for extra warmth, to draped over the shoulders like a shawl.
This pattern calls for fingering weight yarn and size 4.0mm knitting needles. However, feel free to experiment with different yarns and needle sizes to achieve the desired look and feel. The pattern is written in a garter stitch, making it easy to follow and the perfect project for practicing your knitting skills.
So grab your knitting needles and get ready to create a cozy and stylish accessory with the free knit hitchhiker scarf pattern. Whether you’re making it for yourself or as a gift for a loved one, this pattern is sure to become a favorite in your knitting repertoire.
What is a Hitchhiker Scarf?
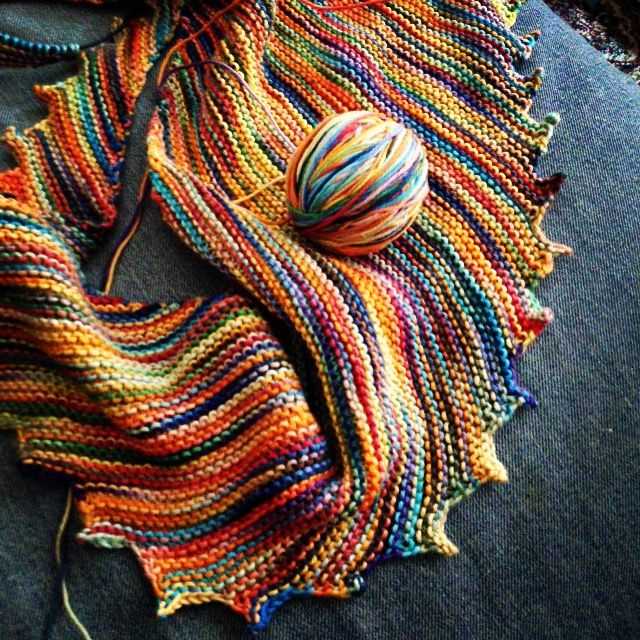
A hitchhiker scarf is a popular type of scarf pattern that is characterized by its shape and construction. It is typically worked in a garter stitch, which creates a squishy and textured fabric. The scarf starts at one corner and gradually increases in width as you knit, creating a triangular shape. The name “hitchhiker” comes from the fact that the scarf resembles a hitchhiker’s thumb, with its elongated shape and curved edge.
One of the key features of a hitchhiker scarf is the use of short rows to create wedges or teeth along the curved edge. These short rows are worked in a specific manner, allowing the edges of the scarf to lie flat and preventing any curling. The result is an interesting and visually appealing design that adds a unique touch to the scarf.
The hitchhiker scarf pattern is versatile and can be customized in many ways. You can use different types of yarn and adjust the size according to your preference. It is also a great pattern for using up leftover yarn, as each wedge or tooth can be worked in a different color. The pattern can be easily memorized, making it a great project for knitting on the go or while watching TV.
Whether you’re a beginner or an experienced knitter, the hitchhiker scarf pattern is a fun and engaging project to try. With its unique shape and customizable options, it is sure to be a stylish and cozy addition to your winter wardrobe.
Why Choose a Free Knit Hitchhiker Scarf Pattern?
When it comes to knitting scarves, there are countless patterns available for knitters to choose from. However, opting for a free knit hitchhiker scarf pattern has its own unique benefits and advantages.
1. Cost-effective: One of the main reasons to choose a free knit hitchhiker scarf pattern is that it eliminates the need to spend money on purchasing a pattern. With the abundance of free patterns available online, knitters can easily find and download a hitchhiker scarf pattern without spending a single penny.
2. Creativity: Free knit hitchhiker scarf patterns often allow knitters to showcase their creativity and experiment with different color combinations, yarn types, and stitch variations. Knitters can customize the scarf according to their preferences, making each project unique and one-of-a-kind.
3. Skill-building: Knitting a hitchhiker scarf using a free pattern can be a great opportunity for knitters to enhance their skillset. These patterns often include detailed instructions and techniques that can help beginners learn new stitches and techniques, while experienced knitters can challenge themselves with more complex stitch patterns.
4. Accessibility: With the prevalence of free knit hitchhiker scarf patterns available online, they are easily accessible to anyone with an internet connection. Knitters can download the pattern, refer to it at any time, and knit at their own pace, making it convenient and accessible for all levels of knitters.
In conclusion, choosing a free knit hitchhiker scarf pattern can be a cost-effective and creative way to knit a unique scarf while also enhancing knitting skills. With the accessibility and wide range of patterns available, knitters have the opportunity to explore their creativity and create beautiful scarves with ease.
Materials Needed for the Knit Hitchhiker Scarf
The knitting hitchhiker scarf is a popular pattern among knitting enthusiasts. To create this beautiful scarf, you will need a few essential materials. The following is a list of items required for this project:
- Yarn: Choose a high-quality yarn that is suitable for knitting scarves. A fingering weight yarn works best for this pattern, but you can also use a sport weight yarn if desired. The amount of yarn needed will depend on the desired length of your scarf.
- Knitting Needles: You will need a set of circular knitting needles with a length of at least 24 inches. The needle size should match the recommended gauge for the yarn you are using. Check the yarn label for the recommended needle size.
- Tapestry Needle: A tapestry needle is essential for weaving in loose ends and finishing your project. Make sure to choose a needle with a large eye that can easily accommodate your yarn.
- Scissors: A pair of sharp scissors is necessary for cutting the yarn. Choose a pair that is comfortable to hold and has a pointed tip for precision cutting.
- Stitch Markers: Stitch markers can be helpful for keeping track of your stitches, especially when knitting in the round. You can use commercial stitch markers or make your own using small pieces of yarn or safety pins.
- Measuring Tape: A measuring tape or ruler is useful for checking your gauge and measuring the length of your scarf as you progress. This will ensure that your finished scarf has the desired dimensions.
Once you have gathered all the necessary materials, you will be ready to start knitting your hitchhiker scarf. Ensure that you have enough yarn to complete the project, and double-check that your needle size matches the recommended gauge. With these materials in hand, you can dive into your knitting project with confidence and create a beautiful handmade scarf.
How to Start Knitting the Hitchhiker Scarf
Knitting the Hitchhiker Scarf is a fun and relaxing project that is perfect for both beginner and experienced knitters. This popular pattern, created by Martina Behm, features a unique construction and an eye-catching design that is sure to impress. If you’re ready to get started on this beautiful scarf, follow these simple steps.
Gather Your Materials
Before you begin knitting the Hitchhiker Scarf, make sure you have all the necessary materials. You’ll need approximately 400-450 yards of fingering weight yarn and a pair of US size 4 (3.5mm) circular knitting needles. Additionally, you may want to have stitch markers, a tapestry needle, and scissors on hand.
- Yarn: 400-450 yards of fingering weight yarn
- Needles: US size 4 (3.5mm) circular knitting needles
- Stitch markers
- Tapestry needle
- Scissors
Cast On Stitches
To start knitting the Hitchhiker Scarf, cast on 42 stitches using the long-tail cast-on method. This will create the foundation row for your scarf. Remember to leave a long tail to weave in later. Once you’ve cast on, place a stitch marker on your needle to mark the beginning of the row.
| Row | Stitch |
|---|---|
| 1 | K1, yo, k until 1 st remaining, yo, k1 |
Following the pattern, knit the first row by knitting one stitch, yarn over, then continue knitting until one stitch remains. Yarn over again, and knit the last stitch. Repeat this row until your scarf reaches the desired length, keeping track of your row count to ensure symmetry.
Now that you have the basic steps to start knitting the Hitchhiker Scarf, it’s time to grab your materials and get knitting. Enjoy the process and create a beautiful accessory that you can be proud of!
Knitting Techniques for the Hitchhiker Scarf
The Hitchhiker Scarf is a popular pattern that showcases both simplicity and elegance. Using basic knitting techniques, this pattern creates a unique and eye-catching accessory that is perfect for both beginner and experienced knitters. Here are some knitting techniques to help you successfully complete the Hitchhiker Scarf.
Casting On:
To start your Hitchhiker Scarf, you will need to cast on. There are different methods to cast on, such as the long tail cast on or the provisional cast on. The provisional cast on is preferred for this pattern as it allows for seamless joinings, giving the scarf a smooth and professional finish. Follow the instructions provided in the pattern to cast on the required number of stitches, ensuring that your foundation row is even and not too tight.
Knit and Purl Stitches:
The Hitchhiker Scarf primarily consists of knit and purl stitches. The knit stitch creates a smooth and flat surface, while the purl stitch adds texture and variety to the design. It is important to maintain a consistent tension throughout your knitting to achieve an even appearance. Take your time to practice these basic stitches before starting the scarf and familiarize yourself with their techniques.
Increases and Decreases:
The Hitchhiker Scarf incorporates both increases and decreases to create its distinctive shape. Increases are used to add stitches and create the elongated triangular shape of the scarf, while decreases are used to shape the points. Common increases include knit front and back (kfb) and yarn overs, while common decreases include knit two together (k2tog) and slip, slip, knit (ssk). Follow the pattern instructions closely to ensure you are completing the correct increase or decrease at the specified points.
By mastering these knitting techniques, you will be equipped to create a beautiful Hitchhiker Scarf that showcases your knitting skills. Take your time, be patient, and enjoy the process of creating this versatile and stylish accessory.
Tips and Tricks for a Successful Hitchhiker Scarf
Making a hitchhiker scarf can be a fun and rewarding knitting project. With its unique shape and simple stitch pattern, it’s a great project for both beginner and experienced knitters. To ensure your hitchhiker scarf turns out beautifully, here are some tips and tricks to keep in mind:
Choose the Right Yarn
When selecting yarn for your hitchhiker scarf, consider the weight and fiber content. A lightweight yarn with good stitch definition, such as a fingering or sport weight yarn, is ideal for this pattern. Additionally, opt for a yarn with some elasticity to help the scarf maintain its shape. Natural fibers like wool, silk, or a blend of both are great choices for their softness and drape.
Use Circular Needles
Using circular needles instead of straight needles can make knitting the hitchhiker scarf more comfortable and convenient. With the increasing number of stitches, the scarf can become heavy and slide off straight needles. Circular needles allow the weight of the project to rest on your lap, reducing strain on your wrists and making it easier to manage.
Pay Attention to Markers
As you knit the hitchhiker scarf, it’s important to use stitch markers to keep track of your progress. Place a marker after a certain number of repeats or before a particular section, such as the border or the garter stitch ridge. These markers will help you stay on track and serve as a visual guide as you work through each section.
Block Your Scarf
Blocking is a crucial step in finishing any knitted project, and the hitchhiker scarf is no exception. Once you’ve completed knitting your scarf, wet blocking or steam blocking can help even out the stitches, open up the lace sections, and give the garment its final shape. Follow the blocking instructions specific to your yarn to achieve the desired result.
Experiment with Color
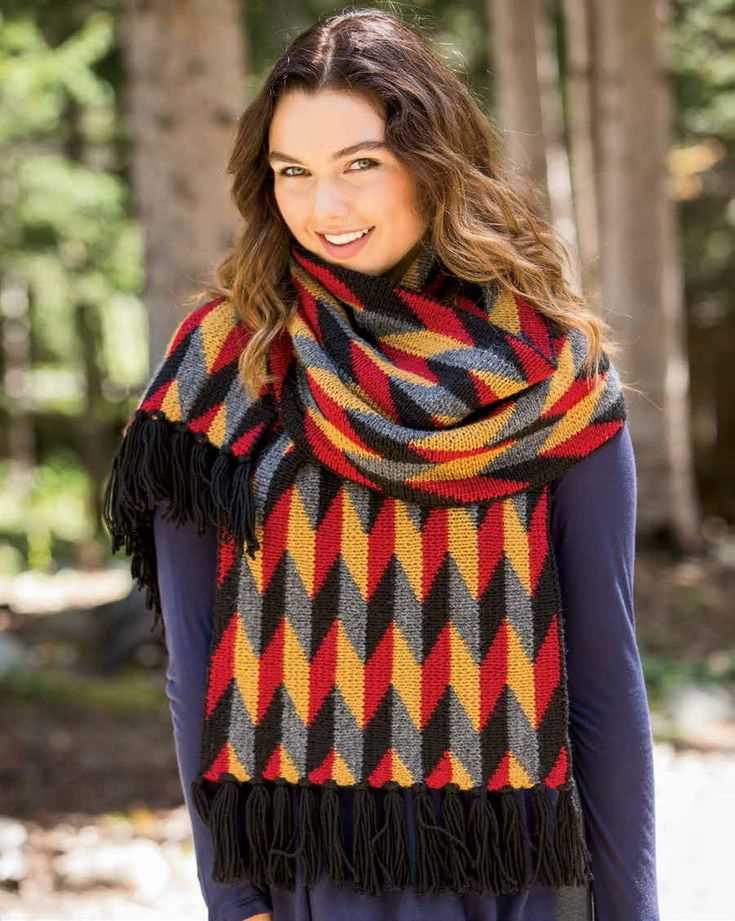
One of the best things about the hitchhiker scarf pattern is that it lends itself well to experimentation with color. Play around with different color combinations and gradient yarns to create a unique and visually striking scarf. Remember to consider the number of teeth in the pattern and how the colors will transition to get the desired effect.
By following these tips and tricks, you’ll be well on your way to creating a stunning hitchhiker scarf that you’ll love to wear or gift to someone special. Enjoy the process and happy knitting!
Variations and Customizations for the Hitchhiker Scarf
The Hitchhiker scarf pattern is a versatile knitting project that allows for a lot of creativity and personalization. Here are some variations and customizations you can try to make your scarf unique:
1. Yarn Choice:
One of the easiest ways to customize your Hitchhiker scarf is by choosing different types of yarn. Experiment with different textures, colors, and weights of yarn to create a unique look. You can use variegated yarn for a rainbow effect or opt for a solid color for a sleek and sophisticated look.
2. Stitch Patterns:
While the Hitchhiker pattern itself is simple and repetitive, you can add interest by incorporating different stitch patterns or motifs. Try adding lace sections, cables, or even colorwork to create a more intricate design. Be sure to keep the stitch count consistent with the pattern, so the increases and decreases still align.
3. Length and Width:
The Hitchhiker scarf pattern is easily customizable in terms of length and width. If you prefer a longer scarf, simply continue working the pattern until you reach the desired length. For a wider scarf, you can cast on more stitches at the beginning. Just keep in mind that altering the dimensions may affect the amount of yarn needed.
4. Embellishments:
If you want to add some extra flair to your Hitchhiker scarf, consider incorporating embellishments such as buttons, beads, or tassels. You can sew them onto the points of the scarf or attach them at regular intervals along the edge. These small details can make a big difference in the overall appearance of the finished scarf.
5. Color Changes:
Another way to customize your Hitchhiker scarf is by changing colors at specific points in the pattern. You can create stripes by switching yarn colors after a certain number of pattern repeats or incorporate ombre effects by gradually transitioning between different shades of the same color. The possibilities are endless!
By exploring these variations and customizations, you can take the basic Hitchhiker scarf pattern and make it truly your own. Let your creativity shine and enjoy the process of creating a one-of-a-kind accessory to keep you warm and stylish.
Frequently Asked Questions about the Hitchhiker Scarf
Here are some frequently asked questions about the Hitchhiker Scarf:
1. Can I make the Hitchhiker Scarf with a different type of yarn?
Yes, you can use any type of yarn to make the Hitchhiker Scarf. Just keep in mind that the size and texture of the scarf may vary depending on the type of yarn you choose. It is recommended to use a lightweight yarn for a delicate and drapey scarf, but you can also experiment with different weights of yarn to achieve different looks.
2. How many stitches should I cast on to start the Hitchhiker Scarf?
The Hitchhiker Scarf pattern calls for casting on 42 stitches, but you can modify it to make the scarf wider or narrower by increasing or decreasing the number of cast-on stitches. Just make sure to adjust the number of increase sections accordingly.
3. Can I adjust the length of the Hitchhiker Scarf?
Yes, you can adjust the length of the scarf by knitting more or fewer rows. The pattern suggests knitting until you run out of yarn or until the scarf reaches your desired length. Keep in mind that the longer the scarf, the more yarn you will need.
4. How do I block the Hitchhiker Scarf?
To block the Hitchhiker Scarf, soak it in lukewarm water with a gentle wool wash or mild detergent. Gently squeeze out the excess water and lay the scarf flat on a blocking mat or towel. Use T-pins or blocking wires to pin the edges of the scarf to your desired shape and size. Leave it to dry completely before unpinning.
5. Can I make the Hitchhiker Scarf in a different color or pattern?
Yes, you can customize the Hitchhiker Scarf by using different colors or adding pattern variations. You can incorporate stripes, color blocks, or even lace sections into the scarf to make it unique. Feel free to let your creativity flow and experiment with different color combinations and stitch patterns.
6. How long does it take to knit the Hitchhiker Scarf?
The time it takes to knit the Hitchhiker Scarf depends on your knitting speed and the amount of time you dedicate to it. On average, it can take a few days to a couple of weeks to complete, depending on the length and intricacy of the scarf.
7. Can I sell the Hitchhiker Scarf that I make using this pattern?
Yes, you can sell the Hitchhiker Scarf that you make using this free pattern. However, please give credit to the original designer, Martina Behm, for creating the pattern. It is always good practice to respect the intellectual property of others.
Summary:
The Hitchhiker Scarf is a versatile and customizable accessory. It can be made with any type of yarn and the length and width can be easily adjusted. The scarf can be personalized with different colors and patterns to suit your style. It is a relatively quick project to knit and can be a great option for gift-giving or for adding a unique touch to your own wardrobe.